

Page 1
Page 2

Contents
INSTALLATION
Installing Worms 2. . . . . . . . . . . . . . . . . . . . . . . . . . . . . . . . . . . . . . . . . . . . . . . . . 1
Un-installing Worms 2 . . . . . . . . . . . . . . . . . . . . . . . . . . . . . . . . . . . . . . . . . . . . . . 1
Readme File (Readme.txt) . . . . . . . . . . . . . . . . . . . . . . . . . . . . . . . . . . . . . . . . . . . 1
Starting The Game
. . . . . . . . . . . . . . . . . . . . . . . . . . . . . . . . . . . . . . . . . . . . . . . . . . 1
. . . . . . . . . . . . . . . . . . . . . . . . . . . . . . . . . . . . . . . . . . . . . . . . 1
INTRODUCTION
A Word Of Caution... . . . . . . . . . . . . . . . . . . . . . . . . . . . . . . . . . . . . . . . . . . . . . . . 2
THE CONCEPTS OF PLAY
Overview . . . . . . . . . . . . . . . . . . . . . . . . . . . . . . . . . . . . . . . . . . . . . . . . . . . . . . . . 3
Turn-Based System . . . . . . . . . . . . . . . . . . . . . . . . . . . . . . . . . . . . . . . . . . . . . . . . 3
Time . . . . . . . . . . . . . . . . . . . . . . . . . . . . . . . . . . . . . . . . . . . . . . . . . . . . . . . . . . . 3
Randomly-Generated Landscapes . . . . . . . . . . . . . . . . . . . . . . . . . . . . . . . . . . . . . 3
Worms And Weapons . . . . . . . . . . . . . . . . . . . . . . . . . . . . . . . . . . . . . . . . . . . . . . . 3
Strategy. . . . . . . . . . . . . . . . . . . . . . . . . . . . . . . . . . . . . . . . . . . . . . . . . . . . . . . . . 3
On Your Own, Or In A Group . . . . . . . . . . . . . . . . . . . . . . . . . . . . . . . . . . . . . . . . . 4
QUICK-START
PLAYING
Moving The View . . . . . . . . . . . . . . . . . . . . . . . . . . . . . . . . . . . . . . . . . . . . . . . . . . 6
Changing Worms . . . . . . . . . . . . . . . . . . . . . . . . . . . . . . . . . . . . . . . . . . . . . . . . . . 6
Moving Worms. . . . . . . . . . . . . . . . . . . . . . . . . . . . . . . . . . . . . . . . . . . . . . . . . . . . 6
Jumping . . . . . . . . . . . . . . . . . . . . . . . . . . . . . . . . . . . . . . . . . . . . . . . . . . . . . . . . 6
Other Moves . . . . . . . . . . . . . . . . . . . . . . . . . . . . . . . . . . . . . . . . . . . . . . . . . . . . . 6
Action Replay . . . . . . . . . . . . . . . . . . . . . . . . . . . . . . . . . . . . . . . . . . . . . . . . . . . . 6
Quit . . . . . . . . . . . . . . . . . . . . . . . . . . . . . . . . . . . . . . . . . . . . . . . . . . . . . . . . . . . . 7
Name Switch . . . . . . . . . . . . . . . . . . . . . . . . . . . . . . . . . . . . . . . . . . . . . . . . . . . . . 7
On-Screen Information . . . . . . . . . . . . . . . . . . . . . . . . . . . . . . . . . . . . . . . . . . 7
Commentary Panel . . . . . . . . . . . . . . . . . . . . . . . . . . . . . . . . . . . . . . . . . . . . . . . . 7
Turn/Round Time Indicator . . . . . . . . . . . . . . . . . . . . . . . . . . . . . . . . . . . . . . . . . . 7
Wind Bar/Background Incidentals . . . . . . . . . . . . . . . . . . . . . . . . . . . . . . . . . . . . . 7
Team Status. . . . . . . . . . . . . . . . . . . . . . . . . . . . . . . . . . . . . . . . . . . . . . . . . . . . . . 7
Worm Status . . . . . . . . . . . . . . . . . . . . . . . . . . . . . . . . . . . . . . . . . . . . . . . . . . . . . 7
WORMS 2
. . . . . . . . . . . . . . . . . . . . . . . . . . . . . . . . . . . . . . . . . . . . . . . . . 2
. . . . . . . . . . . . . . . . . . . . . . . . . . . . . . . . . . . . . . 3
. . . . . . . . . . . . . . . . . . . . . . . . . . . . . . . . . . . . . . . . . . . . . . . . . . . 5
. . . . . . . . . . . . . . . . . . . . . . . . . . . . . . . . . . . . . . . . . . . . 6
i
WEAPONS
Selecting Your Weapon
Wreaking Havoc - The Art Of Weapon Usage
Bazooka . . . . . . . . . . . . . . . . . . . . . . . . . . . . . . . . . . . . . . . . . . . . . . . . . . . . . . . . 9
Homing Missile . . . . . . . . . . . . . . . . . . . . . . . . . . . . . . . . . . . . . . . . . . . . . . . . . . . 9
Mortar . . . . . . . . . . . . . . . . . . . . . . . . . . . . . . . . . . . . . . . . . . . . . . . . . . . . . . . . . . 9
Homing Pigeon . . . . . . . . . . . . . . . . . . . . . . . . . . . . . . . . . . . . . . . . . . . . . . . . . . . 9
. . . . . . . . . . . . . . . . . . . . . . . . . . . . . . . . . . . . . . . . . . . . . . . . . . . . . . . 8
. . . . . . . . . . . . . . . . . . . . . . . . . . . . . . . . . . . . . . . . . . 8
. . . . . . . . . . . . . . . . . . . . . 8
Page 3

Grenade . . . . . . . . . . . . . . . . . . . . . . . . . . . . . . . . . . . . . . . . . . . . . . . . . . . . . . . 10
Cluster Bomb . . . . . . . . . . . . . . . . . . . . . . . . . . . . . . . . . . . . . . . . . . . . . . . . . . . 10
Banana Bomb . . . . . . . . . . . . . . . . . . . . . . . . . . . . . . . . . . . . . . . . . . . . . . . . . . . 10
Homing Cluster . . . . . . . . . . . . . . . . . . . . . . . . . . . . . . . . . . . . . . . . . . . . . . . . . . 11
Shotgun . . . . . . . . . . . . . . . . . . . . . . . . . . . . . . . . . . . . . . . . . . . . . . . . . . . . . . . 11
Handgun . . . . . . . . . . . . . . . . . . . . . . . . . . . . . . . . . . . . . . . . . . . . . . . . . . . . . . . 11
Uzi . . . . . . . . . . . . . . . . . . . . . . . . . . . . . . . . . . . . . . . . . . . . . . . . . . . . . . . . . . . 11
Mini-Gun . . . . . . . . . . . . . . . . . . . . . . . . . . . . . . . . . . . . . . . . . . . . . . . . . . . . . . . 11
Fire Punch. . . . . . . . . . . . . . . . . . . . . . . . . . . . . . . . . . . . . . . . . . . . . . . . . . . . . . 12
Dragon Ball . . . . . . . . . . . . . . . . . . . . . . . . . . . . . . . . . . . . . . . . . . . . . . . . . . . . . 12
Kamikaze. . . . . . . . . . . . . . . . . . . . . . . . . . . . . . . . . . . . . . . . . . . . . . . . . . . . . . . 12
Prod . . . . . . . . . . . . . . . . . . . . . . . . . . . . . . . . . . . . . . . . . . . . . . . . . . . . . . . . . . 12
Dynamite . . . . . . . . . . . . . . . . . . . . . . . . . . . . . . . . . . . . . . . . . . . . . . . . . . . . . . . 12
Land-Mine . . . . . . . . . . . . . . . . . . . . . . . . . . . . . . . . . . . . . . . . . . . . . . . . . . . . . . 13
Sheep . . . . . . . . . . . . . . . . . . . . . . . . . . . . . . . . . . . . . . . . . . . . . . . . . . . . . . . . . 13
Super Sheep . . . . . . . . . . . . . . . . . . . . . . . . . . . . . . . . . . . . . . . . . . . . . . . . . . . . 13
Air-Strike . . . . . . . . . . . . . . . . . . . . . . . . . . . . . . . . . . . . . . . . . . . . . . . . . . . . . . . 13
Homing Air-Strike . . . . . . . . . . . . . . . . . . . . . . . . . . . . . . . . . . . . . . . . . . . . . . . . 14
Napalm Strike . . . . . . . . . . . . . . . . . . . . . . . . . . . . . . . . . . . . . . . . . . . . . . . . . . . 14
Blow Torch . . . . . . . . . . . . . . . . . . . . . . . . . . . . . . . . . . . . . . . . . . . . . . . . . . . . . 14
Drill . . . . . . . . . . . . . . . . . . . . . . . . . . . . . . . . . . . . . . . . . . . . . . . . . . . . . . . . . . . 14
Girder . . . . . . . . . . . . . . . . . . . . . . . . . . . . . . . . . . . . . . . . . . . . . . . . . . . . . . . . . 15
Baseball Bat . . . . . . . . . . . . . . . . . . . . . . . . . . . . . . . . . . . . . . . . . . . . . . . . . . . . 15
Ninja Rope . . . . . . . . . . . . . . . . . . . . . . . . . . . . . . . . . . . . . . . . . . . . . . . . . . . . . 15
Bungee . . . . . . . . . . . . . . . . . . . . . . . . . . . . . . . . . . . . . . . . . . . . . . . . . . . . . . . . 16
Parachute . . . . . . . . . . . . . . . . . . . . . . . . . . . . . . . . . . . . . . . . . . . . . . . . . . . . . . 16
Teleport. . . . . . . . . . . . . . . . . . . . . . . . . . . . . . . . . . . . . . . . . . . . . . . . . . . . . . . . 16
Super Banana . . . . . . . . . . . . . . . . . . . . . . . . . . . . . . . . . . . . . . . . . . . . . . . . . . . 16
Holy Hand Grenade . . . . . . . . . . . . . . . . . . . . . . . . . . . . . . . . . . . . . . . . . . . . . . . 16
Petrol Bomb . . . . . . . . . . . . . . . . . . . . . . . . . . . . . . . . . . . . . . . . . . . . . . . . . . . . 17
Priceless Ming Vase . . . . . . . . . . . . . . . . . . . . . . . . . . . . . . . . . . . . . . . . . . . . . . 17
Sheep Strike . . . . . . . . . . . . . . . . . . . . . . . . . . . . . . . . . . . . . . . . . . . . . . . . . . . . 17
Mad Cows . . . . . . . . . . . . . . . . . . . . . . . . . . . . . . . . . . . . . . . . . . . . . . . . . . . . . . 17
Old Woman . . . . . . . . . . . . . . . . . . . . . . . . . . . . . . . . . . . . . . . . . . . . . . . . . . . . . 17
Skip Go . . . . . . . . . . . . . . . . . . . . . . . . . . . . . . . . . . . . . . . . . . . . . . . . . . . . . . . . 17
Surrender . . . . . . . . . . . . . . . . . . . . . . . . . . . . . . . . . . . . . . . . . . . . . . . . . . . . . . 18
MENU SYSTEM
Game Menu
Play Roster . . . . . . . . . . . . . . . . . . . . . . . . . . . . . . . . . . . . . . . . . . . . . . . . . . . . . 19
Team Pool . . . . . . . . . . . . . . . . . . . . . . . . . . . . . . . . . . . . . . . . . . . . . . . . . . . . . . 19
Create New Team . . . . . . . . . . . . . . . . . . . . . . . . . . . . . . . . . . . . . . . . . . . . . . . . 19
Adding Teams To The Play Roster . . . . . . . . . . . . . . . . . . . . . . . . . . . . . . . . . . . . 20
Editing A Team. . . . . . . . . . . . . . . . . . . . . . . . . . . . . . . . . . . . . . . . . . . . . . . . . . . 20
Removing A Team From The Play Roster . . . . . . . . . . . . . . . . . . . . . . . . . . . . . . . 20
Worms In Team . . . . . . . . . . . . . . . . . . . . . . . . . . . . . . . . . . . . . . . . . . . . . . . . . . 20
Rounds Required To Win . . . . . . . . . . . . . . . . . . . . . . . . . . . . . . . . . . . . . . . . . . . 21
Energy Setting. . . . . . . . . . . . . . . . . . . . . . . . . . . . . . . . . . . . . . . . . . . . . . . . . . . 21
Option Set . . . . . . . . . . . . . . . . . . . . . . . . . . . . . . . . . . . . . . . . . . . . . . . . . . . . . . 21
. . . . . . . . . . . . . . . . . . . . . . . . . . . . . . . . . . . . . . . . . . . . . . . . . 19
. . . . . . . . . . . . . . . . . . . . . . . . . . . . . . . . . . . . . . . . . . . . . . . . . . . . 19
ii
Page 4
Weapon Set . . . . . . . . . . . . . . . . . . . . . . . . . . . . . . . . . . . . . . . . . . . . . . . . . . . . . 21
Go! . . . . . . . . . . . . . . . . . . . . . . . . . . . . . . . . . . . . . . . . . . . . . . . . . . . . . . . . . . . 21
Start Mission . . . . . . . . . . . . . . . . . . . . . . . . . . . . . . . . . . . . . . . . . . . . . . . . . . . . 22
Options Menu
Round Time. . . . . . . . . . . . . . . . . . . . . . . . . . . . . . . . . . . . . . . . . . . . . . . . . . . . . 22
Turn Time . . . . . . . . . . . . . . . . . . . . . . . . . . . . . . . . . . . . . . . . . . . . . . . . . . . . . . 22
Worm Select . . . . . . . . . . . . . . . . . . . . . . . . . . . . . . . . . . . . . . . . . . . . . . . . . . . . 22
Worm Retreat . . . . . . . . . . . . . . . . . . . . . . . . . . . . . . . . . . . . . . . . . . . . . . . . . . . 22
Rope Retreat . . . . . . . . . . . . . . . . . . . . . . . . . . . . . . . . . . . . . . . . . . . . . . . . . . . . 23
Timer Displayed. . . . . . . . . . . . . . . . . . . . . . . . . . . . . . . . . . . . . . . . . . . . . . . . . . 23
Number Of Land-Mines . . . . . . . . . . . . . . . . . . . . . . . . . . . . . . . . . . . . . . . . . . . . 23
Mine Explosion Delay . . . . . . . . . . . . . . . . . . . . . . . . . . . . . . . . . . . . . . . . . . . . . 23
Dud Land-Mines . . . . . . . . . . . . . . . . . . . . . . . . . . . . . . . . . . . . . . . . . . . . . . . . . 23
Wind Strength . . . . . . . . . . . . . . . . . . . . . . . . . . . . . . . . . . . . . . . . . . . . . . . . . . . 23
Friction Level. . . . . . . . . . . . . . . . . . . . . . . . . . . . . . . . . . . . . . . . . . . . . . . . . . . . 23
Action Replay Setting . . . . . . . . . . . . . . . . . . . . . . . . . . . . . . . . . . . . . . . . . . . . . 23
Fall Damage . . . . . . . . . . . . . . . . . . . . . . . . . . . . . . . . . . . . . . . . . . . . . . . . . . . . 23
Repeat Swings. . . . . . . . . . . . . . . . . . . . . . . . . . . . . . . . . . . . . . . . . . . . . . . . . . . 24
Sudden Death Mode . . . . . . . . . . . . . . . . . . . . . . . . . . . . . . . . . . . . . . . . . . . . . . 24
Girder Setting . . . . . . . . . . . . . . . . . . . . . . . . . . . . . . . . . . . . . . . . . . . . . . . . . . . 24
Load Option Scheme . . . . . . . . . . . . . . . . . . . . . . . . . . . . . . . . . . . . . . . . . . . . . . 24
Save Option Scheme . . . . . . . . . . . . . . . . . . . . . . . . . . . . . . . . . . . . . . . . . . . . . . 24
Option Scheme Details . . . . . . . . . . . . . . . . . . . . . . . . . . . . . . . . . . . . . . . . . . . . 24
. . . . . . . . . . . . . . . . . . . . . . . . . . . . . . . . . . . . . . . . . . . . . . . . . . 22
Weapons Menu. . . . . . . . . . . . . . . . . . . . . . . . . . . . . . . . . . . . . . . . . . . . . . . . . 25
Stockpiling . . . . . . . . . . . . . . . . . . . . . . . . . . . . . . . . . . . . . . . . . . . . . . . . . . . . . 25
Crate Drops. . . . . . . . . . . . . . . . . . . . . . . . . . . . . . . . . . . . . . . . . . . . . . . . . . . . . 25
First Aid Crates . . . . . . . . . . . . . . . . . . . . . . . . . . . . . . . . . . . . . . . . . . . . . . . . . . 25
Booby-Trapped Crates . . . . . . . . . . . . . . . . . . . . . . . . . . . . . . . . . . . . . . . . . . . . . 25
Crate Intelligence . . . . . . . . . . . . . . . . . . . . . . . . . . . . . . . . . . . . . . . . . . . . . . . . 25
Specific Weapon Settings . . . . . . . . . . . . . . . . . . . . . . . . . . . . . . . . . . . . . . . . . . 25
Load Weapon Scheme . . . . . . . . . . . . . . . . . . . . . . . . . . . . . . . . . . . . . . . . . . . . . 26
Save Weapon Scheme . . . . . . . . . . . . . . . . . . . . . . . . . . . . . . . . . . . . . . . . . . . . . 26
Weapon Scheme Details . . . . . . . . . . . . . . . . . . . . . . . . . . . . . . . . . . . . . . . . . . . 26
Terrain Menu
Landscape Graphics . . . . . . . . . . . . . . . . . . . . . . . . . . . . . . . . . . . . . . . . . . . . . . 26
Water Type. . . . . . . . . . . . . . . . . . . . . . . . . . . . . . . . . . . . . . . . . . . . . . . . . . . . . . 26
Landscape Type. . . . . . . . . . . . . . . . . . . . . . . . . . . . . . . . . . . . . . . . . . . . . . . . . . 27
Enter Code . . . . . . . . . . . . . . . . . . . . . . . . . . . . . . . . . . . . . . . . . . . . . . . . . . . . . 27
Generate . . . . . . . . . . . . . . . . . . . . . . . . . . . . . . . . . . . . . . . . . . . . . . . . . . . . . . . 27
Edit . . . . . . . . . . . . . . . . . . . . . . . . . . . . . . . . . . . . . . . . . . . . . . . . . . . . . . . . . . . 27
Preview . . . . . . . . . . . . . . . . . . . . . . . . . . . . . . . . . . . . . . . . . . . . . . . . . . . . . . . . 27
Save As... . . . . . . . . . . . . . . . . . . . . . . . . . . . . . . . . . . . . . . . . . . . . . . . . . . . . . . 27
Configuration Menu
Video. . . . . . . . . . . . . . . . . . . . . . . . . . . . . . . . . . . . . . . . . . . . . . . . . . . . . . . . . . 27
Audio . . . . . . . . . . . . . . . . . . . . . . . . . . . . . . . . . . . . . . . . . . . . . . . . . . . . . . . . . 28
. . . . . . . . . . . . . . . . . . . . . . . . . . . . . . . . . . . . . . . . . . . . . . . . . . . 26
. . . . . . . . . . . . . . . . . . . . . . . . . . . . . . . . . . . . . . . . . . . . 27
iii
Page 5

SINGLE PLAYER MISSION GAME
Passwords. . . . . . . . . . . . . . . . . . . . . . . . . . . . . . . . . . . . . . . . . . . . . . . . . . . . . . 30
. . . . . . . . . . . . . . . . . . . . . . . . . . . . . 30
WORLD DOMINATION - SETTING-UP
NETWORK AND INTERNET PLAY
. . . . . . . . . . . . . . . . . . . . . . . . . . . . . . 31
Local Area Network Play
Messages . . . . . . . . . . . . . . . . . . . . . . . . . . . . . . . . . . . . . . . . . . . . . . . . . . . . . . 31
Hosting A Game . . . . . . . . . . . . . . . . . . . . . . . . . . . . . . . . . . . . . . . . . . . . . . . . . 32
Joining A Game . . . . . . . . . . . . . . . . . . . . . . . . . . . . . . . . . . . . . . . . . . . . . . . . . . 33
Playing Over The Internet
A Word On Communication Problems
Chat Mode
Public Messages . . . . . . . . . . . . . . . . . . . . . . . . . . . . . . . . . . . . . . . . . . . . . . . . . 35
Anonymous Messages . . . . . . . . . . . . . . . . . . . . . . . . . . . . . . . . . . . . . . . . . . . . . 35
Actions . . . . . . . . . . . . . . . . . . . . . . . . . . . . . . . . . . . . . . . . . . . . . . . . . . . . . . . . 35
Advanced Messaging Control . . . . . . . . . . . . . . . . . . . . . . . . . . . . . . . . . . . . . . . 35
Shortcuts. . . . . . . . . . . . . . . . . . . . . . . . . . . . . . . . . . . . . . . . . . . . . . . . . . . . . . . 36
. . . . . . . . . . . . . . . . . . . . . . . . . . . . . . . . . . . . . . . . . . . . . . . . . . . . . 35
TROUBLESHOOTING
On-Line Help . . . . . . . . . . . . . . . . . . . . . . . . . . . . . . . . . . . . . . . . . . . . . . . . . . . . 37
Mail. . . . . . . . . . . . . . . . . . . . . . . . . . . . . . . . . . . . . . . . . . . . . . . . . . . . . . . . . . . 38
Send Us Your Feedback! . . . . . . . . . . . . . . . . . . . . . . . . . . . . . . . . . . . . . . . . . . . 38
The Worm-Wide-Web . . . . . . . . . . . . . . . . . . . . . . . . . . . . . . . . . . . . . . . . . . . . . . 38
CREDITS
. . . . . . . . . . . . . . . . . . . . . . . . . . . . . . . . . . . . . . . . . . . . . . . . . . . . . . . . 39
Team 17. . . . . . . . . . . . . . . . . . . . . . . . . . . . . . . . . . . . . . . . . . . . . . . . . . . . . . . . 39
MicroProse . . . . . . . . . . . . . . . . . . . . . . . . . . . . . . . . . . . . . . . . . . . . . . . . . . . . . 40
APPENDIX 1 - GAME CONTROLS
. . . . . . . . . . . . . . . . . . . . . . . . . . . . . . . . . . . . . . . 31
. . . . . . . . . . . . . . . . . . . . . . . . . . . . . . . . . . . . . . 33
. . . . . . . . . . . . . . . . . . . . . . . . . . . 34
. . . . . . . . . . . . . . . . . . . . . . . . . . . . . . . . . . . . . . . . . . . 37
. . . . . . . . . . . . . . . . . . . . . . . . . . . . 41
APPENDIX 2 - WORMS 2 SPEECH
BANK EDITOR
Play. . . . . . . . . . . . . . . . . . . . . . . . . . . . . . . . . . . . . . . . . . . . . . . . . . . . . . . . . . . 42
Stop . . . . . . . . . . . . . . . . . . . . . . . . . . . . . . . . . . . . . . . . . . . . . . . . . . . . . . . . . . 42
Set . . . . . . . . . . . . . . . . . . . . . . . . . . . . . . . . . . . . . . . . . . . . . . . . . . . . . . . . . . . 42
Restore . . . . . . . . . . . . . . . . . . . . . . . . . . . . . . . . . . . . . . . . . . . . . . . . . . . . . . . . 42
Load, Save and Delete. . . . . . . . . . . . . . . . . . . . . . . . . . . . . . . . . . . . . . . . . . . . . 42
. . . . . . . . . . . . . . . . . . . . . . . . . . . . . . . . . . . . . . . . . . . . . . . . . . 42
iv
Page 6
Installation
To install the game, simply insert the Worms 2 CD into the CD-ROM drive whilst
in Windows® 95.
If Auto-run is not enabled, click Start and select Run. Type d:\Setup.now.exe
(where d: is the letter of your CD-ROM drive) and press Return on your
keyboard.
INSTALLING WORMS 2
• Click Install Worms 2 and follow the on-screen instructions.
When Worms 2 has successfully been installed, a Team17 program group will
be added in Programs within your Start menu.
UN-INSTALLING WORMS 2
To un-install Worms 2, click the Start button, select Settings and click Control
Panel. Double-click Add/Remove Programs, select Worms 2 and click OK.
README FILE (README.TXT)
Software is continually improved throughout all stages of development,
wherever possible, to ensure the finest quality gaming experience. The
installation program will automatically offer you the chance to view the Readme
file (Readme.txt). We advise all players to read this file for any last minute
changes or additions that are not reflected in this manual.
N
OTE
A Worms 2 CD must
be present in order to
play the game. If you
are playing a multiplayer game over a
Network, then each
player must have a
Worms 2 CD.
1
STARTING THE GAME
:
To play Worms 2, click Start and select Team 17 from the Programs menu.
Click on Worms 2.
Finally, once the game is installed to your Hard Disk, you can play the game
from CD, simply ensure the CD is in your CD-ROM drive and select Play
Worms 2 from the installation menu.
They’re back! They’re crazy! And they’re ready for action!
The sequel to the highly successful Worms, Worms 2 gives you all the
Page 7

Introduction
outrageous features and addictive game-play of the original and some things
you wouldn’t believe!
Worms 2 is a multi-player game that blends no-holds-barred action, strategy
and sheer outrageous fortune, meaning you can play for 20 minutes or 20
hours. No game of Worms 2 is ever the same, making it endlessly entertaining.
Up to six teams can battle it out on the same machine, local network or on the
Internet, making it the ideal party game. It doesn’t matter how you play it, once
you’re hooked, you’ll always come back for more!
A WORD OF CAUTION...
As a new player you may be overwhelmed by the addictive game-play and
great graphics of Worms 2 and miss out on many of the game’s great features.
We recommend that you read as much of the manual as possible to get the
most from the game; at the very least you should check out the Quick-Start,
Playing Worms 2 and Weapons sections of this manual. You have been
warned!
If you’re a Worms veteran, then welcome back! We think you’ll enjoy all of the
improvements and extra goodies we’ve added into Worms 2, especially the
Internet play. Now, you can take part in global warfare!
2
Page 8
The Concepts Of Play
OVERVIEW
Worms 2 is a turn-based strategy game, where between two and six teams
(either human or computer controlled) can battle it out over bizarre randomly
generated landscapes. Each team takes it in turn to pick off the opposing
Worm teams, using crazy weapons and tools.
Worms die when they lose all of their energy or drown. The winning team is the
one that manages to survive the mayhem and have the only Worm(s)
left standing.
TURN-BASED SYSTEM
In Worms 2, players have a set time in which to make a move before the game
automatically switches to the next player. During this period, you can select
which Worm to use (unless you only have one!) and either let its arsenal loose
on the enemy or move the Worm into safety.
TIME
In addition to the time limit for each turn (an option that you can change), each
battle has an overall time limit before “Sudden Death” extra time is called. In
Sudden Death, all Worms have their energy reduced to one unit, meaning the
slightest hit will make that vital kill and edge your team towards victory! There
are a number of options you can change for "Sudden Death", including having
the water level gradually rise, making high territory even more strategic!
3
RANDOMLY-GENERATED LANDSCAPES
Each time you play Worms 2, the game will be different - guaranteed! Worms
and mines are randomly placed on billions of possible landscapes, providing
you with endless playing opportunities.
WORMS AND WEAPONS
Each team of Worms will have a huge arsenal of devastating weapons at their
disposal; some of these will be limited in supply so you will have to use
strategy to achieve maximum carnage!
There are a wide variety of weapon types in Worms 2. For full details about
weapons and weapon usage, see the Weapons section later in this manual.
STRATEGY
Worms 2 can be played in many different ways - some players opt for wanton
destruction, others play it safe, and there are those that are so underhanded
Page 9
that they have vengeance wreaked upon them at every opportunity!
Those who resort to hiding their Worms away and playing a very defensive
game, have turned to the ‘Dark Side’ of Worms playing and must be shouted
at! Keep on your toes and tails! You will have to adapt your strategy to the
weapons available, the landscape you’re playing on and to each new
opponent.
ON YOUR OWN, OR IN A GROUP
Worms 2 is enjoyable whether you play alone or in a group. Although the
game is best enjoyed when played against others, Worms 2 also features
Single Player Missions for the lone player, pitting your skills against crack
computer teams.
4
Page 10

Quick-Start
For those of you eager to launch yourself straight into the fray, we have
prepared some quick instructions to get you straight into the game.
After starting Worms 2, click on the Single Machine icon from the title screen.
You will now be on the Game Menu.
We have already prepared some teams and options so that you can play
immediately .
• Double-click on at least two teams from the Team Pool at the bottom of the
screen. To begin with, we suggest Player 1 (a human team) and CPU-
EASY (a weak computer-controlled side).
• Click Go! to start the game.
You will now be in the thick of it, faced only with the landscape, your Worms
and the cold faces of the opposition. You can experiment with weapons and
tactics, or refer to later sections in this manual for full weapon details. There is
also a section devoted to all of the Game Options - read these, they can
drastically change how Worms 2 plays.
5
Page 11
Playing Worms 2
You’ve started the game but now what? This section will familiarise you with
the basic controls of Worms 2 that are essential if you’re going to take on the
world! A key summary is provided at the end of this manual for reference.
MOVING THE VIEW
You can use the mouse to scroll around the landscape, simply move it in the
direction you’d like the screen to scroll.
CHANGING WORMS
If you have Worm Select set to ‘Manual’ (see Options Menu later in the
manual), press TAB to select a different member of your Worms Team.
You can only change Worms if you haven’t already moved one.
MOVING WORMS
Move your Worm around by using the Arrow Keys. The left arrow moves your
Worm to the left, the right arrow moves your Worm to the right. If the Worm is
blocked then it will stop.
JUMPING
You can make your Worms jump forward by pressing the Return key on the
keyboard. The size of the jump will be affected by wind strength and gravity.
Be careful, Worms that jump too far can hurt themselves - a long fall will
prevent your Worm completing its turn.
You can also make Worms jump backwards by pressing the Return twice in
quick succession and perform an upward jump with Backspace.
OTHER MOVES
Some of the weapons and tools have some nifty little tricks that can aid your
Worm in its movements. Check out the Weapons section later in the manual
for further details.
N
OTE
If you lose sight of the
currently selected
Worm, pressing
‘Home’ will centre the
display on that Worm.
:
Along with the Worms controls, there are other keys which can be used.
ACTION REPLAY
• Press ‘R’ to replay the last shot. This can only be done immediately after
the shot.
• Press and hold the Spacebar during a replay, to fast-forward it to the end.
6
Page 12
N
OTE
You cannot Draw
games or declare
Sudden Death in a
Network game.
Selecting Quit will
Surrender all teams
on that machine.
N
OTE
If you are playing with
the highest detail
levels selected, the
background graphics
will also reflect the
wind strength and
direction.
QUIT
:
Press and hold ESC to open the Quit Menu: Draw Game, Sudden Death and
Quit Game. You can also view the number of rounds won by each team
from here.
In a Network game, action will continue as normal behind the menu. In a
normal game, action will be paused while the menu is on-screen.
NAME SWITCH
Press DEL to toggle the Worm Name Visibility setting from full, partial
or none.
On-Screen Information
The Worms 2 game screen is full of useful information - the following explains
what it all means!
COMMENTARY PANEL
A full commentary appears at the top of the screen, giving full details of who
has been killed, who is on the move and which weapon has been selected.
TURN/ROUND TIME INDICATOR
Your Turn Time counts down at the bottom left of the screen. As an option,
you can also have the Round Time displayed here (for full details see the
Options Menu section later in the manual).
:
WIND BAR/BACKGROUND INCIDENTALS
There is a wind strength indicator at the bottom-right of the screen. The arrows
indicate the strength and direction of the wind.
TEAM STATUS
The combined energy bars of each team in play are shown at the centre of the
lower section of the screen. Status bars are removed from the screen when a
team’s energy is depleted and that team is out.
7
WORM STATUS
Worm names, team colour and energy values appear above each Worm.
Page 13
Weapons
Selecting Your Weapon
Okay, this is the section where it all happens...the armoury! There are two
ways to load up with your favourite weapon:
1) Click the right-mouse button to display the Weapon Selection Menu, then
click the weapon or tool of your choice. As you move the cursor, the name
of the highlighted weapon appears at the bottom of the Weapon Selection
Menu. Click away from the menu to close it without making a selection.
The number next to the weapon, shows the amount of that weapon available.
When a weapon is unavailable (ie your stock is at zero), the weapon is
removed from the Weapon Selection Menu.
2) Use the ‘F’ keys at the top of your keyboard, to select your weapon directly.
You can use this to speed up the slaughter!
The Weapon Selection Menu shows which ‘F’ keys relate to which weapons.
Where more than one weapon shares a key, simply press that key more than
once (up to four times) to select the other weapons. Currently selected
weapons will appear in the Commentary Panel.
N
OTE
Worms can still be
moved with this menu
on-screen.
:
Wreaking Havoc
- The Art Of Weapon Usage
The following section details the weapons of Worms 2, their effects and how to
use them. There are many more that are top secret and will only be found in
weapon crates - good luck finding them!
Remember, all weapon instructions are written assuming you have already
selected that weapon.
One of the new tactics introduced into Worms 2 is ‘Air Moves’. Many of the
weapons can be used in the air, when jumping or falling for example.
N
OTE
You can change which
weapons you start the
game with in the
Weapons Menu (for
full details see the
Weapons Menu
section later in this
manual).
8
:
Page 14
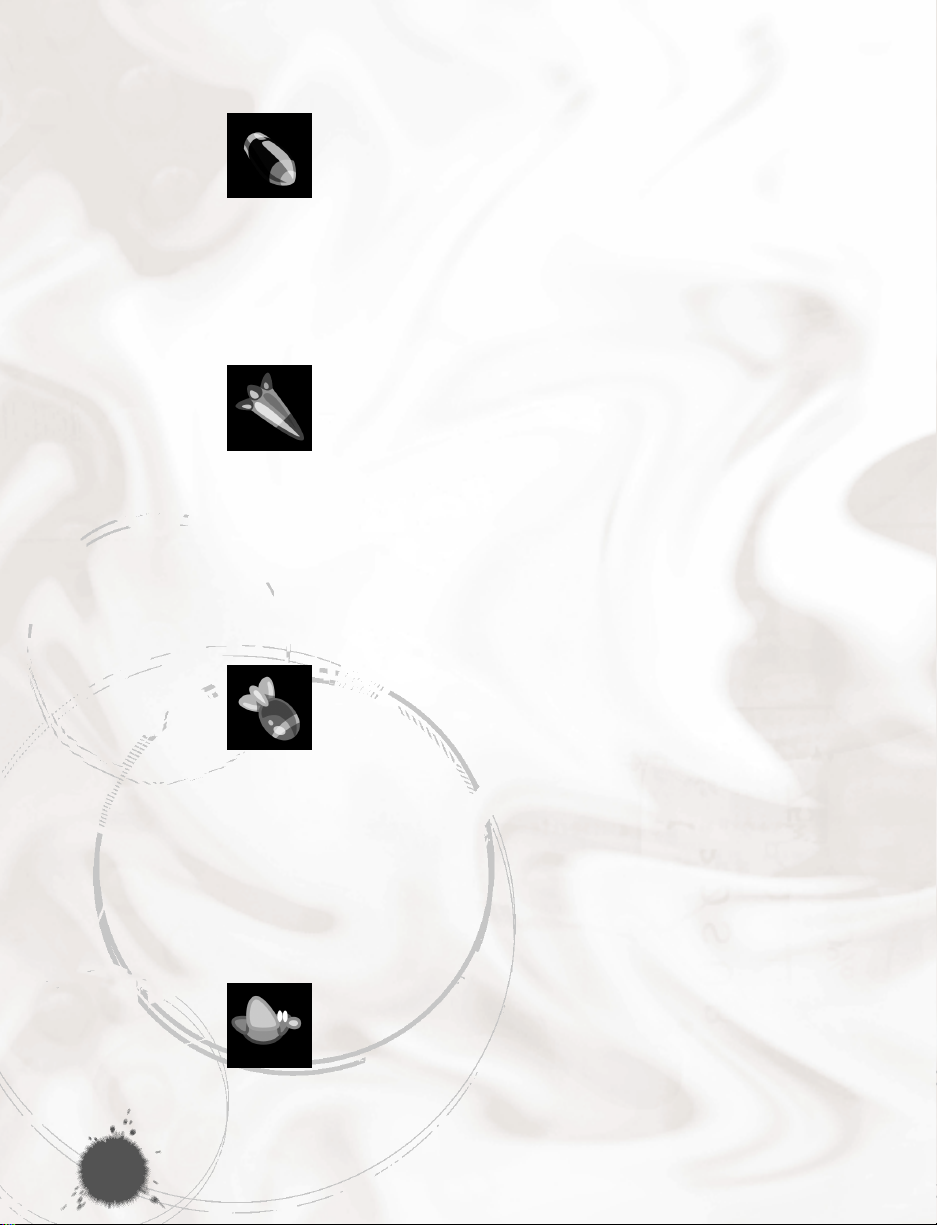
BAZOOKA (F1)
The Bazooka is a powerful weapon that offers immediate
satisfaction. Careful use of the wind strength and direction turns
this weapon into a strategic wonder.
• Use the up and down Arrow Keys to move the cross-hair and press the
Spacebar to fire (the longer you press the Spacebar, the stronger the shot
will be).
The Bazooka inflicts a maximum of 50 points of damage.
HOMING MISSILE (F1 X2)
Eternally useful, the Homing Missile will aim for a specified
target. Remember to give it enough power so that it can
effectively find its target. Homing Missiles in Worms 2 are aquatic
and can be fired under water.
• Move the target cursor with the mouse and click on the target to mark it
(with an X). Then, use the up and down Arrow Keys to move the cross-hair
and press the Spacebar to fire (the longer you hold the Spacebar, the
stronger the shot will be).
This missile inflicts a maximum of 50 damage points.
MORTAR (F1 X3)
The Mortar always fires at full power and explodes on contact
spreading cluster bomb fragments around the immediate area.
9
This weapon is very useful towards the end of a round, when groups of Worms
may be on opposite sides of the landscape. It is also very effective on cavern
levels, as firing Mortars into the roof will deflect the clusters downwards onto
unsuspecting Worms.
• Use the up and down Arrow Keys to move the cross-hair and press the
Spacebar to fire.
Each cluster can do 30 points damage.
HOMING PIGEON (F1 X4)
A semi-intelligent equivalent of the Homing Missile, that will do
its best to reach the target you select. Obviously Pigeons aren’t
totally reliable though…
• Move the target cursor with the mouse and click on the target to mark it
(with an X). Then, use the up and down Arrow Keys to move the cross-hair
Page 15
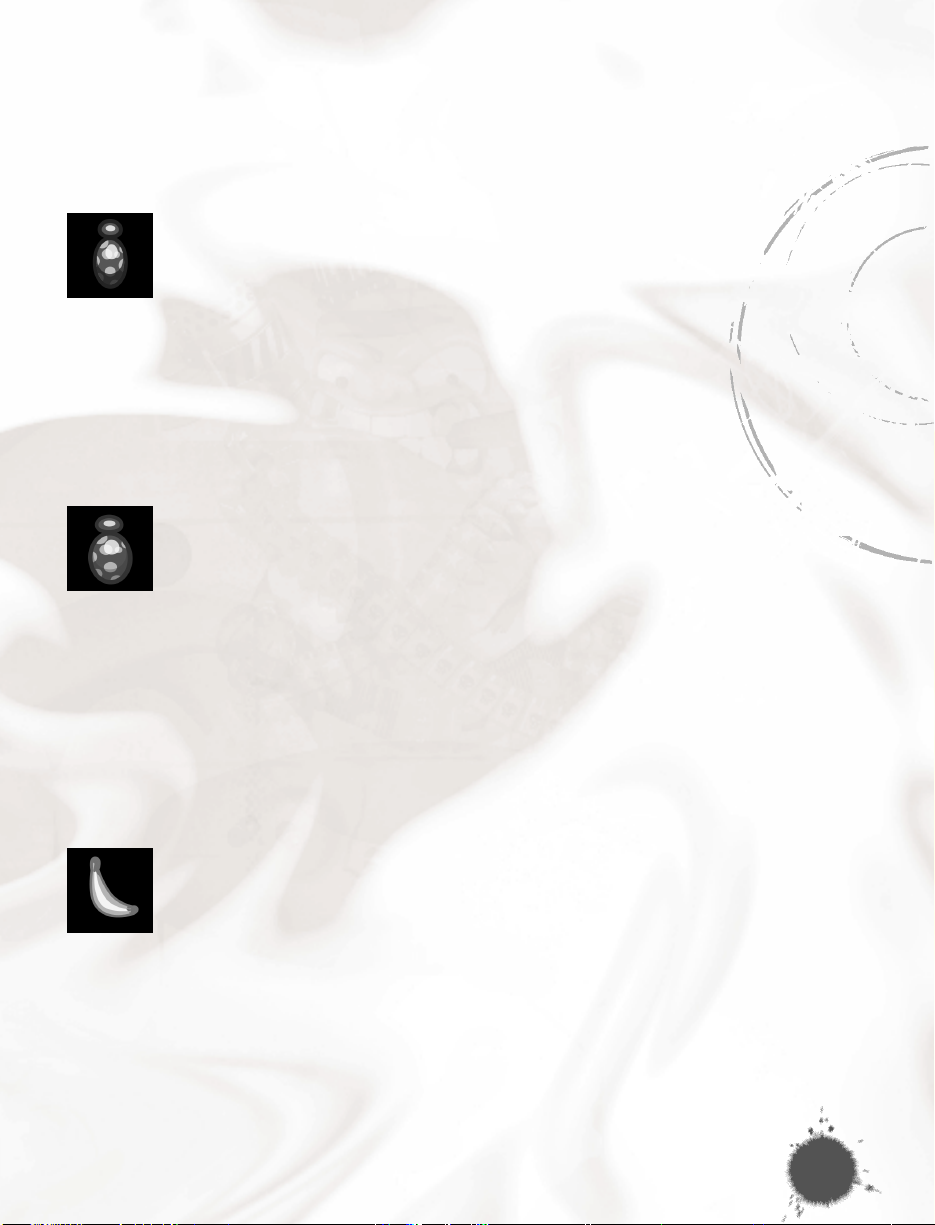
and press the Spacebar to set it on its way.
As the Pigeon is strapped to large amounts of high explosive, it does a
maximum of 75 points damage.
GRENADE (F2)
Grenades are simple but effective.
• Set the fuse time (in seconds) using keys 1-5 on the keyboard and toggle
the bounce setting, from high to low, with the ‘+’ and ‘-’ keys.
• Use the up and down Arrow Keys to move the cross-hair and press the
Spacebar to fire (the longer you hold the Spacebar, the stronger the shot
will be).
The Grenade inflicts a maximum of 50 points of damage.
CLUSTER BOMB (F2 X2)
This is no ordinary Grenade! The Cluster Bomb shatters into
smaller bomblets which explode around the target. Whilst less
precise than a Grenade, a Cluster Bomb can be really useful for
damaging groups of Worms.
• Use keys 1-5 on the keyboard to set the fuse time (in seconds) and toggle
the bounce setting, from high to low, with the ‘+’ and ‘-’ keys.
• Use the up and down Arrow Keys to move the cross-hair and press the
Spacebar to fire (the longer you hold the Spacebar, the stronger the shot
will be).
Each cluster does a maximum of 30 points damage.
BANANA BOMB (F2 X3)
The ‘soft fruit of doom’ will explode, split and cause wanton
devastation to an area the size of a small Greek Island.
• Use keys 1-5 on the keyboard to set the fuse time (in seconds) and toggle
the bounce setting, from high to low, with the ‘+’ and ‘-’ keys.
• Use the up and down Arrow Keys to move the cross-hair and press the
Spacebar to fire (the longer you hold the Spacebar, the stronger the shot
will be).
Each Banana inflicts a maximum of 75 points of damage.
10
Page 16
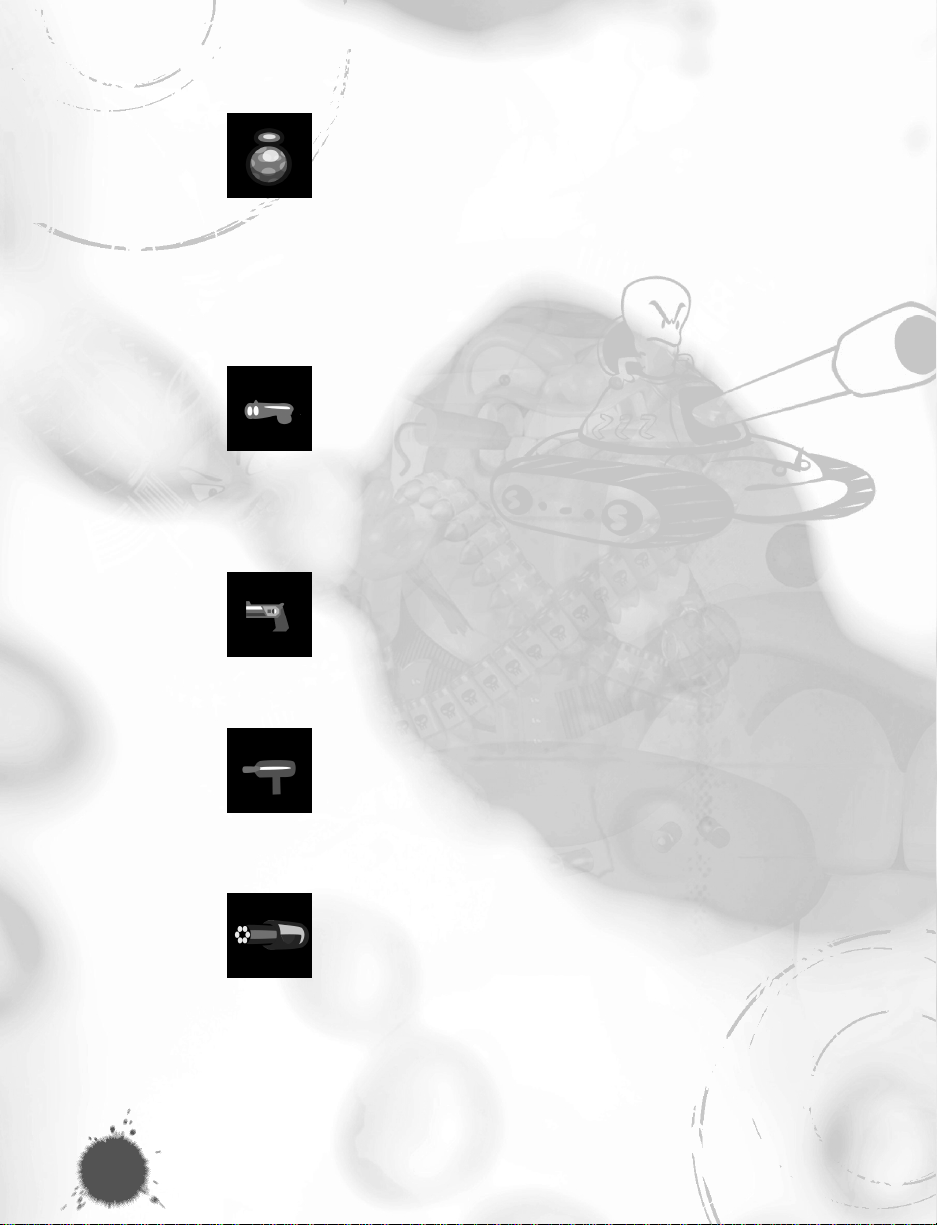
HOMING CLUSTER (F2 X4)
Like the Cluster Bomb, except that the bomblets seek out their
target directly, destroying anything in their path.
• Move the target cursor with the mouse and click on the target to mark it
(with an X). Then, use the up and down Arrow Keys to move the cross-hair
and press the Spacebar to fire (the longer you hold the Spacebar, the
stronger the shot will be).
Each cluster does a maximum of 30 points of damage.
SHOTGUN (F3)
This wide-gauge Shotgun is great for picking-off Worms at long
range. Remember you get two shots!
• Use the up and down Arrow Keys to move the cross-hair and press the
Spacebar to fire.
Each shot inflicts a maximum of 25 damage points.
HANDGUN (F3 X2)
Not much use, just a pleasing way of finishing off a particularly
hated Worm! Fires 3 consecutive shots.
• Use the up and down Arrow Keys to move the cross-hair and press the
Spacebar to fire.
11
UZI (F3 X3)
Spray Worms with bullets from one of the coolest guns around.
A great finishing-off weapon.
• Use the up and down Arrow Keys to move the cross-hair and press the
Spacebar to fire.
MINI-GUN (F3 X4)
Misleading name for a huge, souped-up Uzi machine gun.
• Use the up and down Arrow Keys to move the cross-hair and press the
Spacebar to fire.
Page 17
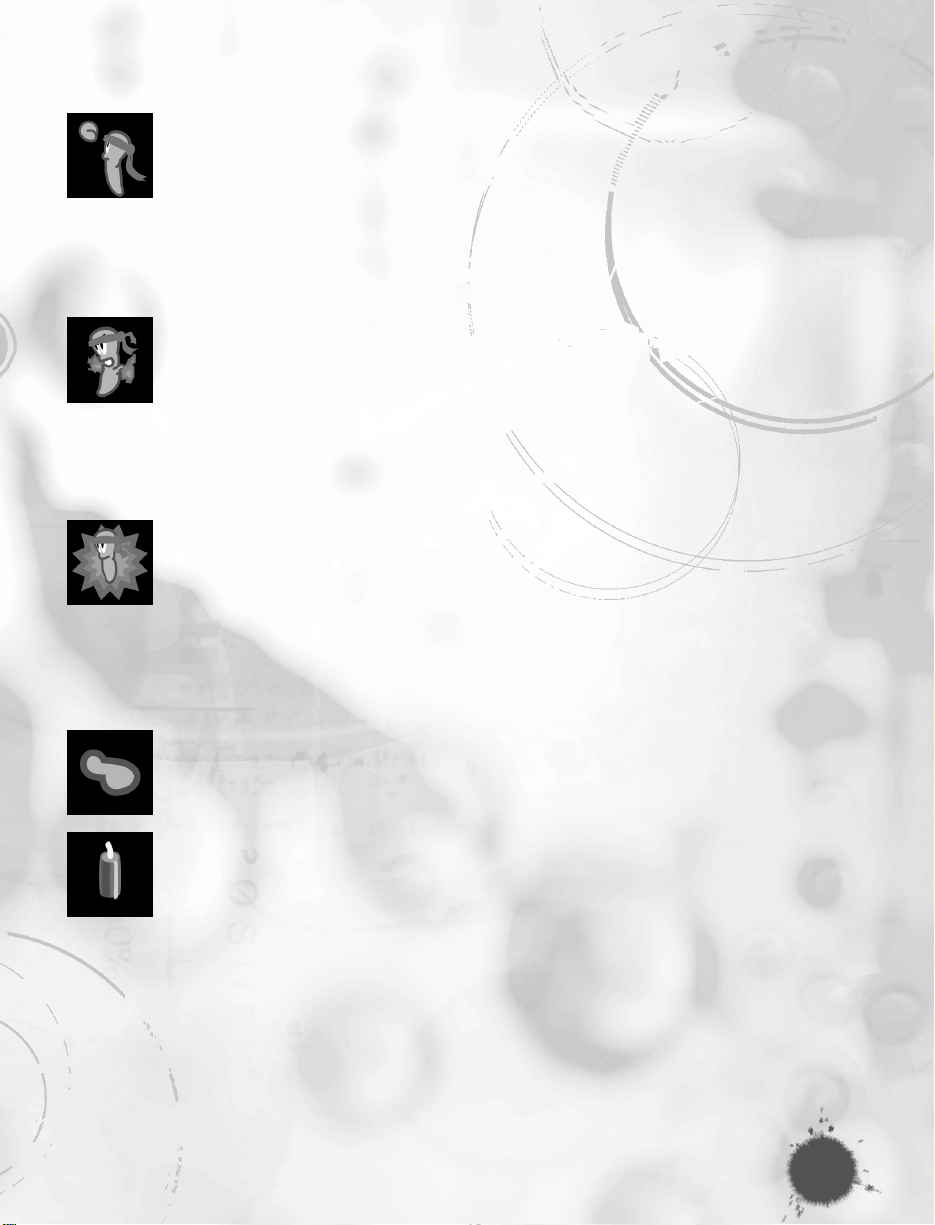
FIRE PUNCH (F4)
This powerful punch knocks Worms into the air and also cuts
upward through land.
• Stand next to your target with this selected and press the Spacebar
to punch.
The Fire Punch inflicts 30 points of damage.
DRAGON BALL (F4 X2)
This unleashes an energy ball toward the enemy, knocking its
victim back.
• Stand next to your target with this selected and press the Spacebar
to attack.
The Dragon Ball Inflicts 30 points of damage.
KAMIKAZE (F4 X3)
The ultimate sacrifice. Select one of eight directions with the
Arrow Keys, then press Spacebar and watch the Worm fire off
and explode. You are guaranteed to lose the Worm of course, so
it had better be worth it!
The final explosion does a maximum of 50 points damage and any Worms
unlucky enough to be hit along the way will also suffer a loss of 30 points.
PROD (F4 X4)
Sarcasm personified in a move. Press the Spacebar to nudge a
Worm and send it to its doom.
DYNAMITE (F5)
Press Spacebar to drop Dynamite from the edges of cliffs onto
unsuspecting Worms, or next to a group of Worms. This is a
very powerful weapon and great for multiple Worm slaughter.
Press Return to drop this from a rope.
Dynamite causes a maximum of 75 points of damage.
12
Page 18
LAND-MINE (F5 X2)
Similar to Dynamite in their operation, with the exception that
they are proximity mines and will only explode if Worms are
nearby. Mines are also a great strategic tool and can be
knocked onto Worms by other explosions.
• Press Spacebar to drop a Mine.
Land-Mines cause a maximum of 50 damage points.
SHEEP (F5 X3)
Your fluffy friend runs unselfishly towards the enemy and will
detonate on your command. With the effectiveness of dynamite
and the dexterity that only a four legged fluffy mammal can
muster, the sheep is a priceless tool. Use it wisely…
• Sheep are released with the Spacebar and are detonated with a further
press of the Spacebar. If left undetonated, they eventually get fed up and
blow themselves up!
Sheep can inflict a maximum of 75 points of damage.
SUPER SHEEP (F5 X4)
The amazing ‘steerable’ flying Sheep! Press Spacebar to
release, what on the surface looks like your everyday, run-of-themill sheep. Press the Spacebar a second time and this Sheep is
given powers other farm animals can only dream of!
13
• Control the flight of the sheep using the left and right Arrow Keys. You can
either crash your sheep into something to make it explode or, if you are
feeling particularly nasty, you can remove its special powers by pressing
Spacebar again causing an abrupt end to its super-hero-type activities.
A Super Sheep can do a maximum of 75 points of damage.
AIR-STRIKE (F6)
This weapon calls in an aerial missile strike in the target area
you select. (Strike Weapons cannot be called in Caverns and are
not affected by wind.)
• To launch the Air-Strike, simply move the target cursor with the mouse and
click on the target to mark it (with an X). If you wish to abandon, simply
Page 19
select another weapon. Select the direction of the Air-Strike with the left and
right Arrow Keys.
Each of the five missiles does a maximum of 30 points of damage.
HOMING AIR-STRIKE (F6 X2)
A more intelligent adaptation of the Air-Strike. Great for multiple
kills.
• To launch the Air-Strike, simply move the target cursor with the mouse and
click on the target to mark it (with an X). You can re-target by clicking on a
new target.
Each missile inflicts a maximum of 30 points of damage.
NAPALM STRIKE (F6 X3)
Light up the sky with pyrotechnic devastation! Scorch the Earth
and barbecue the opposition.
• Move the target cursor with the mouse and click on the target to mark it
(with an X). Select the direction of the Air-Strike with the left and right
Arrow Keys.
BLOW TORCH (F7)
Use the Torch to dig through the landscape, but remember, a
sneaky hiding game is a sign of the Dark Side!
• Select your direction with the Arrow Keys and press Spacebar to start and
then stop the Blow Torch.
More twisted individuals can use the Blow Torch to inflict 15 points of damage
on enemy Worms.
DRILL (F7 X2)
Press Spacebar to dig down. This is useful for gaining access to
tunnels that other Worms have made. You can start and stop the
drill by hitting the Spacebar.
You can turn the drill on enemy Worms to inflict 15 points of damage.
14
Page 20
GIRDER (F7 X3)
Girders have many uses. They are designed to enable Worms to
cross valleys, provide a base for the Ninja Rope or a ramp so
that Sheep can cross critical paths. Some players use Girders to
block the progress of the enemy and others use them as a
deflector for Grenades and Cluster Bombs.
Girder use can be restricted to the immediate area around the currently
selected Worm, from the Options Menu.
• Use the left and right Arrow Keys to rotate the Girder around and press
Spacebar to place it.
BASEBALL BAT (F7 X4)
Sometimes the only really satisfying thing to do to an enemy
Worm, is to walk up behind it and smack it with a heavy
wooden bat!
• Stand next to your target, aim the cross-hair and press the Spacebar to sort
him out!
N
OTE
You can also use the
up and down Arrow
Keys to alter the length
of the rope.
N
OTE
When you need to
trigger a weapon, such
as an Exploding
Sheep, you must press
Return and not the
Spacebar, or you will
let go of the rope
and fall.
15
The Baseball Bat inflicts 30 points of damage.
:
NINJA ROPE (F8)
Ropes can be used to manoeuvre Worms into otherwise
inaccessible areas.
• Press Spacebar to launch the Ninja Rope and use the left and right Arrow
Keys to swing on the rope.
• Press the Spacebar to detach your Worm from the rope.
:
Experts can drop weapons (usually dynamite or exploding sheep) whilst
swinging through the air...simply press Return, to drop the current weapon.
Be careful, this is only advisable with certain weapons!
If the ability to drop Sheep from great heights wasn’t enough, you can also
swing, let go, fire the rope again whilst in mid-air, swing and repeat, covering
huge distances quickly! Be warned, this is a very tricky technique and really
works well in spacious caverns.
Page 21
BUNGEE (F8 X2)
Large falls can seriously damage your Worms’ health, but with
the Bungee selected you can safely wander off a cliff and drop
weapons whilst bouncing around.
• Press Spacebar to release your Worm from the Bungee.
• Press Return to drop selected weapons whilst on the Bungee.
PARACHUTE (F8 X3)
Useful when dropping off a rope or as an alternative to
the Bungee.
• Press Spacebar to open the parachute. Make sure you know which way the
wind is blowing.
• Press the Spacebar to close the parachute. A further press of the Spacebar
will open it again.
TELEPORT (F8 X4)
Moving a Worm out of a potentially disastrous starting position is
the most popular use for this feature. The normal Teleporting
strategy is to search for high ground away from cliffs and mines.
Dark Side players use it to cram their Worms into small,
inaccessible places – call them a ‘Crevice Girl’ if they do!
• Simply click the mouse on the location where you want your Worm to
end up.
SUPER BANANA (F9)
Although this looks like a standard Banana Bomb, the Super
Banana has the added bonus of manual detonation. Just press
the Spacebar after you have thrown it and shower your enemies
in soft fruit.
HOLY HAND GRENADE (F9 X2)
Unleash the power of the heavens with the Lord’s preferred
weapon. This is a 3 second (no more, no less) low bounce
grenade that will only explode on impact.
The most powerful weapon in the game (only a certain garden ornament could
possibly be more dangerous), it is capable of delivering 100 points of damage.
N
OTE
You cannot Teleport
into solid land.
:
16
Page 22
PETROL BOMB (F10)
Really hot stuff - an urban favourite. You can smash the bottle
against a wall and watch the flames drop on an unsuspecting
victim. Best used in confined spaces.
• Use the up and down Arrow Keys to move the cross-hair and press the
Spacebar to fire (the longer you hold the Spacebar, the stronger the shot
will be).
PRICELESS MING VASE (F10 X2)
Drop this like Dynamite and run. After 5 seconds it will explode,
sending pieces of china (the material, not the country)
everywhere, much to the disgust of antique lovers.
SHEEP STRIKE (F10 X3)
Death by mutton from the skies. Similar to Air-Strikes, except five
Sheep are dropped instead. Being fluffy, they also bounce on
impact causing much more damage than a normal Air-Strike.
MAD COWS (F11)
Frothing mad cows intent on mass destruction.
• Unleash them by pressing the Spacebar. If you have more than one, you
can release them in a mad herd by pressing keys 1-5. Being stupid, they
will make no effort to get over an obstacle and just explode instead.
17
Each Cow can do up to 75 points of damage.
OLD WOMAN (F11 X2)
Press Spacebar to set the old lady wandering around,
complaining about the price of tea and mumbling about the
good old days, before violently exploding. An erratic but
fun weapon.
This old girl causes up to 75 points of damage.
SKIP GO (F12)
If for some reason you feel that you needn’t cause any wilful
decimation during your turn, you can skip it by pressing
the Spacebar.
Page 23

SURRENDER (F12 X2)
If you are unable to face it anymore, you can surrender. The
humiliation continues however, as your team remain waving little
white flags, for the other teams to pick them off in a totally
immoral way!
But that’s not the end of it…
Well you didn’t think we’d tell you about every weapon in the game now,
did you?
So make sure you collect those weapon crates – who knows, the fabled
Concrete Donkey may even make an appearance...
18
Page 24
Menu System
From the Worms 2 title screen, you have four options you can select:
• Single Machine/Hot-Seat Play - Click this to start a new single player or
hot-seat game.
• Multi-Player/Network Play - Click this to start a Network or Internet game.
• Worms 2 Configuration - Click this to configure your sound and video
options (for further details see Configuration Menu later in the manual).
• About Worms 2 - Click this for details about Worms 2. From here you can
check the latest documentation, the credits for Worms 2 and link to us via
e-mail and the official Worms 2 web-site.
There are four further menus available if you select the Single Machine/Hot-
Seat Play option:
N
OTE
Every Option in these
menus has help text
attached. For
information on a
specific option, leave
your mouse pointer
over it and help will
appear at the bottom
of the screen.
:
• Game Menu
• Options
• Weapons
• Terrain
Game Menu
From here you can set-up the Play Roster, create new teams and check-out
the top ranked teams.
19
PLAY ROSTER
The Play Roster shows the teams currently selected for the next battle.
TEAM POOL
The Team Pool shows all of the teams currently available. You can sort these
according to the following statistics: Rounds Played, Rounds Won, Rounds
Drawn, Rounds Lost, Kills For, Killed Against, Kill Difference and Points.
Simply click on the appropriate statistic tab, to order the Team Pool in that
way.
CREATE NEW TEAM
• Double-click on Create New Team in the Team Pool.
Page 25
A dialogue box will appear allowing you to enter new details. Enter your new
team’s name and the names of up to eight Worms.
To select a Speech Bank from the many that are packaged with Worms 2, use
the drop down menu. You can edit or create your own Speech Banks using the
Speech Bank Editor (for further details see Appendix 2).
• Click OK to accept, or Cancel to reject your new team details. Once
created, the team details will be saved. New teams will be added to the
Team Pool.
ADDING TEAMS TO THE PLAY ROSTER
• Double-click a team name in the Team Pool. The team will be moved to the
Play Roster.
EDITING A TEAM
• Click on the team name to edit a team’s details.
• Enter your new details.
• Click OK to accept or Cancel to reject.
Team details cannot be edited once the team has played games and gained
match statistics.
You can view the statistics of a team by pressing (and holding) the rightmouse-button over a team name.
N
OTE
If you can’t think of any
names for your Worms,
pressing ALT and ‘R’
keys simultaneously
when you are entering
names, will generate a
random Worm name.
N
OTE
You need at least two
teams on the Play
Roster before the Go!
button will be
highlighted. Alternatively,
add one player and then
select the Start Mission
button, to play the
Single Player Missions.
:
:
REMOVING A TEAM FROM THE PLAY ROSTER
• Double-click a team in the Play Roster to remove it to the Team Pool.
To delete a team from the Team Pool, click on it and click Delete from the
bottom of the edit team dialogue box; you will be asked for confirmation.
WORMS IN TEAM
This allows you to set the number of Worms in a team between 1 and 8.
There can only be 18 Worms on the landscape, so this number will change
depending on the number of teams taking part. The following table indicates
how the number of Worms changes depending on the number of teams:
Teams Worms
2 1-8
3 1-6
4 1-4
5 1-3
6 1-3
20
Page 26
If you are using fewer Worms, you can edit their starting Energy Value to be
greater than the normal 100 units.
ROUNDS REQUIRED TO WIN
You can change the number of rounds required for a team to win the match,
from 1 to 9.
TIP:
Giving each Worm 500
units of energy is not
recommended - Worms
with a lot of energy can
be drowned just as
easily as Worms with
low energy! In the
wrong hands, a 500
unit game could
last weeks!
N
OTE
Details of the Option
sets can be found by
clicking the Details
button in the Options
Menu.
N
OTE
Details on the included
weapon sets can be
found on the game CD
and by clicking the
Details button in the
Weapons Menu.
Matches can last from 5-10 minutes (1 round, 2 team Challenge), right up to
1-4 hours (9 round, 6 team Campaign game).
A six-player heavy-energy campaign is not recommended unless you have a
whole day to spare, or are intent on a sponsored Worm-a-thon!
ENERGY SETTING
Here you can adjust the energy each Worm starts with, normally this is 100.
Most weapons deliver 30-75 points of damage, so giving Worms more Energy
will mean longer battles.
OPTION SET
If you do not wish to change all of the options, you can select from some pre-
:
defined option sets.
• Click the drop down box to change it and select a different option. The new
set is automatically saved for when you play next time.
Rookie is the default set. For beginners we recommend that you play using
the Rookie set, which has increased time, lower gravity and fewer mines,
making Worms 2 easier to play.
WEAPON SET
:
As with Options, you can choose from a list of pre-defined Weapon sets.
Experiment with these to alter dramatically the way the game plays. The default
set is Standard.
You can create Option and Weapon sets and exchange them with friends
creating endless hours of fun!
21
GO!
This is highlighted when enough teams are selected to play Worms 2. Just
click it and let battle commence.
Page 27
START MISSION
This is highlighted when 1 human player has been added to the roster. If you
enter the Missions game, you will be taken to the Mission Screen where you
can select a Skill Level or enter a password to resume a previous mission. The
option and weapon settings on this page will replace all other settings.
Options Menu
Use this menu to select in-game options. There are many aspects to change
and you can save sets out for later use. The on-screen help information tells
you what each aspect changes.
ROUND TIME
This is the time before the game plunges into Sudden Death. The round will
be drawn, when the time expires and Sudden Death is disabled. Use the
slider bar to change the length of each Round.
TURN TIME
This is how long you have to make your move. Times range from 15 seconds
(highly experienced, Speed-Wormers only) to 2 minutes. The default setting is
60 seconds, although 30 seconds is recommended when more than 3 teams
are playing.
WORM SELECT
This lets you set how the Worm you control is chosen. It can be set to Auto,
Manual, or Intelligent. When set to Auto, the Worms cycle through
sequentially, so after the first Worm in your team has taken a shot, the second
Worm will be chosen for the next go.
The Manual setting allows you to choose which Worm you’d like to use by
pressing the TAB key.
With Worm Select set to Intelligent, the computer will decide which Worm you
should use.
N
OTE
Round Time is not
usually visible on
screen, so that players
don’t use it as a
delaying tactic.
TIP:
Speed-Worm play is
recommended only
for link-up/network
play (it’s just too
quick for hot-seat
play!)
N
OTE
:
:
WORM RETREAT
This sets the length of time you can move after using your weapon, giving
your Worm a chance to find cover. You’ll have to be quick, the default is just
3 seconds.
The camera usually
follows the weapon, so
you’ll have to use the
mouse to centre the
screen on your Worm.
22
Page 28
ROPE RETREAT
This option sets the length of time you can move after dropping a weapon
from the rope. It is normally set to 3 seconds.
TIMER DISPLAYED
As it says, when selected you will be able to see the Round Time count down
to Sudden Death or the end of the round.
TIP:
Mine strength can
be altered using the
Weapon options.
N
OTE
You can press ‘R’ to
force an Action Replay
during a game.
NUMBER OF LAND-MINES
You can set the number of Land-Mines that start on the landscape from 0 to 8.
Normally there are 8 mines on the landscape.
MINE EXPLOSION DELAY
This setting determines when the mine explodes. A fuse time of 0 to 3 seconds
or random can be set. The default is 3 seconds.
DUD LAND-MINES
If selected, this makes some Mines into duds. The Mine will have a fuse as
normal, but will not explode. Dud mines will puff black smoke when triggered.
WIND STRENGTH
Each landscape will have a pre-set wind strength which you can change from
here. You can change the wind strength of each landscape from none through
to gale-force.
FRICTION LEVEL
This can be set at Low, Medium or High and affects how the Worms and
objects react to the landscape surface. If set to Default Worms 2 will use the
landscape’s own unique settings. If set to Low, Medium or High, the game will
replace the default settings.
:
ACTION REPLAY SETTING
This allows you to select when an Action Replay is triggered. You can adjust
the settings so that a Replay will be shown after a certain level of damage has
been inflicted, or between 1 and 10 kills. You can also turn auto-replay off.
23
FALL DAMAGE
With this setting, a Worm can sustain damage when falling from a height. You
can also turn this feature off.
Page 29
REPEAT SWINGS
This option restricts how many times the Ninja Rope can be used in one turn.
This option is normally set for 3 uses per turn.
SUDDEN DEATH MODE
You can alter what happens when Round Time has elapsed to any of
the following:
• Sudden Death - All Worms are reduced to 1 unit of energy
• Sink Or Swim - The landscape gradually sinks into the water each turn
• Sudden Sinking - All Worms are reduced to one unit of energy and the
landscape sinks into the water
GIRDER SETTING
When set, Girder (bridge sections) placement is restricted to the immediate
area surrounding the currently selected Worm. This is the default option.
Otherwise, you can place girder sections anywhere on the landscape.
LOAD OPTION SCHEME
• Click the Load/Save Options drop menu and select an Option scheme.
The set will be loaded and replace the current settings.
SAVE OPTION SCHEME
• Click in the Load/Save Options box and type the name of your new
scheme. Press Return on your keyboard or click Save to save the
Options scheme.
N
OTE
You’ll hear a noise if
the Girder section
cannot be placed.
:
OPTION SCHEME DETAILS
• Click this button and type some notes about the scheme and its uses. This
is useful when exchanging schemes with friends.
24
Page 30
TIP:
Choose a weapon
set with more
weapons that have
unlimited ammo, for
a Stockpiling game.
Weapons Menu
The Weapons Menu allows you to set preferences for each individual weapon.
It also allows you to set some general options concerning weapons and First
Aid crates:
STOCKPILING
A Stockpiling game carries remaining weapons forward into the following
round. When Stockpiling is enabled, new supplies are NOT delivered every
round. You can only get further supplies from crates which, thankfully, will fall
more frequently during a Stockpiling game.
CRATE DROPS
Here you can select the regularity of crate drops. You can also choose which
weapons will or will not appear in the crates in the Weapon Options. Special
weapons cannot be set to appear - but look out for them!
N
OTE
First Aid Crates will not
drop during Sudden
Death.
N
OTE
Crates can be
blown up.
You can, of course, turn crates off.
:
FIRST AID CRATES
This option allows you to vary the amount of energy restored to injured Worms
(between 10-100 units), by the First Aid Crates. You can also select None so
that no First Aid Crates will drop.
BOOBY-TRAPPED CRATES
Here you can choose whether to have booby-trapped Weapon Crates or not.
:
CRATE INTELLIGENCE
This setting will drop crates near to, or on the turn of, teams who are fairing
worst, helping very unfortunate and inexperienced players.
SPECIFIC WEAPON SETTINGS
The Weapons Menu also allows you to tailor the effects, strength and
availability of all weapons individually. Some weapons are kept under wraps
though and will only be seen when they are discovered in Weapon Crates.
The Weapon Menu contains a List Box of all weapons available to edit.
• Click on a weapon. The options for that weapon appear on the right hand
side of the screen.
Each weapon will have its own individual settings. We will not list all of them
here but, you can find help text for each one on-screen, simply rest your
25
Page 31

mouse pointer over the option in question and read the help information at the
bottom of the screen.
LOAD WEAPON SCHEME
• Click the Load/Save Weapons drop menu and select a Weapon scheme.
The scheme will be loaded and replace the current settings.
SAVE WEAPON SCHEME
• Click in the Load/Save Weapons box and type the name of your new set.
Press Return on your keyboard or click Save to save the Options scheme.
WEAPON SCHEME DETAILS
• Click this button and type some information about the weapon scheme and
its uses. This is useful reference when exchanging schemes with friends.
Terrain Menu
From here you can influence the type of terrain generated and the kind of
graphics used.
The silhouette outline of the current landscape selection, is shown in the
middle of the screen. Around this are variations based on this level, that you
can select.
• Click on a variation. The selected image moves to the centre and becomes
the current level design; four more variations of this landscape will then
appear around it.
You can continue to modify the design of the level by clicking on these
landscape variations.
To the right of the screen, there are a number of controls for selecting the type
of landscape:
LANDSCAPE GRAPHICS
This control allows the player to select the graphic style of the landscape.
WATER TYPE
This control allows the player to select the type of water that is featured on
the level.
26
Page 32
LANDSCAPE TYPE
This control allows the player to select between Open and Cavern landscapes.
Air-Strike weapons will not be available in Cavern landscapes.
ENTER CODE
This button allows the player to enter a level code consisting of numbers or
letters. Worms 2 will generate a different level from any text and numbers that
you type here.
GENERATE
This button causes the editor to generate a totally different landscape.
EDIT
This button allows the player to edit the current level silhouette using basic
drawing tools. Clicking the left-mouse button will allow you to paint; clicking
the right-mouse button allows you to use the pointer as an eraser. You can
change the shape of the drawing brush with the icons.
PREVIEW
Click this to see how the current level will appear in the game.
SAVE AS...
You can also save the current landscape using the Current Level box at the
bottom of the screen. The Current Level box contains the name of the current
level set-up. Click in the box and enter your new landscape name. Click Save
or press Return to save.
27
Configuration Menu
Use the following options to configure Worms 2 to your satisfaction.
VIDEO
These Options allow you to configure the way Worms 2 looks. These are saved
for the next time you play.
Animation Sequences
You can toggle animation sequences on or off here. Animation sequences only
appear before the first round of any match.
Page 33
Detail Level
If Worms 2 is running slowly in-game, try adjusting the detail level to improve
performance. Check out Troubleshooting at the end of the manual if problems
persist. There are 6 levels of detail in Worms 2. They are:
Level 1 - No background, one layer of water (Fastest)
Level 2 - No background, limited water
Level 3 - Coloured background, more water
Level 4 - Gradient-filled background, more water
Level 5 - Gradient-filled background, incidentals for wind indication
Level 6 - Full detail level including parallax background
AUDIO
The Audio Options allow you to set the volume of sound effects and CD music
during the game.
Volume
Audio Mixer Volume
Click this button to edit the mixer settings. From here you can balance the CD
audio and the sound-effects.
Play Audio Track
Click this to play one of the CD tracks for test purposes. The CD Audio value
on the mixer is used to control the volume level.
N
OTE
You can change the
detail level in-game by
pressing the INSERT
key.
TIP:
Mixing is best done
when an audio track
and a looped sound
effect are playing.
:
Play Sound Effect
Click this to play a sound effect - balance it with the CD track using the mixer
and adjusting the Wave value.
Repeat Samples
This option makes it easier to edit the sound by repeating the sound-effect.
Click the button again to stop the sample looping.
Save Settings
Click here to Save the current configuration.
Cancel
Click this to Exit without saving.
Music Configuration
This panel allows you to configure the order of music played in the game.
Track Listing
Click the boxes to toggle a track on or off.
28
Page 34

Move Up
Click this to move the highlighted track up the list.
Move Down
Click this to move the highlighted track down the list.
Random
Click this to shuffle the tracks into random order.
Play
Click this to Play the currently highlighted track.
Stop
Click this to Stop the current track playing.
Select All
Click this to select all tracks to play in the list.
Deselect All
Click this to deselect all tracks in the list.
Save
Click this to Save the track configuration.
Cancel
Click this to Exit without saving.
29
Page 35

Single Player Mission Game
Single Player Missions have been added as a great way for Worms players to
practice their skills. Missions are set up against computer controlled teams,
with different abilities, weapon configurations and game set-ups.
N
OTE
:
• Click the Start Mission button. This will be highlighted when just one
human player is present. You will then be whisked to the Mission Screen
where you may select a skill level (either Beginner, Medium or Expert) or
resume a previous mission by entering a password.
PASSWORDS
When you have completed a mission, you will be given a password. You can
use this at a later stage to continue from where you left off.
Missions will override
any game and weapon
settings you may have
already chosen.
30
Page 36
World Domination - Setting-
Up Network and Internet Play
Local Area Network Play
To enter a link-up game, you will first have to go to the Network Set-up
Screen and then the Lobby Screen.
The Lobby is an area where you can view which players are available to join a
game, which games are in progress and which games are being created.
• Click Networked Game from the Game Menu.
Type your name so that you can be identified on-line. Make sure that the name
you type has no spaces in it - all spaces are removed when you enter the
name.
• Click Local to open the Lobby Screen.
When you arrive in the lobby, you will see that some games are ready to join,
you can spectate other games or you can host your own game.
On the left-side of the screen, you will see a list of games. A Green Light
signifies games that require players. A Green Light with ‘XXX’ on it is a game
that needs players with an appropriate password to join the game.
31
Some games are closed; a red light signifies that the game is running and
cannot be joined. The maximum number of players who can join, the number
of teams already joined and available spaces for spectators are also shown
here.
Players in the lobby appear in a box on the right-side of the screen. These
players haven't yet joined a game.
MESSAGES
In the centre of the Lobby Screen is the Message Board where all public
messages, or private messages addressed to you, are displayed. Click the
appropriate tab to view private or public messages. When a new message has
been received, the Chat icon (on the tab) will be highlighted.
To send your own messages:
Page 37
Type your message in the text box below the Message Board. Click either the
Public or Private tabs above the box. If the message is private, then you must
highlight the recipients by double-clicking their names in the lobby panel on
the right-side of the screen.
Public messages are seen by everyone in the lobby (or current lobby room, in
the case of an Internet connection). Private messages will only be seen by
those players you have selected.
HOSTING A GAME
Click Host New Game if you want to host your own game. You will now be
taken to the Host Game screen where you will configure all game options,
weapon options and the number of players able to join in the game.
Configuring Your Game
You will notice that the Menus on the Host Game screen are those you see
when you play Single Machine/Hot-Seat Worms 2, and they are used in exactly
the same way.
There are also some other items you will have to adjust before creating your
game. These are found on the Settings tab.
Teams Allowed
This sets the total number of teams allowed to play in the game.
Teams Per Player
This sets the number of teams each player may enter. More than one player
can be entered from the same computer in a link-up game, up to a limit of five
(eg five players on one computer can play against a single player on a
separate linked machine).
Worms Per Team
This sets the maximum number of Worms allowed in a Team. This is limited by
the number of teams participating (see Worms In Team in Game Menu for
full details).
N
OTE
As soon as you have
selected to host a
game, the door is
closed so others
cannot join it until you
have configured the
game settings.
:
Victories Required
This sets the number of rounds required to win the game.
Password
Click the Password Security checkbox to set a password, restricting entry into
your game. Type your password at the prompt and press Return.
32
Page 38
N
OTE
When you have set all of the options for your game, you will need to make it
available to other players.
:
• Click Open Door.
Depending on the
Options you have
defined, more than
one team may be
entered from the
same computer.
When you create a game, it will appear in the left hand box on the Lobby
Screen for other players to see. As players join your game, the options you
have set will be passed on to them. You can still change options after this but
they are not applied until you click Apply.
All new players will appear on the left of the Host Game screen. These players
are local to this game and you can highlight them to send messages. Not all
players listed here will participate in the game, some may have come to
spectate. If there is anyone that you do not want spectating or participating in
the game, then you can send them back to the lobby screen by clicking
Dismiss.
When you are ready to start the game, click Close Door to restrict further entry
into the game. Then Click Go! The game will now start.
JOINING A GAME
• Click on any of the games listed in the left panel with a green light.
• Click Join Game. You will be taken to the game set-up screen.
If the game requires a password to join it, you will be prompted for it here
before being given access. The game set-up screen is similar to the Host
Game screen, but you have none of the command options, ie you cannot
configure options, dismiss people or close the door.
Only the host can start the game so you may have to wait here until enough
players have joined.
33
Playing Over The Internet
Joining and Creating Internet games is exactly the same as with a LAN game,
but with potentially thousands of people connecting at once!
To play over the Internet, you must first enable your Internet connection. You
must then connect to a Server:-
• Click Networked Game from the Game Menu.
Page 39

Type your name so that you can be identified on-line. Make sure that the name
you type has no spaces in it - all spaces are removed when you enter the
name.
• Click Internet to enter the Lobby Screen.
From the lobby, use the Connection drop down box to select from which
server you wish to play. The game will connect to a Team17 server if you do
not select one.
New servers are planned to appear periodically in different territories, so keep
your eyes on the official Worms 2 website http://www.worms2.com, for an upto-date list of all available servers.
In an Internet game, the lobby will have a list of Rooms which act as minilobbies. These Rooms can contain other Rooms, players waiting for a game,
spectators and other games being hosted. Worms 2 uses Rooms to sort the
sheer number of Internet players into smaller areas, so that you can easily find
and connect to a game.
• Click Create Room to create your own room where you can chat amongst
a group of users or create your own games.
You can also password protect rooms, in the same way that you create
password protected games (see Password section for details). When a game
is started, each player is connected to the host machine and the server
disconnects. This is called a peer-to-peer connection.
A Word On Communication Problems
As you are playing a Link-Up game you may experience communication
problems such as dropped lines etc; this is nothing to do with Worms 2 and
Team17 can undertake no guarantee that Internet games will play without
problems at all times. If a player is experiencing a communication problem,
then the Worms in that team will automatically surrender. This may result in an
automatic winner depending on how many teams are in play at the time.
34
Page 40
N
OTE
:
You will be unable to
control your Worms
whilst the Chat Box is
active. You can toggle
the Chat Box on/off
with the same key.
Chat Mode
This is an in-game chat facility that allows you to send taunts and abuse to
other players participating in a link-up game. Sending a message is simple.
• Press the ‘`’ key (to the left of the ‘1’ key) to open the Chat Box.
PUBLIC MESSAGES
Sending a public message to all players couldn’t be easier, simply type the
message and press Return.
eg Come Get Some!
ANONYMOUS MESSAGES
To send an anonymous message to everyone in the game, just type: /anon
<message> eg /anon Losers!
Anonymous messages appear in yellow.
ACTIONS
To do an action, just type /me <action>
eg /me laughs at Paul
Actions appear in green.
ADVANCED MESSAGING CONTROL
For advanced messaging, type any of the following instructions and
press Return:-
35
/msg <machine> <message> This will send a private message to a specific machine that you identify.
eg /msg Karl ha! Got you there!
All other players will only see the message, “Whisper...” so they know that a
private conversation is taking place. We hope you aren’t paranoid!
Private messages appear in blue.
/ex <machine> - This will exclude a machine that you identify from a public
message.eg /ex Karl
If you don’t specify a machine, all machines will be excluded.
Page 41

/inc <machine> - Includes a machine in public message that has been
previously excluded eg /inc Karl
If you don’t specify a machine, all machines will be included.
SHORTCUTS
The ‘F’ keys provide a quick way of sending private messages to other
machines. Which ‘F’ key is assigned to which machine is shown by the names
to the right of the Chat Box. The colours by the side of a name indicate the
teams on that machine.
Holding CTRL and pressing an ‘F’ key will include/exclude that machine.
N
OTE
A machine name will
turn red if an error
occurs. If the error
remains the name will
change to grey.
:
36
Page 42

Troubleshooting
If you are experiencing a lack of performance from Worms 2, it may be due to
one of the following:
1) Worms 2 uses a large amount of video memory, so video cards with less
than a 2Mb video card may suffer serious performance problems, especially
systems with 16Mb or less of RAM. The game features a detail level toggle
in the game (See Configuration Menu for full details) which allows you to
play at a detail level that suits your machine.
2) The speed of the machine also has a bearing on how fast the game runs the faster the machine, the better the performance.
3) Lack of system memory can also slow things down, 16Mb is the minimum
you should have, but we recommend 32Mb or above.
4) Ensure that you are not running any other tasks or applications unless they
are necessary. Running other programs may seriously impact on the
amount of resources available to Worms 2 in order to run at optimum
performance.
If you have any other technical problems with Worms 2, please refer to the
Readme.txt on the root of your Worms 2 CD.
If the problem persists, you can try the following sources for further help.
37
ON-LINE HELP
For those of you with access to the Internet, you can find help at the Sold Out
Website at: http://www.sold-out.co.uk
Or, you can E-mail support directly at:
[email protected]
You could also ring us on: 00 44 (0)20 7928 9655
Or, Fax us on: 00 44 (0)20 7261 0540
Page 43

MAIL
Write to us at:
Sold Out Software
122 Southwark Street
London
SE1 0SW
United Kingdom
SEND US YOUR FEEDBACK!
We would love to hear your comments on the game, so please let us know!
We aim to continue supporting this product long after release, check out the
web-site (www.worms2.com) for news of exciting new releases/features and
upgrades.
You can e-mail Team17 with direct comments: [email protected]
THE WORM-WIDE-WEB
Visit www.worms2.com for all the latest game news, web support,
competitions, chat, gossip, new weapons and speech banks.
38
Page 44
Credits
TEAM17
Here’s a list of the guilty ones at Team17...
Concept Andy Davidson Design
Lead Programmer Karl Morton Game Code Guru
Lead Artist Dan Cartwright Game Sprites
Programming Colin Surridge Menu System Code
Graphics Rico Holmes Lead Background Art
Audio Bjorn Lynne Music and Sound Effects
Video Cris Blyth Animation, Sound Effects
Phil Carlisle Network Code
Martin Randall Support/Utilities
Rob Hill Support/Utilities
Paul Robinson Additional Graphics
Matiné Studios Voice Artists
Andy Davidson Voice Artist
Cris Blyth Voice Artist
and Post Production
39
Rory Little Additional Modelling
Mark Taylor Additional Modelling
Quality Assurance Paul Field QA Manager
Paul Dunstan Lead Test
John Eggett Lead Test
Kelvin Aston Lead Test
Grant Towell QA
Mark Baldwin QA
Andy Aveyard QA
Guy Roper QA
Emma Aspinall QA
Production Paul Sharp Localisation
Management Martyn Brown Producer
Page 45

Team17 would also like to thank...absolutely everyone who ever e-mailed us,
posted e-mail on Worm2Worm, got themselves on IRC #Worms, wrote in,
phoned up or pestered us! Without you and your valuable suggestions,
Worms 2 couldn’t have gone in the correct direction. We would also like to
thank the people around the office for their enthusiasm, comments and
suggestions.
MICROPROSE
Product Manager Matthew Carroll
Producer Nick Court
Copywriter Justin Manning
Manual Artwork Jessica Crawley
MicroProse QA Andrew Luckett QA Manager
Anton Lorton
Dan Luton
Neil McEwan
Phil McDonnell
Phil Gilbert
40
Page 46

Appendix 1 - Game Controls
Mouse - View/scroll landscape
Left-Mouse Button - Select target (eg for Homing missile)
- Select weapon from Weapon Selection Menu
- Cycle through Girder selections (when Girder
is selected)
Right-Mouse Button - Open/Cancel Weapon Selection Menu
Cursor Left - Move Worm left
Cursor Right - Move Worm right
Return - Jump
- Drop Weapon whilst on rope. Press Return again to
trigger dropped weapon (if appropriate)
Return-Twice - Back jump
Backspace - Vertical jump
Cursor Up - Aim cross-hair up
- Shorten rope when hanging from it
Cursor Down - Aim cross-hair down
- Lengthen rope when hanging from it
SPACEBAR - Use weapon (one touch)
- Drop from rope
41
SPACEBAR - Set strength of fired weapon (press and hold)
ESC - Quit Options
+/- - Set bounce high/low for projectiles
HOME - Centre on current Worm
TAB - Switch to next Worm on team
R - Action Replay
`
F1-F12 - Weapon shortcuts
- Open/Cancel Chat Box in multi-player
link game
Page 47
Appendix 2 - Worms 2
Speech Bank Editor
You can replace the default sound-banks with your own sounds using this
utility program. From the Worms 2 CD, click Bankedit.exe to load the Speech
Bank Editor.
The Speech Bank Editor has the following options:-
PLAY
• Click this button to play the currently selected sample in the Samples List.
STOP
• Click this to stop any samples that are currently being played.
SET
This button allows the user to replace the current sample with a sample of
their choice.
• Click this button to open the file selector.
• Select a new sample.
• Click OK to accept your choice and replace the current sample. A blue
square will now appear next to the sample name in the Samples List,
indicating that it has been changed.
RESTORE
This button is only effective on samples that have been changed (ie those with
a blue square next to them in the Samples List). Click Restore to change the
sample back to the original sample.
LOAD, SAVE AND DELETE
You can save the current Sample Set using the box at the top of the screen.
Click the box and enter a name for your Set.
• Click Save. Your new Sample Set will now be saved.
You can load a Sample Set by clicking a drop down menu at the top and
selecting the name of the Set. The 'Delete' button can be used to delete the
currently highlighted Sample Set. The default Set cannot be deleted.
TIP:
You can also
preview samples in
this mode, by
clicking the Play
icon.
English TM193417MANR
42
 Loading...