

Page 1
TECHNICAL BULLETIN NO. 20110126 January 26, 2011
SUBJECT Clock Board Installation Instructions
PRODUCT FAMILY WatchDog 2000 Series Weather Stations
DETAILS
Important: The clock board alone draws about
1/3 the power of the original station, so
Alkaline batteries can be expected to last 8-9
months. Use Lithium batteries ("Ultra" or
"High Energy") to obtain 12 month battery life.
1. Examine the clock board carefully to ensure
the battery is in the socket and there are no
bent pins .
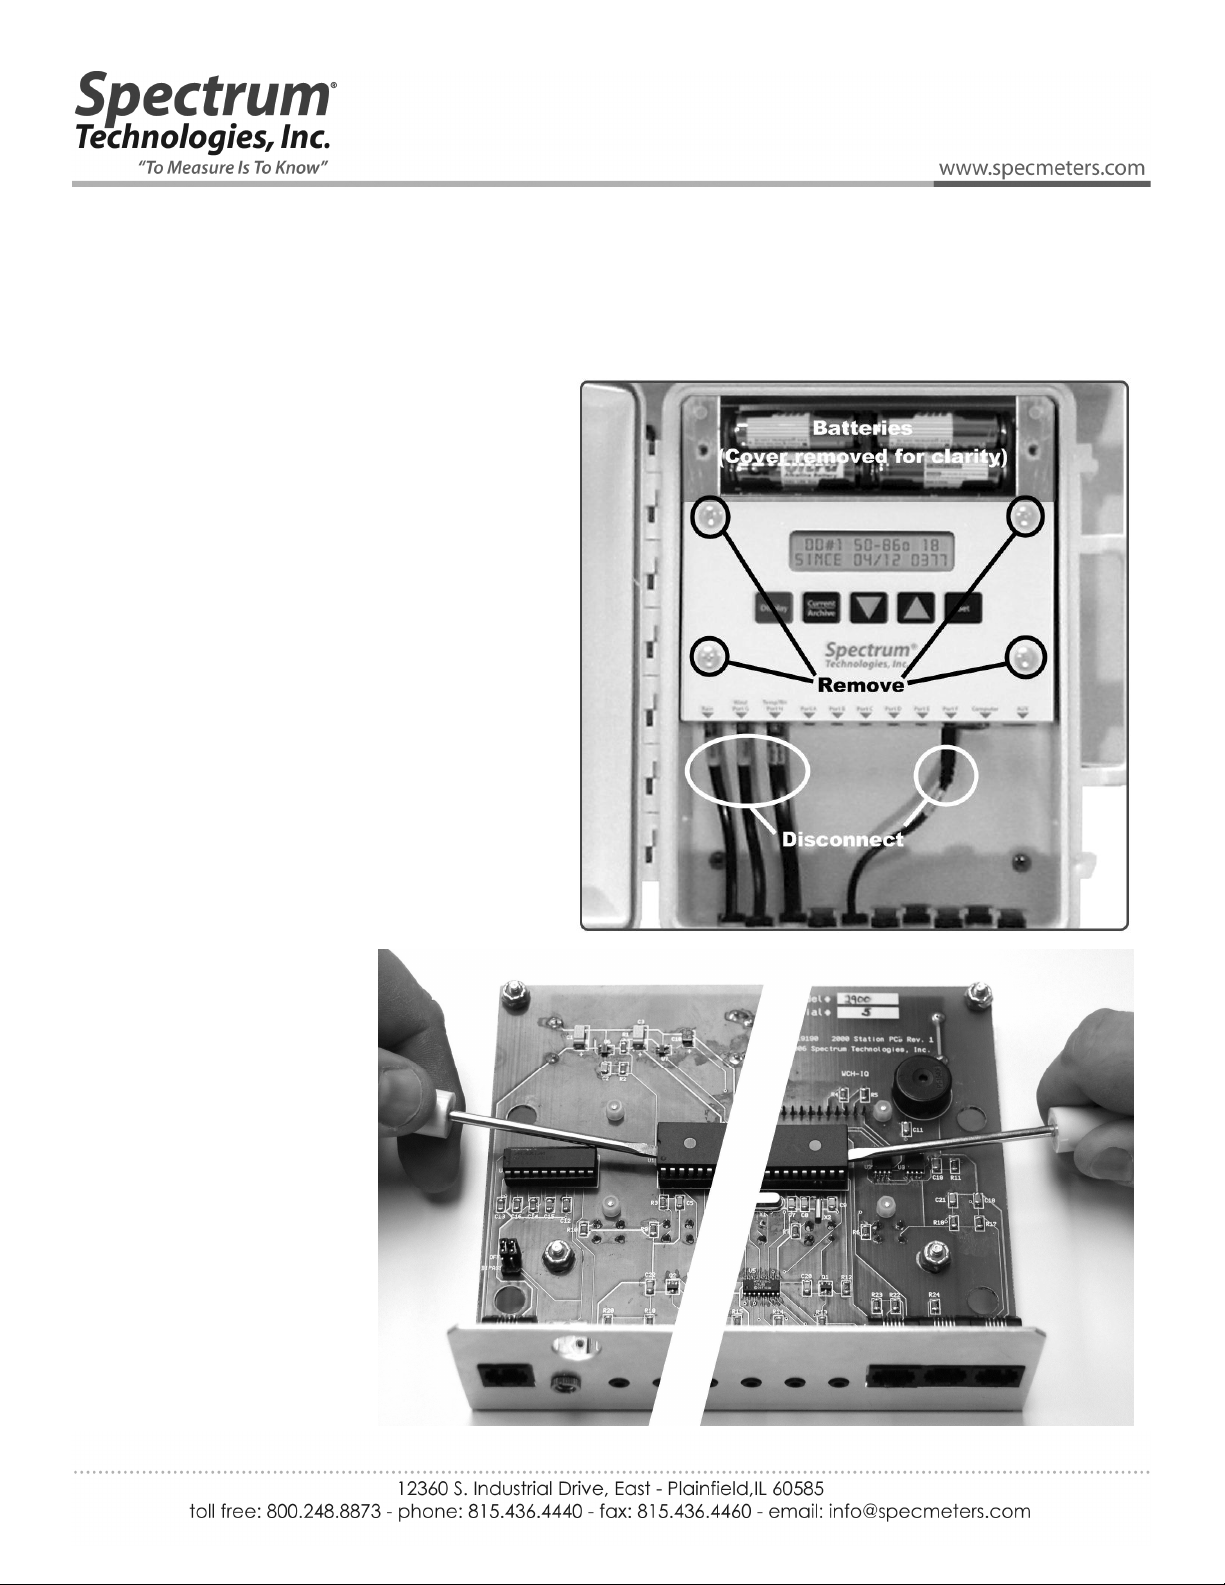
2. Disconnect all sensor wires on the bottom of
the Weather Station display module.
3. Remove the 4 Phillips head screws on the
front of the module.
4. Pull the module straight out of the station
enclosure (may require light prying or
manipulation.
5. Remove the battery
cover, and remove all
batteries.
6. Flip over the display
module and locate the
microcontroller chip in its
socket. With a small
screwdriver or flat blade,
gently pry the chip out of
the socket by alternating
ends. Grasp the
microcontroller by the
ends of the black plastic,
not the pins.
Page 1 of 2
Page 2
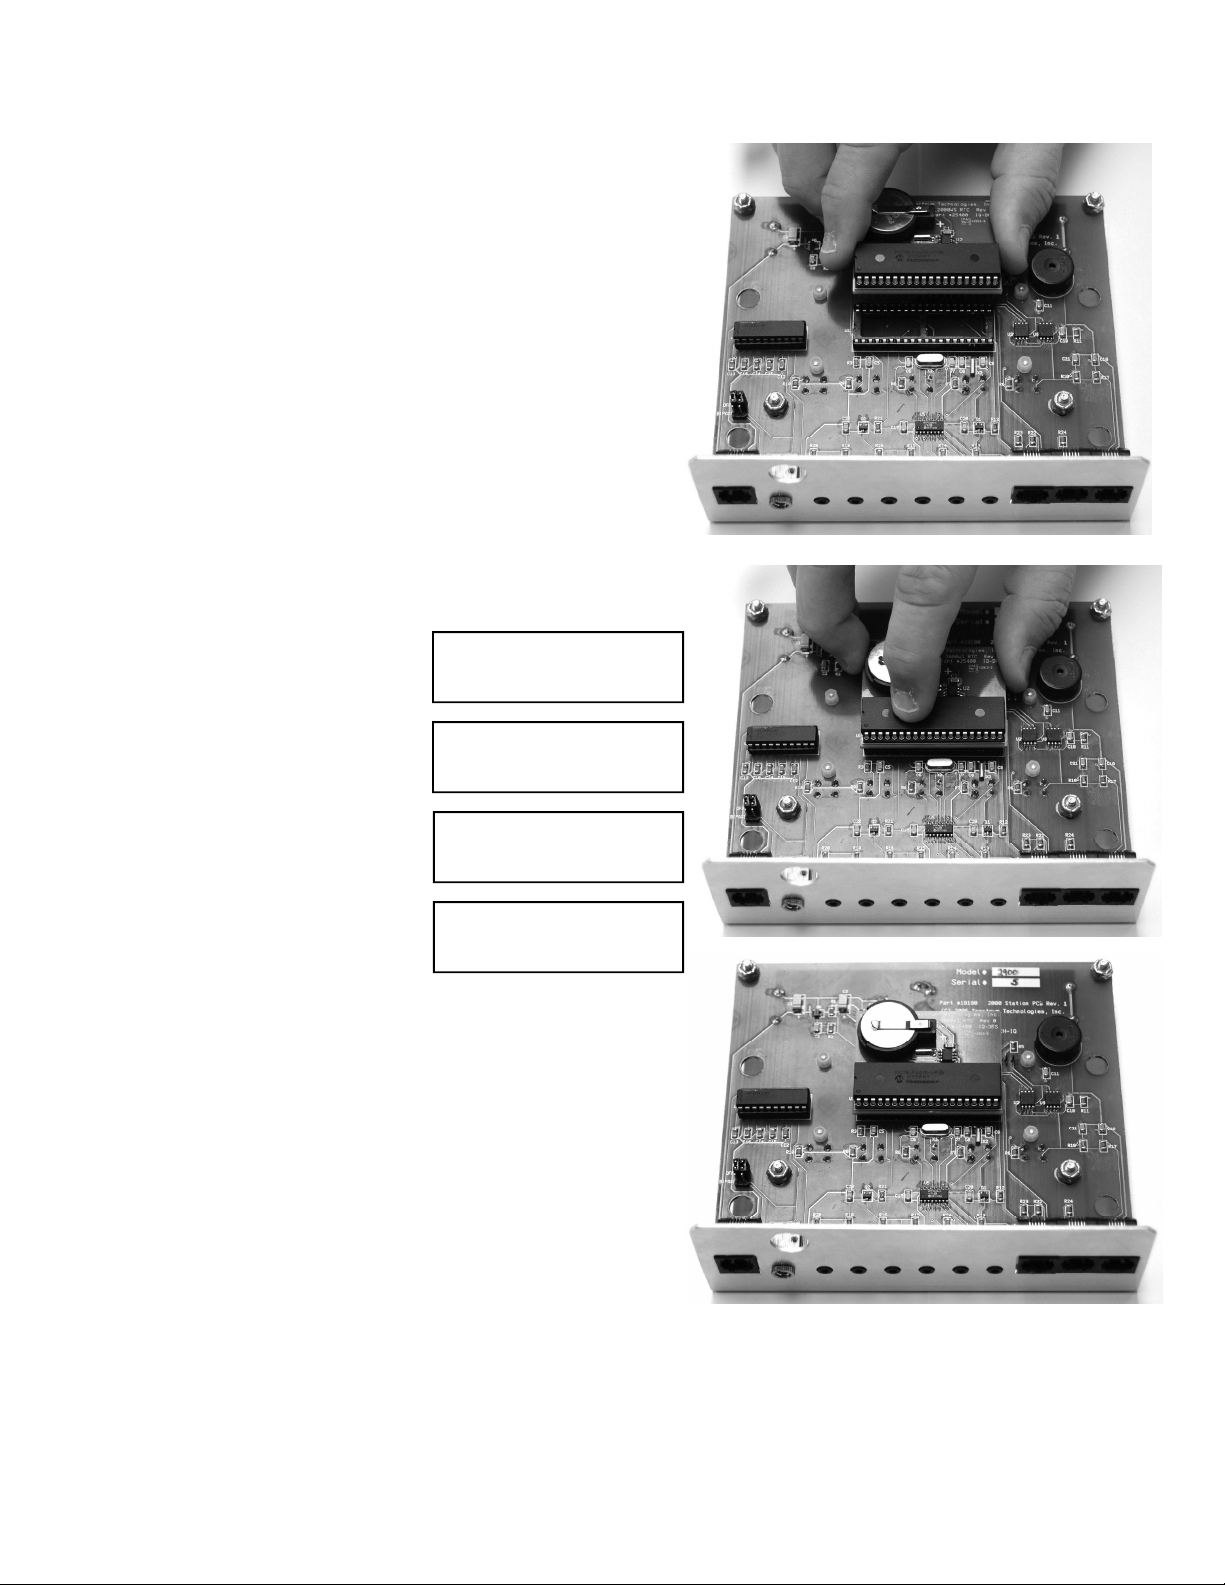
7. Align clock board with the now-empty socket on the
Display
Press
Set.
Set
circuit board. Note that the board extends up, not down
(see top image). Be sure all pins are aligned with the
socket, and press the board firmly into place (center
image).
8. Reinsert the batteries. Important: The clock board
draws about 1/3 the power of the original station, so
Alkaline batteries can be expected to last 8-9
months. Use Lithium batteries ("Ultra" or "High
Energy") to obtain 12 month battery life. The unit
should beep when the last battery is inserted, and the
display should show the model and serial number, and
then either show the date and time, or ask that they be
set. If not, double-check that the clock board and the
batteries were inserted properly.
9. Carefully check the date and time displayed on the LCD.
If necessary, reset the date and time:
Press
Press Set.
Press the down arrow key
once to reach the ‘Time &
Date’ screen.
Press Set.
Enter the month using the arrow keys. Press
Enter the day. Press Set.
Enter the year. Press Set.
Enter the hour. Press Set.
Enter the minutes. Press Set.
Enter AM or PM. Press Set.
LCD will return to the ‘Current Values’ screen. Confirm
the date and time are now correct.
.
Select Parameter
To Be Set (↑↓)
TIME & DATE
Press SET
01-22-11 11:45AM
Press SET
**-22-11 11:45AM
.
9.
Place the old microcontroller in the foam used to ship the
clock board, and return it to:
Spectrum Technologies, Inc.
12360 S. Industrial Dr East
Plainfield, IL 60585
A video of this process is available at http://www.specmeters.com/videos/watchdog_clockboard/
Page 2 of 2
 Loading...