

Page 1
Assembly Instructions
Assembly Instructions
Important
Before you begin, read and comply with all safety and operating instructions,
and ensure all parts and correct quantities are included.
Any parts damaged during shipment must be reported within 5 days of receipt.
To report information regarding missing parts or damage, to purchase parts
or accessories, or if you have any questions, please contact us.
www.spectrumfurniture.com
800-235-1262, 715-723-6750
Thank you for purchasing Spectrum products!
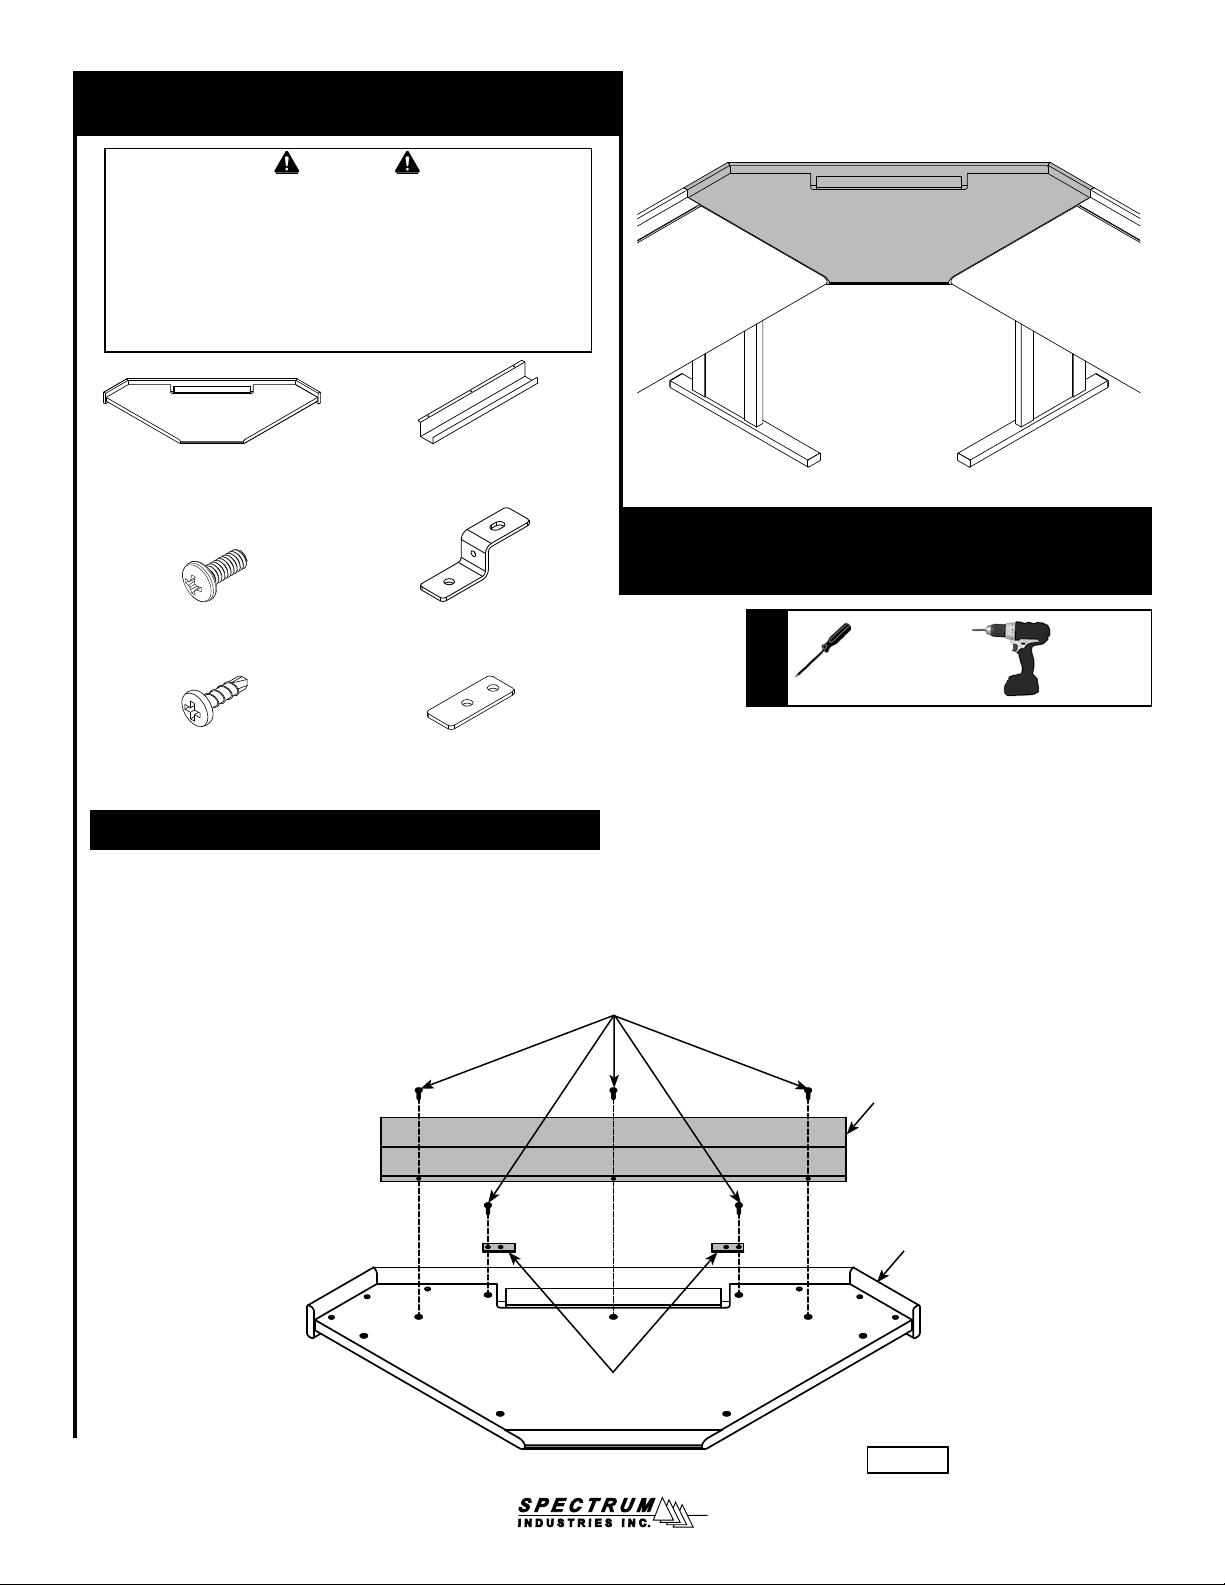
(1) 057938
Worksurface assembly
(1) 044234
Cord channel
Evolution Corner Connector (24”D)
(10) 026064
1/4-20 x 5/8” PHMS
(4) 050524
#8 x 3/4” PH TEK screw
(4) 0102049
Z-bracket
(2) 036207
Flip-top support bracket
1. Attach Brackets & Cord Channel
1. Place the worksurface assembly face-down onto a non-abrasive surface.
2. Attach the two Flip-top support brackets and Cord Channel with 1/4-20 x 5/8” PHM
screws as shown in Figure 1.
(5) 1/4-20 x 5/8”
PHMS
Tools
Required
38917
Phillips
screwdriver
or
Drill with
Phillips driver
Flip-top
support
brackets
Cord channel
Worksurface
assembly
Figure 1
057943R5 Page 1 of 2
Page 2
2. Attach Brackets to Desks
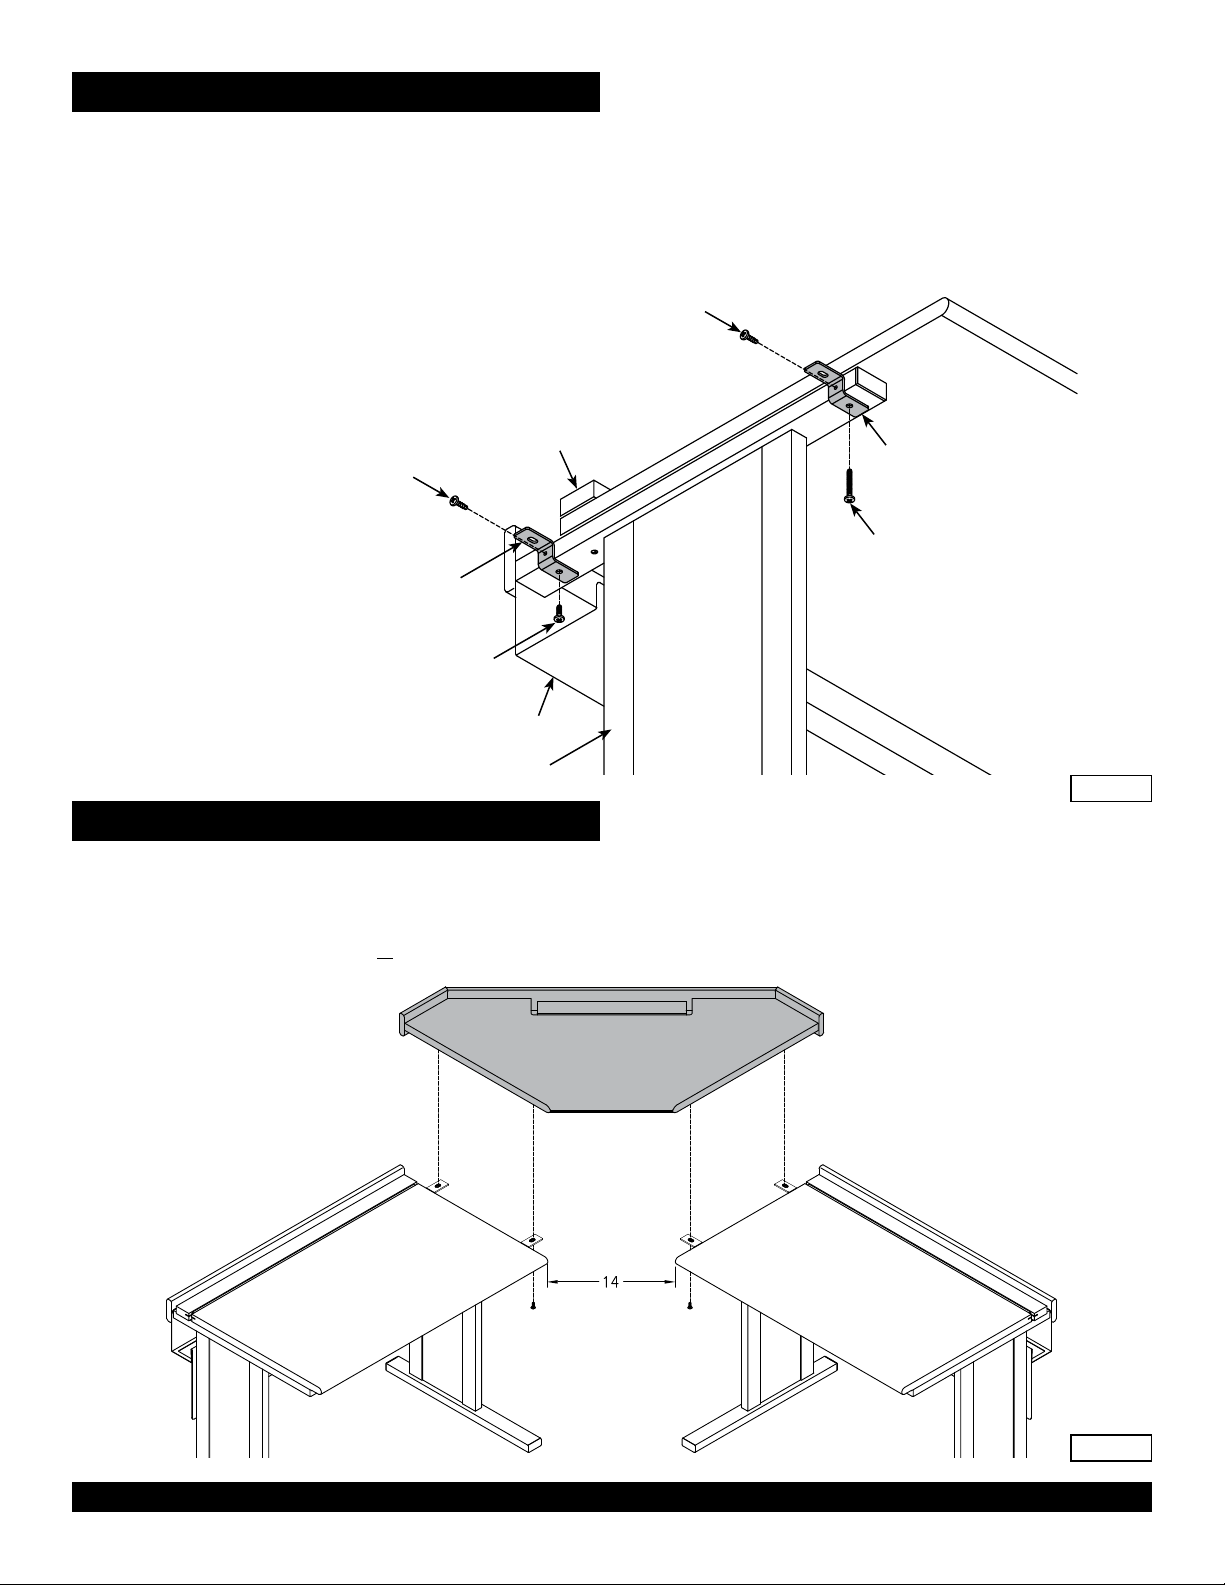
1. Remove the existing front 1/4-20 x 1-3/4” PHM screw that attach the leg to the worksurface.
2. Position Z-brackets as shown in Figure 2. (The elongated hole in the Z-bracket will attach to the corner
connector.) Attach the rear Z-bracket to the leg using a 1/4-20 x 5/8” PHM screw as shown in Figure 2,
attach the front Z-bracket with the existing 1/4-20 x 1-3/4” PHM screw. Tighten completely.
3. Install a #8 x 3/4” Tek screw through each Z-bracket using an electric drill with a phillips head driver.
Note: This is a self-drilling screw-no pilot hole is required. If your drill has a torque setting, set it to
medium and tighten the screw securely, but be careful not to strip-out the hole while tightening the screw.
4. Repeat this procedure for the opposite side.
#8 x 3/4” PH TEK screw
Front of desk
Flip section open
#8 x 3/4” PH TEK screw
Z-bracket
1/4-20 x 5/8” PHMS
Cord channel
Leg
3. Attach Corner Connector to Desks
1. Align both desks 90° to each other leaving about 14” between the corners as shown in Figure 3.
2. Place the Corner Connector onto the Z-brackets and align the mounting holes.
3. Attach with (4) 1/4-20 x 5/8” PHM screws, but do not tighten completely-after the screws are
started, alignment of the desks may be necessary.
4. After alignment is satisfactory, tighten all screws.
Z-bracket
Existing 1/4-20 x 1-3/4”
PHMS
Figure 2
Corner connector
24”D Evolution desk
24”D Evolution desk
Figure 3
925 FIRST AVENUE, CHIPPEWA FALLS, WI 54729 / 800-235-1262 / 715-723-6750 / WWW.SPECTRUMFURNITURE.COM
© 2016 Spectrum Industries Inc., All rights reserved.
057943R5 Page 2 of 2
 Loading...