

Spectrum Digital DSK Quick Start Installation Manual
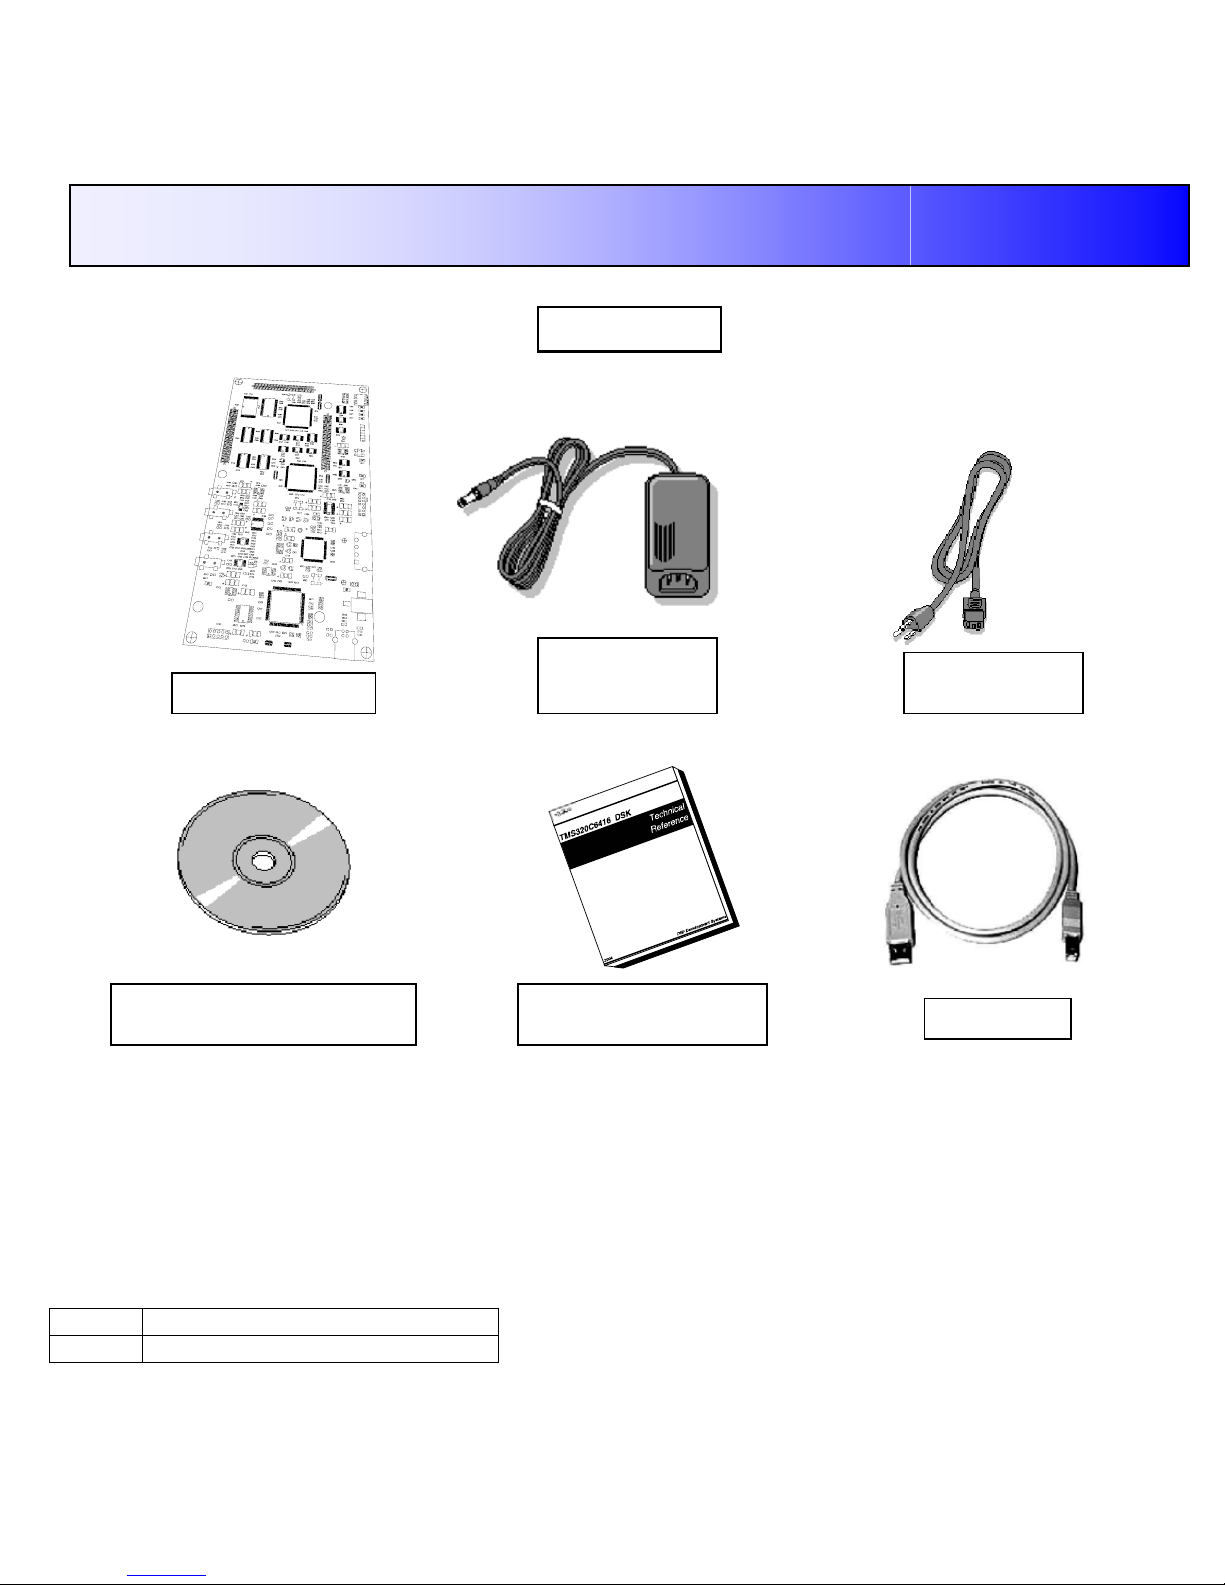
USB Cable
DSP Starter Kit (DSK) for the TMS320C6416T (1 GHz)
Quick Start Installation Guide
Kit Contents
+5V Universal
Power Supply
AC Power
Cord
C6416 DSK Board
C6416 DSK Code Composer
Studio CD ROM
TMS320C6416 DSK
Technical Reference
System Requirements
• 500MB of free hard disk space
• Microsoft Windows™ 2000/XP
• 128MB of RAM
• 16-bit color display
• CD-ROM Drive
Service and Support
Web http://support.spectrumdigital.com
E-Mail support@spectrumdigital.com
Description
The 6416 DSP Starter Kit (DSK) is an all-in-one evaluation
platform for the TMS320C6416T Digital Signal Processor
from Texas Instruments. It includes a target board that
can be used as a reference design for interfacing the DSP
to common devices such as SDRAM, Flash and a codec
as well as a special introductory version of TI's flagship
Code Composer Studio development tools. An on-board
JTAG emulator allows debug from Code Composer Studio
through your PC's USB port.
This kit contains everything you need to get started with TI
DSPs. It can also be used with the full version of Code
Composer Studio and an external JTAG emulator.
508036-4001A Page 1 of 4
12502 Exchange Dr., Ste 440, Stafford, TX. 77477 T:281.494.4505, F:281.494.5310 www.spectrumdigital.com
Downloaded from Elcodis.com electronic components distributor

Install DSK Content from the CD-ROM
Before you install the DSK software, please make sure
you are using Administrator privileges and any virus
checking software is turned off. The DSK board should
not be plugged in at this point.
1. Insert the Code Composer Studio installation CD into
the CD-ROM Drive. An install menu (see below)
should appear. If it does not, manually run
Launch.exe from the CD-ROM. Select the Install
Products option from the menu.
2. Install any components you need. To debug with the
DSK you must have 1) a copy of Code Composer
Studio, 2) the target content package for your board
and 3) a copy of the FlashBurn plug-in.
Users of the full Code Composer Studio package can
skip the DSK Code Composer installation and simply
install the target content packages.
3. The installation procedure will create two icons on
your desktop:
6416 DSK CCStudio 3
6416 DSK Diagnostics
Connect the DSK to Your PC
1. Connect the supplied USB cable to your PC or laptop.
We recommend that anyone making hardware
modifications connect through a USB hub for safety.
2. If you plan to connect a microphone, speaker, or
expansion card these must be plugged in properly
before you connect power to the DSK board.
3. Connect the included 5V power adapter brick to your
AC power source using the AC power cord.
4. Apply power to the DSK by connecting the power
brick to the 5V input on the DSK.
5. When power is applied to the board the Power On
Self Test (POST) will run. LEDs 0-3 will flash. When
the POST is complete all LEDs blink on and off then
stay on. At this point your DSK is functional and you
can now finish the USB driver install.
Jumpers
LEDs
Switches
USB Cable
Power supply
USB connector
(Plugs into DSK)
USB connector
(Plugs into USB
Hub, or port on
PC/Laptop)
S1
0
1
2
3
0123
123
4
ON
SW3
567
8
6. Make sure your DSK CD-ROM is installed in your CDROM drive. Now connect the DSK to your PC using
the included USB. After few seconds Windows will
launch its "Add New Hardware Wizard" and prompt
for the location of the DSK drivers.
7. Follow the instructions on the screens and let
Windows find the USB driver files “sdusbemu.inf” and
“sdusbemu.sys” on the DSK CD-ROM. On XP
systems Windows will find the drivers automatically.
508036-4001A Page 2 of 4
12502 Exchange Dr., Ste 440, Stafford, TX. 77477 T:281.494.4505, F:281.494.5310 www.spectrumdigital.com
Downloaded from Elcodis.com electronic components distributor
 Loading...