

Page 1
DOUBLE WALL STAINLESS STEEL
COFFEE URN
Operating Instruction Manual
Model
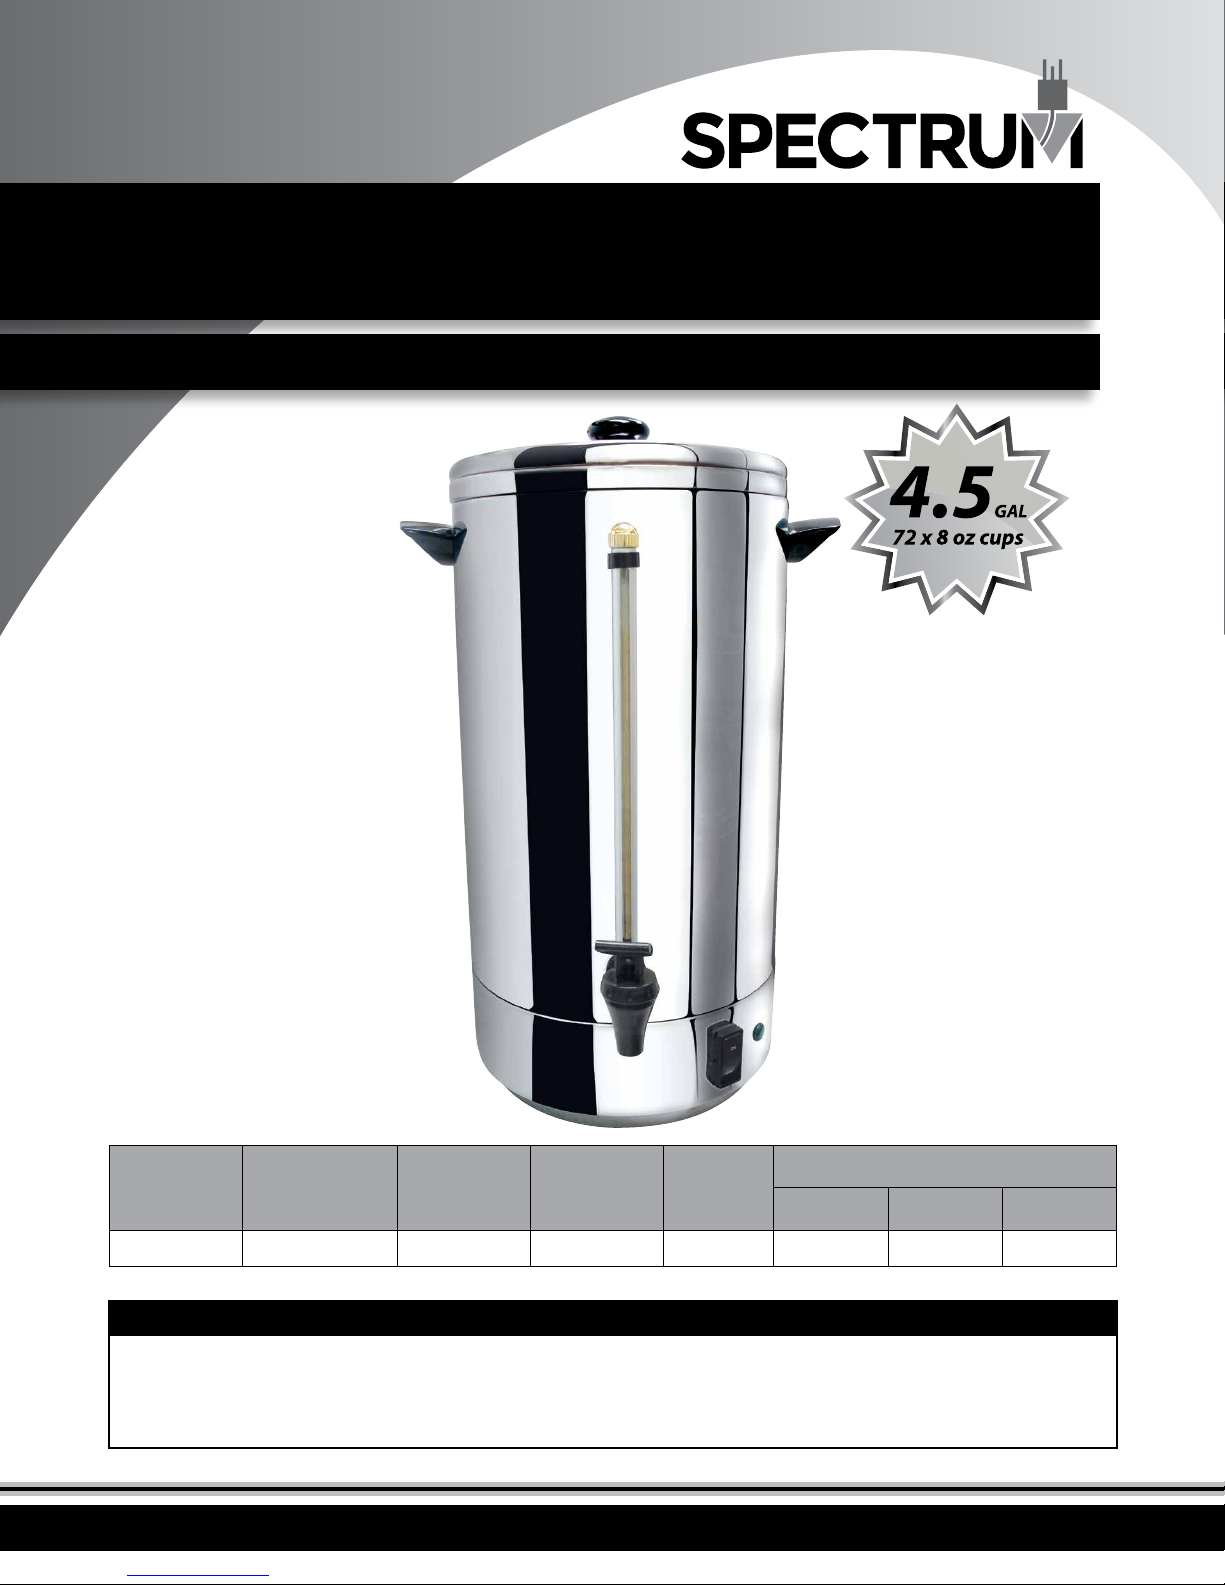
CU-7 2 1.5 120 V 1620 13.5 14.5" 14" 22.5"
BEFORE OPERATING ANY EQUIPMENT, READ AND FAMILIARIZE YOURSELF WITH THESE USE AND SAFETY INSTRUCTIONS
Congratulations on your purchase of SPECTRUM commercial beverage equipment. SPECTRUM takes pride in the design
and quality of our products. When used as intended and with proper care and maintenance, you will experience years of
reliable operation from this equipment. To ensure best results, it is important that you read and follow the instructions in
this manual carefully. It’s important to save these instructions for future reference.
8 oz. Cups
/ Minute
Voltage
Power
(W)
CU-72
Dimensions (inches)
Amps
Width Depth Height
Page 2

Double Wall Stainless Steel Coffee Urn
Important For Future Reference
Please complete this information and retain this manual for the life of the product. For
Warranty Service and/or parts, this information is required. Please see Page 8 for More
information on your Warranty and how to register.
CU-72
Model Number Serial Number Date Purchased
WARNING: IMPROPER INSTALLATION, ADJ USTMENT,
ALTERATION, SERVICE OR MAINTENANCE CAN C AUSE
!
PROPERTY DAMAGE, INJURY, OR DEATH. READ THE
INSTALLATION, OPERATION, AND MAINTENANCE
INSTRUCTIONS THOROUGHLY BEFORE INSTALLING
OR SERVICING THIS EQUIPMENT.
CAUTION: THESE MODELS ARE DESIGNED, BUILT, AND
SOLD FOR COMMERCIAL USE ONLY. IF THESE MODELS
!
ARE POSITIONED SO THE GENERAL PUBLIC CAN USE
THE EQUIPMENT, MAKE SURE THAT CAUTION SIGNS,
WARNINGS, AND OPERATING INSTRUCTIONS ARE
CLEARLY POSTED NEAR EACH UNIT SO THAT ANYONE
USING THE EQUIPMENT WILL USE IT CORRECTLY AND
NOT INJURE THEMSELVES OR HARM THE EQUIPMENT.
WARNING: A FACTORY AUTHORIZED SERVICE
PROVIDER SHOULD HANDLE ALL MAINTENANCE
!
AND REPAIR. BEFORE DOING ANY MAINTENANCE
OR REPAIR, FOLLOW SERVICE SET UP ARRANGEMENT
ON PAGE 11.
AVERTISSEMENT: TOUTE INSTALLATION, RÉGLAGE,
MODIFICATION, RÉPARATION OU ENTRETIEN
INCORRECT PEUT OCCASIONNER DES DOMMAGES
MATÉRIELS, DES BLESSURES GRAVES OU LA MORT.
LIRE LES INTRUCTIONS D'INSTALLATION, D'UTILISATION ET
D'ENTRETIEN ATTENTIVEMENT AVANT D'INSTALLER OU DE
RÉPARER CET APPAREIL.
ATTENTION: CES MODÈLES SONT CONÇUS, FABRIQUÉS,
ET VENDUS POUR UN USAGE COMMERCIAL SEULEMENT.
SI CES MODÈLES SONT PLACÉS POUR QUE LE GRAND
PUBLIC PUISSE LES UTILISER, ASSUREZ-VOUS QUE LES CONSIGNES
D’ATTENTION, D'AVERTISSEMENT, ET LES INSTRUCTIONS
D'UTILISATION SOIENT CLAIREMENT AFFICHÉES PRÈS DE
CHAQUE UNITÉ DE SORTE QUE N'IMPORTE QUEL UTILISATEUR DE
L'APPAREIL L'EMPLOIE CORRECTEMENT ET NE SE BLESSE PAS OU
N'ENDOMMAGE PAS L'APPAREIL.
AVERTISSEMENT: UN TECHNICIEN AUTORISÉ PAR
L'USINE DEVRA EFFECTUER TOUT L'ENTRETIEN ET LES
RÉPARATIONS. AVANT DE FAIRE TOUT ENTRETIEN OU
RÉPARATION, VEUILLEZ CONTACTER WINCO.
!
!
!
Introduction
Congratulations on the purchase of your SPECTRUM machine. Please take time to carefully read through this manual to ensure the machine is
operated and maintained properly, to ensure the best possible performance from the product for many years.
SPECTRUM will not accept liability for the following if:
• The instructions in this manual have not been followed correctly.
• Non-authorized personnel have tampered with the machine.
• Non-original spare parts are used.
• The machine has not been handled and cleaned correctly.
• There is any use damage to the unit.
2
Page 3

Double Wall Stainless Steel Coffee Urn
Table of Contents
Specications .............................................................................. 1
Warnings ..................................................................................... 2
Introduction ................................................................................ 2
Table of Contents ....................................................................... 3
Packaging .................................................................................... 3
Installation - Important Safeguards ........................................ 4
Operation .................................................................................... 5
Cleaning, Care & Maintenance ................................................. 6
Electrical Diagram ...................................................................... 6
Troubleshooting ......................................................................... 7
Safety ........................................................................................... 7
Service & Repair .......................................................................... 7
Limited Warranty ....................................................................... 8
Package Contents
All units come with an Operating Instruction Manual
and the following:
• Coee Urn Body
• Cover
• Percolator Tube
• Coee Basket
SPECTRUM prides itself on quality and service, ensuring that at the
time of packing, all products are supplied fully functional and free
of damage. Should you nd any damage as a result of freight, please
contact your SPECTRUM dealer immediately.
Unpacking the Equipment
DISPOSE OF ALL PACKAGING MATERIALS IN AN
ENVIRONMENTALLY RESPONSIBLE MANNER.
1. Remove all packing materials and tape, as well as any protective
plastic and cardboard, from the unit.
2. Clean any glue residue left over from the plastic or tape.
3. Place the unit in the desired position and height.
SAVE THE ORIGINAL BOX AND PACKAGING FOR USE IN
PACKAGING AND SHIPPING THE EQUIPMENT IF SERVICES
ARENEEDED.
3
Page 4

Installation - Important Safeguards
These instructions should be followed at all times. Failure to follow
these instructions could result in injury to yourself and others.
TO REDUCE RISK OF INJURY OR DAMAGE TO THE UNIT:
1. Read this manual thoroughly before installation and operation.
DO NOT proceed with installation and operation if you have any
questions or do not understand anything in this manual. Contact
your representative or the manufacturer rst.
WARNING AVERTISSEMENT
Fire Hazard.
Correct installation precautions,
procedures and regulations
must be fo llowed. Operati on
and safe ty training is ne cessary
for all use rs of this equipme nt.
2. Inspect the product carefully upon unpacking. Should the cord or
plug be damaged, please notify the vendor and replace before use.
Do not operate with a damaged cord or plug. A factory authorized
service provider should handle all maintenance and repair.
3. Do not touch hot surfaces, particularly ones marked “CAUTION:
HOT.” Caution must always be used when moving the unit if it
contains hot liquid.
Risque d'incendie
La surcha ue des vapeurs d' huile ou de
l'huile peut s'enammer et provoquer
un incendi e. Surveillez la temp érature,
la qualité et l e niveau d’huile. Uti lisez et
entrete nez le système d'élimi nation des
vapeurs d'huile.
WARNING AVERTISSEMENT
Electrical Shock Hazard
Keep water an d other liquids
from entering the inside of the
unit. Liquid inside the unit could
cause an el ectrical sho ck.
Do not spray w ater or cleaning
products. Liquid could contact
the electrical components
and cause a s hort circuit o r an
elect rical shock. Do n ot use unit
if power cor d is damaged or has
been modied.
4. To protect against electrical hazards, shock, or re, do not
submerge cord, plugs, coeemaker, or any other electrical
components in water or other liquid.
5. Only use urn with a grounded 120V AC outlet. Always plug cord
into a wall outlet before turning any control on. To disconnect,
rst switch the control to “o” prior to unplugging.
6. Do not attempt to disassemble the urn; this will void the warranty.
Risque de choc électrique
Conser ver l'eau et d'autres liqui des
de pénétr er à l'intérieur de l'app areil.
Liquide à l'intérieur de l'appareil pourrait
provoquer un choc électrique.
Ne pas pulvé riser de l'eau ou des pro duits
de nettoyage. Le liquide pourrait contacter
avec les comp osants élec triques et caus er
un court- circuit ou un cho c électrique.
Ne pas util iser l'appareil si le cor don
d'alimentation est endommagé.
ou a été modi é.
7. Always switch the unit to o when not in use and prior to
unplugging. Unplug before cleaning.
Proper Grounding · Mise à la terre correcte
This machine is provided with a three-pronged
grounding plug. The outlet to which this plug
is connected must be properly grounded. If the
receptacle is not the proper grounding typ e, contact
an electrician. DO NOT, under any circumstances, cut
or remove the thir d ground prong from the power cord
or use any adapter plug.
Cette machine est équip ée d'une che à trois broches.
La prise sur laquelle cette che es t branchée doit être
correctement mise à la terre. Si la prise n'est pas le type
de mise à la terre, contactez avec un électric ien. NE PAS,
en aucun cas couper ou enlever la troisiè me broche de
terre à partir du cordon d'al imentation ou utiliser un
adaptateur.
8. Do not use the product outdoors.
9. Prior to operation, ensure cover, coee basket, percolator tube,
and cord are all properly and securely attached before the unit is
plugged in. Always ensure the lid is secured whenever the urn has
water inside.
10. Do not let the cord hang over the edge of a table, counter, or
workspace. Also do not allow the cord or plug to touch any hot
surfaces.
11. Place the unit on a at, stable surface. Do not place in, on, or
near a hot burner, stove, oven, or any surface that can reach
exceedingly hot temperatures.
12. Individuals unfamiliar with or unqualied to operate this machine
should not operate it without close and proper supervision.
13. Keep hands and face clear from the top of the coee urn when
removing the lid after use. Hot steam may emit from the top
when the cover is removed.
14. Avoid using accessory attachments not recommended by the
manufacturer, as they may cause hazards or damage to the unit,
and may void the warranty.
15. Proper cleaning and care of the unit are necessary for the
longevity and durability of the machine. Should proper procedures
not be undertaken, it may void the warranty.
16. Improper use, handling, or adherence to these instructions or
common sense may result in scalding or other injury.
USE A GROUNDED OUTLE T
DO NOT ADD AN ADAPTO R
TO THE PLUG
UTILISER UNE PRISE AVEC MI SE
À LA TERRE NE PAS AJO UTER UN
ADAPTATEUR SUR LA FICHE
4
Page 5

Operation
PRIOR TO FIRST USE:
Remove all packaging from inside and outside of the coee urn. Fill
the urn with water, boil, and discard the water to clear the urn of any
packaging debris. Wash coee basket, percolator tube, and interior
with warm, soapy water. DO NOT IMMERSE THE BASE IN WATER.
Rinse and dry thoroughly.
MEASURE WATER:
Remove the cover and basket. Fill coeemaker with fresh, cold water
to ll line. Do not ll past ll line as indicated by the “MAX” line. Do
not use hot water to make coee. Also, it is recommended to not use
soft water, as it may cause the coee basket to ood.
MEASURE COFFEE:
Using the chart below as a guide, measure the appropriate amount
of coee into the coee basket and set basket on percolating tube.
Position the bottom of percolating tube into the heating well, without
excessively forcing it into place. Place cover securely onto the urn.
Coffee Measuring Guide
BEGIN BREWING:
Plug cord into a 110 – 120 V AC grounded outlet.
Select the “ON” position to start brewing – a red light on the switch
should illuminate to indicate proper operation. Once the optimal
serving temperature is reached, the green “Keep Warm” light will
illuminate, and will stay lit until the coee inside the coee urn drops
below recommended serving temperature. As long as the unit is in
the “ON” position, the unit will automatically cycle to applying heat if
the coee falls below serving temperature.
TILT FAUCET LEVER TO DISPENSE.
Tips
DO NOT ALLOW THE UNIT TO RUN DRY. LIQUID MUST ALWAYS
COVER INSIDE BOTTOM OF UNIT TO AVOID DAMAGE TO THE
UNIT. NEVER IMMERSE THE BASE IN WATER.
Never make less than the minimum capacity or more than the
maximum capacity of the coee urn.
Use regular electric perk grind coee or coee ground for all
coeemakers for best results. Do not use drip or nely ground coee
as it may cause ooding of the coee basket.
These amounts are recommendations only – in order to adjust taste
or strength, the user can add or subtract accordingly.
CUPS (8 OZ. SERVING) GROUND COFFEE
(8 OZ. DRY MEASURE)
7 – 10 ¾ Cup
12 – 16 1 ½ Cup
18 – 23 2 Cups
25 – 29 2 ½ Cups
31 – 35 3 ¼ Cups
37 – 41 3 ¾ Cups
50 – 54 5 ½ Cups
59 – 63 6 ¼ Cups
Note: 1 lb. of coee equals 5 cups.
• Grind beans to medium coarseness for best results
• Do not grind to a ne, powder-like texture, since ooding of
coee basket may occur
WARNING AVERTISSEMENT
USE CAUTION WHEN
TOUCHING THE UNIT.
HOT
Remove coee basket and grounds as soon as the brewing cycle is
completed. This maintains coee avor by preventing bitter, extracted
grounds from dripping into the coee or becoming lodged in the
device. Use the coee urn’s removable basket as a carrying tray when
disposing of wet coee grounds. Use caution when hot.
BEFORE BREWING A SECOND POT, ALLOW TIME FOR THE COFFEE
URN TO COOL, AND RINSE THOROUGHLY WITH COLD WATER.
Ne touchez pas le liquide c haud
ou les sur faces de chauage
lorsque l’appareil chaue ou en
fonctionnement.
NOTE
Please remember that this manual and the warning labels do not replace the need to be alert, to properly train
and supervise operators, and to use common sense when using this equipment.
5
Page 6

Cleaning, Care & Maintenance
To maintain the appearance and increase the service
life, clean your unit daily. The Coffee Urn should be
cleaned after each day’s operation. However, the
unit may require more frequent cleaning, depending
on the volume of production.
WARNING AVERTISSEMENT
USE CAUTION WHEN
TOUCHING THE UNIT.
HOT
1. Unplug the unit and dispose of any remaining water, coee, and
grounds. Allow the unit to thoroughly cool.
2. Add hot water, brush the interior sides, and rinse with hot water
until the water exiting the faucet runs clear.
3. Clean the lter unit and lid with a non-abrasive detergent. Dry
with soft, dry cloth. Coee stains on underside of cover may be
removed by scrubbing with a damp cloth or scouring pad and a
non-abrasive cleanser.
4. The percolating tube should be cleaned frequently with a long,
narrow brush to remove mineral deposits or residue, which may
impair the unit’s operation.
5. The heating wells should be scoured. Clean thoroughly with an
abrasive pad. Rinse thoroughly and dry. This cleaning will remove
mineral deposits that will cause the percolationg tube to get stuck
in the heating tube and break. It will also clean any burnt coee
Ne touchez pas le liquide c haud
ou les sur faces de chauage
lorsque l’appareil chaue ou en
fonctionnement.
Electrical Diagram
grounds, which aects taste.
6. Use a soft cloth to wipe the urn body dry. Do not use benzene,
thinners, or other harsh abrasives, as they may damage the unit’s
exterior nish.
7. Clean the unit promptly after use.
Note:
Proper cleaning instructions must be followed;
otherwise, operation of the unit may be seriously
impaired. Do not wash parts in an automatic
dishwasher.
De-Scaling
1. Scale buildup may aect the urn, tap, and faucet. Supermarket
descaling agents can be used, or natural alternatives such as
lemon-based agents are also eective (instructions as follows).
2. Slice a lemon into four slices, wrap them in a cloth, and place into
the urn.
3. Pour water up to the “MAX” level.
4. Boil the water and allow the lemons to sit inside the unit for one
hour.
5. Pour out the water and lemons, and use a nylon brush to scrub the
inside of the urn.
6. To completely remove the smell and aftertaste, rell the urn, boil
the water again, and dispose of the water.
CU-72
The above circuit diagram has been provided to assist qualied technicians. Only SPECTRUM agents or Recommended Qualied Technicians should
carry out repairs if needed. Do not remove any components or service panels on this product.
6
Page 7

Troubleshooting
If your SPECTRUM Coee Urn does not operate, please check the following before placing a service call.
ISSUE MIGHT BE CAUSED BY RECOMMENDED SOLUTION
Unit not plugged in Check power cord
Power switch not turned on Check to make sure the unit is plugged in and
turned on
The unit is not working
Light is on, but urn is not heating up
Switch light o, but unit is heating up Faulty switch light Call Winco
Coee taste bad/burnt
Coee too hot (Over 195°F) Unit thermostat/heater Faulty Call Winco
Glass level indicator dirty
Breaker for outlet has tripped Check the breaker for the outlet the unit is plugged
into
Damage to power cord Call Winco
Internal wiring fault Call Winco
Heater Element is Faulty Call Winco
Internal Thermostat Faulty Call Winco
Unit not properly cleaned between uses Let the coee cool, empty the unit and clean using
the proper cleaning and care operations. Make sure
to clean the heater area in the bottom center of the
urn to avoid burnt coee.
Improper amount of coee ground to water Try using the guide table for recommended
servings, or try another recipe.
Coee too hot Check coee temperature with thermometer.
If over 195°F, the thermostat may be faulty.
Call Winco.
Darkens over time with use After allowing the unit to cool and empty. You can
unscrew the top o the glass indicator and remove
it. Clean with soap and water. Use pipe cleaner
if available. Replace before relling the unit and
screw top down securely.
Safety
A WINCO Approved Service Technician should carry out repairs if
necessary. Do not remove any components or service panels on this
product.
If the power cord is damaged, it must be replaced by a WINCO
Approved Service Technician in order to avoid a hazard.
Service and Repair
There are no user serviceable parts within this appliance.
To avoid serious injury or damage, NEVER attempt to repair the unit
or replace a damaged power cord yourself.
To initiate warranty service contact: support@wincous.com
or call: 973-295-3899
DO NOT send unit to WINCO without rst contacting our customer
service department.
See "Limited Warranty" section on page 8 for details.
7
Page 8

Limited Warranty
WINCO warrants to the original purchaser of new equipment that said
equipment, when installed in accordance with our instructions within
North America and subjected to normal use, is free from defects in
material or workmanship for a period of 1 year. The labor warranty is
one year from original installation or 18 months from actual factory
shipment date, whichever date occurs rst.
THIS WARRANTY IS IN LIEU OF ALL OTHER WARRANTIES,
WHETHER EXPRESSED OR IMPLIED. WINCO EXPRESSLY
DISCLAIMS ANY IMPLIED WARRANTY OF MERCHANTABILITY
OR EXPRESSED OR IMPLIED WARRANTY OF FITNESS FOR A
PARTICULAR PURPOSE.
WINCO’S OBLIGATION AND LIABILITY UNDER THIS WARRANTY
IS EXPRESSLY LIMITED TO REPAIRING AND REPLACING
EQUIPMENT THAT PROVES TO BE DEFECTIVE IN MATERIAL OR
WORKMANSHIP WITHIN THE APPLICABLE WARRANTY PERIOD.
IN NO EVENT SHALL WINCO BE LIABLE FOR INCIDENTAL OR
CONSEQUENTIAL DAMAGES TO BUYER OR ANY THIRD PARTY,
INCLUDING, WITHOUT LIMITATION, LOSS OF PROPERTY,
PERSONAL INJURY, LOSS OF BUSINESS OR PROFITS OR OTHER
ECONOMIC LOSSES, OR STATUTORY OR EXEMPLARY DAMAGES,
WHETHER IN NEGLIGENCE, WARRANTY, STRICT LIABILITY, OR
OTHERWISE.
This warranty is given only to the rst purchaser from a retail dealer.
No warranty is given to subsequent transferees.
Warranty does not cover product failures caused by: failure to
maintain, neglect, abuse, damage due to excess water, re, normal
wear, improper set up and use. Periodic maintenance is not covered.
REGISTER ONLINE AT:
http://support.wincous.com
Proof of purchase is required to extend warranty more than 1 year
from date of shipment from the factory.
THE FOREGOING WARRANTY PROVISIONS ARE A COMPLETE
AND EXCLUSIVE STATEMENT BETWEEN THE BUYER AND SELLER.
WINCO NEITHER ASSUMES NOR AUTHORIZES ANY PERSONS
TO ASSUME FOR IT ANY OTHER OBLIGATION OR LIABILITY IN
CONNECTION WITH SAID EQUIPMENT.
Examples of items not covered under warranty, but not limited to just
these items:
1. Acts of God, re, water damage, burglary, accident, theft.
2. Freight damage.
3. Improper installation or alteration of equipment.
4. Use of generic or after market parts.
5. Repairs made by anyone other than a WINCO designated
service provider.
6. Lubrication.
7. Expendable wear parts, adjustable feet, blown fuses, lamps, etc.
8. Cleaning of equipment.
9. Misuse or abuse.
WARRANTY REGISTRATION
This warranty is not in force until such time as a properly completed
and digitally signed Installation/Warranty Registration has been
received by WINCO within 30 days from the date of installation.
WARRANTY SERVICE
To initiate warranty service contact: support@wincous.com
or call: 973-295-3899
DO NOT send unit to WINCO without rst contacting our customer
service department.
Please keep this manual in a safe place for future use!
8
SCAN THE QR CODE WITH YOUR MOBILE DEVICE
or go to
http://support.wincous.com
TO FILL OUT AND SUBMIT YOUR WARRANTY REGISTRATION.
 Loading...