

Page 1
Snare Drum Stand
3 Piece Drumset
Setup Guide
Thank you for purchasing the Drum Set. Please take a few moments to
familiarize yourself with the setup guide.
This setup should only be performed by an adult.
Check all of the parts listed below are included in the box. For greater safety, the Mounted Tom
Drum should be mounted on the Bass Drum at an angle of 80 degrees.
Warning: Not suitable for children under 5 due to small parts.
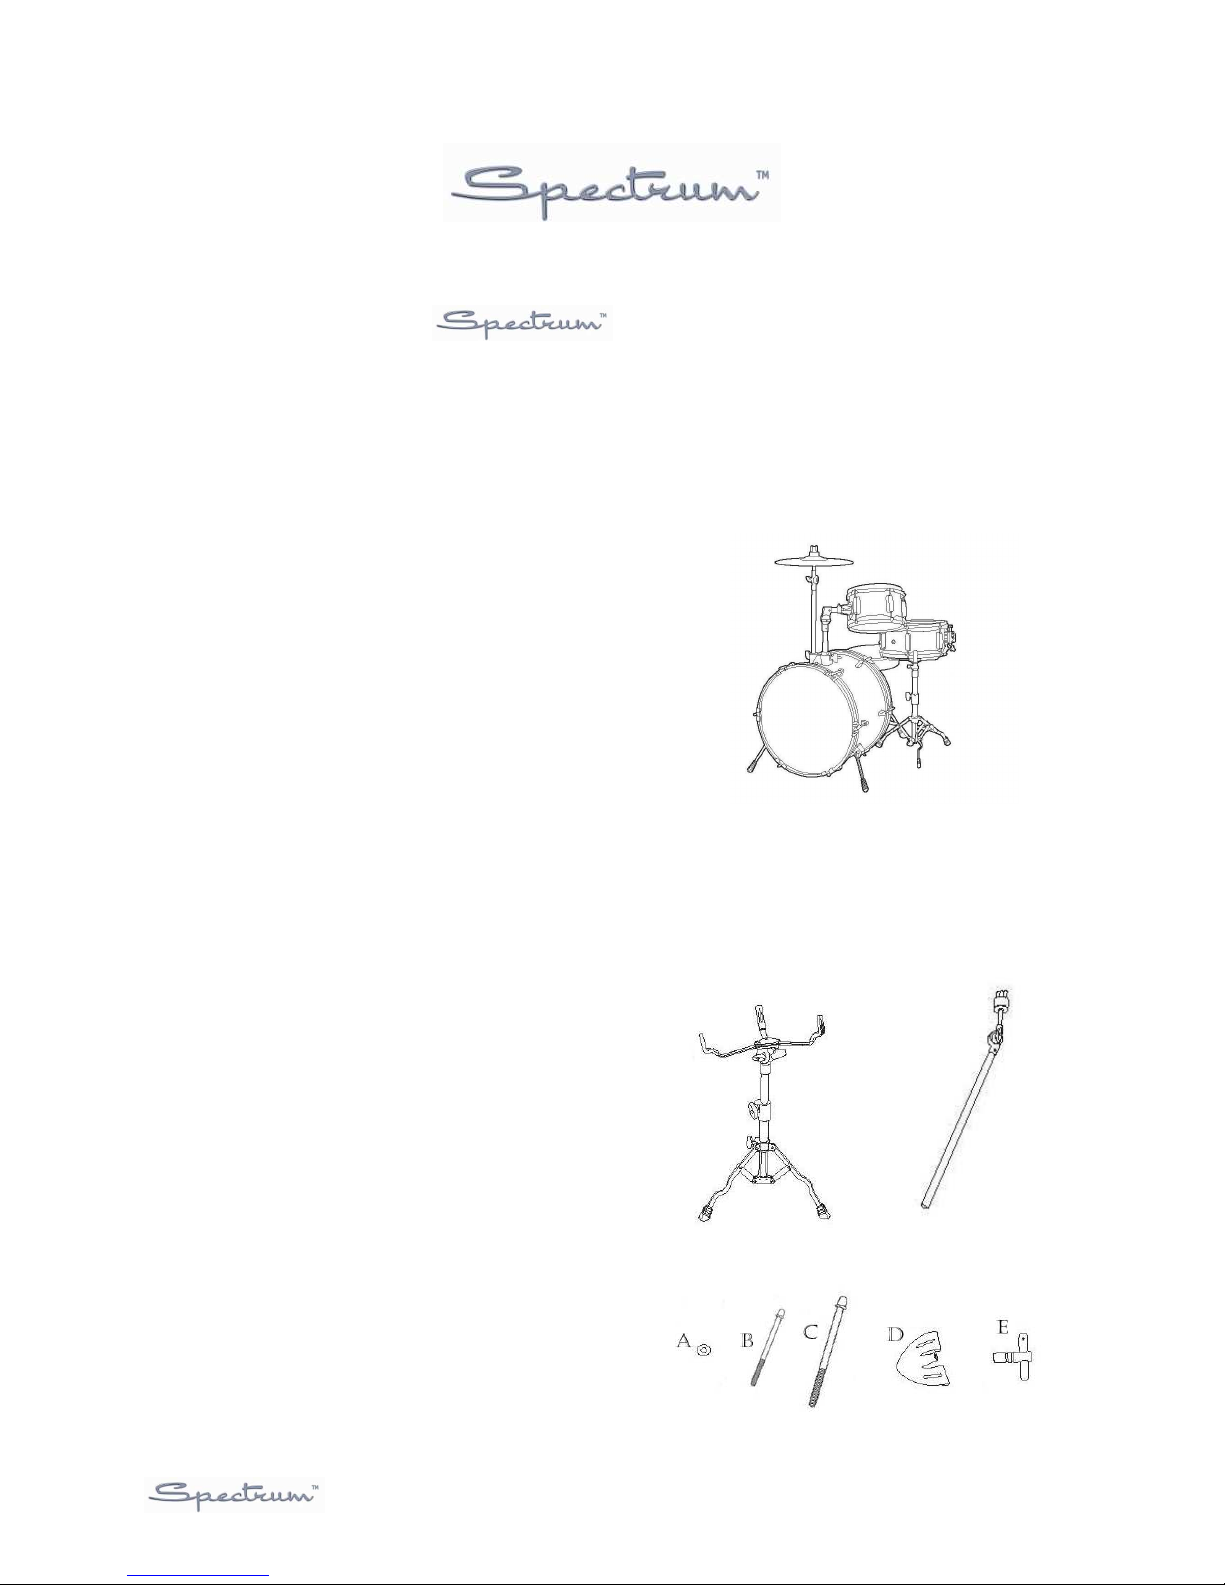
SET INCLUDES:
Drums:
One 16” x 12” Bass Drum
One 8” X 5” Mounted Tom Drum
One 10” x 4” Snare Drum
Drum Heads:
One 16” Clear Batter Side Bass Drum Head
[The Batter Side is the side of the bass drum nearest the
drummer and is struck with the Beater – Foot Pedal]
One 16” Resonant Side Bass Drum Head with Logo.
The Resonant side of a Bass Drum is the side facing out
to the audience.
One 8” Batter Side Mounted Tom Drum Head
On the Tom Drum, the Batter side faces up toward the
drummer.
One 8” Resonant Side Mounted Tom Drum Head
On the Tom Drum, the Resonant Side faces down to the
ground.
Snare Drum Heads are already installed on snare.
Legs:
Two Bass Drum Legs
Stands:
One Snare Drum Stand
One Cymbal Stand
Bag Packaged Parts:
34 Washers (A)
22 Short Tension Rods (B)
12 Long Tension Rods (C)
12 Bass Drum “Claws” (D)
1 Drum Key (E)
Set shown for illustrative purposes only. Actual set
may vary.
Cymbal Stand
Drum Set Assembly Instructions 1
Page 2
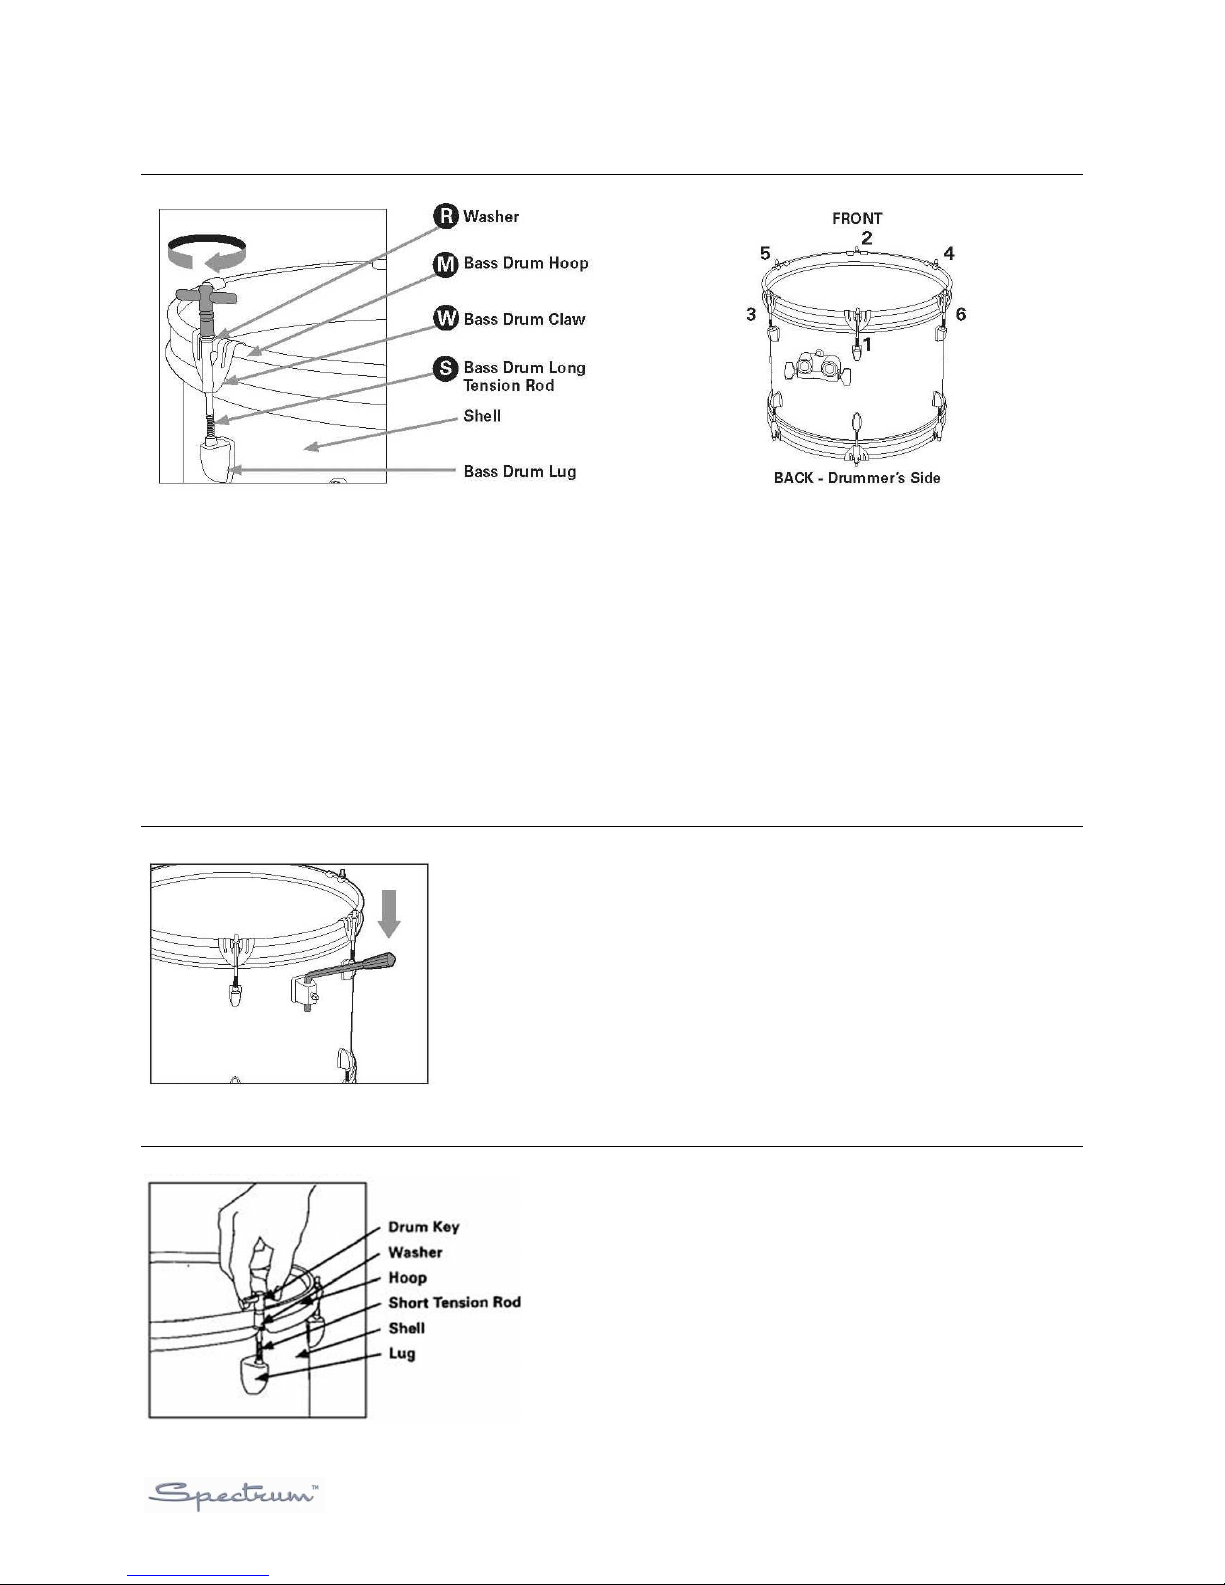
Bass Drum Head Assembly
1. Place bass drum head with logo on front of
bass drum head.
2. Place one of the bass drum hoops onto drum
head.
3. Insert long tension rod (C)/ washer (A) /bass
drum claw hook assembly (D) into bass
drum lug. Make sure claw hook is secure on
the bass drum hoop. Tighten with your
fingers.
4. Repeat this for all the lugs on one side of the
drum.
Bass Drum Leg Assembly (Spurs)
5. After all tension rods on one side are finger
tight, use the drum key (E) to tighten the #1
tension rod 3 turns. Follow these steps for
tension rods #2 through #6 in a criss cross
pattern as shown. Repeat this pattern,
tightening each tension rod one half turn,
until the drum head is taut and wrinkle free.
6. Repeat for the clear batter head on the
opposite side of the drum.
1
. Insert both legs through the assemblies on the
bottom side of the bass drum and tighten screw
with drum key (E).
2. Adjust the angle to ensure the bass drum
sits evenly on the floor when positioned.
Mounted Tom Head Assembly
Drum Set Assembly Instructions 2
1. Place 2 ply batter head on tom shell. The
batter drum head goes on the top.
2. Install tom drum hoop.
3. Insert short tension rods (B) with washers (A)
through holes in drum hoop and tighten to finger
tight.
4. Using drum key (E), gradually tighten each
tension rod screw in equal amounts in a crisscross pattern until head is taut and wrinkle free.
5. Repeat for bottom resonant drum head.
Page 3

Mounted Tom Assembly – to Bass Drum
Cymbal Stand Assembly
1. Extend legs into open position.
2. Slide upper tubes into base and set desired
height
using set screws
3. Place cymbal between felt cushions.
Leave thumbscrew somewhat loose to allow
cymbal
freedom to move when struck.
4. Set desired angle of cymbal using swivel
adjustment.
Attaching Bass Drum Pedal or Beater
1. Insert the bass
drum beater into the
bass drum pedal
and tighten with the
drum key (E).
2. Attached bass
pedal to the bass
drum hoop using
the toe clamp.
1. Set desired height of support arms using thumb
screws on tom mounting base (located on top of
bass drum).
2. Loosen support collar 1. using drum key (E).
Then, slide collar down to fit into mounting base.
Make sure to align collar nub into indentation on
mounting base.
3. Set angle of support arm to recommended 80
degrees and tighten thumb screw.
4. Using drum key (E) loosen support collar 2.
5. Slide mounted tom drum onto support arm and
tighten support collar 2. The mounted tom drum
should be located to the left when drumming.
3. Tighten the
wingnut on the toe
clamp until secure
Drum Set Assembly Instructions 3
Page 4

Snare Drum Stand Assembly
Drum Throne Assembly
Top View of Drum Placement
1. Extend legs of Snare Drum stand into open
position.
2. Insert Wingnut into middle snare arm.
3. Adjust the basket to the desired angle with
the tilter assembly.
4. Place snare drum in snare basket. The basket
should be adjusted to fit snug to the drum
1. Fold out leg at the base of the Drum Throne.
2. Place center tube into base and tighten
height adjustment wingnut.
3. Place seat on top and tighten wingnut.
Drum Set Assembly Instructions 4
 Loading...