

Page 1
Assembly Instructions
Important
Before you begin, read and comply with all safety and operating instructions,
and ensure all parts and correct quantities are included.
Any parts damaged during shipment must be reported within 5 days of receipt.
To report information regarding missing parts or damage, to purchase parts
or accessories, or if you have any questions, please contact us.
www.spectrumfurniture.com
800-235-1262, 715-723-6750
Thank you for purchasing Spectrum products!
(1) 042342
17-3/4” Slide
(1) 044321 Parts bag
(1) Slide guard
(1) Rubber bumper
(8) #8 x 5/8” PHSM
(1) 043517
Keyboard tray
Note: The spacers and longer screws are used between the slide and
worksurface only on worksurfaces with a 1” protruding support bar.
(1) 044217
Micro-arm
bracket
(8) 026070
#8 x 1-3/4”
PHSM
1. Attach micro-arm bracket to keyboard tray
1. Align the micro-arm bracket with the 6 pre-drilled holes in the center of
the keyboard tray and attach with (6) #8 x 5/8” PHSM screws. Figure 1.
2. Tighten screws securely.
(1) 044480
Spacer block
Micro Arm Keyboard Tray
95506
Tools
Required
(5) 043878
Nylon spacer
1” x .375” OD
x .171” ID
Phillips
screwdriver
#8 x 5/8” PHSM
screws (6 required)
Micro-arm bracket
Keyboard tray
Figure 1
043548R8 Page 1 of 2
Page 2

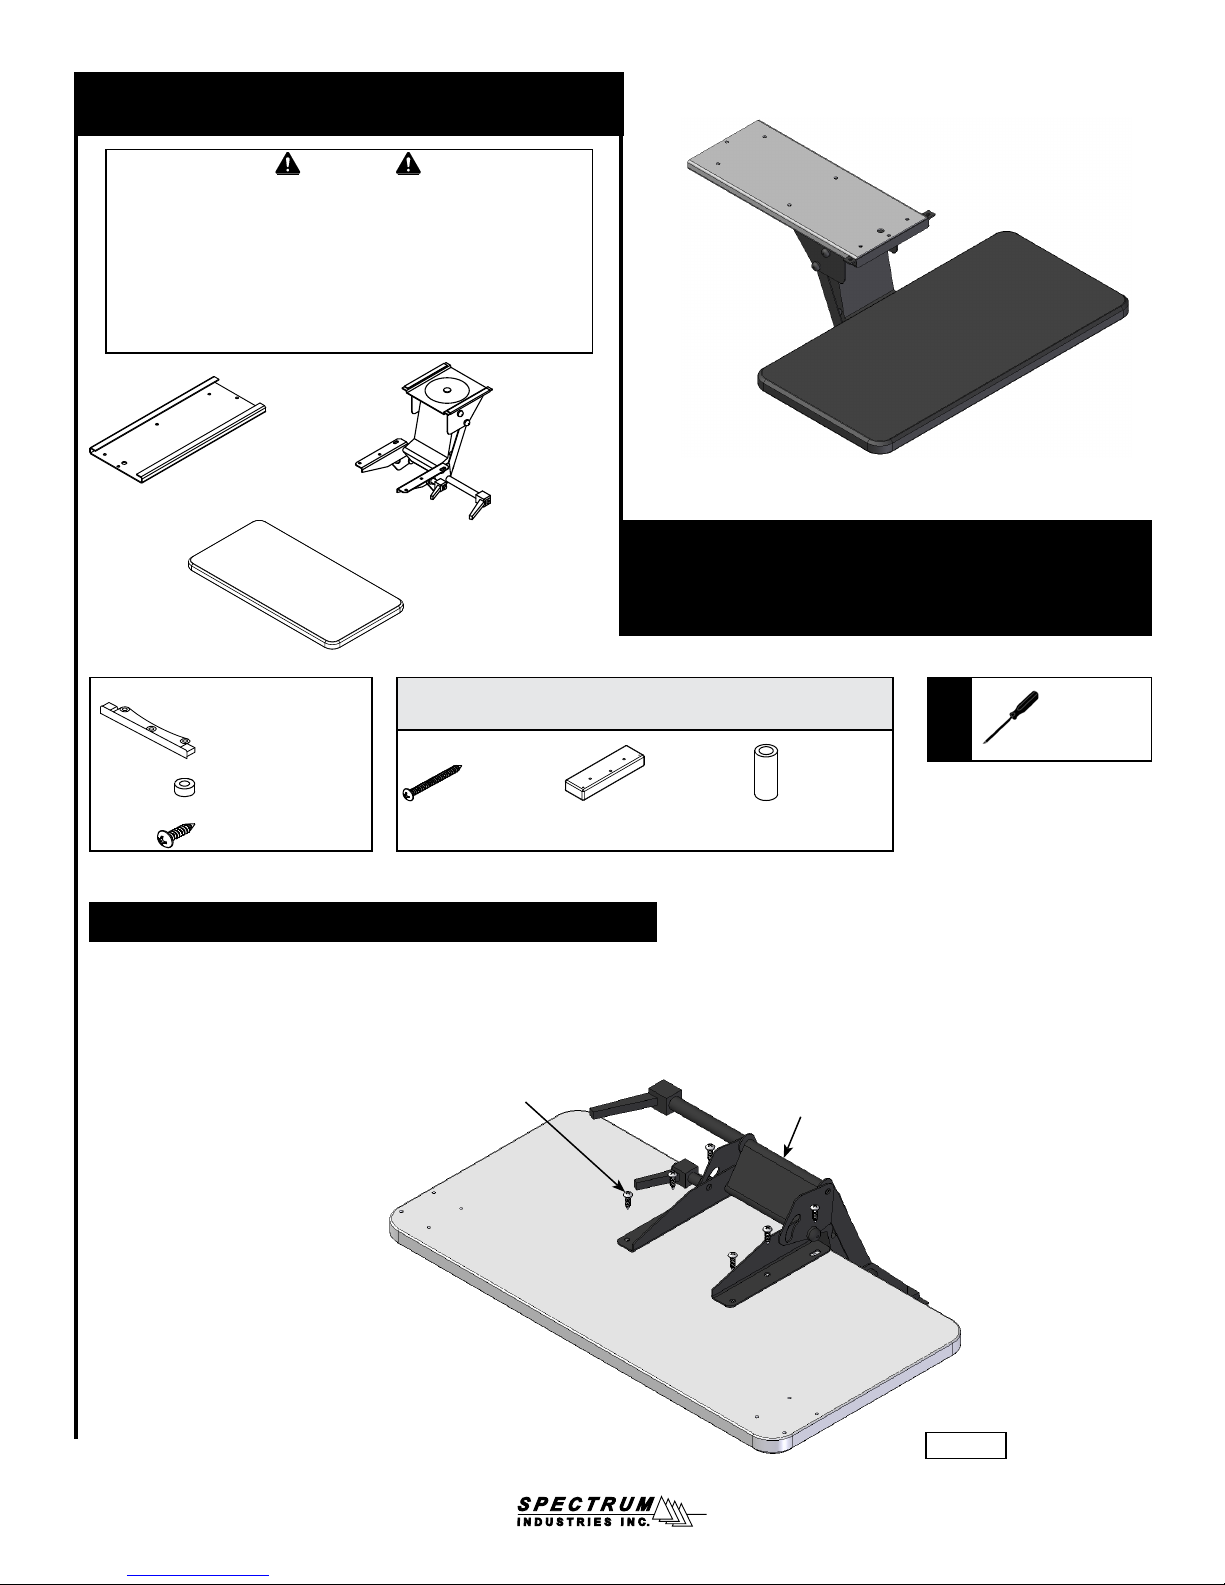
2. Attach slide to desk
1. Flip the worksurface / desk upside-down onto a non-abrasive surface.
2. Locate the slide perpendicular and about 1” from the edge of the
worksurface. The slide should not be mounted closer than 8” to the
nearest leg.
Installation on desks with support barTypical installation
3. Attach the slide using (8) #8 x 5/8” PHSM screws and tighten securely.
Figure 2A.
4. Attach the rubber bumper toward the back of the slide using the
middle hole.
Rubber
Slide
#8 x 5/8” PHSM
Attach 1”
from edge
Figure 2A
Bumper
Underside of
worksurface
Note: The nylon spacers and longer screws are used between the slide
and worksurface only on worksurfaces with a protruding support bar.
3. Place the spacer block and (5) nylon spacers under the tray as
shown Figure 2B.
4. Attach the slide, spacer block, and nylon spacers using (6) #8 x
1-3/4” PHSM screws and tighten securely.
5. Attach the rubber bumper toward the back of the slide using the middle hole.
Support bar
Slide
#8 x 1-3/4” PHSM
Spacer
block
Rubber
bumper
Attach 1”
from edge
Figure 2B
Nylon
spacer
Underside of
worksurface
3. Attach slide guard
1. Flip the desk right-side up.
2. Slide the keyboard assembly into the slide. Figure 3A.
3. Using (2) #8 x 5/8” PHSM screws, attach the slide guard to the front
of the slide. Figure 3B.
Slide under
worksurface
Keyboard
assembly
Figure 3A
#8 x 5/8” PHSM
(2 required)
Slide guard
Figure 3B
925 FIRST AVENUE, CHIPPEWA FALLS, WI 54729 / 800-235-1262 / 715-723-6750 / WWW.SPECTRUMFURNITURE.COM
043548R8 Page 2 of 2
 Loading...