

Page 1
Assembly Instructions
Important
Before you begin, read and comply with all safety and operating instructions,
and ensure all parts and correct quantities are included.
Any parts damaged during shipment must be reported within 5 days of receipt. To
report information regarding missing parts or damage, to purchase parts or accessories, or if you have any questions, please contact us.
www.spectrumfurniture.com
800-235-1262, 715-723-6750
Thank you for purchasing Spectrum products!
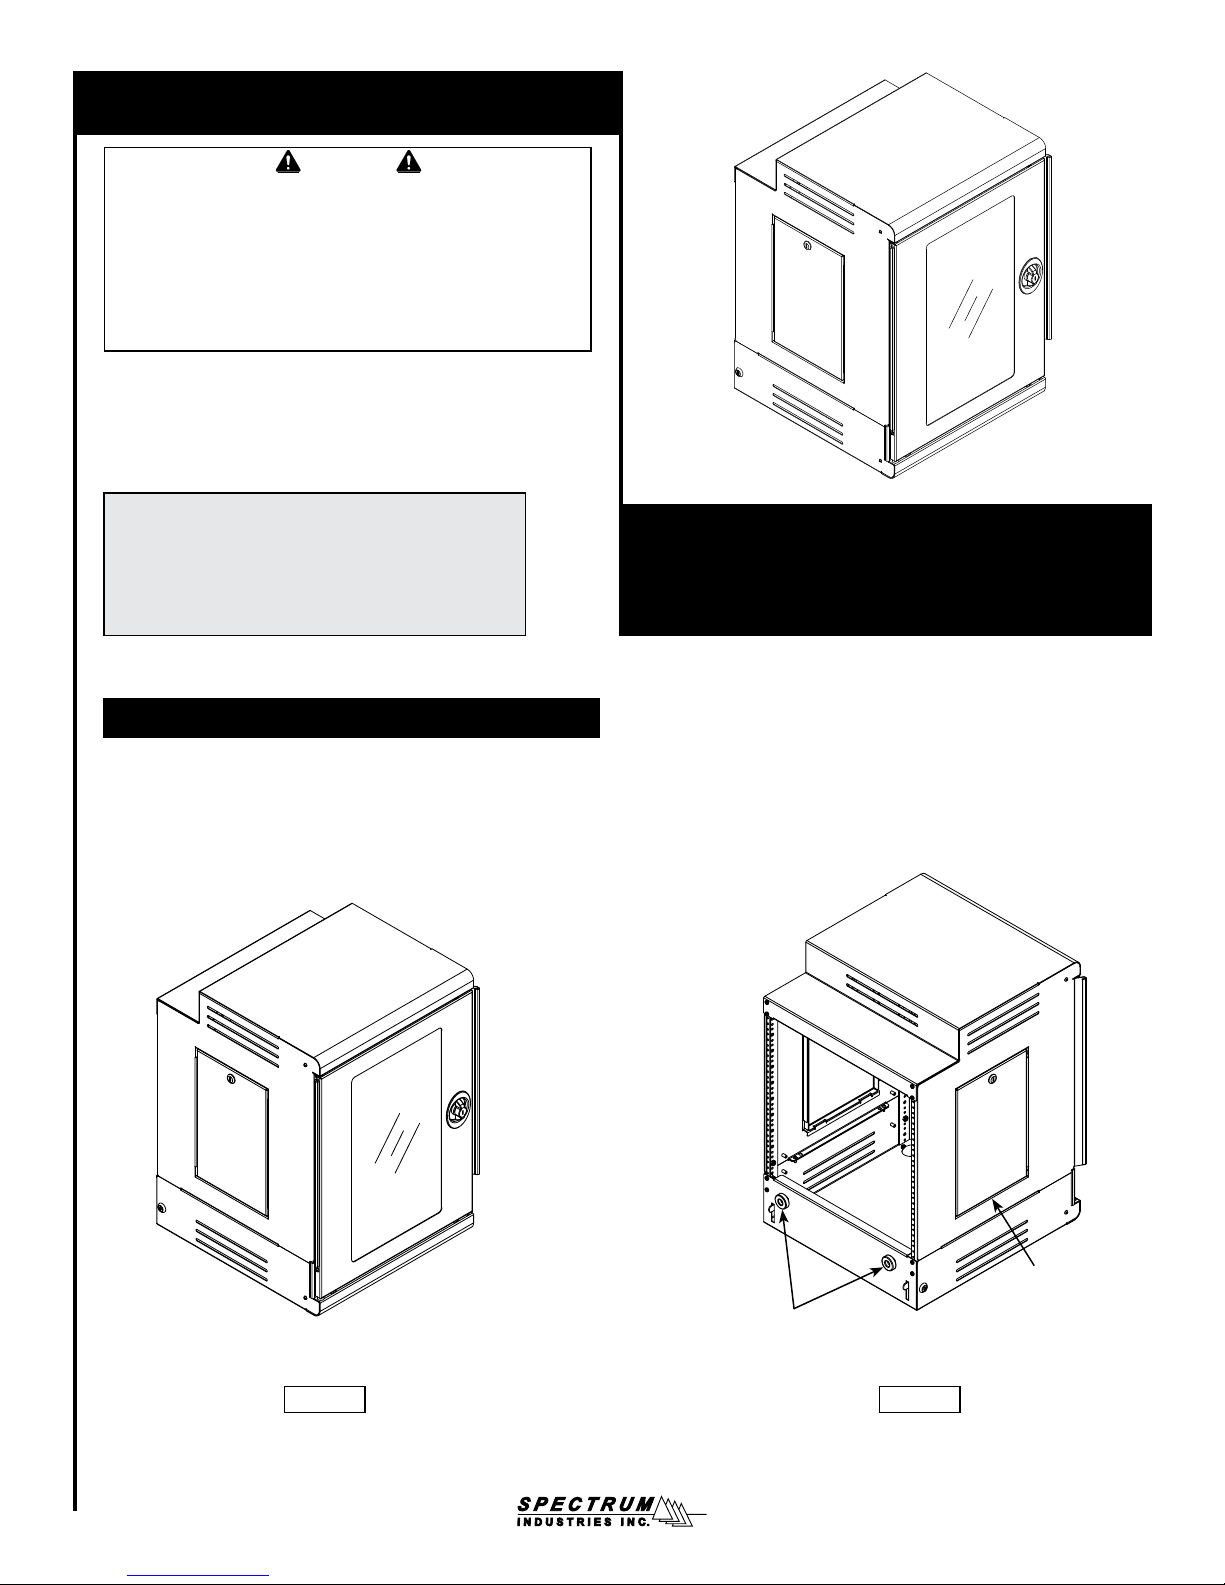
The removable rack cabinet (14RU front, 10RU rear)
simplies installation and provides the ability to integrate
equipment remotely, and dock into the lectern at a later date.
Note: Roller glides under the cabinet provide easy
repositioning for quick and easy access (not intended for
long-range transport).
Rack Cabinet
for Freedom XRS Elite
55297
Rack Cabinet
Cabinet front
(instructor-side)
Cabinet rear
(open-back)
Side hatch
Figure 1
Glide posts
(to dock cabinet
to lectern)
Figure 2
0119056R1 Page 1 of 4
Page 2
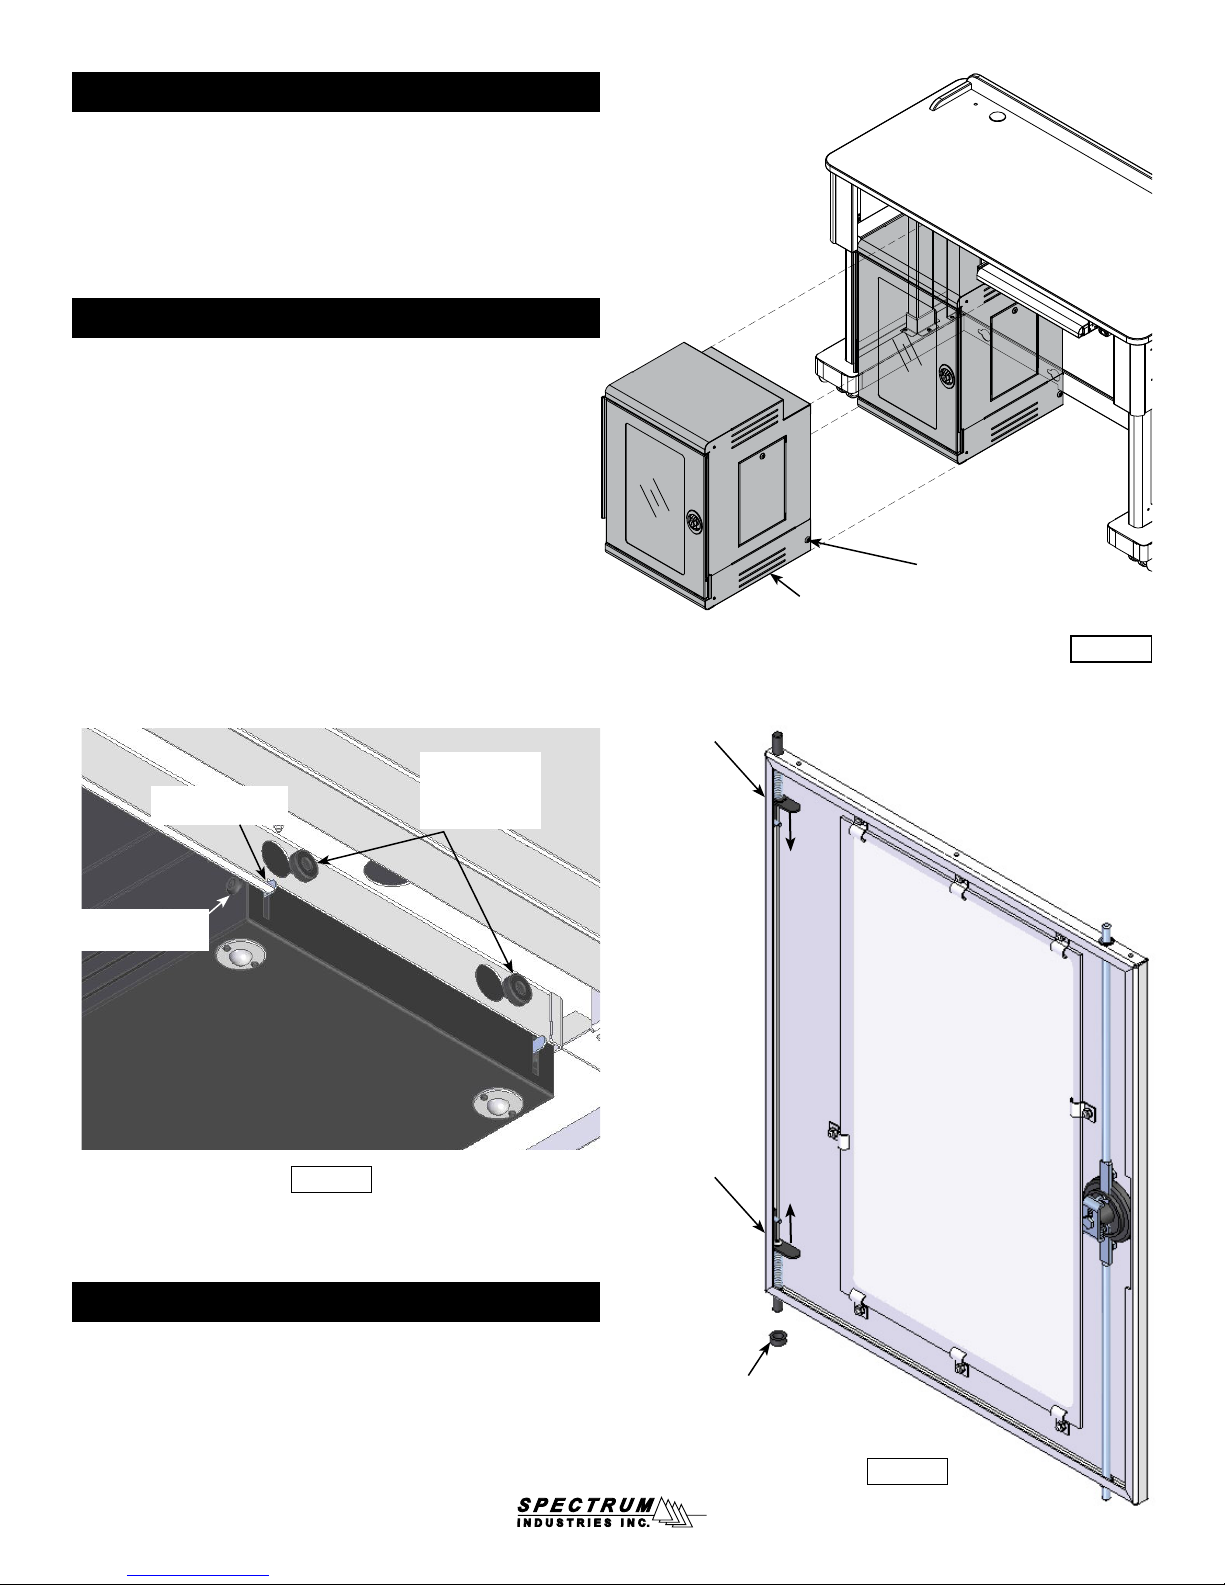
Docking Cabinet
1. To secure the rack cabinet to the lectern, position the
cabinet on the left, or right-side of the lectern. Figure 3.
2. Engage the keyhole slots and slide the cabinet toward
the outside leg of the lectern to secure.
3. Lock the cabinet lock pawl near the oor.
Detaching Cabinet
1. To detach the rack cabinet from the lectern, unlock
the cabinet lock pawl near the oor. Figure 4.
2. Slide the cabinet toward the center of the lectern
to release the cabinet from the keyhole slots.
Rack cabinet
(shown on leftside of lectern)
Keyed lock
(one on each side)
Figure 3
Lock pawl secures
cabinet to lectern
Keyed lock
(one on each side)
Bottom of
Rack cabinet
Figure 4
Quickrelease
lever
Glide posts in
keyhole slots
(to dock cabinet to lectern)
Quickrelease
lever
Quick-Release Door
The symmetrical door can easily be removed or switched to be hinged from
left or right using the quick-release hinge lever located on the door. Figure 5.
If switching sides, the nylon bushing must be relocated to the lower hinge pin.
Nylon bushing on
lower hinge pin
Figure 5
0119056R1 Page 2 of 4
Page 3

Rack Rails
If necessary, the rack rails can be repositioned to
accommodate rack-mount components with protruding
controls/knobs. Figure 6. To relocate, remove the
1/4-20 locknuts and install on the 2nd set of studs.
Section view A-A
Tools
Required
7/16” or
Adjustable
wrench
Instructor sideAudience side
Clearance for
cord channel and
overbridge-installed
devices
14RU available
(rail shown in
outer position)
Side hatch
10RU available
(rail shown in
outer position)
(Overall
height)
Optional inner
mounting positions
Note: Check the dimensions of all equipment
before installation.
(Overall depth)
Figure 6
0119056R1 Page 3 of 4
Page 4

Wiring
Leave enough slack in the cords and wires from the rack cabinet
to pull the rack cabinet out from the lectern. Figure 7.
Cords and wires
from Rack Cabinet
Rack Cabinet
Figure 7
925 FIRST AVENUE, CHIPPEWA FALLS, WI 54729 / 800-235-1262 / 715-723-6750 / WWW.SPECTRUMFURNITURE.COM
0119056R1 Page 4 of 4
 Loading...