

Page 1
Assembly Instructions
Important
Before you begin, read and comply with all safety and operating instructions,
and ensure all parts and correct quantities are included.
Any parts damaged during shipment must be reported within 5 days of receipt. To
report information regarding missing parts or damage, to purchase parts or accessories, or if you have any questions, please contact us.
www.spectrumfurniture.com
800-235-1262, 715-723-6750
Thank you for purchasing Spectrum products!
(1) 0119288
Upper Logo Panel
(1) 0119283 backer
YOUR LOGO HERE
YOUR LOGO HERE
Customized Logo Panel(s) for Honors Lectern
(2) 037542
#8 x 5/8” PHSM
(1) 0119287
Lower Logo Panel
(1) 0119298 backer
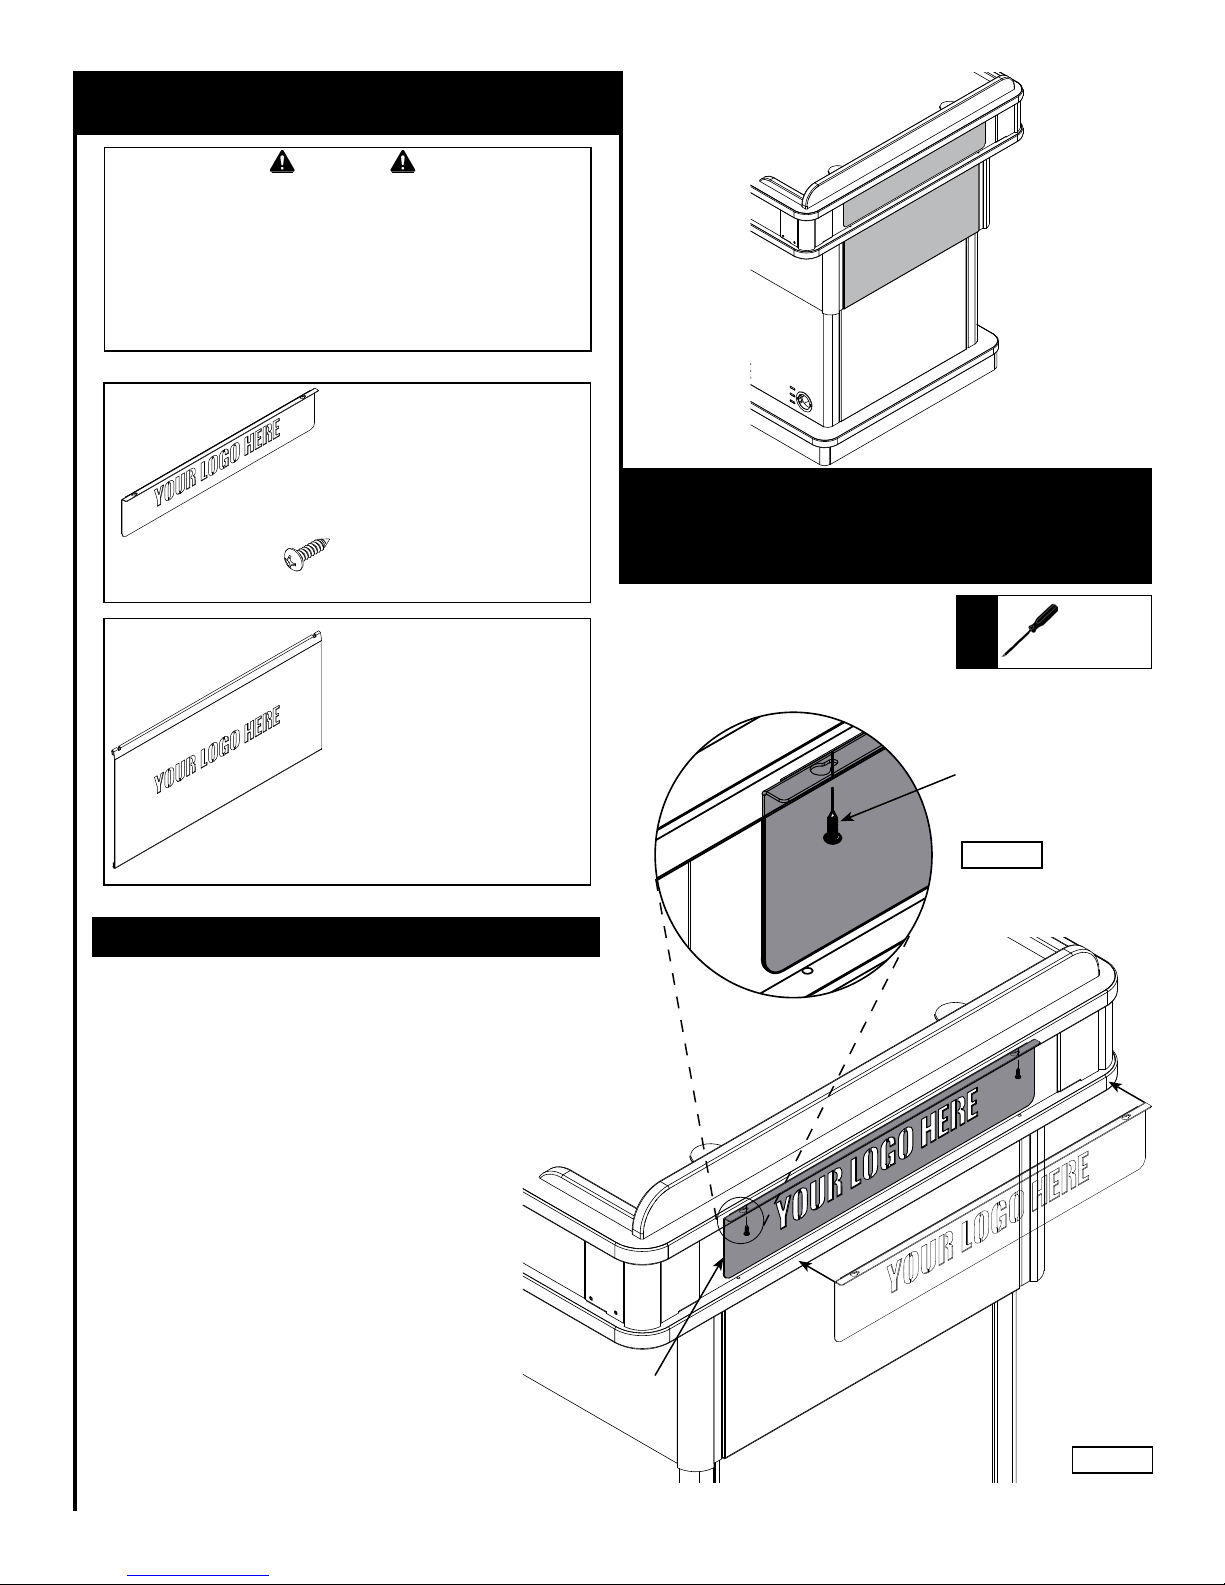
Upper Logo Panel Installation
1. To install, locate the (2) holes under the worksurface edge on the
audience-side and install the (2) #8 x 5/8” PHSM screws, but do
not tighten completely. Figure 1.
2. Align the logo panel slots with the screws, placing the panel
against the lectern.
3. Shift the logo panel slightly to the left to lock into the keyhole slots,
then secure by tightening the screws securely. Figure 1A.
Upper - 55148
Lower - 55149
Tools
Required
(2) 037542
#8 x 5/8” PHSM
Figure 1A
Phillips
screwdriver
Upper logo
panel
Figure 1
0119488R1 Page 1 of 2
Page 2
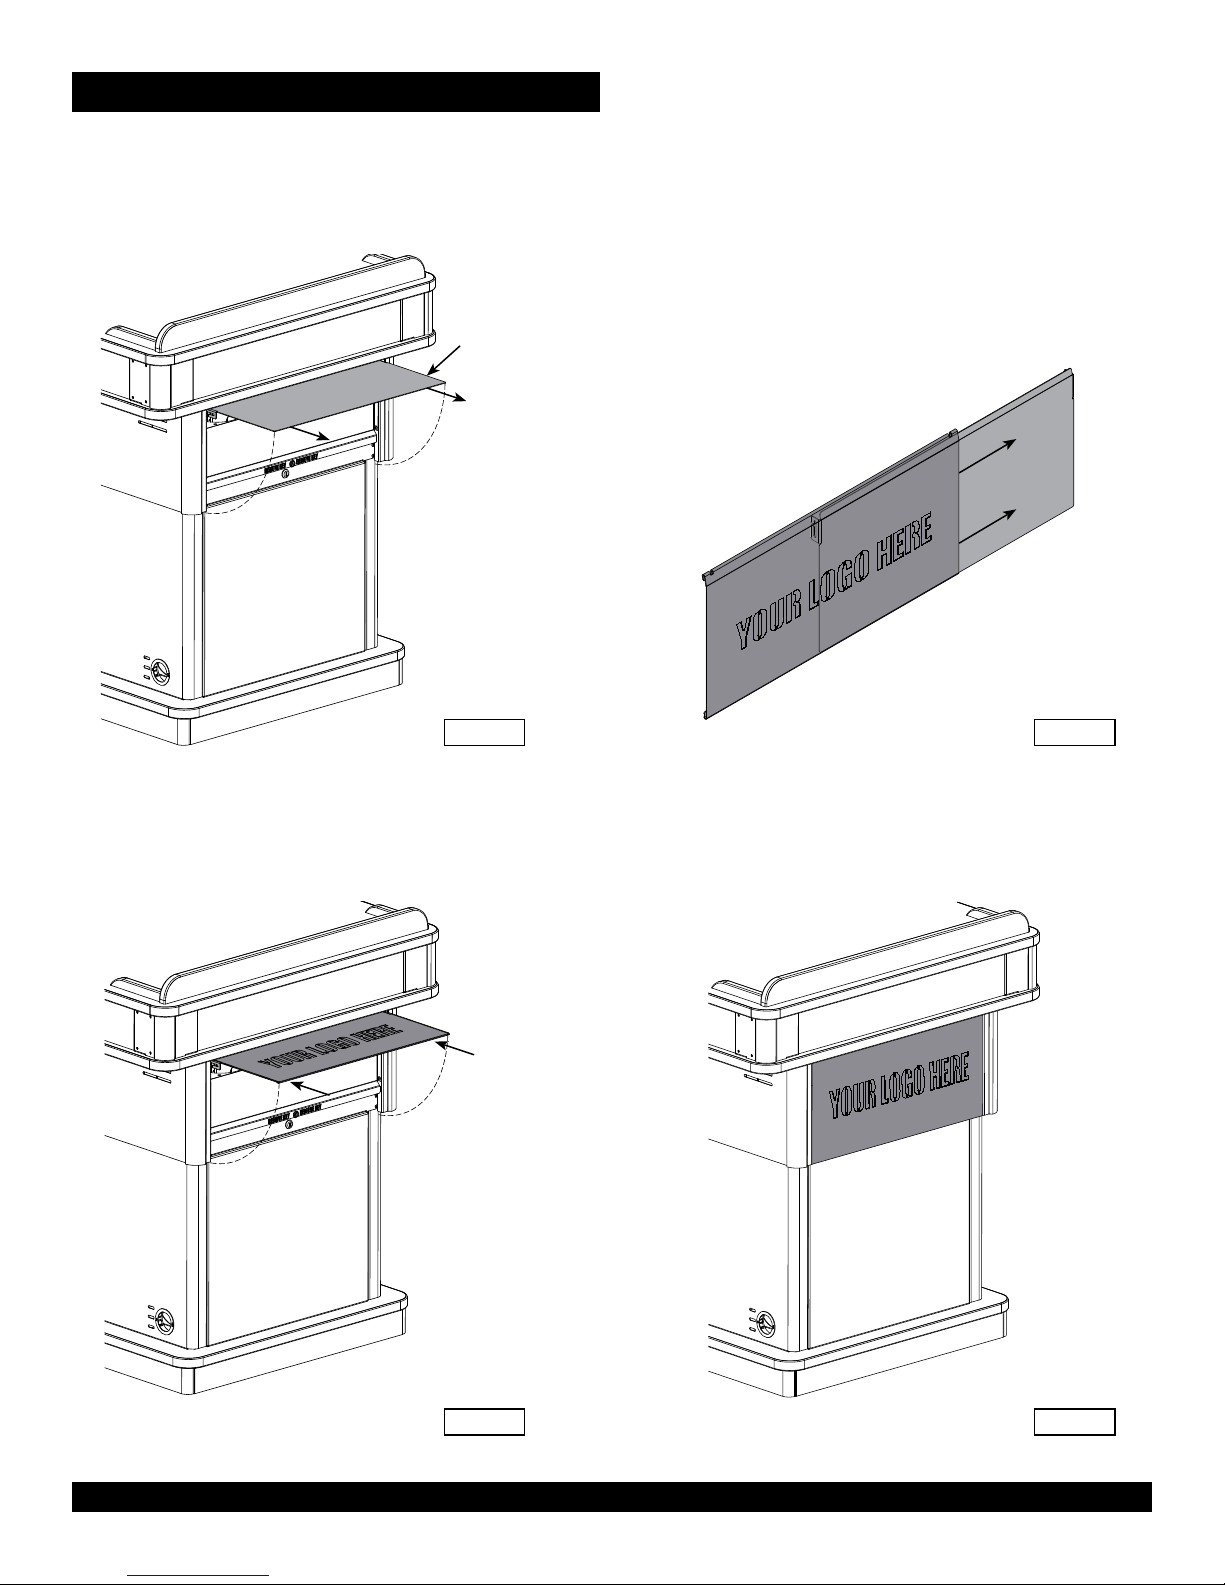
Lower Logo Panel Installation
1. Raise the lectern all the way up.
2. Lift the hinged lower panel to a horizontal position
and pull away from lectern to remove. Figure 2A.
3. Slide the lower logo panel over the
hinged lower panel. Figure 2B.
Hinged
lower panel
Lower logo
panel
Figure 2A Figure 2B
Hinged
lower panel
4. With the hinged lower panel in a horizontal
position, re-install to the lectern. Figure 2C.
5. When lowered, the panel will
lock into place. Figure 2D.
925 FIRST AVENUE, CHIPPEWA FALLS, WI 54729 / 800-235-1262 / 715-723-6750 / WWW.SPECTRUMFURNITURE.COM
Figure 2C
© 2016 Spectrum Industries Inc., All rights reserved.
Figure 2D
0119488R1 Page 2 of 2
 Loading...