

Page 1

Assembly Instructions
Important
Before you begin, read and comply with all safety and operating instructions,
and ensure all parts and correct quantities are included.
Any parts damaged during shipment must be reported within 5 days of receipt. To
report information regarding missing parts or damage, to purchase parts or accessories, or if you have any questions, please contact us.
www.spectrumfurniture.com
800-235-1262, 715-723-6750
Thank you for purchasing Spectrum products!
(8) 026073
#8 x 3/4” PHSM
screw
(1) 050574
Left shelf
support
(1) 050573
Folding shelf
(2) 056886
12” x 8” Folding brackets
(1) 050575
Right shelf
support
(4) 044541
1/4-20 x 20mm
JC bolts
(8) 0100167
#8 x 1/2” PH
Thread-cutting
screw
(1) 039622
2” Grommet
1. Attach support brackets
1. Attach the left and right support brackets to the LINK cart as
shown using (2) 1/4-20 x 20mm JC bolts per bracket. Figure 1.
2. Do not tighten the JC bolts completely yet.
Support brackets
attached with 2 JC bolts
(do not tighten completely)
(1) 025039
4mm Hex
wrench
Folding
bracket
Flip-up shelf
for LINK Lectern
55140
Support
bracket
Tools Required
Phillips
screwdriver
Drill with #1 Phillips
driver and extension
4mm Hex wrench
(included)
2. Attach folding brackets
1. Determine the height you would like the shelf to be mounted.
2. Open each folding bracket, and align the mounting holes at the desired height.
3. With an electric drill, driver extension, and #1 Phillips driver, attach each folding bracket to a support bracket
with (3) #8 x 1/2” thread-cutting screws. Tighten securely, but be careful not to strip out the holes. Figure 2.
#8 x 1/2” PH threadcutting screws
(3 per bracket)
Figure 1 Figure 2
050581R8 Page 1 of 2
Page 2
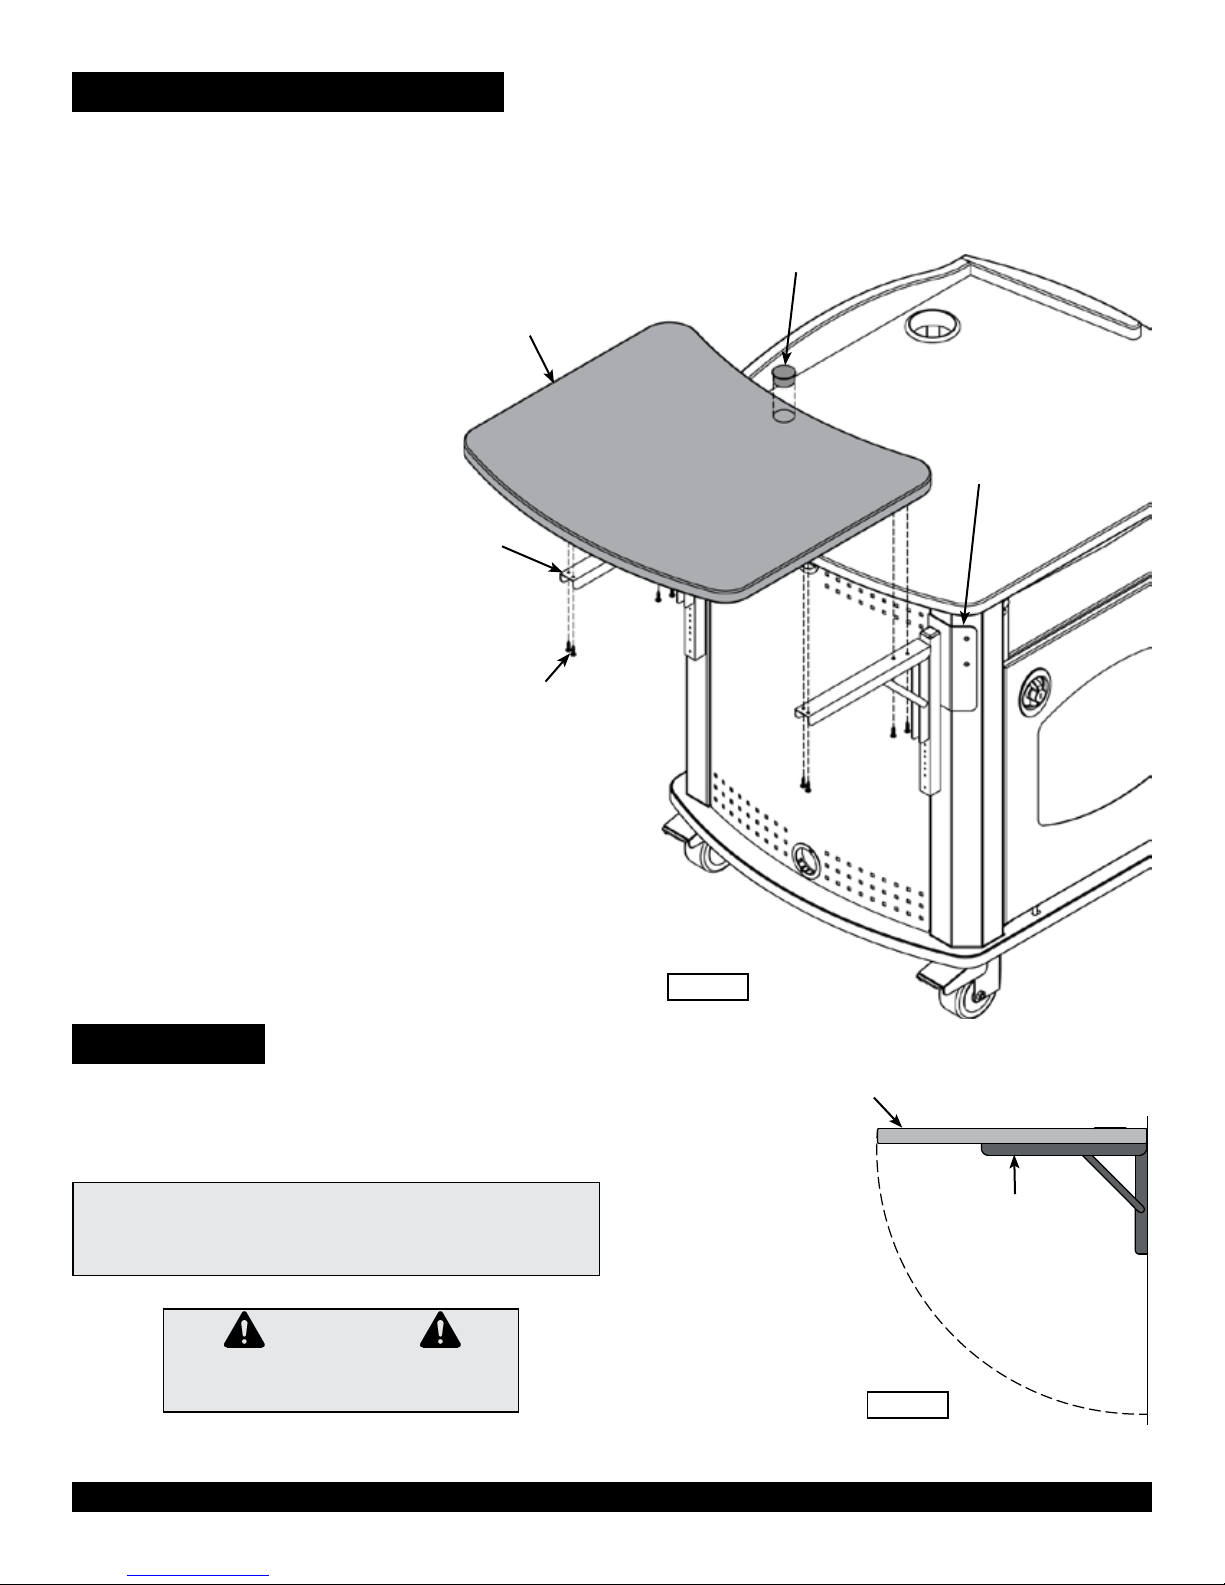
3. Attach shelf to folding brackets
1. With the folding brackets in the “UP” position, set the shelf on the
brackets and align the mounting holes.
2. Attach the shelf to the each folding bracket with (4) #8 x 3/4” PHSM
screws and tighten securely with a Phillips screwdriver. Figure 3.
3. Install the 2” grommet.
4. Lower shelf (see instructions below.)
5. With the shelf in the lowered position, tighten the previously installed
JC bolts securely.
Shelf
Folding bracket
2” Grommet
Tighten all bolts
with the shelf in the
lowered position
#8 x 3/4” PHSM screws
(4 per bracket)
Figure 3
3. Operation
The shelf will automatically lock into place when lifted into the horizontal position with the levers
released. Figure 4. To lower or ip-up the shelf, press and hold the levers under each folding shelf
bracket at the same time while slowly lowering or raising the shelf. Do not exceed a maximum of 35
lbs of weight on the shelf. Do not move the lectern while the shelf is in the horizontal position.
Note: Power and communication wiring for document cameras, laptop
computers, and / or projectors placed on the ip-up shelf should be routed
on top of the audience-side of the shelf. Use of the shelf grommet hole for
wiring will result in pinching of the cords when the shelf is folded.
Folding shelf
Release lever
(press here)
CAUTION
Keep clear of pinch points during shelf movement.
Do not exceed 35 lbs [15.9 kg] of weight on shelf.
925 FIRST AVENUE, CHIPPEWA FALLS, WI 54729 / 800-235-1262 / 715-723-6750 / WWW.SPECTRUMFURNITURE.COM
© 2016 Spectrum Industries Inc., All rights reserved.
Figure 4
050581R8 Page 2 of 2
 Loading...