

Page 1
Assembly Instructions
Important
Before you begin, read and comply with all safety and operating instructions,
and ensure all parts and correct quantities are included.
Any parts damaged during shipment must be reported within 5 days of receipt.
To report information regarding missing parts or damage, to purchase parts
or accessories, or if you have any questions, please contact us.
www.spectrumfurniture.com
800-235-1262, 715-723-6750
Thank you for purchasing Spectrum products!
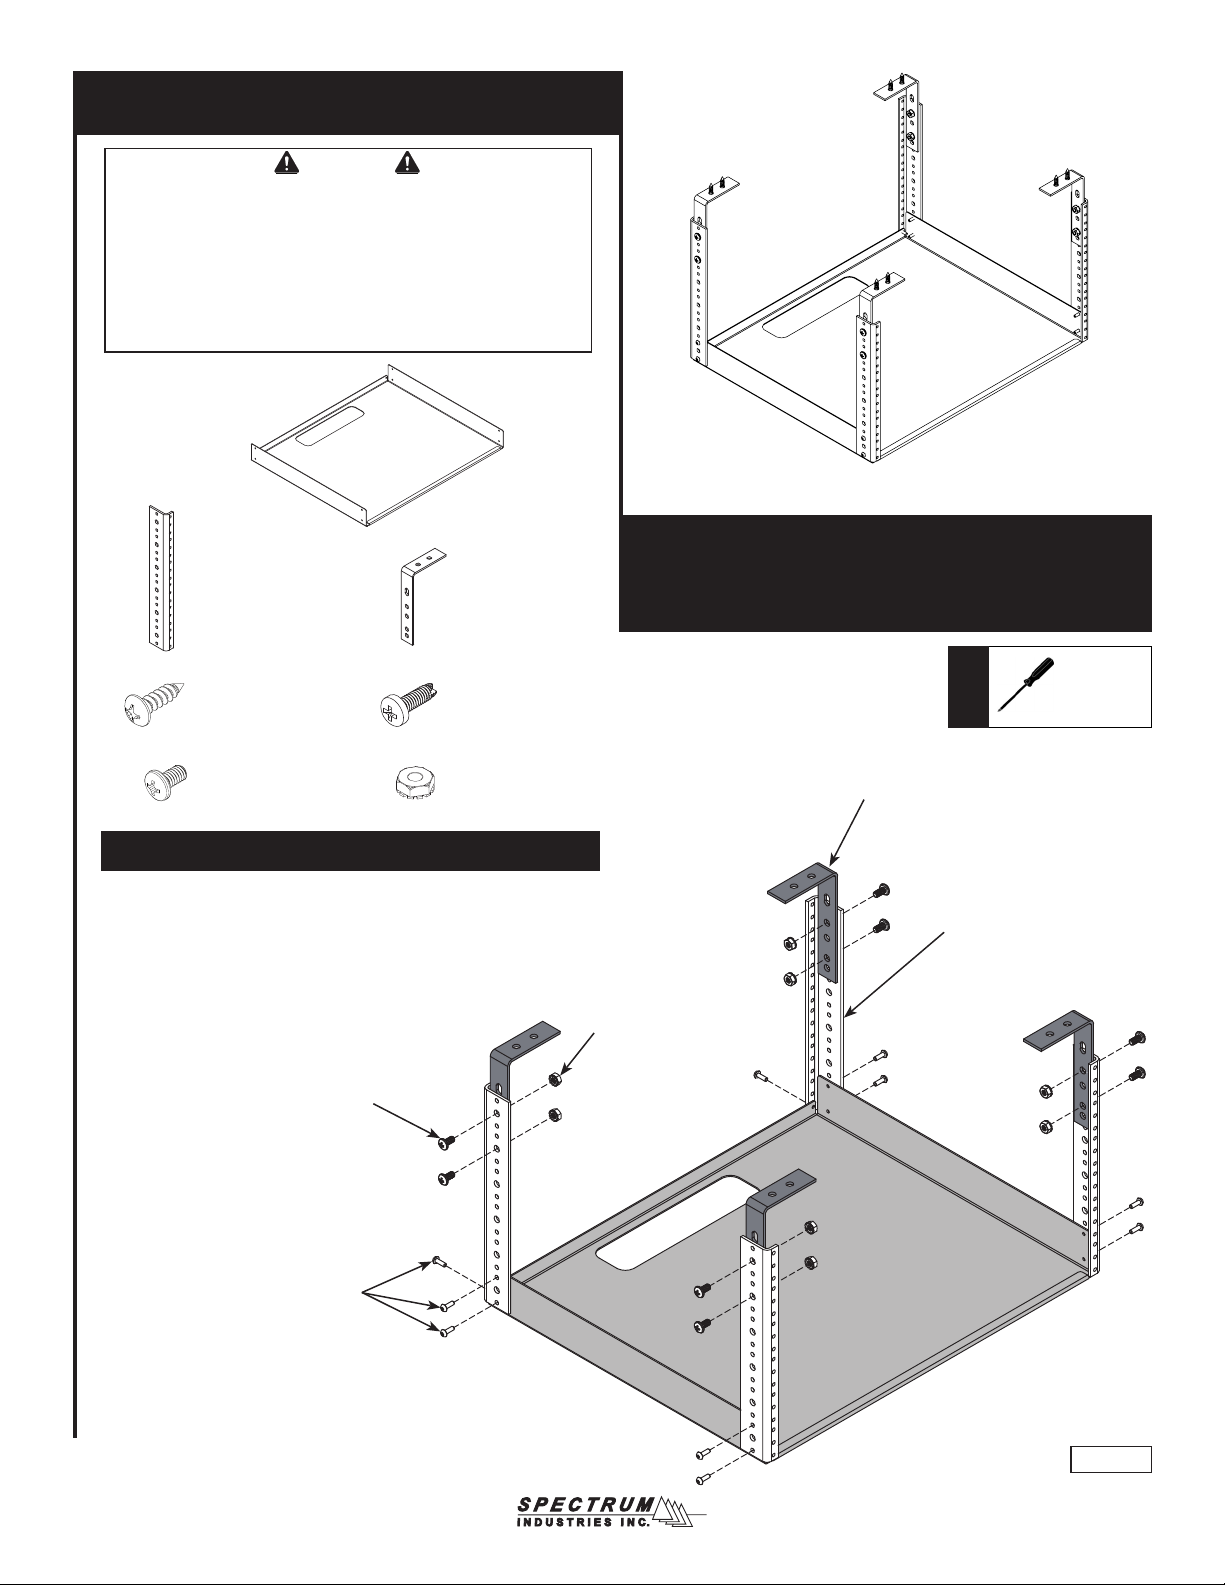
(1) 0144237
Shelf
6RU Rack Rail Kit
for Pivot Premier
(4) 058516
Rack rail (10.5”)
(8) 0101382
#14 x 7/8” PHSM
(8) 035728
1/4-20 x 1/2” PHMS
(4) 050881
“L” Bracket
(10) 0100167
8-32 x 1/2” PH
thread-cutting screw
(8) 0106543
1/4-20 Keps nut
1. Assemble rack cube
1. Attach the rails to the shelf with (10) 8-32 x 1/2” PH threadcutting screws. Note the orientation of the rails. Figure 1.
2. Attach each bracket to a rail as shown with (2) 1/4-20 x 1/2” PHM
screws, and (2) 1/4-20 Keps nuts.
3. Tighten all fasteners securely.
1/4-20 Keps nut
(2 per)
1/4-20 x 1/2” PHMS
(2 per)
38983
Tools
Rack Rail “L” Bracket
(4 req’d)
Rack rail (10.5”)
(4 req’d)
Required
Phillips
Screwdriver
8-32 x 1/2” PH
thread-cutting screw
(10 req’d total)
Shelf
Figure 1
0191440 Page 1 of 2
Page 2
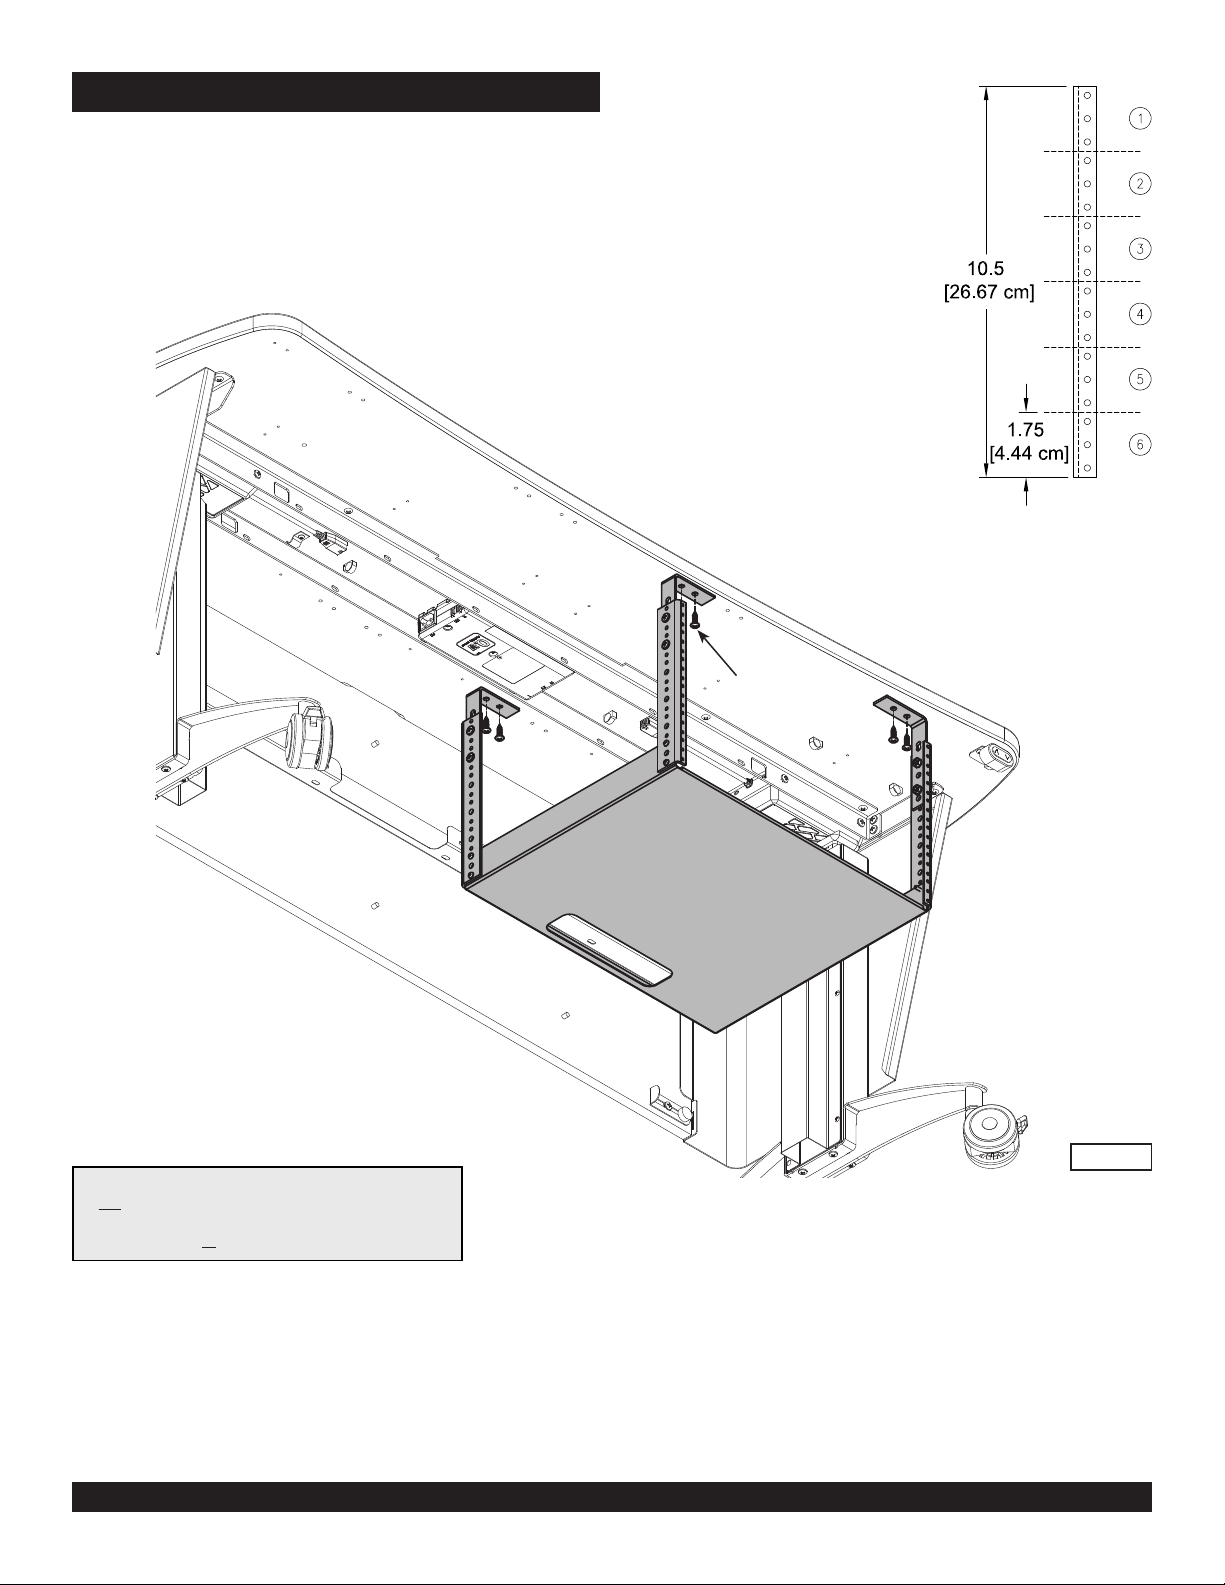
2. Install rack assembly
1. Determine the preferred position of the rack assembly (left, centered, or right).
2. Using the corresponding pre-drilled mounting holes under the worksurface,
attach the rack assembly with (8) #14 x 7/8” PHSM screws. Figure 2.
(2 through each “L” bracket).
3. Tighten screws securely.
Note: On the 48”W lectern, the 55496 Keyboard tray
is not compatible with the 6RU Rack option. On the
60”W lectern, the keyboard tray is compatible with (1)
6RU rack option or (1) 38982 CPU sling.
(2) #14 x 7/8”
PHSM
Rack assembly
Figure 2
925 FIRST AVENUE, CHIPPEWA FALLS, WI 54729 / 800-235-1262 / 715-723-6750 / WWW.SPECTRUMFURNITURE.COM
© 2019 Spectrum Industries Inc., All rights reserved.
0191440 Page 2 of 2
 Loading...