

Page 1
Assembly Instructions:
Note
: The hole in the center of the mounting flange does not require a JC bolt into the work surface
To purchase parts or accessories, please contact us at
044541
1/4-20 x 20mm JC bolt
(13) for cord channel
(8) for modesty panel
Before you begin, please make sure all parts and proper quantities are
included. Any parts damaged during shipment must be reported within
15 days of receipt. To report information regarding damages or if you
have any questions, please call 1-800-235-1262.
www.spectrumfurniture.com
1-800-235-1262
Thank you for choosing Spectrum products!
(1) 025039
4mm Hex wrench
Cord Channel
Cord Channel / Modesty Panel
for Flex Training Tables
Cord Channel
37256 - for 48" table
37257 - for 60" table
37258 - for 72" table
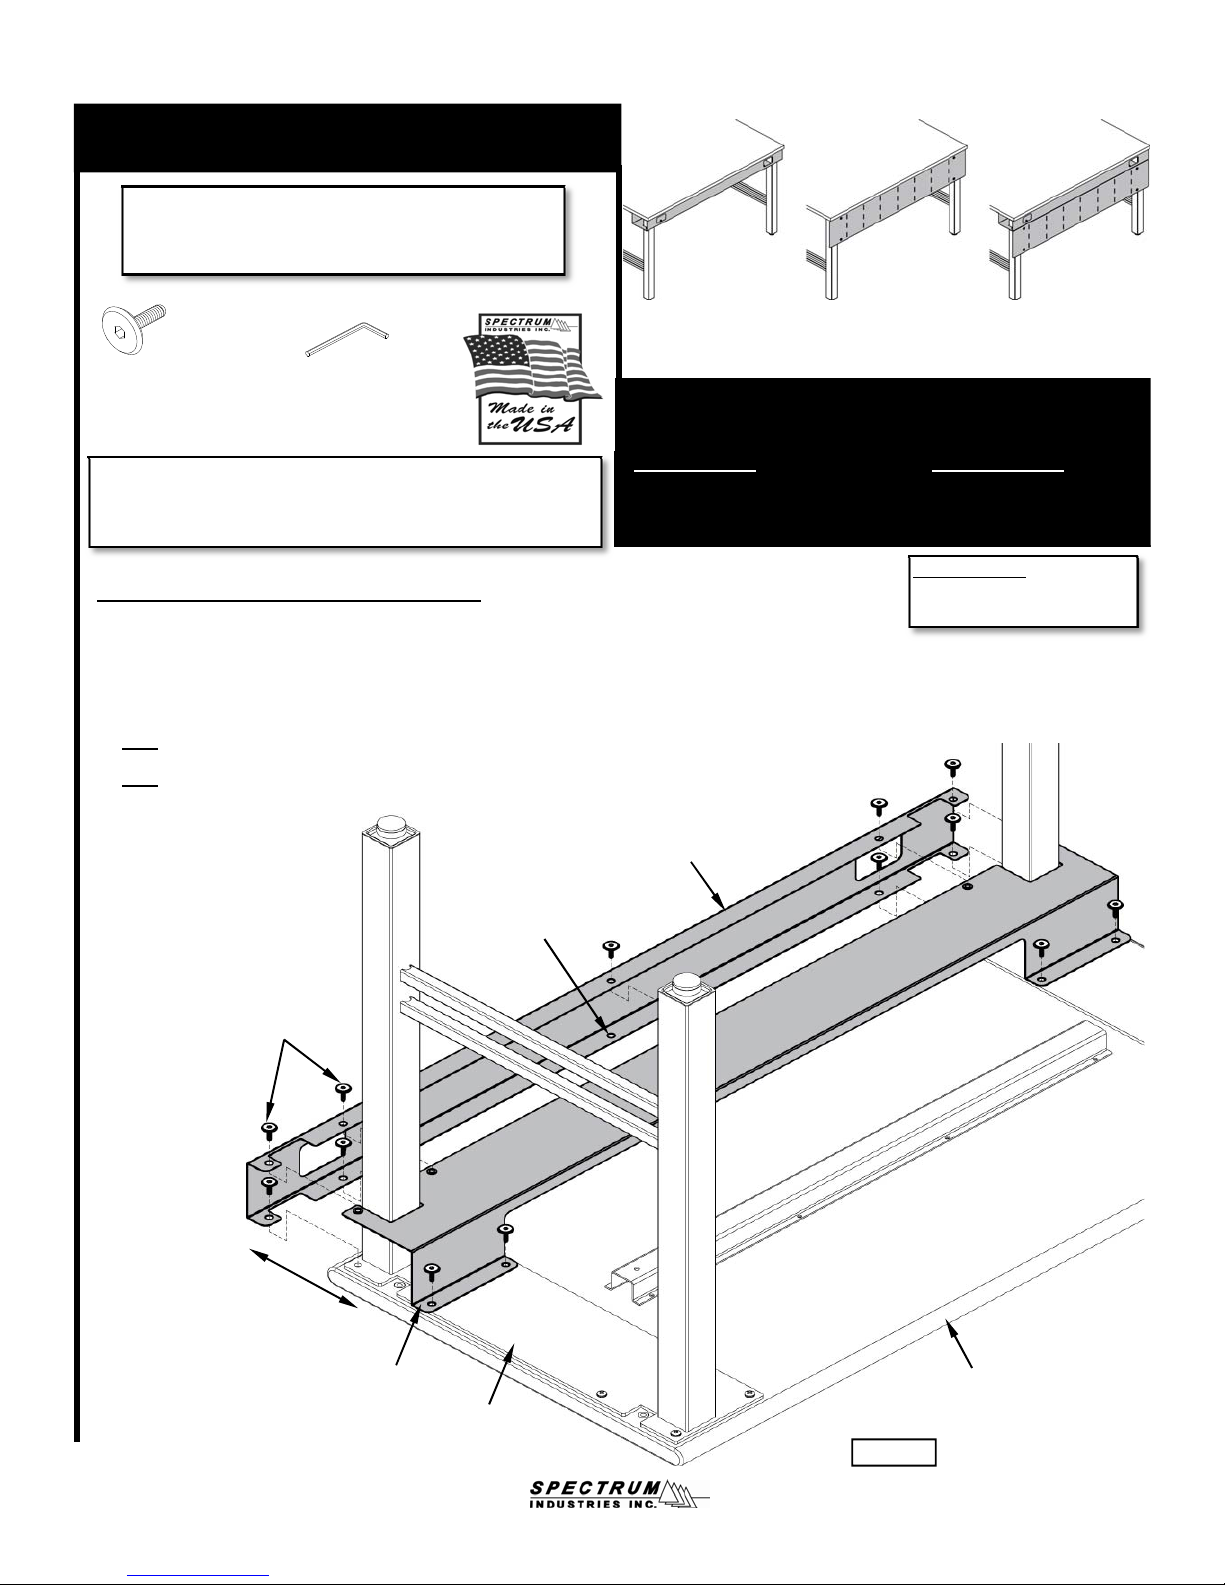
Attaching cord channel to table
A. Flip the table upside-down onto a non-abrasive surface.
B. Remove the 4 rear-most PHM screws from each leg mounting plate.
C. Attach the front half of the cord channel to the work surface (through the leg mounting plates)
as shown using 1/4-20 JC bolts and tighten securely. Figure 1.
D. Attach the rear half of the cord channel to the work surface (through the leg mounting plates)
as shown using 1/4-20 JC bolts and tighten securely.
E. Align the cord channel mounting holes from both halves, and attach together with JC bolts.
: The rear half will overlap the front, and the JC bolts will thread into the front half.
Note
Modesty Panel Cord Channel &
Modesty Panel
Modesty Panel
37253 - for 48" table
37254 - for 60" table
37255 - for 72" table
Tools Required:
Phillips screwdriver
4mm Hex wrench (included)
.
1/4-20 JC bolts
Front half of cord
channel
Leg mounting plate
Rear half of cord
channel
JC bolt not
necessary here
Wor k s ur fa c e
Figure 1
0106710X Page 1 of 3
Page 2
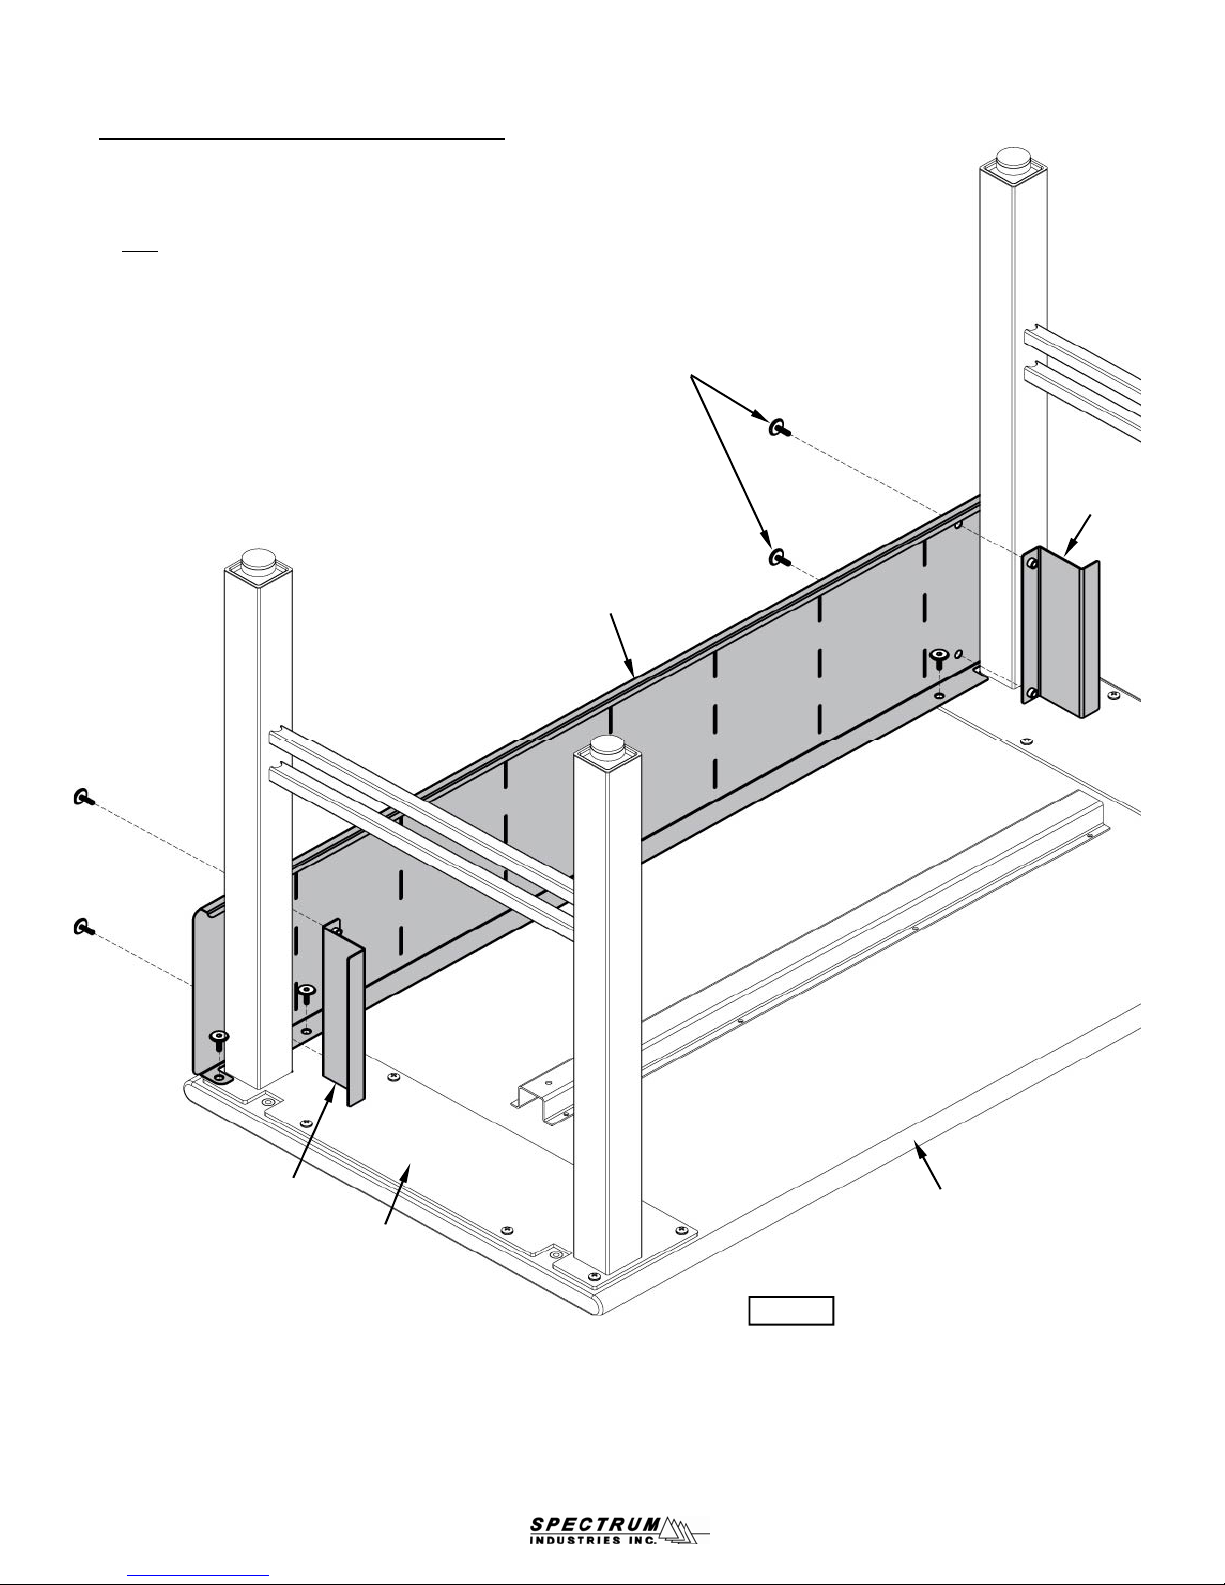
Attaching modesty panel to table
A. Flip the table upside-down onto a non-abrasive surface.
B. Remove the two rear-most PHM screws from each leg mounting plate.
C. Align the modesty panel mounting holes with the work surface inserts and attach (through the leg mounting
plates) with 1/4-20 JC bolts as shown. Figure 2.
: The hole in the center of the mounting flange does not require a JC bolt into the work surface.
Note
D. Orient the two modesty panel braces as shown, and secure with JC bolts.
E. Tighten all fasteners securely.
1/4-20 JC bolts
Modesty Panel
Modesty
Panel
Brace
Modesty Panel
Brace
Leg mounting plate
Work surface
Figure 2
0106710X Page 2 of 3
Page 3

Attaching cord channel with modesty panel to table
A. Flip the table upside-down onto a non-abrasive surface.
B. Remove the 2 rear-most PHM screws from each leg mounting plate.
C. Attach the front half of the cord channel to the work surface (through the leg mounting plates) as shown using
1/4-20 JC bolts and tighten securely. Figure 3.
D. Attach the rear half of the cord channel to the work surface (through the leg mounting plates) as shown using
1/4-20 JC bolts and tighten securely.
E. Align the modesty panel mounting holes with the cord channel mounting holes from both halves, and attach
with JC bolts. Note
attaching to both.
F. Orient the two modesty panel braces as shown, and secure with JC bolts.
G. Tighten all fasteners securely.
: The rear half of the cord channel will overlap the front half, with the modesty panel
1/4-20 JC bolts
Modesty Panel
Modesty
Panel Brace
Rear half of cord
channel
Modesty Panel
Brace
Front half of cord
channel
Work surface
Leg mounting plate
Figure 3
0106710X Page 3 of 3
 Loading...