

Page 1
Assembly Instructions
Assembly Instructions
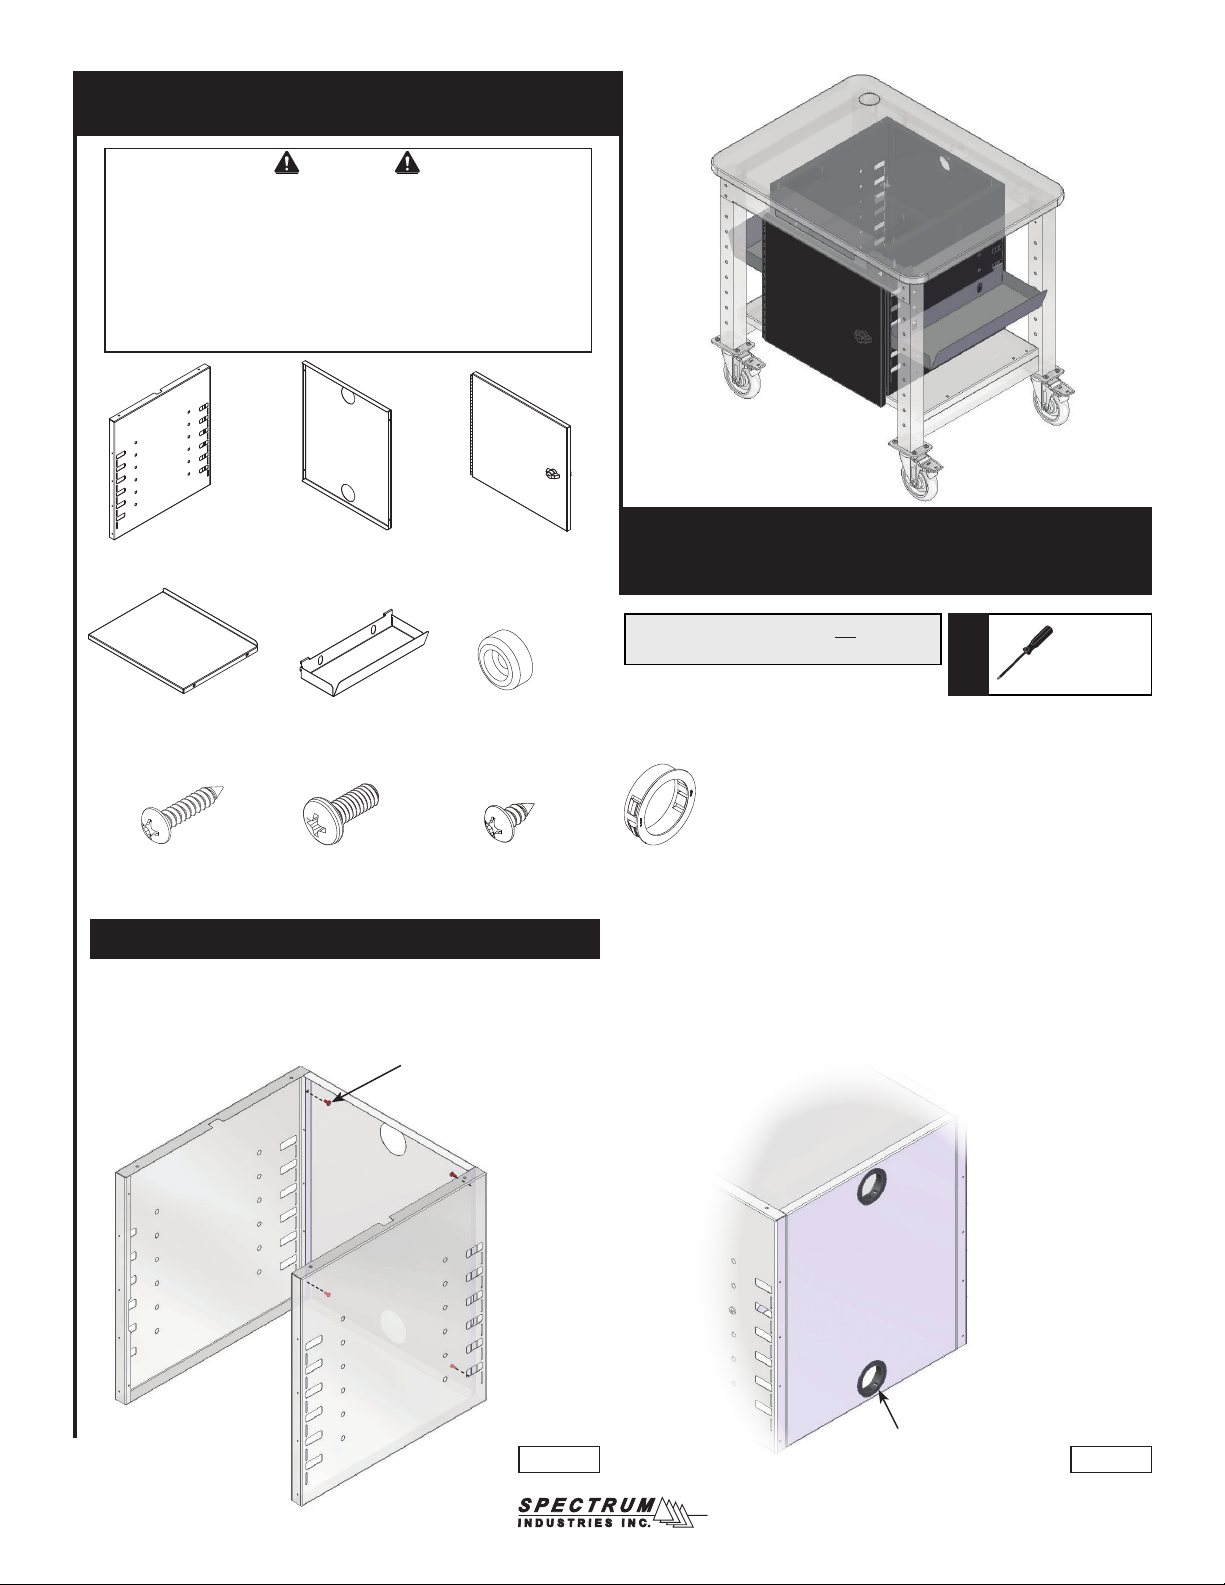
Important
Before you begin, read and comply with all safety and operating instructions,
and ensure all parts and correct quantities are included.
Any parts damaged during shipment must be reported within 5 days of receipt.
To report information regarding missing parts or damage, to purchase parts
or accessories, or if you have any questions, please contact us.
www.spectrumfurniture.com
800-235-1262, 715-723-6750
Thank you for purchasing Spectrum products!
(2) 013250
Side panel
(1) 0134837
Internal shelf
(4) 026073
#8 x 3/4” PHSM
(1) 0134807
Back panel
(2) 0135232
Side bin
(4) 026064
1/4-20 x 5/8” PHM
1. Assemble cabinet
1. Attach the side panels to the rear panel with
(4) #8 x 3/8” PHSM screws. Figure 1.1.
#8 x 3/8” PHSM screws
(4 required)
(1) 0135328
Door assembly
(2) 0119468
Recessed bumper
with washer
(14) 0190174
#8 x 3/8” PHSM
Locking Cabinet for 3D2GO™ Printer Cart
37135
Note: The Locking Cabinet is not compatible
with the 37136 Adjustable Shelf.
(2) 059984
2” Grommet
2. Install (2) 2” grommets in the back panel.
Figure 1.2.
Tools
Required
Phillips
Screwdriver
Side panel
Back panel
Side panel
Figure 1.1
2” Grommet
Figure 1.2
0190574 Page 1 of 2
Page 2
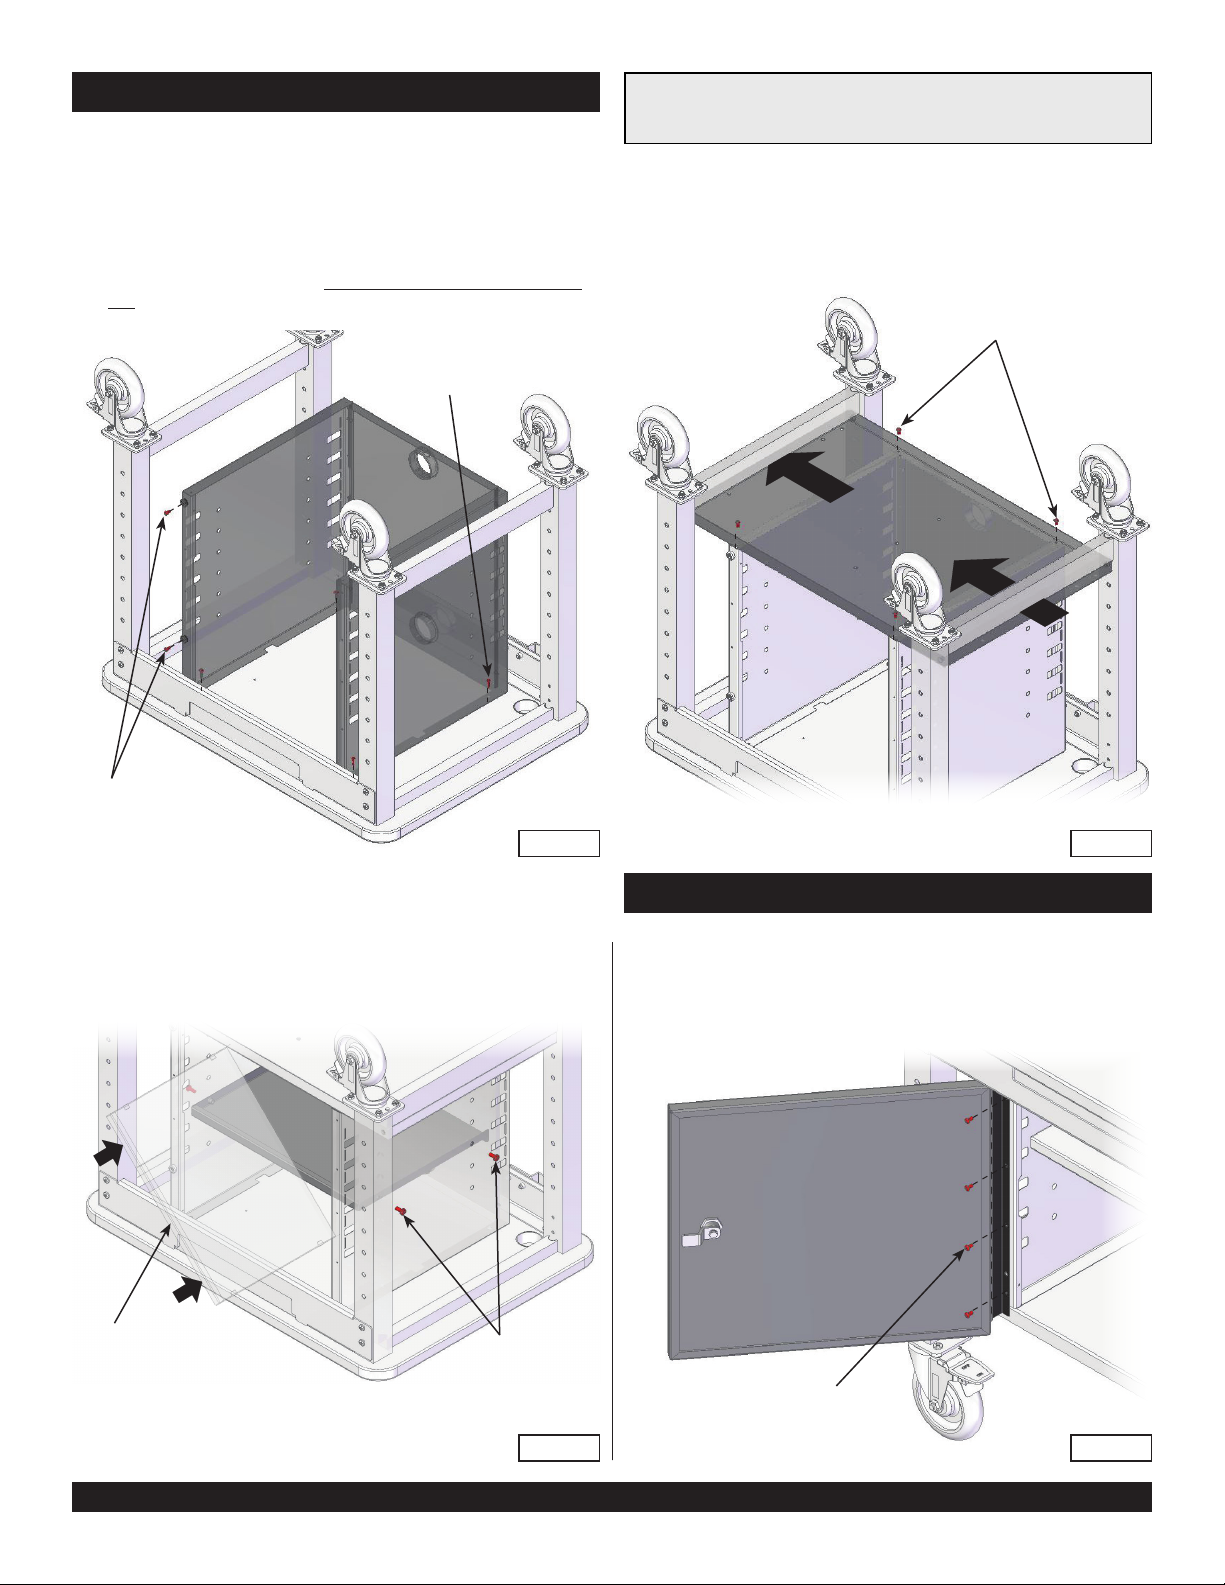
2. Install cabinet to cart
Note: The cabinet should be installed with the cart ipped upside-down. To
provide clearance to install the cabinet, the bottom panel should not be installed. If this panel is installed, please remove screws and set panel aside.
1. Carefully ip the cart upside-down onto a non-abrasive surface.
This may require two people.
2. Set the cabinet onto the worksurface underside and align with the
mounting holes. Figure 2.1.
3. Secure the cabinet to the worksurface with (4) #8 x 3/4” PHSM
screws and tighten securely.
4. Attach the (2) recessed bumpers to the side opposite the preferred hingeside as shown using (2) #8 x 3/8” PHSM screws.
#8 x 3/4” PHSM screw
(4 required)
5. Slide the bottom panel (bends facing wheels) into place and attach to
the legs with the previously removed screws. Figure 2.2.
6. Install (4) #8 x 3/8” PHSM screws into the cabinet to secure.
(4) #8 x 3/8” PHSM
Bottom panel
(2) Recessed bumper
with washer and
(2) #8 x 3/8” PHSM
7. Tip the internal adjustable shelf at 45° and insert into the cabinet. Figure 2.3.
Note: The at side of the shelf will face the bottom of the worksurface.
8. Align and attach the shelf at the desired height using (4) 1/4-20 x 5/8”
PHM screws.
Internal adjustable
shelf
Figure 2.1
1/4-20 x 5/8”
PHM screw
(4 required)
Figure 2.2
3. Install door
1. Carefully ip the cart back upright. Figure 3.
2. Align the door assembly hinge with the mounting holes in the cabinet
and attach with (4) #8 x 3/8” PHSM screws. Tighten securely.
3. Install external bins at desired height. (Not shown).
Door Assembly
(4) #8 x 3/8” PHSM
Figure 2.3
925 FIRST AVENUE, CHIPPEWA FALLS, WI 54729 / 800-235-1262 / 715-723-6750 / WWW.SPECTRUMFURNITURE.COM
© 2017 Spectrum Industries Inc., All rights reserved.
0190574 Page 2 of 2
Figure 3
 Loading...