

Page 1
Spectra 12000™ Library User Guide
This Guide
This guide describes the installation and operation of the Spectra 12000
automated tape library, including troubleshooting inform ation.
Related Publications
These publications are also available from Spectra Logic:
Release Notes: Spectra 12000, Spectra 64000 (90910852): provides
last-minute information about the library.
Developer Guide: Spectra 12000, Spectr a 64000 (90910850): provides
SCSI reference material and other reference information useful to
application developers.
Copyright © 2001 Spectra Logic Corporation. All Rights Reserved.
P.N. 90910889 Revision C
December 2001
Page 2

2 Spectra 12000 User Guide
Notices
Except as expressly stated herein, Spectra Logic Corporation makes available the
Spectra 12000 library and associated documentation on an “as is” basis, without
warranty of any kind, either expressed or implied, including but not limited to
the implied warranties of merchantability or fitness for a particular purpose. In
no event shall Spectra Logic be liable for any loss of profits, loss of business,
loss of use or data, interruption of business, or for indirect, special, incidental or
consequential damages of any kind, even if Spectra Logic has been advised of
the possibility of such damages arising from any defect or error.
Information furnished in this manual is believed to be accurate and reliable. However, no
responsibility is assumed by Spectra Logic for its use. Due to continuing research and development,
Spectra Logic may revise this publication from time to time without notice, and reserves t he right to
change any product specification at any time without notice.
Some products or services mentioned in this manual are provided by companies other than Spectra
Logic. Inquiries about one or more of these products or services should be sent directly to the
company in question. This manual refers to the following brand or product names, registered
trademarks, and trademarks that are listed according to their respective owners. These trademarks
may be registered in this country, other countries, or both.
Spectra Logic Corporation
Spectra Logic
Gator
®
TM
Spectra 12000™
Spectra 64000™
RackPac™
Exabyte Corporation Quantum Corporation
TM
Exabyte
EXB-210
Mammoth
TM
TM
Hewlett Packard
TM
HP
®
Red Hat
Microsoft
Microsoft®
Windows 2000
Windows NT
TM
DLT
Quantum
TM
TM
Seagate Corporation
TM
Seagate
TM
Silicon Graphics Incorporated
®
IRIX
Sun Microsystems
®
Java
®
Solaris
®
Sun
®
SunOS
X/Open Company, Ltd.,
licenses the following:
®
UNIX
License
You have acquired a Spectra 12000 Library that includes software owned or licensed by Spectra Logic from one or more
software licensors (“Software Suppliers”). Such software products, as well as associated media, printed materials and
“online” or electronic documentation (“SOFTWARE”) are protected by copyright laws and international copyright
treaties, as well as other intellectual property laws and treaties.
If you do not agree to this end user license agreement (“EULA”), do not use the Spectra 12000
Library; instead, promptly contact Spectra Logic for instructions on return of the Spectra 12000
Library for a refund. Any use of the SOFTWARE, including but not limited to use on the Spectra
12000 Library, will constitute your agreement to this eula (or ratification of any previous consent).
Page 3

Notices 3
Grant of License. The SOFTWARE is licensed on a non-exclusive basis, not sold. This EULA grants you
the followin g ri g h t s to th e S OFTWARE:
You may use the SOFTWARE only on the Spectra 12000 Library.
Not Fault Tolerant. The SOFTWARE is not fault tolerant. Spectra Logic has independently determined
how to use the SOFTWARE in the Spectra 12000 Library, and suppliers have relied upon Spectra
Logic to conduct sufficient testing to determine that the SOFTWARE is suitable for such use.
No Warranties For the SOFTWARE. Except as expressly stated herein, the SOFTWARE is provided “AS IS” and with all
faults. The en ti re ri sk as t o sa ti sf ac t ory qual i t y, per for man c e, ac cu r a cy, an d e ff ort ( inc l udi ng l ack of ne gl i ge nce ) i s w ith
you. Also, there is no war ranty against interference with your enjoyment of the SOFTWARE or against infringement. If
you have received any w arranties regarding the SOFTWARE, those warranties do not originate from,
and are not binding on SOFTWARE suppliers.
Note on Java Support. The SOFTWARE may contain support for programs written in Java. Java
technology is not fault tolerant and is not designed, manufactured, or intended for use of resale as
online control equipment in hazardous environments requiring fail-safe performance, such as in the
operation of nuclear facilities, aircraft navigation or communications systems, air traffic control,
direct life support machines, or weapons systems, in which the failure of Java technology could lead
directly to death, personal injury, or severe physical or environmental damage.
No Liability for Certain Damages. Except as prohibited by law, SOFTWARE suppliers shall have no liability for any
indirect, special, consequential or incidental damages arising from or in connection with the use or performance of the
SOFTWARE. This limitation shall apply even if any remedy fails of its essential purpose. In no event shall SOFTWARE
suppliers, individually, be liable for any amount in excess of U.S. two hundred fifty dollars (U.S. $250.00).
Limitations on Rever se Engineering, Decompilation, and Disassembly. You may not reve rse engineer,
decompile, or disassemble the SOFTWARE, except and only to the extent that such activity is
expressly permitted by applicable law notwithstanding this limitation.
Software transfer allowed with restrictions. You may permanently transfer rights under this EULA only as
part of a permanent sale or transfer of the Spectra 12000 Library, and only if the recipient agrees to
this EULA. If the SOFTWARE is an upgrade, any transfer must also include all prior versions of the
SOFTWARE.
Export restrictions. Export of the SOFTWARE from the United States is regulated by the Export
Administration Regulations (EAR, 15 CFR 730-744) of the U.S. Commerce Department, Bureau of
Export Administration. You agree to comply with the EAR in the export or re-export of the
SOFTWARE: (i) to an y country to which the U.S. has embargoed or restricted the export of goods or
services, which as May 1999 include, but are not necessarily limited to Cuba, Iran, Iraq, Libya, North
Korea, S udan , Syr ia , an d t he F e deral R epub li c o f Yugoslavia (includi ng Ser bia , b ut not Mont e neg ro ),
or to any national or any such country, wherever located, who intends to transit or transport the
SOFTWARE back to such country; (ii) to any person or entity who you know or have reason to know
will utilize the SOFTWARE or portion thereof in the design, development or production of nuclear,
chemical, or biological weapons; or (iii) to any person or entity who has been prohibited from
participating in U.S. export transactions by any federal agency of the U.S. government. You warrant
and represent that neither the BXA nor any other U.S. federal agency has suspended, revoked or
denied your export privileges.
For additional information see http://www.microsoft.com/exporting/
.
Page 4

4 Spectra 12000 User Guide
Warranty
The Spectra 12000 library is warranted for one year from date of shipment from the factory. This
warranty includes a Next Business Day (On-Site) service contract for sites loca ted in North America
and the European Union, and is explained as follows:
Access to a Spectra Logic support representative any business day (not including evenings,
weekends or holidays) from 8:00 a.m. to 5:00 p.m. Mountain Time
Service visit from a field service representative-upon verification that the unit purchased has
malfunctioned, Spectra Logic must be notified by 4:00 p.m. (local time) for a field service
representative to be dispatched that day for arrival the following business day.
Firmware Support Process
The support model for Spectra Logic firmware will be based on the father-grandfather scheme. It
will be implemented as follows:
Current Shipping Release Any issues found in the current release of firmware will be resolved either with a
new patch or a new release, depending on the types of changes needed. The current release will be
completely supported.
One Release Prior to the Current Release Suppor t w il l st ro ng ly recommend that customers us ing the prev iou s
release of firmware upgrade to the current release. If the customer is unwilling or unable to do this,
Spectra Logic will provide patches to the previous release.
Two Releases Prior to the Current Release Customers will be asked to upgrade to the current release. There must
be a compelling reason to avoid upgrading. Patches to firmware that is two releases prior to the
current release will be rare.
Warnings and Cautions
Tapes
Caution: Use only the data cartridges approved for use with
the drives in the Spectra 12000 li brary. Improper data
cartridges can cause damage to the drives, library and
cartridges.
Page 5

AC Power
Notices 5
Warning: Risk of electrical shock. Do not remove the library
cover. To remove AC power from the library, unplug the
power cord from the power inlet. There are no user
serviceable parts within the library.
Page 6

6 Spectra 12000 User Guide
Page 7

Contents 7
Notices . . . . . . . . . . . . . . . . . . . . . . . . . . . . . . . . . . . . . . . . . . . . . . . 2
License . . . . . . . . . . . . . . . . . . . . . . . . . . . . . . . . . . . . . . . . . . . . . . . 2
Warranty . . . . . . . . . . . . . . . . . . . . . . . . . . . . . . . . . . . . . . . . . . . . . . 4
Firmware Support Process . . . . . . . . . . . . . . . . . . . . . . . . . . . . 4
Warnings and Cautions . . . . . . . . . . . . . . . . . . . . . . . . . . . . . . . . . . . 4
Chapter 1. Introduction 15
Introduction . . . . . . . . . . . . . . . . . . . . . . . . . . . . . . . . . . . . . . . . . . . 16
About the Gator Architecture . . . . . . . . . . . . . . . . . . . . . . . . . . . . . . 17
Option Enablement . . . . . . . . . . . . . . . . . . . . . . . . . . . . . . . . . . . . . 18
A Tour of the Spectra 12000 Library . . . . . . . . . . . . . . . . . . . . . . . . . 19
The Library Controller Stylus . . . . . . . . . . . . . . . . . . . . . . . . . . . . . . 20
A Tour of the Library Controller . . . . . . . . . . . . . . . . . . . . . . . . . . . . 21
IP Address and User . . . . . . . . . . . . . . . . . . . . . . . . . . . . . . . 21
Exception Bar . . . . . . . . . . . . . . . . . . . . . . . . . . . . . . . . . . . . 22
Toolbars . . . . . . . . . . . . . . . . . . . . . . . . . . . . . . . . . . . . . . . . 22
General Toolbar . . . . . . . . . . . . . . . . . . . . . . . . . . . . . . . . . . 23
Configuration Toolbar . . . . . . . . . . . . . . . . . . . . . . . . . . . . . . 24
Maintenance Toolbar . . . . . . . . . . . . . . . . . . . . . . . . . . . . . . . 25
Security Toolbar . . . . . . . . . . . . . . . . . . . . . . . . . . . . . . . . . . 26
Getting Started . . . . . . . . . . . . . . . . . . . . . . . . . . . . . . . . . . . . . . . . . 27
Page 8

8 Spectra 12000 User Guide
Chapter 2. Installing the Spectra 12000 Library 29
Preparing a Controlled Environment . . . . . . . . . . . . . . . . . . . . . . . . . 30
Media and Hardware Environment . . . . . . . . . . . . . . . . . . . . 30
Air Quality . . . . . . . . . . . . . . . . . . . . . . . . . . . . . . . . . . . . . . 30
Unpacking the Spectra 12000 Library . . . . . . . . . . . . . . . . . . . . . . . . 31
Connecting the SCSI Cables and Terminators . . . . . . . . . . . . . . . . . . 32
Connecting the Fibre Channel Cables . . . . . . . . . . . . . . . . . . . . . . . . 33
Connecting the Ethernet Cables . . . . . . . . . . . . . . . . . . . . . . . . . . . . 35
Turning the Library On and Off . . . . . . . . . . . . . . . . . . . . . . . . . . . . 36
Chapter 3. Using Security 37
Setting Up Security . . . . . . . . . . . . . . . . . . . . . . . . . . . . . . . . . . . . . . 37
To Set Up a User . . . . . . . . . . . . . . . . . . . . . . . . . . . . . . . . . . 37
To Delete a User . . . . . . . . . . . . . . . . . . . . . . . . . . . . . . . . . . 39
Chapter 4. Partitioning the Spectra 12000 Library 41
Displaying the Configuration Toolbar . . . . . . . . . . . . . . . . . . . . . . . . 42
Partitioning the Library . . . . . . . . . . . . . . . . . . . . . . . . . . . . . . . . . . 43
Chapter 5. Configuring the Spectra 12000 S-QIP 47
Displaying the Configuration Toolbar . . . . . . . . . . . . . . . . . . . . . . . . 48
Configuring S-QIPs . . . . . . . . . . . . . . . . . . . . . . . . . . . . . . . . . . . . . 49
S-QIP Configure Controller Screen . . . . . . . . . . . . . . . . . . . . . . . . . . 51
Page 9

Contents 9
Chapter 6. Configuring the Spectra 12000 Library F-QIP 55
Displaying the Configuration Toolbar . . . . . . . . . . . . . . . . . . . . . . . . 56
Configuring F-QIPs . . . . . . . . . . . . . . . . . . . . . . . . . . . . . . . . . . . . . 56
F-QIP Configure Controller Screen . . . . . . . . . . . . . . . . . . . . . . . . . . 58
About Serverless Backup . . . . . . . . . . . . . . . . . . . . . . . . . . . . . . . . . 61
Configuring the F-QIP for Serverless Backup . . . . . . . . . . . . . . . . . . 61
Enabling Serverless Backup . . . . . . . . . . . . . . . . . . . . . . . . . . 62
Serverless Backup F-QIP Setup . . . . . . . . . . . . . . . . . . . . . . . 62
Chapter 7. Configuring the Spectra 12000 E-QIP 65
About TAOS™ . . . . . . . . . . . . . . . . . . . . . . . . . . . . . . . . . . . . . . . . . 66
TAOS ITP . . . . . . . . . . . . . . . . . . . . . . . . . . . . . . . . . . . . . . . 66
NDMP Enabled by TAOS . . . . . . . . . . . . . . . . . . . . . . . . . . . . 66
Sharing Tape Devices . . . . . . . . . . . . . . . . . . . . . . . . . . . . . . 67
TAOS User Interfaces . . . . . . . . . . . . . . . . . . . . . . . . . . . . . . . . . . . . 67
Connecting to the Serial Port . . . . . . . . . . . . . . . . . . . . . . . . . . . . . . 68
Setting Up the E-QIP . . . . . . . . . . . . . . . . . . . . . . . . . . . . . . . . . . . . 69
Password Configuration . . . . . . . . . . . . . . . . . . . . . . . . . . . . 69
Ethernet Configuration . . . . . . . . . . . . . . . . . . . . . . . . . . . . . 70
Setting Up TAOS ITP . . . . . . . . . . . . . . . . . . . . . . . . . . . . . . . . . . . . 72
TAOS ITP Configuration . . . . . . . . . . . . . . . . . . . . . . . . . . . . 72
TAOS ITP Driver Installation . . . . . . . . . . . . . . . . . . . . . . . . . 73
Setting Up NDMP Enabled by TAOS . . . . . . . . . . . . . . . . . . . . . . . . 100
Enabling TAOS NDMP . . . . . . . . . . . . . . . . . . . . . . . . . . . . . 100
Configuring NDMP Enabled by TAOS . . . . . . . . . . . . . . . . . 101
Page 10

10 Spectra 12000 User Guide
Chapter 8. Configuring the Drives 107
Configuring SCSI IDs, Emulation and Dip Switch Settings . . . . . . . . 108
Chapter 9. Using the Spectra 12000 Library 113
Checking Library Status . . . . . . . . . . . . . . . . . . . . . . . . . . . . . . . . . 114
Checking Robotics . . . . . . . . . . . . . . . . . . . . . . . . . . . . . . . . . . . . . 115
To Enable Keys . . . . . . . . . . . . . . . . . . . . . . . . . . . . . . . . . . 115
To Set IP Addresses . . . . . . . . . . . . . . . . . . . . . . . . . . . . . . 116
Checking Inventory . . . . . . . . . . . . . . . . . . . . . . . . . . . . . . . . . . . . 116
Inserting and Ejecting Cartridges . . . . . . . . . . . . . . . . . . . . . 116
Insert New Media . . . . . . . . . . . . . . . . . . . . . . . . . . . . . . . . 117
Eject Media . . . . . . . . . . . . . . . . . . . . . . . . . . . . . . . . . . . . . 118
Checking Drives . . . . . . . . . . . . . . . . . . . . . . . . . . . . . . . . . . . . . . . 121
Checking Drive Status . . . . . . . . . . . . . . . . . . . . . . . . . . . . . 121
The Maintenance Toolbar . . . . . . . . . . . . . . . . . . . . . . . . . . . . . . . . 122
Checking Diagnostics . . . . . . . . . . . . . . . . . . . . . . . . . . . . . . . . . . . 123
Updating Firmware . . . . . . . . . . . . . . . . . . . . . . . . . . . . . . . . . . . . 123
Accessing Firmware from a Remote Server . . . . . . . . . . . . . . 125
Accessing Firmware from an Alternate Location . . . . . . . . . . 125
Reset Picker Parameters . . . . . . . . . . . . . . . . . . . . . . . . . . . 127
Viewing the F-QIP Configuration . . . . . . . . . . . . . . . . . . . . . . . . . . 129
Checking Resources in Use . . . . . . . . . . . . . . . . . . . . . . . . . . . . . . . 130
Deleting a Partition Configuration . . . . . . . . . . . . . . . . . . . . . . . . . 132
Page 11

Contents 11
Chapter 10. Using the Drive 133
Bar Code Labels . . . . . . . . . . . . . . . . . . . . . . . . . . . . . . . . . . . . . . . 134
Using AIT Data Cartridges . . . . . . . . . . . . . . . . . . . . . . . . . . . . . . . 135
Write-Protecting and Recording . . . . . . . . . . . . . . . . . . . . . . 136
Storing Cartridges Outside the Library . . . . . . . . . . . . . . . . . 137
Caring for Data Cartridges . . . . . . . . . . . . . . . . . . . . . . . . . . . . . . . 137
Cleaning the AIT Drive Heads . . . . . . . . . . . . . . . . . . . . . . . . . . . . 138
Chapter 11. Maintaining the Spectra 12000 Library 141
Changing the Spectra 12000 Library Air Filters . . . . . . . . . . . . . . . . 142
Adding Drives . . . . . . . . . . . . . . . . . . . . . . . . . . . . . . . . . . . . . . . . 144
Adding QIPs . . . . . . . . . . . . . . . . . . . . . . . . . . . . . . . . . . . . . . . . . 149
Troubleshooting the Spectra 12000 Library . . . . . . . . . . . . . . . . . . . 151
Troubleshooting Library Initialization . . . . . . . . . . . . . . . . . 151
Troubleshooting SCSI Problems . . . . . . . . . . . . . . . . . . . . . . 151
Troubleshooting Fibre Channel Device Problems . . . . . . . . . 152
Purchasing Additional Accessories . . . . . . . . . . . . . . . . . . . . . . . . . 153
Purchasing Custom Bar Code Label Sequences . . . . . . . . . . . . . . . . 154
Purchasing CoD . . . . . . . . . . . . . . . . . . . . . . . . . . . . . . . . . . . . . . . 154
To enable CoD . . . . . . . . . . . . . . . . . . . . . . . . . . . . . . . . . . 155
Page 12

12 Spectra 12000 User Guide
Appendix A. Fibre Channel Cable Requirements 157
Fibre Channel Cable Requirements . . . . . . . . . . . . . . . . . . . . . . . . . 157
Appendix B. SCSI Cable and Terminator
Requirements 159
SCSI Cable Requirements . . . . . . . . . . . . . . . . . . . . . . . . . . . . . . . . 159
SCSI Terminator Requirements . . . . . . . . . . . . . . . . . . . . . . . . . . . . 160
Appendix C. Specifications 161
Sony AIT Tape Specifications . . . . . . . . . . . . . . . . . . . . . . . . . . . . . . . . . . . .161
Sony AIT-2 Tape Drive Specifications . . . . . . . . . . . . . . . . . . . . . . . 162
Sony AIT-3 Tape Drive Specifications . . . . . . . . . . . . . . . . . . . . . . . 163
Power Requirements . . . . . . . . . . . . . . . . . . . . . . . . . . . . . . . . . . . 164
Spectra 12000 Library . . . . . . . . . . . . . . . . . . . . . . . . . . . . . 164
Operating Environment Limits . . . . . . . . . . . . . . . . . . . . . . . . . . . . 165
Acoustic Noise Limits . . . . . . . . . . . . . . . . . . . . . . . . . . . . . 165
Shock and Vibration Specifications . . . . . . . . . . . . . . . . . . . 166
Appendix D. Regulatory and Safety Standards 167
Safety Standards . . . . . . . . . . . . . . . . . . . . . . . . . . . . . . . . . 167
FCC Statement . . . . . . . . . . . . . . . . . . . . . . . . . . . . . . . . . . . . . . . . 167
EU Declaration of Conformity . . . . . . . . . . . . . . . . . . . . . . . . . . . . . 168
Japan VCCI Class A Statement . . . . . . . . . . . . . . . . . . . . . . . . . . . . 169
Taiwan BSMI Statement . . . . . . . . . . . . . . . . . . . . . . . . . . . . . . . . . 169
Page 13

Contents 13
Appendix E. Using the TAOS ITP Control Panel to View Settings 171
Opening the TAOS ITP Configuration Control Panel . . . . . . 171
Device Discovery . . . . . . . . . . . . . . . . . . . . . . . . . . . . . . . . 172
Installed Devices . . . . . . . . . . . . . . . . . . . . . . . . . . . . . . . . . 172
Ethernet . . . . . . . . . . . . . . . . . . . . . . . . . . . . . . . . . . . . . . . 172
Password . . . . . . . . . . . . . . . . . . . . . . . . . . . . . . . . . . . . . . 172
Control . . . . . . . . . . . . . . . . . . . . . . . . . . . . . . . . . . . . . . . . 172
Appendix F. Using the Serial Port Interface 173
Password Configuration . . . . . . . . . . . . . . . . . . . . . . . . . . . 175
Fibre Configuration . . . . . . . . . . . . . . . . . . . . . . . . . . . . . . . 176
Ethernet Configuration . . . . . . . . . . . . . . . . . . . . . . . . . . . . 177
TAOS ITP Configuration . . . . . . . . . . . . . . . . . . . . . . . . . . . 178
TAOS NDMP Configuration . . . . . . . . . . . . . . . . . . . . . . . . . 179
Enable Options . . . . . . . . . . . . . . . . . . . . . . . . . . . . . . . . . . 179
Save Changes . . . . . . . . . . . . . . . . . . . . . . . . . . . . . . . . . . . 180
Discard Changes . . . . . . . . . . . . . . . . . . . . . . . . . . . . . . . . . 180
Reboot . . . . . . . . . . . . . . . . . . . . . . . . . . . . . . . . . . . . . . . . 180
Help . . . . . . . . . . . . . . . . . . . . . . . . . . . . . . . . . . . . . . . . . . 180
Exit . . . . . . . . . . . . . . . . . . . . . . . . . . . . . . . . . . . . . . . . . . . 180
Glossary of Terms 181
Index 187
Page 14

14 Spectra 12000 User Guide
Page 15

1Introduction
This guide is written for Spectra 12000 library users and reviews the
library’s installation and use. This chapter covers:
Introduction
About the Gator Architecture
Option Enablement
A Tour of the Spectra 12000 Library
A Tour of the Library Controller
Getting Started
Page 16

16 Spectra 12000 User Guide
Introduction
The Spectra 12000 library provides a combination of high reliability,
speed, large capacity, ease of use, and built-in redundancy to minimize
or eliminate downtime. The Spectra 12000 library’s features include:
Hot swappable tape drives—you can easily switch drives without
tools and without interrupting other backups.
Multiple logical libraries partitioned within a single physical library
Color touchscreen interface (Library Controller).
A single Spectra 12000 library can communicate via Fibre Channel,
SCSI, Ethernet or any combination of the three.
Scalable to eight drives an d 120 cartridge s .
Support for AIT drives.
High reliability-system redundancy allows the library to continue
operating while it is being serviced.
Import and export tapes either individually or in removable cartridge
packs of 15.
Page 17

Chapter 1. Introduction 17
About the Gator Architecture
Both the Spectra 12000 and Spectra 64000 libraries utilize the Gator™
architecture for robotic tape libraries developed by Spectra Logic. Gator
architecture in the Spectra 12000 library can be configured with 60 to
120 cartridges and from two to eight tape dr ives. Gator architecture in
the Spectra 64000 library can be configured with up to 640 cartridges
and 32 tape drives in a single rack. Gator architecture is based on hot
swappable Quad Interface Processor (QIP) boards (S-QIP for HVD SCSI,
L-QIP for LVD SCSI, F-QIP for Fibre Channel and E-QIP for Ethernet).
The heart of Gator architecture is a counter-balanced rack-and-pinion
picker mechanism that can perform more than 600 tape handling
operations per hou r. Ga tor architecture includes Shared Library
Services™ that allows users to allocate the library’s resources across
various platforms, software applications and tape drives. Gator
architecture off ers a color t ouchscreen user interface t hat provi des access
to status information, configuration parameters, and diagnostics.
Page 18

18 Spectra 12000 User Guide
Option Enablement
Spectra Logic has added a new feature to the Spectra 1200 0 library called
Option Enablement. Option Enablement allows the user to add several
functions to their library:
CoD™ is a capacity on demand system that allows you to add library
storage capacity in increments as small as 15 slots, virtually
instantaneously . Slots are k ey a ctivated and can be purchased in adv ance
or as needed. CoD allows you to efficiently manage your data growth,
while eliminating the need for long-range forecasting and expensive
retrofits.
NDMP Enabled by TAOS in your library provides a simple and effective
storage networking solution for the network attached storage (NAS) filer
environment. In this solution, the NDM P (N etwork Data Management
Protocol) feature enables shared backup and restore between multiple
filers via your library, which can also be attached directly to the network.
The need for dedicated hardware and shared storage software is
eliminated, reducing risk and complexity, and lowering the total cost of
ownership.
Serverless Backup Enabl ed by T AOS in your library shifts management of the
backup and restore process from the server to the library. With this
feature enabled, the library is able to communicate directly with other
storage devices and can backup data from a disk device directly to tape.
The server is no longer needed to manage the data input/output (I/O),
therefore freeing up the central processing unit for other tasks.
Additionally, now that there is one less device/step in the process ,
backup and restore performance is improved.
Remote Library Controller (RLC) allows for convenient, remote (off-site)
access to your library. The Remote Library Controller can manage all
library actions, including moving tapes, creating par t itions, ma na g ing
library inventory, monitoring drive and library status and performing
configurations. In addition, feature modules, such as CoD and TAOSenabled NDMP and Serverless Backup can be activated with the Remote
Library Controller.
T o add any of these functions to your library contact Spectra Logic
Technical Support at (800) 227-4637. You will n eed to know the serial
number of your device (as display ed in the Serial # f ield after tapping the
Robotics bar) when you call. Or, go to the Spectra Logic Web site:
http://www.spectralogic.com, for ordering information.
Page 19

Chapter 1. Introduction 19
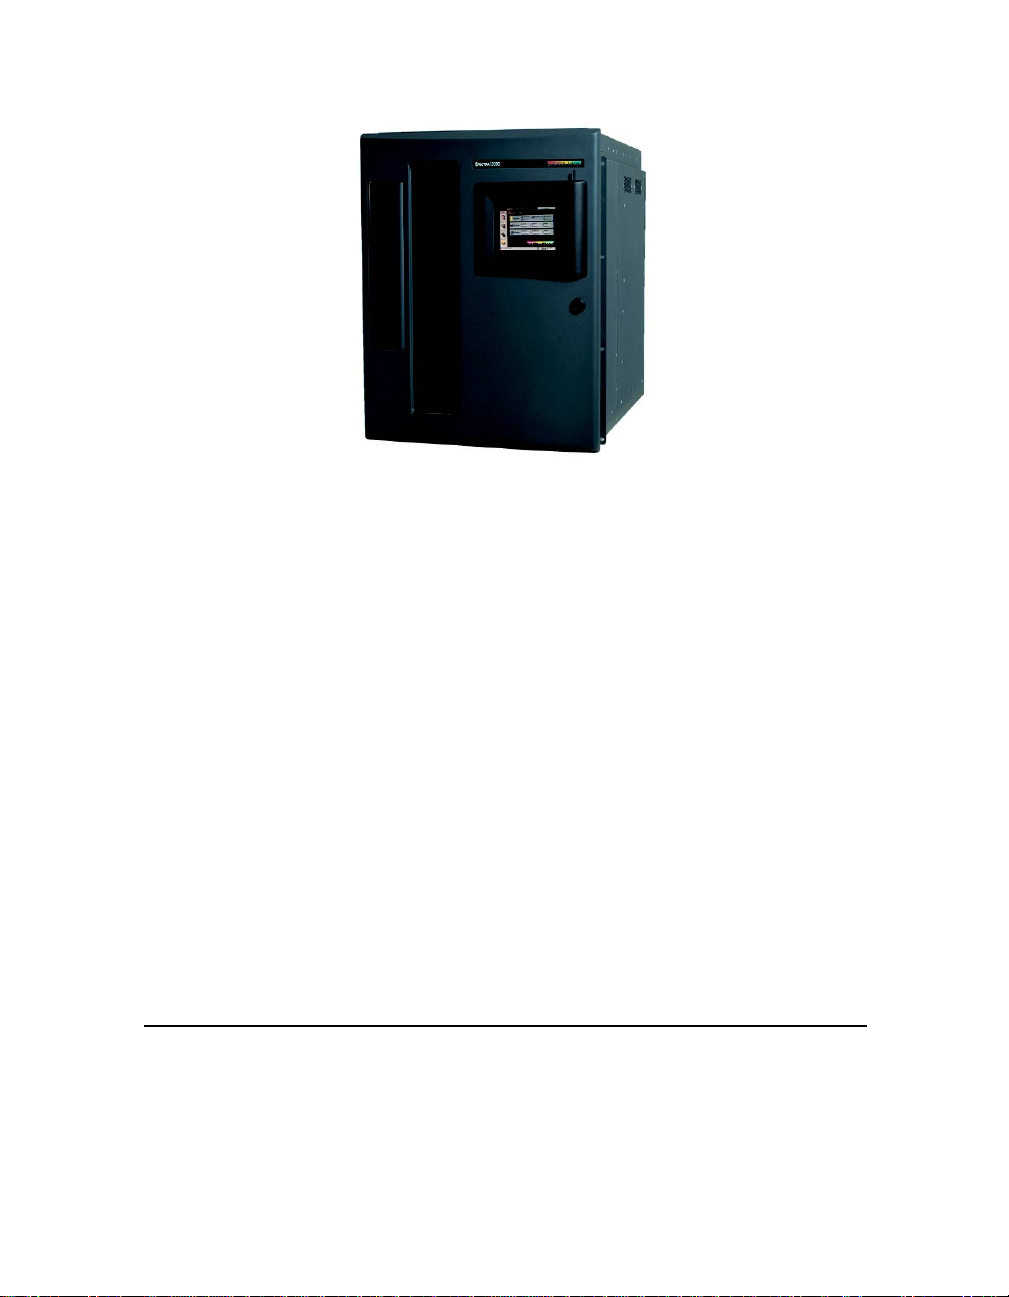
A Tour of the Spectra 12000 Library
Library
Entry/Exit
Port
Figure 1-1 Spectra 12000 library, front view.
The illustration of the front of the Spect ra 12000 library (Figure 1-1)
shows the Entry/Exit (E/E) ports, through which you can insert and
remove cartridges individually or using cartridge packs. Each pack holds
up to 15 cartridges at a time. The Library Controller (also called the
Gator Control Panel) simplifies the library’s use and main tenance.
Controller
Page 20

20 Spectra 12000 User Guide
The Library Controller Stylus
Figure 1-2 The Library Controller stylus.
Stylus Use the stylus to navigate the Library Controller. Touch the screen
with the stylus to make a selection. The stylus is designed for safe use
with the Library Controller touchscreen.
Store the stylus in the slot located on the top right -hand corner of the
Library Controller.
Caution: Do not use metal objects to navigate the Library
Controller. Metal objects may damage the screen.
Page 21
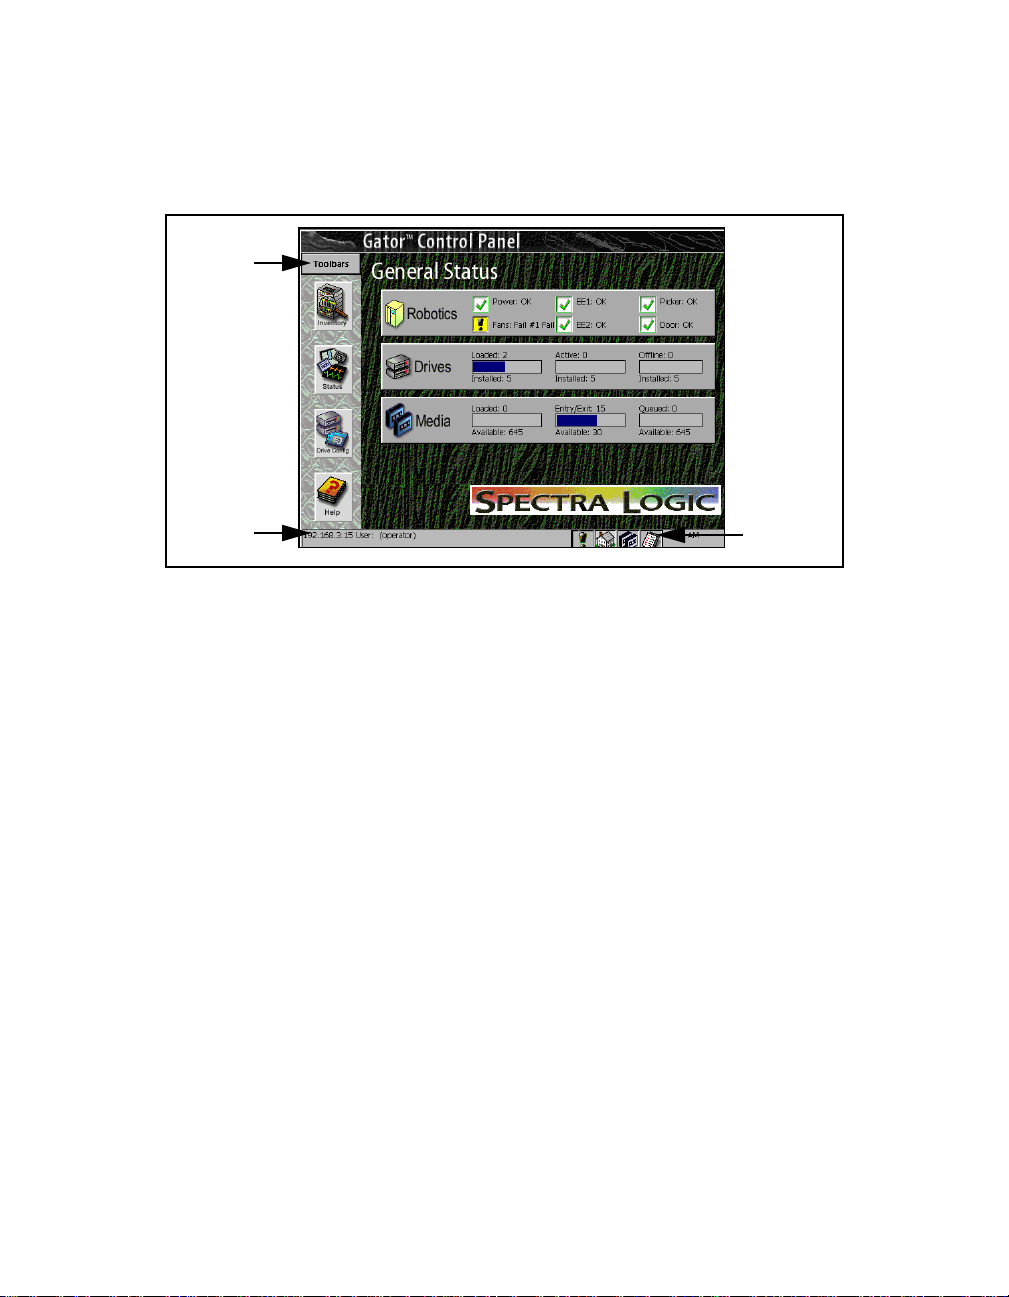
A Tour of the Library Controller
Toolbars
Chapter 1. Introduction 21
IP Address and User
Figure 1-3 General Status screen.
Exception
Bar
IP Address and User
The IP Address and User at the bottom of the Library Controller displays
the library’s IP address and the current user of the library.
Page 22
22 Spectra 12000 User Guide
Exception Bar
The Exception Bar contains the Except ion, Home, Inventory and Trace
Log icons.
Exception
Figure 1-4 Library Controller Exception Bar.
Exception The Exception icon, a exclamation point, will appear with a
yellow background only if the library experiences a problem. Tap the
icon to bring up a window where you can view the problem.
Home Tap to return to the General Status screen.
Inventory Tap to go to the Inventory screen.
Home
Inventory
Trace Log
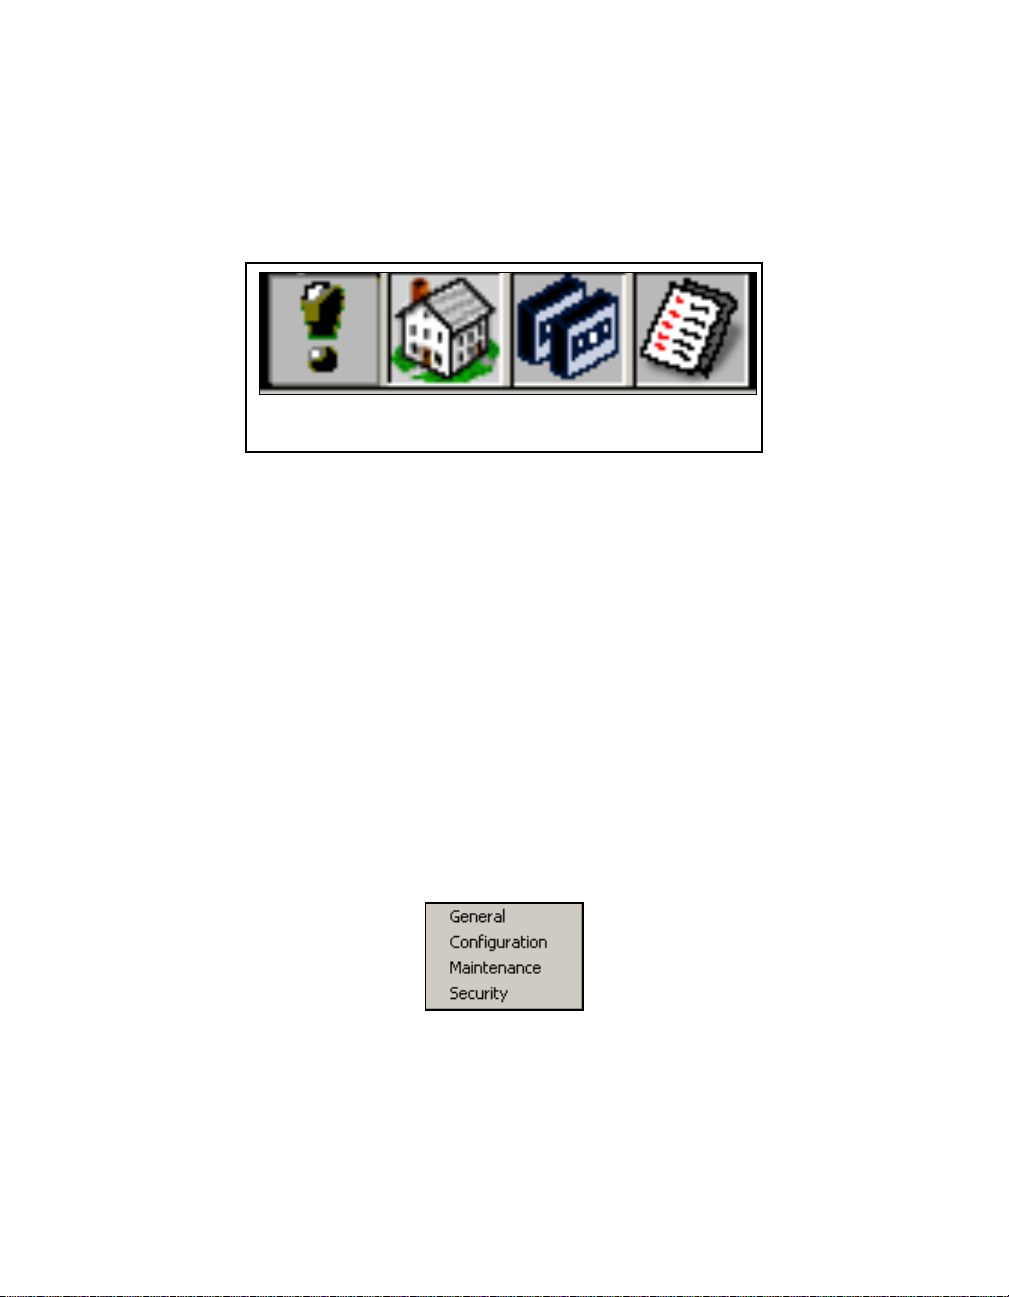
Toolbars
The Library Controller has multiple toolbars; the General toolbar displa ys
by default. To see the list of other toolbars, and to select one, tap
Toolbars, then select from the pull-down menu.
Figure 1-5 Toolbars
pull-down menu.
Page 23

General To olbar
The General toolbar displays commonly used options,
including:
Inventory Shows transport locations: Use this to move tapes
between slots and drives. Select the Inventory icon to
access logical libraries and slot inventory information.
Status Shows information about robotics, drives and media
elements.
Drive Config Shows drive configuration information, and lets
you configure drives. Drive information includes the
emulation of th e d r ive, th e fi rmware level, and the SCS I
ID assigned to each drive. Use th is screen to remove
drives or replace them in case of drive problems.
Help This button displays online help for the Library
Controller.
Chapter 1. Introduction 23
Figure 1-6
General
toolbar.
Page 24
24 Spectra 12000 User Guide
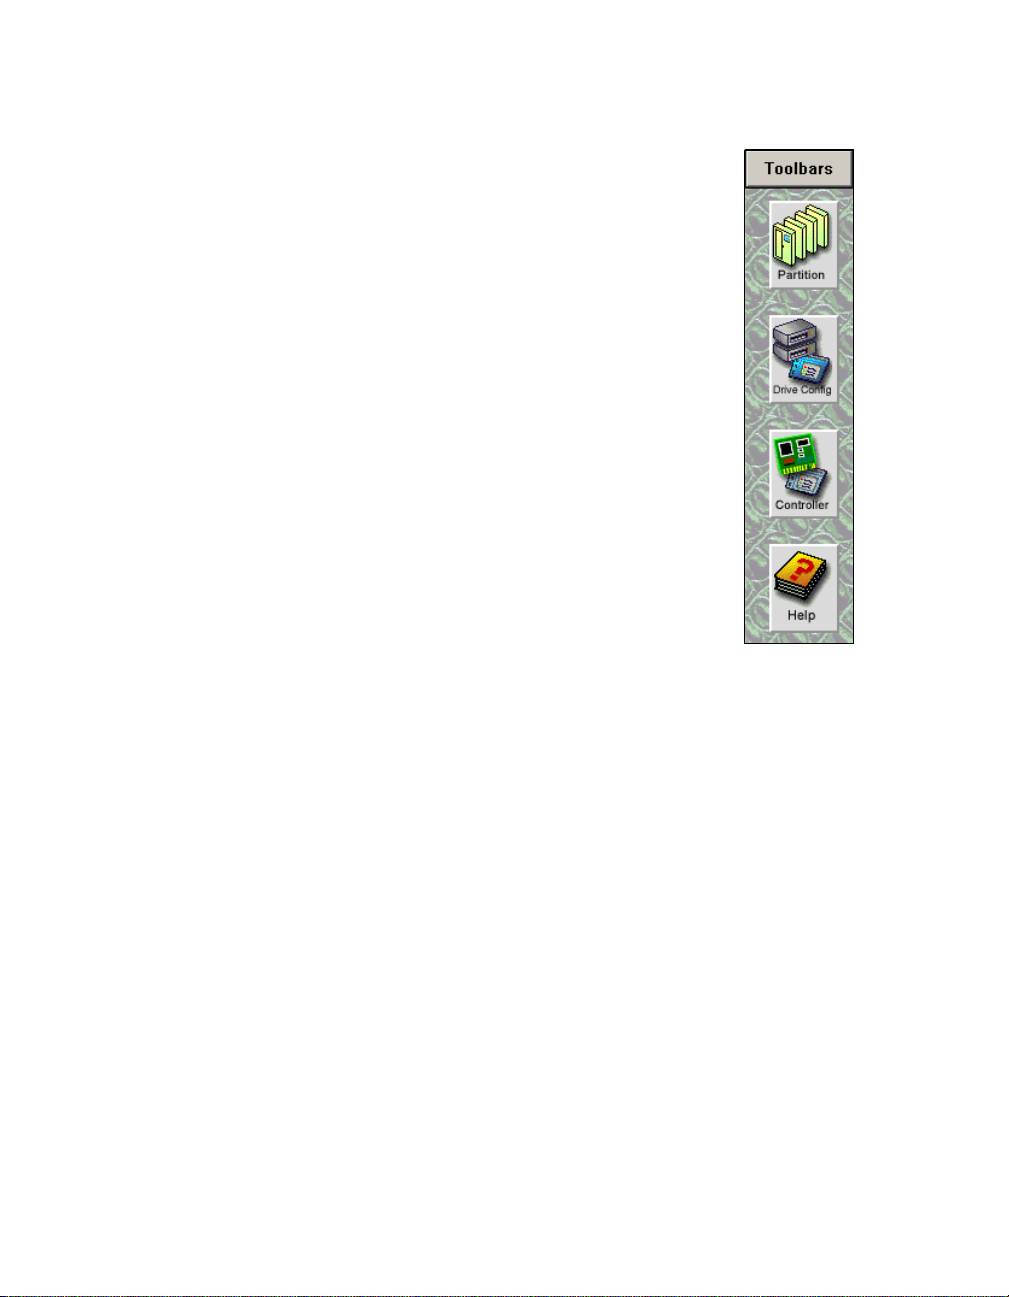
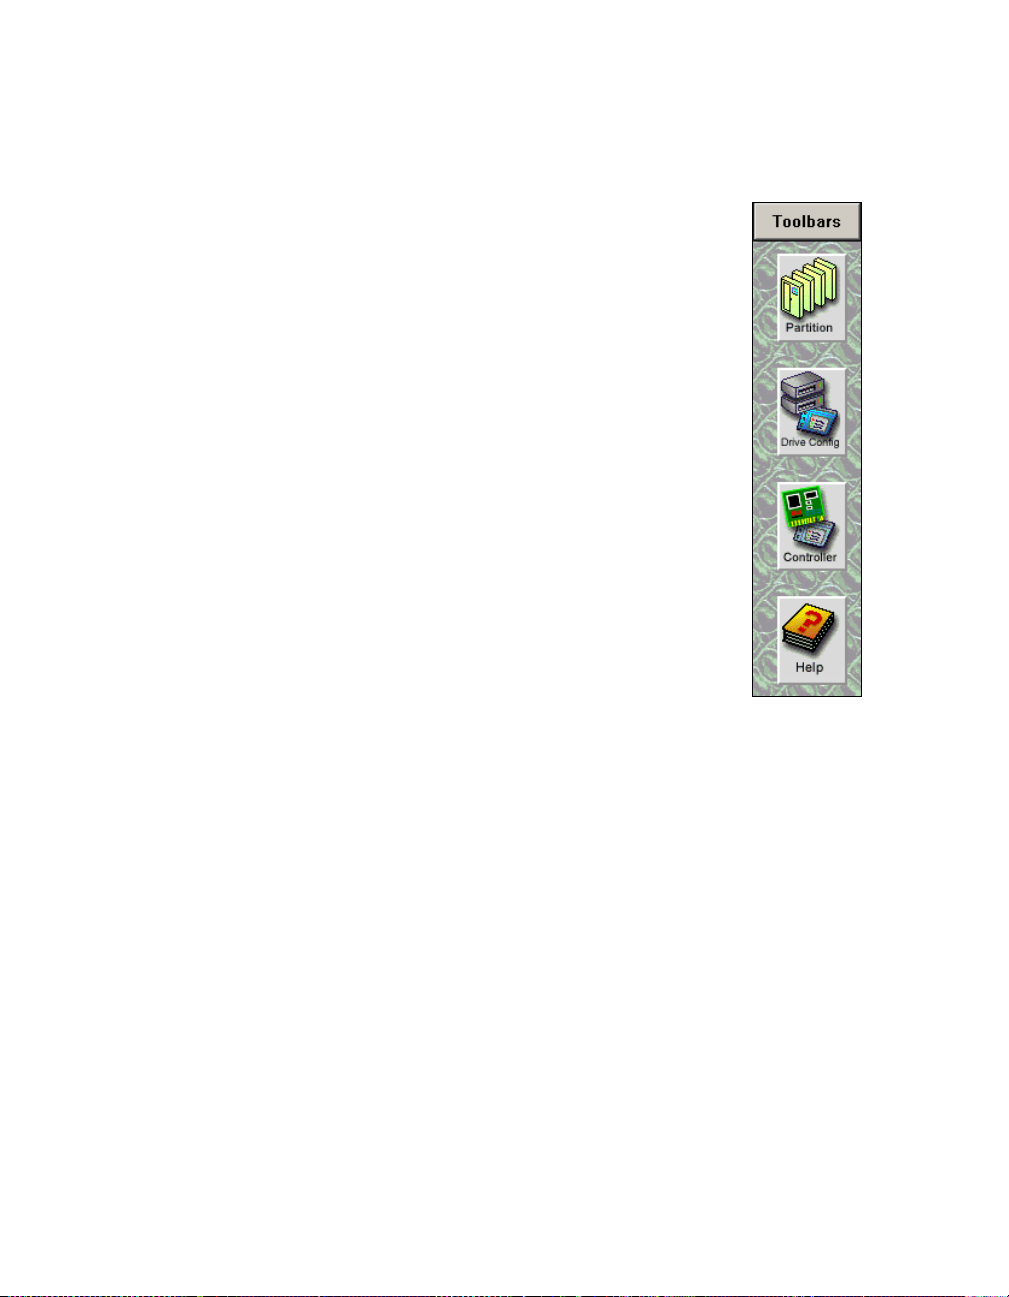
Configuration Toolbar
Use the Configuration toolbar to conf ig ure the lib r ary:
Partition Shows partition status. This lets you set up and
alter library partitions, assign drives to each partition,
assign the number of slots, and name the partition.
Drive Config Shows drive configuration information, and lets
you configure drives. Drive information includes the
emulation of th e d r ive, th e fi rmware level, and the SCS I
ID assigned to each drive. Use this to rem ove drives or
replace them in case of drive problems.
Contro l ler This shows QIP information and lets you
configure controllers.
Help This button displays online help for the Library
Controller.
Figure 1-7
Configuration
toolbar.
Page 25
Chapter 1. Introduction 25
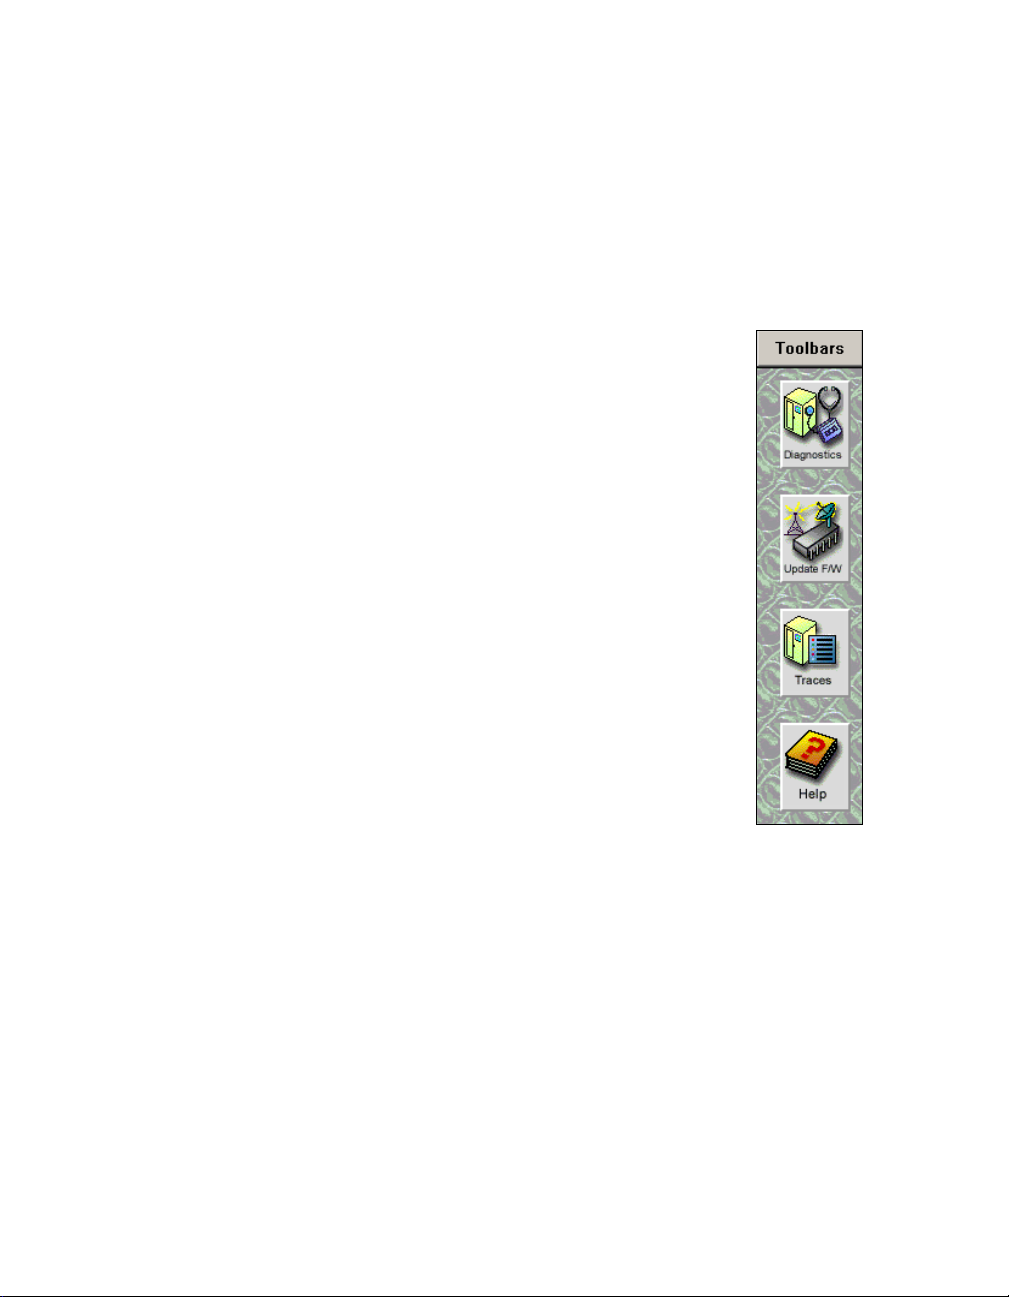
Maintenance Toolbar
Use the Maintenance toolbar to handle various library upkeep tasks,
including:
Diagnostics Field service engineers use diagnostics to identify possible
system problems and run tests.
Update Firmware Displays Firmware Update screen where you
can update the front panel, front panel operating system,
library robotics and controller firmware.
Traces The traces button is used to help diagnose library
problems by tracking th e library’s activities.
Help This button displays online help for the Library
Controller.
Figure 1-8
Maintenance
toolbar.
Page 26
26 Spectra 12000 User Guide
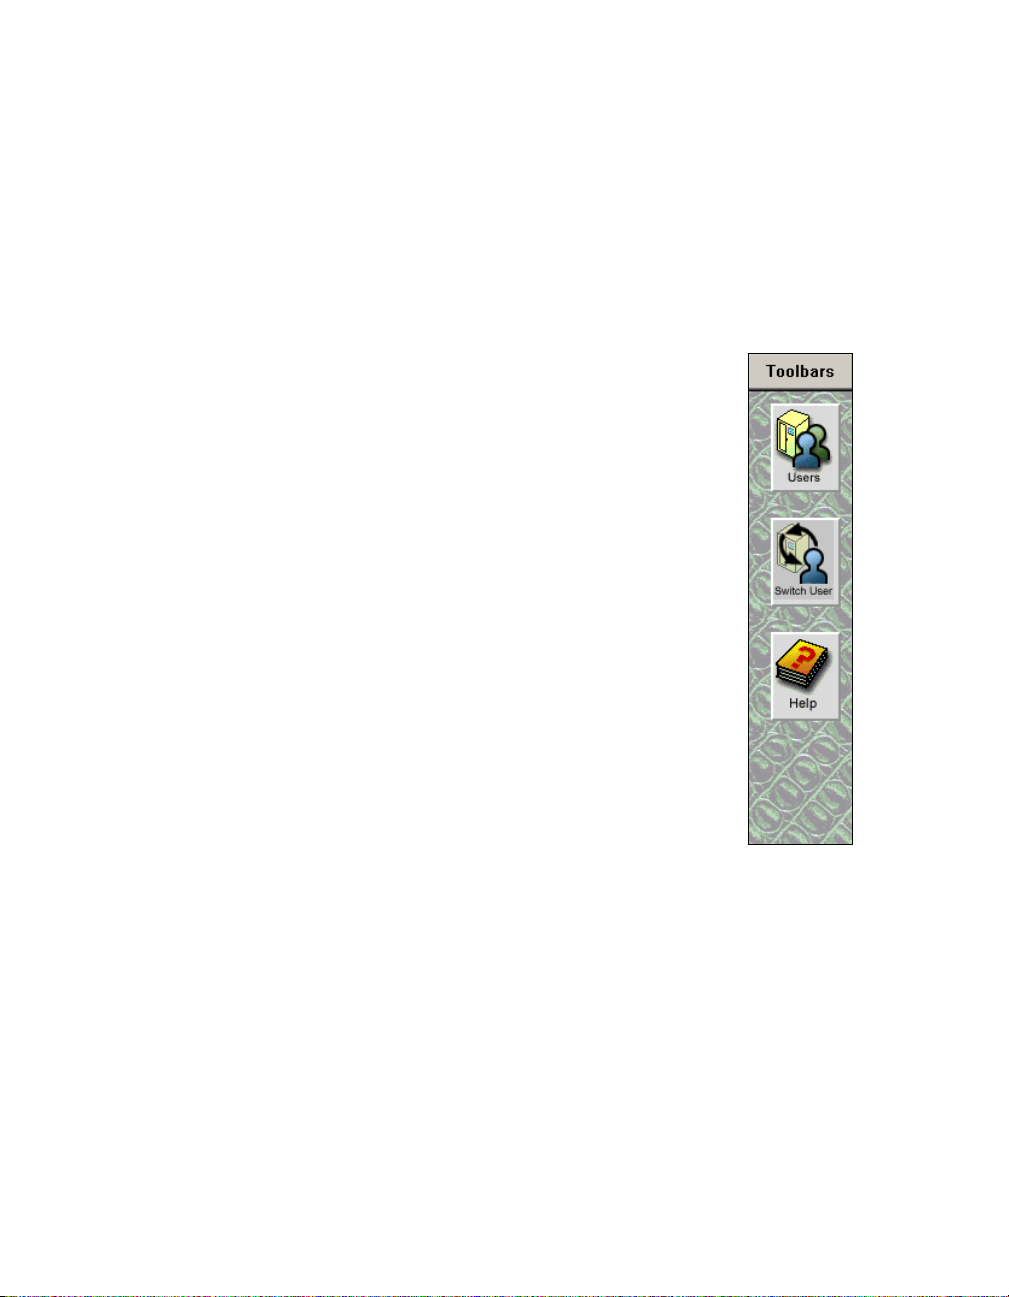
Security Toolbar
Use the Security toolbar to handle various library upkeep tasks,
including:
Users Use the Users button to access the security s creen. This allow s the
user to set up different users with different levels of access and delete
users.
Switch Users This button allows a new u ser to l og on i n place
of the previous user.
Help This button displays online help for the Library
Controller.
Figure 1-9
Security
toolbar.
Page 27
Chapter 1. Introduction 27
Getting Started
If your Spectra 12000 library is already insta lled and configured, review
Using the Spectra 12000 Library on page 113.
To install and configure the Spectra 12000 library, read the chapters in
this book in sequence, referring to the Release Notes: Spectra 12000,
Spectra 64000, as directed.
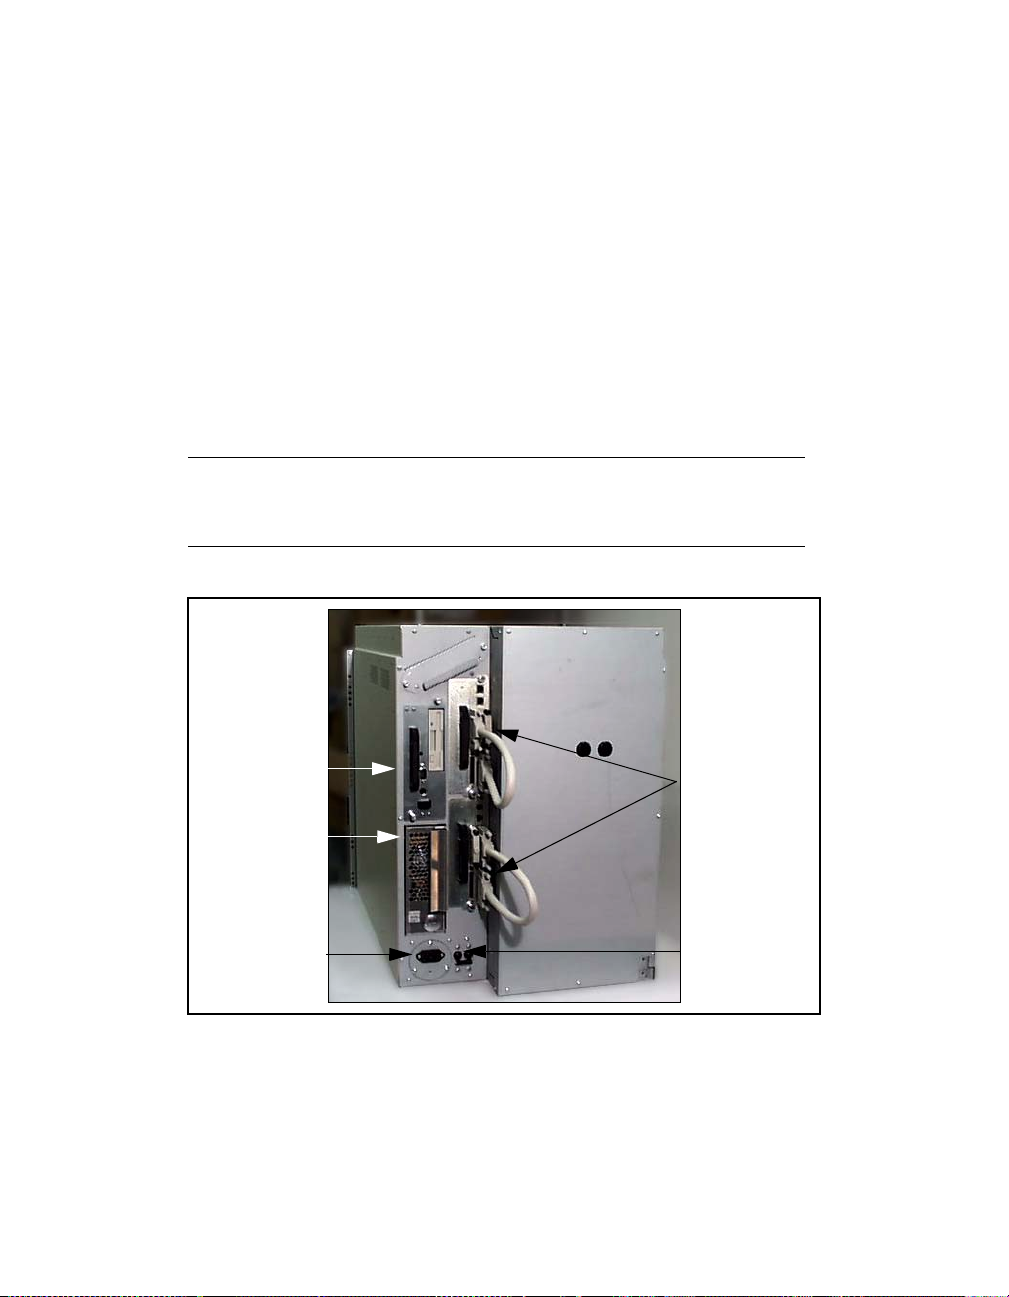
On the back of the Spectra 12000 library, you’ll find the On/Off switch,
power cable socket, and the ports for SCSI, Fibre Channel, or Ethernet
cables. The Spectra 12000 library holds up to two QIPs (Quad Interface
Processors). Each QIP can support up to four drives.
Note: Spectra 12000 library QIPs and Drives are numbered
from the bottom up. QIP #3, for example, would be the
third QIP from the bottom.
LCM
Power Supply
AC Power
Cable Socket
Figure 1-10 Spectra 12000 library, rear view.
QIPs Quad Inter f ace Processors conn ect the library to a host using either
Fibre Channel (F-QIPs), High Voltage Differential SCSI (S-QIPs), Low
Host/
Network
Cabling
(QIPs, SCSI
displayed)
On/Off
Switch
Page 28

28 Spectra 12000 User Guide
V oltage Differential SCSI (L-QIP s), Ethernet (E-QIPs), or any combination
of the above.
To check the status of the F-QIPs on the bac k of the QIP. In the upper
right-hand corner of the F-QIP you can see two lights, labelled Fibre and
QIP, corresponding to the Fibre processor and QIP processor. Both lights
should be li t up green, indi c ating the processor’s status as good.
Library Control Module The Library Control Module (LCM) is a multipurpose
controller module with six primary functions. The six functions are to:
Control the Entry/Exit Port.
Issue diagnostics commands via the diagnostics menu.
Control the front door locking solenoids.
Run the Library Controller interface program and provide outputs to
the main display/touch screen.
Issue move commands.
Interface with QIPs for the programming of logical libraries, drive
configurations and controller configurations.
The LCM connects to the QIPs and robotics via the Control le r Ar ea
Network (CAN) bus. CAN is a super-robust, low-noise bus technology.
Spectra Logic’s CAN bus eliminates a QIP as a single point of failure. I f a
single QIP fails, other QIPs can be configured to take over .
Page 29

2 Installing the Spectra 12000 Library
This chapter reviews:
Preparing a Controlled Environment
Unpacking the Spectra 12000 Library
Connecting the SCSI Cables and Terminators
Connecting the Fibre Channel Cables
Connecting the Ethernet Cables
Turning the Library On and Off
Page 30

30 Spectra 12000 User Guide
Preparing a Controlled Enviro nment
Media and Hardware Environment
When planning the Spectra 12000 library installation, note that the
library, drives and media must be maintained in a controlled
environment. Environmental ex tr em e s ca u se erratic opera ti on and
possible failures.
The Spectra 12000 library is typically mounted in a rack. Make sure t he
temperature in the rack does not exceed the maxi mum ambient
operating temperature of t he library and that th e library is w ell vent ilated
with adequate air flow at all times.
Library operating specifications are:
Temperature: +35°F to +86°F (+2°C to +30°C)
Relative humidity: 20 percent to 80 percent (non-condensing)
Maximum wet bulb temperature: +77° F (+25°C)
Caution: Before using any new media, expose media to the
local operating environment for 24 hours. This let s the
media adjust to the local temperature and humidity.
See Specifications on page 161 for additional information on the drives
and media.
Air Quality
Large quantities of airborne particles can cause erratic operation of the
drives and library. The Spectra 12000 library comes with three intak e air
filters on the inside of the front door to reduce the airborne particulates
in the library.
The table below shows the maximum amount of particulate
contamination per cubic foot and cubic meter of air that the library’s
Page 31

Chapter 2. Installing the Spectra 12000 Library 31
filter can handle. If you exceed these limits, filter the air in the room in
which the library is housed.
Part icle Size
(microns)
0.1 8.8 x 10
0.5 3.5 x 10
5.0 2.5 x 10
Number of Particles
≥ Particle Size per Cubic Meter
7
7
5
Number of Particles
≥ Particle Size per Cubic Foot
6
2.5 x 10
6
1.0 x 10
3
7.0 x 10
Unpacking the Spectra 12000 Library
Use the Spectra 12000 Insta llation and Unpac k ing Guide, P.N. 90910884
to unpack and install the library.
Caution: The Spectra 12000 library is heavy. Use extreme
caution when unpacking and lifting the library. You will
need more than two people to position the library.
The Spectra 12000 library is shipped with the following items:
Spectra 12000 Installation and Unpacking Guide
Release Notes: Spectra 12000, Spectra 64000.
Spectra 12000 Library User Guide (this guide).
15-slot cartridge pack, with cover.
AC power cord.
Front panel filter element.
One or two Quad Interface Processors (QIPs) already installed for
Fibre Channel, SCSI, Ethernet, or some combinati on; with two SCSI
terminators per S-QIP or L-QIP.
Optionally, up to eight drive sleds ordered with this library. Drives
are boxed separately and shipped in the crate with the Spectra 12000
library. See Adding Drives on page 144 for more information.
Page 32

32 Spectra 12000 User Guide
Connecting the SCSI Cables and Terminators
After you ha ve placed th e l ibrary care full y and prepared it for operation,
you are ready to connect the Spectra 12000 library to the host bus.
There are four 68-pin micro-SCSI connectors per S-QIP or L-QIP on the
rear panel to connect the library to the system SCSI buses. The SCSI
connectors are labeled SCSI Port 1, IN and OUT; SCSI Port 2, IN and
OUT.
To attach SCSI connections between the libr ary and the host:
1. Put in the QIP controller cards, if they are not already installed. For
more information on installing QIPs, refer to Adding QIPs on page
149.
2. Cable each host adapter to a unique bus on the QIP or daisy-chain it
to the next bus.
3. Terminate each SCSI bus.
Note: All SCSI buses must be terminated at the output of
the final SCSI device on the bus (see SCSI Terminator
Requirements on page 160).
4. Connect the AC power cord supplied with the Spectra 12000 library
to the AC connector on the rear of the library. Connect the other end
to a 110V AC outlet .
5. Put in drive sleds, if they are not already installed. For more
information on adding drives, refer to Adding Drives on page 144.
6. Go to Turning the Library On and Off on page 36 to power up the
Spectra 12000 library.
Page 33

Connecting the Fibre Channel Cables
Chapter 2. Installing the Spectra 12000 Library 33
Figure 2-1 Spectra 12000 F-QIP in
library.
After you have place d the libra ry carefull y and prepared it for operation,
you are ready to connect the Spectra 12000 library to the SAN.
There are two G igabit I nterface Conv erter (G BIC) p orts per F-QIP on the
rear panel to connect th e lib r a ry to the host system. The GBIC ports are
labeled Fibre Chnl A and Fibre Chnl B.
The Spectra 12000 library has one of two different kinds of GBICs, either
optical with an SC connector or copper wire with an HSSDC serial
connector as specified when ordered. The different GBIC types and
correspond in g ca b l es and connectors are s h ow n be l ow. Contact your
Spectra Logic representa tive for infor m at ion about c onver tin g to a
different GBIC type.
Page 34

34 Spectra 12000 User Guide
Figure 2-2 Optical cable for
SC GBIC connector.
Figure 2-4 SC GBIC
connector.
Figure 2-3 Copp e r ca bl e for
HSSDC GBIC connector.
Figure 2-5 HSSDC GBIC
connector.
To attach the Fibre Channel cables:
1. Consult the documentation for your host operating systems and Fibre
Channel adapter cards for information on adding new devices. In
particular, look for details on creating and configuring de vice fil es or
drivers, and whether your system must b e restarted before using new
devices.
2. Put in the QIP controller cards, if they ar e not al re a dy instal led. For
more information on installing QIPs, refer to Adding QIPs on page
149.
3. Insert the GBICs into the GBIC ports on your library (and in your
host HBAs ir switch ports, if necessary).
4. Insert the Fibre Channel cables into t he GBIC ports according to your
configurati on a nd ne tw or k dia gram. R ef er t o Partitioning the Spectra
12000 Library on page 41.
Page 35

Chapter 2. Installing the Spectra 12000 Library 35
5. Connect the AC power cord supplied with the Spectra 12000 library
to the AC connector on the rear of the library. Connect the other end
to a 110V AC outlet.
6. Put in the drive sleds, if they are not already installed. See Adding
Drives on page 144 for more information.
7. Go to Turning the Library On and Off on page 36 to power up the
Spectra 12000 library.
Connecting the Ethernet Cables
After you have place d the libra ry carefull y and prepared it for operation,
you are ready to connect the Spectra 12000 library to the SAN.
T o attach Ethernet connection between the library and the network:
1. Put in the QIP controller cards, if they ar e not al re a dy instal led. For
more information on installing QIPs, refer to Adding QIPs on page
149.
2. Attach appropriate fibre optic cables to the Gigabit Ethernet Ports on
the E-QIP.
3. Connect the AC power cord supplied with the Spectra 12000 library
to the AC connector on the rear of the library. Connect the other end
to a 110V AC outlet.
4. Put in drive sleds, if they are not already installed. For more
information on adding drives, refer to Adding Drives on page 144.
5. Go to Turning the Library On and Off on page 36 to power up the
Spectra 12000 library.
Page 36

36 Spectra 12000 User Guide
Turning the Library On and Off
The Spectra 12000 library power switc h is in the lower , lef t corner of the
library’s rear panel (Figure 2-6).
LCM
Power Supply
AC Power
Cable Socket
Figure 2-6 Spectra 12000 library, rear view.
Host/
Network
Cabling
(QIPs, SCSI
displayed)
On/Off
Switch
Page 37

3Using Security
Before you begin to configure your library, you should set up the security
feature of the Spectra 12000 library.
The Spectra 12000 library has a security feature that allo ws for three types of
users:
Super User—A Super User is allowed ultimate control of the library and
controls who has access to the library.
Administrator—An Administrator is allowed control of the library, but
cannot control who has access to the library.
Operator—An Operato r is allow ed only limi ted access to the library . The
Operator can move, remove and add inventory via the Entry/Exit port,
but is denied access to more sensitive areas of the library, such as
configuration and diagnostics.
Setting Up Security
Before you set up security, determine who is going to be allowed access to
the library, and what level of security that user will have.
To Set Up a User
1. On the Library Controller, tap Toolbars and then tap Security. The Security
toolbar displays.
Page 38

38 Spectra 12000 User Guide
2. Tap Users, to display the Security screen (Figure 3-1).
Figure 3-1 The Security screen .
3. Select the type of user you want to create in the Group Permissions
box.
4. Tap the white text box next to User Name to display the virtual
keyboard.
5. Type whatev er name you w ould lik e to use for the user on t he virtual
keyboard and then tap OK. The name will appear in th e U ser Name
box.
6. Using the virtual keyboard, type a password for the user.
Note: Take care when selecting a passw ord, make a note of
it and keep it in a safe place.
Page 39

Chapter 3. Using Security 39
7. Tap the Add/Edit User arrow, the confirmation window will confirm
that your security settings have been saved (Figure 3-2). Tap OK.
Figure 3-2 The confirmation
window.
Note: If this is the first time using your library, you should
delete the default Super User (SU) from your library
before continuing.
To Delete a User
1. Tap the user name in the Supported Users box to select it.
2. Tap Delete User.
Note: You cannot delete the last Super User listed in the
Supported Users box.
Page 40

40 Spectra 12000 User Guide
Page 41

4 Partitioning the Spectra 12000 Library
This chapter includes:
Displaying the Configuration Toolbar
Partitioning the Library
Page 42

42 Spectra 12000 User Guide
Displaying the Configuration Toolbar
The Library Controller lets you configure the library
through the Configuration toolbar. This toolbar provides
buttons you can use to configure all aspects of the library:
Partitioning the physical library into logical libraries.
Configuring drives.
Configuring QIPs.
The Library Controller also provide s online help for e ach of
the configuration tasks.
To display the Configuration toolbar:
Using your finger or a stylus, tap the Toolbars button on
the Library Controller.
Select the Configuration toolbar. The following buttons
display (Figure 4-1).
Figure 4-1
Configuration
toolbar.
Page 43

Chapter 4. Partitioning the Spectra 12000 Library 43
Partitioning the Library
The Spectra 12000 library provides Shared Library Services (SLS). You
may partition the library so that it performs and looks like more than one
partition up to a total of four partitions. Each library can be dedicated for
a specific host or application. You always need to set up partitioning on a
new library, even if you are using only one partition.
To create a partition on a new library , you will have to unassign slots
from the default partition. You must have at least one unassigned set of
15 slots and one unassigned drive to create a new partition. To do this
use the following steps.
To set up partitioning:
1. On th e L i brary Controll er, tap Toolbars, then tap Configuration. The
Configuration toolbar displays.
2. Tap the Partition icon on the Configuration toolbar.
3. The Shared Library Services screen displays a button for the entire
library and a button for each configured partition (Figure 4-2).
Note: On a new librar y you will see an All Partitions bar
and a Library 1 bar.
Page 44

44 Spectra 12000 User Guide
4. You can partition the library by editing the default partition
(Library 1), and/or creating a new partition.
Figure 4-2 Shared Library Services screen.
5. To create a new partition, tap New. T o edit an existing partition, select
the library and tap Edit. This displays the Edit Partition Configuration
window (Figure 4-3).
Figure 4-3 Edit Partition Configuration window.
Page 45

Chapter 4. Partitioning the Spectra 12000 Library 45
6. Create or edit a part ition using this window.
Name... Tap the Name... button and enter the name in the keyboard dialog.
Slots Tap the +/- buttons to add/remove slots in increments of 15. As you
add or remove slots, the number of slots in the partition will appear
between the +/- buttons, while the Slots Remaining field displays the
number of unassigned slots available. When creating multiple partitions,
make sure you have enough unassigned slots remaining for other
partitions you may be creating.
Drives Displays the drives in the partition listed.
Add To add a drive, select a drive or pair of drives from the Available
Drives Window and tap Add. The drive or drives will move to the This
Partition box and the assigned controller bus will move to the controller
list.
Remove T o remove a drive or pair of drives , select the driv e from the list in
the This Partition box and tap Remove. The driv e(s) will move to the
available list and the bus will be removed from the controller list.
Note: All drives on a bus must be allocated to the same
partition, but all d ri ve location s do not need to be
populated.
A controller configured to export a library shows an
asterisk next to it. Only one controller in each partition
can be configured to export a librar y.
Enable Queued Unloads and Defer Queued Unloads We strongly recommend you
leave both of thes e checked.
When Enable Queued Unloads is checked, your library responds
immediately to the host software that an eject was successful. The
front panel then moves the “queued” tapes to the E/E port as slots
become available.
If all E/E port slots are full, the tapes are marked as having bee n
logically ejected, and it will be reported to the software that they
have bee n ejected. They will then be physicall y ejected as E/E slots
Page 46

46 Spectra 12000 User Guide
become availabl e. This is different when Defer Queued Unloads is
checked.
When Defer Queued Unloads is checked, the library waits until you
have tapped the Eject Queued Tapes in the Inventory screen before
moving the cartridges you have ejected to the E/E port. Queued
ejects allow the library to share the E/E resource and also allow the
host software to eject more tapes than a single E/E pack holds.
7. Tap Save to save the changes you hav e made, or Cancel to exit without
saving any changes.
Now that the partition has been created, proceed to the appropriate
chapter for the controller (QIPs) you have assigned to the new partition.
To configure the Spectra 12000 S-QIP, go to Configuring the Spectra
12000 S-QIP on page 47. You will then need to configure any drives
assigned in Configuring the Drives on page 107.
To configure the Spectra 12000 F-QIP, go to Con fig ur in g the Spectra
12000 Library F-QIP on page 55. You will then need to configure
any drives assigned in Configuring the Drives on page 107.
To configure the Spectra 12000 E-QIP, go to Configuring the Spe ctra
12000 E-QIP on page 65. You will then need to configure any drives
assigned in Configuring the Drives on page 107.
Page 47

5 Configuring the Spectra 12000 S-QIP
This chapter includes:
Displaying the Configuration Toolbar
Configuring S-QIPs
S-QIP Configure Controller Screen
Page 48
48 Spectra 12000 User Guide
Displaying the Configuration Toolbar
The Library Controller lets you configure the library through
the Configuration toolbar. This toolbar provide s buttons you
can use to configure all aspects of the library:
Partitioning the physical library into libraries.
Configuring drives.
Configuring library QIPs.
The Library Controller also provides online help f or e ach of
the configuration tasks.
To display the Configuration toolbar:
Using your finger or a stylus, tap the Toolbars button on
the Library Controller.
Select the Configuration toolbar (Figure 5-1).
Figure 5-1
Configuration
toolbar.
Page 49

Chapter 5. Configuring the Spectra 12000 S-QIP 49
Configuring S-QIPs
The Library Controller allows the user to configure SCSI controllers (SQIPs) in a number of ways. To conf igure S-QIPs:
1. From the Configuration toolbar, select the Partitions icon. This brings
up the Shared Library Services screen.
Figure 5-2 The Shared Library Services screen.
2. Select the partition with the controller you want to configure.
Page 50

50 Spectra 12000 User Guide
3. Tap Edit. The Edit Partition Configuration window appears
(Figure 5-3).
Figure 5-3 Edit Partition Configuration window.
4. In the Drives section, select the controller you would like to
configure by tapping the drive it is connected to. Tap Configure
Controller. This brings up the Configure Controller window
(Figure 5-4).
Page 51

Chapter 5. Configuring the Spectra 12000 S-QIP 51
S-QIP Configure Co ntroller Screen
S-QIP Default ID Settings
Note: Each S-QIP bus must have an ID unique to that bus.
This allows the S-QIP to initiate commands to the drive.
Each S-QIP uses two SCSI busses, and each bus must have a SCSI ID
unique to that SCSI bus.
Figure 5-4 The Configure Controller window.
In the Configure Controller window, you can implement the following
options.
Name The assigned bus name displays here.
SCSI ID Use the +/- buttons to set SCSI ID of the controller.
Exports a Logical Library Check here to configure this S-QIP as having robotic
control for a logical library.
Page 52

52 Spectra 12000 User Guide
Note: When configuring the Spectra 12000 library as one
logical library, one bus on any QIP must have the option
Exports a L o g ic al Lib rary enabl ed to pr ov i d e th e rob o ti c s
control interface to a host. The Exports a Logical Library
check box indicates that this bus is the one that will be
assigned to control robotics
When partitioning the Spectra 12000 library into more
than one logical library, each of the partitions must have
one QIP bus export a logical library for robotics interface.
The bus which exports a library must also be configured
so that the QIP SCSI ID is unique from all drives on the
QIP bus, and any device on the host bus it is attached to.
Emulation Select an identity you want the library to emulate here.
Recommended only if software does not have native support.
Page 53

Chapter 5. Configuring the Spectra 12000 S-QIP 53
You can also use the Controller Configuration screen to configure the
QIPs. To do this, tap Controllers on the Configuration T oolbar . This opens
the Controller Configuration screen (Figure 5-5).
Figure 5-5 Controller Configuration screen.
The Controller Configuration screen displays the following information:
Controllers detected by the library.
Bus on which the controller resides, and the controller’s SCSI ID.
Buttons allowing you to scroll through more controllers.
Buttons you can use to configure and replace the controllers. (To
configure a controller, select the controller and tap Configure.)
Go to Configuring the Drives on page 107 to complete the configuration
procedure.
Page 54

54 Spectra 12000 User Guide
Page 55

6 Configuring the Spectra 12000 Library F-QIP
This chapter includes:
Displaying the Configuration Toolbar
Configuring F-QIPs
F-QIP Configure Controller Screen
About Serverless Backup
Configuring the F-QIP for Serverless Backup
Page 56

56 Spectra 12000 User Guide
Displaying the Configuration Toolbar
The Library Controller lets you configure the library through
the Configuration toolbar. This toolbar provide s buttons you
can use to configure all aspects of the library:
Partitioning the physical library into logical libraries.
Configuring drives.
Configuring library QIPs.
The Library Controller also provides online help f or e ach of
the configuration tasks.
To display the Configuration toolbar:
Using the stylus, tap the Toolbars button on the Library
Controller.
Select the Configuration toolbar (Figure 6-1).
Configuring F-QIPs
The Library Controller allows the user to configure Fibre
Channel controllers (F-QIPs) in a number of ways. To
configure F-QIPs:
1. Go to the Library Controller. Select the Toolbars drop
down menu and select the Configuration.
Figure 6-1
Configuration
toolbar.
Page 57

Chapter 6. Configuring the Spectra 12000 Library F-QIP 57
2. From Configuration toolbar, select the Partitions icon. This brings up
the Shared Library Services screen.
Figure 6-2 Shared Library Services screen.
3. Select the partition that contains the controller you want to configure.
4. Tap Edit. The Edit Partition Configuration window appears
(Figure 6-3).
Figure 6-3 Edit Partition Configuration window.
Page 58

58 Spectra 12000 User Guide
5. In the Drives window, select the controller you want to configure by
tapping the drive it is connected to.
6. Tap Configure Controller. This brings up the Controller Configuration
window.
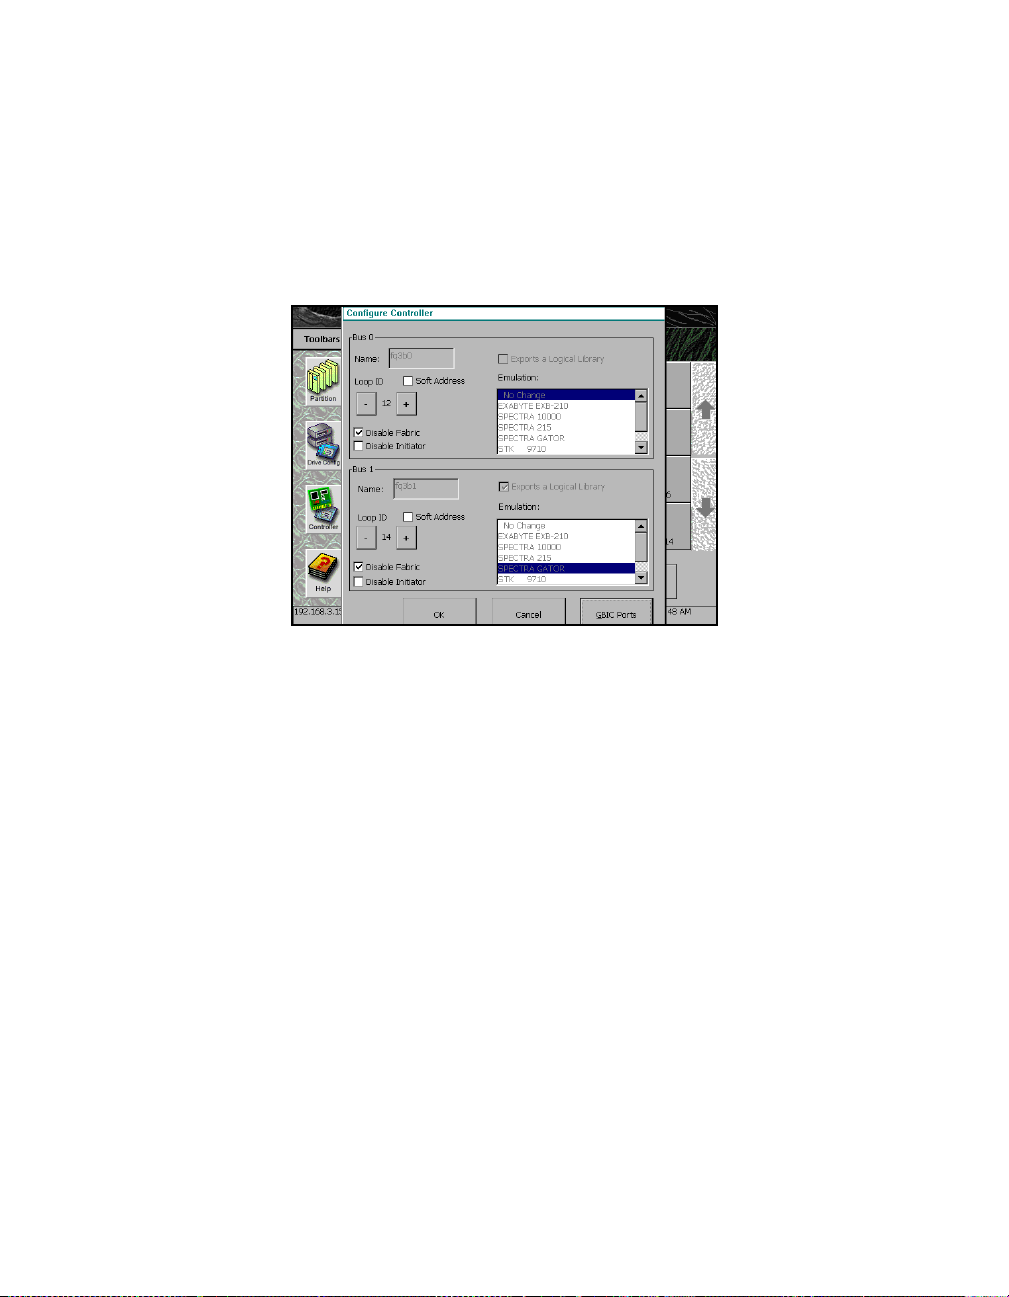
F-QIP Configure Con troller Screen
In the F-QIP Configure Controller window (Figure 6-4), you can
implement the following option s.
Figure 6-4 F-QIP Configure Controller window.
Name The assigned bus name displays here.
Loop ID/ Soft Address Soft Address enabled is the default. Otherwise, disable
Soft Address and use the +/- buttons to configure desired Hard Address.
Soft Address enabled is the default.
Soft and Hard Addresses When a Fibre Channel loop initializes, it tries to
assign requested ID numbers to devices that use hard addresses. It then
dynamically assigns soft addresses to other devices from remaining
available nu mbers. Each device must have a unique address on the loop
Page 59

Chapter 6. Configuring the Spectra 12000 Library F-QIP 59
ID from 0 to 125. Conflicts arise if two devices t ry to use the same loop
ID, or if more than 126 devices and hosts are connected to the loop.
When the library’s address type is set to “soft,” the library’s loop ID is
assigned dynamically whenever the Fibre Channel loop is initialized.
When the library’s address type is set to “hard,” the library always
requests the loop ID number yo u specify in the Configuration screen. If
you assign a hard address to the library, make sure no other device on
the loop uses the same hard address. If two devices on the same loop
have hard addresses set to the same number , only one of the tw o devices
will be accessible. Setting the libra ry address type to “soft” avoids
duplication of addresses, but the library address is subject to change any
time the Fibre Channel loop initializes.
A hard address is recommended.
Disable Fabric Select this box to have the F-QIP switch login as a loop ID
instead of on fabric.
Disable Initiator Check to disable the F-QIP as an initiator on the Loop or
Fabric Switch. Initiator disabled is the default. Unless you are absolutely
sure you have an environment that supports multi-initiators, you must
disable the F-QIP as initiator. If you don’ t, this could cause conflicts on
the loop.
Exports a Logical Library Check here to configure a bus on th e F-QIP to export
a logical library.
Note: When configuring the Spectra 12000 library as one
logical library, one bus on any QIP must have the option
Exports a L o g ic al Lib rary enabl ed to pr ov i d e th e rob o ti c s
control interface to a host. The Exports a Logical Library
check box indicates that this bus is the one that will be
assigned to control robotics
When partitioning the Spectra 12000 library into more
than one logical library, each of the partitions must have
one QIP bus export a logical library for robotics interface.
Emulation Select an identity you want the library to emulate. This is
recommended only if software does not have native support.
Page 60

60 Spectra 12000 User Guide
GBIC Ports Tap GBIC Ports to configure the GB IC ports. The Configur e GBIC
Ports window appears (Figure 6-5).
Figure 6-5 Controller GBIC Ports window.
This determines which drives and libraries are a vailable from each GBIC.
Side A includes Library 1 and you can assign any or all of the four
available drive s by checking them. Side B includes Library 2 and you can
assign any drives you have not assigned to Side A by checking them. Or,
for redundancy and failover, you can check both sides to see all drives.
If multiple hosts are configured to access an overlapping set of drives,
access to those drives must be restricted/managed through the backup
software.
Page 61

Chapter 6. Configuring the Spectra 12000 Library F-QIP 61
About Serverless Backup
Serverless Backup is sometimes referred to as Third Party Copy or
Extended Copy (X c o py) . Serverless Backup is a bac ku p arc h itecture in
which data flows directly from one storage device to another, bypassing
the server . Serverless Backup is made possible when storage devices
support the Xcopy commands as specified in the SCSI protocol. The
Xcopy command set al lo ws a de vice to read blo cks of da ta fro m ano the r
compliant device. In a Serverless backup environment the Spectra Logic
library reads data from the disk device and writes it directly to tape.
This backup process requires a backup application that has Xcopy
functionali ty. Serverless backups are normally performed in Storage
Networking environments since data can be shared by multiple hosts or
initiators. The backup application is responsible for determining which
blocks on the disk get backed up to tape.
Configuring the F-QIP for Serverless Backup
Setup of Serverless Backup requires the following steps:
Enabling Serverless Backup.
Serverless Backup F-QIP Setup.
Page 62

62 Spectra 12000 User Guide
Enabling Serverless Backup
1. From the General Status screen, tap Robotics. The System Setup
screen appears.
Figure 6-6 The System Setup screen.
2. To enable Serverless Backup, you will need to obtain an ac tivation
key from Spectra Logic. Contact Spectra Logic with the serial number
of the device, as displayed in the Serial # field, to obtain the
activation key.
3. Tap the blank field to the righ t o f Submit Key.
4. A virtual keyboard appears. Enter the key.
5. Tap OK on the virtual keyboard.
6. Tap Submit Key.
Serverless Backup F-QIP Setup
To use Serverless Backup the F-QIP must be configured as an initiator/
target. To enable this mode you will need to uncheck the Disable
Initiator box in the Edit F-QIP Configuration menu on the Libr a ry
Controller.
Page 63
Chapter 6. Configuring the Spectra 12000 Library F-QIP 63
1. Open the Configuration toolbar and tap Controller. The Configure
Controller screen appe ars
2. Select the F-QIP you want to enable Serverless Backup on. The
Configure Controller window appears
Figure 6-7 The Configure Controller window.
3. Tap the box next to Disable Initiator to uncheck it.
Go to Configuring the Drives on page 107 to complete the configuration
procedure.
Page 64

64 Spectra 12000 User Guide
Page 65

7 Configuring the Spectra 12000 E-QIP
This chapter includes:
About TAOS™
TAOS User Interfaces
Connecting to the Serial Port
Setting Up the E-QIP
Setting Up TAOS ITP
Setting Up NDMP Enabled by TAOS
Page 66

66 Spectra 12000 User Guide
About TAOS
The Spectra Logic TAOS operating system architecture is an innovative
approach to sharing tape back up resources among hosts. The TAOS
enabled Spectra 12000 E-QIP ha s an ethernet interface and the ability to
enable one of two components: TAOS ITP or TAOS NDMP.
™
TAOS ITP
TAOS Internet Tape Protocol (ITP) is enabled on every TAOS enabled EQIP shipped from the factory. TAOS ITP is used by installing ITP drivers
on all hosts that require access to the library. Once the ITP drivers are
installed and configured the host sees the E-QIP as a locally attached
SCSI device. All applications that work with your existing SCSI device s
will work seamlessly with all TAOS enabled devices.
When an application runs, SCSI commands are issued to the ITP driver—
a virtual SCSI HBA. These SCSI commands are converted to IP packets by
the ITP driver, sent across the network to the E-QIP, then re-assembled
into SCSI commands before being sent to the drives.
NDMP Enabled by TAOS
T AOS Ne twork Data Management Protocol (NDMP) is an optional feature
that can be purchased and enabled with an activation key. TAOS NDMP
includes an NDMP agent built directly into the E-QIP, so that NetworkAttached Storage (NAS) devices that support NDMP can talk directly to
the library across the network.
Typically, a backup application host will initiate a backup job and
instruct the NAS file syste m and th e l ibr a ry to get ready. They are then
instructed to talk to each other to co mplete the backup. Metadata and
management commands may involve the backup server, but the bulk of
the data—the information being re ad/w r itte n to tap e—p asse s direc tly
from the NAS device to the tape drives, without detouring through the
backup server.
The E-QIP supports versions 2 and 3 of NDMP.
Page 67

Chapter 7. Configuring the Spectra 12000 E-QIP 67
Sharing Tape Devices
TAOS ITP and TA OS NDMP both allow a set of tape resources to be
shared between multiple hosts. Care must be taken to ensure that
multiple requests are not being sent to same tape drive at the same time.
With TAOS NDMP, there is typically a backup application server that
manages access to the tape drives. Even though mult iple NAS devic es
can access the tape device directly these requests are routed through a
single backup server. This ser ver, then, is responsible for managing
access to the drives. As long as the devices and NAS clients are
configured properly in the software, resource contention is eliminated.
Access to TAOS NDMP functionality is also password protected--any NAS
host wishing to write to the Spectra 12000 library must authenticate
themselves with the correct username and password. This is also
generally set up in the backup software.
With TAOS ITP, there may be many backup applications on many hosts,
all responsible for managing their own access to the tape drives, and as
the E-QIP looks like a locally attached resource to each configured host,
each host has no idea that other hosts also have access. There are three
ways to manage resource contention with TA OS ITP. First, the E-QIP will
only be visible to hosts where the TAOS ITP driver has been installed.
Second, the TAOS ITP configuration utilities in the E-QIP allow you to
configure IP address ranges of hosts that can access the library. Finally,
devices can be locked during use by going through on e of the available
configuration interfaces. When a device has been locked, no other host
can gain access to the drive until it is unlocked.
In any case, if multiple hosts will be accessing the library, some access
management scheme must be implemented to prevent stored data
written by one host from being overwritten by another.
TAOS User Interfaces
There are two user interfaces available to access and change TAOS
options: a serial port interface and a TAOS ITP control panel (available
on Windows systems only). The serial interface is the only way to set the
Ethernet configuration of the library, however, once the Ethernet
parameters have been set and the unit is connected to your network, the
TAOS ITP control panel can be used to view settings.
Page 68

68 Spectra 12000 User Guide
This chapter will guide you through the installation process for TA OS ITP
and TAOS NDMP, using both interfaces. Both are described in further
detail in the appendices.
Connecting to the Serial Port
Connect a serial cable to t he E-QIP diagnosti c port, labeled DIAG 1, with a
serial port terminal emulation application like HyperTerminal running on
a host computer. The serial port settings are as follows:
Figure 7-1 Serial port settings.
Bits per second (BAUD): 115200
Data bits: 8
Parity: None
Stop bits: 1
Flow control: No ne
Page 69

The TAOS Configuration menu displays:
Figure 7-2 The TAOS Configuration menu.
Chapter 7. Configuring the Spectra 12000 E-QIP 69
Setting Up the E-QIP
Password Configuration
As shipped, the serial port configuration menu is not password
protected. To prevent unauthorized users from changing the E-QIP ’s
Page 70

70 Spectra 12000 User Guide
configuration settings, you should enable a password. To launch the
Password Configuration menu, select
Figure 7-3 The Password Configuration menu.
1.
[1] Set Password: Select to set or change the password. If changing the
password, you will be prompted to enter your password, then prompted
to enter it again. When a password is set, it will need to be entered to
make any subsequent configuration changes to the unit.
[2] Disable Password: Select to disable your password.
[?] Help: Displays help for this menu.
[Esc] Return to Main Menu: Returns you to the main menu.
Ethernet Configuration
By default the E-QIP is shipped with an IP address of 10.0.0.254 and a
hostname specific to the unit’s serial number. You will need to change
Page 71

Chapter 7. Configuring the Spectra 12000 E-QIP 71
these to values appropriate to your site before attaching the E-QIP to
your network. To launch the Ethernet Configuration menu, select
3.
Figure 7-4 The Ethernet Configuration menu.
To configure the ethernet port, use the follo wing commands:
[1] DHCP: Either enabled or disabled. Make sure to provide a hostname
when DHCP is enabled; it is necessary to provide system identification to
the DHCP host. If DHCP is disabled, you must provide a static IP
address.
Note: DHCP is support ed for use only with TAOS ITP at
this time. If you will be using TAOS NDMP you will need
to assign a static IP address to the library.
[2] Hostname: The name for the IP interface. This is used by DHCP, DNS
and other communications for name resolution. The hostname should be
less than 12 characters to suppor t DHCP and DN S naming conventions.
[3] IP address: Standard IP address. This field is not a vailable while in DHCP
mode.
Page 72

72 Spectra 12000 User Guide
[4] IP subnet mask: IP network mask (standard IP parameter).
[5] IP gateway: Gateway address (standard IP parameter).
[?] Help: Displays help for this menu.
[Esc] Returns you to the main menu
Setting Up TAOS ITP
TAOS ITP Configuration
As shipped, the E-QIP can be accessed by any host on the network that
can see its IP address. Setting up ITP protocol security lets you limit
access to the unit by filtering IP address ranges. To launch the ITP
Configuration menu, select
4.
Figure 7-5 The ITP Configuration menu.
[1] ITP secu rity: Select to set ITP security so that only those hosts in
specified IP ranges can read/write to the E-QIP.
Page 73

Chapter 7. Configuring the Spectra 12000 E-QIP 73
[2] Add secured IP range: If you have set ITP security, use this option to add a
secured IP rang e. If sec ur ity is tu rne d o n, th e E- QIP w il l o n l y re s pon d t o
hosts in the secured IP address range(s).
[3] Delete secured IP range : Use this option to delete a secured IP range.
[4] Clear all secured IP ranges: Use thi s to clear all IP ranges you have secured.
[?] Help: Displays help for this menu.
[Esc] Returns you to the main menu
TAOS ITP Driver Installation
Note: Operating system information is documented in the
following chapters. This information is provided only as a
convenience; refer to your operating system for the most
current information. If your operating system is not
included in this guide, use the installation instructions
provided in their documentation.
To install TAOS ITP on Windows NT, turn to Installing TAOS ITP on
Windows NT on page 74.
To install TAOS ITP on Windows 2000, turn to Installing TAOS ITP
on Windows 2000 on page 81.
To install TAOS ITP on Solaris, turn to Installing TAOS ITP on Solaris
on page 96.
T o install TAOS ITP on Linux, turn to Installing TAOS ITP on Linux
on page 98.
Page 74

74 Spectra 12000 User Guide
Installing TAOS ITP on Windows NT
To install TAOS ITP on Windows NT:
1. Insert the TAOS ITP disk into your CD-ROM drive and browse to the
NT folder o n you r CD-ROM drive.
2. Double-click on setup to start the InstallShield Wizard.
3. The InstallShield Wizard appears. Click Next (Figure 7-6).
Figure 7-6 The InstallShield Wizard window, click Next.
Page 75

Chapter 7. Configuring the Spectra 12000 E-QIP 75
4. Read the License Agreement. If you accept the terms of agreement,
check the box la b eled I accept the terms in the license agreement and
click Next. (Figure 7-7)
Figure 7-7 The TAOS ITP License Agreement, click Next.
Note: You must accept the terms of the License Agreement
to continue with the installation. You will not be able to
click Next until you have accepted the terms of the license
agreement.
Page 76

76 Spectra 12000 User Guide
5. Click Next to install to C:\Program Files\Spectra Logic\TAOS\. Click
Change to install to a different destination (Figure 7-8).
Figure 7-8 The Destination folder window.
Page 77

Chapter 7. Configuring the Spectra 12000 E-QIP 77
6. Click Install to install the TAOS ITP control panel and driver. Click
Back to review or change installation settings
Figure 7-9 The Install the Control Panel and Driver Window, click
Install.
(Figure 7-9).
Page 78

78 Spectra 12000 User Guide
7. The TAOS ITP Configuration window appears (Figure 7-10).
Figure 7-10 Device Discovery on the TAOS ITP
Configuration control panel.
Note: Your library host name will appear instead of
deneciah.
As long your Windows NT system and TAOS enabled device are on the
same subnet system, the TAOS enabled device will be listed on the
Device Discovery window. If your TAOS enabled device is not listed,
check your Ethernet connections and click Refresh.
Note: Each TAOS enabled E-QIP is shipped with a default
IP address of 10.0.0.254. If you have not previously
changed the IP address of the unit to something unique
for your site, you may be unable to se e the unit due to an
IP address conflict.
Once all devices are displayed, continue to Step 8.
Page 79

Chapter 7. Configuring the Spectra 12000 E-QIP 79
8. click on the square box next to the TAOS enabled device to checkmark each T AOS enabled device you want installed (Figure 7-11).
Figure 7-11 Device Discovery on the TAOS ITP
Configuration control panel, with the device selected.
9. Click on the + symbol to display all the devices locate d within the
TAOS enabled device and v erify all de vices are checked.
10. Press Install.
11. A dialog box displays, reading Installation Complete. Click OK.
12. Click Close to close the TAOS ITP Configur at ion wind ow.
Page 80

80 Spectra 12000 User Guide
13. Click Finish to complete the installation (Figure 7-12).
Figure 7-12 Click Finish.
14. Click Yes to reboot the system (Figure 7-13).
Figure 7-13 Click Yes.
Any TAOS devices you have installed are now configured and ready.
Page 81

Chapter 7. Configuring the Spectra 12000 E-QIP 81
Installing TAOS ITP on Windows 2000
1. Insert the TAOS ITP disk into yo ur CD-ROM drive.
2. Click on My Computer., and open the 2000 folder on your CD.
3. Double-click on setup.
4. The TAOS ITP InstallShield Wizard launches. Click Next to install
(Figure 7-14).
Figure 7-14 The InstallShield Wizard window, click Next.
Page 82

82 Spectra 12000 User Guide
5. Read the Lic en se Agreement. If you accept the ter ms of the
agreement, check the box labeled
agreement
and click Next (Figure 7-15).
Figure 7-15 The License Agreement window.
I accept the terms in the lic ense
Note: You must accept the terms of the License Agreement
to continue with the installation. You will not be able to
click Next until you have accepted the terms of the license
agreement.
Page 83

Chapter 7. Configuring the Spectra 12000 E-QIP 83
6. Click Next to install to C:\Prog r a m Files\Spe ctra Logic\TAOS\. Click
Change to install to a different destination.
Figure 7-16 The Destination folder window.
Page 84

84 Spectra 12000 User Guide
7. Click Install to install the TAOS ITP control panel and driver. Click
Back to review or change installation settings.
Figure 7-17 The Install the TAOS ITP control panel and driver
Window, click In st all.
8. Wait for the TAOS ITP installation to complete.
Page 85

Chapter 7. Configuring the Spectra 12000 E-QIP 85
9. The TAOS ITP Configuration window appears (Figure 7-18).
Figure 7-18 Device Discovery on the TAOS ITP
Configuration control panel.
Note: Your library host name will appear instead of
deneciah.
As long your Windows NT system and TAOS enabled device are on the
same subnet system, the TAOS enabled device will be listed in the
Device Discovery window. If your TAOS enabled device is not listed,
check your Ethernet connections and click Refresh.
Once all devices are displayed, continue to Step 10.
Page 86

86 Spectra 12000 User Guide
10. Click on the square box next to the TAOS enabled device to checkmark each T AOS enabled device you want installed (Figure 7-19).
Figure 7-19 Device Discovery on the TAOS ITP
Configuration control panel, with the device selected.
11. Click on the + symbol to display all the devices located within the
TAOS enabled device and v erify all de vices are checked.
12. Press Install.
13. A dialog box displays, reading Installation Complete. Click OK.
14. Click Close to close the TAOS ITP Configur at ion wind ow.
15. The Add/Remove Hardware Wizard displays. Click Next.
Note: An online text file displays wi th the Add/Remove
Hardware Wizard, walking you through the rest of the
hardware installation procedure. Use the online te xt file in
conjunction with the following instructions to install your
TAOS enabled hardware.
Page 87

Chapter 7. Configuring the Spectra 12000 E-QIP 87
16. Select Add/Troubleshoot a device and click Next (Figure 7-20).
Figure 7-20 Install the TAOS ITP control panel and driver.
17. Select
Add a new device and click Next (Figure 7-21).
Figure 7-21 Install the TAOS ITP control panel and driver.
Page 88

88 Spectra 12000 User Guide
18. Select No, I want to s elect the hardware from a list and click Next
(Figure 7-22).
Figure 7-22 The Find New Hardware Window.
19. Highlight SCSI and RAID controller s from the li st and click Next
(Figure 7-23).
Figure 7-23 The Hardware Type window.
Page 89

Chapter 7. Configuring the Spectra 12000 E-QIP 89
20. Click the Have Disk… button (Figure 7-24).
Figure 7-24 The Se lect a Device Driver window, cl i ck Have Disk.
21. Click Browse.
22. Navigate to the TAOSitp.inf file on your TAOS CD and click Open.
23.
Click OK.
Page 90

90 Spectra 12000 User Guide
24. Highlight TAOS ITP SCSI Adapter and click Next (Figure 7-25).
Figure 7-25 The Se lect a Device Driver Windo w , click Next.
25. A dialog box appears. Cli ck OK (Figure 7-26).
Figure 7-26 An Add Remove Hardware dialog box, click OK.
Page 91

Chapter 7. Configuring the Spectra 12000 E-QIP 91
26. Highlight Input/Output Range and click on Change Setting…
(Figure 7-27).
Figure 7-27 The Add New Hardware Wizard Properties
window, click Change Setting.
27. The Edit Input/Output Range dialog box appears. Look in the
Conflict information field to see if any device conflicts.
Page 92

92 Spectra 12000 User Guide
28. If no devices are conflicting, click OK. If another device does conflict,
press the up arrow button to increment the value until no devices
conflict, then click OK (Figure 7-28).
Figure 7-28 The Edit Input/Output Range
dialog box, click OK.
Page 93

Chapter 7. Configuring the Spectra 12000 E-QIP 93
29. The Add New Hardware Wizard Properties dialog box reappears.
Click OK.
Figure 7-29 The Add New Hardware Wizard Properties
window, click OK.
30. Click Yes in the Creating a Forced Configuration dialog box
(Figure 7-30).
Figure 7-30 The Creating a Forced Configuration
dialog box, click Yes.
Page 94

94 Spectra 12000 User Guide
31. The Add/Remove Hardwa re Wizard is now ready to install the driv er.
Click Next (Figure 7-31).
Figure 7-31 The Start Hardware Installation window, click Next.
32. When The Digital Signature Not Found dialog box appears, click Yes
(Figure 7-32).
Figure 7-32 The Digital Signature Not Found dialog box,
click Yes.
Page 95

Chapter 7. Configuring the Spectra 12000 E-QIP 95
33. Click Finish to complete the installation (Figure 7-33).
Figure 7-33 The Completing the Add/Remove Hardware Wizard
window, click Finish.
34. Click Yes to reboot the system. The TA OS ITP driver will be loaded
when the system restarts (Figure 7-34).
Figure 7-34 The Systems Settings Change dialog box,
click Yes.
Page 96

96 Spectra 12000 User Guide
Installing TAOS ITP on Solaris
TAOS ITP is supported on Solaris versions 2.6 and later.
Caution: TAOS ITP must be used with a software package
that provides a Shared Storage Option (SSO) type
arbitration between machines that backup to the library. If
you do not have an SSO type option, the only valid
configuration is one computer per library. Without an SSO
type option, data loss is likely.
To install TAOS ITP on a Solaris system:
1. Navigate to the
CD-ROM disk.
2. Run the script
3. Choose a directory to which the script will untar the package. This
can be a temporary directory. The install script will start
automatically.
4. When prompted
(or ’all’ to process all packages)
TAOS ITP.
5. When asked if you want to continue with the installation of TAOS
ITP, enter
6. When prompted again
process (or ’all’ to process all packages)
7. Enter
TAOSdiscover searches for TAOS enabled devices and lists each device’s
target components.
8. Enter the number of a listed device you want to install drivers for.
9. Enter the target number for all targets of this device you will want
10. Repeat Step 8 and Step 9 for each device you want installed.
y to install and configure TAOS enabled devices.
access to, or just tap Enter to select all target numbers.
solaris directory under the taos* directory on the
install.sh.
Select package(s) you wish to process
, tap Enter to install
y.
Select package(s) you wish to
, enter q.
To remov e a device, re-enter it. You will then be asked if you want to
remove the device.
Page 97

Chapter 7. Configuring the Spectra 12000 E-QIP 97
11. When satisfied with the device list, enter y to accept devices.
After configuring the
/devices and /dev directories, links will be
created in the appropriate directories for the various target drivers.
Each TAOS device requires a separate instance of the HBA de vice driv er,
and will appear as a separate SCSI adapter. The device driver’s config file
/usr/kernel/drv/TAOSitp.conf has one line for each possible
instance. Because changes to this file would only be recognized after a
reboot, the maximum nu mber of 16 instances are defined in this file by
default. To add more TAOS devices at a later time, re-run the discovery
process.
1. If you are using backup software, complete any kernel modifications
required by the application.
2. Reboot the system using the
boot -r command.
3. After rebooting, verify that the kernel modific ations are correct as
follows:
i.Insert a tape into a drive using the front panel
interface.
ii.From Solaris command line, run the command:
mt -f /dev/rmt/<device file> status
where <device file> is the specific device file for
the tape drive in which the tape is located.
iii.All Solaris machines return the value:
Sony AIT
If a different value displays, you have not modified st.conf correctly;
repeat the entire procedure.
Page 98

98 Spectra 12000 User Guide
Installing TAOS ITP on Linux
Caution: TAOS ITP must be used with a software package
that provides a Shared Storage Option (SSO) type
arbitration between machines that backup to the library. If
you do not have an SSO type option, the only valid
configuration is one computer per library. Without an SSO
type option, data loss is likely.
The TAOS ITP driver for Linux is currently released in RPM format only.
There are pre-compiled binarie s (unipr ocessor only at this time) built for
the following i386 based platforms:
RedHat Linux 6.2
RedHat Linux 7.1
To install the TAOS ITP driver for Linux:
1. Navigate to the Linux direct ory on the CD-ROM disk.
2. Based on the revision of the operating system, select the binary RPM
appropriate for the system you want to install.
3. Issue the following command at a shell prompt:
rpm –Uvh
<appropriate binary RPM>
4. To return a list of libraries on the net wor k a vailab le for use, issue th e
following:
/usr/sbin/TAOSdiscover
5. Enter y to install and configure TAOS enabled devices.
TAOSdiscover searches for TAOS enabled devices and lists each device’s
target components.
6. Enter a listed device number for a device you want to install drivers
for.
7. Enter the target number for all targets of this device you will want
access to, or just tap Enter to select all target numbers.
8. Repeat Step 8 and Step 9 for each device you want installed.
To remov e a device, re-enter it. You will then be asked if you want to
remove the device.
Page 99

Chapter 7. Configuring the Spectra 12000 E-QIP 99
T o verify connectivity, load a tape to the drive and use the mt or the tar
command. Use the
mtx command to verify communication with the
library.
You are now ready to install the backup package of your choice.
The following files are installed by adding the RPM:
/dev/TAOSitp
/etc/TAOSitp
/etc/TAOSitp/connect
/etc/TAOSitp/devices
/etc/TAOSitp/discover
/etc/rc.d/init.d/taos
/lib/modules/(running kernel version)/misc/TAOSitp.o
/usr/sbin/TAOSbusctl
/usr/sbin/TAOSdiscover
/usr/sbin/TAOScontrol
Page 100
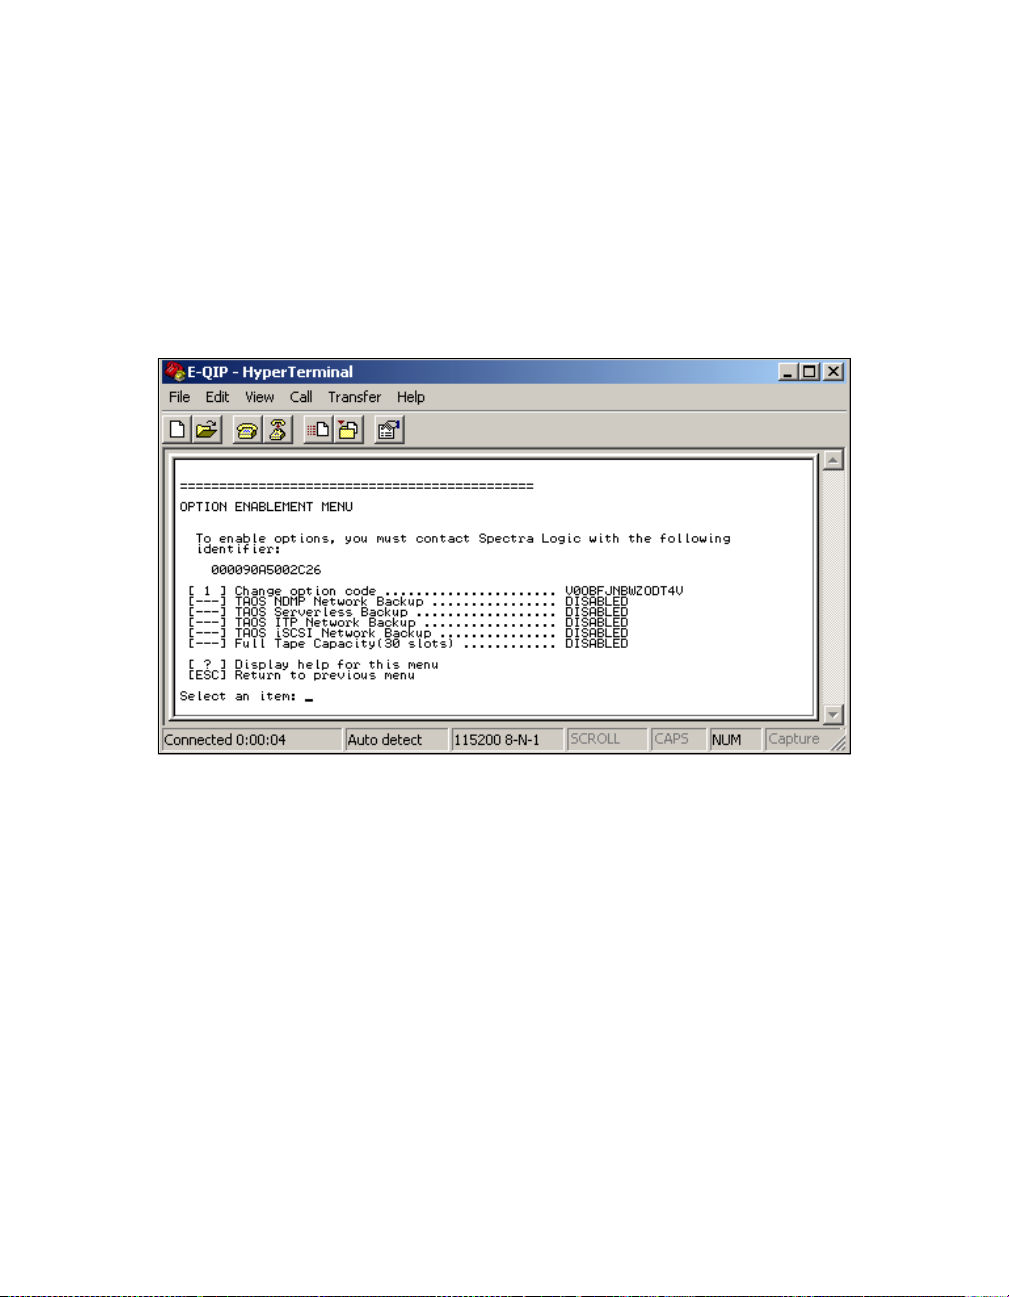
100 Spectra 12000 User Guide
Setting Up NDMP Enabled by TAOS
Enabling TAOS NDMP
The Options Enablem ent menu allows you to enable TAOS NDMP
Network Backup. To launch the Options Enablement menu, select
6.
Figure 7-35 The Option Enablement menu.
If you will be using NDMP Enabled by TAOS, you will need to obtain an
activation key from Spectra Logic to enable the NDMP Enabled by TAOS
function. Contact Spectra Logic with the identifier of the device, as
displayed on this page, to obtain the activation key.
[1] Change option code: Enter the option code from Spectra Logic to enable
options.
[?] Help: Displays help for this menu.
[Esc] Returns you to the main menu.
 Loading...