

Specter OFF-ROAD 310-73D, 310-80D, 310-73D-BD, 310-73D-GD, 310-79D Installation Instructions Manual
Specter O-Road, Inc.
21600 Nordho St. Chatsworth, CA 91311 USA,
www.sor.com,
(818)882-1238, Fax: (818) 882-7144
sor@sor.com
Seat Cover Installation Instructions
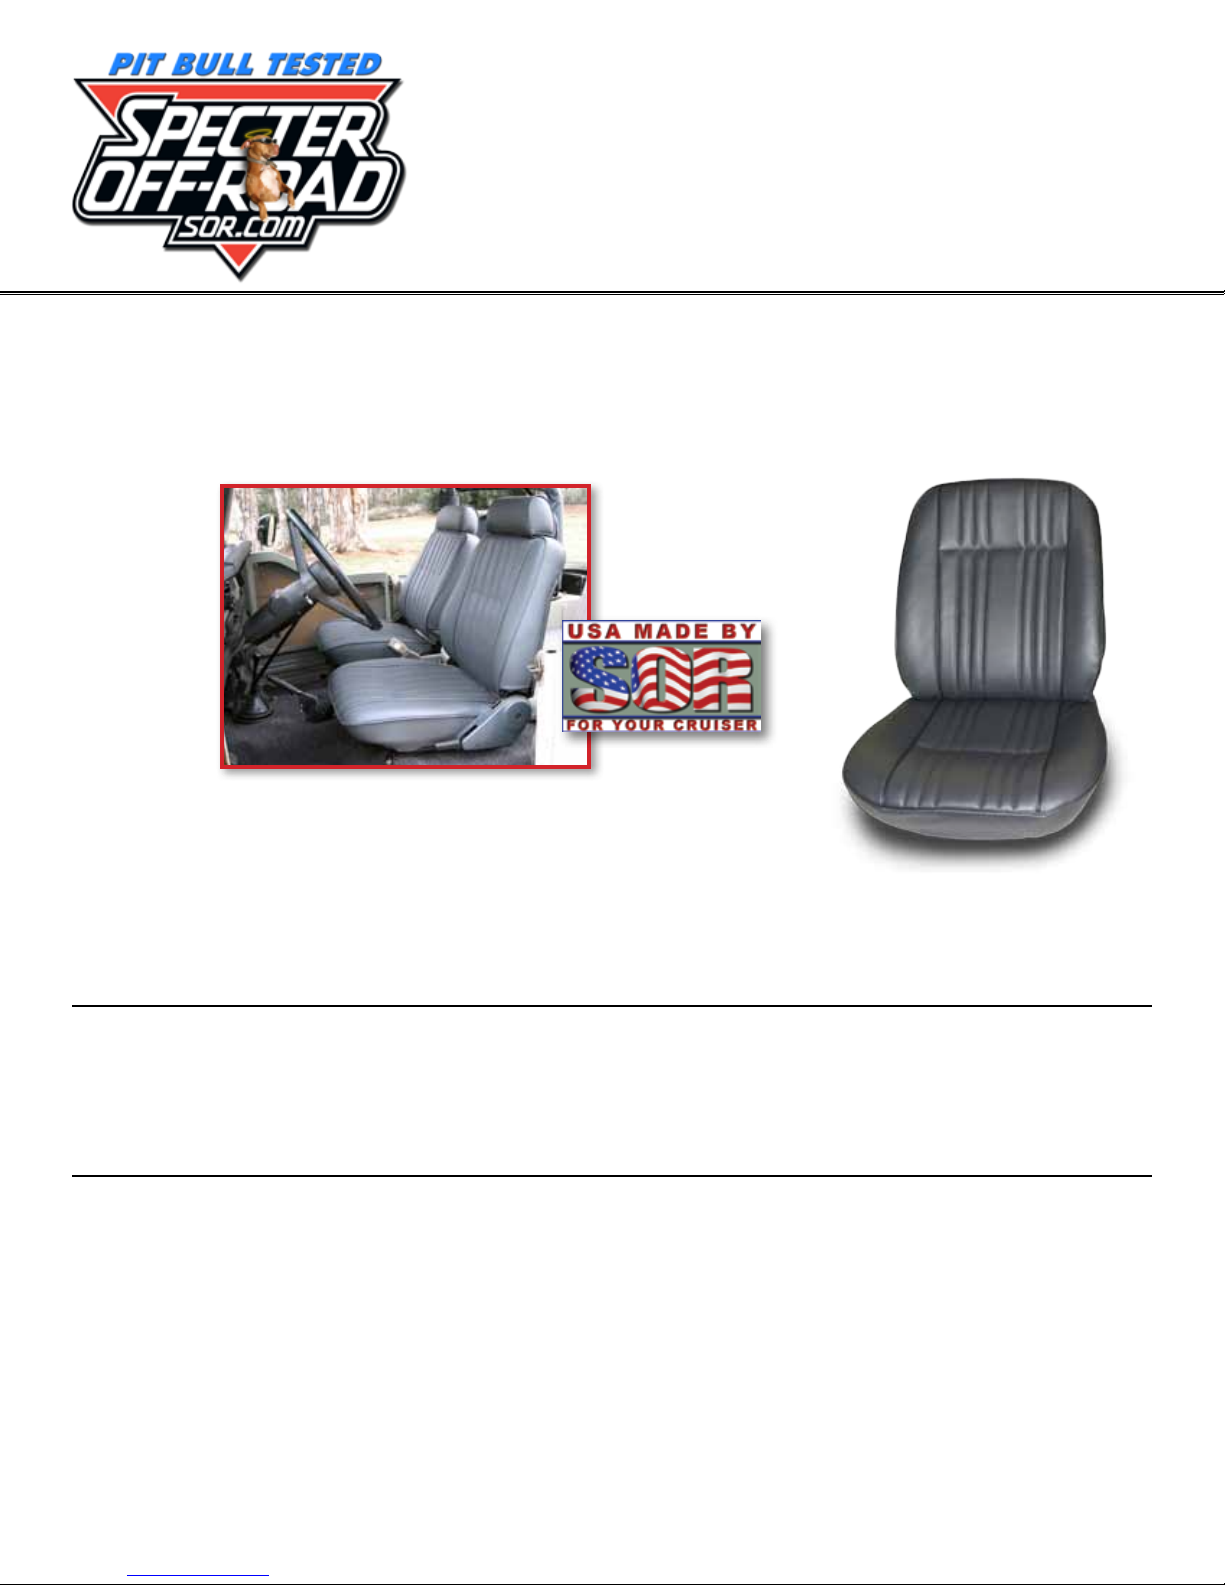
1973 - 1984 40 Series Front Bucket Seat Covers
SOR Parts: #310-73D, #310-79D, #310-80D, 310-73D-BD & 310-73D-GD
Specter O-Road Seat Covers are designed and sewn by our own upholstery
professionals on our premises. They are made to industry specications to be
installed by upholstery professionals and will exhibit a factory original t. With a little
forethought the average home mechanic will successfully achieve that same original
t. For a proper t, we also recommend replacing worn and torn seat foam. Replacement foam can be purchased from
Specter O-Road. Headrests were a factory option on some 40 series Land Cruisers and are therefore headrest covers
are sold separately, see part numbers below.
Bottom Seat Foam
#310-81D SOR High Density
Bottom Molded Foam
Fits 1973-1978 FJ40 & BJ40 front
driver or passenger seat bottom
Headrest Cover
310-73D-AHR SOR Deluxe Vinyl Headrest
Covers-Dark Charcoal Grey
vinyl-Fits 1973-1978
310-79D-H SOR Deluxe Vinyl Headrest
Covers-Light Charcoal Grey
Fits 1979-8/80
310-80D-H SOR Deluxe Vinyl Headrest
Covers-Light Charcoal Grey
Fits 8/80-1984
#310-82D SOR High Density
Bottom Molded Foam
Fits 1979-1984 FJ40 & BJ40 front
driver or passenger seat bottom
310-73D-GDHR SOR Deluxe Gray Denim
Headrest Covers
Fits 1973-1978 FJ40 & BJ40-
310-73D-BDHR SOR Deluxe Black Denim
Headrest Covers
Fits 1973-1978 FJ40 & BJ40
310-73D_0816R3AS
Page 1
© Copyright 2016 Specter O-Road, Inc.
All rights reserved
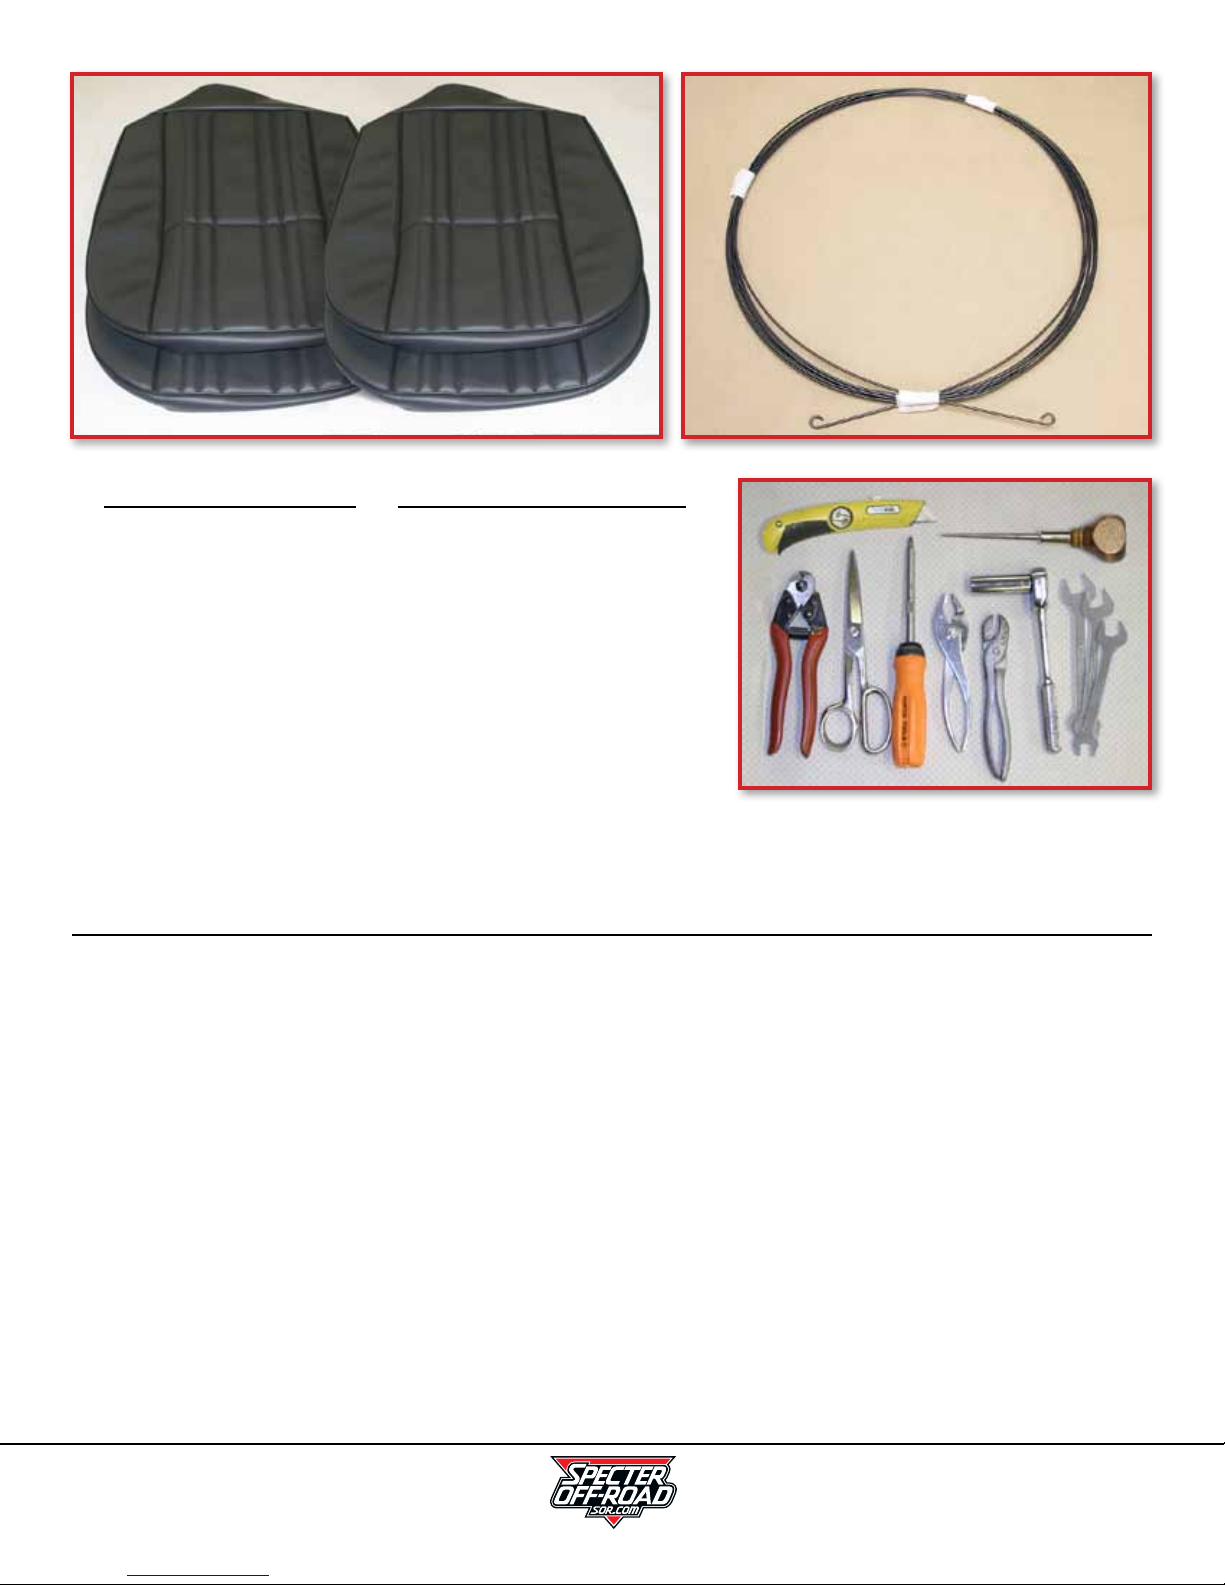
Parts List
Tools Required
2 bottom seat covers
2 back rest cover
Retainer wire
Hog rings
Wire cutters
12, 14 & 17 mm Wrenches
Open End or Socket
Phillips Screwdriver
Hog Ring Pliers
Pliers
Scissors
Utility Knife
Awl
4 Small kitchen trash bags
(Not included)
Preparation
1. READ THESE INSTRUCTIONS IN THEIR ENTIRETY BEFORE YOU PROCEED.
2. Unbolt and remove your seats from your Land Cruiser.
3. Detach the bottom cushion from the backrests. Remove the seat belts where applicable and remove the pivot
brackets from the sides of the seat. Disassemble one seat at a time so you have a reference.
4. Clean and repaint mounting brackets as necessary. Replace any damaged, rusted or missing hardware.
Replacement parts can be purchased from Specter O-Road. Now is also a good time to service the seat
adjustment tracks. Clean and re-lubricate the tracks
5. Your kit came with a length of retainer wire. You have been supplied with enough to properly install your new SOR
seat covers. This wire is used to reinforce hems that attach the vinyl to seat frame. Pass the curled end of the wire
through the mounting seams of the seat cover. The curl in the wire prevents the sharpened ends of the cut wire
from damaging the vinyl. Cut the wire to length leaving enough excess at each end of the hem to curl into a small
loop. Make a ½ curl in the newly cut ends with a pair of pliers.
6. It is not advisable to install this kit in temperatures under 75 degrees Fahrenheit. Lay the covers in the sun to
warm them. Work in a clean environment. Use an old blanket or towel as a work surface to prevent damage to
your new seat covers during the installation process.
Page 2
© Copyright 2016 Specter O-Road, Inc.
All rights reserved
Specter O-Road, Inc. 21600 Nordho St.
Chatsworth, CA 91311 USA, www.sor.com,
sor@sor.com, (818) 882-1238, Fax: (818) 882-7144
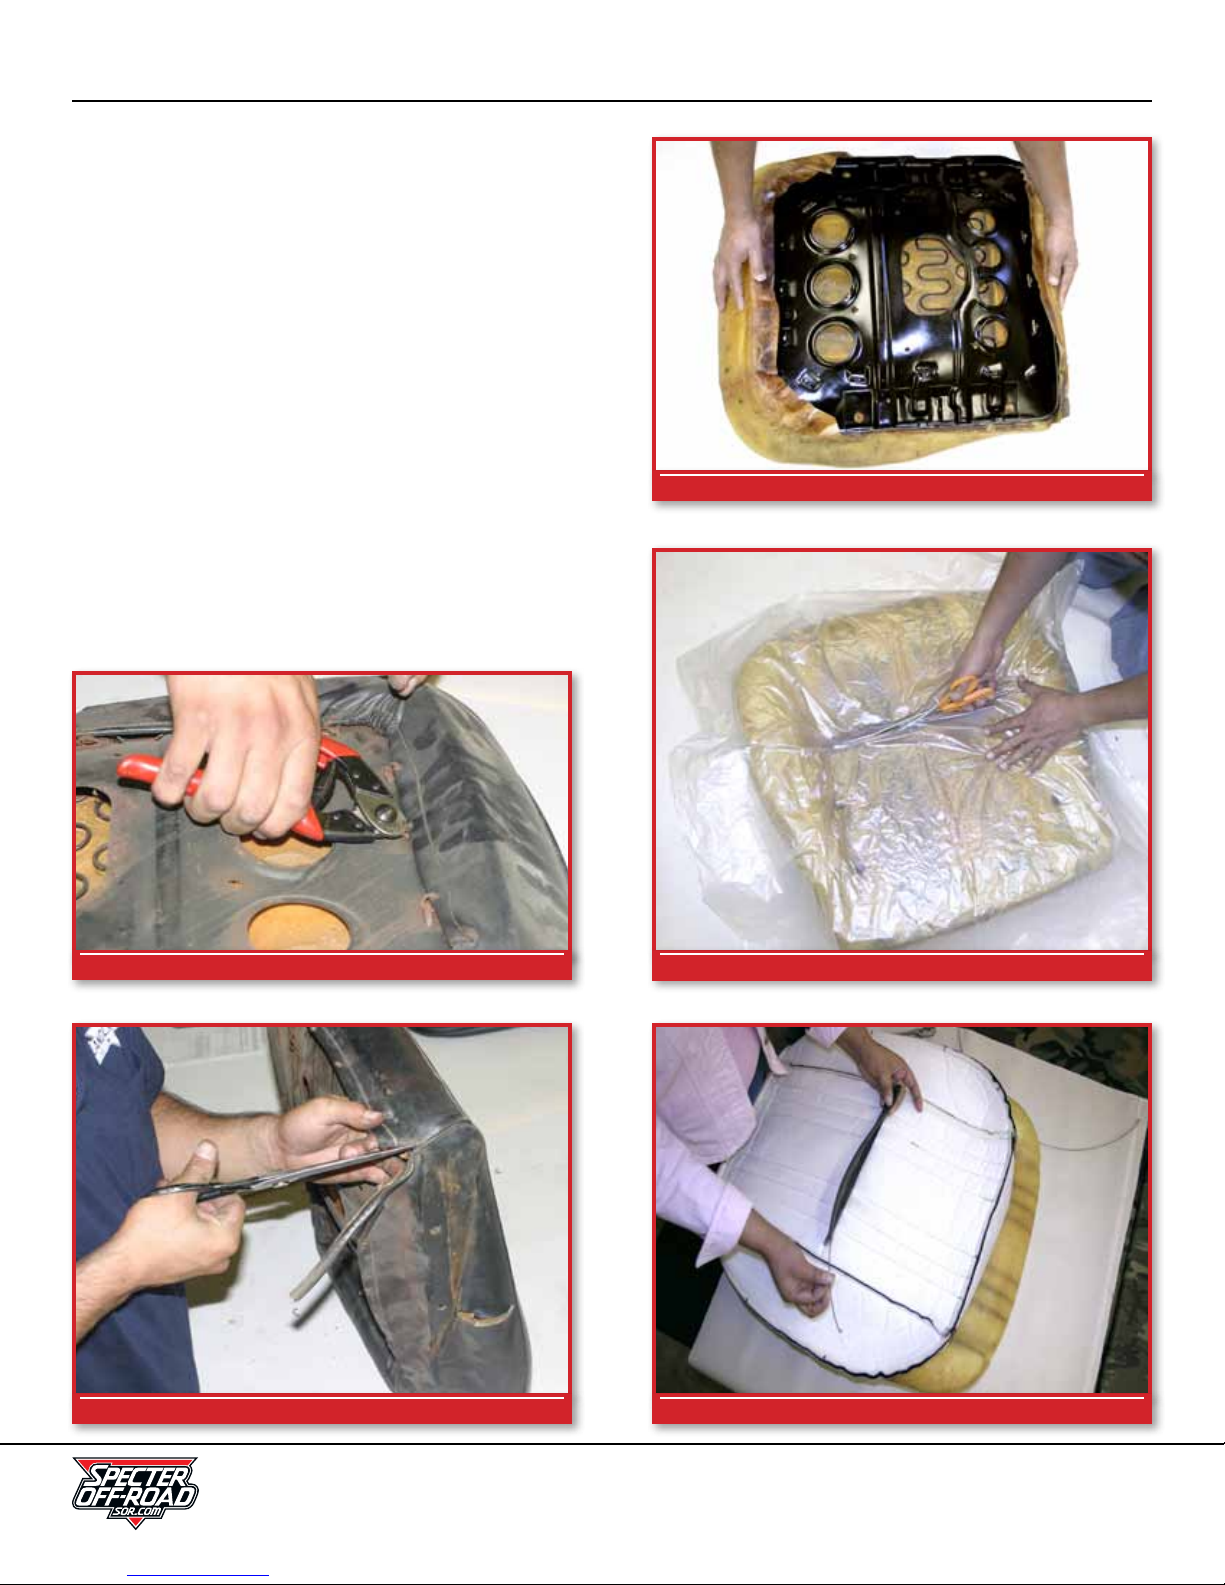
Part I — Seat Cushion Cover Installation
1. Remove the existing cover. Cut the old hog rings with
wire cutters to remove them (see gure 1-1). Carefully
clip the seams with scissors (see gure 1-1B). Avoid
cutting the foam. Note: It is best to clean the steel
frame removing as much rust and dirt as possible.
Optimally, the frame should be primed and repainted.
2. Place the steel frame into the cushion as shown in
gure 1-2
3. Pull a small kitchen trash bag (gure 1-3, bag not
included in the kit) over the seat cushion. This will aid
in reducing friction between the inside surface of the
vinyl and the seat foam. Cut a slit in the bag to allow
the loop and retainer wire mentioned in the next step
to easily pass through.
4. Turn the cover inside out. Insert a retainer wire
through the loop in the center of the bottom side of the
cover (gure 1-4). The wire should extend through the
loop leaving excess evenly on both ends.
Figure 1-2
Figure 1-1
Figure 1-1B
Specter O-Road, Inc. 21600 Nordho St.
Chatsworth, CA 91311 USA, www.sor.com,
sor@sor.com, (818) 882-1238, Fax: (818) 882-7144
Figure 1-3
Figure 1-4
Page 3
© Copyright 2016 Specter O-Road, Inc.
All rights reserved
 Loading...