

Page 1
®
Instruction Manual
CVC-614C High Resolution Color Camera
and
CVC-865DN/24 High Resolution Color
Camera With Mechanical IR Cut Filter
200 New Highway
Amityville . NY . 11701
1-800-645-5516
Fax: 631.957.9142 or 631.957.3880
www.specotech.com
Speco Technologies CVC-614C : CVC-865DN/24
Instruction Manual
1
Page 2

CONTENTS
Speco Technologies CVC-614C : CVC-865DN/24
Instruction Manual
Introduction
FCC Information --------------------------------------------------------------------2
Warning -------------------------------------------------------------------------------2
About this Manual ------------------------------------------------------------------3
Dimensions --------------------------------------------------------------------------3
Features ------------------------------------------------------------------------------3
Accessories --------------------------------------------------------------------------3
Camera Functions
Parts Descriptions ------------------------------------------------------------------4
Function Descriptions -------------------------------------------------------------5
DIP Switch Control -----------------------------------------------------------------6
White Balance Mode ---------------------------------------------------------------6
Color Temperature Chart (White Balance) ------------------------------------7
Installation Guide
Installing the lens -------------------------------------------------------------------8
Auto iris lens connection ----------------------------------------------------------8
Connections --------------------------------------------------------------------------9
Auto Iris Lens Adjustments -------------------------------------------------------9
Troubleshooting ---------------------------------------------------------------------9
Specifications
Color HQ-1 Camera ---------------------------------------------------------------13
2
Page 3
Introduction
♦
FCC Information
This equipment has been tested and found to comply with the limits of a class A digital device, pursuant to
part 15 of the FCC rules and also guaranteed with CE approval. These limits are designed to provide
reasonable protection against harmful interference in a residential installation. This equipment generates,
uses, and can radiate radio frequency energy and, if not installed and used in accordance with the
instructions, may cause harmful interference to radio communications.
Operation of this equipment in a residential area is likely to cause harmful interference, in which case the
user will be required to correct the interference at his or her own expense.
The user's manual or instruction manual for an intentional or unintentional radiator shall caution the user that
changes or modifications not expressly approved by the party responsible for compliance could void the
users' authority to operate the equipment.
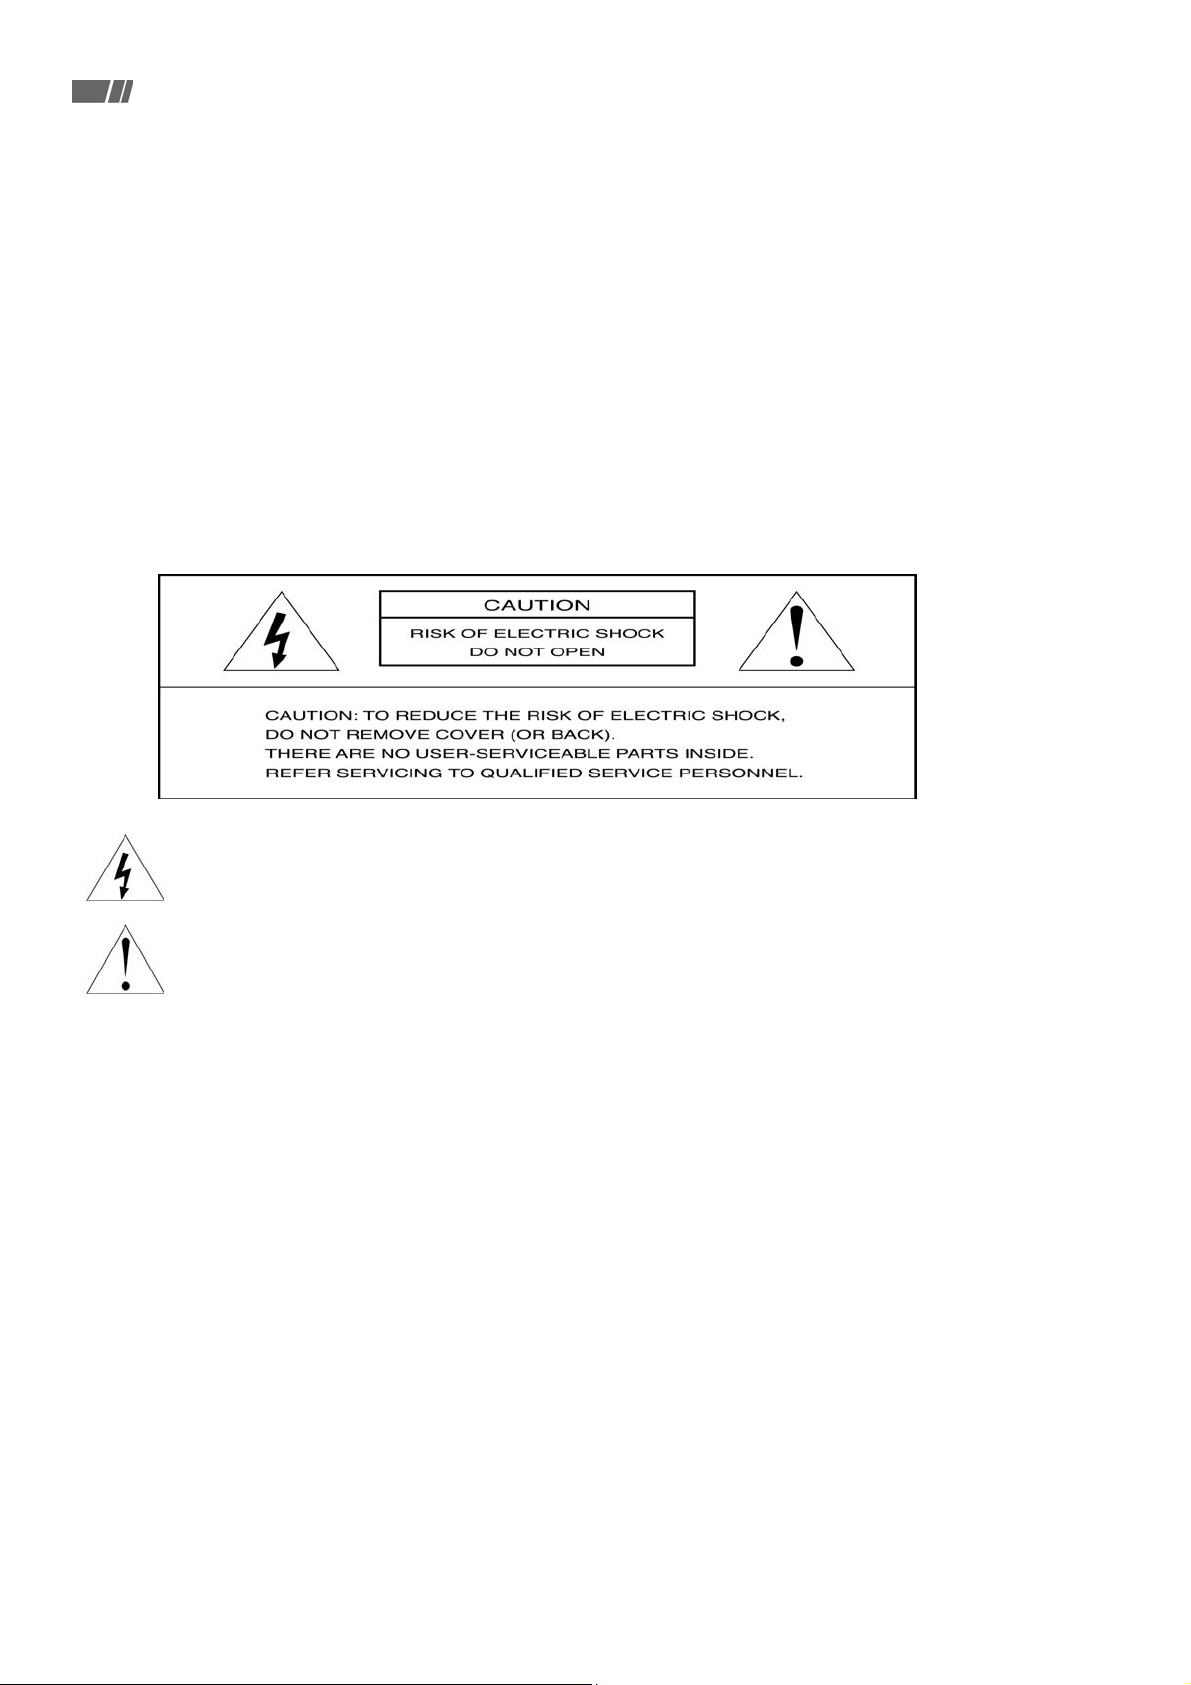
♦ Warning
To prevent fire or shock hazard, do not expose the unit to rain or moisture.
This symbol alerts the user to the presence of non-insulated dangerous voltage within the
product's enclosure that may be of sufficient magnitude to constitute a risk of electric shock.
This symbol alerts the user to the presence of important operating and maintenance
(servicing) instructions in the literature accompanying the product.
►Handle the camera with care.
Be careful while handling or installing the camera. Do not drop it or subject it to strong shock or vibration to
prevent any damages to it. Do not disassemble it or place it on an unstable base.
►Never face the camera toward the sun.
The camera's picture may be influenced when working in unusual brightness environment. Sun light may do
influence on the picture quality or camera itself. Never aim the camera at the sun or other extremely bright
objects whether it is in use or not.
►Cleaning.
Do not touch the surface of CCD sensor by hand directly. Using lens tissue or a cotton tipped applicator and
ethanol to clean the CCD sensor and camera lens. When the camera is not in use, always put the cover cap on
the lens mount.
►Operation temperature.
This camera is designed for use in general purpose indoor CCTV application. Only operate your camera
between the temperature of -10℃ to +60℃(14℉ to 140℉)
Speco Technologies CVC-614C : CVC-865DN/24
Instruction Manual
3
Page 4
♦ About this Manual
This user manual covers the following models listed below. Before installing and using the camera,
please read this manual carefully. Be sure to keep it handy for later use.
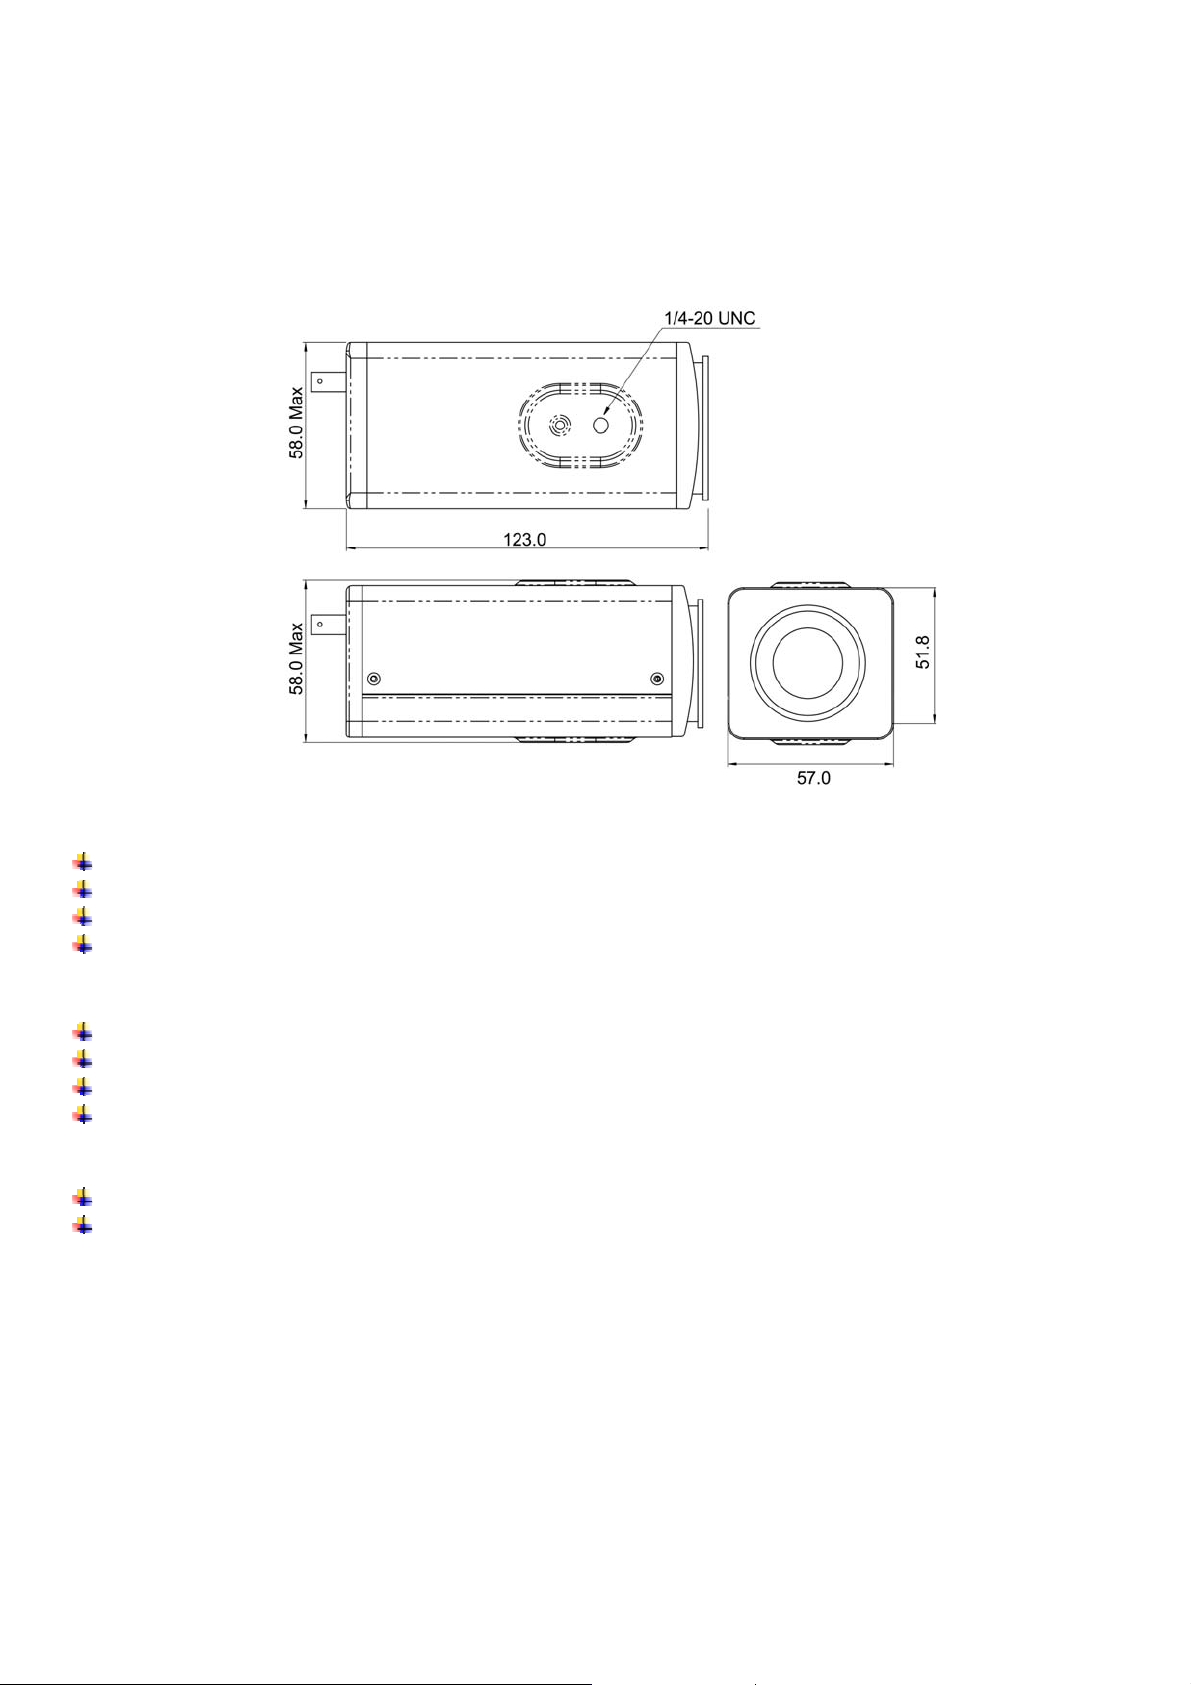
♦ Dimensions
(Unit: mm):
♦ Features
Accepts C or CS mount lens.
Low light, high sensitivity.
DC/Video Drive
Back Focus
Available in Selected Models
AGC (Automatic Gain Control)
Back light compensation.
External Sync.(Line Lock)
Day & Night (Removable)
►Under different light conditions, it will automatically changeover the color to B/W and
vice versa. *Perfectly for clear viewing
High Resolution 580 TV Lines (HQ1)
Min. illumination of 0.5Lux, F1.4 (HQ1)
♦ Accessories
The packaging contains:
z Camera x 1
z Instruction Manual x 1
z C/CS Mount adjusting ring x 1
z Connector of Auto Iris Lens x 1
z Adjustment Tools x 1
If any parts are missing or damaged, contact the dealer you purchased the camera from.
Speco Technologies CVC-614C : CVC-865DN/24
Instruction Manual
4
Page 5

Camera Functions
♦ Parts Descriptions
1. C mount lens ring adapter.
If you are using a CS mount lens, remove the C mount lens ring adapter.
2. Flange back adjusting ring
If back focus adjustment is required, loosen the flange back locking screw,
and adjust back focus by rotating the ring.
3. Mounting bracket screw hole (1/4" -20 UNC)(top)
4. Auto iris lens connector (mini jack)
5. Video output terminal (BNC)
6. Power supply indicator
7. Power input terminal
8. Video / DC drive auto iris lens selector
9. ALC level adjuster - for DC-DRIVE lens
10. Function control DIP switch
*10-1: Function control DIP switch (WB mode)
*11. Color & B/W Level switch
*12.Phase adjustor (
*Selected models.
Speco Technologies CVC-614C : CVC-865DN/24
Instruction Manual
button)
5
Page 6

Camera Functions
Function Description
♦
1. Auto Electronics Shutter (AES)
When using a DC Drive or Video Drive Auto Iris Lens, turn off the AES. When a Fixed Iris or Manual
Iris Lens is used, turn the AES on to adjust the shutter speed automatically.
2. Automatic Gain Control (AGC)
AGC can automatically amplify the digital signal to adjust are for the difference of light level.
3. Auto Tracking White Balance (ATW) / Auto White Balance (AWB)
When the color difference is too obvious, turn the AWB on to have better balanced color, Set the
switches to ATW to have a normal color picture.
4. Aperture Gain (APG)
APG cam make the picture becomes sharper, switch to OFF for normal mode.
5. Back Light Compensation (BLC)
When BLC is ON, the AGC, AES and IRIS operating point is determined by averaging over the
center area instead of entire field-of-view, so that a dimly-lit foreground object at center area can be
clearly distinguished from brightly-lit backgrounds. When operating the camera outdoor, turn the
BLC on to get clear picture of object on screen. For indoor using or when operating the camera in
low light environment turn, the BLC ON as well.
6. DAY & NIGHT (ICR removable)
The camera provides automatic mode changeover from color to B/W or B/W to color by sensing
different light conditions. It remains at true color mode in the day condition for optimal color and
switched to B/W mode in night condition for clear viewing by removing the Infrared Cut Filter.
7. Flickerless (FLC)
This switch captures the wide and intense range of color of some light sources and adjust the color,
gain, electronic shutter control and tracking balance to produce a good quality color picture.
8. Internal Line Lock (INT / LL)
The Line Lock is designed to stabilize the image. Always switch it on. Line Lock sync is interchange
and only available when with an AC Power source. It's unavailable with 12V DC power.
Speco Technologies CVC-614C : CVC-865DN/24
Instruction Manual
6
Page 7

♦
DIP Switch Control
Function Format Description
LL - IN
OFF-AES
BLC-OFF
LL
IN
OFF
AES mode
BLC
OFF
OFF
For stabilizing the image
Use the ( ) button to adjust.
Initial setting is IN.
Normal:1/60 (1/50)
NTSC:1/60~1/100000
PAL:1/50~1/100000
ON
BLC OFF.
AGC OFF.
OFF-AGC
FLC-OFF
WB1
WB2
WB3
AGC
FLC
OFF
H
L
H
L
H
L
Turn it on in the dark environment to get
clear image.
Use to change shutter speed under
flicker state.
NTSC:1/120
PAL:1/100
Note: Can only be used when AES is
on.
FLC OFF
When the color temperature of the
environment dramatically changes, you
can adjust WB mode/switches to have
better color image.
*Please see the “White balance mode”.
♦
White Balance Mode
WB1 WB2 WB3 MODE Remark
L L L
ATW
(Auto White balance)
Natural: Outdoor and environments
under daylight.
L L H
L H L
L H H Hold
H L L
H L H
H H L
H H H
MWB
(Manual White balance)
Push Similar with ATW.
fixed value (4700°K)
fixed value (3200°K)
fixed value (4200°K)
fixed value (6300°K)
Speco Technologies CVC-614C : CVC-865DN/24
Instruction Manual
Use the ( ) button to adjust.
(White balance mode-manual)
When you use this function, pointing the
camera to a specific area, ex: white
paper, you can then apply the color to
elsewhere.
For your reference, please check on
Color Temperature chart.
K= Kelvin color Temperature
7
Page 8
Camera Functions
♦ Color Temperature Chart (White Balance)
Light Sources
Summer Skylight 12000 – 25000°k
Daylight Shade 10000°k
Skylight 8000~10000°k
Overcast 6500~7500°k
Studio Electronic Flash 6500°k
Daylight/ Auto Flashlight 5500°k
Fluorescent bulbs 4200~5000°k
Cool white- fluorescent bulbs 4500°k
Warm white- fluorescent bulbs 3500°k
Studio Lights 3400°k
Professional Tungsten photo lamp 3200°k
Household bulb 2700~3200°k
Degrees (°k)
Sunrise、 Sunset
Candle 1900°k
※ note: Please note that the values are approximations because many factors affect
color temperature.
2000~3000°k
Speco Technologies CVC-614C : CVC-865DN/24
Instruction Manual
8
Page 9
Installation Guide
♦
Installing the lens
1. Remove the lens cap from the front of the camera.
2. If you are using a C mount lens, screw the lens directly into the camera.
3. If you are using a CS mount lens, remove the C mount lens ring adapter.
4. When using a fixed iris lens, switch the shutter control to AES ON.
5. When using a manual adjustable iris lens, switch the shutter control to AES OFF.
6. When using a Video servo auto iris lens or DC servo auto iris lens, switch the shutter control
to AES OFF.
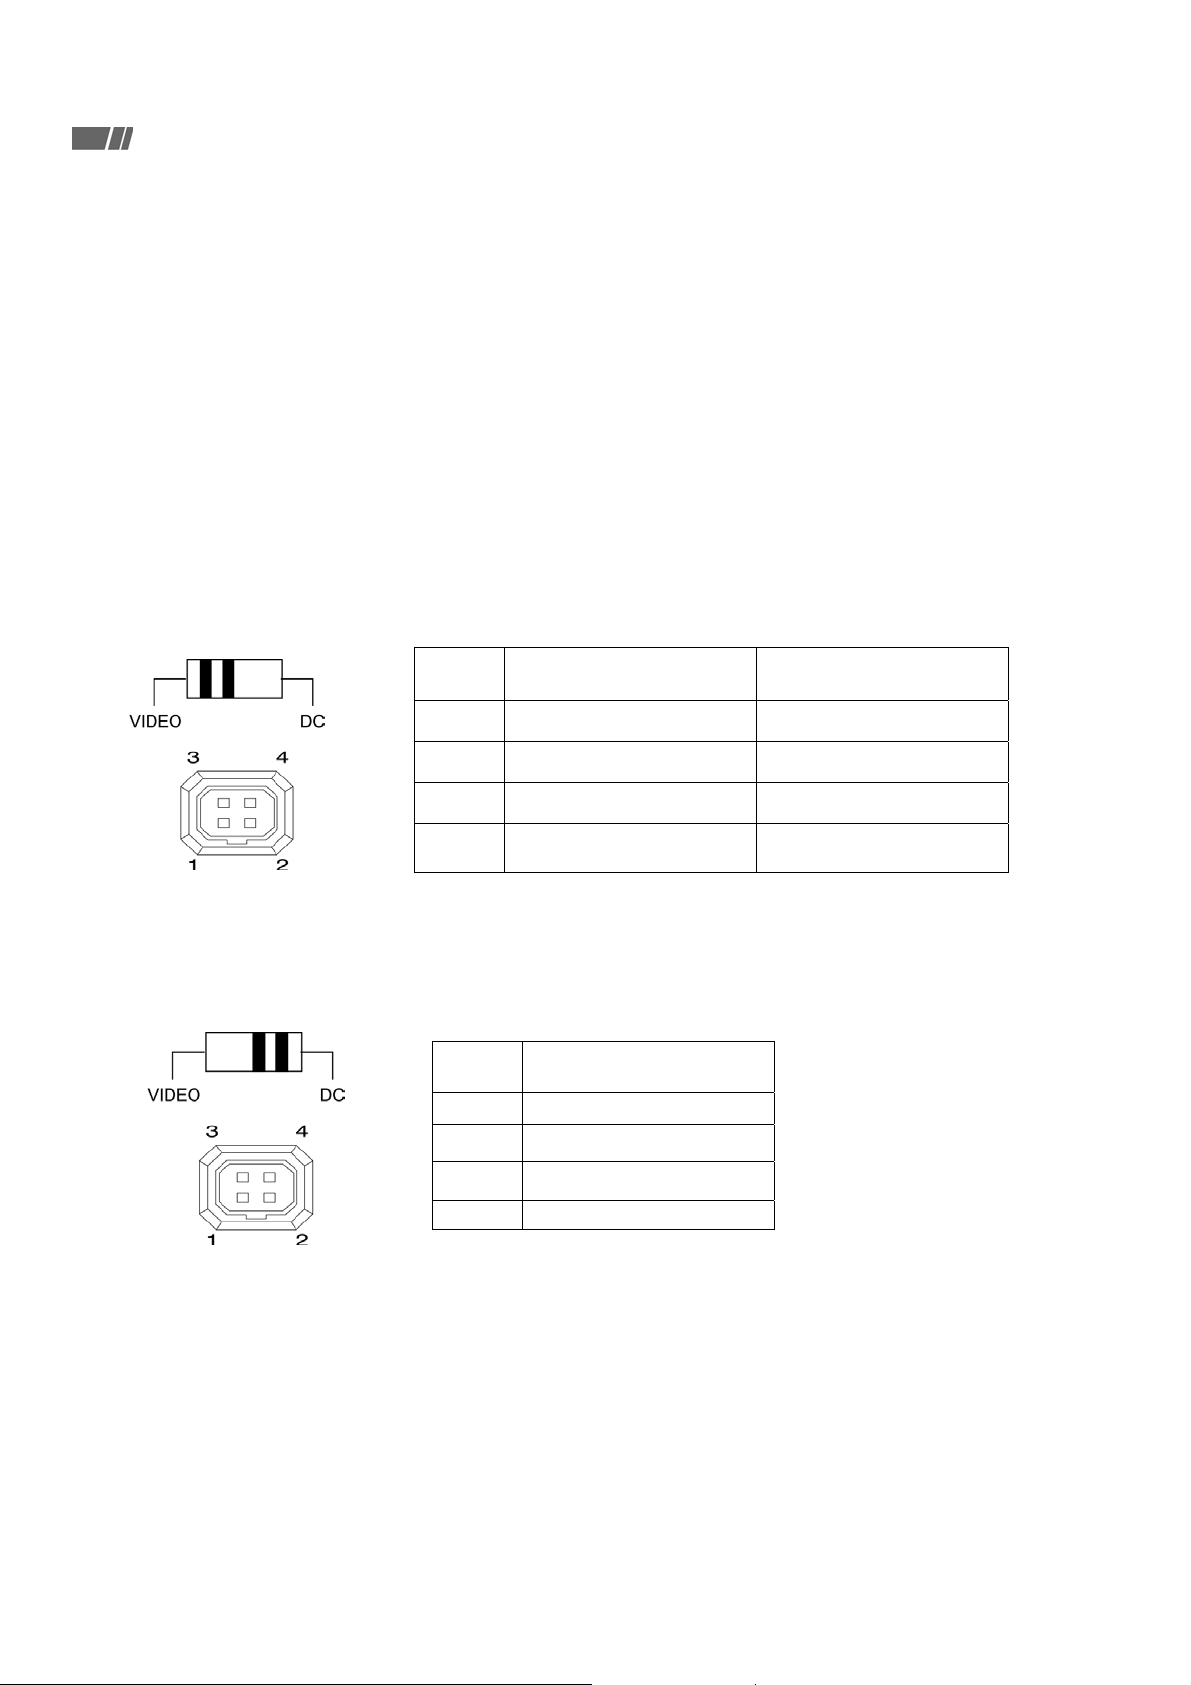
♦ Auto iris lens connection
1. When using auto iris lens (with EE amp)
Set the lens selector to the "Video" position.
PIN
DEFINITION LENS CABLE LEAD
1
2
3
2. DC servo auto iris lens (without EE amp)
Set the lens selector to the "DC" position.
To ensure correct lead connection, please refer to the instructions on the lens.
4
PIN
1
2
3
4
DC +12 V Red
Video iris White
NC -
Ground Black
DEFINITION
Damping -
Damping +
Driving+
Driving-
Speco Technologies CVC-614C : CVC-865DN/24
Instruction Manual
9
Page 10

Installation Guide
♦ Connections
1. Keep the cameras' power OFF during the installation.
2. Ensure that the input voltage is correct for the plug pack; both the camera and the plug pack may be
damaged if the voltage is incorrect.
3. Terminate the camera output to 75 ohms.
Use 75-ohm coaxial cable (RG-59/U, RG-6/U, RG-11/U).
Always set the last monitor termination switches to 75 ohms, and set the termination switches of
intermediate monitors to HIGH (HI-Z)
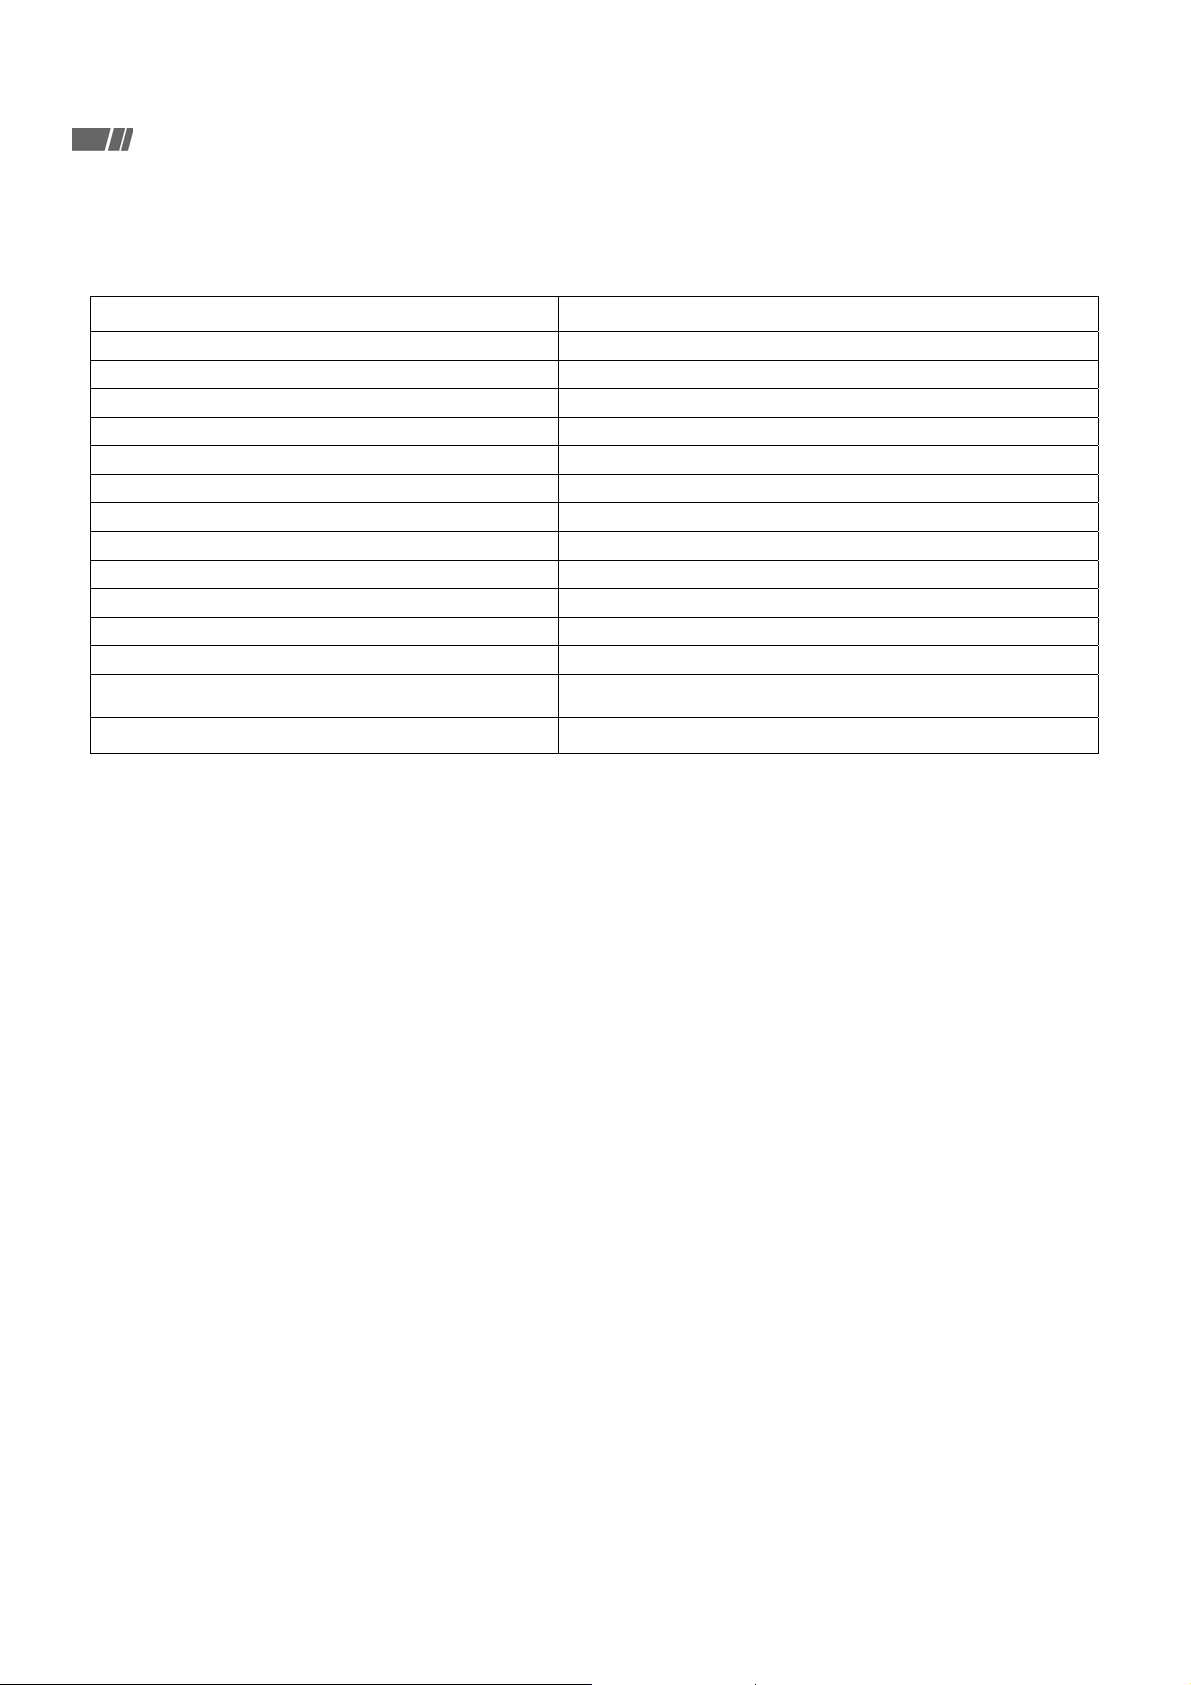
4. The table below shows the Maximum recommended cable length.
Type of Coaxial Cable
Recommended
Maximum Cable Length
RG-59 / U
(3C-2V)
30 ft.
100m
RG-6 / U
(5C-2V)
660 ft.
200m
RG-11 / U
(7C-2V)
825 ft.
250m
Auto Iris Lens Adjustments
♦
Once the lens is screwed in completely to its mechanical stop position, you will then be
able to rotate lens chassis back to suit the set-up position of the camera.
The back focus adjustment is accessible at the front end of the camera. It allows you to
adjust the back focal length or picture focus.
*Note: it does not apply to all types of lens, please contact with your dealer you
purchased your lens from.
♦ Troubleshooting
Problem What to Check
Is the system power on?
Is the cable connected properly?
- No picture appears on the monitor
- The picture is not clear
◎Note: If dust adheres to the lens, the picture quality will suffer.
To clean the lens, wipe lightly with a soft cloth or commercially available lens cleaning paper.
Has the lens cap been removed?
Is the illumination proper?
Is the monitor properly adjusted?
Is the lens mount ring proper?
Is the lens clear?
Is the lens properly focused?
Is the monitor terminated properly?
Speco Technologies CVC-614C : CVC-865DN/24
Instruction Manual
10
Page 11

Specifications
♦ Color HQ-1 Camera
Item CVC-614C CVC-865DN/24
Description 1/3" Color HQ1 Camera 1/3" Color HQ1 Camera with ICR
DSP Sony HQ1
Pick up Element Sony Super-HAD CCD Image Sensor
Number of Pixels <NTSC> 768 (H) × 494 (V)
Auto Electronics Shutter ON-OFF
AGC ON-OFF
ALC Low-High
WB ATW/ MWB (PUSH-HOLD) 3200°k/ 4200°k/ 4700°k/ 6200°k
Back Light Compensation ON-OFF
FLC ON-OFF
Line Lock* IN-LL
(Mechanical IR Cut Filter)
Sync. Mode Internal Sync.
Scanning System 2:1 Interlace
Resolution 580 TV Lines
S/N Ratio More than 48dB
Gamma 0.45
Minimum illumination 0.5 Lux, F1.4
Horizontal Sync. Frequency <NTSC>15.734 KHz
Video Output 1.0 Vp-p, 75 ohm
Power Source AC/DC(12~24)V, AC 99V~240V
Power Consumption (AC/DC)3W
Operating Temperature
-10℃ to +60℃
Lens Mount C/CS mount
Shutter Control <NTSC>1/60-1/100,000 sec.
Dimensions 123(L) x 57(W) x 52(H) mm
Net Weight <AC/DC type>0.44kg
* Specifications are subject to change without prior notice.
* Line Lock is available when AC Voltage is used.
Speco Technologies CVC-614C : CVC-865DN/24
Instruction Manual
11
Page 12

1-800-645-5516 Fax: 631.957.9142 or 631.957.3880
Speco Technologies CVC-614C : CVC-865DN/24
Instruction Manual
Speco Technologies
200 New Highway
Amityville . NY . 11701
www.specotech.com
12
®
CR300000209
 Loading...