

Page 1

Thank you for purchasing our product. Speco Technologies is constantly
developing and improving products. We reserve the right to modify
product design and specifications without notice and without incurring
any obligation.
7” LCD CCTV Test monitor
Quick guide
◎connect battery before using
Page 2

PRECAUTIONS
The lightning flash with arrowhead symbol, within an equilateral triangle, is
intended to alert the user to the presence of insulated dangerous Voltage
within the product’s enclosure that may be sufficient magnitude to constitute
risk of electrical shock to persons.
The exclamation point within an equilateral triangle is intended to alert the
user to the presence of important operation and maintenance (servicing)
instructions in the literature accompanying the appliance.
Please read before using
1. Please read the service manual in details before using.
2. Don't try to disassemble the chassis or the part easily , in case that touch the power
by mistake , is shocked by electricity the danger or caused inside parts to be
damaged.
3. Do not attempt to service this unit yourself unless you are authorized to do so.
Opening cover may exposure you to dangerous voltage or other hazards. Refer all
servicing to qualified personnel only.
4. When being regular, please lock the parts firmly first to prevent the machine
damage.
5. Please connect correctly in accordance with the regulation, prevent the machine
from using, or striking improperly.
6. Please don't use any organic solution or the corrosively sanitizer to insert and wipe
away the chassis outside. While inserting and wiping away, please turn off the
power, and use the clean cloth is stained with letting a small amount of branch
water, insert and wipe away appearance.
7. Please don't use the camera under the following abominable environments:
Temperature is lower than -10 degrees Centigrade, or is higher than +50 degrees
Centigrade.
2
Page 3
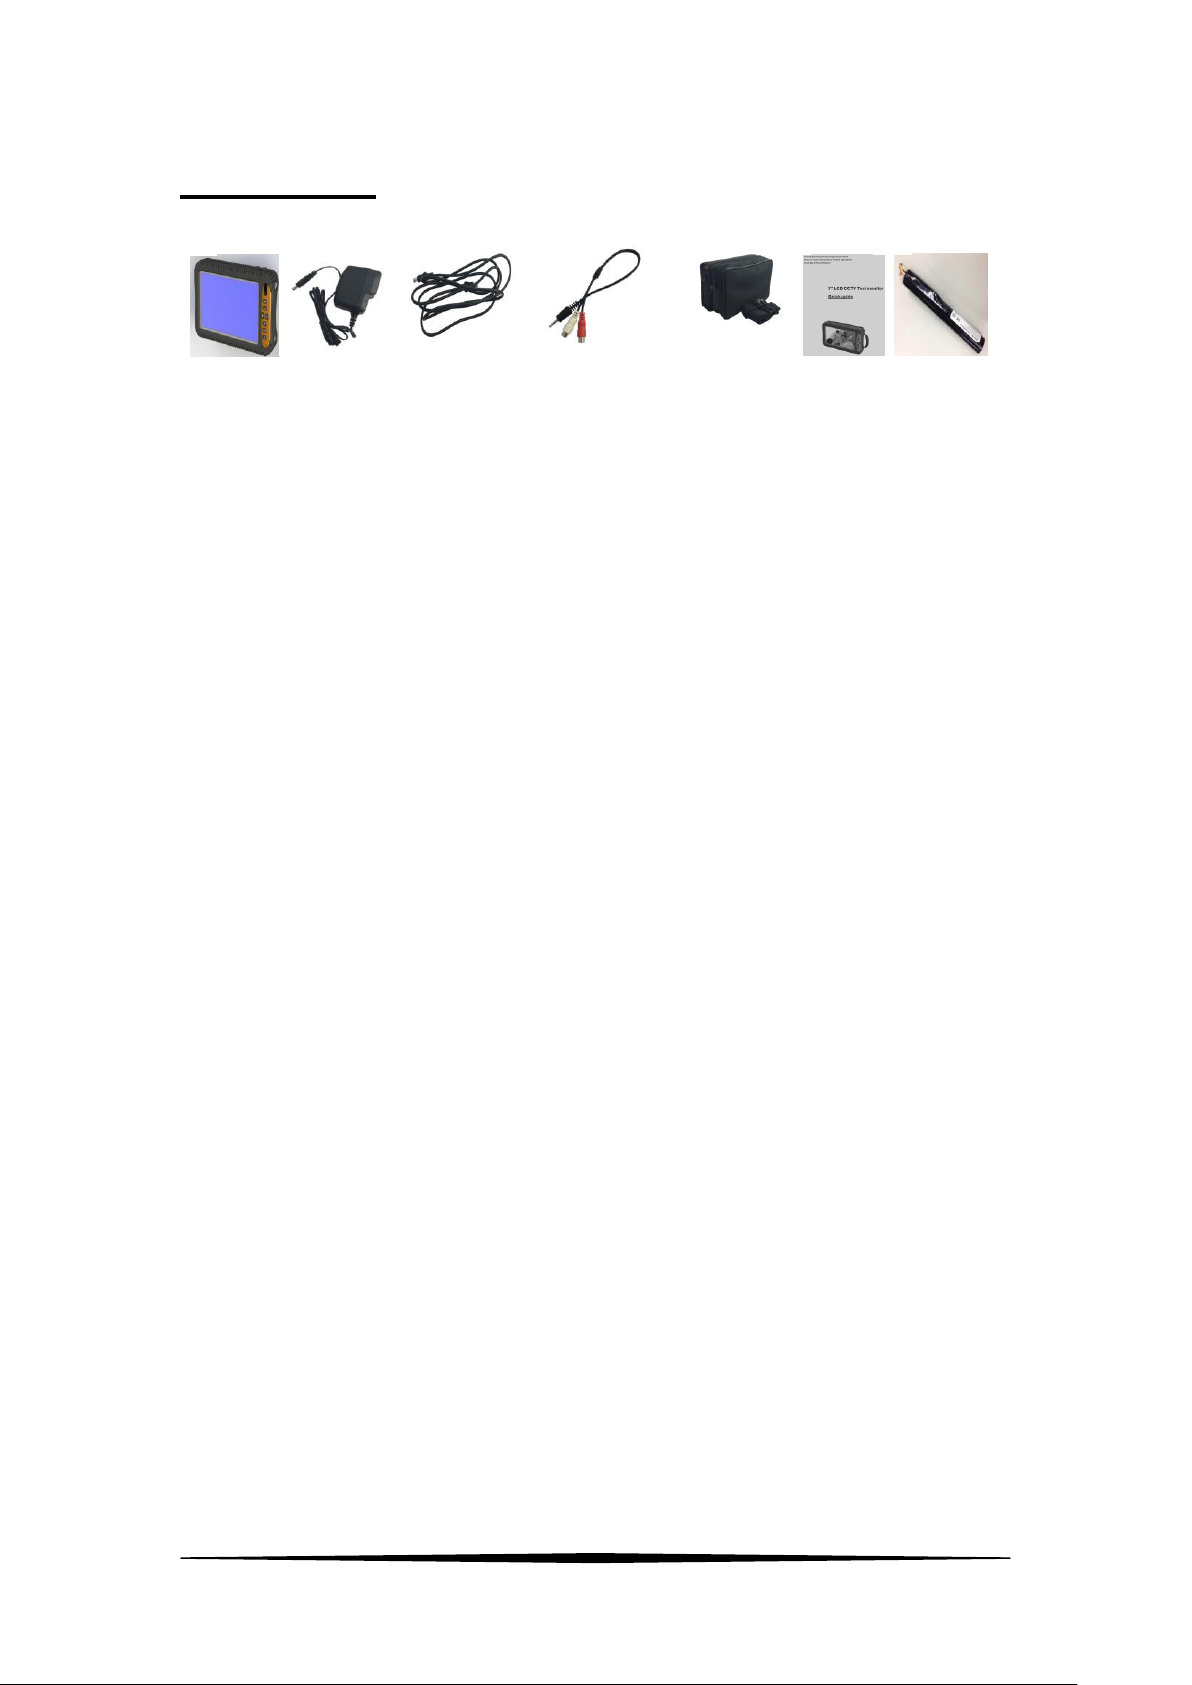
Components
①
②
③
④
⑤
⑥
⑦
1. 7”LCD CCTV Test monitor
2. Power cord
3. Power supply cable (for camera)
4. Audio cord
5. Storage Bag
6. Quick guide
7. battery
3
Page 4

Exploring your Test Monitor
①System indicator
Green light: Power on
Red light: Charging
Green light winking: Sleep mode
②Light sensor
Auto adjusting back light
③Source
Switch AUTO / TVI / AHD input
④Direction
Up / Down / L / R direction for select options
⑤Menu
Entry Menu to adjust detail.
⑥Sleep mode
Turn on / Off the back light
⑦Power switch
Turn on / off the power
①
②
③
④
⑤
⑥
⑦
4
Page 5

①Speaker
Build-in speaker for testing
②Li-on battery
3400mAh, Li-ion Battery
③Led light
Flashlight
④stand
Easy for using on desk
⑤Power input
DC 12V / 2A for charge
⑥Power output
DC 12V / 500mA, supply temporary power for camera
⑦Audio input
Test sound from camera
⑧Cable test
Cable open / Short circuit test
⑨Pattern output
AV pattern output
⑩ Video input
AHD / TVI / AV
③
①
②
④
⑤
⑥
⑦
⑧
⑨
⑩
5
Page 6
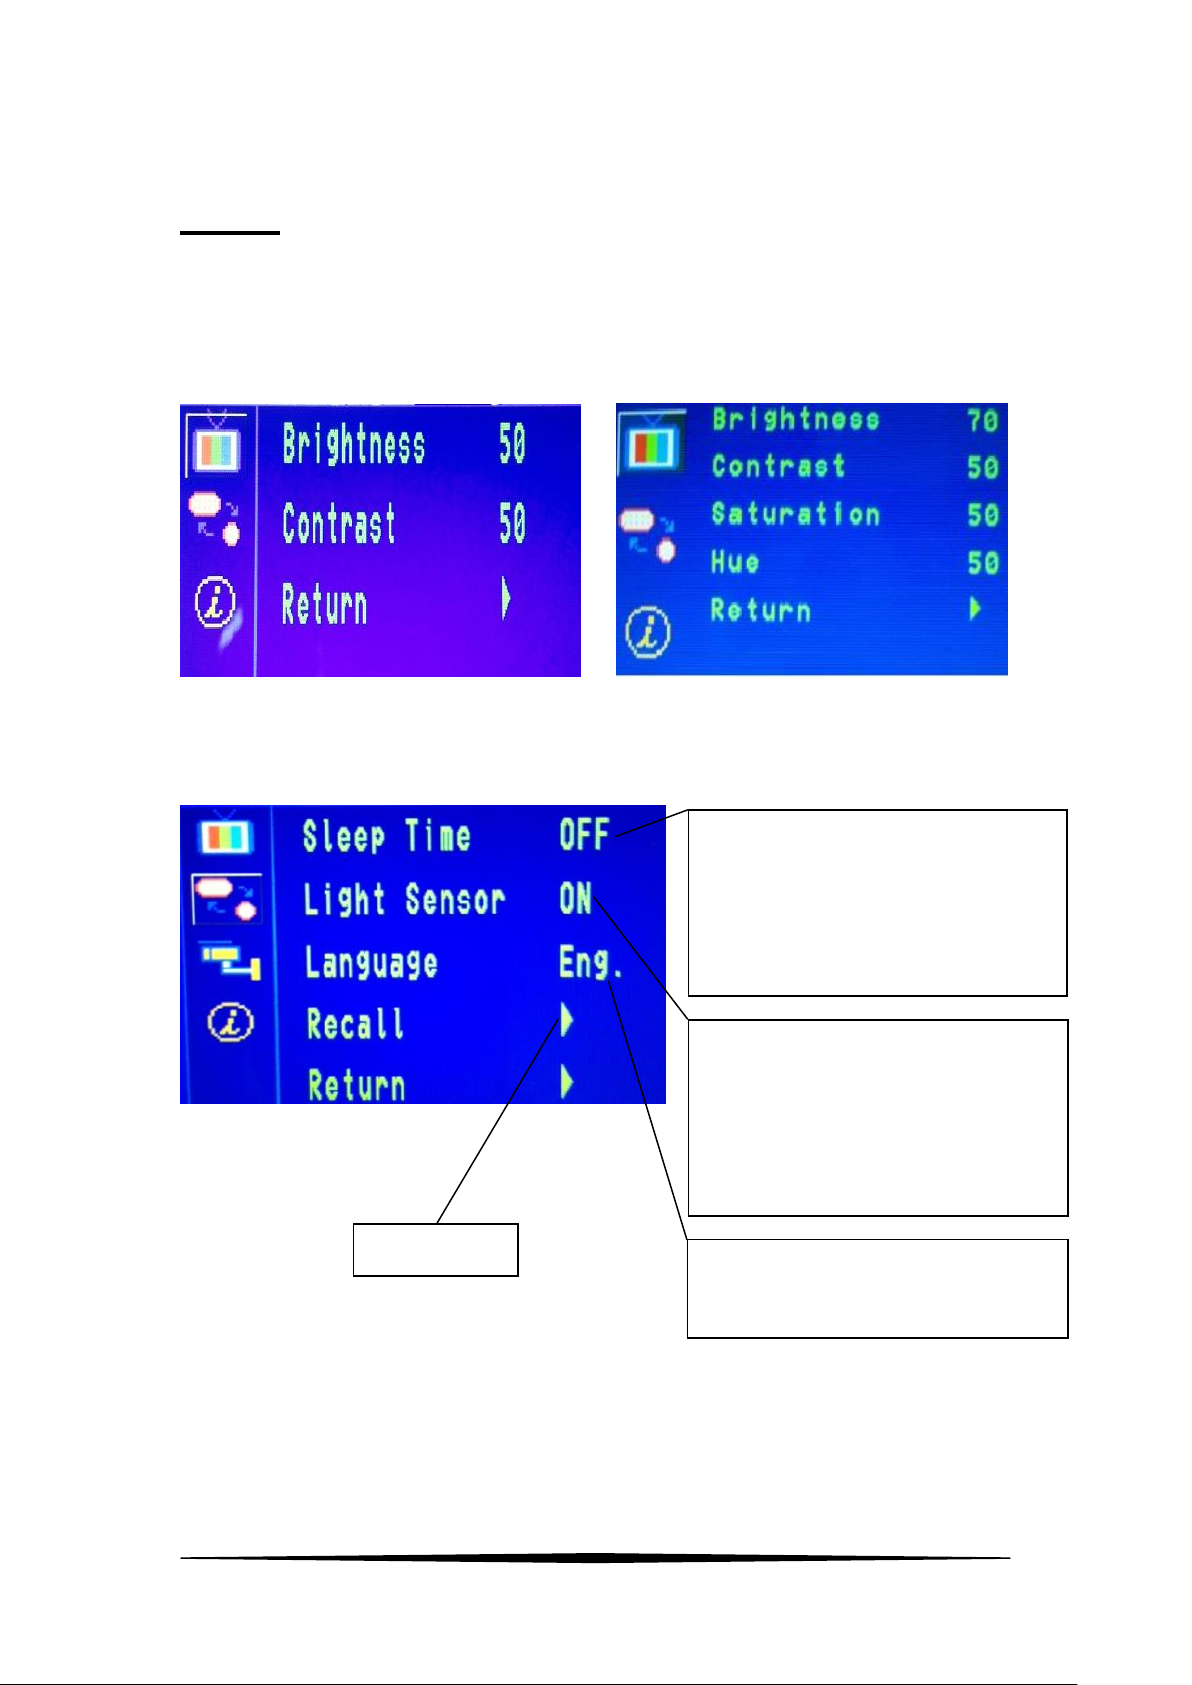
System will go to standby mode to
save power automatically when no
input.
OFF, 5, 10, 30, 60 min can be
A light sensor is a device that is
used to detect light and
automatically control the back light
of a screen, especially in low-light or
high-light situations.
Factory reset
Change language.(Chinese, Japan,
English)
Menu
1. Image adjust: Click “ Menu ” to enter adjust menu as below.
a. AHD or TVI input b. AV input
2. System function: Click “ Menu ” →” ▼” to enter menu as below
6
Page 7

3. Default Input & PTZ (If camera available): Click “ Menu ” →” ▼”
To control Tele/ Wide/ Far/ Near.
Change Default Input AUTO / AHD / TVI
twice→” ► twice” to enter Default Input & PTZ function
Click “ Menu ” →” ▼” twice→” ►” →” ▼”→” ►” to enter PTZ Menu
( Camera OSD menu)
7
Page 8

Test Function and Operation
Press ◄ or ► button to switch function and ▲ or ▼ to select more
options.
1. CABLE TEST:Open or Short circuit testing
8
Page 9

Don’t connect others I/O in AC/DC mode, measure AC/DC voltage in any
types of I/O function or operate AC/DC measure function in charge mode.
2. PATTERN OUT (NTSC): Press ▲ or ▼ to switch 5 different modes.
(NTSC V RAMP) (NTSC V COLOR) (NTSC H GRAY) (NTSC V GRAY)
(NTSC H RAMP)
3. PATTERN OUT (PAL): Press ▲ or ▼ to switch 5 different modes.
(PAL V RAMP) (PAL V COLOR) (PAL H GRAY) (PAL V GRAY)
(PAL H RAMP)
4. AUDIO IN : ON / OFF
5. LED : OFF / LOW / MIDDLE / HIGH
Notice
1. When you first time to start using the test monitor, please charge
battery above 5 hours to make sure this battery is fully charge to
extend its usage life as your cell phone. After that the battery just
charge 2~3 hours could be charged fully and enough usage for 2~4
hours.
2. Battery charge life time is about 250 times and depends on use
environment and operation to decide its decadent speed. Please
follow correct charge method to extend battery life.
9
Page 10

3. System indicator will show charge status. Charge independently is
Panel Size
7'' TFT-LCD
Caution!
Do not use when charging battery.
better for battery life and fast short battery charger time. In addition,
Charge voltage should not be below 2A.
Dimension
Specifications
10
Page 11
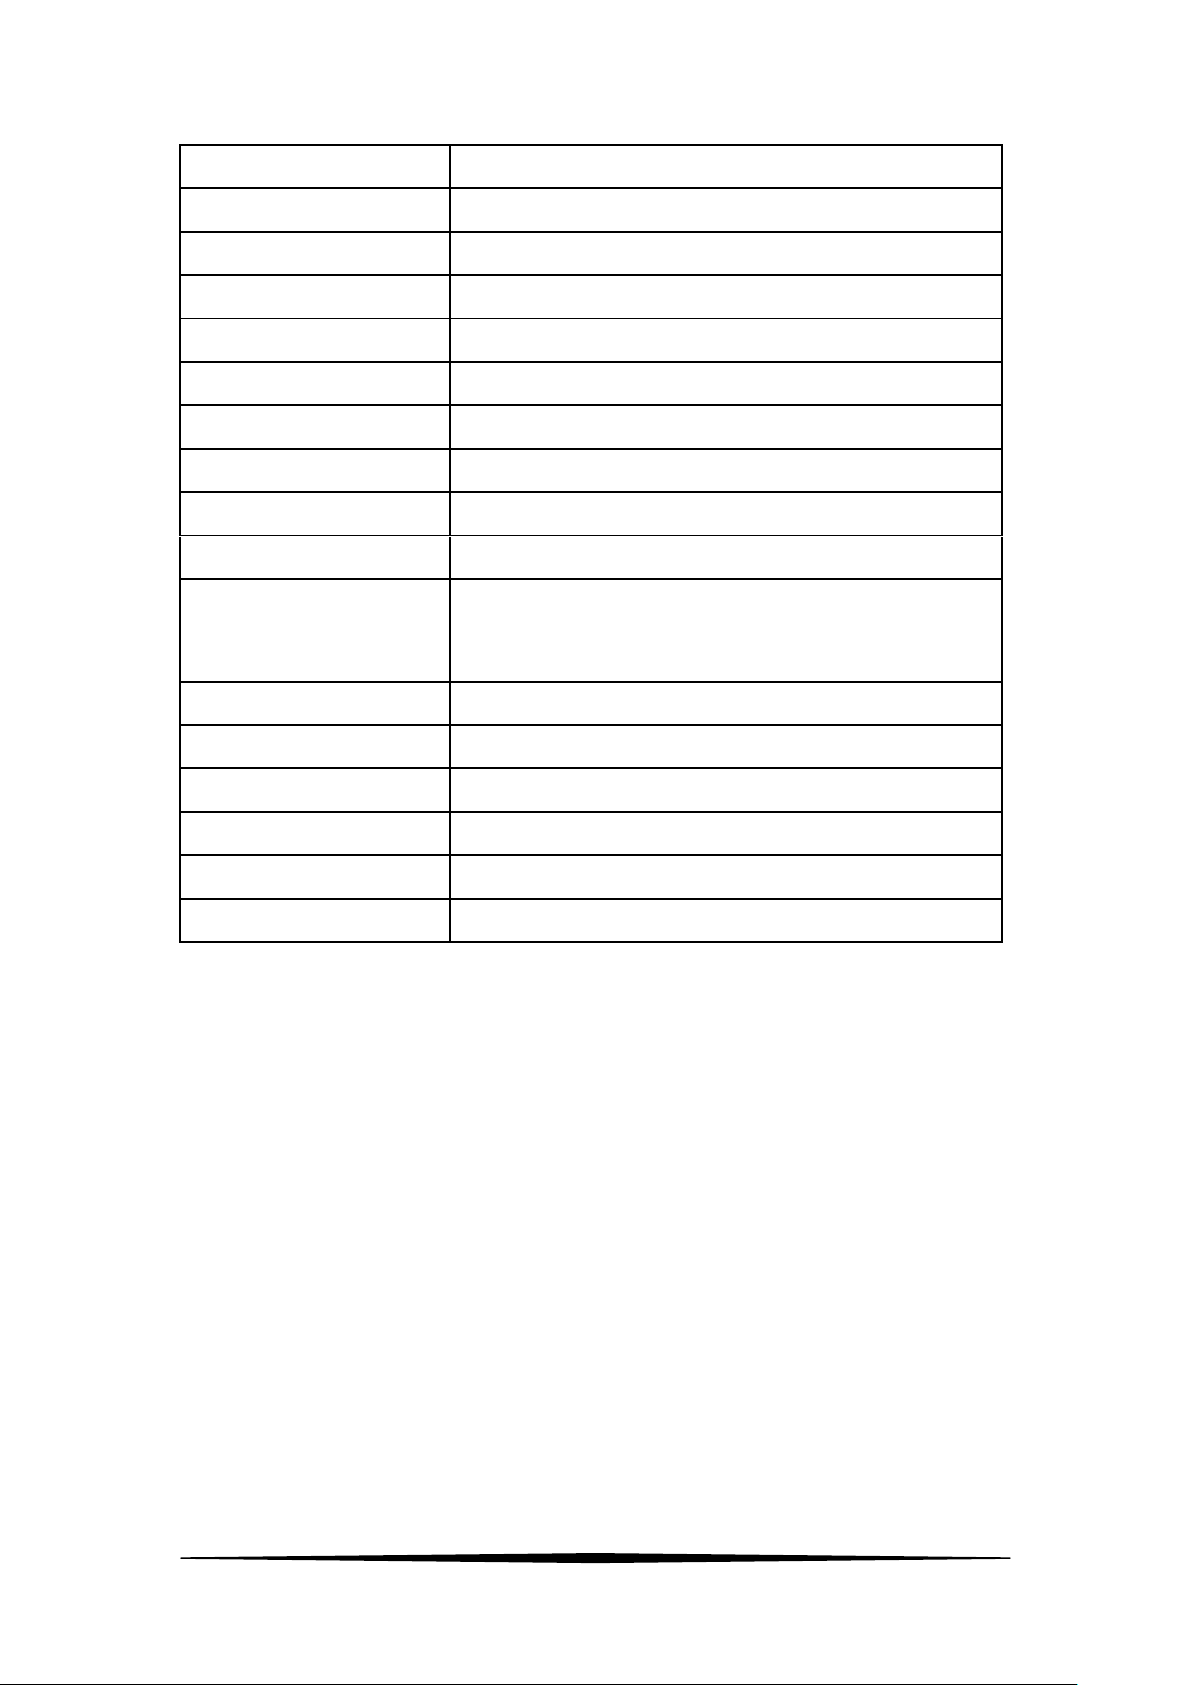
Display Resolution
800 x 480
Input Support
AHD / TVI / AV
Brightness
400 cd / m²
Signal Input
BNC x 1 ( For AHD / TVI / AV )
Output signal
BNC x 1 ( For CVBS Pattern test )
Power Output
DC 12V / 500mA ( Supply the temporary power )
Pattern Output
Output the color bar pattern to test display
Cable Test
Test cable open / short
Charging Voltage/Current
DC 12V / 2A
Battery
7.4V / 3400mAh, Li-ion Battery Pack
Accessories
Storage Bag , Power cord , Power supply cable ,
,Audio cord , battery , Quick guide
Charger Time
2~3 Hours
Stay Time
2~4 Hours
Operating Temperature
14℉ to 122℉
Storage Temperature
-4℉ to 140℉
Dimension (inches)
82.95”(L) x 49.29”(W) x 17.72”(T)
Weight
900g (1.99 pounds)
11
 Loading...