

Page 1
! ITEM №: VLDT3WM/ VLDT3GM
! Caution for Installation
1. In order to prevent electronic shock, don’t loosen any screws or covers.
2. Do not directly touch the front glass. If necessary, use a soft cloth
moistened with alcohol to wipe off the dust.
3. Avoid places where there are frequent vibrations or shocks.
4. Don’t operate the camera beyond its temperature, power source ratings.
5. When any abnormalities happen, make sure to unplug the camera and
contact your local dealer.
! Packing
1. Camera X1
2. Junction box X1
3. User Manual X1
4. 4*34mm Screw X4
5. 4*20mm Screw X4
6. Plastic-Conical-Anchor X4
7. Junction box cotton pad X1
8. Hexagonal Wrench X1
9. Mounting drawing paper X1
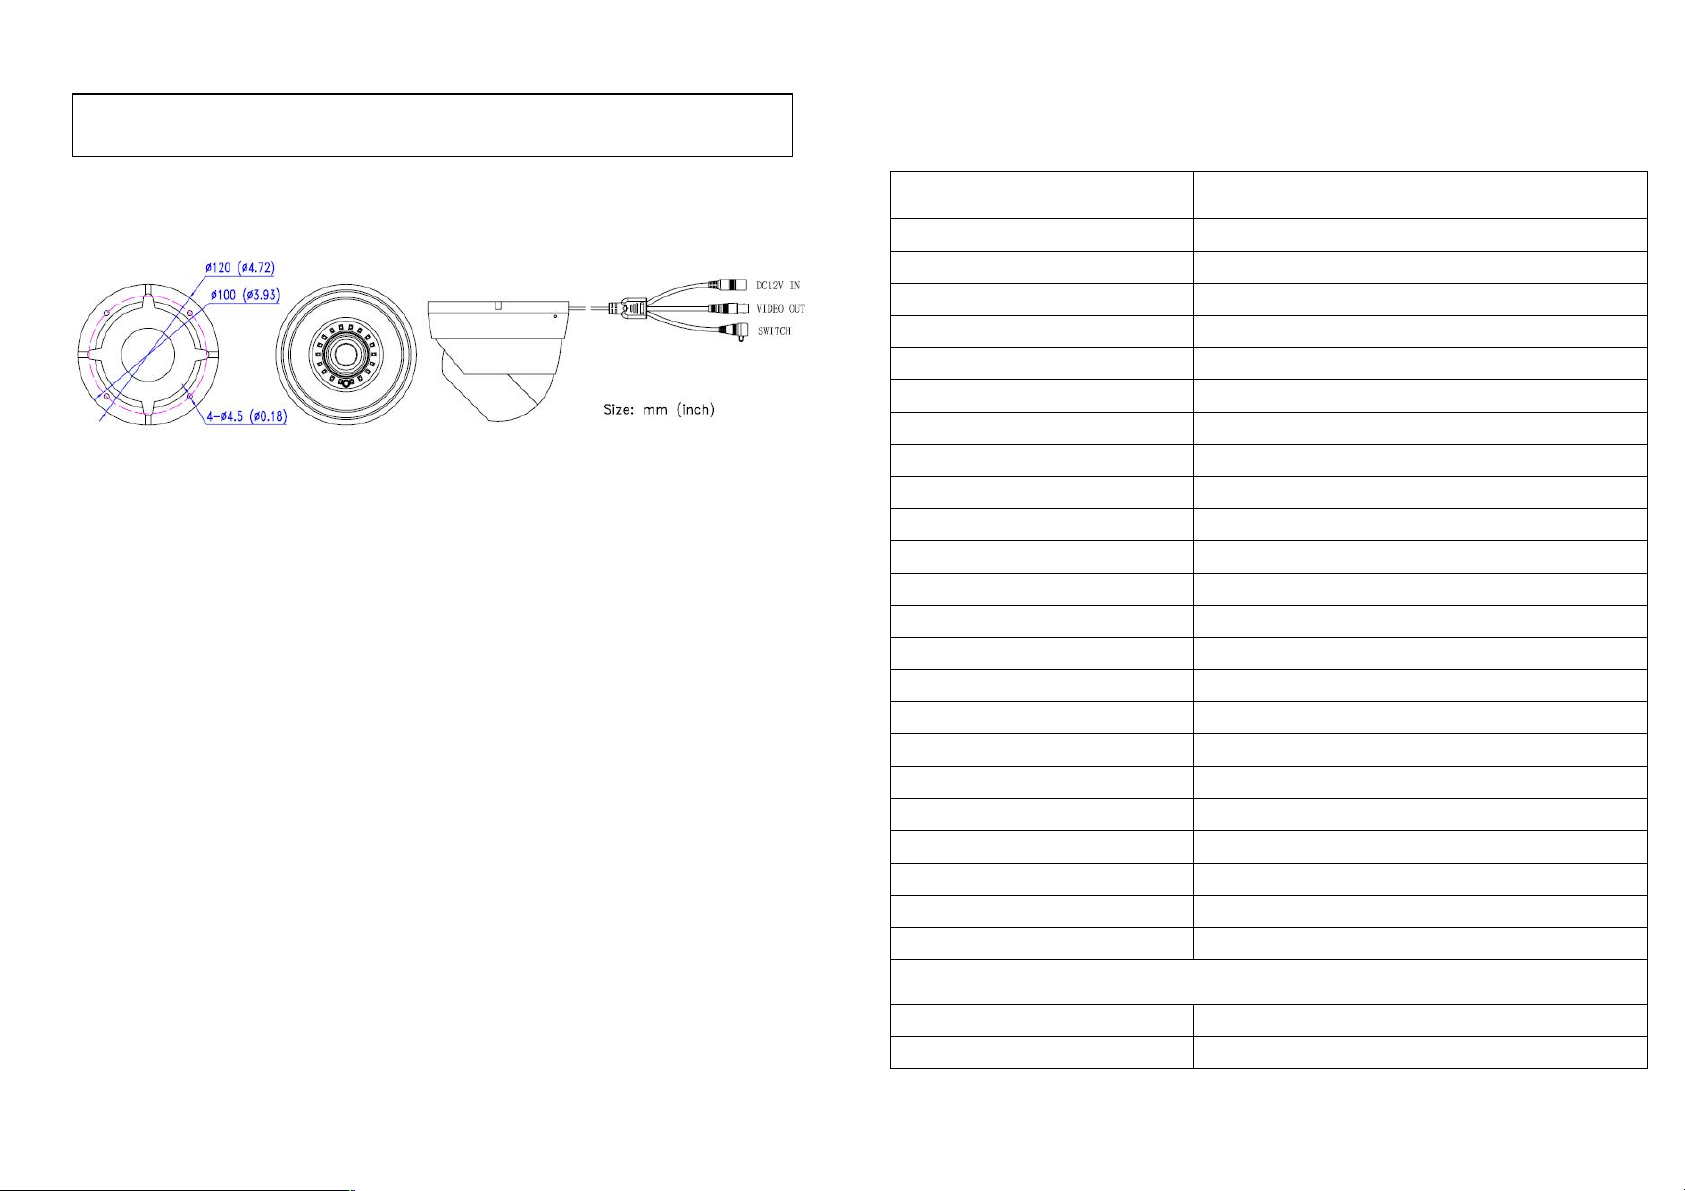
! Specification
ITEM
VLDT3WM/VLDT3GM
IP Rating
IP66
Type
Removable IR Cut Filter
Signal System
NTSC/PAL
Pick Up Device
1/2.9" 2.2 Mega Pixels CMOS
Picture Elements
1920(H)X1080(V)
Min Illumination
0Lux(18 Pieces IR LED ON)
S/N Ratio
≥52dB
Lens
2.8-12mm Motorized Vari-focal Fixed Iris Lens
3D/2D
ON
SENS-UP
ON
IR SMART
ON
White Balance
ATW
Back Light Compensation
OFF
DWDR
ON/OFF
OSD
With UTC Signal(DVR Control OSD)
Video Out-put
HD-TVI/HD-AHD/HD-CVI/CVBS
Power Supply
DC12V ±10%
Current Consumption
500mA(MAX)
IR Effect Distance
49.2~65.6ft(indoor)
Dimension
Φ4.72”×3.93” inch
Weight
790g(27.86oz)
Storage Temperature
-22~+140
Operating Temperature
-22~+104
Junction box
Dimension
Φ4.72””×1.59” inch
Weight
255g (9.0oz)
Remark: Non-regulative adaptor may cause camera damaged.
Multi-Format HD Analog IR Camera
Page 2
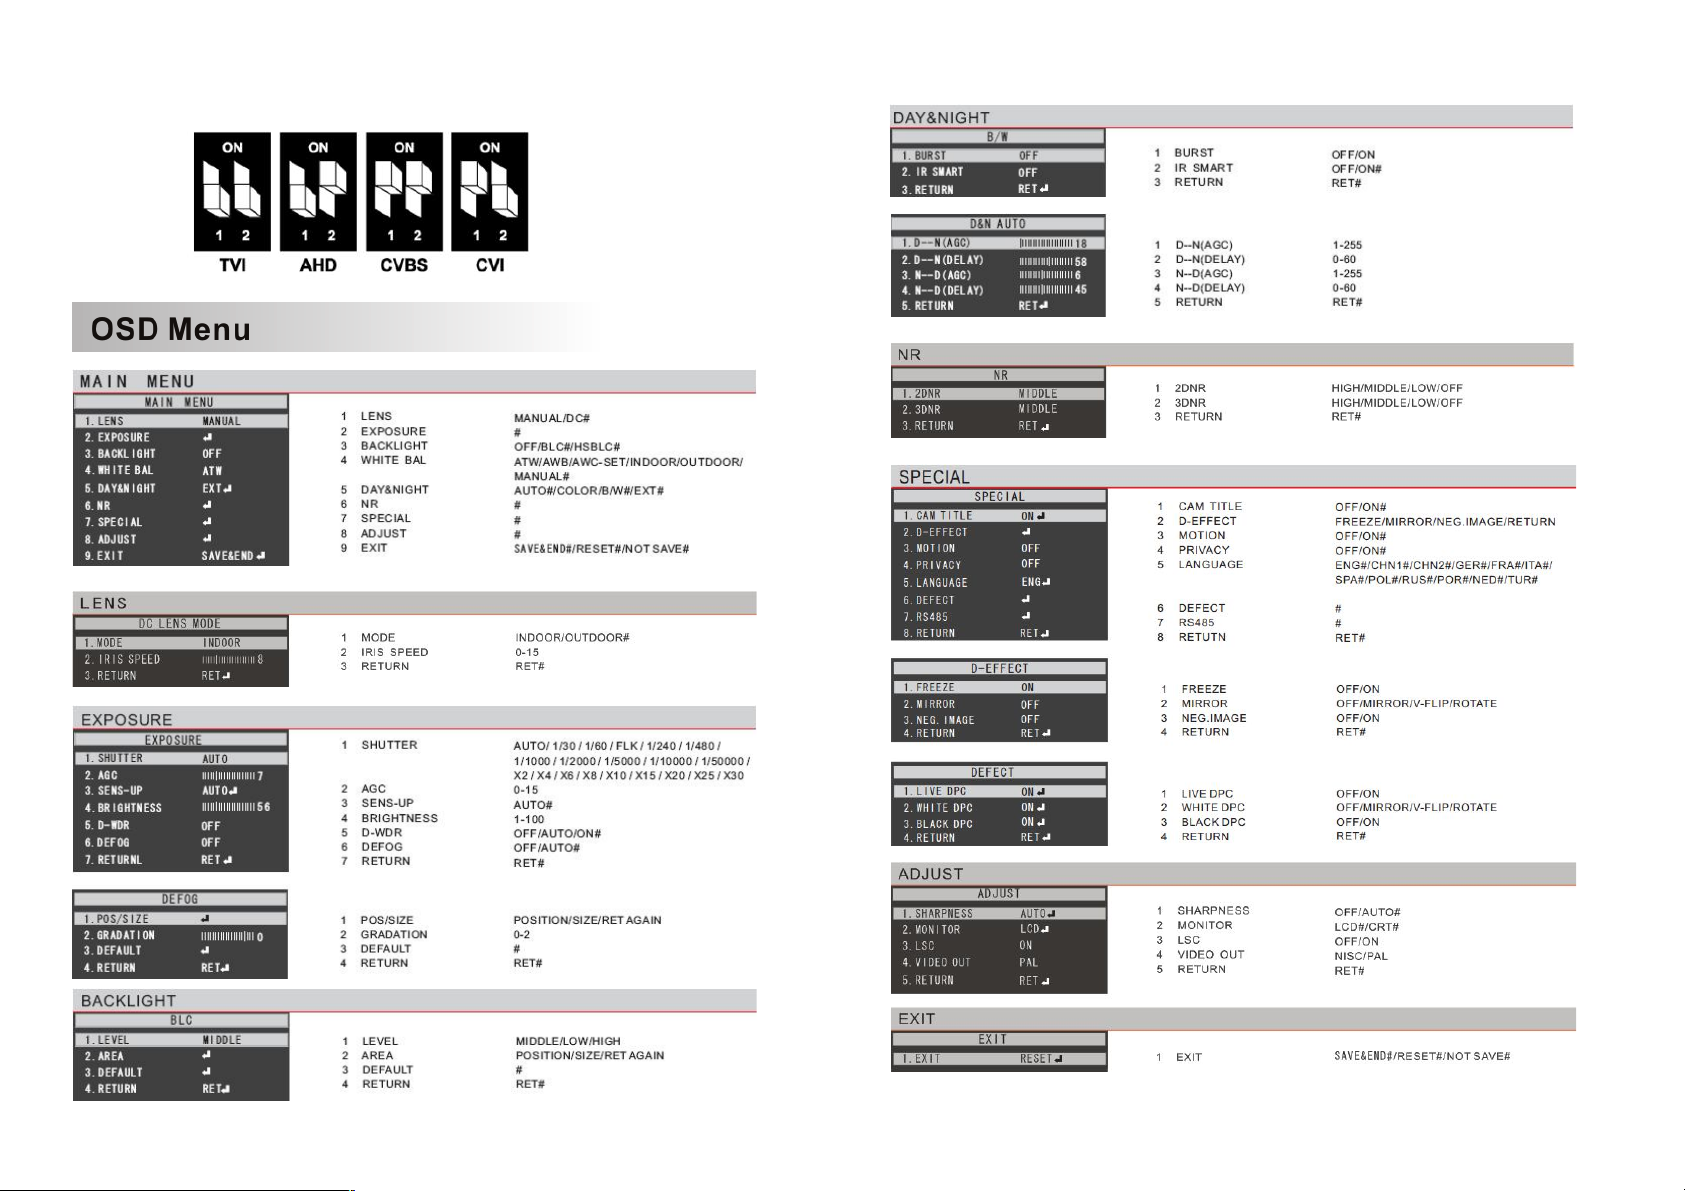
! video signal output switches
Page 3

! Multi Format HD Analog UTC Control
● Overview
Junction box
● Installation
(1)
(2)
(3)
(4) (5)
(5)
M20 Plastic Screw
1. Paste the drawing paper on the wall and drill holes。
2. Paste the sponge pad on the back of junction
box,Fix with M20 plastic stopper on back hole or
side hole according to different installing needs。
3.Fix with 4pcs plastic rubbers into the wall, use M4
threaded screws to fix the junction box on the wall。
4.Disassemble the camera as
picture shown, use M4*20mm
screws to fix camera base on the
junction box。
5. Connect all cables and put them inside
the junction box, then fix the dome with the
metal ring, adjust camera viewing angle,
when finished, rotate the metal ring and fix
the metal ring with the screw.
Junction box
cotton pad
Drawing paper
(1)
(2)
(3)
(4)
(5)
1. Zoom/Focus
As picture shown, Click(1) enter into lens
menu;Click (2) zoom in;Click (4) zoom out;
Click (3)enter into camera OSD main menu。
2. OSD
As picture show, Click (5) enter into main
menu operation page。
(1)- Zoom/focus lens menu
(2)- Zoom in
(3)- Enter into camera OSD main menu
(4)- Zoom out
(5)- Main menu operation page
 Loading...