

Page 1
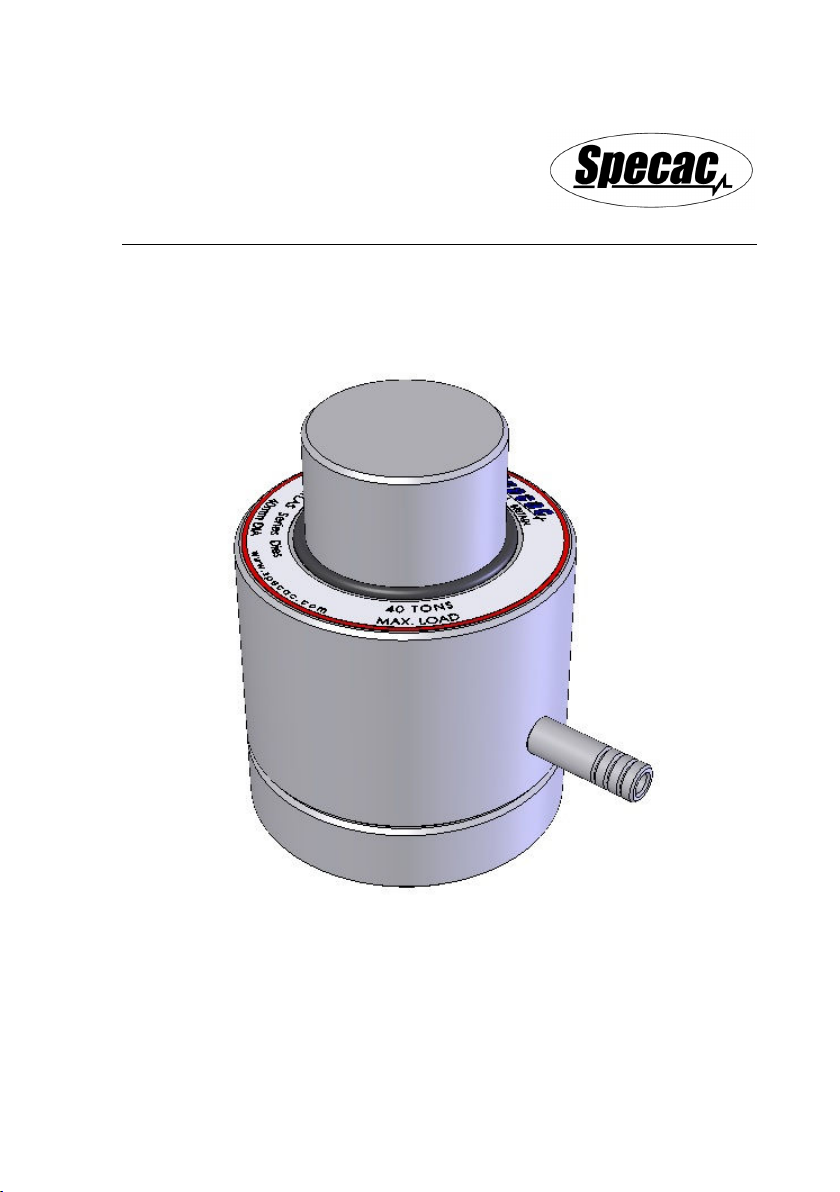
Atlas™ Lightweight
Evacuable Pellet Dies
User Manual
2I-25410 Issue 3
Page 2

Page 3

Atlas™ Lightweight
Evacuable Pellet Dies
User Manual
2I-25410 Issue 3
Page 4

User Manual
Atlas™ Lightweight Evacuable Pellet Dies
P/N’s GS25410 and GS25411
CONTENTS
1.
INTRODUCTION
2.
UNPACKING AND CHECKLIST
3.
SAFETY AND DIE CARE
4.
PREPARING THE DIE FOR USE
5.
FILLING THE DIE WITH SAMPLE
6.
MAKING THE PELLET
7.
REMOVING THE PELLET FROM THE DIE
8.
CLEANING AND STORAGE OF THE DIE
9.
LEGEND FOR THE LIGHTWEIGHT DIE
10.
SPARE PARTS FOR THE LIGHTWEIGHT DIE
................................................................................. 5
.............................................................. 6
....................................................................... 8
............................................................. 7
.......................................................... 11
........................................................................ 12
.............................................. 13
................................................ 14
.................................................. 14
....................................... 15
© December 2017 Specac Ltd. All rights reserved.
Brilliant Spectroscopy is a trademark of Specac Ltd.
Other product names mentioned herein may be trademarks
of their respective owners.
4
Page 5

Atlas™ Lightweight Evacuable Pellet Dies
1. Introduction
Thank you for purchasing a Specac product.
The Atlas™ Lightweight Evacuable Pellet Dies have been specifically
designed to work with the range of Atlas™ Power and Autotouch
Presses up to a maximum load rating of 40 tons. The Lightweight Dies
are also compatible for use with Specac’s 15 and 25 tons Atlas™
Manual Hydraulic Presses.
The Dies are made of 440C stainless steel and offered to prepare
pellet discs of 32mm or 40mm diameter size. They are well suited for
the preparation of solid pellets for study by X-Ray Fluorescence
spectroscopy. When many samples are to be prepared for study, the
physical effort required to load and remove an Atlas™ Lightweight
Evacuable Pellet Die into a press is greatly reduced, as the Dies
themselves are physically smaller and lighter in weight by comparison
to conventional 32mm and 40mm diameter pellet dies.
To aid in the weight reduction there are no individual internal pressing
pellets as with conventional Dies and so a sample is compressed
between the plunger and the base pieces of the Lightweight Die
assembly. For this reason, both the plunger and base have a highly
polished surface that contacts with the sample. The highly polished
faces help in producing an even surface finish to the sample pellet and
in release of the sample from the Die components.
The Lightweight Dies have an evacuation port and can be operated
using a partial vacuum for the compression of samples into pellets that
may be moisture sensitive.
These user instructions are based upon the 40mm Lightweight Die P/N
GS25411 shown as an example throughout. The same instructions
apply for use of the 32mm Lightweight Die P/N GS25410.
5
Page 6
User Manual
2. Unpacking and Checklist
Remove the Atlas™ Lightweight Evacuable Pellet Die from its
protective packaging.
Please check that the following have been supplied:
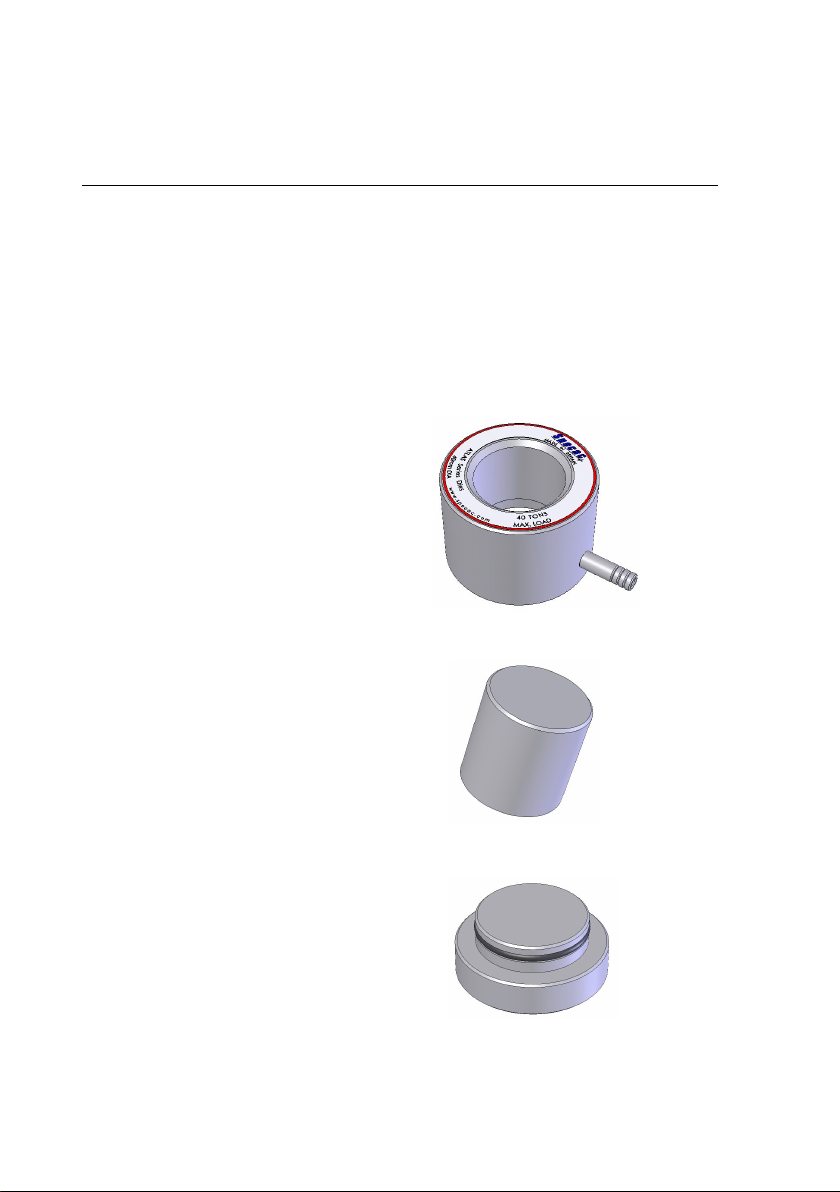
• A 32mm or 40mm Lightweight Evacuable Pellet Die complete.
To include the following parts:
• Die body.
• Plunger.
• Base with O-ring.
6
Page 7
Atlas™ Lightweight Evacuable Pellet Dies
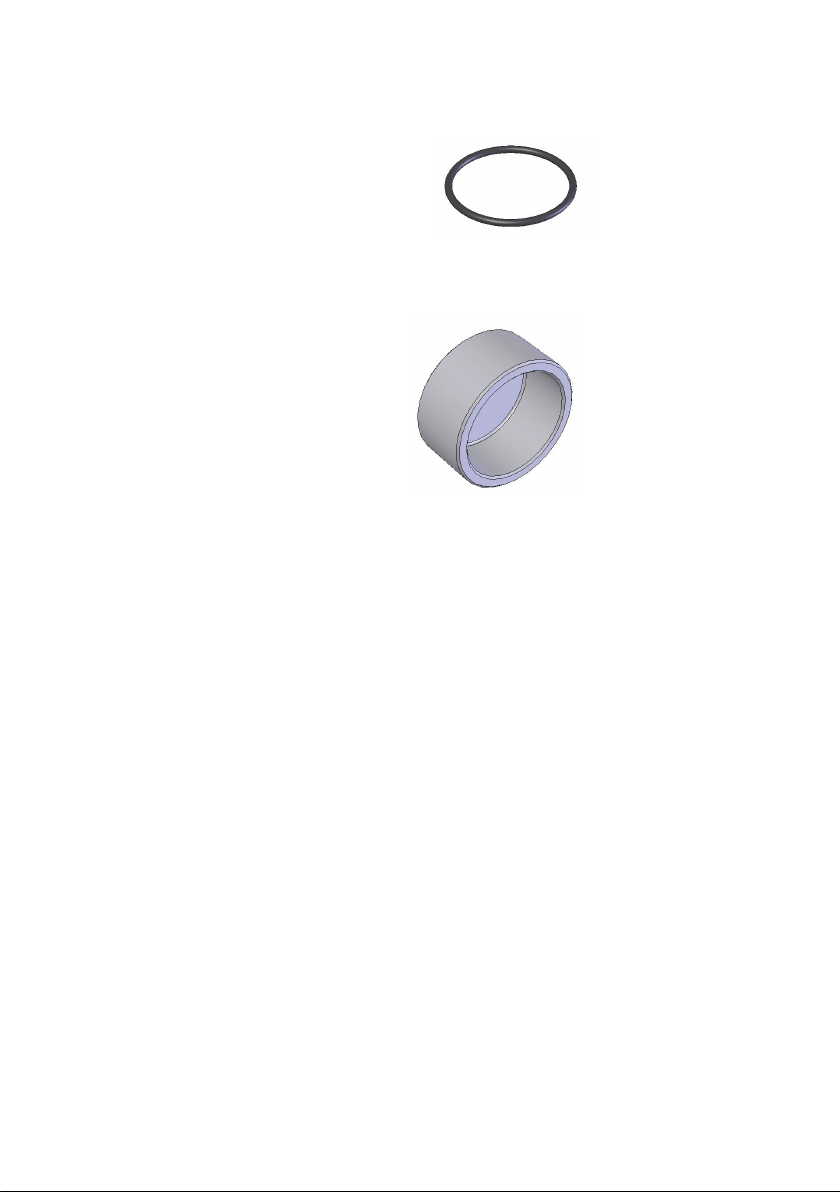
• O-ring for Plunger.
• Extractor cap.
Check the parts over and proceed to use them from the following
instructions.
7
Page 8
User Manual
3. Safety and Die Care
Safety
The Atlas™ Lightweight Evacuable Pellet Dies are inherently safe from
correct use. It may be that the sample type to press within the Die
could pose the most risk, so any health and safety instructions
pertaining to the sample type itself in its handling should be observed.
However, when the Die is being used in a Press, any safety
precautions involved with operation of the Press itself must also be
observed. An Atlas™ Lightweight Die must always be placed as
centrally as possible within the pressing area of a Press to provide a
correct and consistent evenness in loading when being compressed.
Warning!
Never exceed the stated maximum safe load of 40 tons
when pressing using an Atlas™ Lightweight Die.
Die Care
The Atlas™ Lightweight Dies are made from corrosion resistant steel
(440C), but because of the nature of certain materials that may be
used with the Dies, it is necessary to take certain precautions. Any
sample to press that is harder than stainless steel in having a Mohs
value of higher than 7.5, risks damage to the parts. Similarly, pressing
of very fine particulate samples (smaller than the minimum tolerance
clearance values for the Dies), risks damage to certain components.
The Atlas™ Lightweight Die parts can usually be cleaned between
samples initially with warm or cold water, then rinsed in methanol and
finally dried with soft tissue. When not in use always ensure that the
Lightweight Die and its component parts are thoroughly clean and dry,
and if possible store the Lightweight Die in a desiccator. When
cleaning the internal pressing pellets, do not wipe their polished faces
with a cloth that has a hard, abrasive texture. Always use a soft cloth
or tissue.
8
Page 9

Atlas™ Lightweight Evacuable Pellet Dies
4.Preparing The Die For Use
The Atlas™ Lightweight Evacuable Pellet Die and its component parts
are packed from the factory in such a way that they do not suffer
damage during transit. The optically polished surfaces of the plunger
and the base are covered in a protective material and the die may be
lightly coated with oil.
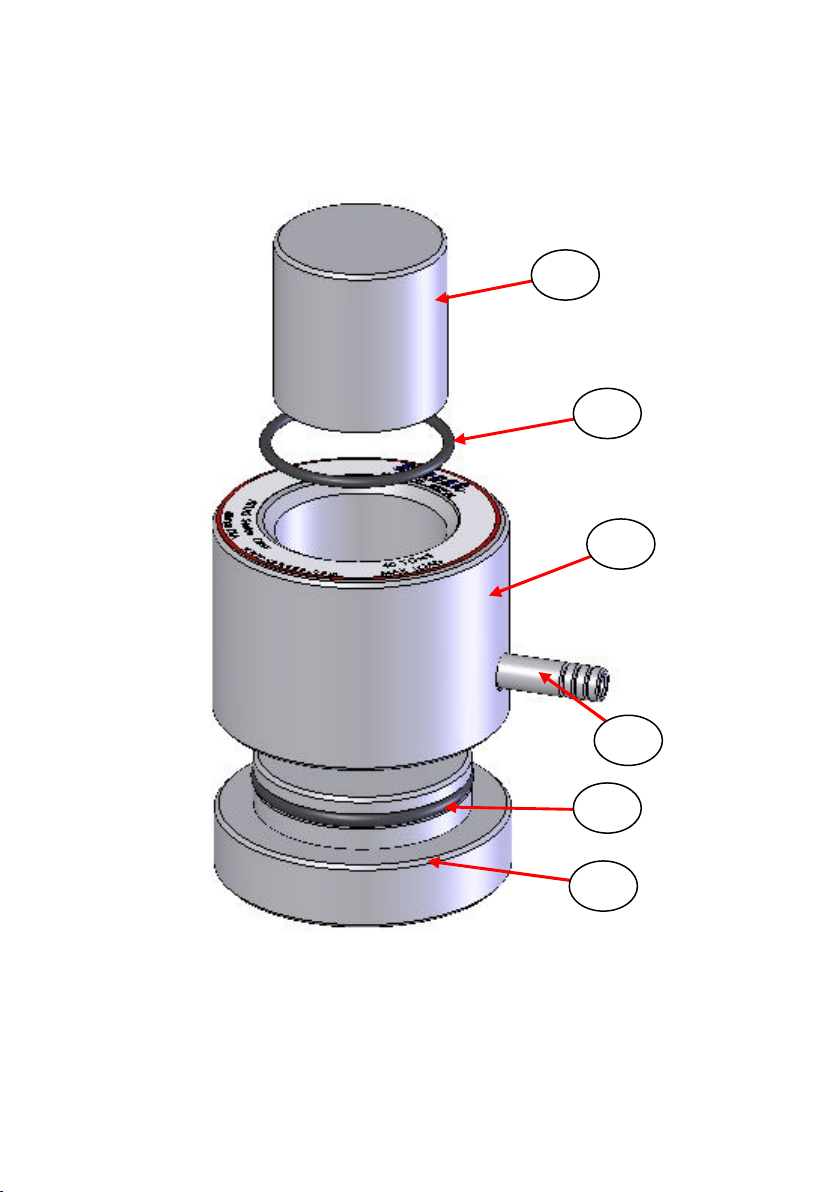
1) Before use the protective material on the plunger (1) and base (2)
should be removed and all component parts must be thoroughly
cleaned with an organic solvent to ensure that the protective oil is
fully removed. The parts should be wiped dry taking care to use
non-abrasive cleaning cloths on the polished faces of the plunger
(1) and the base (2).
2) Place the base (2) onto the bench top. Ensure the base O-ring
seal (3) is correctly positioned in the groove on the base (2) and is
not damaged.
3) Assemble the Cylinder Body (4) by pressing down onto the base
(2). A tight fit between the parts is achieved from contact with the
base O-ring seal (3). (See Exploded Diagram page 10.)
The Die is now ready to accept a sample for compression. The sample
can be either a solid powder material alone or a solid powder material
contained in a support cup.
Note: For X-Ray Fluorescence analysis, solid powder samples are
usually contained in an aluminium or plastic support cup of
32mm or 40mm diameter corresponding to the particular
diameter size of die. A variety of support cups for this purpose
can be purchased through Specac.
9
Page 10
User Manual
1
5
4
6
3
2
Exploded Diagram of Atlas™ Lightweight Evacuable Pellet Die
10
Page 11

Atlas™ Lightweight Evacuable Pellet Dies
5. Filling The Die With Sample
A solid powder sample can be transferred for filling the Die using a
spatula or a by making a paper chute or funnel.
If using an aluminium or plastic support cup with a solid sample,
ensure that an empty support cup is first placed into the die and
pushed towards the base (2). You can use the plunger (1) to gently
guide the support cup down inside the cylinder body (4).
If using a support cup the amount of solid sample powder that you can
place into the die should never be at a level higher than the lip of the
support cup.
When the sample powder to be compressed has been placed into the
cylinder body (4) use the tip of a spatula to spread the powder such
that it has a flat, evenly distributed surface. Preparation of the
uncompacted powder surface helps to produce a more homogenously
compressed sample pellet.
Note: If filling the cylinder body to a depth of circa 10mm with a
powder sample, a circa 8mls volume of sample is used with a
32mm die and circa 12.5mls of sample with the 40mm die.
The plunger (1) is now inserted into the cylinder body (4) ensuring that
the optically polished face of the plunger is contacting the sample
powder.
When the plunger (1) has reached the limit of its travel take the plunger
O-ring seal (5) and press it into place around and over the plunger (1)
and into the recessed chamfer at the top of the cylinder body (4).
The complete Die assembly is now ready to be placed in a Press.
11
Page 12

User Manual
6. Making the Pellet
Place the prepared Die assembly in its upright position (as seen as
Exploded Diagram and on front cover) carefully and centrally into a
hydraulic Press.
At this stage, the Die assembly may be connected to a vacuum
pumping system via the evacuation port (6) on the cylinder body (4).
Vacuum quality rubber tubing can be routed through to the pressing
area of any Specac Press to fit over the evacuation port (6) whilst the
Die is being compressed. A regime for evacuation time and application
may be devised for a specific sample or set of samples to be
compressed. If using a vacuum, apply evacuation to the Die assembly
prior to compression in the Press.
Note: Evacuation of the Die assembly can help in the production
quality of certain pellets depending on the dryness of a sample.
Follow the specific instructions for operation of your Press to apply a
load to the die assembly. The Atlas™ Lightweight Evacuable Pellet
Dies have a maximum load limit of 40 tons.
Warning: DO NOT EXCEED THE MAXIMUM LOAD.
Keep the load applied to the Die assembly for however long it is
necessary to produce an acceptable sample pellet.
If using a vacuum pump system, evacuation should proceed during the
application of load and be maintained for a further minute after the load
has been released.
12
Page 13
Atlas™ Lightweight Evacuable Pellet Dies
7. Removing The Pellet From The Die
When the Die assembly with powder sample has been compressed
and the load has been released, remove the Die assembly from the
Press. (Disconnect any vacuum tubing to the Die if this has been
used.)
The following procedure is adopted to remove the compacted powder
pellet from the Die.
1) Remove the base (2) from the cylinder body (4) leaving the plunger
in position.
2) Invert the Die assembly and place the hollow, open end of the
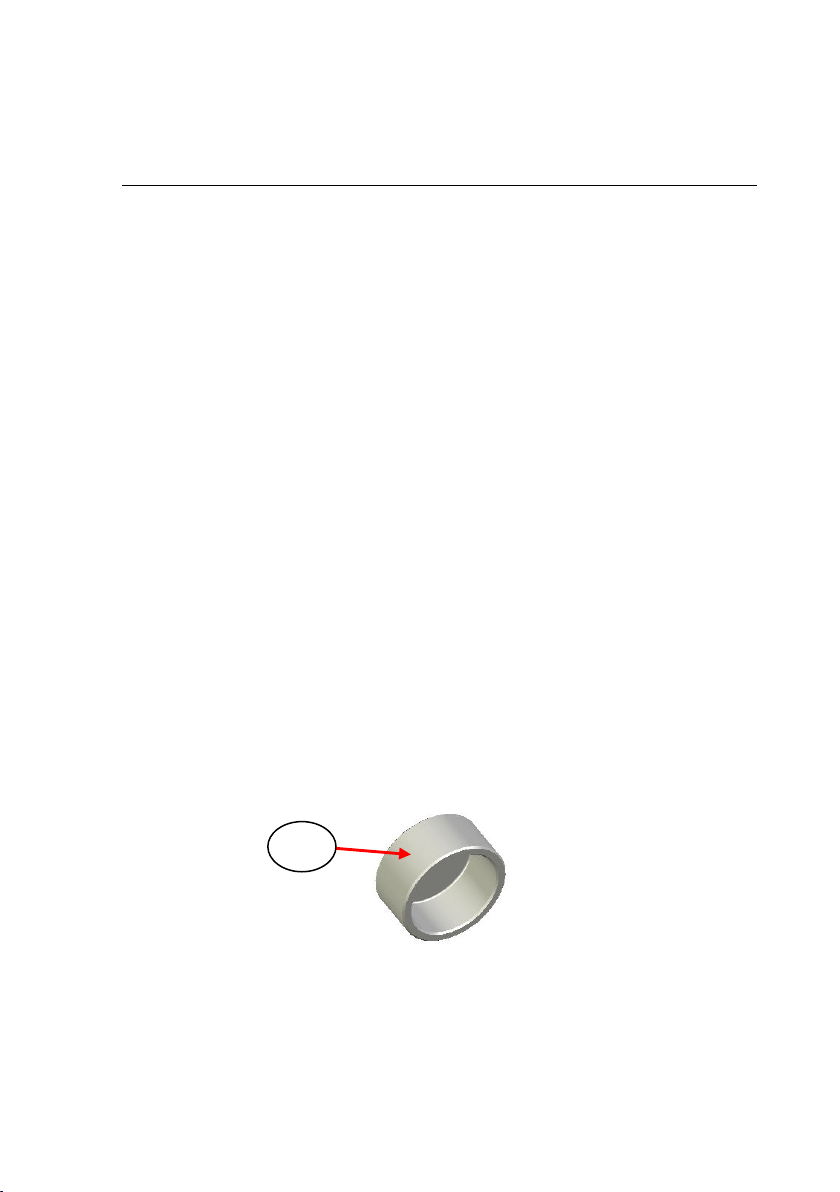
extractor cap (7) onto the underside of the cylinder body (4). This
configuration of parts creates a space for the compacted pellet to
be pushed into after further travel of the plunger (1).
3) Place this new inverted assembly back into the Press and apply a
light load between the extractor cap (7) and the plunger (1).
Note: The compacted pellet will emerge first from the cylinder body
(4) followed by the plunger (1).
4) When the compacted pellet is accessible, release any applied load
and remove the Die assembly very carefully from the Press.
The prepared compacted pellet sample can now be analysed by an
appropriate technique.
7
View of hollow end of extractor cap used for pellet removal
13
Page 14

User Manual
8. Cleaning And Storage Of The Die
When the Atlas™ Lightweight Evacuable Pellet Die is not in use,
ensure it is clean and stored correctly.
Depending on the sample types (inorganic or organic chemicals), that
have contacted the parts of the Die, the sample can usually be
removed by a combination of washing with warm water, then distilled
water and finally with methanol.
The Die parts are then dried and can be stored in a desiccator,
warming cabinet or left on a warm (35°C) hot plate. When drying with a
cloth ensure the material is non-abrasive to protect from scratches to
the polished faces of the plunger (1) and die base (2).
9.Legend For The Lightweight Die
(1) Plunger.
(2) Base.
(3) Base O-ring seal.
(4) Cylinder body.
(5) Plunger O-ring seal.
(6) Evacuation port.
(7) Extractor cap.
14
Page 15

Atlas™ Lightweight Evacuable Pellet Dies
10.Spare Parts For The Lightweight Die
Complete Dies
P/N GS25410 Atlas™ 32mm Lightweight Evacuable Pellet Die.
P/N GS25411 Atlas™ 40mm Lightweight Evacuable Pellet Die.
Individual Spares
P/N GS25412 Atlas™ 32mm Lightweight Die Body.
P/N GS25413 Atlas™ 32mm Lightweight Die Plunger.
P/N GS25414 Atlas™ 32mm Lightweight Die Base.
P/N GS25415 Atlas™ 32mm Lightweight Die O-ring Kit.
P/N GS25416 Atlas™ 40mm Lightweight Die Body.
P/N GS25417 Atlas™ 40mm Lightweight Die Plunger.
P/N GS25418 Atlas™ 40mm Lightweight Die Base.
P/N GS25419 Atlas™ 40mm Lightweight Die O-ring Kit.
P/N GS03297 Extractor cap for Atlas™ Lightweight Evacuable
Pellet Dies.
15
Page 16
User Manual
Notes
16
Page 17

Worldwide Distribution
France
Eurolabo - Paris.
Tel.01 42 08 01 28
Fax 01 42 08 13 65
email: [email protected]
Germany
L.O.T. - Oriel GmbH & Co,
KG - Darmstadt
Tel: 06151 88060
Fax: 06151 880689
email:[email protected]
Website: www.LOT-Oriel.com/de
Japan
Systems Engineering Inc. -Tokyo
Tel: 03 3946 4993
Fax: 03 3946 4983
email:[email protected]
Website: www.systems-eng.co.jp
Spain
Teknokroma S.Coop C. Ltda
Barcelona
Tel: 93 674 8800
Fax: 93 675 2405
email: [email protected]
Switzerland
Portmann InstrumentsAG
Biel-Benken
Tel: 061 726 6555
Fax: 061 726 6550
email: [email protected]
Website:www.portmann-instruments.ch
USA
SPECAC INC.
414 Commerce Drive
Suite 175,
Fort Washington,
PA 19034, USA
Tel: 215 793 4044
Fax: 215 793 4011
United Kingdom
Specac Ltd. - London
River House, 97 Cray Avenue,
Orpington
Kent BR5 4HE
Tel: +44 (0) 1689 873134
Fax: +44 (0) 1689 878527
Registered No. 1008689 England
Page 18

Brilliant Spectroscopy™
SPECAC INC.
414 Commerce Drive
Suite 175,
Fort Washington,
PA 19034, USA
Tel: 215 793 4044
Fax: 215 793 4011
www.specac.com
River House, 97 Cray Avenue,
Registered No. 1008689 England
SPECAC LTD.
Orpington
Kent BR5 4HE
Tel: +44 (0) 1689 873134
Fax: +44 (0) 1689 878527
 Loading...