

Page 1
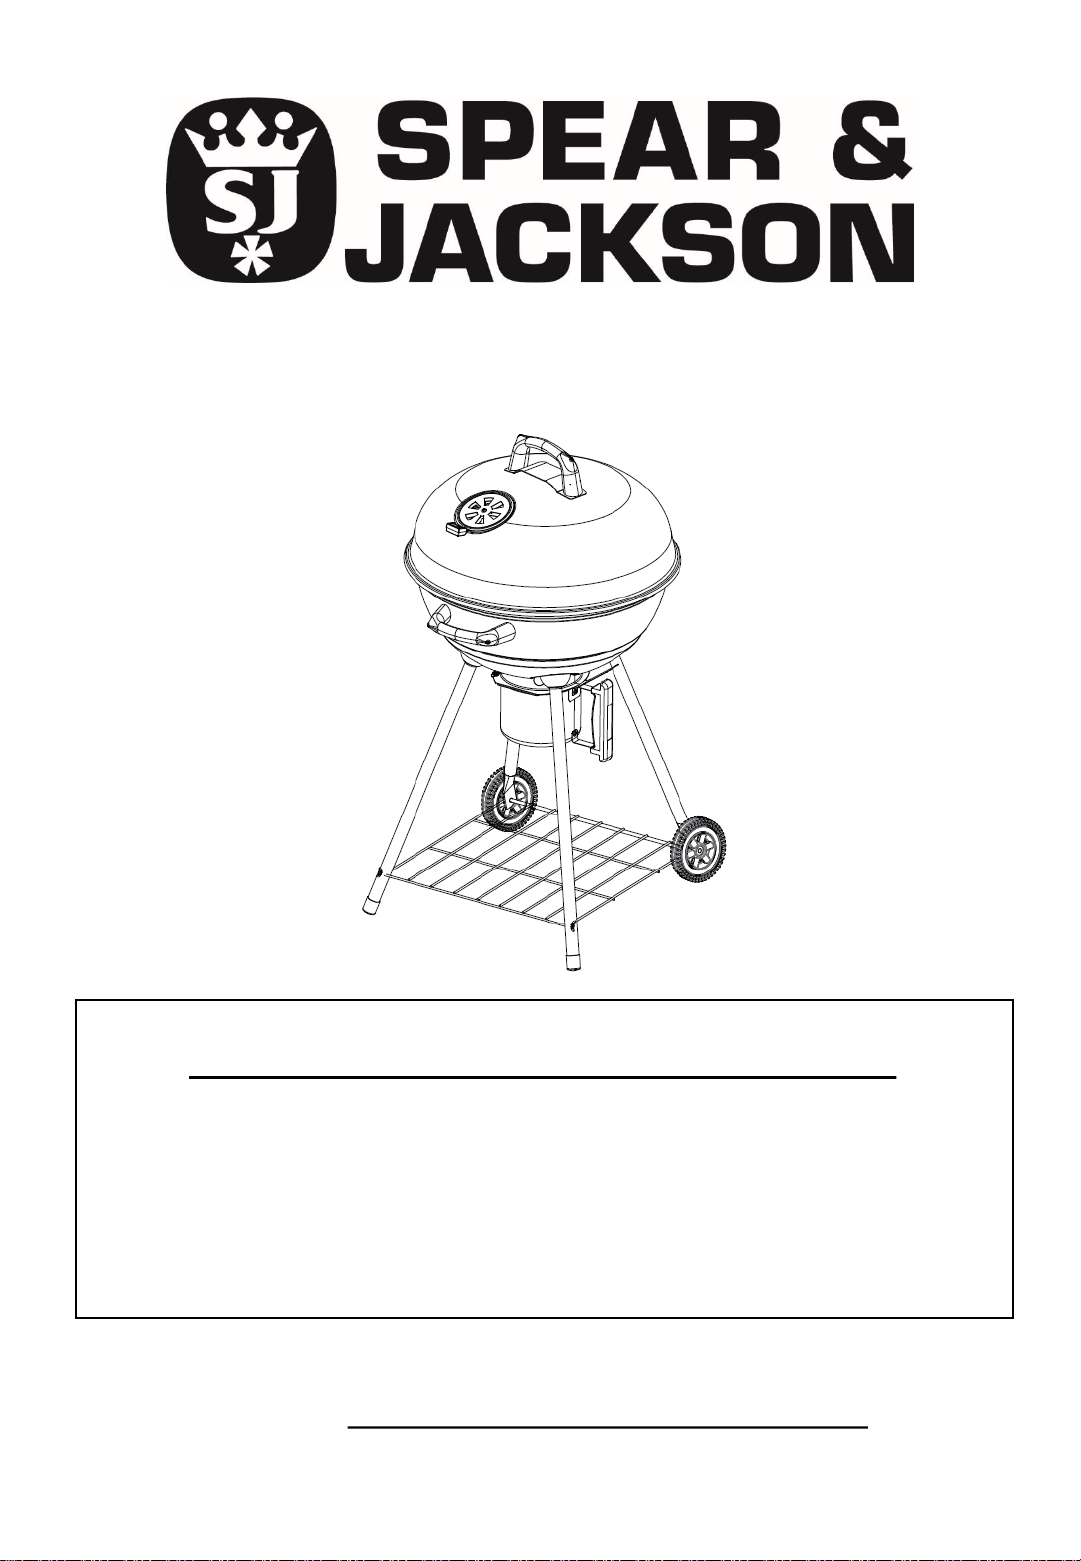
KETTLE BBQ - JDWCKBBQ
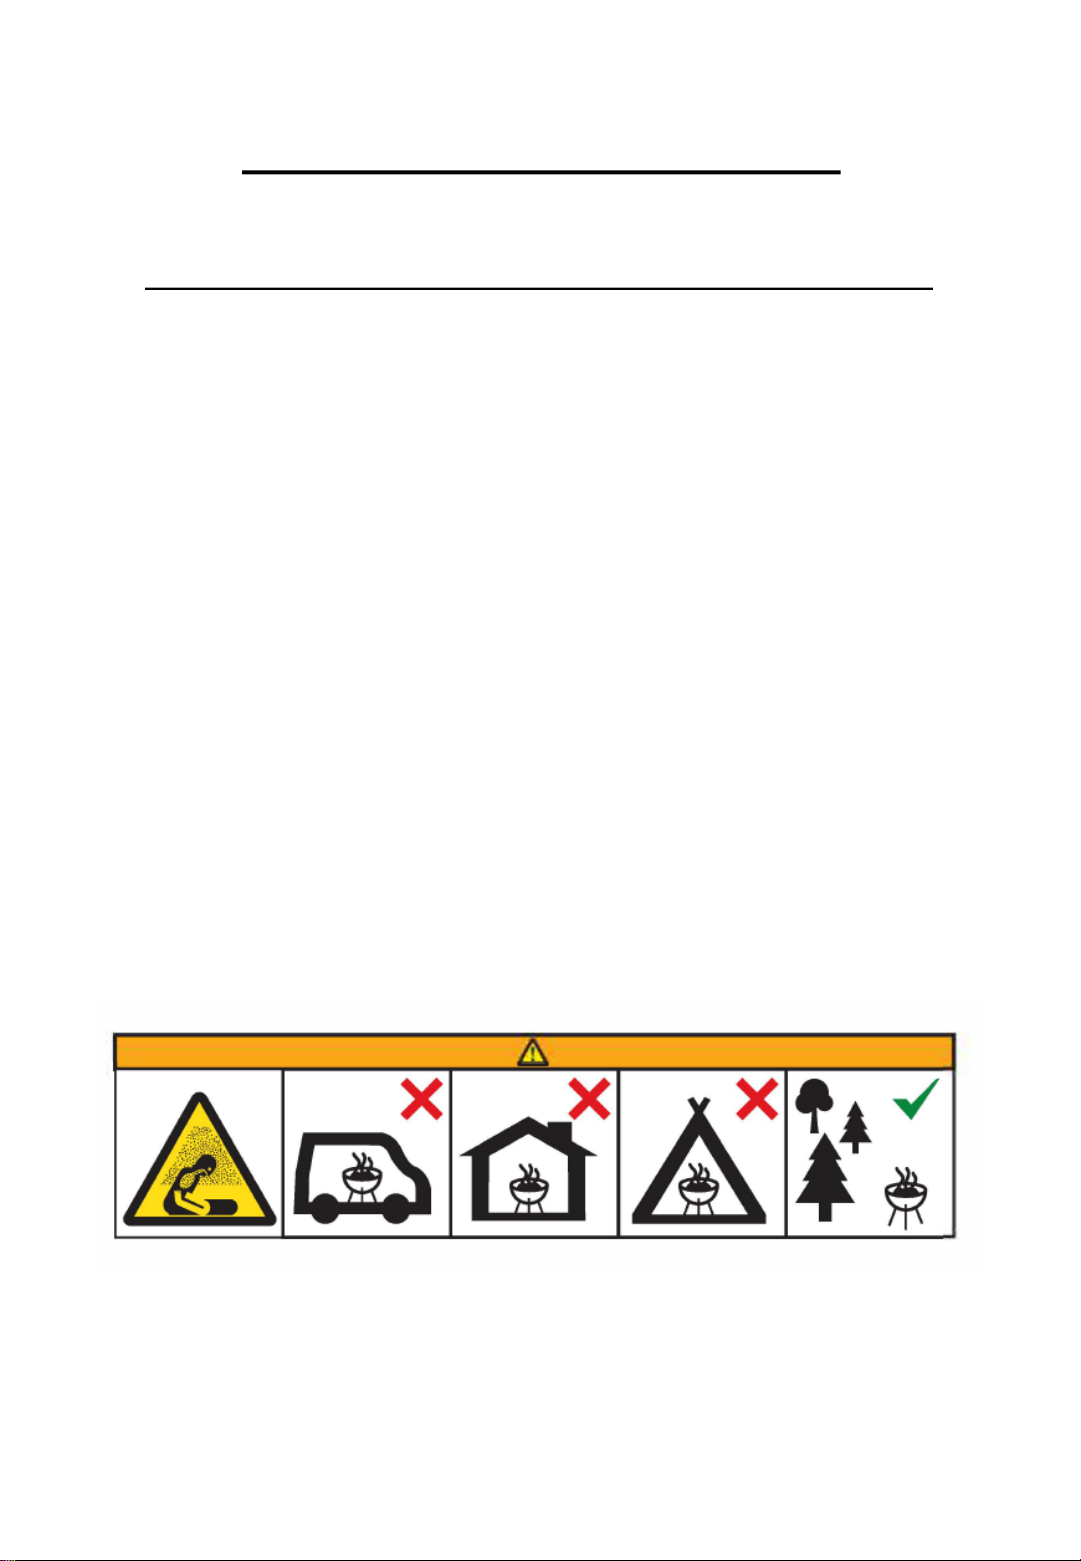
WARNING: CARBON MONOXIDE HAZARD
Burning charcoal inside can kill you. It gives off carbon
monoxide which has no odour. NEVER burn charcoal in
enclosed spaces e.g. homes, vehicles or tents
PLEASE RETAIN INSTRUCTIONS FOR FUTURE REFERENCE
For customer services & spare parts please call 0345 0719018
or email General-enquiries@jdwilliams.co.uk
Opening times: 7am to 10pm Monday to Friday
8am to 6pm Saturday and Sunday
Page 2

CONTENTS
2
Page(s)
Safety instructions
3
BBQ
Feature Diagram
4
BBQ Parts List
5-6
BBQ Assembly
7-10
Lighting
your BBQ
11
Food
Safety
12
Cleaning and care
13
Guarantee and customer services
14
Notes
15
Page 3
3
SAFETY INSTRUCTIONS
IMPORTANT SAFETY INSTRUCTIONS
READ CAREFULLY AND KEEP FOR FUTURE REFERENCE
WARNING:
• The Barbeque must be installed on a secure level base
prior to use.
• The Barbeque shall be heated up for at least 30 minutes
prior to the first cooking on the barbeque.
• Ensure that the coals placed do not exceed half the
height between the cooking grill and the coal area.
• WARNING! This barbecue will become very hot, do not
move it during operation.
• Do not use indoors!
• WARNING! Do not use spirit or petrol for lighting or re-
lighting! Use only firelighters complying to EN 1860-3!
• WARNING! Keep children and pets away.
Carbon
Monoxide
Poisoning
Hazard
Do not
use in
Motor
Homes
Do Not
Use
Indoors
Do Not
Use in
Tents
Use in
open
Spaces
Page 4
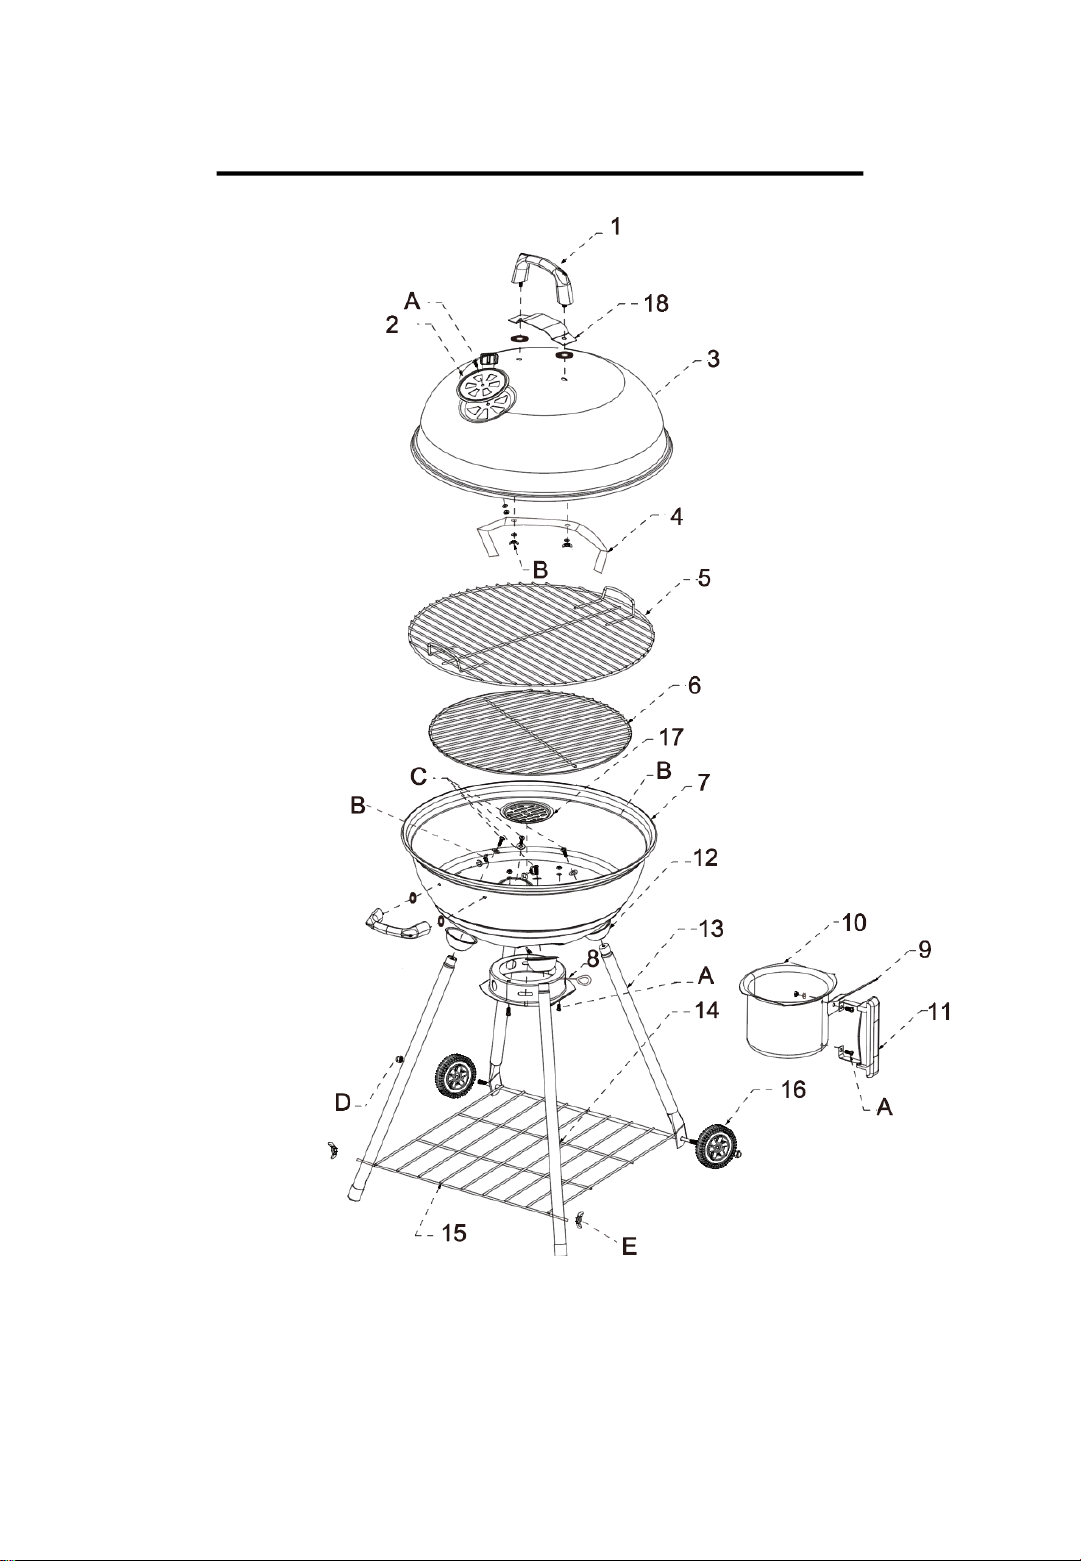
BBQ FEATURE DIAGRAM
You will need…
• Cross Head Screwdriver
• Adjustable Spanner
4
Page 5

PART
DESCRIPTION
QTY
1 Lid and Fire Bowl Handle 2
2 Lid air vent 1
3 Lid 1
4 Lid support 1
5 Cooking grill 1
6 Charcoal grill 1
7 Fire bowl 1
8 Fire bowl air vent and adjustment lever (preassembled) 1
9 Heat deflector 1
10 Ash cup 1
11 Ash cup handle 1
12 Leg cups 4
13 Wheel leg 2
14 Long leg 2
15 Shelf 1
16 Wheel 2
17 Ash grill 1
18 Heat resistant plate 1
19 Ash cup ring (preassembled) 1
BBQ PARTS LIST
5
Page 6

BBQ PARTS LIST
PART
DESCRIPTION
SIZE
QTY
A Bolt M5 x 10 5
Washer Ø6 x 12mm 5
Nut M5 5
B Washer (Fibre) Ø6 x 18mm 4
Washer Ø6 x 16mm 4
Wing Nut M6 2
C Bolt* M6 x 30 4
Washer* Ø6 x 20mm 4
D Wheel Nut M8 2
E Wing Nut M6 2
*Parts C are preassembled on the leg (13) (14)
6
Page 7

7
BBQ ASSEMBLY
Assembling the Lid
1. Attach one of the handles (1) onto the
fire bowl (7) using 2 each of the “B”
Washers and Wing Nuts.
Ensure the fibre washers are placed on
the outside of the fire bowl and the
metal washers and wing nuts are
placed on the inside of the fire bowl.
2. Attach the ash cup ring (19) to the
bottom of the fire bowl using 2 each of
the “A” Bolts, Washers and Nuts.
Ensure the bolts are placed on the
outside of the fire bowl and the
washers and nuts are placed on the
inside of the fire bowl.
19.
7.
1.
1. Attach one of the handles (1), the heat
resistant plate (18) and the lid support
(4) onto the lid (3) using 2 each of the
“B” Washers and Wing Nuts.
The lid support should be placed on the
inside of the lid.
Ensure the fibre washers are placed on
the outside of the lid and the metal
washers and wing nuts are placed on
the inside of the lid.
2. Attach the lid air vent (2) onto the lid
(3) using 1 each of the “A” Bolts,
Washers and Nuts.
Ensure the bolt is placed on the outside
of the fire bowl and the washer and
nut are placed on the inside of the fire
bowl.
1.
18.
4.
3.
2.
Assembling the Fire Bowl
Page 8

8
BBQ ASSEMBLY
Assembling the Legs
1. Remove the “C” Bolts and Washers
that have been preassembled onto the
legs (13 & 14).
2. Attach the leg cups (12), long legs (14)
and wheel legs (13) to the body (3)
using the “C” Bolts and Washers.
IMPORTANT: Ensure the long legs (14)
are attached to the handle side of the
body.
14.
13.
12.
IMPORTANT
Adding the Shelf
1. Attach the shelf (15) to the legs. Use
the 2 “D” wing nuts to secure the shelf
to the long legs (13).
3.
13.
15.
Page 9

9
BBQ ASSEMBLY
Assembling the Ash Cup
1. Attach the heat deflector (9) and the
ash cup handle (11) to the ash cup
(10) using 1 each of the “A” Bolts,
Washers and Nuts.
Ensure the bolt is placed on the outside
of the ash cup and the washer and nut
are placed on the inside of the ash cup.
Attaching the Wheels
1. Attach the wheels (16) onto the shelf
struts protruding through the wheel
legs (13) using 2 of the “E” wing nuts.
13.
16.
10.
9.
11.
Page 10

10
BBQ ASSEMBLY
1. Place the ash grill (17) into the base of
the fire bowl (7) followed by the
charcoal grill (6) and finally the
cooking grill (5) Slide the ash cup
assembly (10) into the ash cup ring
(19)
2. Slide the ash cup assembly (10) into
the ash cup ring (19)
3. Place the lid assembly (3) onto the fire
bowl (7).
Your BBQ is now assembled.
The lid can be suspended from the rim
of the fire bowl using the lid support to
act as a windshield.
Assembling your BBQ
3.
5.
6.
17.
7.
10.
19.
Page 11

11
LIGHTING YOUR BBQ
WARNING! Do not use spirit or petrol for lighting or re-lighting!
Use only firelighters complying to EN 1860-3!
1. Remove the cooking grill and place a small quantity charcoal
into the charcoal pan and light in accordance with the
instructions on the charcoal pack.
2. Close the lid and open the air vent to obtain satisfactory
combustion. Opening the air vents will increase the airflow and
cause the charcoal to burn more fiercely. Wear oven gloves
when adjusting the air vent.
3. When the charcoal becomes red hot add more charcoal for
cooking. Maximum fill level for charcoal is 1 kg.
4. Replace the cooking grill and wait approximately 20-30
minutes before cooking and do not cook before the fuel has a
coating of ash.
CAUTION
When using barbecue for the first time allow the charcoal to
remain red hot for at least 30 minutes before cooking.
Accessible parts will be hot - wear oven gloves when touching the
barbecue and adjusting the air vent.
Do not extinguish with water as this may damage the barbecue.
Page 12

12
FOOD SAFETY
Thoroughly defrost frozen meat and poultry in the refrigerator
before cooking. Keep raw meat and poultry separate from cooked
foods.
Always wash hands after handling raw meat and poultry, before
handling any ready to eat foods.
Wipe and disinfect surfaces that have been in contact with raw
meat and poultry.
When barbecuing meat and poultry, make sure the barbecue is
really hot. Place the larger, thicker portions furthest away from the
most intense heat to ensure thorough cooking without burning and
turn regularly.
Use separate utensils for handling raw meat/poultry and cooked
food on the barbecue, or wash them thoroughly between uses.
To check whether meat, particularly poultry, is cooked, pierce the
flesh with a skewer or fork; the juices should run clear. Ensure the
product is piping hot throughout.
Page 13

13
CLEANING AND CARE
Removing the Ash
Allow the barbecue and ash to become completely cold before
emptying.
Remove the ash cup and safely dispose of the cold ash in a fire
proof container or dampen with water to ensure the ash is entirely
cold before disposing in a suitable container.
Remove the cooking grill before inverting the barbecue and
emptying the ash into a suitable container.
Care and Maintenance
Empty the ash from the barbecue and clean after each use.
The fire bowl, cooking grill and charcoal pan can be cleaned using
barbecue cleaning fluid. Avoid using wire wool and brushes as
these may scratch the surface.
When not in use this barbecue should be stored in a dry location or
under a waterproof cover.
Page 14

14
GUARANTEE AND
CUSTOMER SERVICES
To check the availability of spare parts, simply contact our friendly
Customer Services team on
0345 0719018 or email General-enquiries@jdwilliams.co.uk
Opening times: 7am to 10pm Monday to Friday
8am to 6pm Saturday and Sunday
This product is guaranteed for 12 months from the date of the
original purchase. If any defect arises due to faulty materials or
workmanship, the faulty product must be returned to the place of
purchase.
Refund or replacement is at the discretion of the retailer.
The following conditions apply:
• The product must be returned to the retailer with the original
proof of purchase.
• The product must be installed and used in accordance with the
instructions contained in this instruction guide and any other
instructions for use which are supplied.
• It must be used for domestic purposes only and for its intended
use.
• This warranty does not cover wear and tear, damage, misuse
or consumable parts.
This does not affect your statutory rights.
Page 15

15
NOTES
Page 16

16
Catalogue number: EQ868
Supplier number: 52698
Produced for N Brown
Griffin House, 40 Lever St, Manchester, M60 6ES
Revision 1
KETTLE BBQ - JDWCKBBQ
 Loading...