

Page 1

INSTRUCTION
18V
Cordless
Hedge Trimmer
HT04
ORIGINAL
MANUAL
Important - Please read these instructions
fully before starting assembly
These instructions contain important information that will help
you get the best from your trimmer, ensuring it is assembled correctly
and safely. If you need help or have damaged or missing parts,
call the Customer Helpline on 0345 605 2067
AFTER SALES SUPPORT
0345 605 2067
Page 2

SPEAR & JACKSON SINCE 1760
For more than 250 years gardeners have enjoyed high quality performance and
great results using Spear & Jackson tools.
Our garden power tools combine continuous innovation and the latest in
manufacturing technologies with a proud heritage.
Each product is carefully designed with performance, comfort and durability
rmly in mind, which has earned Spear & Jackson an enviable reputation as a
maker of tools to trust.
3 YEARS GUARANTEE
As a testament to the quality of our products, we offer a 3 year manufacturers warranty and a comprehensive after sales service.
The warranty covers manufacturing faults, however in the event that the item has
been deliberately damaged, used in a commercial environment or disassembled then
the warranty will be null and void.
Please retain proof of purchase.
7 DAYS A WEEK TECHNICAL SUPPORT
We want you to get the best out of your products. Our easy-to-read instruction manual guides you with best practice use and maintenance tips. Please call 0345 605 2067
for technical support, we can solve around 80% of questions directly over the phone.
We hope you enjoy your product and we look forward to any feedback, as this allows
us to develop even better products for the future.
2 AFTER SALES SUPPORT 0345 605 2067
Page 3

CONTENTS
Safety Information 04
Description of symbols 04
General safety
Additional safety instructions for batteries and chargers
Additional safety instructions for hedge trimmer
Maintenance and storage safety
Intended use
Box Content / Parts 17
Assembly 18
Check battery capacity 18
Charging the battery
Unpacking
Operation 22
General operation 22
Switching on/off
Trimming times
Trimming
Maintenance 25
Technical Data 28
Troubleshooting 30
Warranty 31
05
09
13
15
16
19
19
22
22
23
3AFTER SALES SUPPORT 0345 605 2067
Page 4
SAFETY INFORMATION
Please read these instructions fully before operating or maintaining your machine
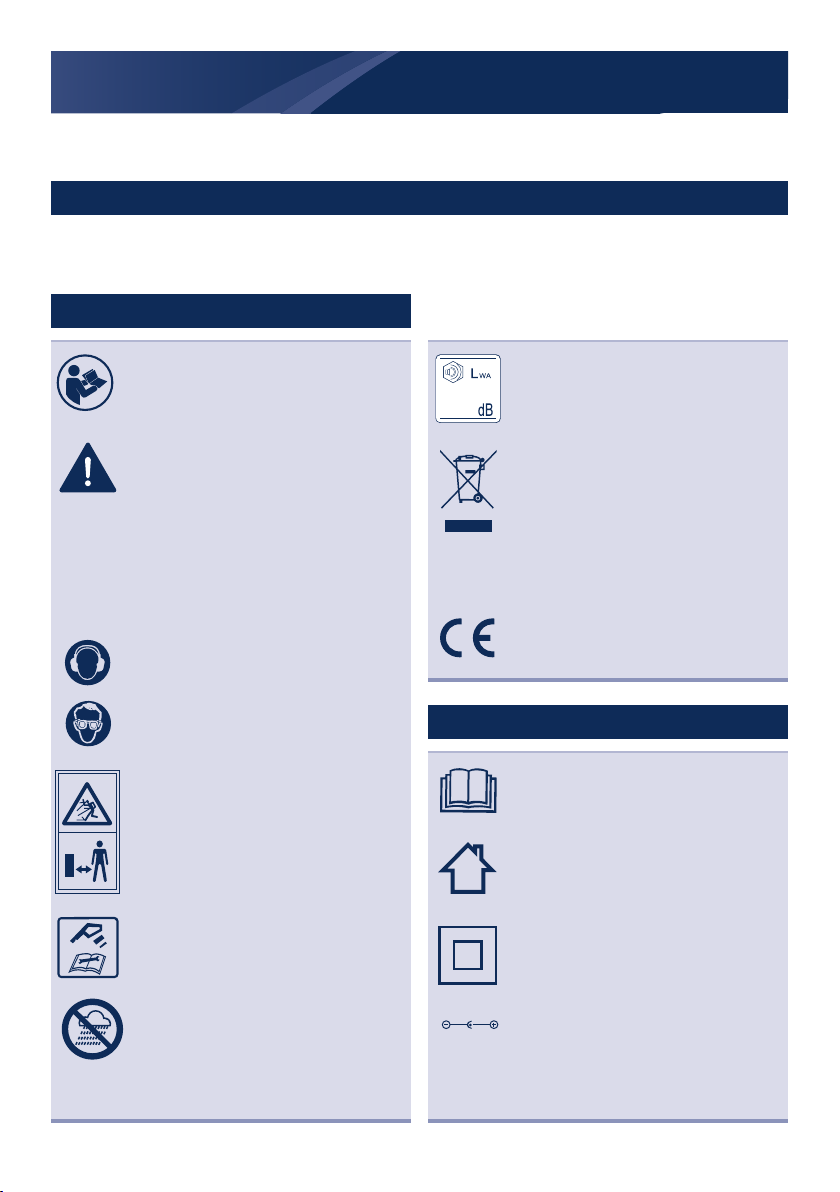
DESCRIPTION OF SYMBOLS
The following warning symbols appear throughout this manual and indicate the appropriate
safety measures you should take when operating and maintaining the hedge trimmer.
WARNING SYMBOLS ON THE MACHINE
Read instruction handbook before
operating this machine.
WARNING!
This is a warning symbol. This
symbol is used throughout the user
guide whenever there is a risk of
personal injury. Ensure that these
warnings are read and understood
at all times.
This symbol indicates the
requirement of wearing ear.
Protection and eye protection when
using the product.
Keep bystanders away.
Disconnect the battery pack before
any repair or maintenance.
Guaranteed sound power level
value in 90dB.
90
Waste electrical products should
not be disposed of with household
waste. Please recycle where
facilities exist. Check your Local
Authority or retailer for recycling
advice.
Conforms to all relevant safety
standards.
WARNING SYMBOLS ON THE CHARGER
Read instruction handbook before
operating this machine.
The charger is for indoor use only.
Double insulation.
Do not expose and operate the tool
in rain.
AFTER SALES SUPPORT 0345 605 2067
4
Pole orientation.
Page 5

SAFETY INFORMATION
Please read these instructions fully before operating or maintaining your machine
GENERAL SAFETY
Waste electrical products should
not be disposed of with household
waste. Please recycle where
facilities exist. Check your Local
Authority or retailer for recycling
advice.
WARNING SYMBOLS ON THE BATTERY PACK
Batteries contain Li-ion, waste
batteries should be sorted for ecofriendly. Do not dispose of waste
Li-Ion
batteries as unsorted municipal
waste.
Do not dispose of batteries in rivers
or immerse in water.
Do not dispose of in fire.
Do not subject the battery to strong
max. 45
sunlight over long periods and do
o
not leave it on a heater (max.45
C
Do not dispose of batteries. Return
exhausted batteries to your local
collection or recycling point.
o
C).
WARNING! Read all
safety warnings and
all instructions. Failure
to follow the warnings
and instructions
may result in electric
shock, fire and/or
serious injury.
Save all warnings and
instructions for future
reference. The term
“power tool” in all
warnings listed below
refers to your battery
operated power tool.
■
Read the instructions
carefully. Be familiar
with the controls and
the correct use of
the appliance. Read
and understand the
operator’s manual and
observe the warnings
and instruction labels
affixed to the appliance.
■
Users. Never allow
children or people
unfamiliar with these
instructions to use
the appliance. Local
AFTER SALES SUPPORT 0345 605 2067
5
Page 6

SAFETY INFORMATION
Please read these instructions fully before operating or maintaining your machine
regulations may restrict
the age of operator. Never
operate the tool under
the influence of alcohol,
medication or drugs.
■
Do not operate power
tools in explosive
atmospheres, such
as in the presence of
flammable liquids, gases
or dust. Power tools
create sparks which may
ignite the dust or fumes.
Do not force the power
tool. Use the correct
power tool for your
application. The correct
power tool will do the
job better and safer at
the rate for which it was
designed.
■
Keep work area clean and
well lit. Cluttered areas
can cause accidents.
■
Consider work area
environment. Do not
expose the tool to high
humidity or rain. Do not
use the tool in damp and
wet conditions. Keep the
work area well lit. Do not
use the tool where there
is a risk of causing fire
or explosion, e.g. in the
presence of flammable
liquids and gases.
■
Keep children and
bystanders away while
operating a power tool.
Distractions can cause
you to lose control.
The operator or user is
responsible for accidents
or hazards occurring
to other people or the
property.
■
Dress properly. Do not
wear loose clothing or
jewellery. Keep your
hair, clothing and gloves
away from moving parts.
Loose clothes, jewellery
or long hair can be
caught in moving parts.
■
Head protection. Always
use safety glasses and
gloves. Use a face or
dust mask whenever the
operations may produce
dust or flying particles.
Wear ear protection
whenever the sound level
6 AFTER SALES SUPPORT 0345 605 2067
Page 7

SAFETY INFORMATION
Please read these instructions fully before operating or maintaining your machine
seems uncomfortable.
■
Do not overreach. Keep
proper footing and balance
at all times. This enables
better control of the
power tool in unexpected
situations
■
Stay alert, watch what
you are doing and use
common sense when
operating a power tool. Do
not use a power tool while
you are tired or under the
influence of drugs, alcohol
or medication. A moment
of inattention while
operating power tools may
result in serious personal
injury.
■
Grip the tool securely.
Operator should have one
hand on the main handle,
the other on the front
handle. Keep finger off
trigger until ready to use.
■
Remove any adjusting
key or wrench before
turning the power tool
on. A wrench or a key left
attached to a rotating part
of the power tool may
result in personal injury.
■
Do not use the power
tool if the switch does
not turn it on and off. Any
power tool that cannot be
controlled with the switch
is dangerous and must be
repaired.
■
Prevent unintentional
starting. Ensure the switch
is in the off-position before
connecting to power
source and/or battery
pack, picking up or
carrying the tool. Carrying
power tools with your
finger on the switch or
energy sing power tools
that have the switch on
invites accidents.
■
Check for damaged
parts. Before further
use, carefully check the
tool for damage. Check
for alignment of moving
parts, binding of moving
parts, breakage of parts,
mounting and any other
condition that may affect
its operation. Do not use
the tool if any parts are
7 AFTER SALES SUPPORT 0345 605 2067
Page 8

SAFETY INFORMATION
Please read these instructions fully before operating or maintaining your machine
damaged or defective.
Have any damaged or
defective parts repaired or
replaced by an authorized
service agent. Never
attempt any repairs
yourself.
■
Store idle tools. When not
in use, tools should be
stored in a dry, lockedup place out of reach of
children.
■
Maintain tools with care.
Keep tools clean and in
good condition for better
and safer performance.
Follow the instructions
for maintenance and
changing accessories.
Keep handles and
switches dry, clean and
free from oil and grease.
poorly maintained power
tools.
■
Have your tool repaired
by an authorized
service agent. This
tool is manufactured
in accordance with the
relevant safety regulations.
To avoid danger, electrical
appliances must only
be repaired by qualified
technicians.
■
Power tool plugs must
match the outlet. Never
modify the plug in any
way. Do not use any
adapter plugs with earthed
(grounded) power tools.
Unmodified plugs and
matching outlets will
reduce risk of electric
shock.
■
Check for misalignment or
binding of moving parts,
breakage of parts and any
other condition that may
affect the power tool’s
operation. If damaged,
have the power tool
repaired before use. Many
accidents are caused by
8 AFTER SALES SUPPORT 0345 605 2067
■
Avoid body contact with
earthed or grounded
surfaces, such as pipes,
radiators, ranges and
refrigerators. There is an
increased risk of electric
shock if your body is
earthed or grounded.
■
Do not expose power
Page 9

SAFETY INFORMATION
Please read these instructions fully before operating or maintaining your machine
tools to rain or wet
conditions. Water entering
a power tool will increase
the risk of electric shock.
■
Do not abuse the cord.
Never use the cord
for carrying, pulling or
unplugging the power
tool. Keep cord away from
heat, oil, sharp edges or
moving parts. Damaged
or entangled cords
increase the risk of electric
shock.
■
When operating a power
tool outdoors, use an
extension cord suitable
for outdoor use. Use of a
cord suitable for outdoor
use reduces the risk of
electric shock.
■
If devices are provided
for the connection of dust
extraction and collection
facilities, ensure these
are connected and
properly used. Use of
dust collection can reduce
dust-related hazards.
WARNING!
Do not use any
attachments or
accessories not
recommended by the
manufacturer of this
tool.
The use of
attachments or
accessories not
recommended can
result in serious
personal injury.
ADDITIONAL SAFETY INSTRUCTIONS FOR BATTERIES AND
CHARGERS
Batteries
■
Never attempt to open for
any reason.
■
Do not expose to water.
■
Do not incinerate the
battery pack even if it is
severely damaged or is
completely worn out. The
battery pack can explode
in a fire.
■
Do not store in locations
9 AFTER SALES SUPPORT 0345 605 2067
Page 10

SAFETY INFORMATION
Please read these instructions fully before operating or maintaining your machine
where the temperature
may exceed 40 oC.
■
Do not leave the battery
pack in the charger when
the charging is finished,
otherwise battery leakage
may occur.
■
Charge only at room
temperature.
■
Recharge only with the
charger specified by the
manufacturer. A charger
that is suitable for one
type of battery pack may
create a risk of fire when
used with another battery
pack.
■
Before charging, make
sure that the battery is dry
and clean.
■
Use power tools only with
specifically designated
battery packs. Use of any
other battery packs may
create a risk of injury and
fire.
■
When dispose of
batteries follow the
instructions given in the
section “protecting the
environment”.
■
Under abusive conditions,
liquid may be ejected from
the battery; avoid contact.
If contact accidentally
occurs, flush with water.
If liquid contacts eyes,
additionally seek medical
help. Liquid ejected from
the battery may cause
irritation or burns.
■
The battery fluid, a 25-
30% solution of potassium
hydroxide, can be harmful.
In case of skin contact,
immediately rinse with
water. Neutralize with
a mild acid such as
lemon juice or vinegar.
In case of eye contact,
rinse abundantly with
clean water for at least
10 minutes. Consult a
physician.
■
When battery pack is not
in use, keep it away from
other metal objects, like
paperclips, coins, keys,
nails, screws or other
small metal objects, that
can make a connection
10 AFTER SALES SUPPORT 0345 605 2067
Page 11

SAFETY INFORMATION
Please read these instructions fully before operating or maintaining your machine
from one terminal to
another. Shorting the
battery terminals together
may cause burns or a fire.
■
NOTE: The batteries in
your battery pack are the
Lithium-Ion type. Do not
dispose of battery packs/
batteries into household
waste, fire or water.
Battery packs/batteries
should be collected,
recycled or disposed of in
an environmentally-friendly
manner.
Chargers
WARNING!
This appliance is not
intended for use by
persons (including
children) with reduced
physical, sensory or
mental capabilities,
or lack of experience
and knowledge,
unless they have been
given supervision or
instruction concerning
use of the appliance by
a person responsible
for their safety.
Children should be
supervised to ensure
that they do not play
with the appliance.
■
Before charging, ensure
your charger is matching
the local supply.
■
Charger’s plug must
match the outlet. Never
modify the plug in any
way. Unmodified plug
and matching outlets will
reduce risk of electric
shock.
■
Use your charger only to
charge batteries of the
type supplied with your
tool. Other batteries could
burst, causing personal
injury and damage.
■
Only 2 battery packs are
allowed to be charged
continuously in order to
prevent over heating of
charger, necessary rest
time is required to let the
charger cool down before
11 AFTER SALES SUPPORT 0345 605 2067
Page 12

SAFETY INFORMATION
Please read these instructions fully before operating or maintaining your machine
further charging.
■
When charging is finished,
unplug the charger from
mains socket outlet and
takeaway the battery pack
from the charger, do not
leave the battery pack in
the charger.
■
Never carry the charger
by its cord or pull it to
disconnect from the
socket. Keep the cord
away from heat, oil and
sharp edges.
■
Never attempt to charge
non-rechargeable
batteries.
■
Do not charge a leaking
battery.
■
The cord of the charger
is not changeable, do not
continue to use if the cord
is damaged.
■
Ensure that the connection
between the battery
charger and battery is
correctly positioned and is
not obstructed by foreign
bodies.
■
Keep battery charger’s
slots are free of foreign
objects and protect
against dirt and humidity.
Store in a dry and frostfree place.
■
When charging batteries,
ensure that the battery
charger is in a wellventilated area and
away from inflammable
materials. Batteries can
get hot during charging.
Do not overcharge any
batteries. Ensure that
batteries and chargers
are not left unsupervised
during charging.
■
Do not open the charger.
■
Do not probe the charger.
■
For indoor use, or do not
expose to rain.
■
Respect the polarity “+/-“
when charging.
12 AFTER SALES SUPPORT 0345 605 2067
Page 13

SAFETY INFORMATION
Please read these instructions fully before operating or maintaining your machine
ADDITIONAL SAFETY INSTRUCTIONS FOR HEDGE TRIMMERS
■
Keep all parts of the body
away from the cutter
blade. Do not remove cut
material or hold material
to be cut when blades
are moving. Make sure
the switch is off when
clearing jammed material.
A moment of inattention
while operating the hedge
trimmer may result in
serious personal injury.
■
Carry the hedge trimmer
by the handle with the
cutter blade stopped.
When transporting or
storing the hedge trimmer
always fit the cutting
device cover. Proper
handling of the hedge
trimmer will reduce
possible personal injury
from the cutting blades.
■
Keep cable away from
cutting area. During
operation the cable may
be hidden in shrubs and
can be accidentally cut by
the blade.
■
Advice to check the
hedge for foreign objects,
e.g. wire fences.
■
Hold the hedge trimmer
properly, e.g. with both
hands if two handles are
provided
■
Hold the power tool
by insulated gripping
surfaces only, because
the cutting blade may
contact hidden wiring.
Cutting blades contacting
a “live” wire may make
exposed metal parts of
the power tool “live” and
could give the operator an
electric shock.
■
Check cutting blades
regularly for damage,
and if damaged repair
immediately; check
cable for damage before
starting work and replace
if necessary.
■
Always ensure all handles
and guards are fitted
when using the tool.
■
Do not use the machine
13 AFTER SALES SUPPORT 0345 605 2067
Page 14

SAFETY INFORMATION
Please read these instructions fully before operating or maintaining your machine
when it is raining or on wet
hedges.
■
Never allow children to use
the tool.
■
Choose a stable and safe
position, especially on
steps. When operating the
machine take great care
and always hold it firmly
with both hands.
■
Make yourself familiar with
your working area and be
alert for possible hazards,
which you might not hear
due to the motor noise.
■
Never attempt to use a
damaged or incomplete
machine or one fitted
with an unauthorized
modification.
■
Keep cutting tools sharp
and clean. Properly
maintained cutting tools
with sharp cutting edges
are less likely to bind and
are easier to control.
■ Use the power tool,
accessories and tool bits
etc. in accordance with
these instructions, taking
into account the working
conditions and the work to
be performed. Use of the
power tool for operations
different from those
intended could result in a
hazardous situation
■
Only use original spare
parts and accessories
supplied with the machine
or recommended by the
manufacturer.
■
Always wear suitable
clothing; anti-slip shoes
and close-fitting garments,
that cannot get caught,
however do not restrict
your movement. Tie long
hair back or protect with
a hair net. Do not wear
bracelets or long jewelry
which could get entangled
in moving parts.
■
Use personal protective
equipment. Always wear
eye protection. Protective
equipment such as dust
mask, non-skid safety
shoes, hard hat, or hearing
protection used for
appropriate conditions will
14 AFTER SALES SUPPORT 0345 605 2067
Page 15

SAFETY INFORMATION
Please read these instructions fully before operating or maintaining your machine
reduce personal injuries.
■
Within the working area,
the person using the
power tool is responsible
for any damaged or injury
sustained by third parties
or their property, which has
been caused by the power
tool. Watch your working
area and do not allow third
persons or animals to be
around.
■
When operating the power
tool take great care and
always hold it firmly with
both hands. Adopt a
stable and safe position,
especially on slopes.
■
Never touch the
unprotected blades and
never carry the machine
taking hold of the blades.
MAINTENANCE AND STORAGE
SAFETY
■
Disconnect the product
from the power supply
(i.e. remove the plug from
the charger supply or the
battery pack) and check
for damage after use.
■
Disconnect the plug from
the power source and/
or the battery pack from
the power tool before
making any adjustments,
changing accessories, or
storing power tools. Such
preventive safety measures
reduce the risk of starting
the power tool accidentally.
■
Inspect and maintain the
product regularly. Have
the product repaired only
by an authorised service
centre or similar qualified
specialist.
■
Store idle power tools out
of the reach of children
and do not allow persons
unfamiliar with the power
tool or these instructions to
operate the power tool.
■
Power tools are dangerous
in the hands of untrained
users.
15 AFTER SALES SUPPORT 0345 605 206715
Page 16

SAFETY INFORMATION
Please read these instructions fully before operating or maintaining your machine
■
Have your power tools
serviced by a qualified
repair person using only
identical replacement
parts. This will ensure that
safety of the power tool is
maintained.
INTENDED USE
This cordless hedge
trimmer is designed for
cutting and trimming
of hedges, bushes and
ornamental shrubs in the
domestic environment.
For safety reasons it is
essential to read the entire
instruction manual before
first operation and to
observe all the instructions
therein.
Any use of the machine that
deviates from its intended
use and is not included
in these instructions is
considered unauthorized
use and relieves the
manufacturer from his or
her legal liability.
16 AFTER SALES SUPPORT 0345 605 2067
Page 17

BOX CONTENT
PARTS
1
Main handle
2
Safety switch
3
Front handle
4
Hand guard
5
Cutting blade
6
Battery pack holder
7
Trigger switch
Charger
8
Charger base
9
Battery pack
10
Blade sheath
11
4
3
5
2
1
7
6
10
If there are any parts missing, please call the customer helpline on 0345 605 2067
9
11
8
17 AFTER SALES SUPPORT 0345 605 2067
Page 18

ASSEMBLY
Unpacking
1
i. Unpack all parts and lay them on a flat, stable surface.
ii. Remove all packing materials and shipping devices if
applicable.
iii. Make sure the delivery contents are complete and free
of any damage. If you find that parts are missing or
show damage, do not use the product but contact the
aftersales service within 28 days of purchase. Using an
incomplete or damaged product represents a hazard to
people and property.
iv. Ensure that you have all the accessories and tools
needed for assembly and operation. This also includes
suitable personal protective equipment.
Check battery capacity
2
Push the power indicator button (A), the remaining
percentage of battery capacity will show on screen.
FU
means 100% fully charged.
A
Insert the battery to product
i. Keep the battery pack in line with the holder on
the device.
ii. Push it forward until it reaches the bottom. Before
starting make sure the battery pack is firmly
locked in place.
Remove the battery from product
i. Press the battery pack release button (B)
downward,
ii. Pull the battery pack towards operator, then
remove it.
18 AFTER SALES SUPPORT 0345 605 2067
B
Page 19

ASSEMBLY
Attention! The battery cannot be charged immediately
after use, it should cool off for a period of time. The
LED lights switching from green to red means it can be
charged.
3
Charging the battery
NOTE: This battery pack has been shipped in a low
charge condition. It should be fully charged before
rst use. Make sure the main voltage is the same as
rating label which located on the charger.
WARNING!
The charger and battery pack are specically
designed to work together so do not attempt to
use any other devices. Never insert or allow metallic
objects into your charger or battery pack connections
because an electrical failure and hazard will occur.
The battery needs to be charged before rst use and
whenever it fails to produce sufcient power on jobs
that were easily done before.
19 AFTER SALES SUPPORT 0345 605 2067
Page 20

ASSEMBLY
This product comes with a lithium ion battery pack. Lithium
Ion batteries don’t lose charge when not in use, and don’t lose
charging capacity overtime. Never the less it is best practice to
charge the battery when empty or insufficient to do the job.
Connect charger with charger base, and then plug the
charger into mains.
1. Plug the charger into an appropriate AC power outlet. The LED
lights green to tell you that the charger is ready for use.
2. Slide the charger base (9) into the battery pack(10), make sure
the charger base is fully seated in the battery pack. The LED
lights up red to tell you that the battery pack is on charge.
3. The battery pack will be fully charged in 1 hour. And the LED
lights up green again to tell you that the battery pack is fully
charged.
Important charging notes
Longest life and best performance can be obtained if the battery
pack is charged at room temperature between 18-24°C. Do not
charge the battery pack in a very low or very high air temperature.
This is important and will prevent serious damage to the battery
pack.
■
When using your tool continuously, the batteries in your battery
pack will become hot. You should let a hot battery pack cool
down for approximately 30 minutes before attempting to
recharge.
■
The charger and battery pack may become warm to touch
while charging. This is a normal condition, and does not
indicate a problem.
■
Use the charger in normal room temperatures whenever
possible. To prevent overheating, do not cover the charger
and do not charge battery packs in direct sunlight or near heat
sources.
■
If the battery pack does not charge properly;
(1).Check the main socket by plugging in a lamp or other
20 AFTER SALES SUPPORT 0345 605 2067
Page 21

ASSEMBLY
appliance.
(2). Move the charger and battery pack to a location
where the surrounding air temperature is
approximately 18-24°C.
(3). If charging problems persist, take or send the tool,
battery pack and charger to your local service center.
■
The battery pack should be recharged when it fails to
produce sufficient power on jobs which were easily done
previously. DO NOT CONTINUE to use under these
conditions. Follow the charging procedure. You may also
charge a partially used pack whenever you desire with no
adverse effect on the battery pack.
■
Under certain conditions, with the charger plugged in to
the power supply, the exposed charging contacts inside
the charger can be shorted by foreign material. Foreign
materials of a conductive nature such as, but no limited
to, steel wool, aluminum foil, or any buildup of metallic
particles should be kept away from charger cavities.
Always unplug the charger from the power supply when
there is no battery pack in the cavity. Unplug charger
before attempting to clean.
■
Do not immerse charger in water or any other liquid.
WARING!
Don’t allow any liquid to get inside charger. Electric
shock may result. To facilitate the cooling of the
battery pack after use, avoid placing the charger or
battery pack in a warm environment such as in a
metal shed, or an un-insulated trailer.
CAUTION!
Never attempt to open the battery pack for any
reason. If the plastic housing of the battery pack
breaks or cracks, return to a service center for
recycling; do not put it into further use.
21 AFTER SALES SUPPORT 0345 605 2067
Page 22

OPERATION
General operation
i. Check the product, its battery pack and charger as well
as accessories for damage before each use. Do not use
the product if it is damaged or shows wear.
ii. Double check that accessories are properly fixed.
iii. Always hold the product on its handles. Keep the
handles dry to ensure safe support.
Switching on/off
NOTE: Hold the hedge trimmer away from yourself using
both hands. Stand in a secure and stable position.
To switch on
Pull up the trigger switch of the rear handle and, with your
other hand, pull the the safety switch simultaneously.
To switch off
Release the trigger switch or the safety switch.
Trimming times
Green leaf hedges June to October
Evergreens April and August
Conifers and other fast growing shrubs every 6 - 8 weeks
22 AFTER SALES SUPPORT 0345 605 2067
Page 23

OPERATION
NOTE: Only operate the product during reasonable hours
– not early in the morning, late at night or on weekends/
public holidays when people might be disturbed. Please
check local restrictions.
Trimming
i. Cut and remove branches exceeding the cutting capacity
of this product using a proper pruner before operation.
ii. Move the cutting device lightly through the surface to
be cut in a sweeping motion following the shape of the
hedge or shrub.
iii. A slight tilt downwards of the cutting device in the
direction of motion is recommended for optimum cutting
performance.
iv. Do not to rush and do not attempt to cut too much with
one stroke of the cutting device.
v. First cut both sides from the bottom cutting upwards to
the top. This will prevent any of the trimmings falling into
the path of the area still to be cut.
vi. After cutting the sides proceed to the top. Try to keep
the cutting device angled at approximately 15° to the
cutting surface.
15°
23 AFTER SALES SUPPORT 0345 605 2067
Page 24

OPERATION
vii. Cut in a number of stages if the area being cut is
particularly long to achieve a better result; smaller
trimmings will allow for easy composting.
NOTE: When shaping it is advisable to achieve a
trapezoidal shape. A trapezoidal cut corresponds to the
natural growth of plants and results in optimal hedge
growth, as it will expose more light to the lower end of the
hedge.
24 AFTER SALES SUPPORT 0345 605 2067
Page 25

MAINTENANCE
This product does not contain any parts that can be repaired
by the consumer. Contact an authorised service centre or a
similarly qualified person to have it checked and repaired.
WARNING! Always switch the product off, Pull out
the battery pack and let the product cool down
before performing inspection, maintenance and
cleaning work!
■
Regular and proper cleaning will help ensure safe use and
prolong the life of the product.
■
Inspect the product before each use for worn and
damaged parts. Do not operate it if you find broken
and worn parts.
■
Lubricate the internal surfaces of the blades with
gear grease,after each use.
General cleaning
i. Switch the product off, disconnect it from the power supply
and let it cool down.
ii. Check, clean and store the product as described below.
iii. Clean the product with a damp cloth and pH-neutral soap.
Use a brush for areas that are hard to reach.
iv. In particular clean the air vents after every use with a cloth
and brush.
v. Remove stubborn dirt with high pressure air (max. 3 bar).
NOTE: Do not use chemical, alkaline, abrasive or other
aggressive detergents or disinfectants to clean this product
as they might be harmful to its surfaces.
25 AFTER SALES SUPPORT 0345 605 2067
Page 26

MAINTENANCE
Cleaning the blades
WARNING! Wear safety gloves when working on
blades and close to it! Use appropriate tools to
remove debris, e.g. a brush or wooden stick! Never
use your bare hands!
Always use original spare parts for replacement.
i. Keep the blades clean and free of debris. Remove
trimmings.
ii. Apply a small amount of suitable lubricant, like gear grease,
on the cutting device to retain a good cutting performance.
Repair
This product does not contain any parts that can be repaired by
the consumer. Contact the after sales support if you have any
queries.
Storage
i. Clean the product as described above.
ii. Attach the blade cover.
iii. Store the product and its accessories in a dry, frost-free
place.
iv. Always store the product in a place that is inaccessible to
children. The ideal storage temperature is between 10 30°C.
v. We recommend using the original package for storage or
covering the product with a suitable cloth or enclosure to
protect it against dust.
26 AFTER SALES SUPPORT 0345 605 2067
Page 27

MAINTENANCE
Transportation
i. Switch the product off and disconnect from power supply.
ii. Attach the blade cover.
iii. Always carry the product by its handles/gripping surfaces.
iv. Protect the product from any heavy impact or strong
vibrations which may occur during transportation in
vehicles.
v. Secure the product to prevent it from slipping or falling over.
Recycling and disposal
The product comes in a package that protects it against
damage during shipping. Keep the packaging until you are sure
that all parts have been delivered and the product is functioning
properly. Recycle the packaging afterwards.
Old products are potentially recyclable and do not, therefore,
belong in your household waste. You are requested to assist
us and our contribution to saving resources and protecting
the environment by handing in this product at an equipped
collection centre.
27 AFTER SALES SUPPORT 0345 605 2067
Page 28

TECHNICAL DATA
Model Number HT04
Nominal voltage of product with battery 18V d.c.
No load speed 1300 /min
Cutting length 450 mm
Tooth gap 14 mm
A weighted sound pressure 79dB(A) K
A weighted sound power 87.4dB(A) K
The guaranteed sound power level: 90dB(A)
Net weight 2.4 kg
Vibrations 2 m/s² K=1.5 m/s²
: 3dB(A)
PA
: 3dB(A)
WA
Charger
Model no. SMVCH001212000B
Input voltage & current 230-240V~ 50/60Hz, 50W
Output voltage & current 21V d.c 2A
Charger time Approx.60min
Protection class Class II
Battery pack
Model no. B0P-SP02-20-15A
Battery type Lithium-Ion
Battery capacity 1.5Ah
Battery pack voltage 18V d.c.
28 AFTER SALES SUPPORT 0345 605 2067
Page 29

TECHNICAL DATA
The sound values have been determined according to noise test code given in EN 69745-1,
using the basic standards EN ISO 11094 and EN ISO 3744.
The sound intensity level for the operator may exceed 80dB(A) and ear protection measures
are necessary.
That the declared vibration value has been measured in accordance with a standard test
method (according to EN 60745-1) and may be used for comparing one tool with another.
The declared vibration value may also be used in a preliminary assessment of exposure.
WARNING! The vibration emission during actual use of the power tool can differ from the
declared total value depending on the ways in which the tool is used.
Of the need to identify safety measures to protect the operator that are based on an
estimation of exposure in the actual conditions of use( taking account of all parts of the
operating cycle such as the times when the tool is switched off and when it is running idle in
addition to the trigger time).
Noise and vibration values were determined according to the standards and stipulations
mentioned in the declaration of conformity. Technical and optical changes can be carried
out in the course of further development without notice. All dimensions, references and
information of this instruction manual are therefore without guarantee. Legal claims, which are
made on the basis of the instruction manual, cannot thus be considered as valid.
Part number Accessories
CHT-13 Blade sheath
CGT-40 Safety guard
CGT-50 Charger
01704ZA Battery Pack
29 AFTER SALES SUPPORT 0345 605 2067
Page 30

TROUBLESHOOTING
Suspected malfunctions are often due to causes that the user can x themselves.
Therefore, check the product using this section. In most cases the problem can be solved
quickly by user.
WARNING! Only perform the steps described within these instructions! all further
inspection, maintenance and repair work must be performed by an authorised service
centre or a similarly qualied specialist if you cannot solve the problem yourself!
Gloves and appropriate protective clothing must be worn when performing these
instructions.
Fault
Product is not running.
Unsatisfactory cutting
result
Excessive vibration/
noise
Possible Cause Solution
- Battery discharged
- Battery pack does not sit in
its place correctly
- Device defective
- The branches exceeding the
tooth gap of the blades
- Low battery power
- Some bolts/nuts may have
loosened
- Charge rechargeable battery
- Install the battery pack once
again
- Contact service center
- Only cut branches within the
limits
- Charge the battery
- Contact service center
- Contact service center
30 AFTER SALES SUPPORT 0345 605 2067
Page 31

WARRANTY
If your device develops a fault, please don’t hesitate to contact our customer service
department on 0345 605 2067, the majority of problems can be solved directly on the
phone.
1. These warranty terms cover additional warranty rights and do not affect your statutory
warranty rights. All our products are covered by a 3 year manufacturer warranty.
2. Claims must be accompanied by proof of purchase. This must be in the form of a Sales
receipt or bank statement and must show that the product has been purchased within the
warranty period as described under point 1, from the retailer that it was originally bought
from. Please keep your receipt safe or staple it to the back of this manual for future
reference.
3. Our warranty covers problems caused by material or manufacturing defects, and will
result in the repair of these defects or replacement of the device with a like for like or
similar article.
4. Our devices have not been designed for commercial, trade or industrial applications, any
signs of use of the equipment in these application or equivalent activities, invalidates the
warranty.
5. The following are also excluded from our warranty:
A. Faults due to accidents, customer misuse or unauthorized repairs
B. Consumable Parts such as batteries, chargers, blades, quick release locks, extension
cables, wheels, grass bags and other accessories that are compatible with the
product.
C. Failure due to lack of routine maintenance.
D. Failure as a result of not using the equipment in accordance with the manual and
safety instructions
E. The adjustment of cables, drive gears, or blades.
Warranty claims should be submitted before the end of the warranty period, see point 1, but
a paid service exists for repairs commissioned after this period. The original warranty period
remains applicable to the device even if repairs are carried out or parts are replaced.
In such cases, the work performed or parts fitted will not result in an extension of the
warranty period, and no new warranty will become active for the work performed or parts
fitted.
If you have any problems or questions concerning your garden power tool, please contact
our after sales service at 0345 605 2067.
31 AFTER SALES SUPPORT 0345 605 2067
Page 32

32 AFTER SALES SUPPORT 0345 605 2067
 Loading...