

Page 1
INSTRUCTIONS FOR MODELS
92-SA-1002-02
For additional assistance or service please contact:
SPEAKMAN
®
Company
400 Anchor Mill Road
New Castle, DE 19720
800-537-2107
www.speakman.com
SA-1002
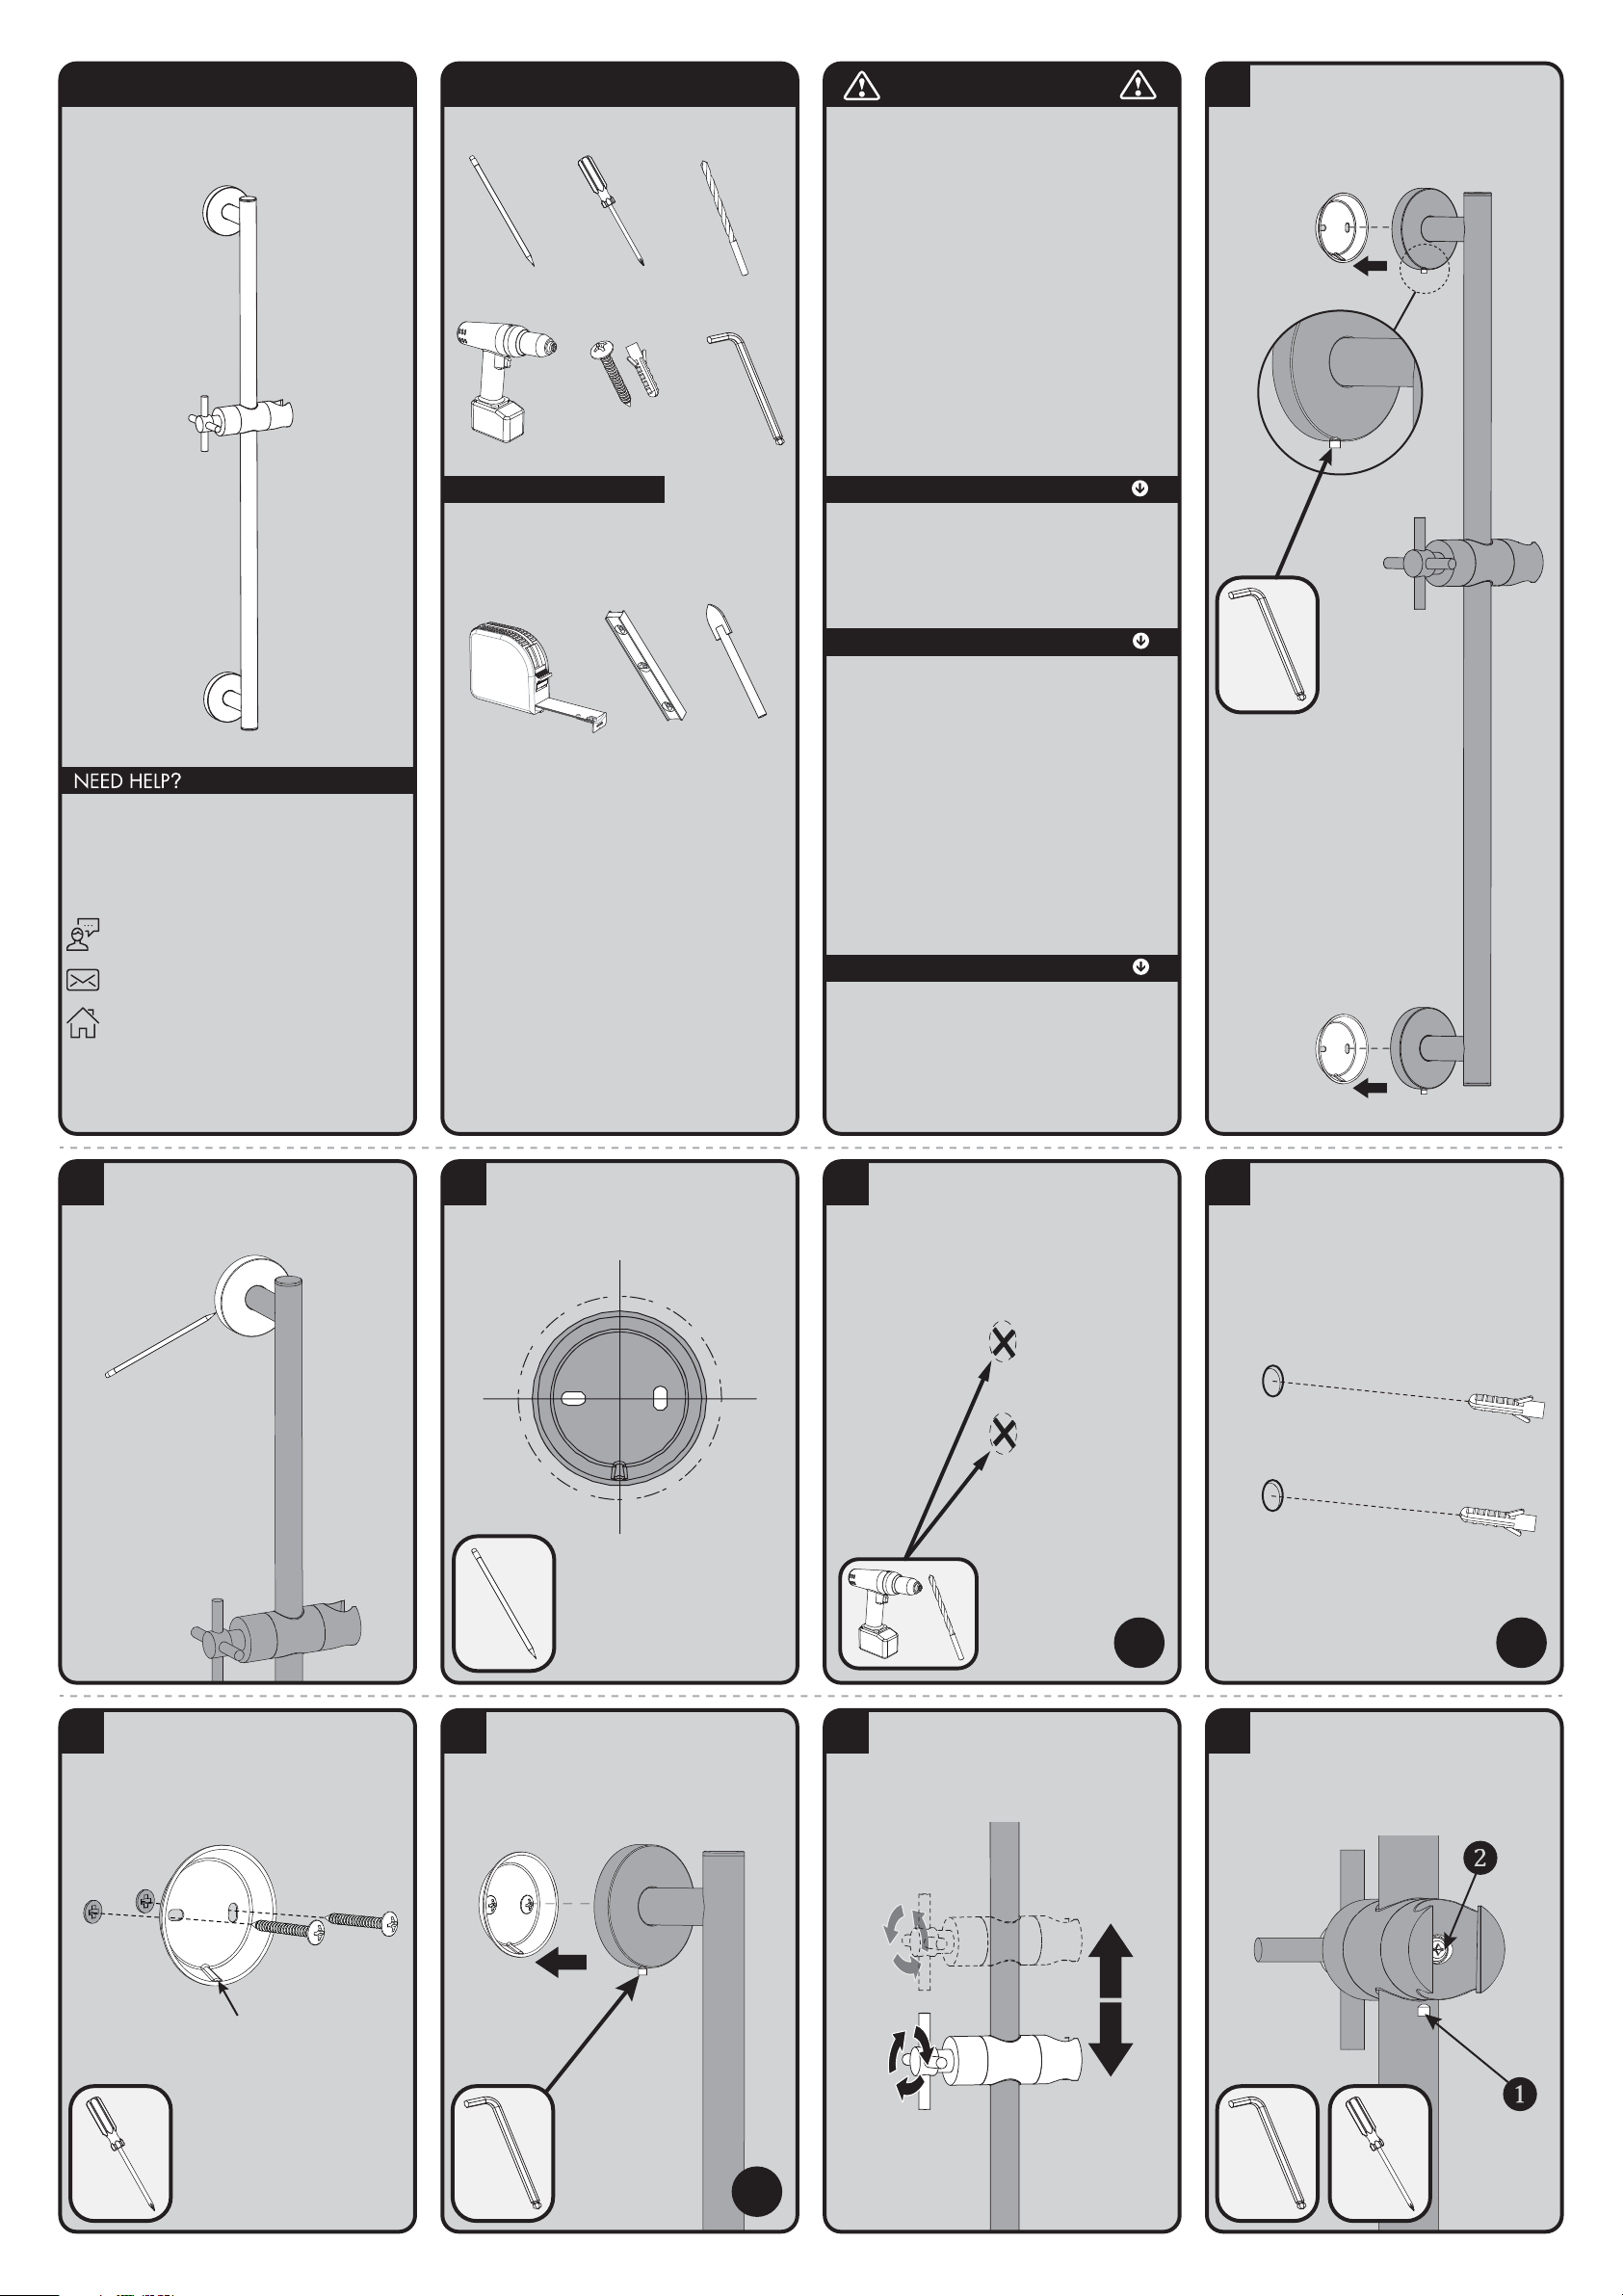
HELPFUL TOOLS & SUPPLIES:
TOOLS AND SUPPLIES
Level
Measuring
Tape
Phillips
Screwdriver
Pencil
Drill
Drill Bit
1/4”
Tile Drill Bit
1/4”
Mounting Hardware
(included)
Hex Key
Wrench
Additional warranty information can be found at:
www.speakman.com
WARRANTY
MAINTENANCE
• Cover your drain to prevent loss of parts. Be sure
to follow all tool manufacturers safety guidelines.
• Use caution when drilling into walls to avoid
electrical and plumbing lines hidden within
the wall.
SAFETY TIPS
IMPORTANT
• Do not over-tighten any connections or damage
may occur.
• Be sure to read instructions thoroughly before
beginning installation.
• This item is NOT designed for use as a grab bar.
Do not mount in locations where product is likely
to be used as a grab bar.
Your new Speakman Product is designed for years of
1
Loosen Set Screws with supplied Allen Wrench,
and remove Mounting Brackets from both ends
of Slide Bar assembly.
2
Place Slide Bar Assembly on to wall in the
desired mounting position. Take care that the
Slide Bar is oriented in a vertical position. Using
a pencil, lightly trace outline of end brackets on
to wall.
3
Center Mounting Bracket within traced outline.
Mark the 2 locations with a pencil.
4
Drill 1/4” hole in marked locations. If drilling
into tile, be sure to use a drill bit designated for
tile. If mounting directly into stud or wood wall,
secure lower end bracket to wall with mounting
screws withouth drilling holes.
Ø 1/4”
X4
5
Push the Plastic Anchors (x4) into the drilled
holes. Ensure the plastic anchors are flush with
the wall. (Note: Plastic Anchors provided may
not be suitable for all types of wall construction,
seek professional help if in doubt).
X4
6
Secure Mounting Plate with the Mounting Screws
provided. Ensure Recess Area of Mounting Plate
is aligned vertically as shown below.
RECESS AREA
7
Install Slide Bar assembly over Mounting
Brackets, and secure with Set Screws using
supplied Allen Wrench.
X2
8
Orient the Hand Held Shower Bracket to your
desired position. Adjustments are made by
rotating the Cross Handle counter-clockwise to
release the position, and clockwise to lock into
the desired position.
9
Note: If the Hand Shower Holder no longer
holds position, Loosen the Set Screw (1) from
underneath the Bracket using the supplied Allen
Key. Tighten the Screw (2) in the Shower Holder
using a Philips Head Screwdriver. Then,
re-tighten the Set Screw (1) from below.
trouble-free performance. Keep it looking new by
cleaning it periodically with a soft cloth. The use of harsh
chemicals and abrasives on any of the Speakman custom
finish products may damage the finish and void the
product warranty. Please be sure to only use approved
cleaners. Please contact Speakman for any clarification
of acceptable cleaners.
Page 2
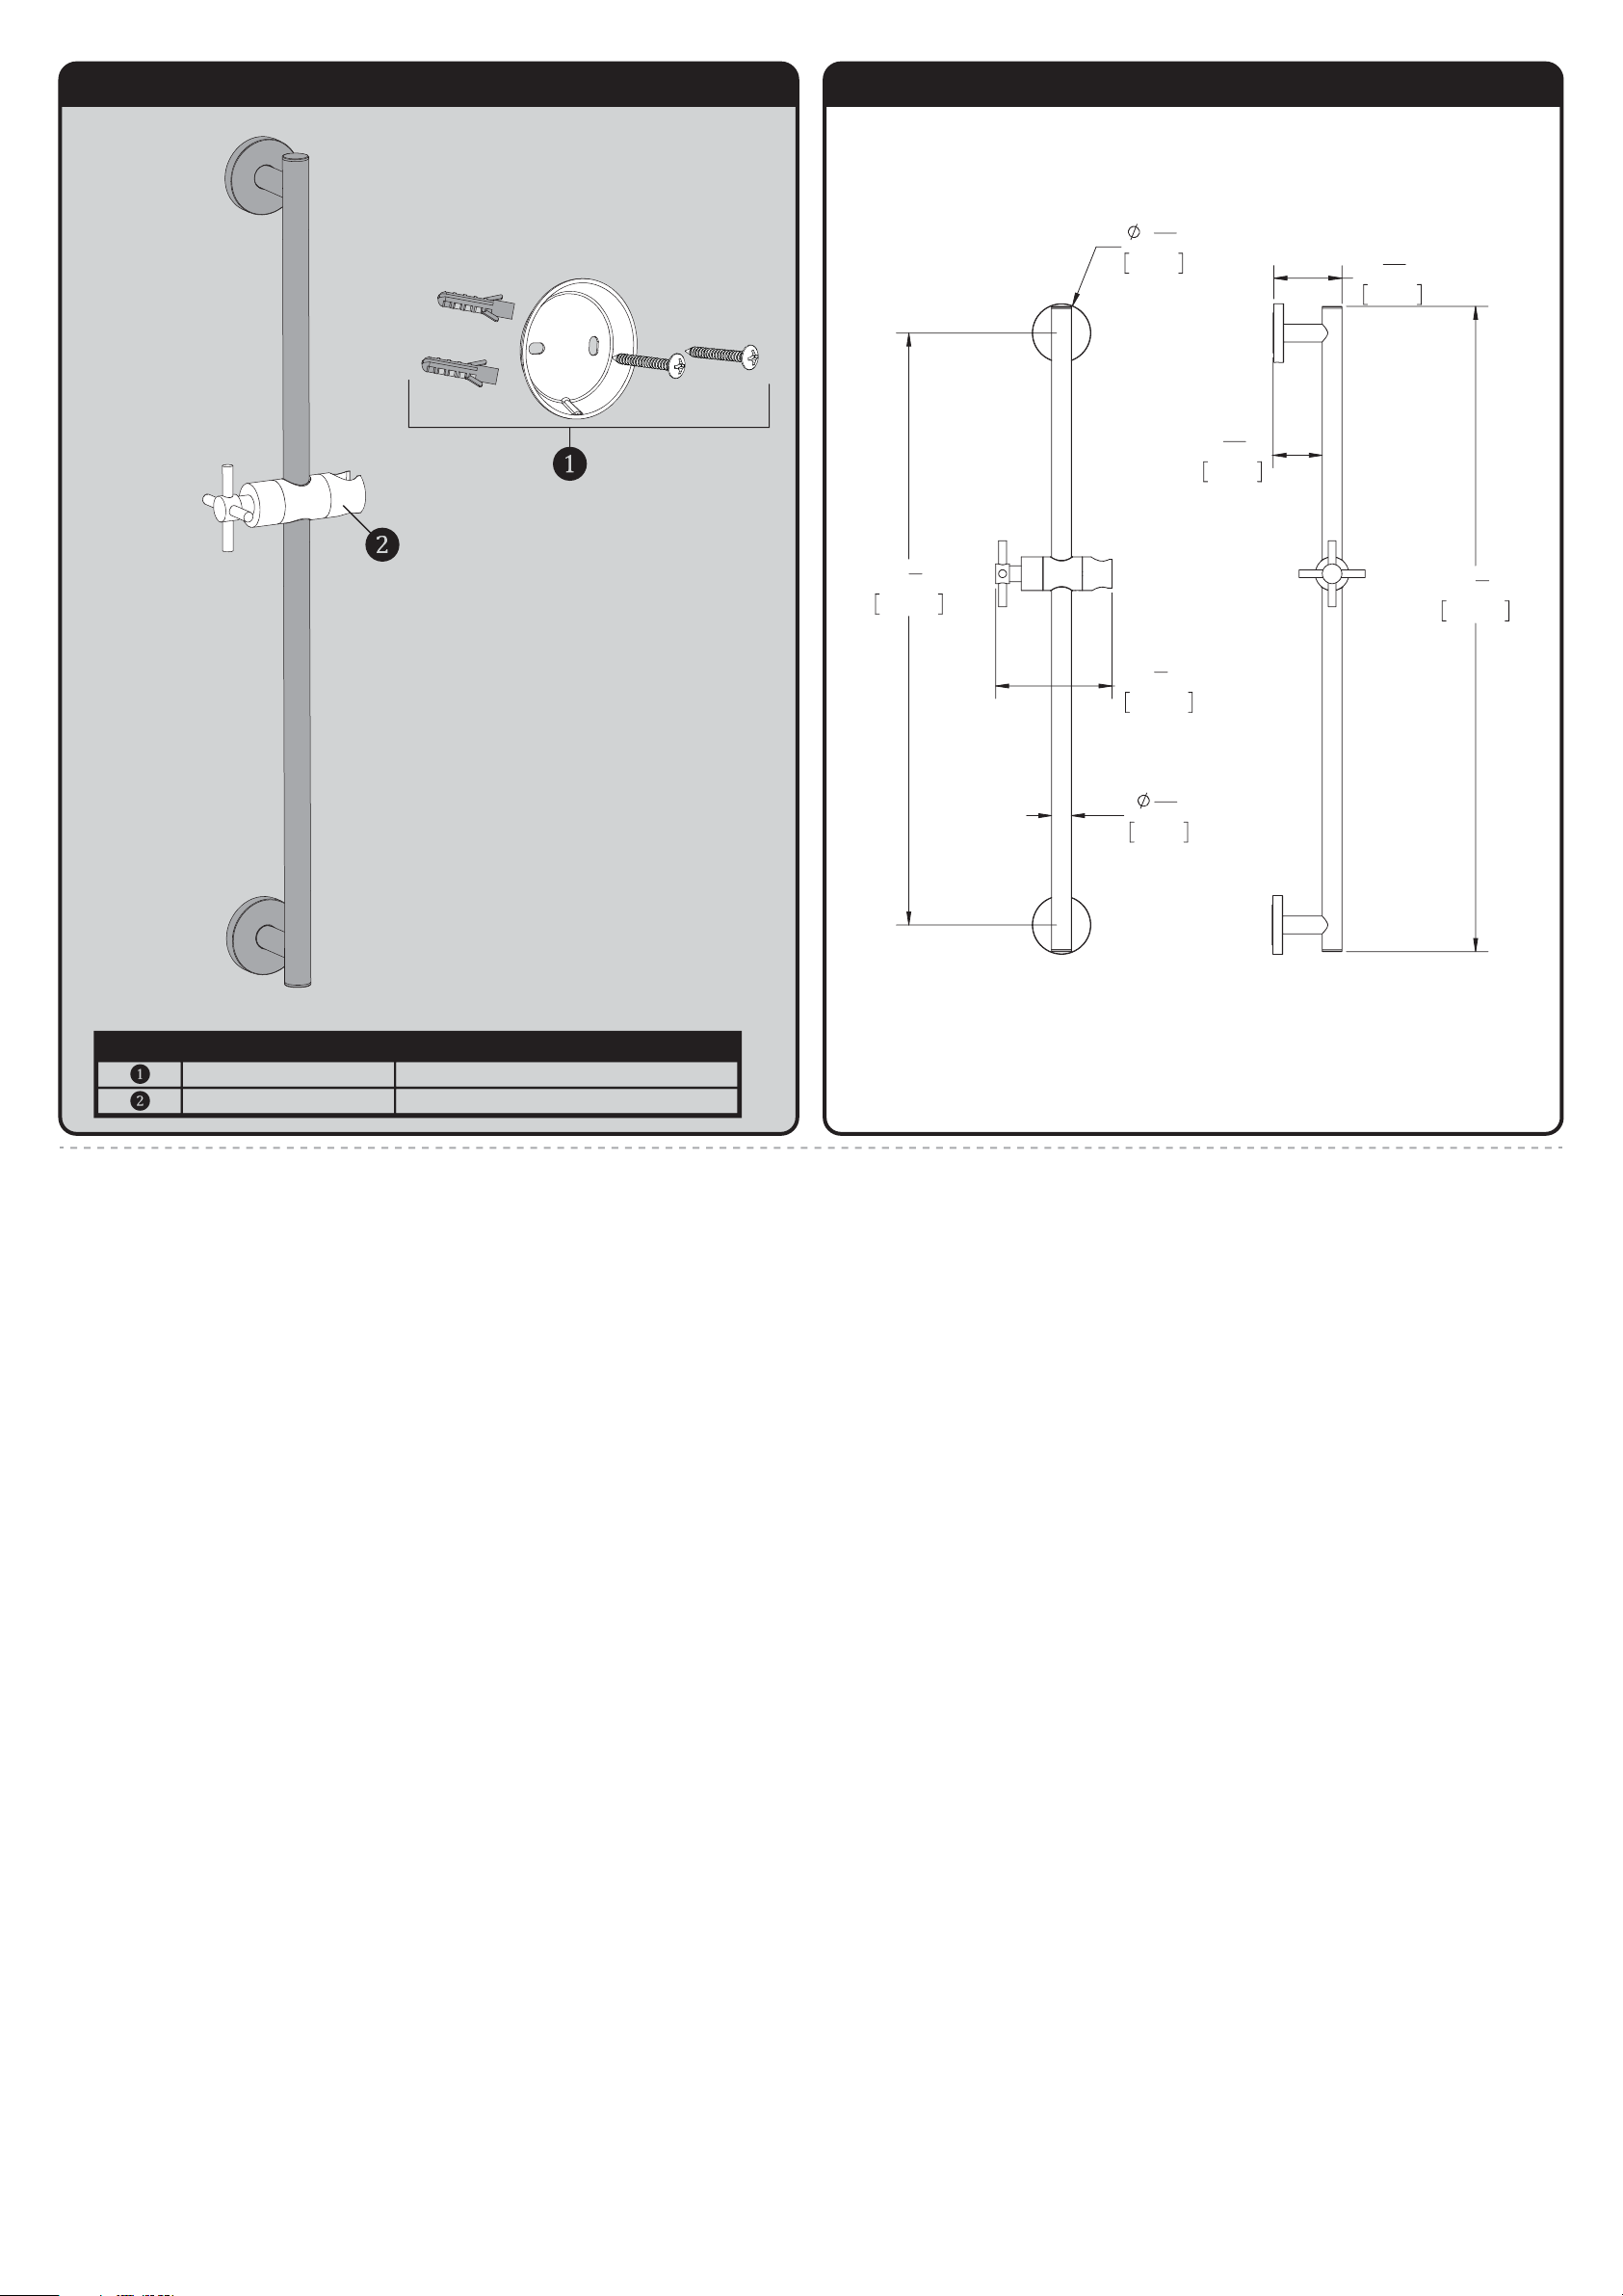
SA-1002 REPAIR PARTS
SPEAKMAN
®
RPG05-0886 MOUNTING HARDWARE
RPG56-0037-XX (XX=FINISH) HAND SHOWER HOLDER
ITEM NO. PART NO. DESCRIPTION
SA-1002 ROUGH-IN DIAGRAM
SPEAKMAN
®
DIMENSIONS SUBJECT TO CHANGE WITHOUT NOTICE.
2
5
16
"
60mm
4
5
8
"
118mm
13
16
"
20mm
23
5
8
"
600mm
2
11
16
"
69mm
1
15
16
"
50mm
25
3
4
"
654mm
 Loading...