

Page 1
INSTRUCTIONS FOR MODELS
S-3471
TOOLS AND SUPPLIES
Plumber’s
Putty
Adjustable
Wrench
Pipe
Wrench
Slip Joint
Wrench
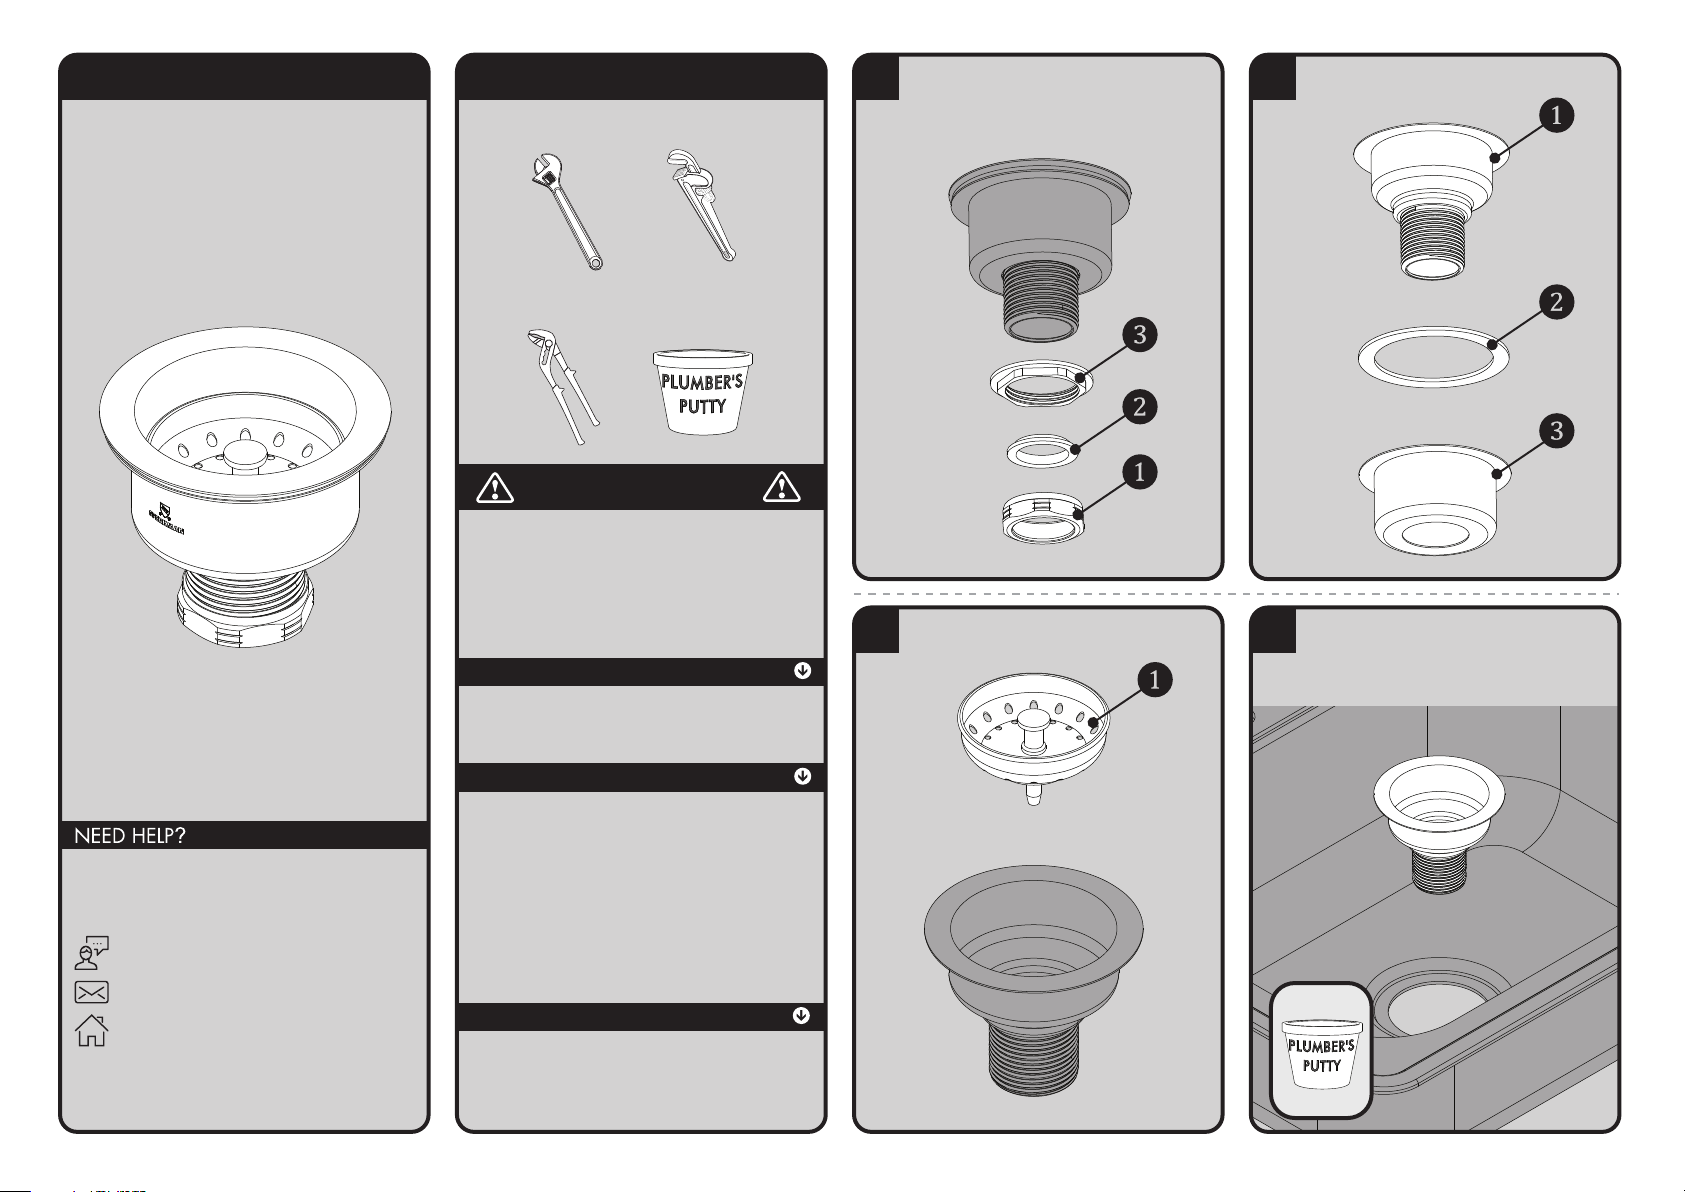
1
Disassemble the Sink Strainer by removing the
Bottom Slip Joint Nut (1), Rubber Sealing Gasket
(2), and Lock Nut (3).
2
Separate the Top Body (1) and Gasket (2) from
the Bottom Body (3).
3
Remove the Basket (1) and set to the side.
4
Apply Plumber’s Putty to the underside lip of the
Top Body. Insert Top Body into the sink from
above.
IMPORTANT
• Do not over-tighten any connections or damage
may occur.
• Be sure to read instructions thoroughly before
beginning installation.
SAFETY TIPS
Cover your drain to prevent loss of parts. Be sure to
wear eye protection while cutting pipe.
For additional assistance or service please contact:
SPEAKMAN
800-537-2107
www.speakman.com
®
92-S-3471-01
MAINTENANCE
Your new Speakman Product is designed for years
of trouble-free performance. Keep it looking new by
cleaning it periodically with a soft cloth. The use of
harsh chemicals and abrasives on any of the
Speakman custom finish products may damage the
finish and void the product warranty. Please be sure
to only use approved cleaners. Please contact
Speakman for any clarification of acceptable
cleaners.
WARRANTY
Warranty information can be found at:
www.speakman.com
Page 2
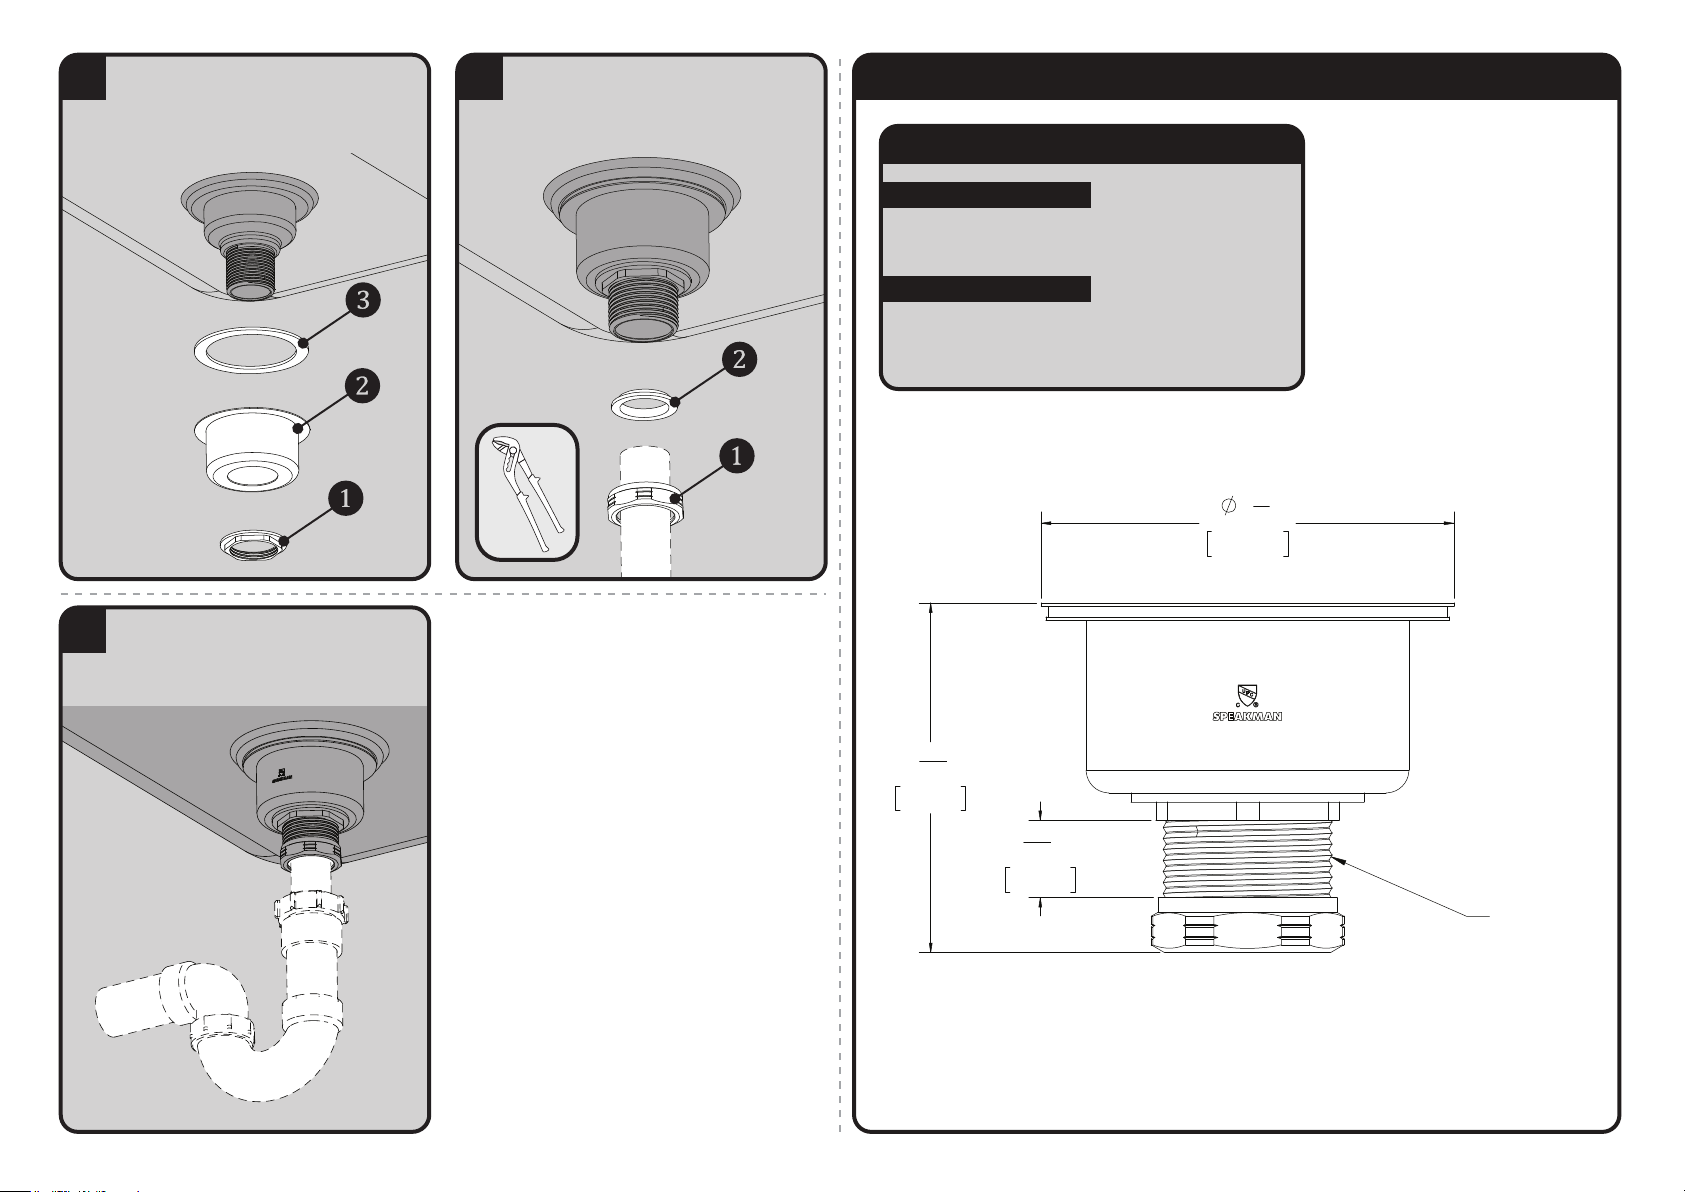
5
From below, install Gasket (3), Bottom Body (2),
and secure with Lock Nut (1). Tighten with Slip
Joint Pliers. Take care to not over-tighten
connection.
6
Install the Rubber Sealing Gasket (2) and Drain
Pipe Tailpiece (not included). Secure with the
Slip Joint Nut (1). Wrench tighten with Slip Joint
Wrench.
7
Assemble all remaining Drain Connections (not
included) and tighten all connections.
S-3471 ROUGH-IN DIAGRAM
SPEAKMAN
®
DIMENSIONS SUBJECT TO CHANGE WITHOUT NOTICE.
NOTES:
COMPLIANCE:
CONNECTIONS:
ASME A112.18.2/CSA B125.2
• Outlets: 1” Drain Pipe (not included)
3
13
16
"
97mm
4
1
2
"
114mm
13
16
"
21mm
1-1/2" NPS
THREADS
 Loading...