

Page 1
INSTRUCTIONS FOR MODELS
92-B-1100-1200-01
For additional assistance or service please contact:
SPEAKMAN
®
800-537-2107
www.speakman.com
B-1100
Oval Undermount Sink with Round Bottom
B-1101
Oval Undermount Sink with Flat Bottom
B-1200
Rectangular Undermount Sink
TOOLS AND SUPPLIES
Phillips
Screwdriver
Silicone Caulk Gun
Warranty information can be found at:
www.speakman.com
WARRANTY
MAINTENANCE
CAUTION: Risk of personal injury.
Product can break, chip or cause injury if
handled carelessly. Handle with care.
SAFETY TIPS
IMPORTANT
• Be sure to read instructions thoroughly before
beginning installation.
• Do not over-tighten any connections or damage
may occur.
• This installation manual covers several models.
While your models may look different, it will install
in the same manner.
• IMPORTANT: Provide your countertop
manufacturer with your bathroom sink model
number. Countertop manufacturer should preinstall
the anchors into the underside of the countertop.
• Use the anchors and fasteners provided by the
countertop manufacturer and the clamps provided
with your sink.
• DO NOT use adhesives or adhesive sealants to
install this sink. Observe all local plumbing and
building codes.
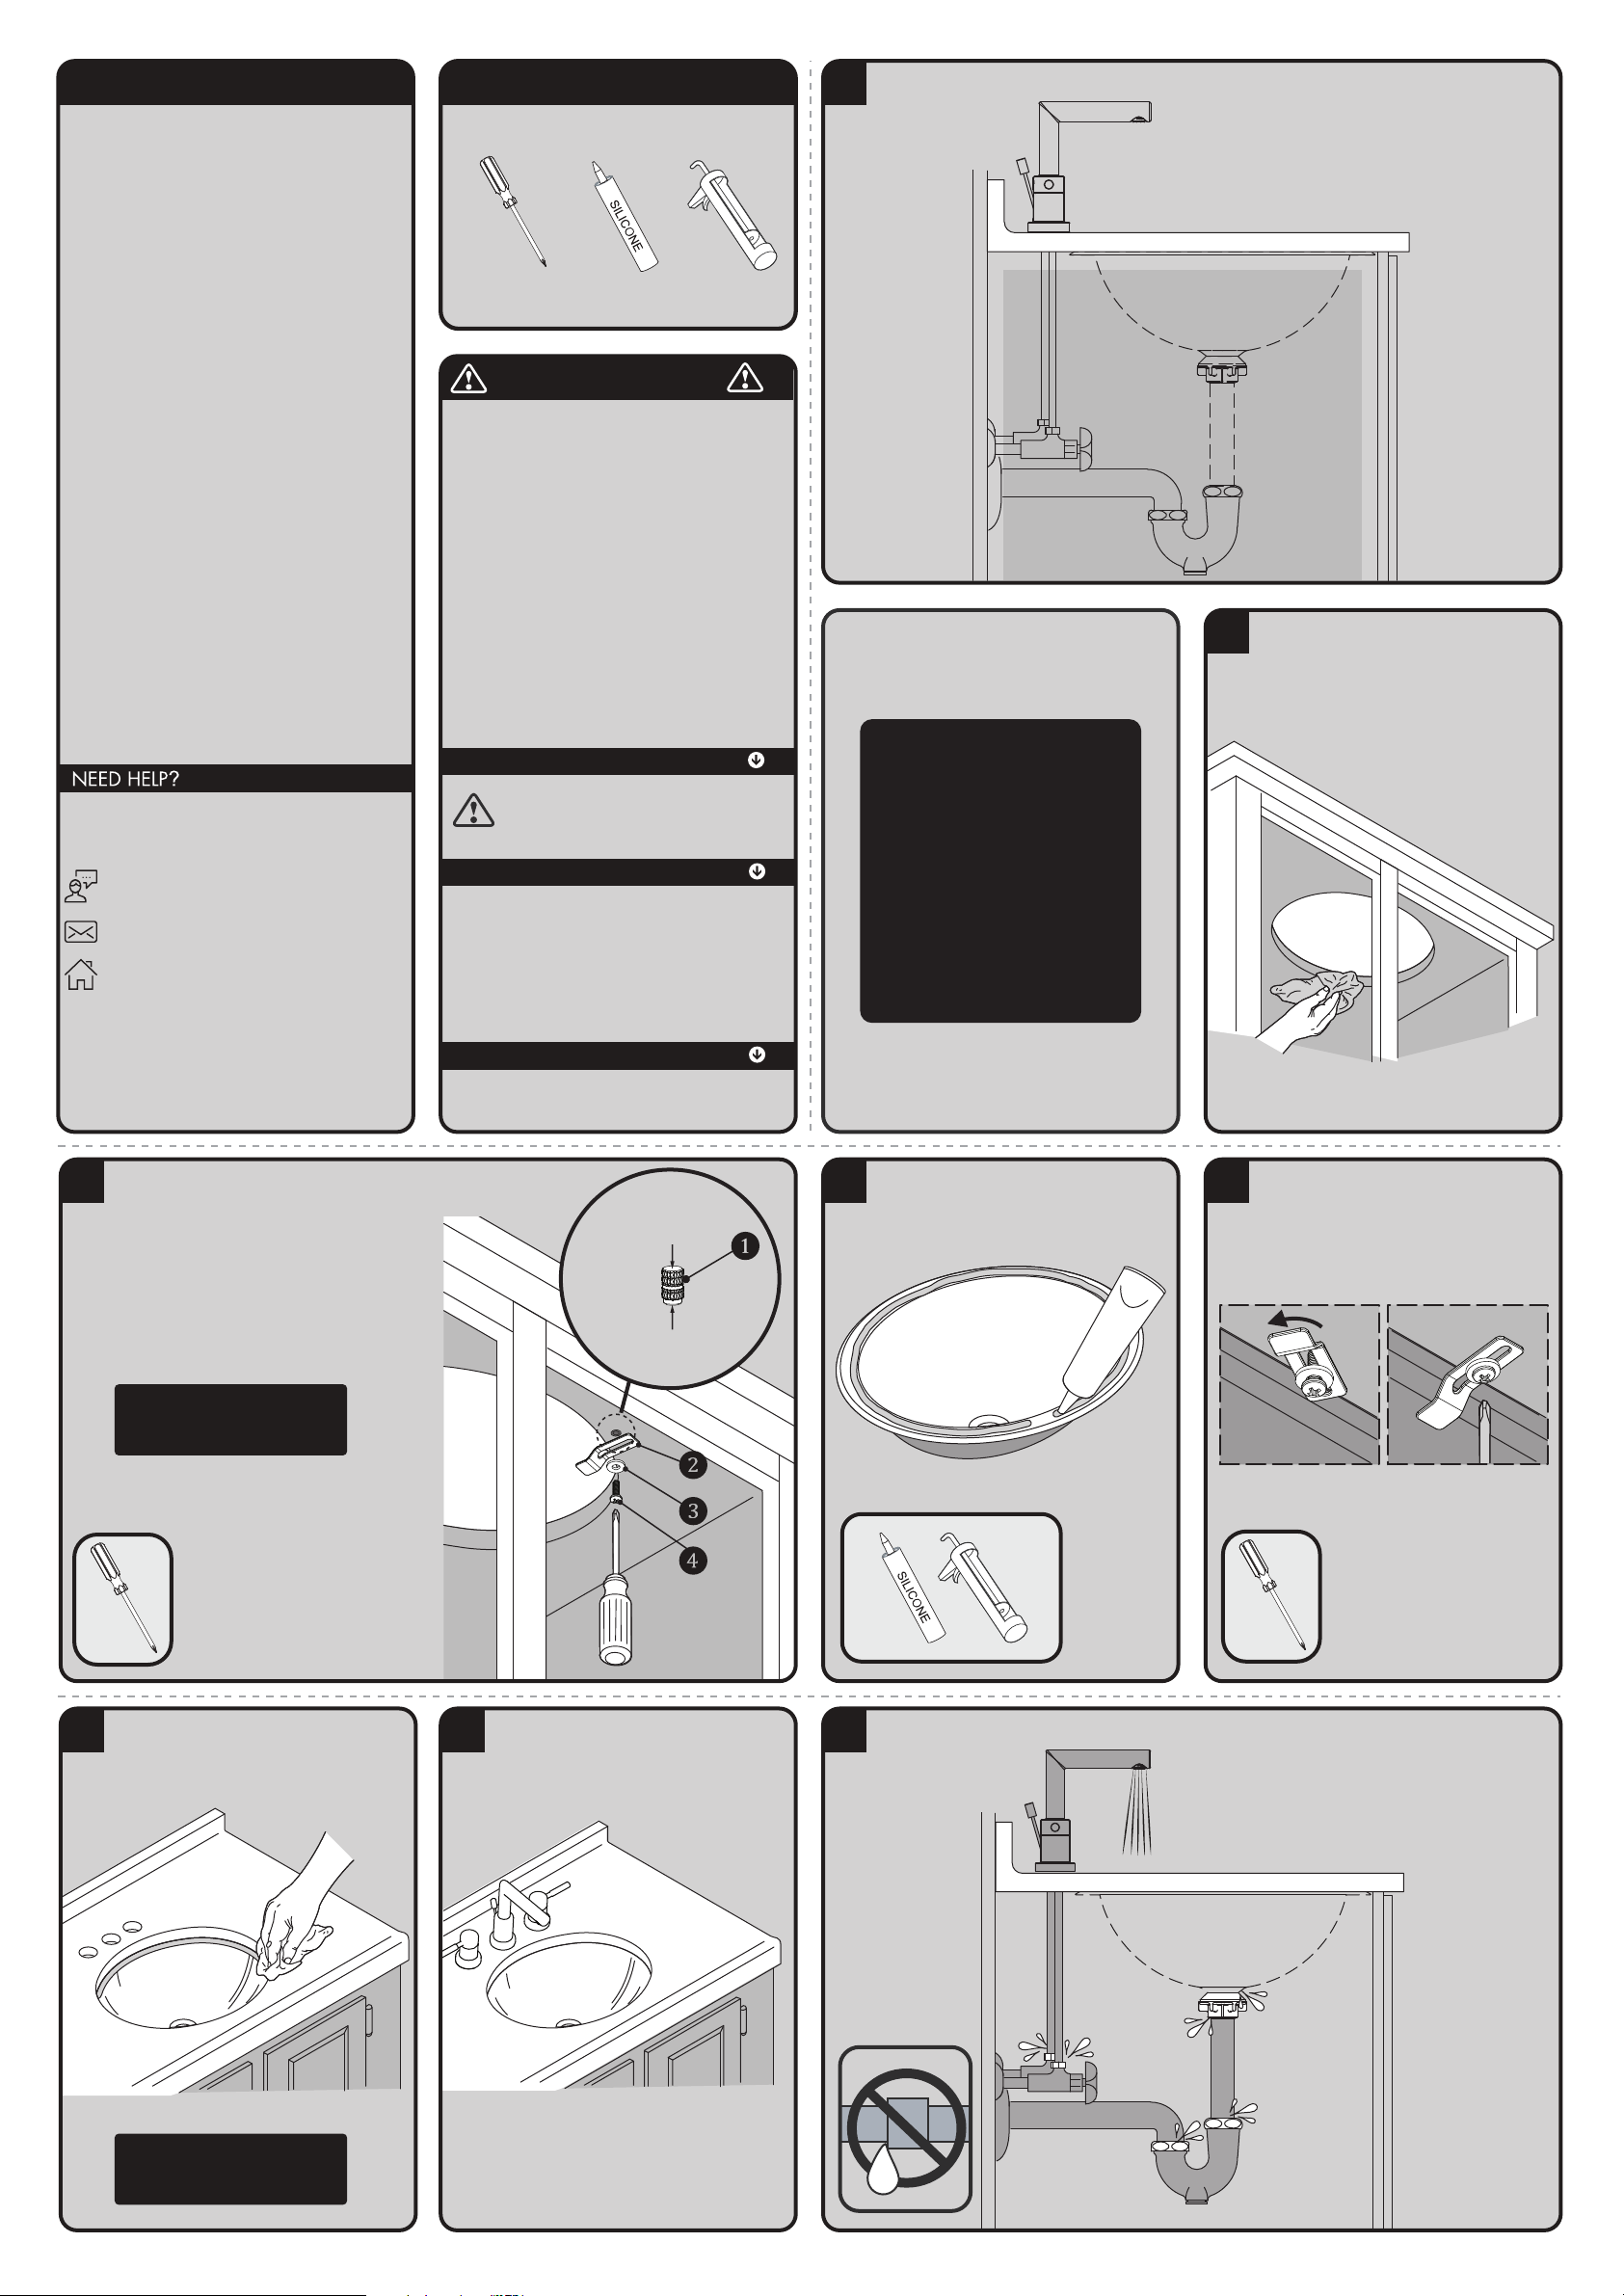
1
Verify cabinet clearance.
2
Clean the underside of the countertop and the
rim of the sink.
3
• Installation for Solid Surface countertops with
a minimum thickness of 1" (25mm).
Installer must supply anchors for thinner
countertops.
• For Solid Surface: Drill anchor holes 3/8"
Dia. x 1/2" deep. Apply small amount of Epoxy
(not provided) to closed end of Threaded Knurl (1).
Insert Threaded Knurl (threaded open end
exposed).
• Then loosely install the provided Mounting Clip
(2), Washer (3) and Screw (4) as shown.
NOTE: For Wood Countertops
use Wood Screws (not provided)
and Anchors.
CLOSED END
Epoxy (not provided)
and Insert Into
Drilled Hole
OPEN END
Exposed to accept
Mounting Screw
4
Generously apply 100% silicone sealant around
the rim.
5
Position the sink under the opening. Hold the
sink in place and rotate each clip over the rim.
Evenly tighten the clips to secure.
6
Immediately wipe away any excess sealant.
NOTE: Allow Sealant to set
before proceeding!
7
Complete the faucet and drain installations.
8
Run water into the sink and check all connections for leaks.
For Cutout Templates
please refer to your
specific model.
B-1100 / B-1101
96-B-1100-AW-01
B-1200
96-B-1200-AW-01
Your new Speakman Product is designed for years of
trouble-free performance. Keep it looking new by
cleaning it periodically with a soft cloth. The use of harsh
chemicals and abrasives on any of the Speakman custom
finish products may damage the finish and void the
product warranty. Please be sure to only use approved
cleaners. Please contact Speakman for any clarification
of acceptable cleaners.
Page 2
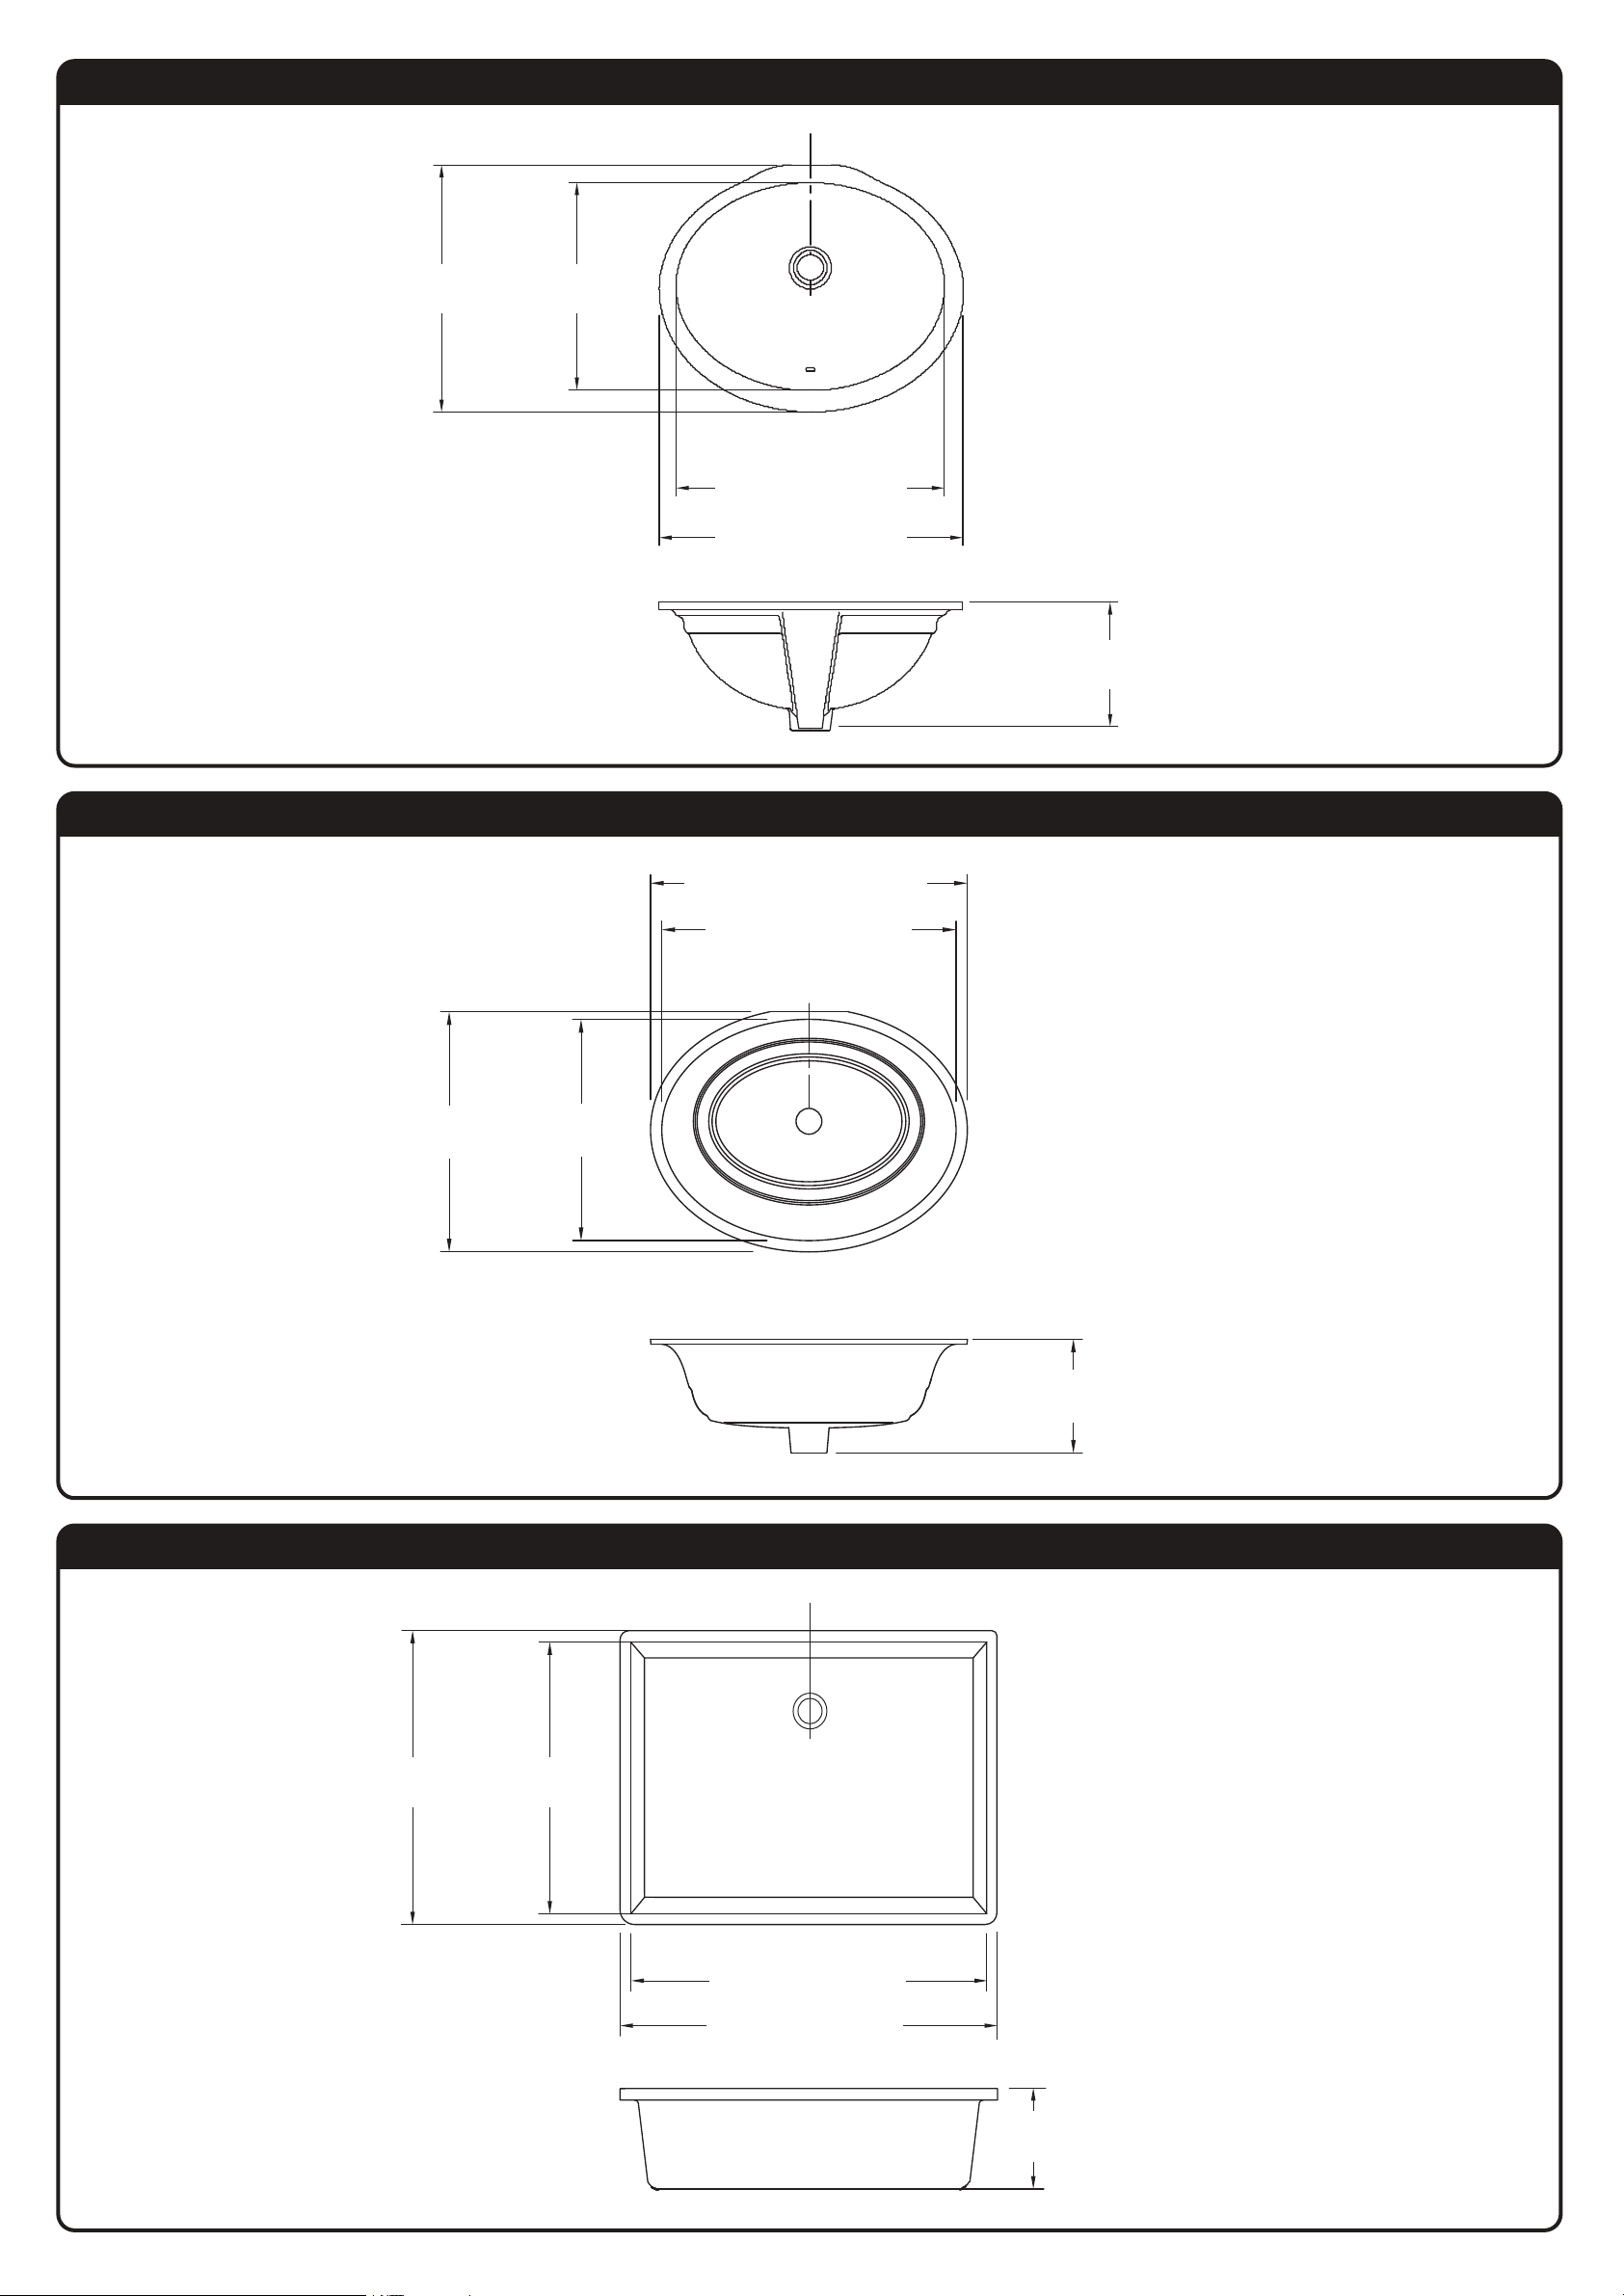
B-1100 ROUGH-IN DIAGRAM
SPEAKMAN
®
DIMENSIONS SUBJECT TO CHANGE WITHOUT NOTICE.
16"
(405 mm)
14-1/8"
(360 mm)
8-1/4"
(210 mm)
19-1/2" (495 mm)
17-1/2" (445 mm)
B-1101 ROUGH-IN DIAGRAM
SPEAKMAN
®
DIMENSIONS SUBJECT TO CHANGE WITHOUT NOTICE.
18-1/9" (460 mm)
16-9/16"
(420 mm)
6-11/16"
(170 mm)
15"
(380 mm)
19-11/16"(500 mm)
B-1200 ROUGH-IN DIAGRAM
SPEAKMAN
®
DIMENSIONS SUBJECT TO CHANGE WITHOUT NOTICE.
19-3/4" (501 mm)
17" (430 mm)
15-1/2"
(396 mm)
13"
(330 mm)
6-1/2"
(166 mm)
 Loading...