

Page 1
INSTRUCTIONS FOR MODELS
92-S-2571-01
For additional assistance or service please contact:
SPEAKMAN
®
Company
400 Anchor Mill Road
New Castle, DE 19720
800-537-2107
www.speakman.com
S-2571
Thread Seal
Tape
Hex Key Wrench
(INCLUDED)
TOOLS AND SUPPLIES
Additional warranty information can be found at:
www.speakman.com
WARRANTY
MAINTENANCE
Cover your drain to prevent loss of parts.
SAFETY TIPS
Be sure to read instructions thoroughly before
beginning installation. Do not overtighten any
connections or damage may occur.
IMPORTANT
Your new Shower Arm is designed for years of
trouble-free performance. Keep it looking new by
cleaning it periodically with a soft cloth. Avoid
abrasive cleaners, steel wool and harsh chemicals as
these will dull the finish and void your warranty.
1
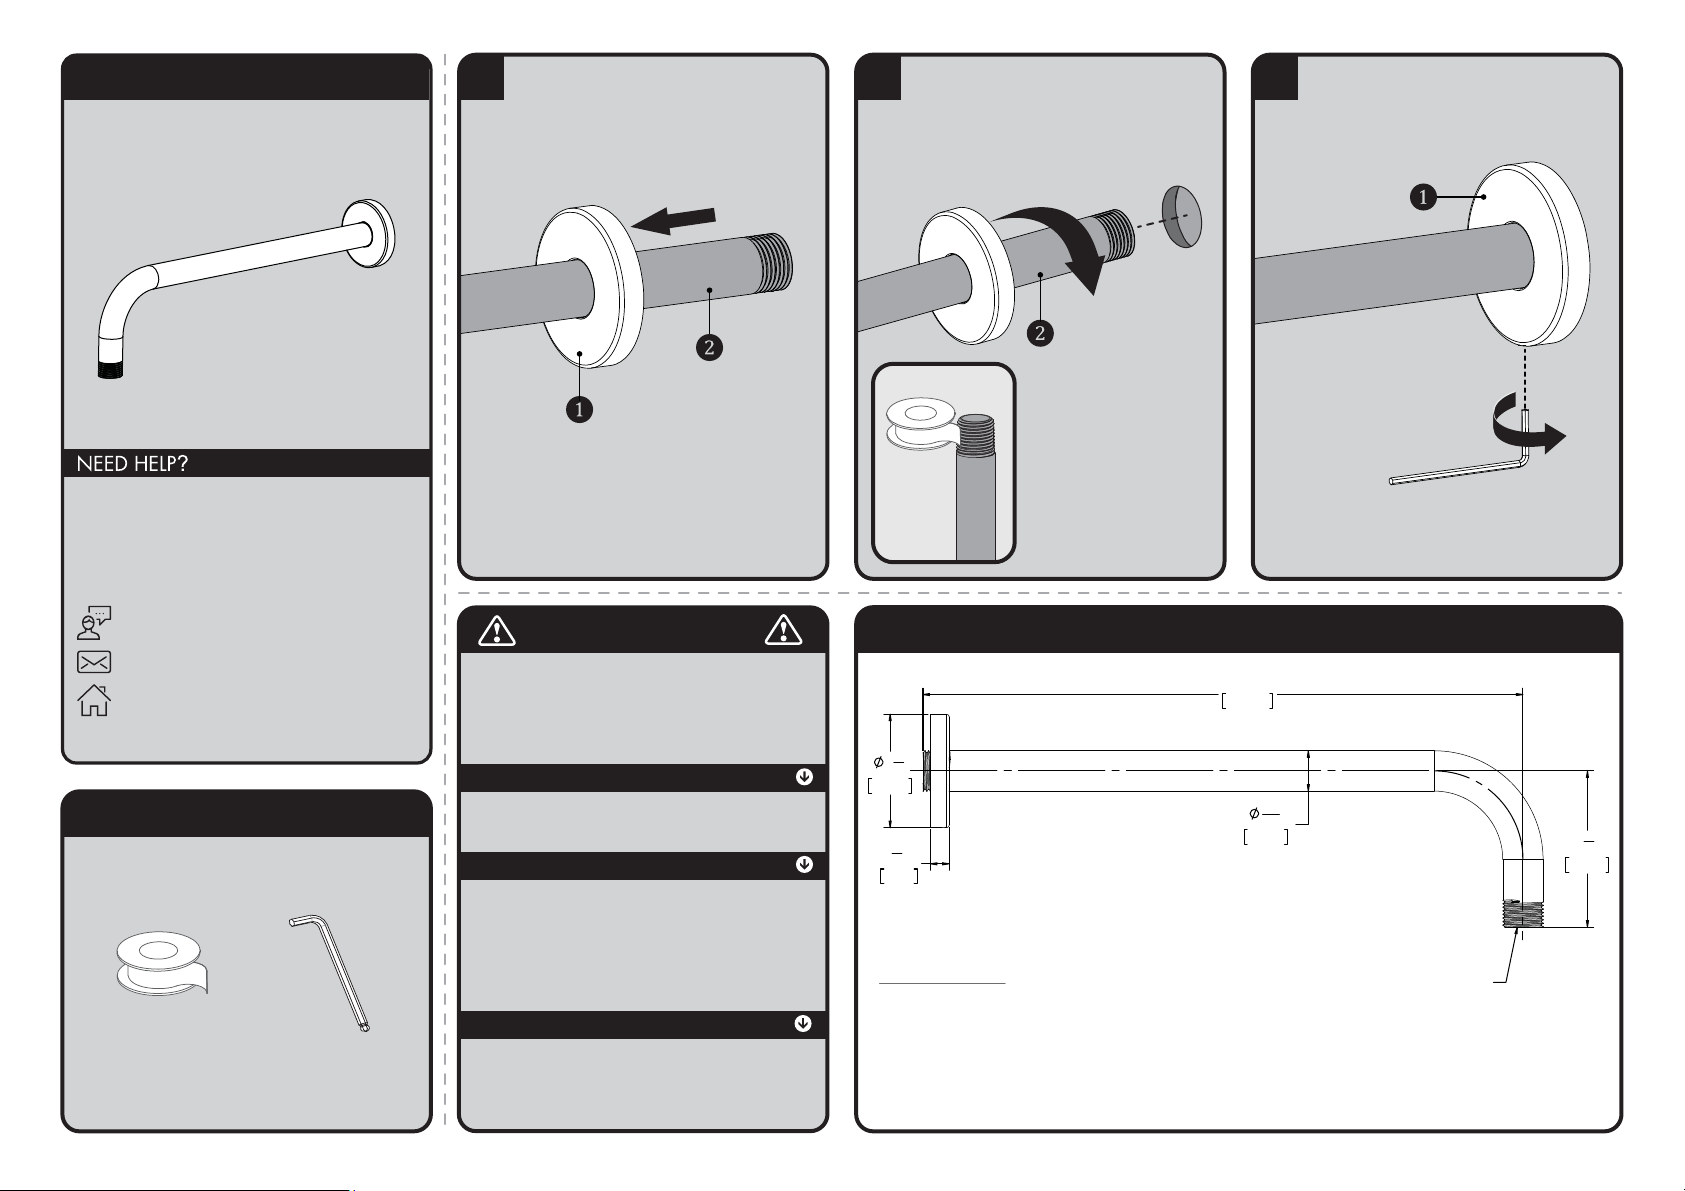
Slide the Escutcheon Plate ❶ over the
long arm of the Shower Arm ❷ as shown
below.
2
Apply Thread Seal Tape to inlet side of
Shower Arm ❷. Thread Shower Arm into
Female Pipe Fitting within the wall. Firmly
tighten, and make sure Shower Arm Outlet is
pointing in a downward position.
3
Position Escutcheon Plate ❶ flat against wall.
Secure Set Screw with Included Hex Key
Wrench.
S-2571 ROUGH IN DIAGRAM
2
1
4
"
58mm
3
8
"
9mm
3
1
8
"
79mm
12"
305mm
13
16
"
21mm
2X 1/2-14 NPT
Specifications:
Supply Inlet: 1/2" NPT MALE
Outlet: 1/2" NPT MALE
The supply fittings behind the wall shall be properly secured and anchored to support the shower arm and any
attachments added.
Note: Dimensions are subject to change without notice
 Loading...