

Page 1
www.spatz-tech.de
Operation Manual
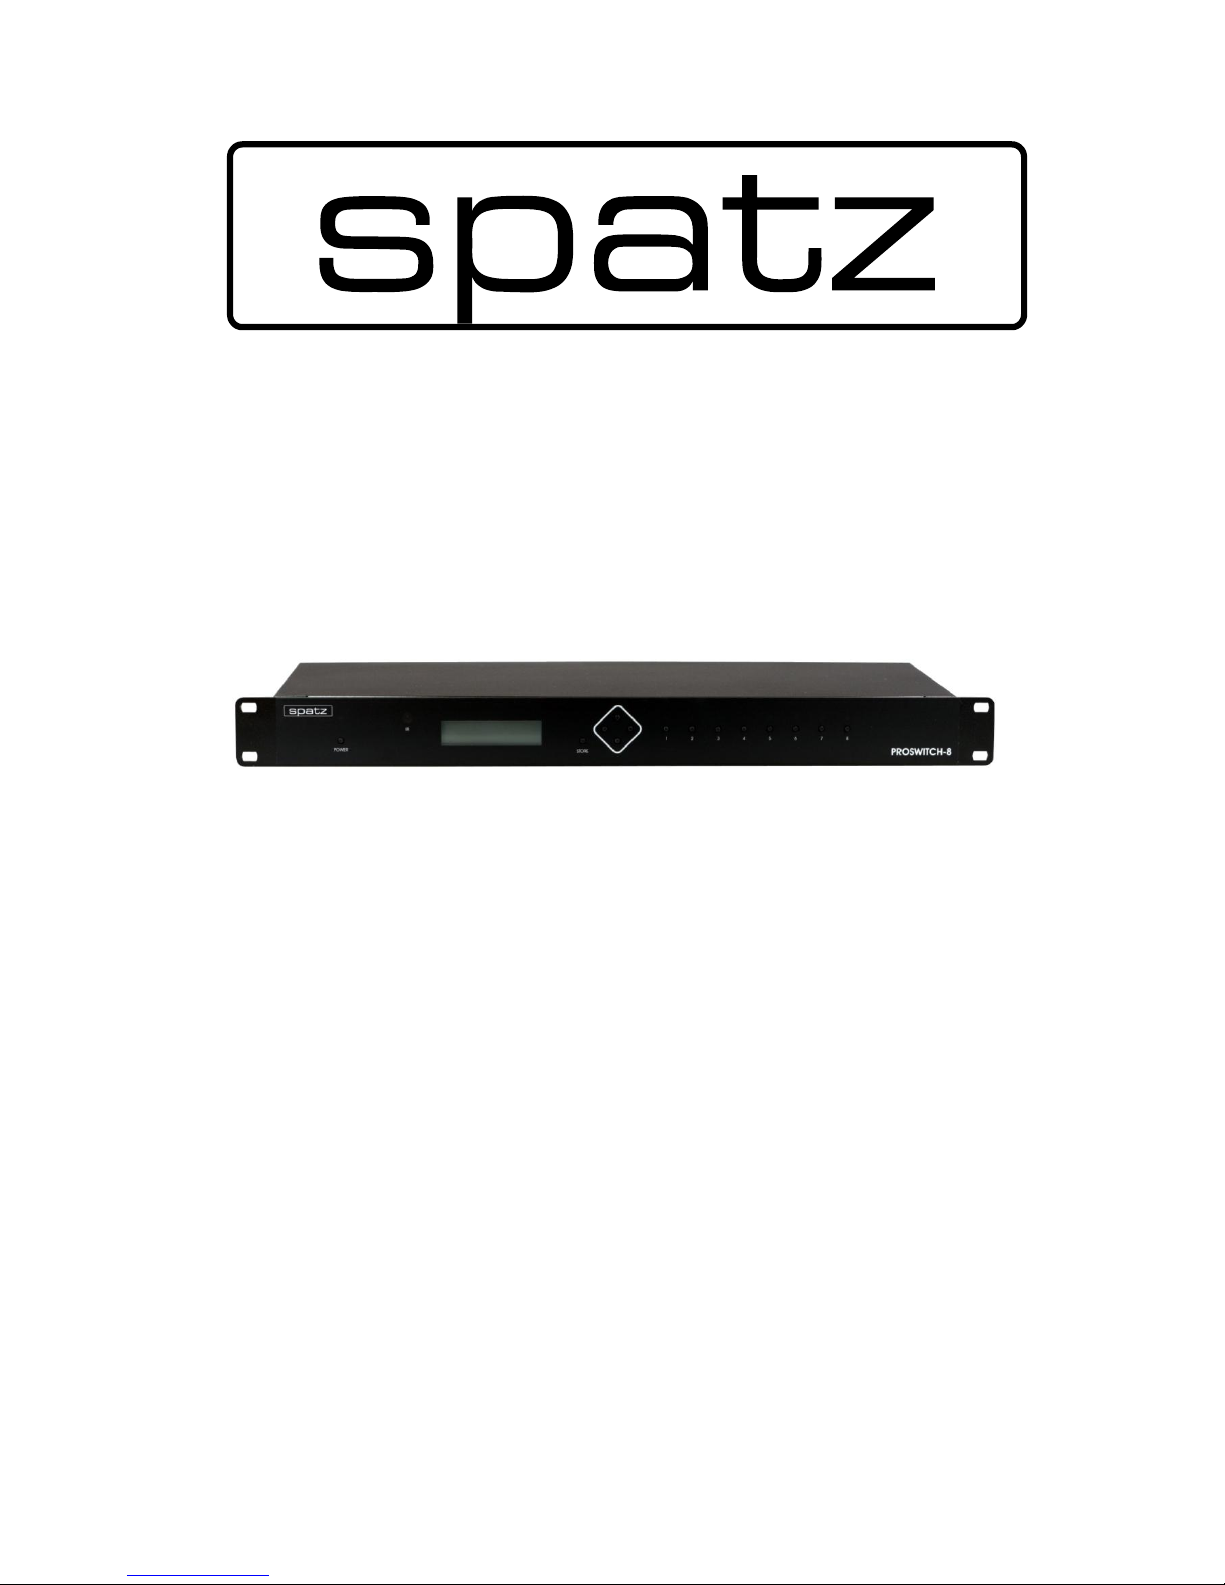
PROSWITCH-8
11/12
2012 SPATZ
May change with ongoing feature upgrades and firmware improvements
Page 2

www.spatz-tech.de
1. Introduction
Many thanks for buying for buying the SPATZ PROSWITCH-8 HDMI/DVI/VGA switcher. We have tried to
manufacture an innovative and easy to operate device without compromising the unique features that only
can be found in our product.
We hope that the PROSWITCH-8 exceeds your expectations and does the job right.
The manual is divided in 2 sections operation and installation and we strongly recommend to read the
manual before using or installing the unit.
Once in a while new source devices or new features are implemented due to customer demand and we will
offer firmware updates on our website www.spatz-tech.de or www.spatz.tech.com.
2. Features
The SPATZ PROSWITCH-8 HDMI/DVI/VGA switcher offers a number of unique features that make it the
perfect tool for a professional switcher. You may use the unit in the most demanding professional
environment or at home to switch your sources and run your home theater.
Pls find an overview of what makes the PROSWITCH-8 so special.
SPATZ SingleEDID Technology for DVI and VGA individual programmable
GREEN Technology with STANDBY Power lesser than 1 Watt
8 DVI-I/HDMI 1.3 Inputs
Full HDCP support – requires hdcp-compatible Monitor
Integrated VGA switcher with 350 MHZ bandwith
IPAD2 compatible
3D compatible with integrated EDID or Learned
8 RCA Stereo Audio Inputs
4 coax SPDIF digital audio Inputs
60m/200ft cable equalizer for each DVI/HDMI input
Output stage Drives 20m cable at full 1080p or UXGA
1 DVI-I output with reclocking
Volume control for analog Stereo Audio Output
Automatic input detection for VGA and DVI
Automatic switching to active input
Signalazing of VGA or DVI input detection
Fast Swtiching because of SingleEDID technology
Supports HDMI 1.3 with Deep color and HD Audio
Infrarot Remote control
Complete control through front panel with LC-display
RS-232 Control (AMX, Crestron)
Input Switching using 8 contact closures
19 inch Rack mount
TIP !
Very helpful software to read out EDID of displays
http://www.entechtaiwan.com/util/moninfo.shtm
Page 3
www.spatz-tech.de
3. Function
The main task for a digital video switcher is the instant switching without long waiting times or image
distortion. SPATZ SingleEDID technology guarantees the shortest switching times matching those of analog
switches. The PROSWITCH-8 offers all kind of EDID management including learning the displays EDID
which we do not recommend because SingleEDID would not be active then.
The whole idea of using EDID management is to move the EDID information in front of the switcher so the
source does not know about the switch and will not renegotiate EDID information which is usually the cause
for long switching times.
We have been using HDMI 1.3 compatible IC’s so the PROSWITCH-8 is fully compatible with HDMI signals
incl. deep color modes and HD audio. You may need HDMI to DVI adaptors that are available from us.
In addition each video input has an accompanying stereo audio input that may be switched with the video
or independently if that is required by your installation. The audio inputs all have volume control.
Some systems may require 5.1 Surround signals that are switched independently of the HDMI with
embedded audo, so we are offering 4 digitale coax inputs with a corresponding output that are routed to
inputs 1-4.
The DVI-I connectors can accept DVI and VGA signals using our DVIBREAK-OUT cable providing EDID
information for both signals with an automatic detection which of the signals has been connected. The
PROSWITCH-8 will signalize this at the Phoenix connector at the back toggling between 0 and 5V. You may
use this information with AMX or CRESTRON to automatically switch your display between VGA and DVI
input. The DVI inputs have powerful cable equalizers that allow cable runs of 60m from source or pockets to
PROSWITCH-8.
Both VGA and DVI signals may be programmed into auto switching so if you connect your source at any of
the 8 inputs the PROSWITCH-8 will instantly switch to it.
4. Operation
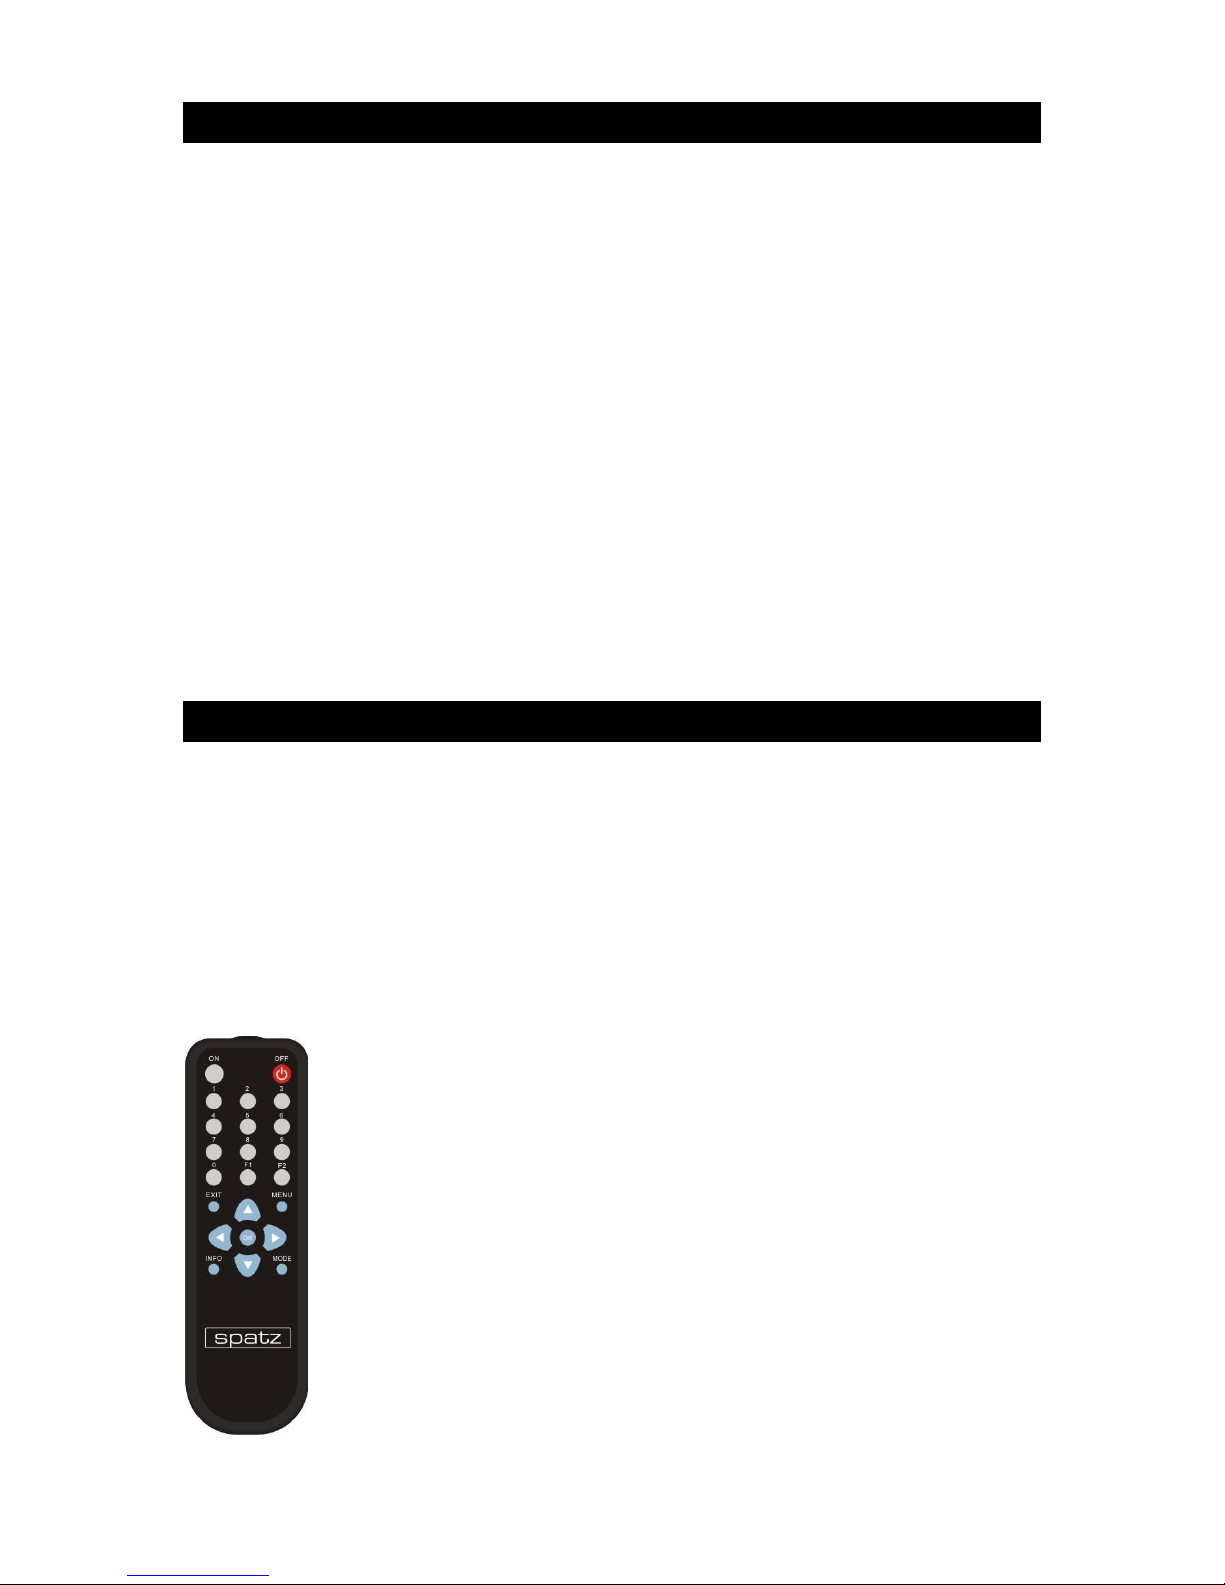
Remote Control
The input LED’s will show you the active input with the ability to control the intensity of the LED’s in the
setup menu of the unit. The integrated infrared receiver may be turned off in the menu to prevent
accidential operation of the unit. The remote is shipping with the unit and should have been in the box.
The remote is working in typical distances and in a wide angle from the units location.
At the back of the unit there is 10-pin Phoenix style connector that allows remote selection of the inputs
using a simple contact closure.
Commands
Power
Turn the unit on with the ON and into Standby using OFF.
According to latest green standards the standby power is less
than 1 Watt.
Input Selection
Use the number buttons to select any of the 8 inputs, OK is
storing your changes
EXIT
Ends current settings
Pfeiltasten
The arrow buttons have the same functionality as the units
buttons so please read below to understand how to use them
Page 4

www.spatz-tech.de
4.1 General operation
The setup of PROSWITCH-8 may be performed using only the 4 front buttons and the guided LC-display.
There are 3 main groups of settings that are accessible with the right button. The UP and DOWN buttons
cycles through EDID. MANAG. GROUP, DEVICE GROUP or SWITCH GROUP. If you want to make
adjustements in one of these groups use the right button to change setting for the active input. UP and
DOWN cycles through the available settings in that sub group. Pressing the right button again allows you to
make adjustments indicated by a blinking cursor. UP and DOWN buttons will change the parameters.
To leave the adjustment use the left button, the cursor should stop blinking and store the settings
permanently with the STORE button.
If you keep the input button pressed for min 3s the unit will generate a HotPlug signal at this input starting
the renegotiating process with the source.
The following paragraphs will explain the menu structure in detail.
4.1.2 DEVICE GROUP
Volume adjustable in steps from 0-16
Audio Mute on/off
Auto Select Mode Off/1-8/8-1 Priority setting if more than one input is active
Auto Sel DVI by Connection/Signal Changes behavior of automatic switching use hotplug or video
LED Brightness 0-10
LCD Backlight 0-10
LCD Contrast 0-10
IR Remote on/off
IR Indication on/off Will blink POWER LED if IR signal is received
SoftwareDownload hold DOWN button 3 sec to enter the firmware update mode
(see 4.3)
Reset to Default (see 4.2)
4.1.3 SWITCH GROUP
Audio Mode Breakaway/Follow Video
Selection Audio/Video
„Selection“ is only displayed if Breakaway has been activated.
If the LC-display is showing “VIDEO” e.g. V5A5 then video and
audio are switched together, if the display is showing AUDIO e.g.
V5A1 then using the input buttons will only switch audio the video
will not be changed.
This new assignement will be resetted when “Follow Video” is
reactivated.
Note:
The individual assignment of audio to video is allowing to route audio 1 to all video inputs so no matter what
video input is selected audio 1 will stay the active audio input but offering volume control.
Page 5

www.spatz-tech.de
4.1.3 EDID MANAG. GROUP
The most powerful tool of the PROSWITCH-8 is the completely manageable EDID system including the
SPATZ SingleEDID technology.
EDID Mode Learned/SingleEdid/Default EDID/Thru/DVI
LEARNED A display must be connected before using this feature !
This is the mode you may find in many other products. It will allow you to read the
EDID table of the display connected at the output and store it in the units memory.
The PROSWITCH-8 will present this EDID to the source simulating the display at each
of its 8 input (in common mode).
After a complete reset this memory contains the EDID of a 1920x1200 computer
monitor that offers most of the resolutions that are used today.
3D ALL AUDIO/ These are the 2 3D EDID modes of the unit that will force a BluRay Player to output a
3D 2CH Audio 3D image with either all audio options turned on or only 2Ch in case you have
selected the “3D 2CH Audio” EDID.
EDID LEARN A monitor must be connected !
The right button activates the EDID learning, a blinking cursor indicates proper
operation, now press the DOWN button for 3 sec to activate the transfer.
Thru This is the standard mode of a simple switcher that is generating a HotPlug Signal
with each input selection. We do not recommend this setting as it generates the
longest switching times. It may be necessary for testing purposes hence the reason
we are offering it.
DVI The DVI EDID is presenting a pure DVI EDID to the source which only contains 128
Byte of EDID data. We included all popular PC and HD resolution in this preset. Mainly
it is necessary for Apple MAC devices that will require a pure DVI EDID to activate
video output if the sink is not HDCP compatible.
Hotplug Break At Thru Mode/Always
This setting determines if the PROSWITCH-8 is generating a HotPlug signal only in
through mode or even using the other EDID modes. Some sources have a funny
programming especially modern HDMI sources and they will go into a sleep modeif
the have no active connection for a certain period of time. The HotPlug signal is
sometimes the only way to rewake them. This may be used in the “Individual Mode”
so other inputs will not send HotPlug signal with the switching thus maintaining fast
switching times.´The setting ALWAYS generates a HotPlug no matter what EDID
mode is active.
EDID Handling Common/Individual
This setting determines if the EDID programming is for the active input only or applied
to all inputs. The Common mode speeds up the Setup of the unit, as you do not have
to setup all 8 inputs with their desired EDID modes. Some modes may require
individual programming, especially if you mix DVI and HDMI sources.
#Driver Strength 0-7 Changes the output power of the DVI output stage
#Driver Termin. -30-0 Changes the high frequency behaviour of the output
Usually these settings do not show any results if the output shows
no distrortions. With very long cable runs beyond 20m or bad
cables they may help to improve the signal quality.
EDID MODE This is the main supgroup that allows EDID settings.
SingleEdid This is the SingleEDID adjustment, pls refer to paragraph 7.
Page 6

www.spatz-tech.de
4.2 Remote Control and singalizing
The PROSWTICH-8 has a 10 pin Phoenix like connector at the back. A simple momentary contact closure
will select the corresponding input. PIN 10 is common for contacts 1-8.
Pin 9 signalizes with 4V that a DVI/HDMI source has been connected, in case of a VGA source the PIN
carries 0V signal level.
A typical control system can detect this change and will allow you to control your display to toggle with the
PROSWITCH-8 between DVI and VGA input.
Another option would be to use the SPATZ DIGISCALE and convert VGA and DVI input signals to DVI or
VGA and scale them to the native resolution to the connected display.
4.3 RESET
The PROSWITCH-8 is a complicated technical device that may not work as it should because certain
button combinations or serial commands have compromised its internal computer.
In these cases we recommend to repower the unit and remove and replug the mains. It this is not helping
to solve the issue it may be necessary to RESET the unit.
Use the navigation buttons until you reach „Reset to Default „ and then press the right button, when the
Cursor is blinking press the DOWN button for min. 3 secs.
The unit is restarting and shows the current firmware on the LC-display.
After a full RESET all EDID memories hold the Default EDID setting which is a SingleEDID that holds the
1280x720p setting that is widely compatible with most modern displays.
4.4 Firmware Update
It is very simple to update the firmware of the PROSWITCH-8. Just download the firmwareupdate *.txt
File from www.spatz-tech.de or www.spatz-tech.com.
The firmware is a simple text file that you can write into the unit using the Hyperterminal communication
software that is part of any Windows operating system.
We also provide a configuration file for Hyperterminal so your serial port settings are matching those of the
PROSWITCH-8 (57600,8N1).
Once you have launched the program and are connected to the unit, you may verify proper communication
by either sending serial commands by typing them in the hyperterminal or replug power which forces the
unit to send some status messages.
Once you have verified you have a serial communication established you have enter the DEVICE GROUP
and navigate to „SoftwareDownload“. Right button engages verifying with blinking cursor, now hold the
DOWN button for min. 3 sec.
The unit will now run in the update mode, you should have seen status messages in the hyperterminal
windows and the display brightness has been reduced.
Now you can upload the new firmware by executing „send text file“ and selection the *.txt file that you have
downloaded from our website.
In no circumstance should you remove the powercord while updating the unit as the unit will delete the
firmware memory at some point. If that ever happens you will only be able to perform the update again
but the unit might not work properly anymore. Just repeat the above steps !
Page 7
www.spatz-tech.de
5. Installation
Installation
After removing the unit from the packaging we recommend to keep the original packing in case you need it
for servicing.
What is in the box:
PROSWITCH-8
Infrared remote incl. 2 AAA batteries
Mains cable Phoenix type 10-pin plug
This manual
Front
The LC-display will show all the relevant operating messages while setting the unit up or performing
adjustments. Each of the 8 inputs has an active LED, the Power LED also serves as IR indicator if selected in
the Setup.
To turn the unit off, you wil have to keep the POWER pressed for min. 3 sec so you cannot accidentially turn
it off.
BACK
Alle connections of the PROSWITCH-8 are located at the back
POWER: 100-250V AC
DVI-I or HDMI 1.3 compatible connectors up to 225 MHz (matches HDMI 1.3 specs)
RS-232 for remote control or firmware update 57600 Baud 8N1
STEREO AUDIO INPUTS 1-8, Stereo RCA
SPDIF inputs 1-4 routed to Video 1-4
DVI-I OUT, connects to the display or projector
STEREO AUDIO OUT, RCA
SPDIF OUT for Dolby Digital or PCM 2-channel
REMOTE for remote selection of 1-8 and toggle output between VGA and DVI
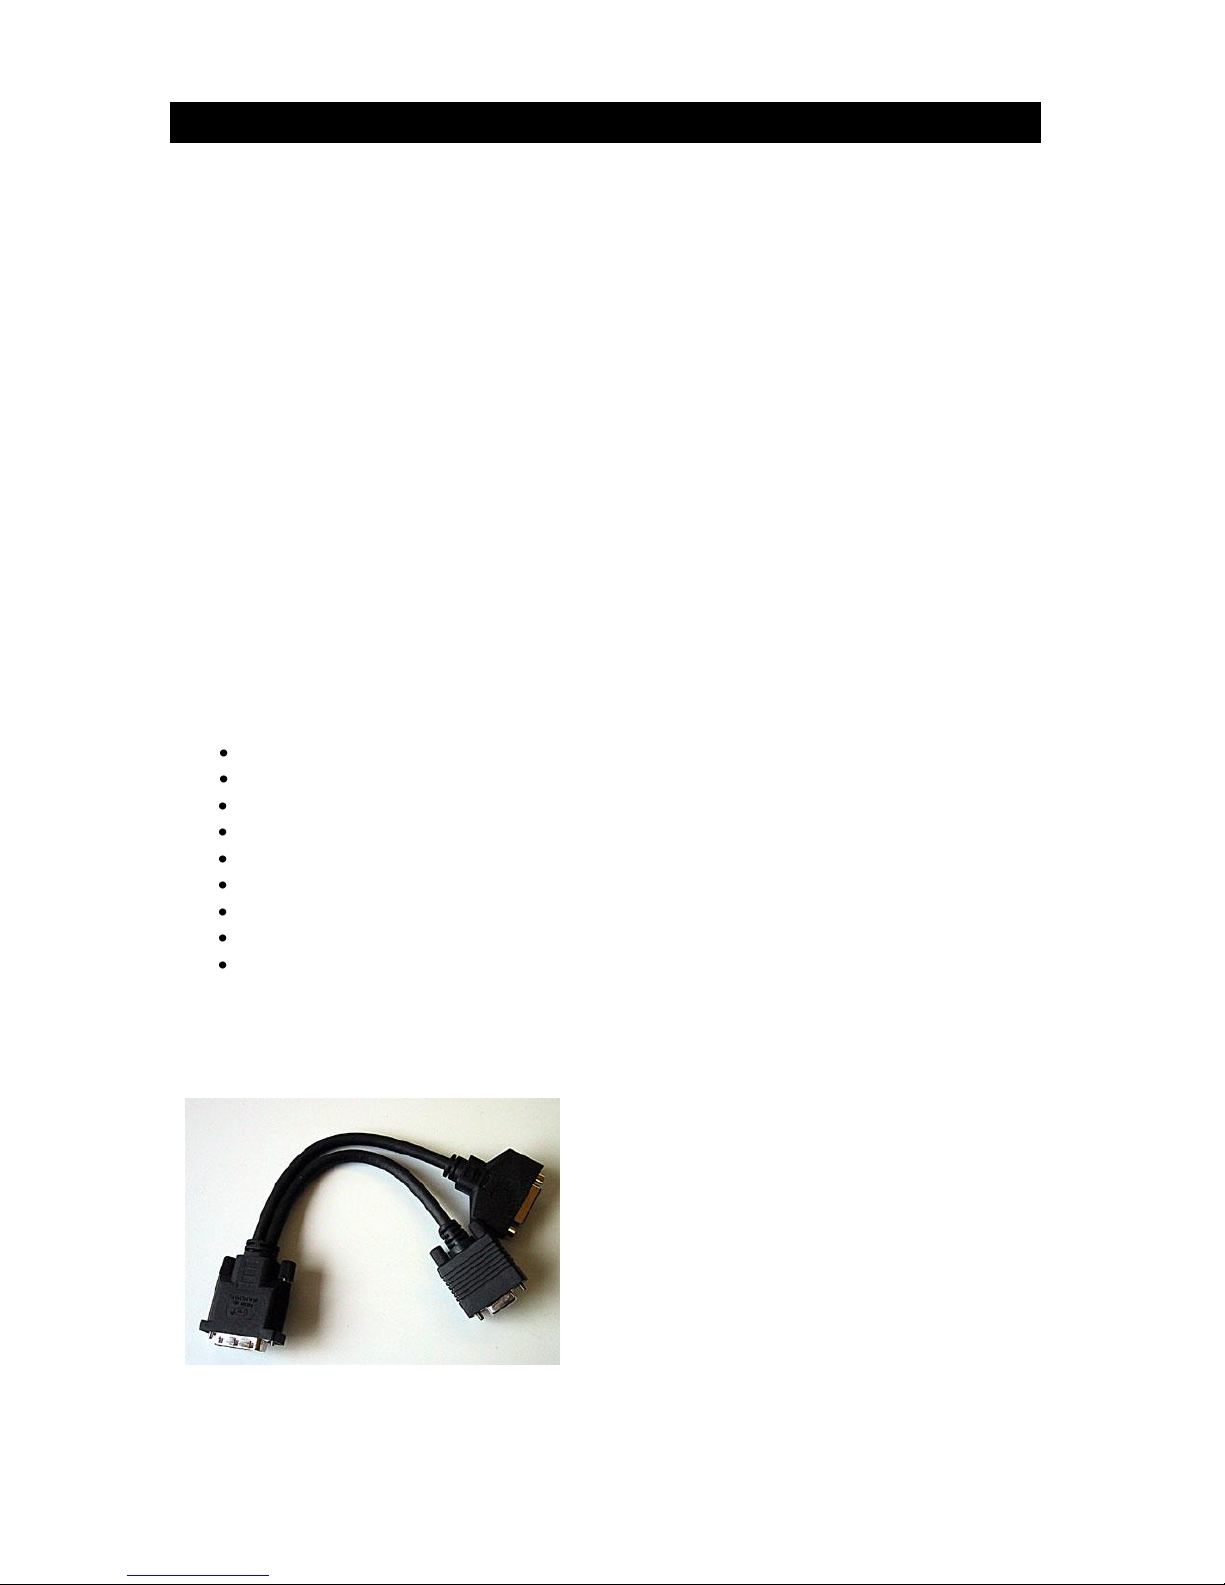
5.1 Optional BreakOut cable
For ease of use we supply a special cable to get access to the DVI and VGA in and outputs of the
PROSWITCH-8. It split the DVI-I connector into a separate VGA and DVI female connector
Page 8

www.spatz-tech.de
6. Inputs/Outputs
The PROSWITCH-8 offers a total of 8 DVI-I inputs that are fully compatible with HDMI 1.3.
To access VGA and DVI independently you will have to use our DVI Breakout cable with female sockets.
Both VGA and DVI are using a common fully programmable EDID including our unique SingleEDID
technology.
VGA inputs have a usuable bandwith of 350Mhz, the HDMI/DVI inputs will work with 480i-1080p or VGA to
WUXGA incl. Deep Color formats and HD audio.
6.1 Audio inputs
The audio inputs of the PROSWITCH-8 have individual volume control to balance levels of individual
sources incl. Master volume control. The seutp allows to select between audio follows video or breakaway.
The volume control works from -53.5 to +3,3 dB divided in 16 selectable steps.
Volume settings are available through the remote (UP/DOWN) button, front panel (UP/DOWN button) or
RS-232 with automatic storage of the new value.
The maximum allowed input level is -2,5dBFS that equals 4,5 Vss, the maximum output level is 5,4 Vss/0,9dBFS.
6.2 Digital audio inputs
In addition to the stereo audio inputs the PROSWITCH-8 offers 4 digital audio inputs that are compatible
with SPDIF signals in 2 ch or 5.1 ch formats. The routing is fixed to inputs 1-4.
6.3 HDMI usage
If you intend to use the PROSWITCH-8 with HDMI signals we recommend to carefully read the following
chapter explaining EDID management and SingleEDID technology.
We have used HDMI 1.3 chips inside the units so the DVI connectors are only chosen because of better
mechanical stability. CEC is not supported.
To connect HDMI signals to the unit you may want to use one of our HDMI to DVI adaptors or just buy a
cable that has a DVI at one end and a HDMI connector at the other end.
7. EDID Programming
For experts:
The EDID information of any digital or even analog display serves the purpose to tell the source the video
resolutions that you can use with this particular display.
Usually the EDID information is holding more than one resolution so depending on the source firmware it
may use any of the various available with the risk that this is not the one you actually want.
In installations where you have displays of different resolutions or displays that have wrong EDID
information it is mandatory to offer a tool that we call SingleEDID.
Usually when switching inputs, EDID information is renegotiated between source and display resulting in
longer switching times. Presenting the EDID before the actual switching hardware will eliminate this
renegotiation. With SPATZ SingleEDID technology we have taken this a step further enforcing the source to
adjust to that the resolution we want it to be. Giving the source only one choice of video resolution simplifies
the system setup and improves the switching reliability. Many sources now offer “AUTO” modes where they
look for the resolution that is marked native in the EDID information and adjust their output accordingly.
This may result in undesired resolution settings, as we have found 1080p displays that have 720p marked
as “native”. With SingleEDID you always have the desired resolution being the “native” as it is the only one
we offer.
Page 9

www.spatz-tech.de
7.1 EDID PROGRAMMING –For experts only
The SinlgeEDID (Assembled) programming of PROSWITCH-8 must be done using the front buttons and
the LC-Display. Please read the instructions carefully as resolution setting that are not supported by the
display may result in getting no picture.
If you are running in this problem you will have to change the setting and reboot your PC or HDMI source
so it can renegotiate the EDID. If you put the unit in pass through then EDID management is not active and
the displays EDID will be passed through the unit to the source. We do not recommend this other than
testing purposes. If you want to use the display’s EDID use the LEARNING function and store it into the
unit.
Not all of the settings may have effect on the source behaviour !!!
Typically audio settings can be forced by the user in the source setup.
7.3 Preprogrammed resolutions to be used for SingleEDID (Assembled)
640x480/60
640x480/75
848x480/60
800x600/50
800x600/60
800x600/75
1024x768/50
1024x768/60
1024x768/75
1152x864/75
1280x768/50
1280x768/60
1280x768/75
1280/800/60
1280/800r/60 reduc. blanking
1360x768/60
1364x768/50
1364x768/60
1364x768/75
1280x1024/50
1280x1024/60
1280x1024/75
1366x1024/60
1400x1050/50
1400x1050/60
1400x1050/75
1680x1050/60
1600x1200/50
1600x1200/60
1920x1200/50
1920x1200/60
480i/59,94
640x480p/59,9
720x480p/59,9
576i/50
720x576p/50
1280x720p/50
1280x720p/60
1920x1080i/50
1920x1080i/50
1920x1080i/60
1920x1080p/24
1920x1080p/25
1920x1080p/30
1920x1080p/50
1920x1080p/50
1920x1080p/60
2048x1080p/50
2048x1080p/50
2048x1080p/60
640x480/60
7.4 Preprogrammed selection for color space settings
RGB
YPrPB /Component 4 : 2 : 2
YPrPb/Component 4 : 4 : 4
7.5 Preprogrammed selection of audio standards
01) LPCM 2.0 48kHz 24bit
02) DolbyDigital (AC-3) 5.1 48kHz 640kbps max.
03) MPEG-1 2.0 48kHz 192kbps max
04) MP3 2.0 48kHz 192kbps max.
05) MPEG-2 (multichannel) 5.1 48kHz 528kbps max.
06) AAC5.1 48kHz 512kbps max.
07) DTS 5.1 48kHz 1536kbps max.
08) ATRAC 2.0 48kHz 292kbps max.
09) DSD (One Bit Audio)
10) E-AC-3 (Dolby Digital +)
11) DTS-HD
12) MLP (MAT-MLP)
13) DST
14) WMA Pro
Page 10
www.spatz-tech.de
7.6 Preprogramed selection of audio channels
Select the number of channels:
2.0, 5.1, 6.1, 7.1, 3CH, 4 CH, 5CH,6 CH, 7CH, 8CH
7.7 Preprogrammed selection of AUDIO Sampling Frequencies
F1) 32kHz F2) 44.1kHz
F3) 48kHz F4) 88.2kHz
F5) 96kHz F6) 176kHz
F7) 192kHz
7.8 Preprogrammed selection of audio bitrates
This setting is only available when PCM modes are selected previously 16,20 or 24 BIT
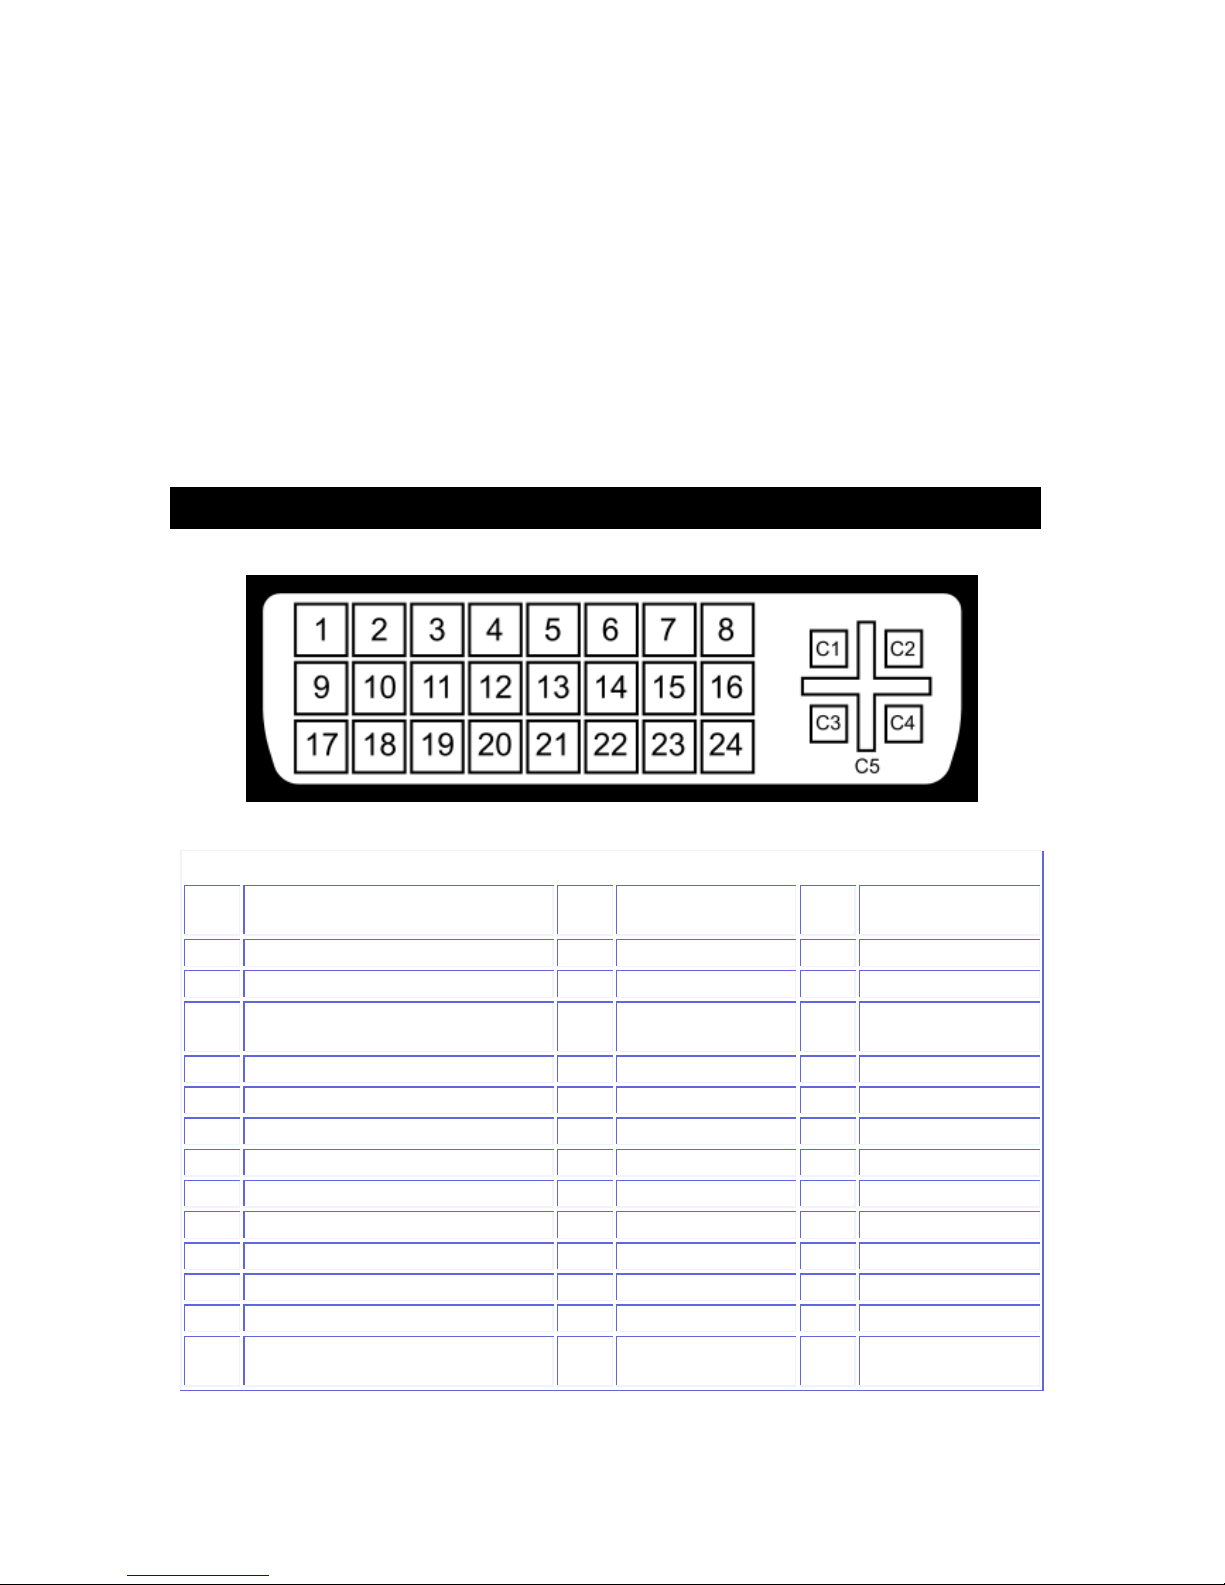
8. Pin Out
29 pin DVI Connector PinOut and Signal Names
Pin
#
Signal Name
Pin
#
Signal Name
Pin
#
Signal Name
1
TMDS Data2-
9
TMDS Data1-
17
TMDS Data0-
2
TMDS Data2+
10
TMDS Data1+
18
TMDSData0+
3
TMDS Data2/4 Shield
11
TMDS Data1/3
Shield
19
TMDS Data0/5
Shield
4
TMDS Data4-
12
TMDS Data3-
20
TMDS Data5-
5
TMDS Data4+
13
TMDS Data3+
21
TMDS Data5+
6
DDC Clock [SCL]
14
+5 V Power
22
TMDS Clock Shield
7
DDC Data [SDA]
15
Ground (for +5 V)
23
TMDS Clock +
8
Analog vertical sync
16
Hot Plug Detect
24
TMDS Clock -
C1
Analog Red
--
--
--
--
C2
Analog Green
--
--
--
--
C3
Analog Blue
--
--
--
--
C4
Analog Horizontal Sync
--
--
--
--
C5
Analog GND Return: (analog R, G,
B)
--
--
--
--
Page 11

www.spatz-tech.de
9. Technical data
Dimensions 483 mm x 44 mm x 185 mm, 19inch rackmountl
Weight approx 2 kg/4lbs
Housing color black
Power supply´ Internal IEC connector 100-250V
Video Inputs DVI-I connectors , HDMI 1.3/DVI and VGA
VGA Bandwidth 350 MHz
HDMI/DVI bandwidth 225 MHz, 480i - 1080p, 640 x 480 - 1920 x 1200
Integrated cable EQ Equalizes up to 60m cable at 1920x1200 or 108p
The cable compensation is fully automatic and needs no user adjustments
Video Output DVI-I connector, HDMI 1.3/DVI ánd VGA
Audio Inputs Analog Stereo max input level -2,5dBFS equals 4,5 Vss
adjustable range -53.5 /+3,3 dB
Audio Output maximum output level is 5,4 Vss/-0,9dBFS
Digitale Audio IN/OUT SPDIF or 2-channel PCM
Remote control Infrared or RS-232, Baudrate 57600, 8N1
CONTROL PORT 10 pin Contacts 1-8 are contact closures sharing pin 10 as common
Pin 9 toggles between 0 and 4V for DVI and VGA signalizing having pin 10
as ground.
10. RS-232 Protocol
Pinout of RS-232 cables
You can use any RS-232 regular cable, the pin out is straight 2,3 and 5 for plug and socket.
You may fully contorl the PROSWITCH-8 using the serial command interface.
The RS-232 port will accept a PC or AMX/CRESTRON like control system.
The communication settings are fixed 57600 BAUD, 8 databits, no parity and 1 Stop Bit.
No Hardware or Software handshaking.
11.1 RS-232 commands
IN
<RET> & (Nb 1-8) <RET>
Video+Audio Input
VIN
<RET> & (Nb 1-8) <RET>
Video Input
AIN
<RET> & (Nb 1-8) <RET>
Audio Input
VOL
<RET> & (Nb 1-16) <RET>
Volume
MUT
<RET> & (Nb 0/1) <RET>
Mute
HPB
Hot Plug Break
EON
Echo On
EOF
Echo Off
STA
Status Request
SWD
Software Download
A18
Activates Automaic Order 1->8
A81
Activates Automaic Order 8->1
AOF
Deactivates Automatic
ET
activates EDID Through
EF
activates Default EDID
ES
activates SINGLE EDID
EL
activates LEARNED EDID
E32 activates 3D 2CH EDID
E3A activates 3D all audio EDID
ED activates DVI EDID
H lists RS-232 commands
Page 12

www.spatz-tech.de
Example:
Switching to input 4 IN[CR]4[CR]
VOLUME 14 VOL[CR]14[CR]
 Loading...