

Spark Bikes Spark, Spark X Owner's Manual
!
Owner’s Manual
Spark"

Contents
Welcome and Comments$ $ …………….…………………………………………… 1"
Handlebar Assembly$ $ …………….…………………………………………… 2"
Fender Assembly$ $ $ …………….…………………………………………… 2"
Front Wheel Assembly$ $ …………….……………………………………………. 3"
Chain Slap Guard Assembly$ …………….……………………………………………. 3"
Seat Assembly$ $ $ …………….……………………………………………. 4"
Pedals Assembly$ $ $ …………….……………………………………………. 4"
Battery Charge$ $ $ …………….………………………………………….… 5"
Battery Care$ $ $ $ …………….………………………………………….… 5"
LCD Display$ $ $ $ …………….………………………………………….… 6"
LCD Parameter Setting$ $ …………….………………………………………….… 7"
LCD Error Code Definition$ $ …………….………………………………………….… 9"
Cleaning and Maintenance$$ …………….………………………………………….… 10%
Tips$ $ $ $ $ …………….………………………………………….… 10%
Legal Requirement$ $ $ …………….………………………………………….… 10"
Warranty$ $ $ $ …………….………………………………………….… 11"

Congratulations on purchasing a Spark Bike. You have chosen a bike that will give you
a superb riding experience. "
This manual will help you install and keep your bike in its best shape ensuring that you
will enjoy every ride.
Warning
Before your first use, check that all components are properly installed and properly
functioning. Test ride your bike until you are confident that you are familiar with its power
modes, stopping function, and overall riding process. Neglecting to do so may cause
serious injury.
Spark Bikes recommends that you always wear a helmet for your own safety. Use front
and rear lights after sunset for increased visibility.
For your safety
!
If this is your first time riding an electric bike, it is highly recommended that you ride in
an open area and set your power assist level to low. Once you feel confident operating
your new bike, increase the power assist gradually. If for any reason you lost control,
apply the brake levers immediately to disconnect the motor power and stop the bike. Do
not try to stop your bike using your feet.
!
Caution
The pedal assist sensor is located at the left side of the bottom bracket where the pedal
arm is mounted. It activates the motor when you move the pedals and will cause a
sudden burst forward. Keeping your hands over the brake levers is good practice.
It is recommended that you perform regular maintenance and tune-ups to ensure that
your bike always performs well. Seek the help of a professional bike mechanic
whenever required.
1
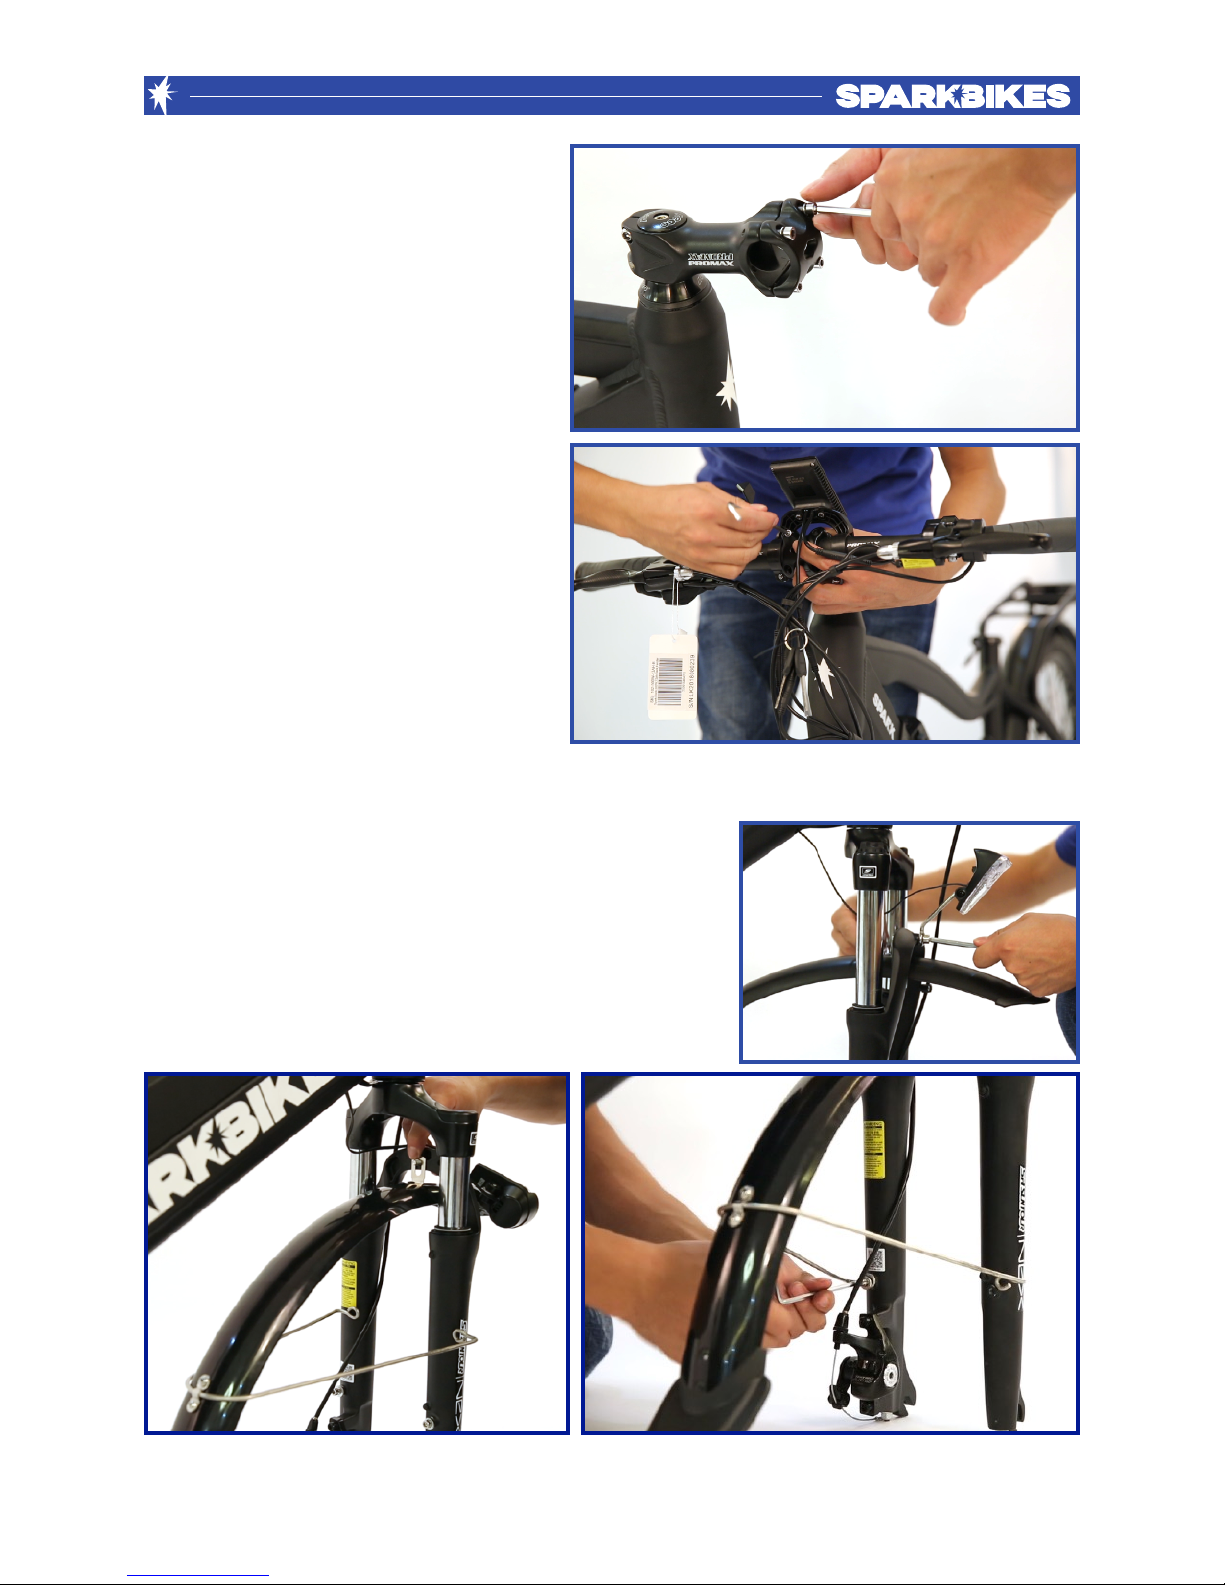
Handlebar Assembly
Required tools:
- 4mm Allen key
1) Unscrew the four bolts from the
stem and remove the cap.
"
2) Insert the handlebar and place the
cap. Screw in the bolts to tighten the
cap."
Fender Assembly
Required tools:%
- 4mm Allen key"
- 5mm Allen key
- 10mm Wrench
1) Place the fender under the fork bracket and attach
the fender hook from the back of the bracket. Insert
the bolt into the light through the fork bracket and
fender and tighten. !
2) Place the fender stays onto the designated area
and tighten."
2
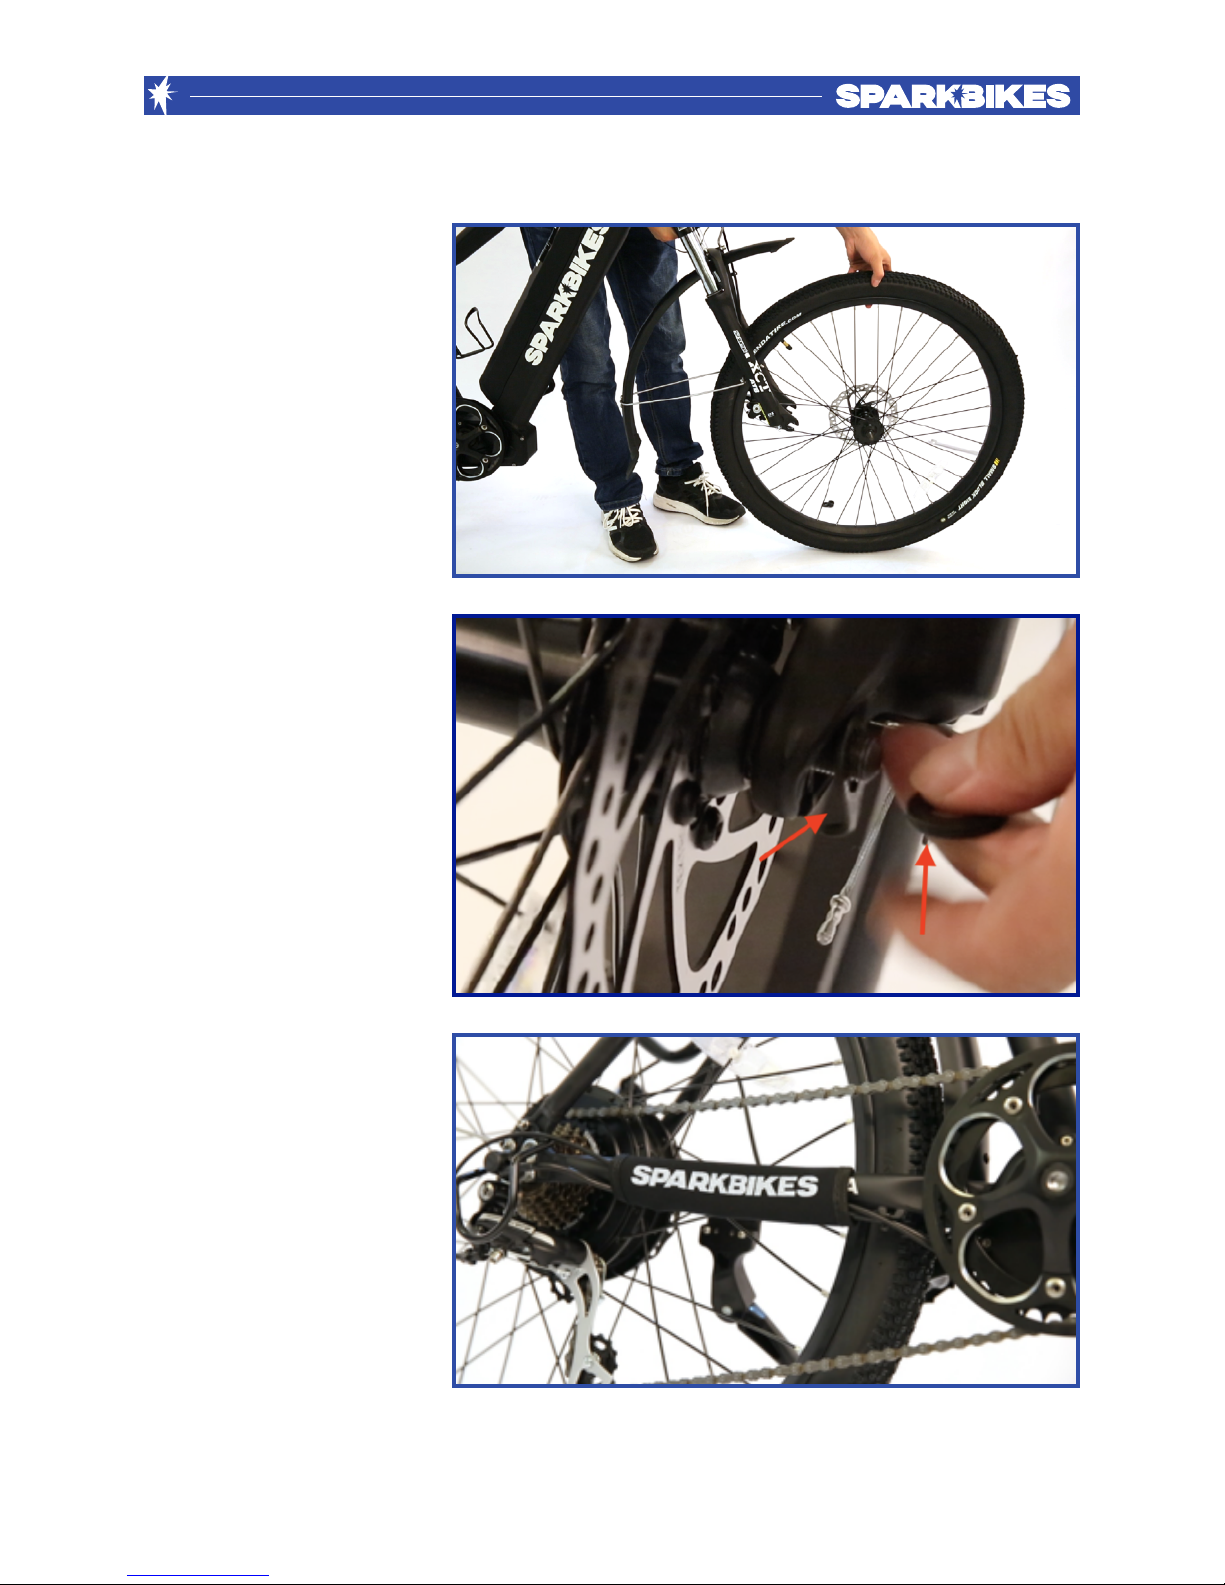
Front Wheel Assembly
Required tools:
-15mm Wrench
!
1) Remove the bolts and
washers from the wheel
axle.
2) Insert the wheel into the
fork hooks ensuring that
the disc brake rotor is
inserted into the brake
pads.
3) Insert the hook washer
pointing downward to fit
into the fork. Insert the
second washer and
tighten the nut.
Chain Slap Guard:
The chain slap guard is
made to protect the frame
and chain. It is placed on
the chain stay.
3
 Loading...