

Sparco Corsa Sparco F500i Isofix Instruction Manual
GB
ECE R44/04
GROUP
1
ISOFIX for Group 1 Sparco F500i
INSTRUCTION MANUAL
9-18
kgs
WARNING!
PLEASE READ THOROUGHLY BEFORE COMMENCING
INSTALLATION AS AN INCORRECT INSTALLATION
COULD BE DANGEROUS.
DO NOT USE THIS CHILD SEAT IN PASSENGER
SEATS EQUIPPED WITH AIRBAGS.
This child seat must only be installed in a forward
facing position in passenger seats. Do not use on
side facing or rear facing seats .
Never use this child seat without fastening the
child's harness correctly, and never attempt to use it
without fastening it into the car as described in these
instructions.
Do not modify the seat in any way.
In the event of an emergency it is important that the
child can be released quickly, this means that the
buckle is not fully tamperproof and so your child
must be taught never to play with the buckle .
Do not leave your child unattended in the seat at any
time.
It is recommended that this car seat should be
changed when it has been subjected to violent
stresses in an accident or has become badly worn,
periodically inspect the harness for wear, paying
particular attention to the attachment points,
stitching and adjusting devices.
Ensure that no part of the seat is trapped in a door or
folding seat, if your car has a folding rear seat,
ensure that it is correctly latched in the upright
position.
2
WARNING!
Car interiors can become very hot when in direct
sunlight, it is therefore recommended that the child
seat is covered when not in use this prevents
components ,particularly those attached to the child
seat ,becoming hot and burning the child.
Luggage and other heavy or sharp objects should be
secured in the car, loose objects are liable to cause
injury in the event of an accident.
The safest seating position for a child car seat is on
the rear seat of a vehicle.
The child restraint must not be used without cover.
The seat cover should not be replaced with any
other than the one recommended by the manufacturer, because the cover constitutes an integral part
of the restraint performance.
Keep this manual properly for future reference.
GB
3
IMPORTANT!:
When installed with 3-point-belt in combination with
support leg, the child seat must be used by 3-point belt
that approved to UN/ECE Regulation No.16 or other
equivalent standards.
IMPORTANT!:
When installed with ISOFIX attachment, read the car
manufacturer’s hand book before use.
4
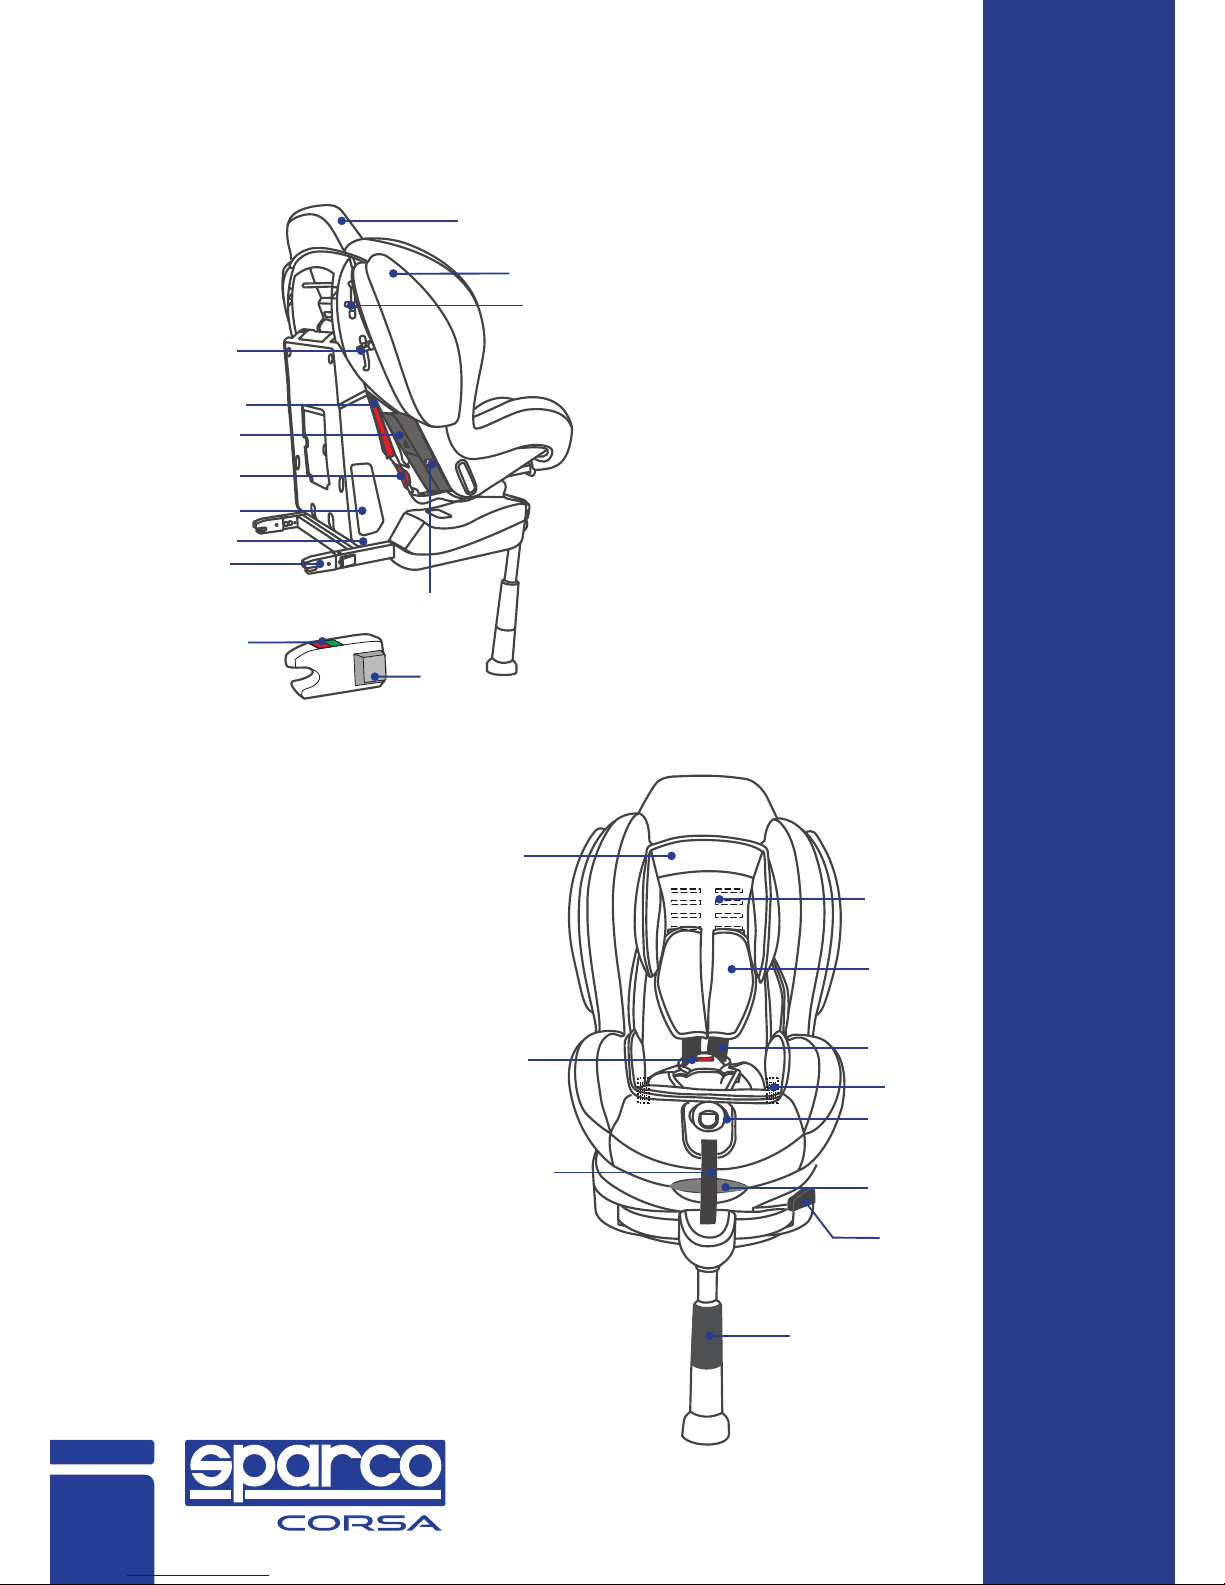
Know Your Child Car Seat
14. Head pillow
15. Belts slots
16. Shoulder pads
17. Harness strap
18. Buckle
19. Crotch strap bracket
20. Harness releasing button
21. Recline handle
22. Adjuster strap
23. ISOFIX connector extending lever
24. Floor support leg
1. Seat cover
2. Seat shell
3. Upper shaft and lock
4. Lower shaft and lock
5. Lock-o device
6. Belt guard door
7. Red hooks
8. Warning marking
9. Belt yoke
10. Seat base
11. ISOFIX connectors
12. ISOFIX indicator
13. ISOFIX releasing
button
1
2
3
9
4
5
6
7
8
10
11
12
13
14
18
22
24
23
21
20
19
17
16
15
Installation
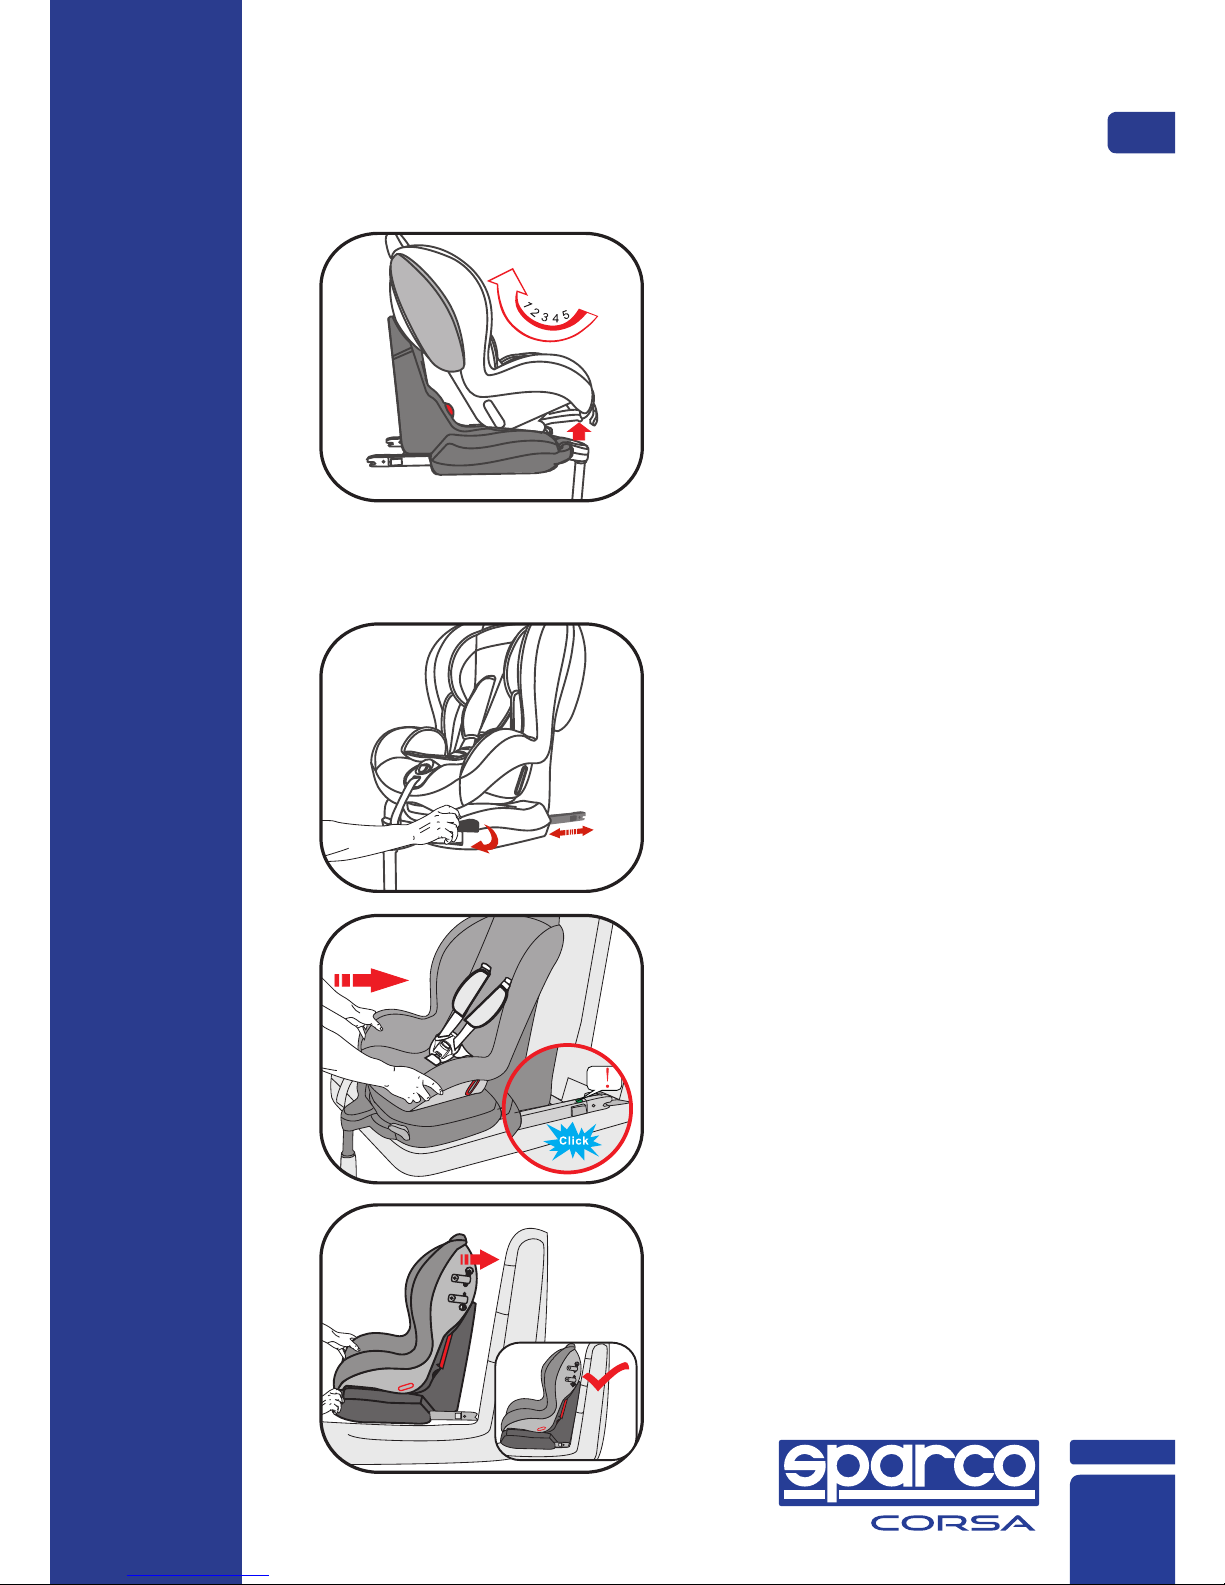
Five positions of the car seat
Install the child car seat using ISOFIX system.
Group l(9-18kg)
GB
5
The car seat can be used in
five positions:
lift the handle under the
front of the seat up and pull
or push the shell forwards
or backwards. Release the
handle in the required
position and push until you
hear a distinct click.
Place the seat forward
facing in your car.
Pull the lever to extend the
ISOFIX connectors.
Lock on the two ISOFIX
connector into the ISOFIX
anchorages, the ISOFIX
indicator will turn to green,
when the connector is locked
to the anchorages.
Pull and hold the ISOFIX
adjusting lever, and pull the
child seat into the car seat ,
release the lever when there
is no space between the
child seat back and car seat.
6
Extend the floor support leg
fully out ,adjust the height of
the floor support leg to make
sure the leg is reached the
floor of your car.
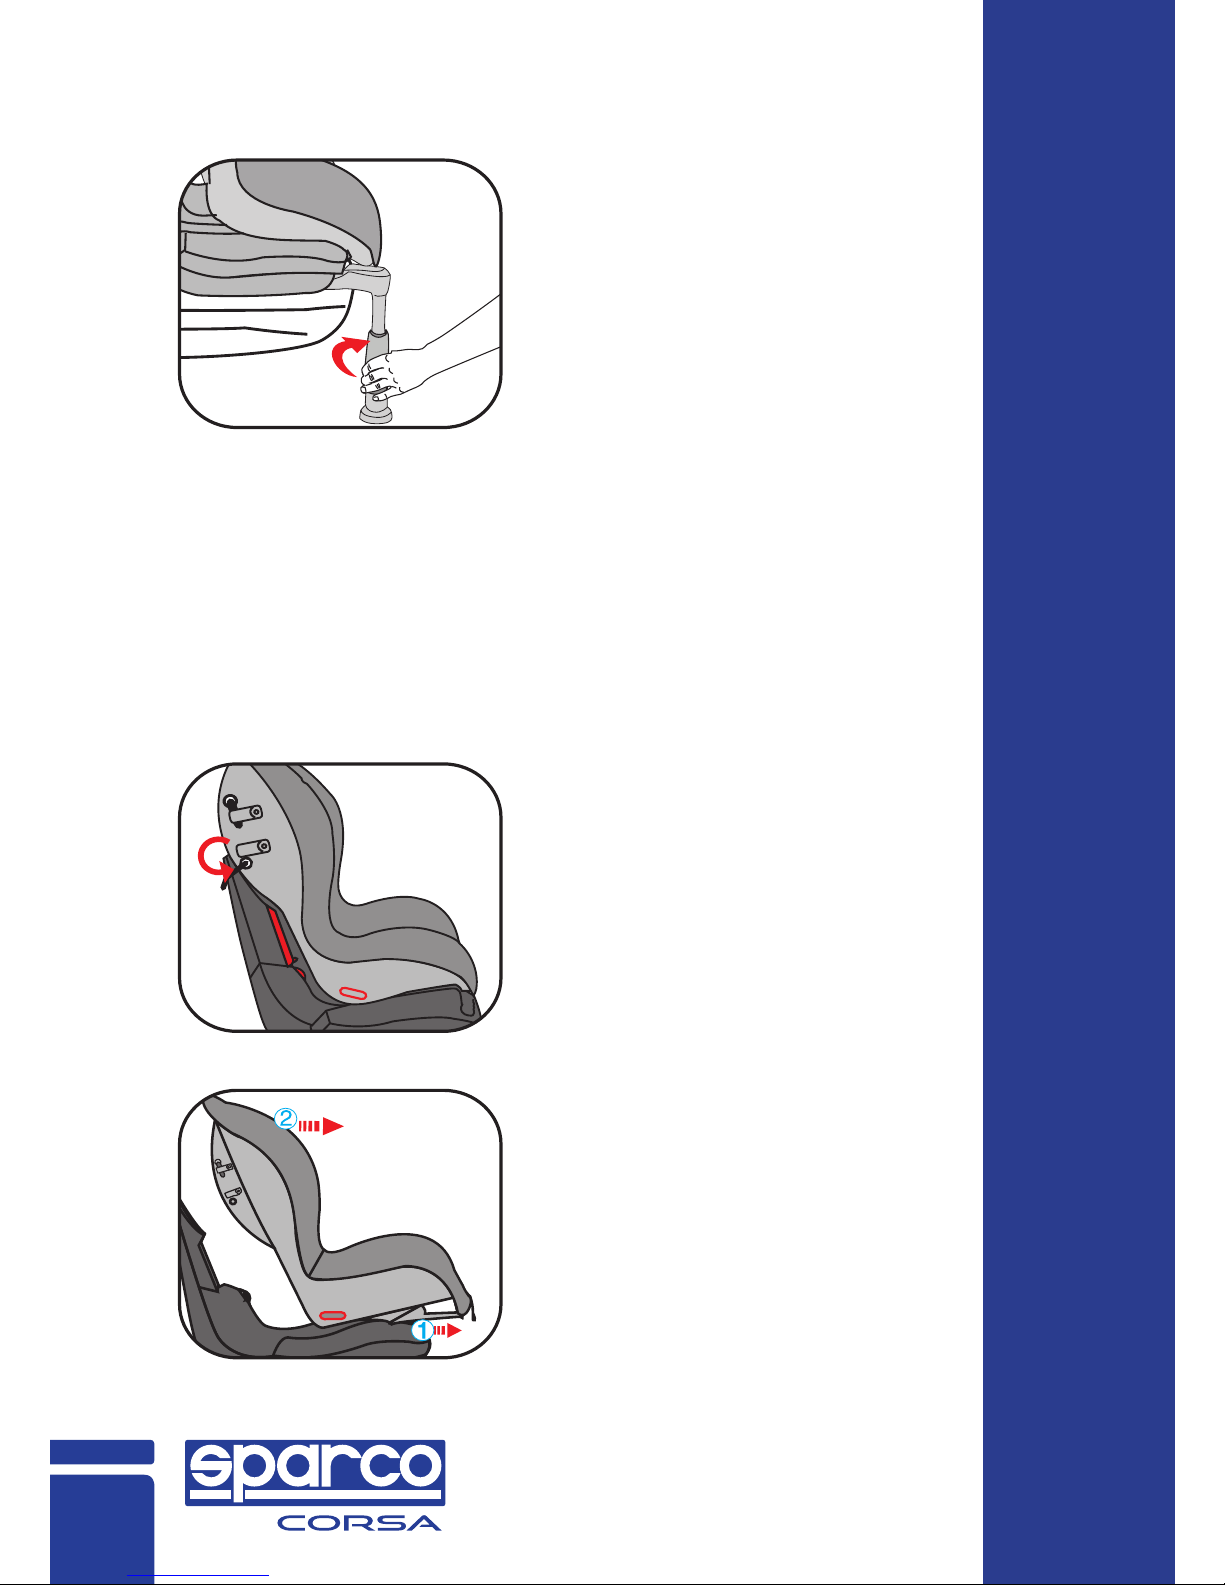
This child seat can also be installed with a 3-point
safety belt, however always in combination with the
adjusted floor support leg.
Place the child seat into car
seat, Pull the lower shaft
out of the seat.
Adjust the child car seat into
the most-reclined position,
then tilt the seat shell
forward.
Installing the car seat using a 3-point safety
belt with floor support leg.
Group 1 (9-18kg)
 Loading...