

Page 1
UK
1
1 x = Current absorption
2 x
= Electronic modules
3
REMOTE-CONTROL ALARM UNIT
AS 80
mod. 6012.1074/UK - 02/04
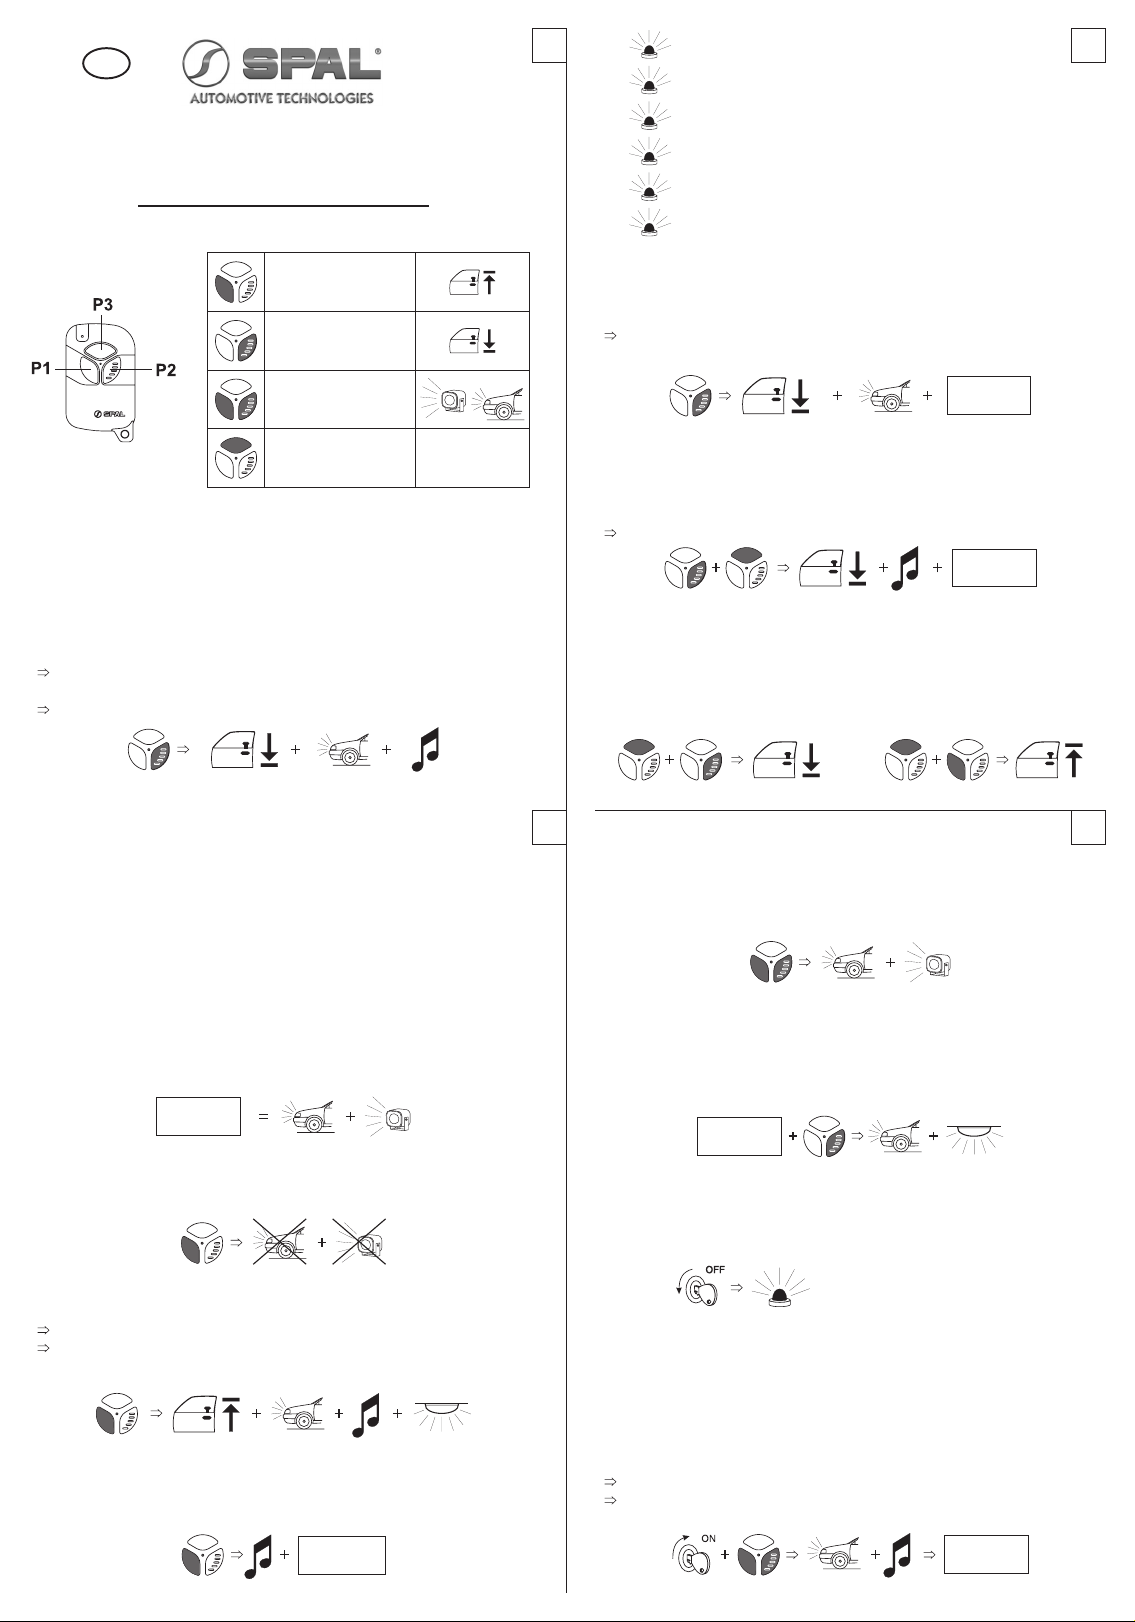
1. REMOTE CONTROL
REMOTE CONTROL UNIT BATTERY LOW
The LED on the remote control flashes when a button is pressed.
When engaged, the alarm causes the direction indicators to flash 6 times quickly
instead of 3.
2. ARMING
The alarm unit engages only with the key contact off.
• Press button P2 of the remote control unit
This is confirmed by 3 flashes of the direction indicators and 3 audible chirps
(if on)
The doors lock and the LED comes on steady.
OPERATING INSTRUCTIONS
DOOR UNLOCKING
OFF
DOOR LOCKING
ON
PANIC alarm
AUX output
3 x
4 x
5 x
6 x
= Ignition attempt
= Door - hood - trunk opening
= Hood opening
= Radio module
6. ARMING WITH MODULE DISENGAGEMENT
To arm the alarm without engaging the connected electronic modules (power windows,
volumetric protection...) press the P2 button of the remote control for over 2 seconds.
Disengagement of the modules is indicated by 6 flashes of the direction indicators.
DISENGAGED
MODULES
2 sec 6 x
7. ARMING WITH SIREN DISENGAGEMENT
To arm the alarm without engaging the siren (optical alarm cycles only) press the P2
button of the remote control and, within 15 seconds, the P3 button.
Disengagement of the siren is confirmed by 3 additional audible chirps
SIREN
DISENGAGED
6 x
8. TEMPORARY DISENGAGEMENT OF AUDIBLE CHIRPS
If these are switched on, the alarm unit emits audible chirps every time the alarm unit
is armed/disarmed. To temporarily disengage these signals, press button P3 from the
remote control before pressing P2 (on) or P1 (off).
Disengagement only refers to subsequent arming/disarming.
3 x 3 x
3. PROTECTION
After an initial neutral time of 40 seconds, the LED starts to flash and the sensors
are ready to determine all possible alarm causes.
POSSIBLE ALARM CAUSES
• Door - hood - trunk opening
Passenger compartment intrusion detected by modules connected to the alarm unit
•
• Ignition attempt
• Current absorption
4. ALARM SIGNAL
The triggering of an alarm generates an acoustic and optical alarm cycle lasting 30 sec.
The alarm cycle, for each of the possible causes, can be repeated for at most 8
consecutive times.
ALARM
CYCLE
ALARM SIGNAL SWITCH-OFF
To interrupt an alarm cycle, press button P1 of the remote control. The alarm unit is
not disarmed.
30 sec 30 sec
5. DISARMING
• Press button P1 of the remote control
This is confirmed by 1 flash of the direction indicators and 1 audible chirp (if on)
The doors are unlocked, the LED goes off and the dome light comes on (if
programmed and connected).
1 x 25 sec1 x
ALARM MEMORY
If, during the previous arming time, a cause of alarm has been found, when the alarm
unit is disarmed, two audible chirps will be heard and the LED will flash in a codified
sequence, indicating the cause of the alarm.
ALARM
MEMORY
2 x
2
9. PANIC ALARM
By pressing buttons P1 and P2 of the remote control together, the alarm unit performs
an alarm cycle.
During installation, it is only possible to select the panic alarm with the unit on or off.
30 sec 30 sec
To interrupt the panic alarm, press button P1 on the remote control.
4
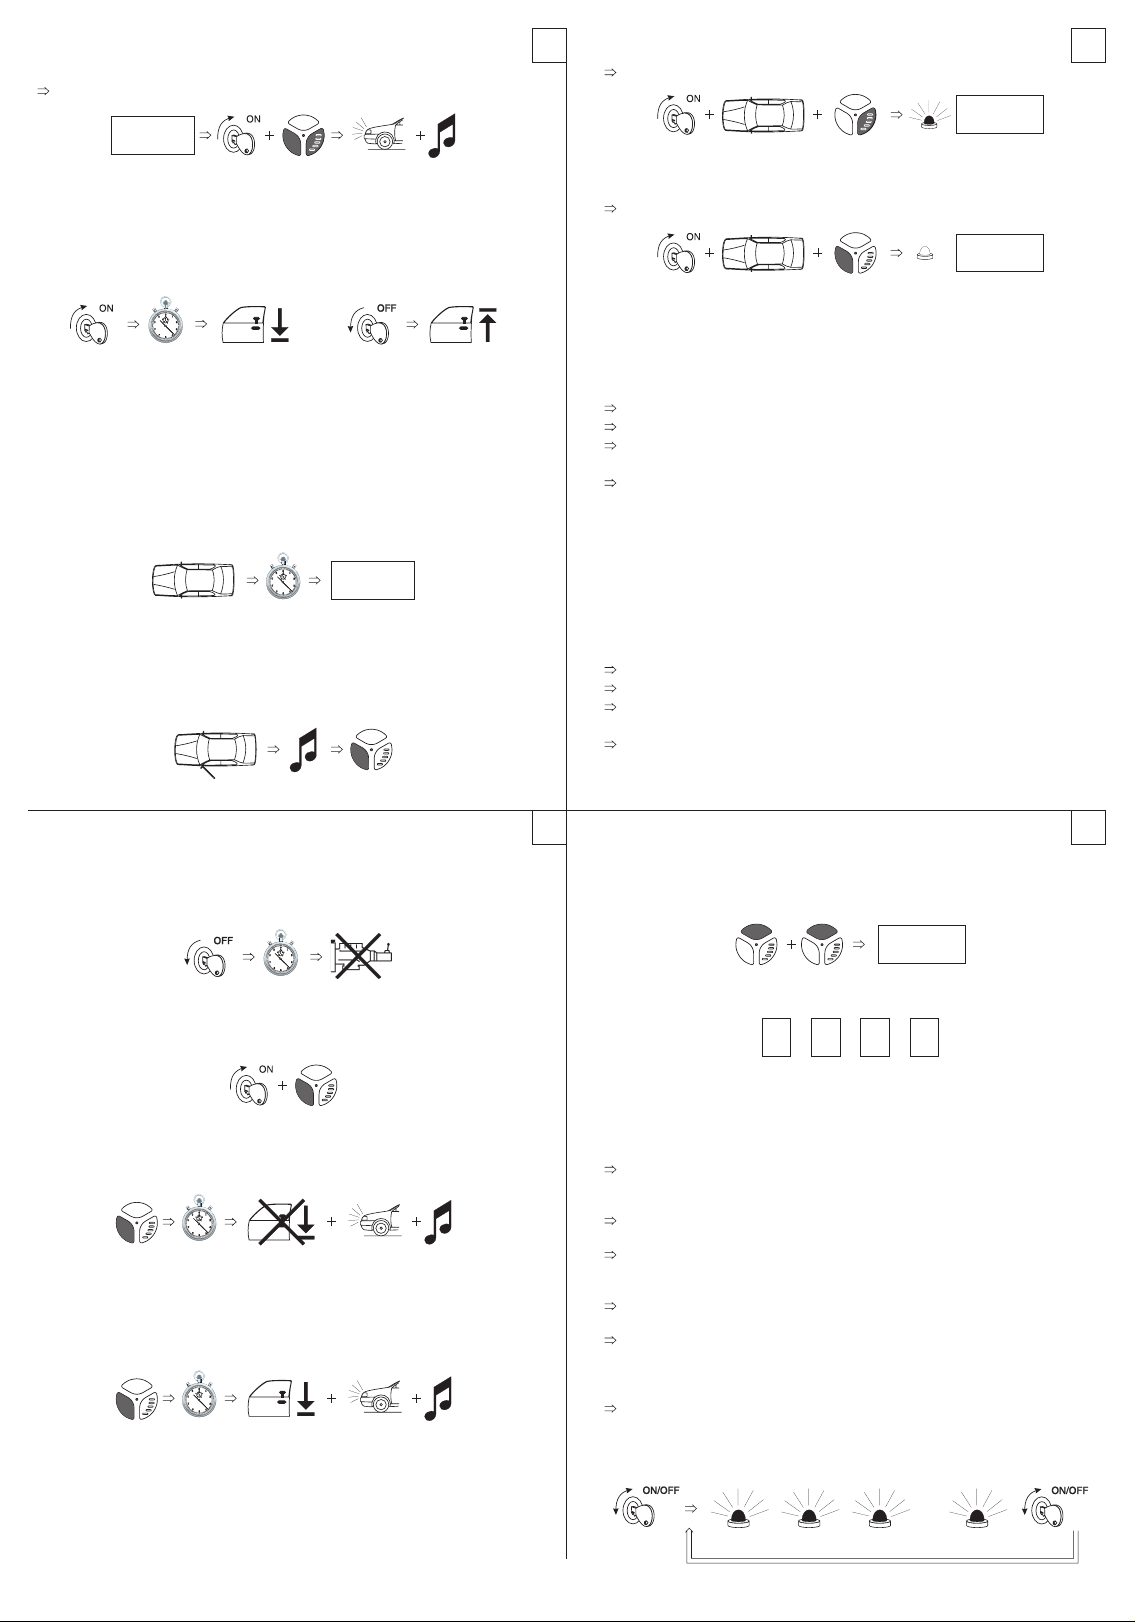
10. CAR LOCATOR
With the alarm engaged, by pressing button P2, the direction indicators and the dome
light come on for 25 seconds.
This function facilitates vehicle localisation.
ALARM
ON
25 sec25 sec
11. STORED REMOTE CONTROLS CHECK
Every time the dashboard is switched off, the LED emits a number of flashes equivalent
to the number of remote controls stored in the unit. This permits checking that the
number of enabled remote controls corresponds to those in possession of the user.
n=number of enabled remote controls
12. VALET MODE
When valet mode is engaged, all the alarm functions are disengaged. The system
is configured as simple remote-controlled locking unit.
The VALET mode is indicated by continuous LED flashing, with dashboard on.
ENTERING VALET MODE
• Switch on the dashboard
• Press buttons P1 and P2 at the same time for at least 2 seconds.
The alarm unit gives 1 flash of the direction indicators and 1 audible chirp
With the dashboard off, the LED flashes continuously
n x
VALET
MODE
1 x1 x2 sec
Page 2
EXITING FROM VALET MODE
• Switch on the dashboard
• Press buttons P1 and P2 at the same time for at least 2 seconds.
The alarm unit gives 1 flash of the direction indicators and 1 audible chirp
VALET
MODE
1 x1 x2 sec
13. AUTOMATIC DOOR LOCKING AT SWITCH-ON
If engaged, the alarm automatically locks the doors 10 seconds after the dashboard
has switched on.
When the dashboard switches off, the doors are automatically unlocked.
10 sec
14. ALARM PASSIVE AUTOARMING
If engaged, the alarm engages automatically 30 seconds after the vehicle has been
left (last door closed).
The passive autoarming of the alarm does not lock the doors and does not engage
the electronic modules connected to the alarm unit, and is indicated in the same way
as arming from remote control.
ALARM
ON
30 sec
DISARMING
With the alarm unit armed in passive mode, when a door is opened, an intermittent
audible chirp is heard lasting 10 seconds, during which time the alarm unit can be
disarmed before this generates an alarm cycle.
10 sec
5
ENGAGEMENT
•
With the dashboard switched on and doors LOCKED, press the P2 button from the remote control.
The LED comes on steady.
ANTI-CARJACK
ON
DISENGAGEMENT
With the dashboard switched on and doors LOCKED, press the P1 button from the remote control.
•
The LED goes off.
ANTI-CARJACK
OFF
ANTI-CARJACK - OPERATION
ACTIVE MODE - CARJACK DURING VEHICLE DRIVING
• The LED comes on steady - anti-carjack on
• Opening and closing of a door (the drivers is forced by the carjacker to leave the
vehicle)
The LED goes off and, after 20 seconds, starts to flash
The alarm fails to respond to the remote control
After 2 minutes, the control unit performs an alarm cycle, without arming the
engine cut
When the engine is next switched off, the engine cut engages
• The only way to release the engine is to re-enable the remote control and enter
the emergency disarming code
PASSIVE MODE - CARJACK ON FETCHING VEHICLE
• The LED comes on steady - anti-carjack on
• Switch the engine off before opening a door
• Exit from the car and lock it. The alarm works normally
• On returning to the car, disarm the alarm by means of the remote control
• Enter the emergency disarming code
If the disarming code is not entered, the LED remains on steady
The alarm fails to respond to the remote control
After 2 minutes, the control unit performs an alarm cycle, without arming the
engine cut
When the engine is next switched off, the engine cut engages
• The only way to release the engine is to re-enable the remote control and enter
the emergency disarming code
7
15. ENGINE CUT PASSIVE AUTOARMING
If engaged, the alarm automatically cuts the engine 90 seconds after the dashboard
switches off.
Passive arming of the engine cut is indicated by the LEDs coming on with short switchoffs.
DISARMING
• Switch on the dashboard
• Press button P1 of the remote control unit
• Alternatively, arm/disarm the alarm system.
90 sec
16. AUTO REARM
If engaged, the alarm automatically engages 90 seconds after disarming from remote
control, unless a door has been opened meantime. The alarm engages without locking
the doors and without switching on the connected electronic modules.
90 sec
3 x3 x
17. AUTO REARM WITH DOOR LOCKING
If engaged, the alarm automatically engages 90 seconds after disarming from remote
control, unless a door has been opened meantime.
The alarm engages, locking the doors and maintaining the settings defined during
previous arming.
90 sec
3 x3 x
18. ANTI-CARJACK
If engaged, in case of the car being broken into, the alarm unit gives alarm signals
and engages the engine cut.
The anti-carjack function can work in two distinct ways, active or passive, depending
on the carjack mode.
The anti-carjack function is only operative after it has been engaged.
6
19. AUX OUTPUT ENGAGEMENT
When the button P2 on the remote control is pressed twice, the AUX output of the
alarm is engaged. This can be used to control various vehicle electric functions.
The output remains engaged for as long as the button is kept pressed the second
time.
AUX OUTPUT
20. EMERGENCY SYSTEM DISARMING
Emergency disarming code
The emergency disarming code (factory set = 1111) can be customised by the user.
Note down the new emergency disarming code in the spaces provided.
EMERGENCY SYSTEM DISARMING PROCEDURE
• Switch the dashboard on and off 3 times in rapid succession
The LED starts to flash
• Switch the dashboard on after counting a number of flashes equal to the first
figure of the emergency disarming code.
The LED goes off - FIRST FIGURE ENTERED
• Switch off the dashboard
The LED starts to flash again
• ASwitch on the dashboard after counting a number of flashes equal to the second
figure of the emergency disarming code.
The LED goes off - SECOND FIGURE ENTERED
• Switch off the dashboard
The LED starts to flash again
…
• Repeat the operation for all four figures of the emergency disarming code.
After entering the fourth exact figure, the control unit goes off, unlocking the doors
and giving 1 flash of the direction indicators and two audible chirps.
If the emergency system disarming procedure is performed during an alarm cycle,
the entering of the first exact figure causes the siren to go off.
3 x 1 2 3 9
figure 1 figure 2 figure 3 figure 4
… … ………
SPAL srl - Via per Carpi 26/B - 42015 Correggio (RE) - ITALY - Tel.+39/0522/731311 - Fax.+39/0522/693611 - www.spal.it - E-mail: aftermarket@spal.it
8
ON
1 x
 Loading...