

Page 1
Eclipse
Powered System
™
OWNER’S MANUAL
Page 2
Introduction. . . . . . . . . . . . . . . . . . . . . . . . . . . . . 3
Proper System Use . . . . . . . . . . . . . . . . . . . . . . . 3
Improper System Use . . . . . . . . . . . . . . . . . . . . . 3
Recommended Loading Instructions . . . . . . . . . 3
Control Functions . . . . . . . . . . . . . . . . . . . . . . . . 4
System Operation and Reset Options . . . . . . . . 4
Control Options . . . . . . . . . . . . . . . . . . . . . . . . . 5
Safety . . . . . . . . . . . . . . . . . . . . . . . . . . . . . . . . . 6
Optional Safeties . . . . . . . . . . . . . . . . . . . . . . . . 7
Security . . . . . . . . . . . . . . . . . . . . . . . . . . . . . . . . 8
Programmable Options. . . . . . . . . . . . . . . . . . . 10
Power Outage Options . . . . . . . . . . . . . . . . . . . 11
Lighting Options . . . . . . . . . . . . . . . . . . . . . . . . 12
Troubleshooting . . . . . . . . . . . . . . . . . . . . . . . . 12
General Maintenance . . . . . . . . . . . . . . . . . . . . 13
Statement of Warranty . . . . . . . . . . . . . . . . . . . 14
2
Table of Contents
Page 3

3
Spacesaver’s powered mobile storage systems provide a simple and efficient means to increase storage
capacity without expanding the space needed for your materials. The purpose of this manual is to provide the
information necessary to use and maintain your Spacesaver system. This document, combined with your onsite training will provide you with the ability to use your system properly and efficiently.
As the owner of a Spacesaver high-density mobile storage system, you can be assured that you have
purchased the best in the industry. Its quality, safety, and ease of use are unsurpassed. Together with your
local representative, we stand behind our products with an installation and service team dedicated to
meeting your needs. From all of us, thank you for purchasing Spacesaver.
Introduction
Below is a list of items/tasks that will help to ensure that you get the most out of your mobile storage
system. Please familiarize yourself with these items and establish a routine based on these guidelines.
1. Familiarize yourself with the content of this manual.
2. Ask questions if you are unsure of any operational or safety features.
3. Bring any unusual performance of the system to the attention of your supervisor.
4. Follow the recommended shelf loading instructions found in this section of the owner’s manual.
5. Keep media neatly stored and pushed fully back onto the shelving to help maintain desired
aisle width.
6. Provide needed periodic maintenance according to the recommended schedule.
Ask about a periodic maintenance contract.
7. Make certain that all system safety devices are operational.
8. Call your local Spacesaver representative immediately if a safety device requires attention.
PROPER SYSTEM USE
Proper use of your system will ensure its longevity. In order to maintain proper performance, please
take the following precautions.
1. Do not climb on the shelving – use a stool.
2. Do not leave items in the aisles.
3. Do not operate the system without checking the open aisle(s) for people and/or objects.
4. Do not allow media to extend into the aisle to the extent that the carriages cannot close
together properly.
5. Do not overload your system. Stay within the recommended weight and distribution limits.
6. Do not operate any system under the safety override condition except in the presence of
your supervisor.
IMPROPER SYSTEM USE
1. Do not fully load one side of double entry shelving without counterbalance weight on the other side.
2. Begin loading at the lowest shelf.
3. At no time should the weight difference from one side of the carriage to the other exceed
30 percent.
RECOMMENDED LOADING INSTRUCTIONS
Page 4
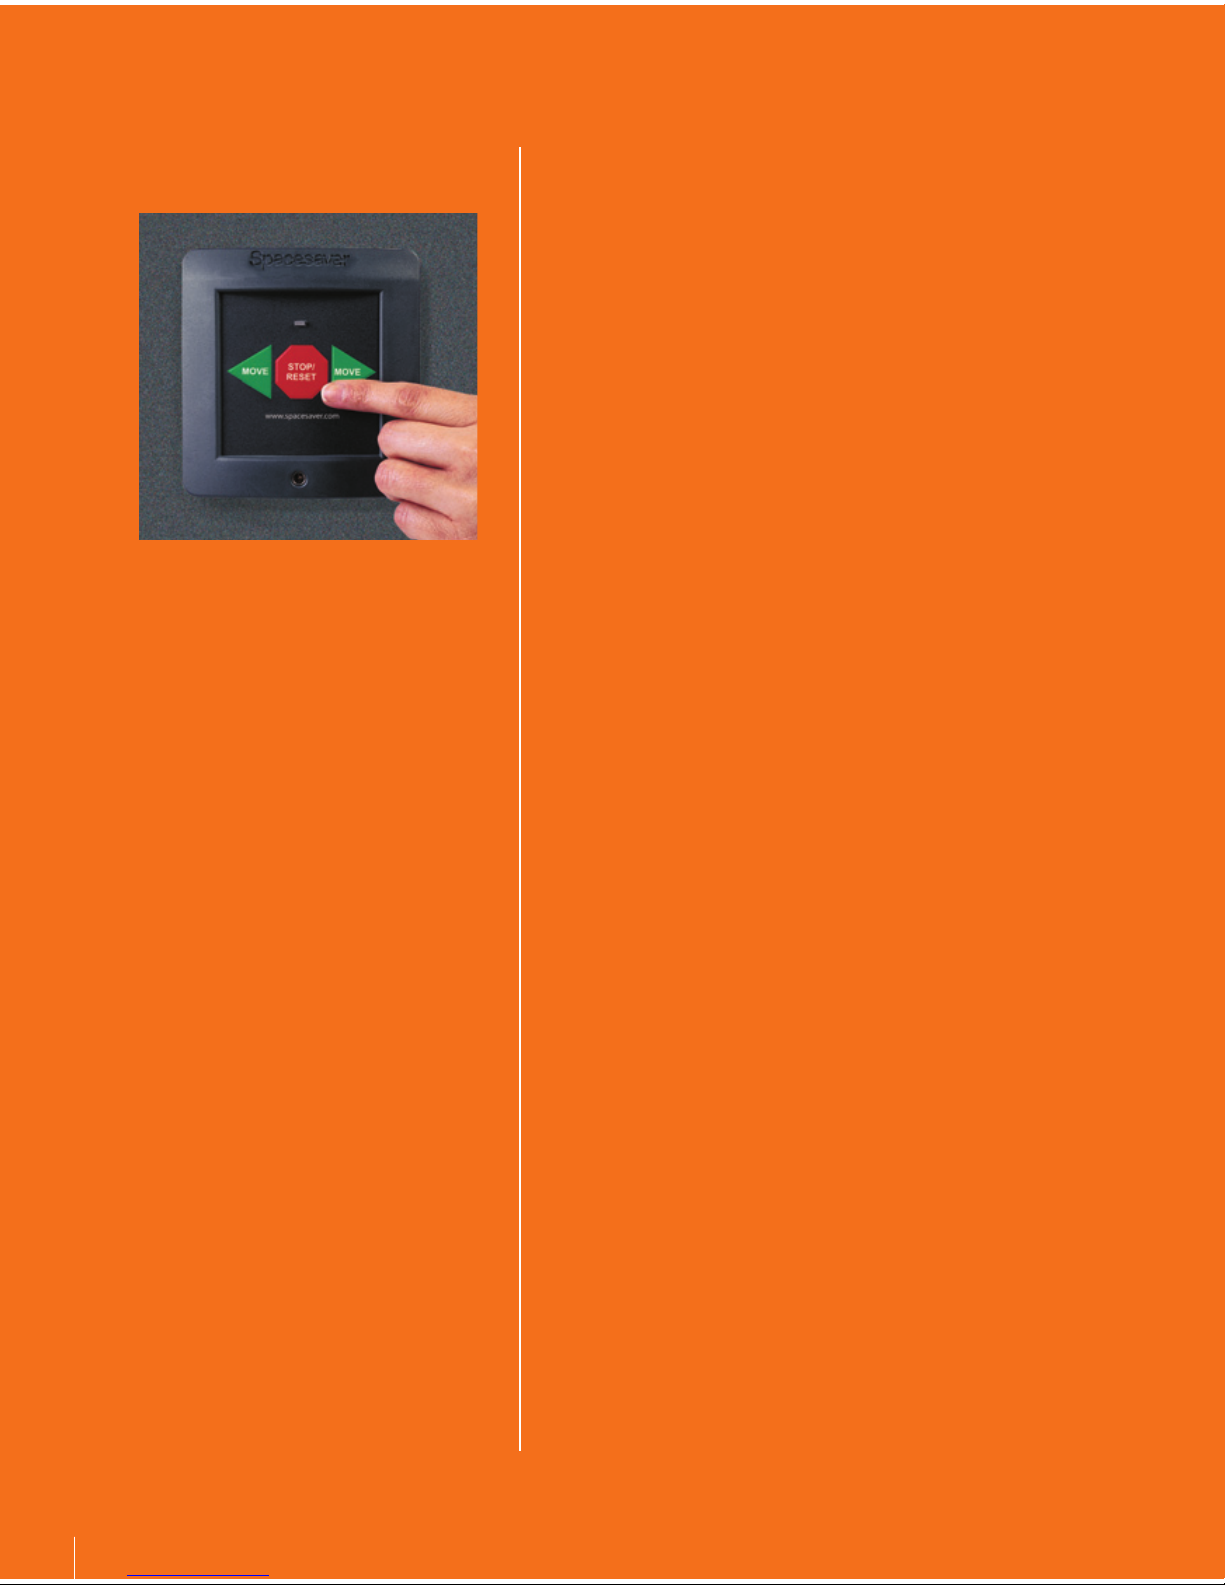
Our push-button control is the standard control for our powered
systems. For your convenience, Spacesaver’s web address is
printed on the front of the control label. The control has easyto-use functionality. A simple push of a button will move, stop
or reset the system.
• The “Move” button:
Begins carriage movement in the direction of the arrow
Turns on aisle lights (if applicable)
• The “Stop/Reset” button:
Stops carriage movement
Resets the system after a safety feature is activated
Cancels a locked aisle condition
Turns off aisle lights (if applicable)
• The LED indicator:
(Located directly above the “Stop/Reset” button)
Alerts the user to the status of the carriage with either red
or green lights
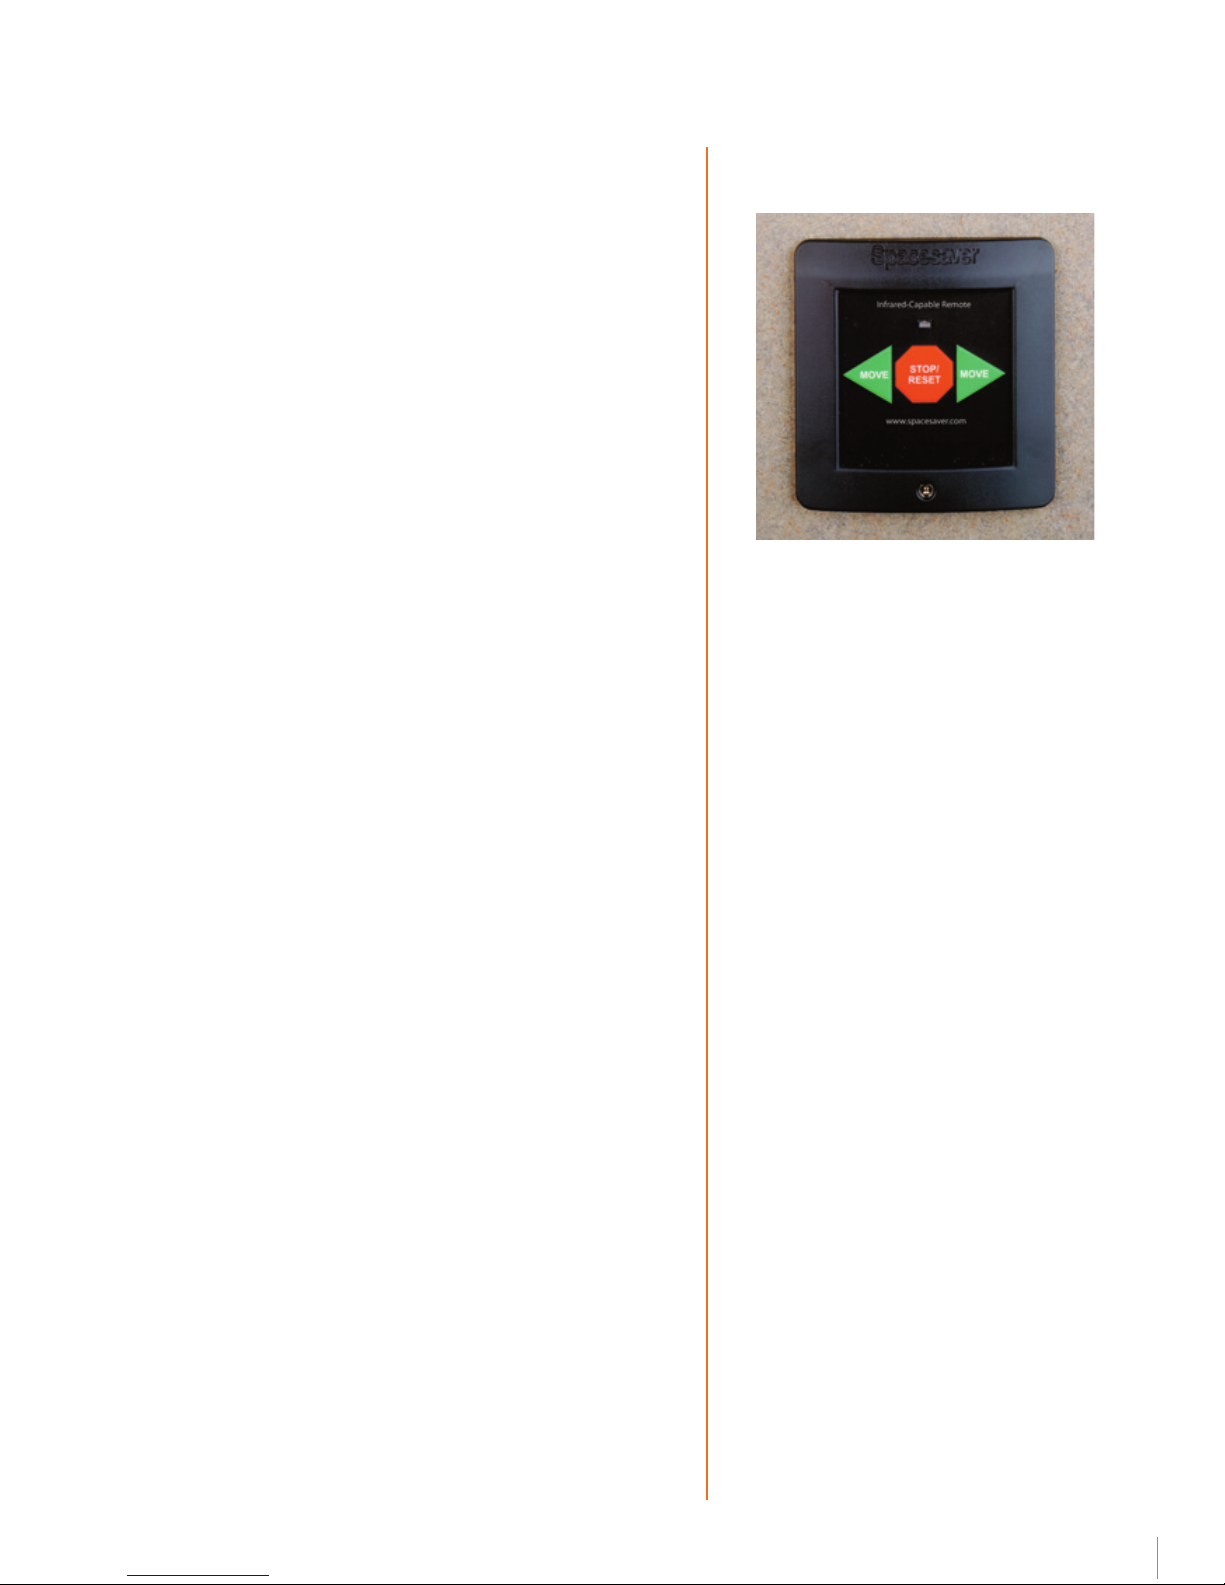
An optional infrared-capable control is available. This control
allows the use of remote controls for system access &
programming. (See the Control Options section of this manual
for more information on this feature.)
System Operation and Reset Options
Touch & Hold Operation
Touch & hold operation requires the user to walk with the
carriage continuously holding the directional “Move” button.
One-Touch Operation
When using one-touch operation, the user presses the
directional “Move” button until they hear a beep and the
carriage begins moving.
Manual Reset
Manual reset requires the user to visually check the open aisle
and press the “Reset” button on the open aisle control. The
system can be programmed to re-lock (go red) after 15 seconds
of inactivity.
Automatic Reset
On a system with automatic reset, the controls automatically
clear after an action or move is completed. If a safety is
activated, the user will need to reset the system once the safety
is cleared of any obstruction.
Carriage Spacing Adjustments
See the Safety Override Key section on page 6 for more details.
4
Control Functions
Page 5
5
Infrared-Capable Control
An optional control is available that allows the user to move a
carriage, program aisles, and conduct the auto move functions.
The buttons on the control itself function identically to the
standard controls. (See Control Functions section of this manual.)
Remote Controls For Use With Optional Infrared-Capable
Control
There are two remotes available for use with this control.
User Key
The user key allows the user to move, stop and reset your
mobile system without making contact with the control. To
use this remote, point the remote at the aisle control you wish
to operate. A touch of either of the directional move buttons
on the remote will begin carriage movement in the direction
desired. If your system is equipped with the touch and hold
feature, continue to hold the move button until the carriage
move is completed. To stop or reset the carriage, simply press
the appropriate button on the remote.
Managerial Key
The managerial key provides additional functionality when
used in conjunction with the infrared-capable control.
System On/Off
A press of the button will turn the entire system on and
off. To initiate this function, point the remote at any
infrared-capable control and press the “On/Off” button.
No further action is necessary to accomplish this task.
Fixed/Stationary Carriage
This feature allows you to make any carriage a temporary
stationary unit, in effect creating two systems from one, or
securing items on one side of the carriage. Please
remember when creating two systems from one to
maintain a realistic/proper aisle width. To use this feature,
position the temporary fixed carriage in the desired
location. Do this by moving it into position and pressing
the “Stop/Reset” button. Point the remote at the control
on the temporary fixed carriage and press the “Fixed”
button. The back lighting on the control will display
“Stationary Carriage”. To cancel the fixed carriage, press
the same button on the managerial key. When using the
fixed carriage function, all safety features remain fully
functional.
NOTE: You need to be within three feet (one meter) of the
control when using the remotes.
Control Options
Page 6
6
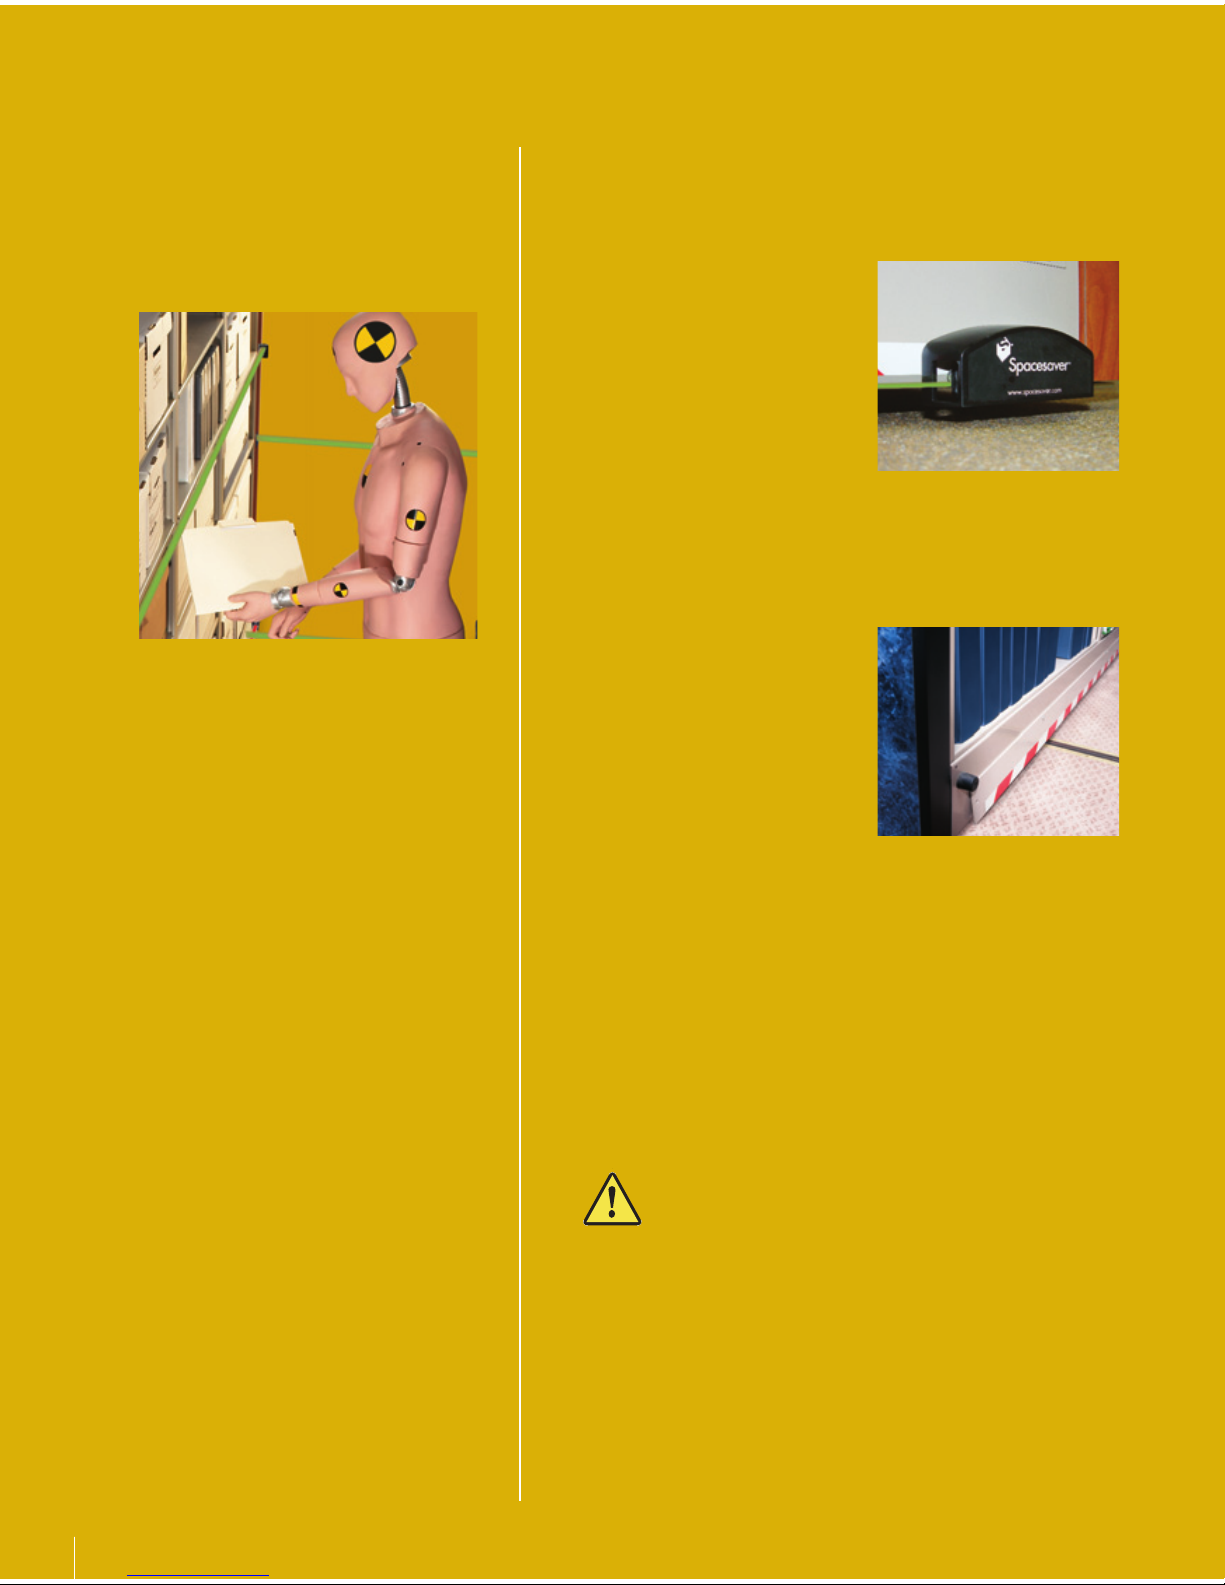
A floor-level safety sweep is considered the system’s primary
safety. Every aisle is required to have a minimum of one sweep.
Spacesaver has two options available for safety sweeps; Photo
Sweep
®
and mechanical sweep.
Photo Sweep
®
An infrared light beam sweeps
for obstructions close to the
floor. If a carriage begins to
move while you are in the aisle, it
can be stopped by breaking the
light beam that is constantly
projected along the entire length
of the carriage. To accomplish
this, simply place your foot in the
area defined by the red and white safety tape. When the
sweep beam has been broken, the control affected will display
“aisle in use”, and the control LED will flash red. All other
controls will go dark. Once the safety sweep has been cleared,
press the “Stop/Reset” button to resume normal system
activity.
Mechanical Sweep
The mechanical sweep functions
by applying pressure to the
sweep located along the length
of the carriage. If a carriage
begins to move while you are in
the aisle, it can be stopped by
depressing the metal sweep
plate with your foot in the area
defined by the red and white
safety tape. When the sweep has been activated, the control
affected will display “aisle in use”, and the control LED will flash
red. All other controls will go dark. Once the safety sweep has
been cleared, press the “Stop/Reset” button to resume normal
system activity.
Safety Override Key
To adjust carriage spacing, insert the safety override key into a
control head on a carriage with an open aisle next to it. Touch
and hold the “Stop/Reset” button. After 5 seconds, the LED
with flash red and green and the “Aisle in Use” will be lit.
Continue pressing the “Stop/Reset” button and press the
“Move” button in the direct you wish to adjust the aisle. Once
the desired spacing is reached, release the “Stop/Reset”
button and remove the safety override key.
Extreme caution must be exercised while operating
under this condition. This should only be used when
the user cannot correct the problem causing the
carriage to fail safe. Please note that this device
should be used only by trained supervisors and/or
service personnel.
The safety override key is inserted
into the jack in the face panel control. Touch and hold
the “Move” button in the direction you wish to move
the carriage. The system will move at a greatly reduced
speed. An audible “beep” alerts users that the system
is operating without safeties. To resume system
function, the safety override key must be removed.
CAUTION: no safeties are functional when the system
is operated using the safety override key.
Safety
Page 7
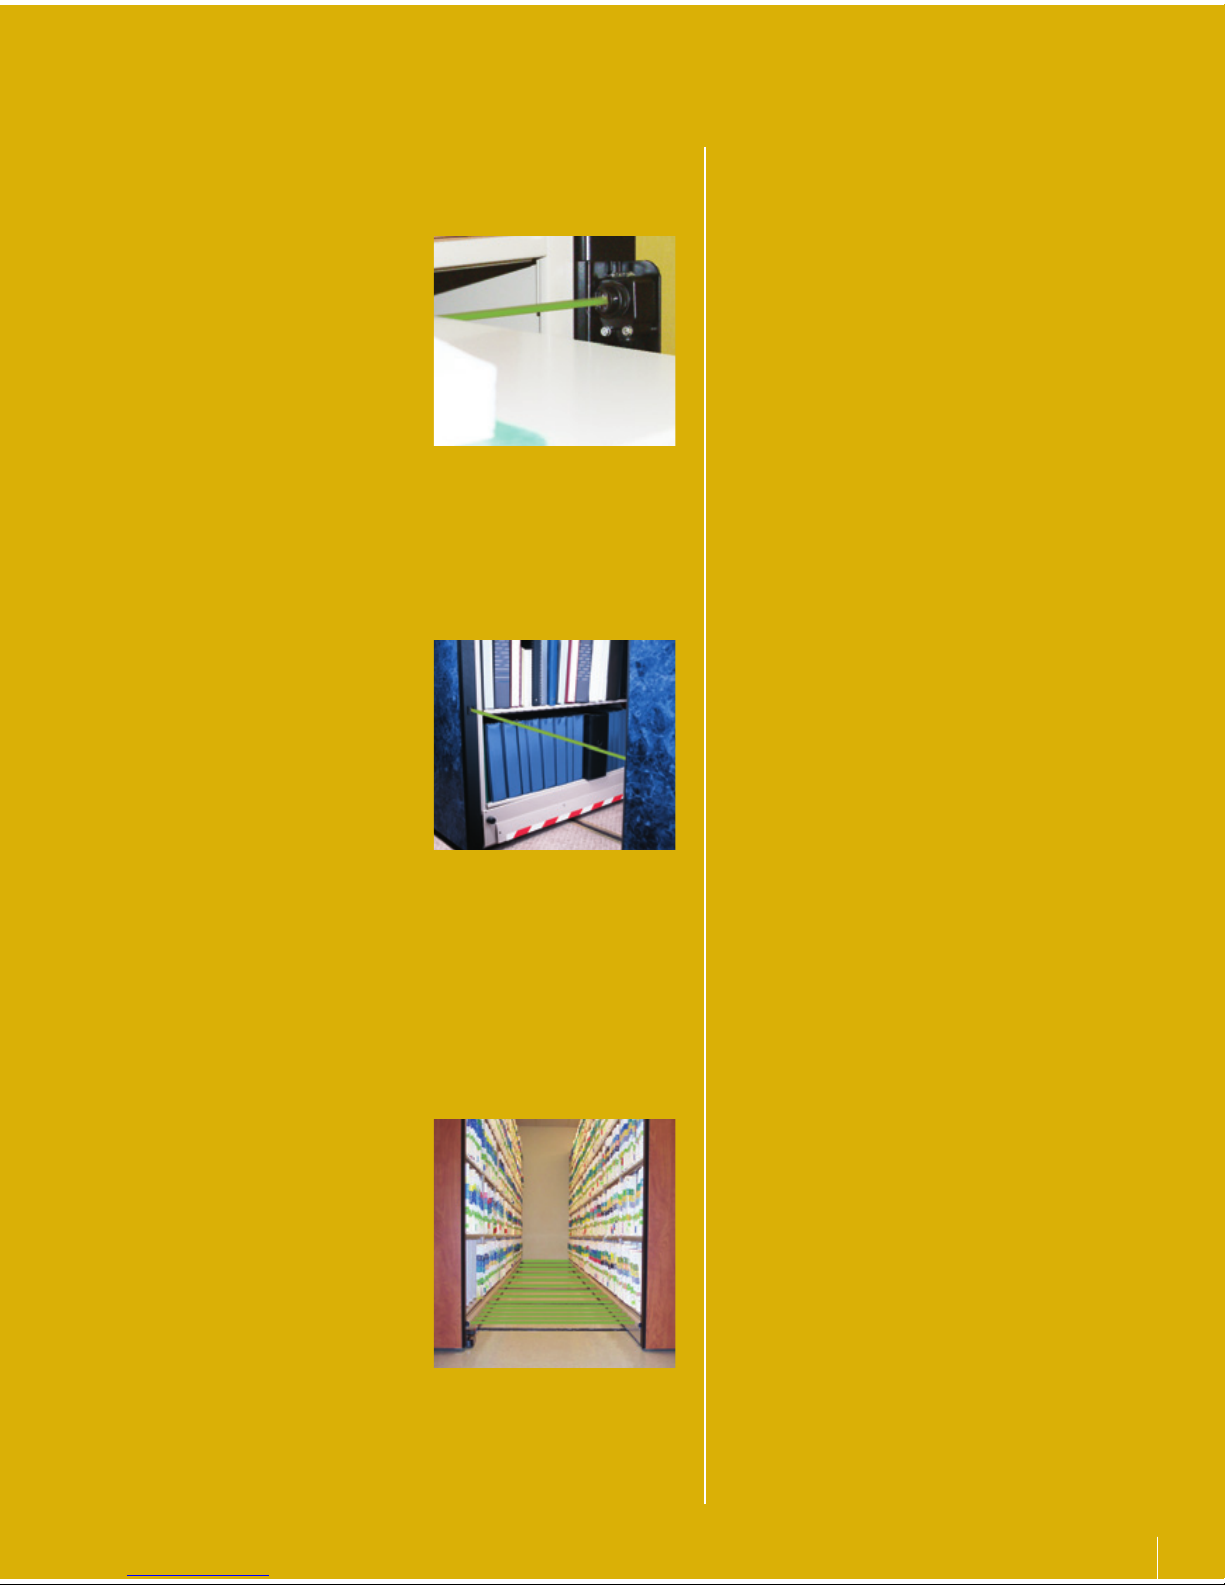
In addition to a floor-level safety sweep, your system may be
equipped with one or more of the following safety options:
Waist-High Photo Sweep
An additional set of Photo
Sweep sensors can be mounted
at waist level for additional
safety. This is typically mounted
at reference shelf height. For
this safety, shelving elevations
need to be consistent, and
overhanging media should not
be present as it could block the
beam. This DOES NOT replace the floor-level sweep.
Hinged Door Protection Photo Sweep
Another Photo Sweep can be added to detect if a hinged
door is open. Again, this DOES NOT replace the floor-level
sweep.
Aisle-Entry Sensor
This feature has an invisible
beam that crosses each aisle.
The following actions occur
when using this safety feature:
• Entering an open aisle
will break the beam, and
prevent the system from
moving.
• Entering an opening aisle will have no effect on the
opening of the aisle, but will prevent the system from
moving once the aisle is fully opened, until the system
is reset.
• Entering a closing aisle breaks the beam stopping
system movement.
In all of the above situations, when you leave the aisle, you
will have to press the “Stop/Reset” button at that aisle in
order to return the system to normal operation.
Zero Force Sensor
®
System
This safety feature requires no
effort on your part. As you
enter the aisle, you are
detected by invisible light
beams. As long as you remain
in the aisle, no carriage
movement is possible, and the
“aisle in use” message is
displayed on the control along
with a solid red light.
As you leave the aisle, the system will automatically return
to a “green light” condition, meaning that it is ready for
use. If it does not go to “green”, please check the aisle for
any obstruction and then press the reset button for normal
operation.
Optional Safeties
7
Page 8
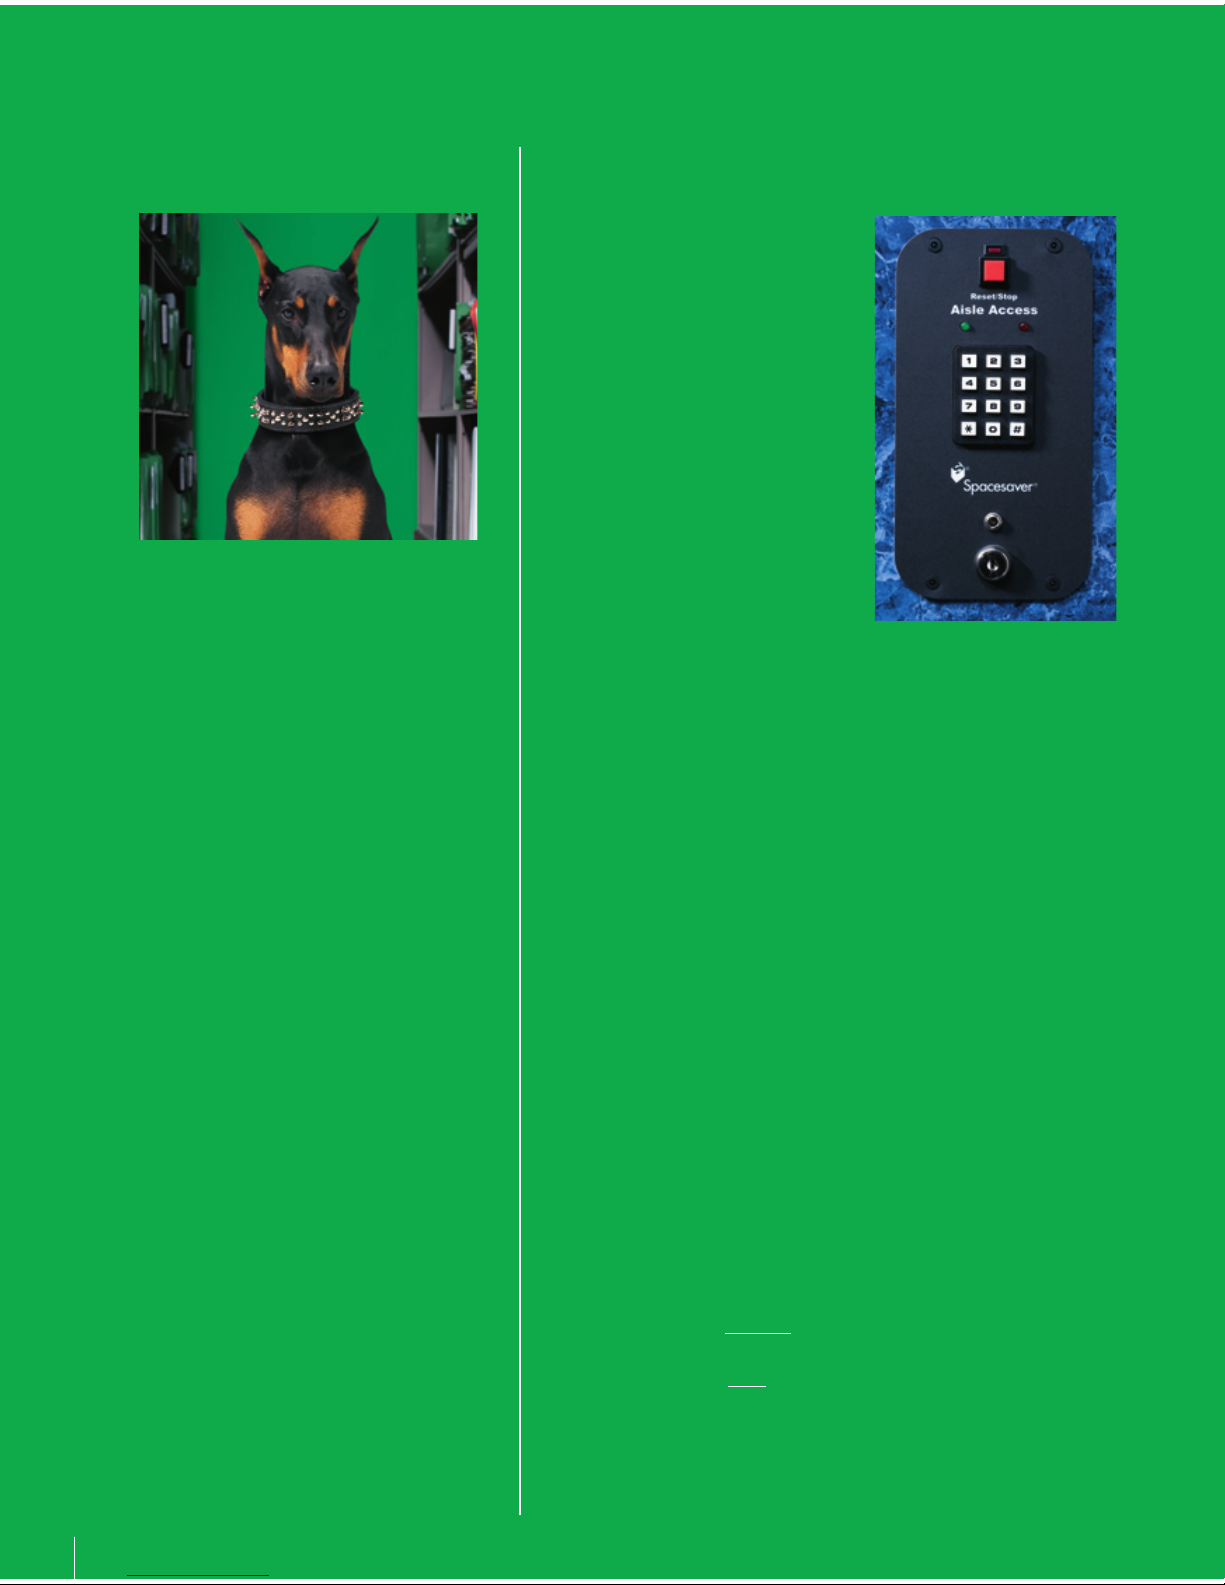
A variety of options exist to secure materials stored on the system.
TouchPad Aisle Access requires a 4digit Personal Identification
Number (PIN) to access a specific
aisle, limiting it only to authorized
individuals. Upon exiting the open
aisle, the user must depress the
“Close” button on the system
module to re-secure the system.
One or all of the carriages may have
this control in place of the standard
or infrared-capable control.
TouchPad System On/Off is used
in addition to the standard control
and functions as follows. When
placed on a platform, it can be
used to turn the system on and off.
TouchPad Stationary Control is used in addition to the
standard control and functions in the following ways to create a
stationary carriage within a powered system.
• Install the TouchPad Stationary Control on the extreme
left (or right) carriage. Park the carriages to the right (or
left). Enter the preset code and the system will remain
locked in that configuration (back lighting on the control
will indicate “Stationary Carriage”) until the code is
entered once again, allowing normal operation to resume.
• Install the TouchPad Stationery Control on any carriage
within the system. Park that carriage in the desired
location. Enter the preset code and the carriage will remain
locked in that position (back lighting on that control will
indicate “Stationary Carriage”) until the code is entered
once again, allowing normal operation to resume.
In all these situations, a 4-digit PIN is required. The following
procedure allows you to program the TouchPad control with
your own 4-digit code. This programming must take place
within a 10-second interval. NOTE: The factory-default code
is 1-2-3-4.
To change the 4-digit PIN;
1. Press the “#” key, then press the “*” key. The green
LED will being to blink.
2. Enter in the cur
rent code within the 10 seconds allotted.
Once the current code is entered, the LED will flash red.
3. Enter in the new
code within the 10 seconds allotted.
4. The solid green LED will return.
Keyed System On/Off turns the entire system on and off with
a key located above the control.
Security
8
Page 9
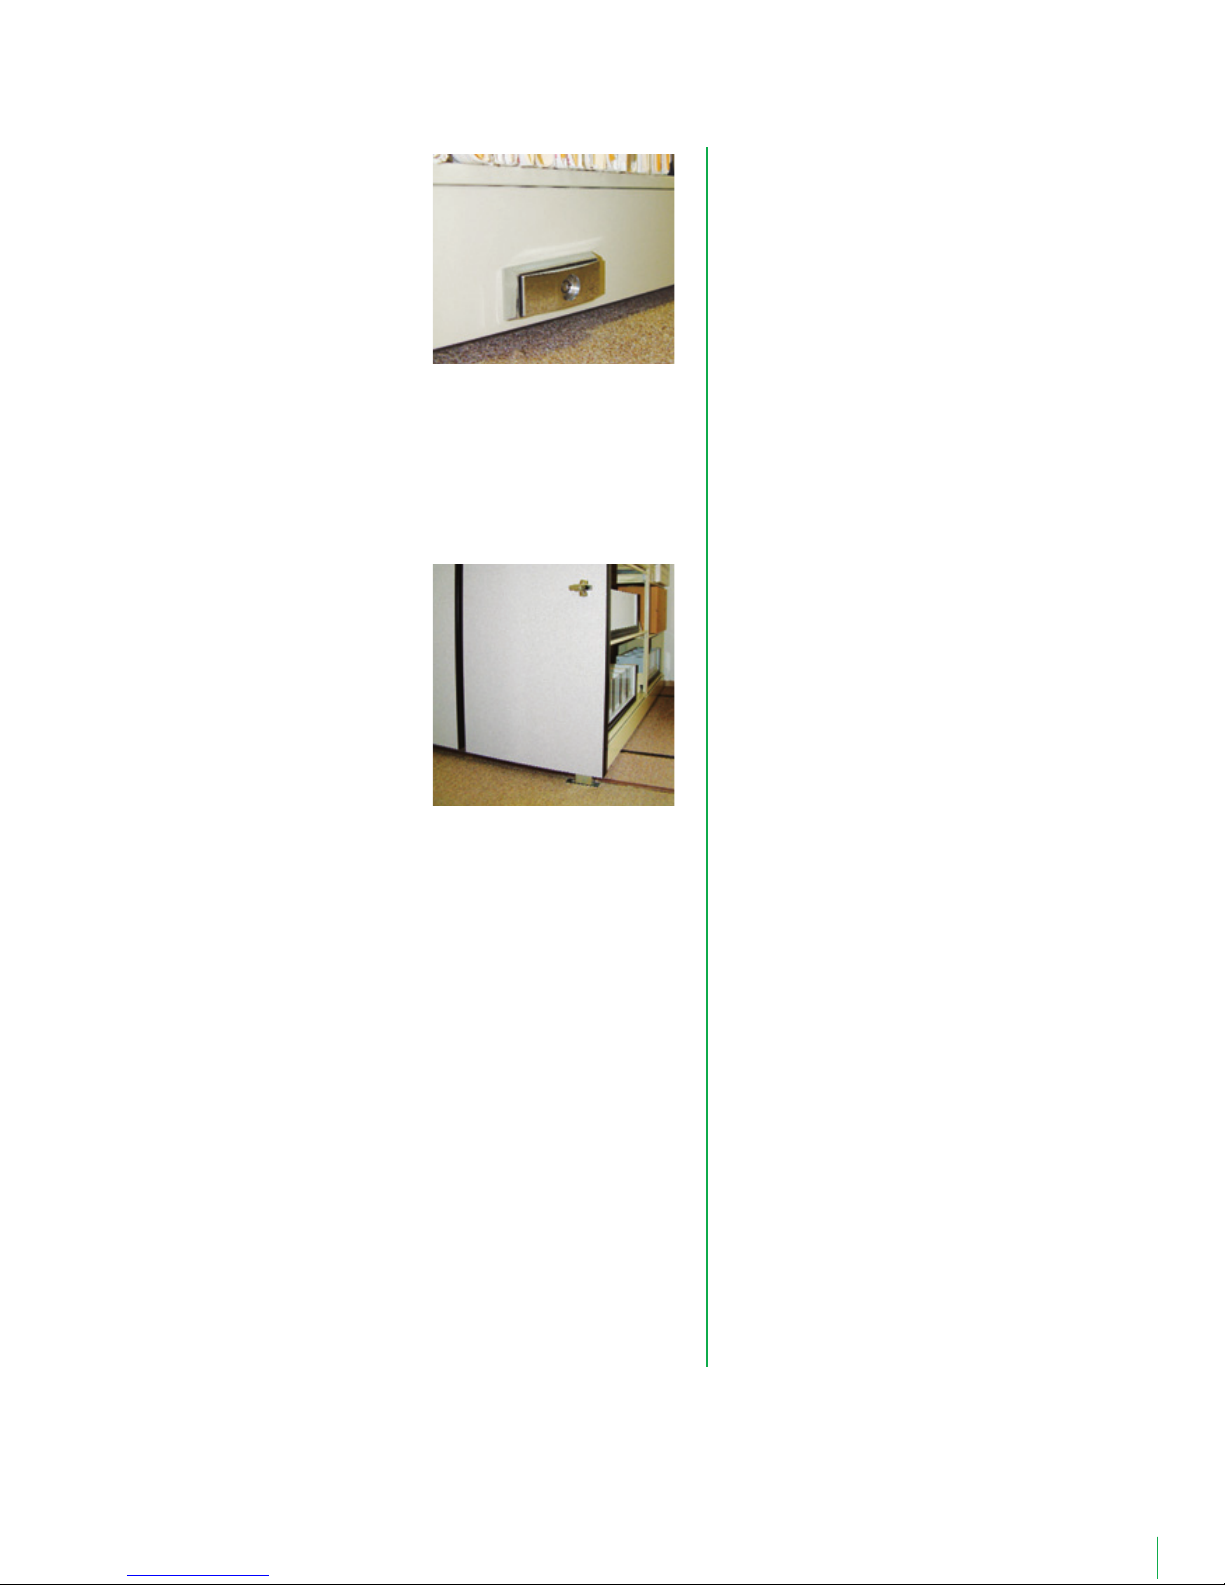
Carriage Lock
The carriage lock is placed on
the carriage and interfaces with
the system’s controls to provide
security for stored materials. It
features a key-controlled dead
bolt that locks into a floormounted strike plate. It can be
used to lock all of the system’s
aisles closed or to secure one or more selected aisles.
A special key is required to release the lock handle. Once
the lock handle releases, turn it 180 degrees to unlock the
system. Push the handle back into its housing. NOTE:
Failure to return the handle to its housing may cause
damage to the lock, floor covering or carriage.
Waist-High Lock
Waist-high lock is conveniently
located on the front of the
system at waist level. It features
a key-controlled dead bolt that
locks into a floor-mounted strike
plate. A special key is required
for locking and unlocking.
Insert the key into the lock and
rotate the key 180 degrees to
lock or unlock. Rotate the
polished chrome handle ⁄ turn to engage or disengage the
lock. It can be used to lock all of the system’s aisles closed
or to secure one or more selected aisles.
Stop All Carriages on Safety Fault
With this option, all carriages stop at once when a safety is
tripped. Where security is king,
Stop All Carriages on Safety
Fault
is an option, to be used in conjunction with
TouchPad
Aisle Access
and
Block Move
, which helps keep carriages
packed closely together limiting access to only the aisle that
was commanded open. Without this option, mobile
carriages “downstream” from a safety fault will complete
their move.
Forced Entry Alert
Used in conjuction with
Stop All Carriages on Safety Fault,
Block Move
and the
Auto Move Interface
, the
Forced Entry
Alert
option sounds an audible alarm when someone pries
open a closed aisle. Additionally, a
TouchPad
(or other key
switch) must be ordered with the system as a means to
silence the alarm.
9
Security
Continued
Page 10
10
Your system may be equipped to provide one or more of
several automated movements when prompted by a
preprogrammed period of inactivity or “building interface
signal.” These functions may be programmed through your
local Spacesaver service technician.
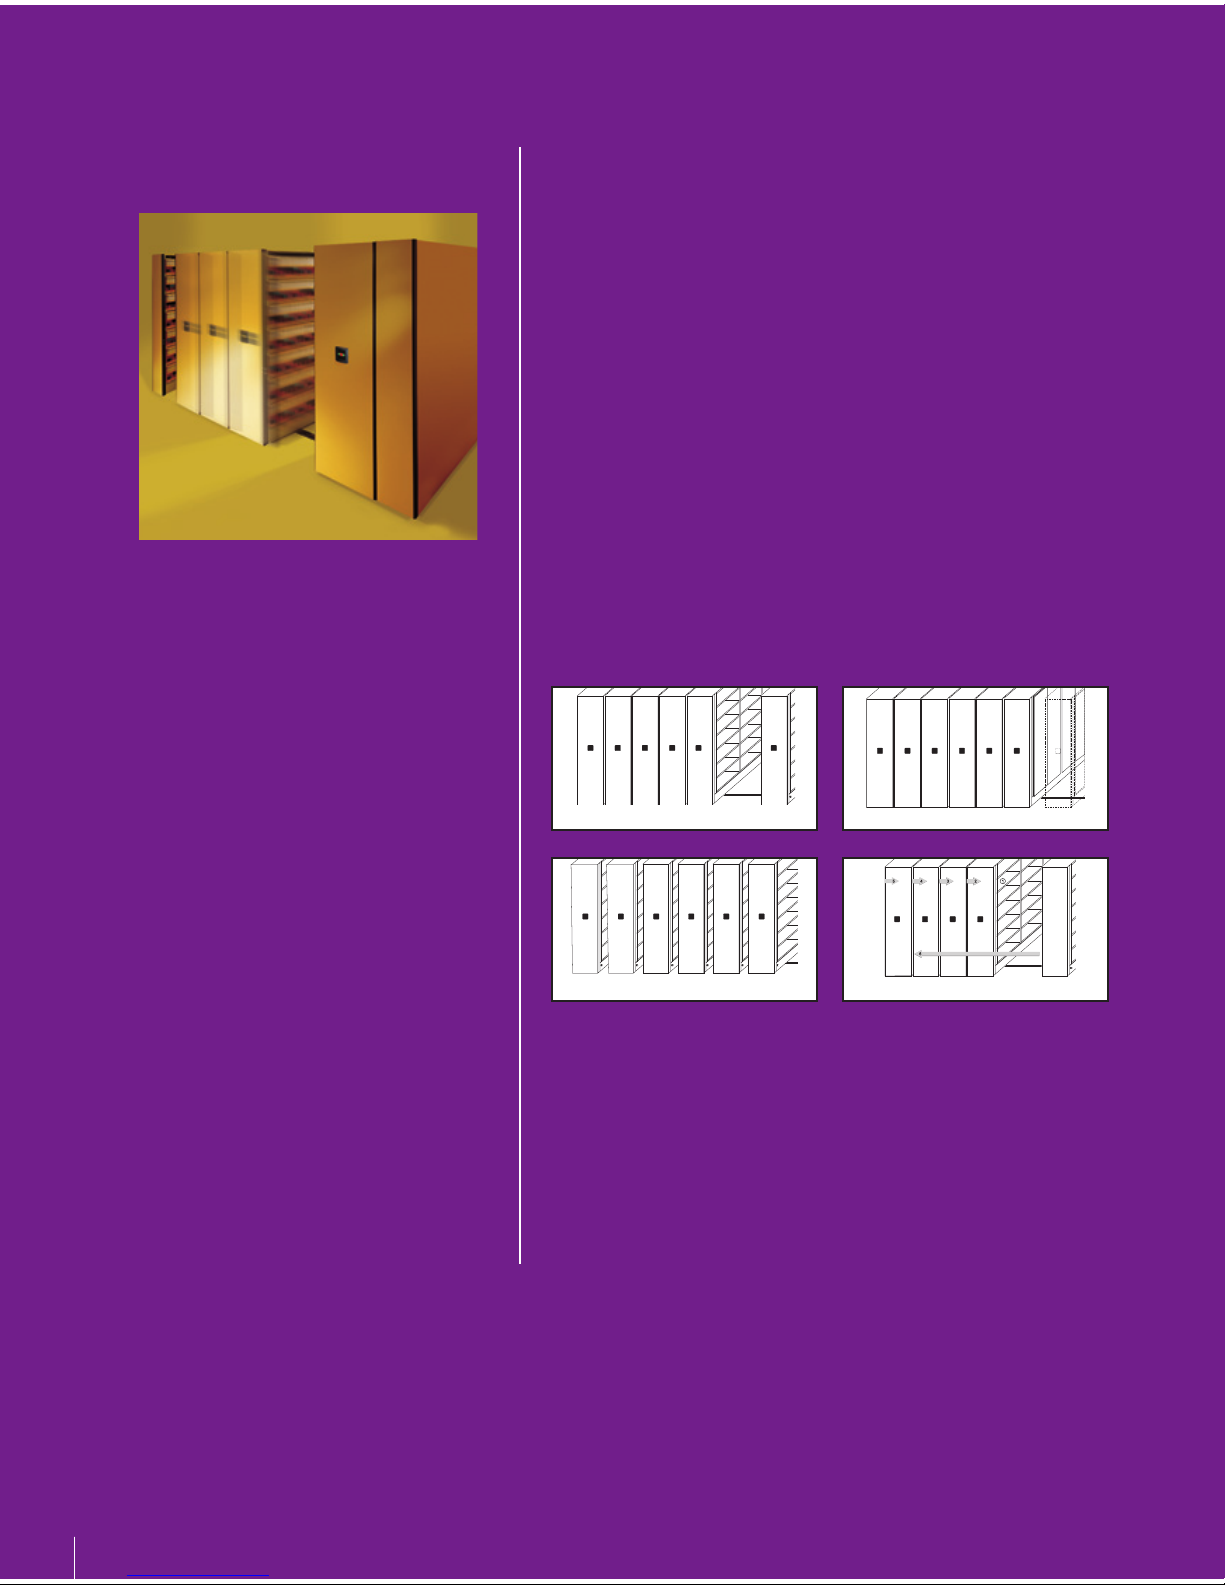
Auto Move Functions
• System Priority Aisle – Opens a specified aisle (or two)
after a period of inactivity.
• System Closed Park – Closes the system left or right.
• System Ventilation Park – Opens the system at evenly
spaced intervals.
• System Auto Cycle – Opens each aisle in sequence.
During automatic move functions, all safety features are
fully functional.
System Fire Park – Typically will evenly space your system in
response to an alarm activation. Requires that your system be
connected to your fire alarm system.
System Night Park – Prompts your system to perform an automove function in response to a building interface signal.
Programmable
Options
System Priority Aisle
System Closed Park
System Ventilation Park
System Auto-Cycle
Page 11
11
Spacesaver has two options that allow the system to operate
during power outages. You can be assured of continuous access
to your stored material.
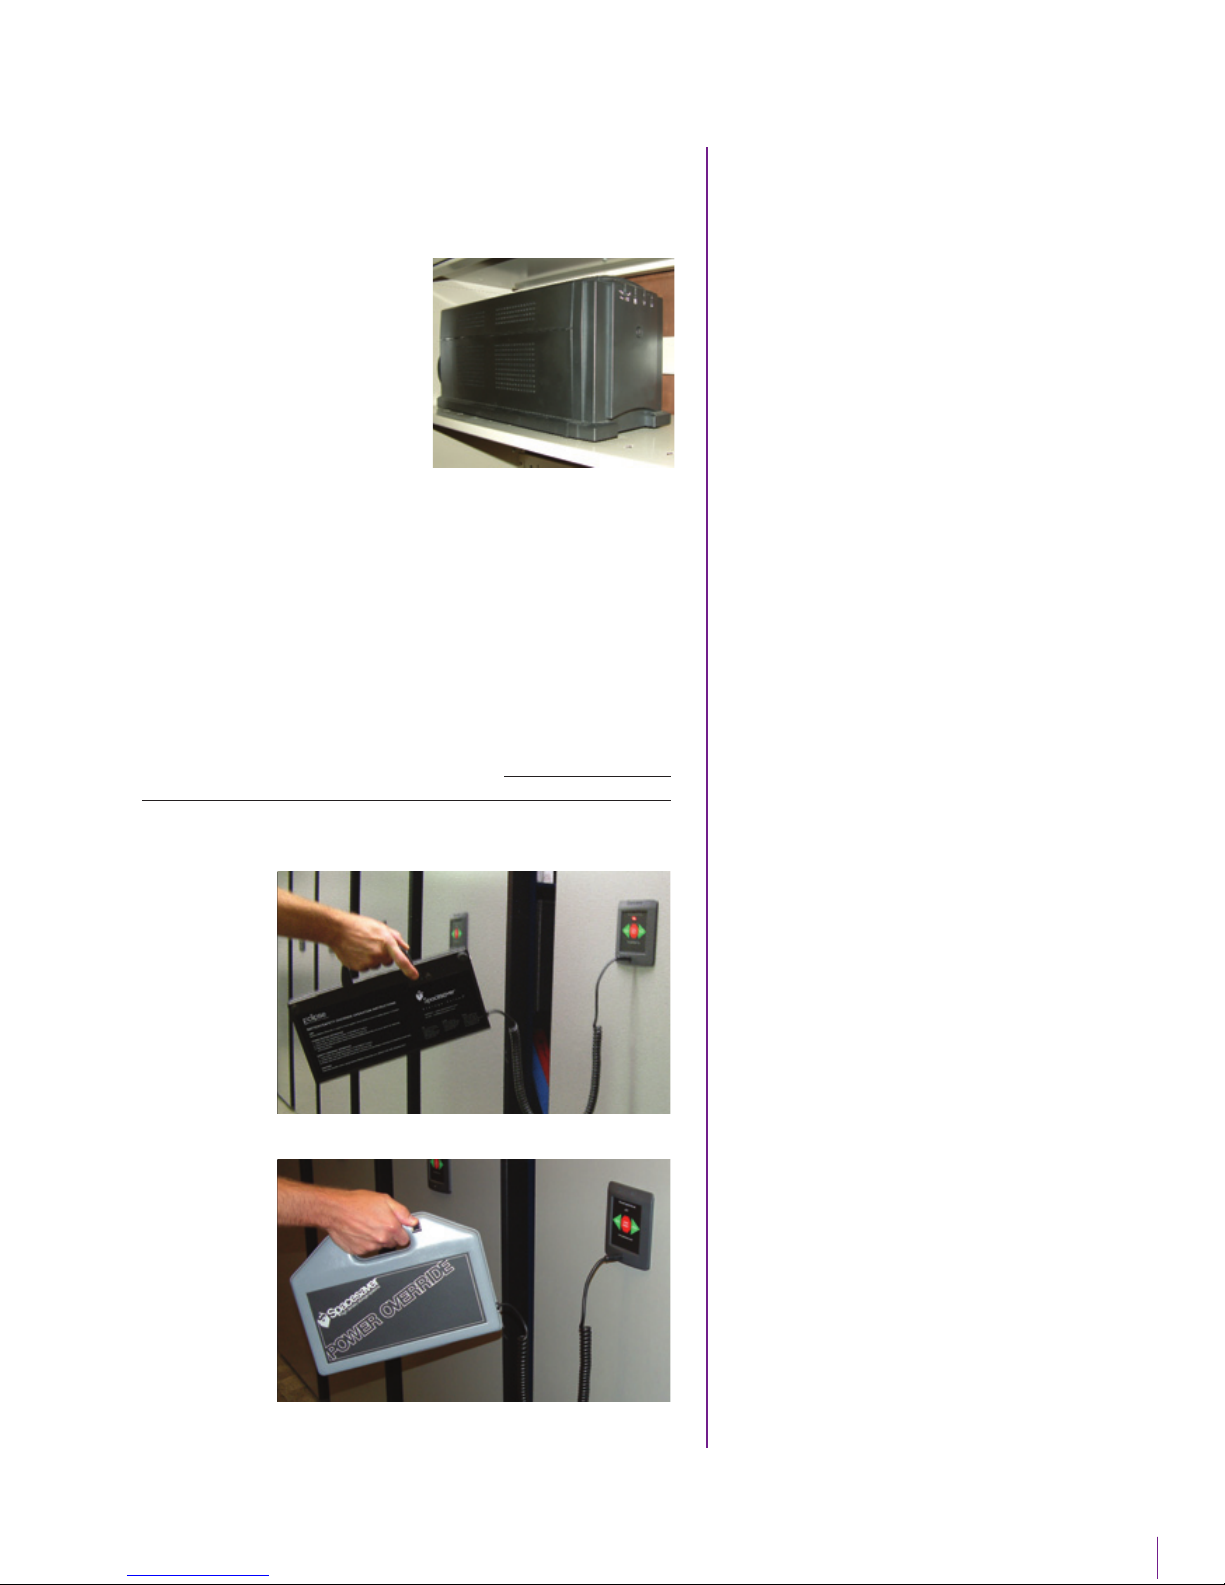
Automatic Battery Backup
switches the system to battery
power if AC power is lost. It
provides for full system function,
including the safeties. The system
can operate for approximately 60
accesses on one charge.
When running on the automatic
battery backup, the system
beeps to let the user know it is running on battery power. As
the battery charge runs low, the system beeps faster. The
automatic battery backup provides the added benefit of
surge protection. When the system is back running on AC
power, the unit automatically recharges itself.
The Power Override Unit is a hand-held rechargeable
battery pack that serves as a backup option during power
outages. This must be plugged into a wall outlet to
recharge. The power override unit moves one carriage at a
time at a reduced speed. The hand-held power override unit
will beep during operation for safety.
CAUTION: system
safeties are not functional when using this power option.
Each charge yields approximately one hour of system use. A
battery pack with replaceable D-Cell batteries is also available.
Power Outage
Options
Rechargeable Battery Override Unit
Replaceable D-Cell Battery Override Unit
Page 12

Your system may be equipped with optional overhead lights.
Use of these lights usually requires no effort on your part. The
lights will come on when the aisle is opened or when an aisle is
entered. The lights will shut off automatically shortly after you
leave the aisle.
If the lights do not turn on when an open aisle is entered, simply
press the “Move” button on the controls on either side of the
aisle.
If the lights are not timed to turn off automatically after leaving
the aisle, they can be turned off by pressing the “Stop/Reset”
button on the controls on either side of the aisle.
Lighting Options
CONTROL INDICATION
Abnormal Carriage Movement
Controls on both sides of the
open aisle display “Aisle in Use”
and the LED is flashing red
None of the controls work;
None of the LED’s are lit
All or most controls display a
blinking red LED
SOLUTION
• Check rails for debris; clean
rails
• Check the aisle for people or
materials obstructing safeties
• Press the “Stop/Reset” button
• If there is no apparent
obstruction, check the LED
on one end of the Photo
Sweep. If the LED is not
flashing green, call for
service.
(The safety override
key may be used in the
interim – see the Safety
section of this manual)
• Is the system locked (via
remote, key, etc.)?
• Is power supplied to the
system? In the event of a
power outage, use your
power outage option (if
purchased).
• Call Service
• Call Service
Troubleshooting
12
Page 13

Rails
• Vacuum the rails and track regularly.
• Some flaking may be seen on the rail surface. This is normal
and no cause for alarm. A light application of a silicon or
teflon spray to the top of the rail is recommended to reduce
this type of wear. Avoid sweeping or mopping over freshly
lubricated rails.
Controls
• Check all the functions of every control.
Carriage Bumpers and End Stops
• Please notify your local Spacesaver service technician if you
observe any missing or damaged bumpers and/or stops.
Stored Media
• All materials must be pushed onto the shelves and be flush
with the shelf front. Any media overhanging the shelf front
will interfere with normal system operation. This media is
very likely to become damaged by normal system operation
as well. Looking for evidence of media interference can help
identify potential problems.
Laminate Panels
• To clean and restore the surface apply a countertop or
laminate cleaner (found at most hardware stores.)
Metal Surfaces
• All metal surfaces are painted with the powder coat system.
This is a high luster and scratch resistant paint.
• To remove surface dust, wipe with a damp cloth.
• To clean soiled surfaces, wash with a mild soap and water
mixture.
• To remove finger prints, an orange-based cleaner or NON-
ammonia window cleaner will work on some colors. Test a
small area before using it on a large surface.
Miscellaneous
• Move the carriage in both directions. Look, listen, and feel
for smooth travel. Please inform your local Spacesaver
service technician of any unusual sounds or vibrations.
• All carriages should move easily across the aisle in both
directions.
• Make sure the floor covering does not interfere with carriage
movement or function.
• All carriages should track properly across the aisle. If one
end of the carriage lags behind, please inform your local
Spacesaver service technician.
General
Maintenance
13
Page 14

Spacesaver has an emphasis on customer satisfaction and continuous
improvement. The statement of warranty is our continued
commitment that Spacesaver is dedicated to serving our customers.
Lifetime Limited Warranty: Subject to the conditions stated below,
Spacesaver Corporation (”Spacesaver”) warrants to the original
purchaser exclusively that the shelving and mobile carriages (”structural
frames”) manufactured by it will be free from defects in materials and
workmanship for the lifetime of the structural frames. For the purposes
of this warranty, structural frames shall be deemed to exclude all
moving parts, controls and guides that have immediate contact with any
moving parts.
10-Year Limited Warranty: Spacesaver also warrants that all carriage
drive motors, shall be free from defects in materials and workmanship
for ten (10) years from the date of the customer‘s written acceptance of
installation. During the 10-year warranty period, all parts are included
at no cost for 10 years. Labor is included at no cost during the first year
of the 10-year warranty period. After the first year, all labor will be
charged at the current rate.
5-Year Limited Warranty: Spacesaver also warrants that all
equipment, other than structural frames and carriage drive motors, shall
be free from defects in materials and workmanship for five (5) years
from the date of the customer‘s written acceptance of installation.
During the 5-year warranty period, all parts are included at no cost for
5 years. Labor is included at no cost during the first year of the 5-year
warranty period. After the first year all labor will be charged at the
current rate.
If any warranted equipment shall be proved to Spacesaver‘s satisfaction
to be defective, such equipment shall be repaired or replaced at the
option of Spacesaver. All warranty service for any equipment
manufactured by Spacesaver must be performed by an authorized
Spacesaver factory representative. This warranty shall be void if any
portion of the purchase price shall be due but unpaid in accordance
with the terms pursuant to which the equipment was sold. This
warranty shall not apply to equipment repaired by any party other than
an authorized Spacesaver factory representative or to defects or
damage caused by (a) acts of God or other circumstances beyond
Spacesaver‘s control, (b) improper installation (unless installation was by
certified factory trained installer), (c) improper electrical supply or
environmental conditions, (d) improper operation, maintenance or
storage, or (e) other than normal use or service. EXCEPT FOR THE
EXPRESS WARRANTIES SET FORTH ABOVE, SPACESAVER MAKES
NO WARRANTIES, IMPLIED OR OTHERWISE, AND SPACESAVER
SPECIFICALLY DISCLAIMS ANY IMPLIED WARRANTY OF
MERCHANTABILITY OR FITNESS FOR A PARTICULAR PURPOSE.
Limitation of Liability: Repair or replacement of any defective
equipment, or refund of the purchase price paid by the customer in the
event Spacesaver determines such equipment cannot be repaired or
replaced, shall be the customer‘s exclusive remedy for breach of the
warranty for product defects, however caused, and in no case shall
Spacesaver be liable for incidental, consequential, special or other
damages, or loss of profits or revenues whether as a result of breach of
contract or warranty, Spacesaver‘s negligence, or otherwise.
Spacesaver shall have no liability for any advice or assistance rendered
by any party outside the scope of Spacesaver‘s written specifications
for the manufacture, operation or maintenance of the warranted
equipment. Original installation must be performed by Spacesaver
trained and certified installers.
Statement of
Warranty
14
WARRANTY ACTIVATION
Please follow the instructions below
to activate
your warranty:
1. Visit our website at
www.spacesaver.com.
2. Click on “Warranty” in the
bottom right hand corner.
3. Enter the required information
in the Customer Profile Section
which includes the your
Customer Job Number. This
number may be found on the
System Acceptance Form
located in the back of this
manual.
Note: You MUST
complete the online
form to activate your warranty.
Page 15

Spacesaver Corporation
1450 Janesville Avenue
Fort Atkinson, WI 53538-2798
1-800-492-3434
www.spacesaver.com
Spacesaver Corporation is a division of KI. KI and Spacesaver are registered trademarks of Krueger International, Inc.
© 2007 KI and Spacesaver Corporation. All Rights Reserved. Litho in USA. REV. 1.0/SC-0603 SSC/MAR 11/07
1330 Bellevue Street
P.O. Box 8100
Green Bay, WI 54302-8100
1-800-424-2432
www.ki.com
With over 100,000 installed systems – more
than all of our competition combined –
Spacesaver leads the industry in customized,
high-density mobile storage solutions.
Almost any type of material – regardless of its
size, weight or shape – can be stored in
Spacesaver Powered Systems. Designed to
maximize your storage space, they often
more than double storage capacity in the
same floor space. They also provide an
extraordinary level of quality, as our ISO
9001:2000 certification attests.
We alone have the know-how and resources
to develop and perfect the advanced technology that makes a solution such as Eclipse
possible.
And that makes power easy. To choose. To
use. To afford. To rely on.
A tailored storage system
that meets your unique criteria.
15
Page 16
Thank You For Your Purchase of a Spacesaver Powered System.
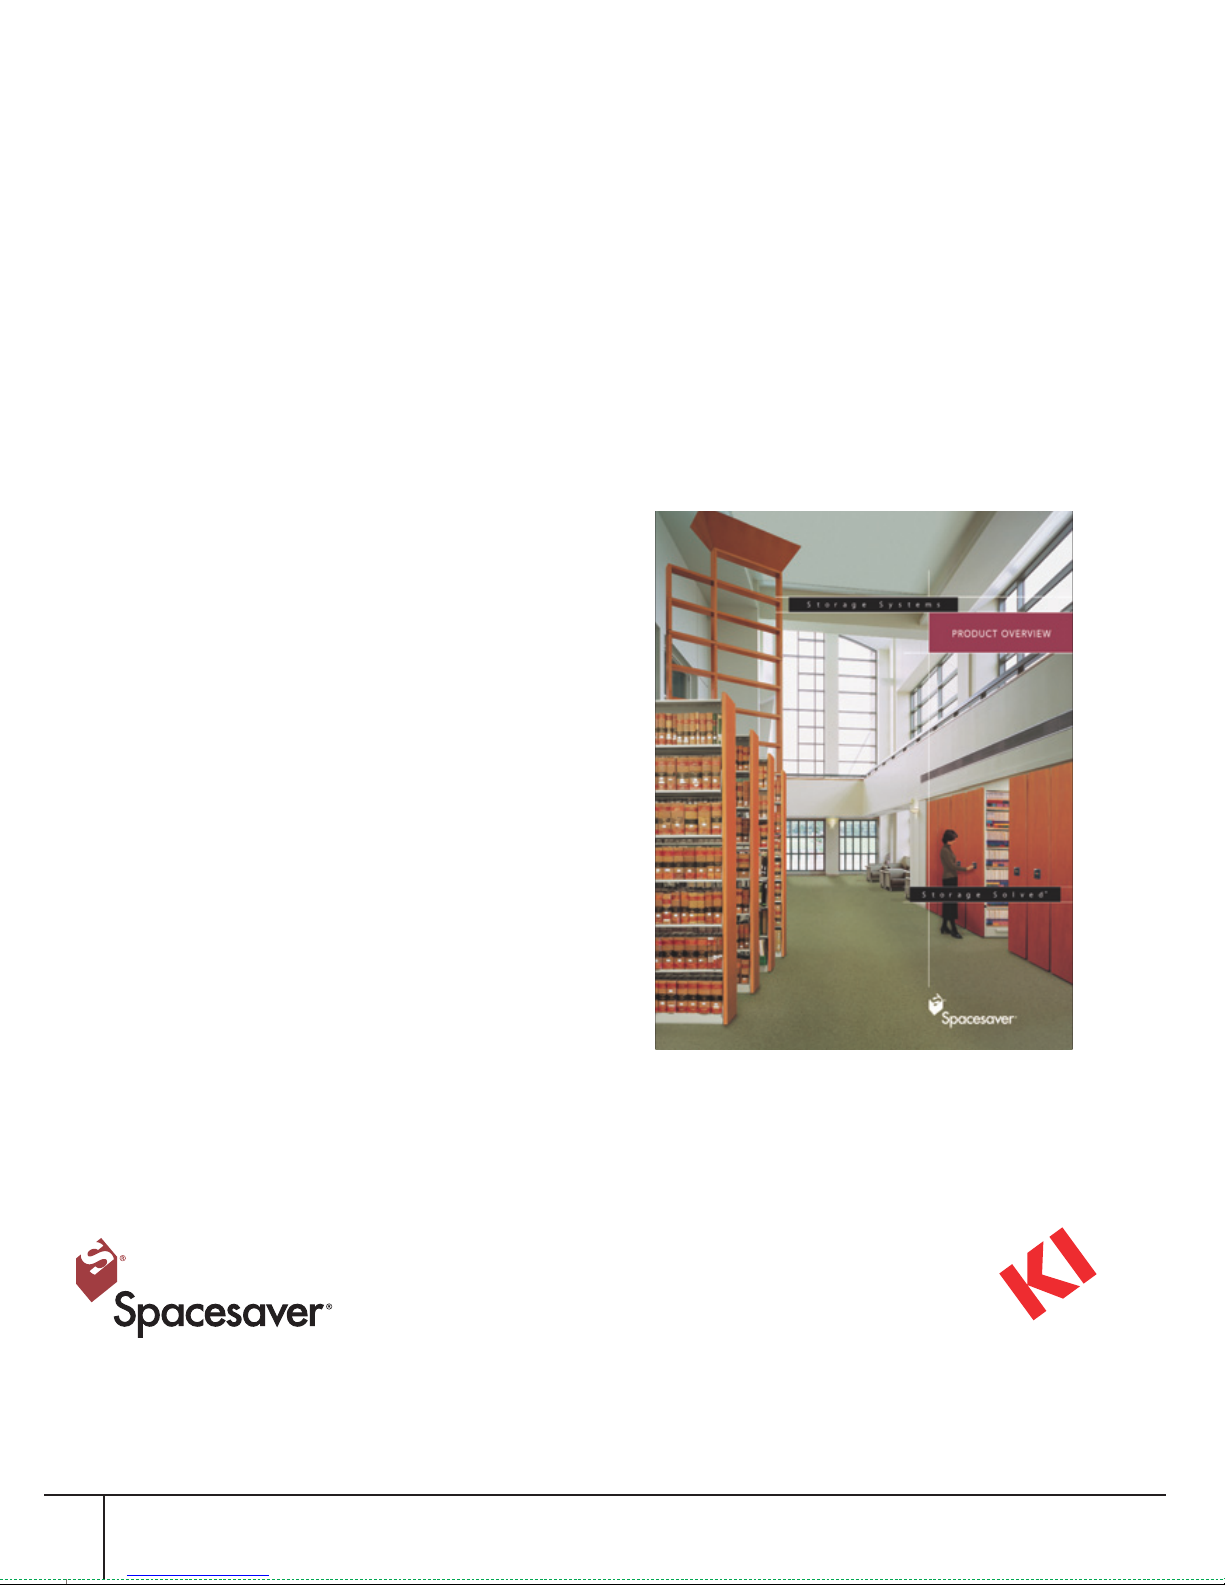
For a comprehensive listing of other Spacesaver products and services, please contact your local Spacesaver
representative for a Product Overview Brochure.
Spacesaver Corporation
1450 Janesville Avenue
Fort Atkinson, WI 53538-2798
1-800-492-3434
www.spacesaver.com
Spacesaver Corporation is a division of KI. KI and Spacesaver are registered trademarks of Krueger International, Inc.
© 2007 KI and Spacesaver Corporation. All Rights Reserved. Litho in USA. REV. 1.0/SC-0603 SSC/MAR 11/07
Additional Products:
• Mechanical Assist Systems
• Manual Systems
• Mobile Pallet Racks
• XTend™Mobile High-Bay Storage Systems
• Modular Mobile Systems
• Modular (Bi-File®) Systems
• QuickSpace®Systems
• Mobile Art Rack Systems
• Hang-Glider Pro
®
Pullout Storage Panel Systems
• Rotary Storage Systems
• Cantilever Bookstack Systems
• XTend™Stationary High-Bay Storage Shelving
• Case-Type Shelving Systems
• 4-Post Bin Shelving Systems
• 4-Post File Shelving Systems
• Fire Hose Rack Storage Systems
• Modular Drawers & Doors
• Weapon & Pistol Racks
• Hinged Doors
• Museum Cabinets
• Wide-Span Shelving
• ActiveStor
®
Lateral File Cabinets
• ActiveStor
®
Storage Cabinets
• ActiveStor®Pedestals
• ActiveStor®Bookcases
• FrameWRX™ Storage Systems
Additional Services:
• Extensive network of local Storage Specialists
• Single-source turn-key project management
• Factory-certified system installation
• Ongoing maintenance and support
KI
1330 Bellevue Street
P.O. Box 8100
Green Bay, WI 54302-8100
1-800-424-2432
www.ki.com
 Loading...