

Page 1
SPR_INSTRUC_BU_05.2016www.spacepro.co.uk/instructions-2/
Page 1 of 5
V1
Contents:
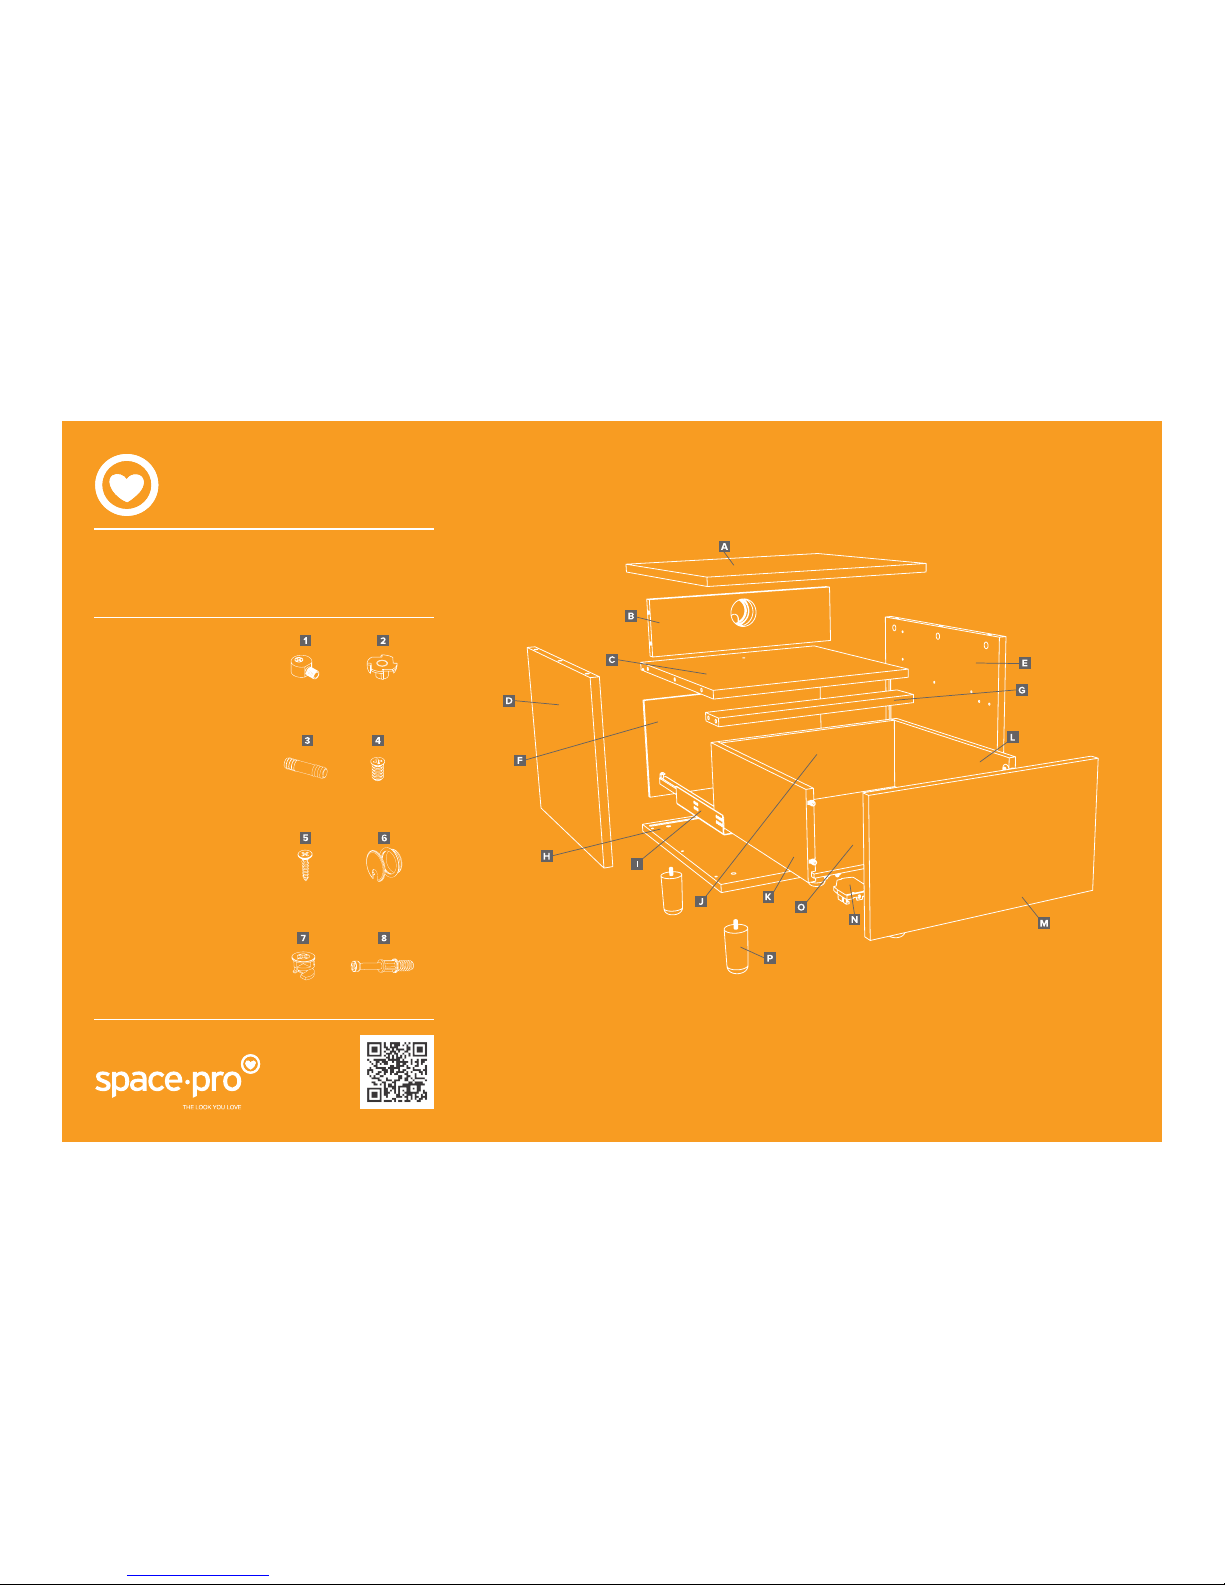
A 1x Top panel
B 1x Top back panel
C 1x Shelf
D 1x Side panel (left)
E 1x Side panel (right)
F 1x Lower back panel
G 1x Drawer infill
H 1x Base
I 2x Soft close drawer runners
(1x left, 1x right)
J 1x Drawer back
K 1x Drawer side (left)
L 1x Drawer side (right)
M 1x Drawer front
N 2x Soft close clips
(1x left, 1x right)
O 1x Drawer base
P 4x Legs
4x
One piece
connectors
4x
T-nuts
4x
Plastic
dowels
4x
Euro
screws
4x
Wood
screws
1x
Cable
hole plug
27x
Cams
27x
Dowels
bedside unit
Assembly Instructions
Page 2
SPR_INSTRUC_BU_05.2016www.spacepro.co.uk/instructions-2/
x6
x5
C
Page 2 of 5
1
D
2 3
4
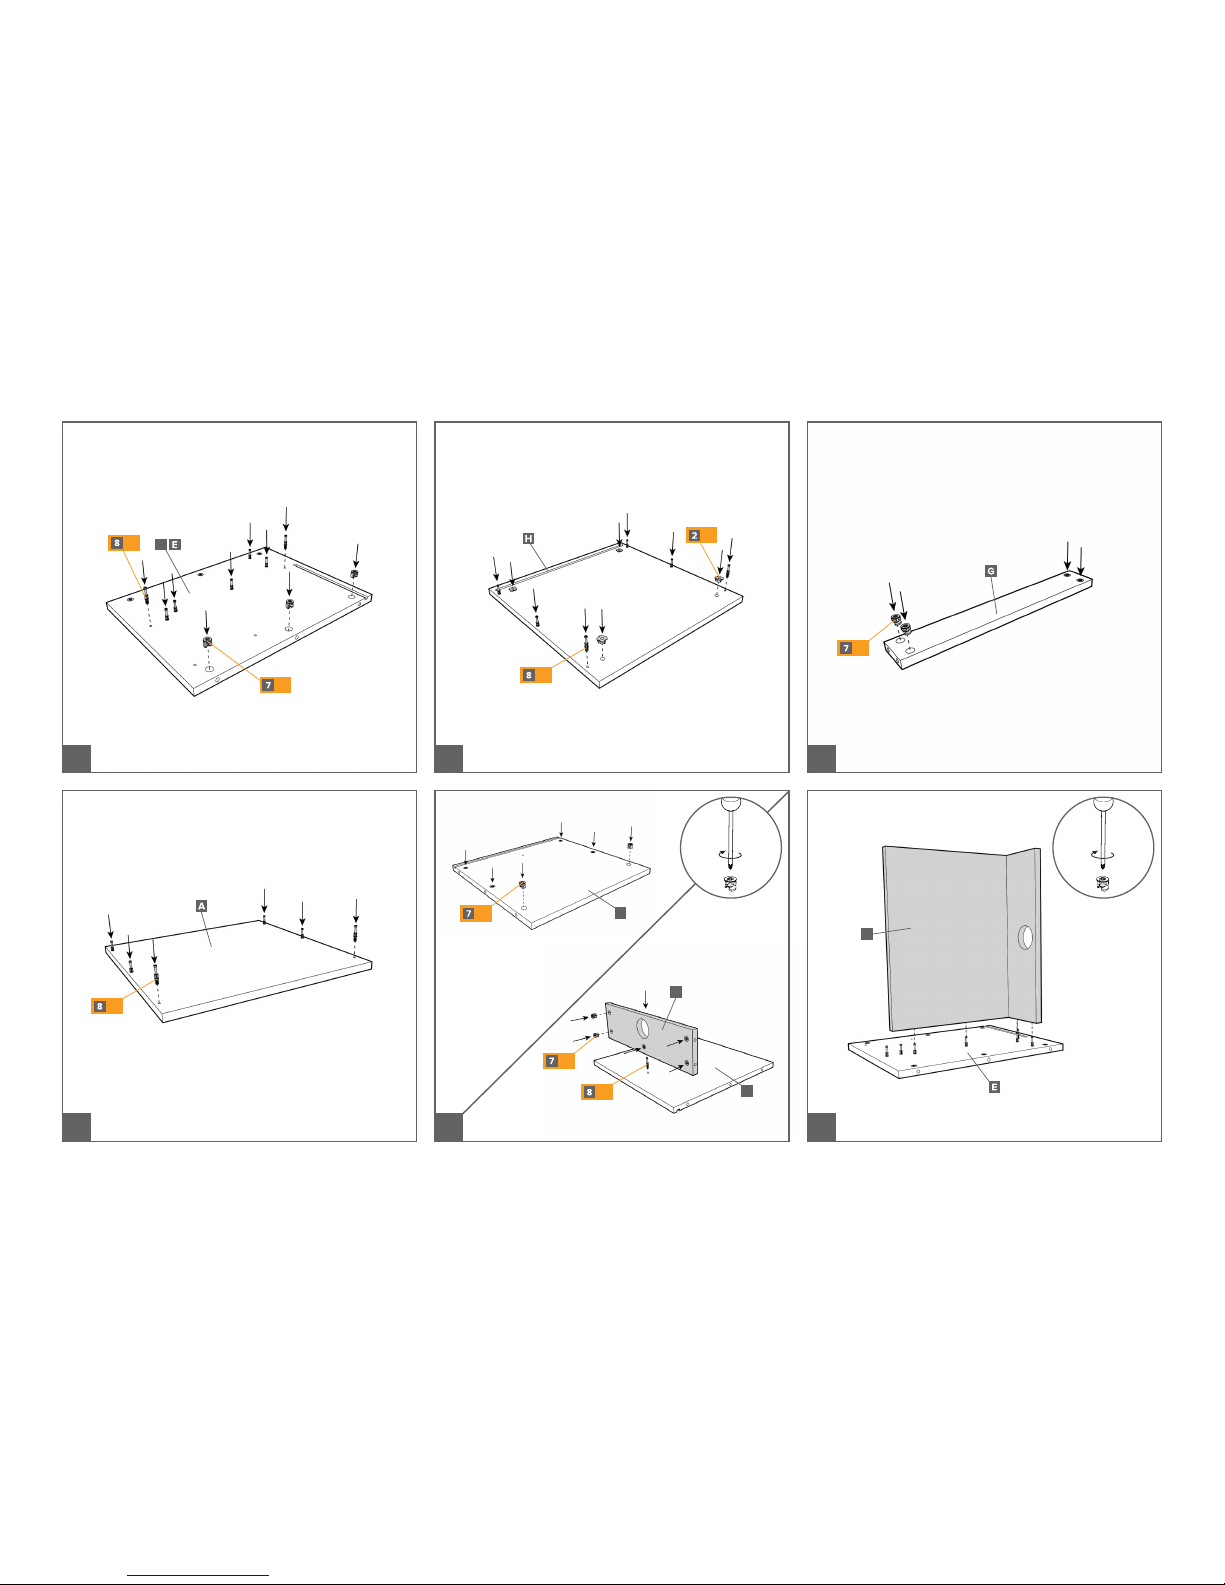
Apply to both panels.
(Shown from underneath).
Use hammer to tap T-nuts (2) into place.
x6
x6
x6
x6
x4
x4
5 6
B
C
C
Lay panel (E) on a flat surface.(Shown from top).
(Shown from bottom).
x1
Page 3
SPR_INSTRUC_BU_05.2016www.spacepro.co.uk/instructions-2/
7
8 9
10
Page 3 of 5
11 12
F
x4
x2
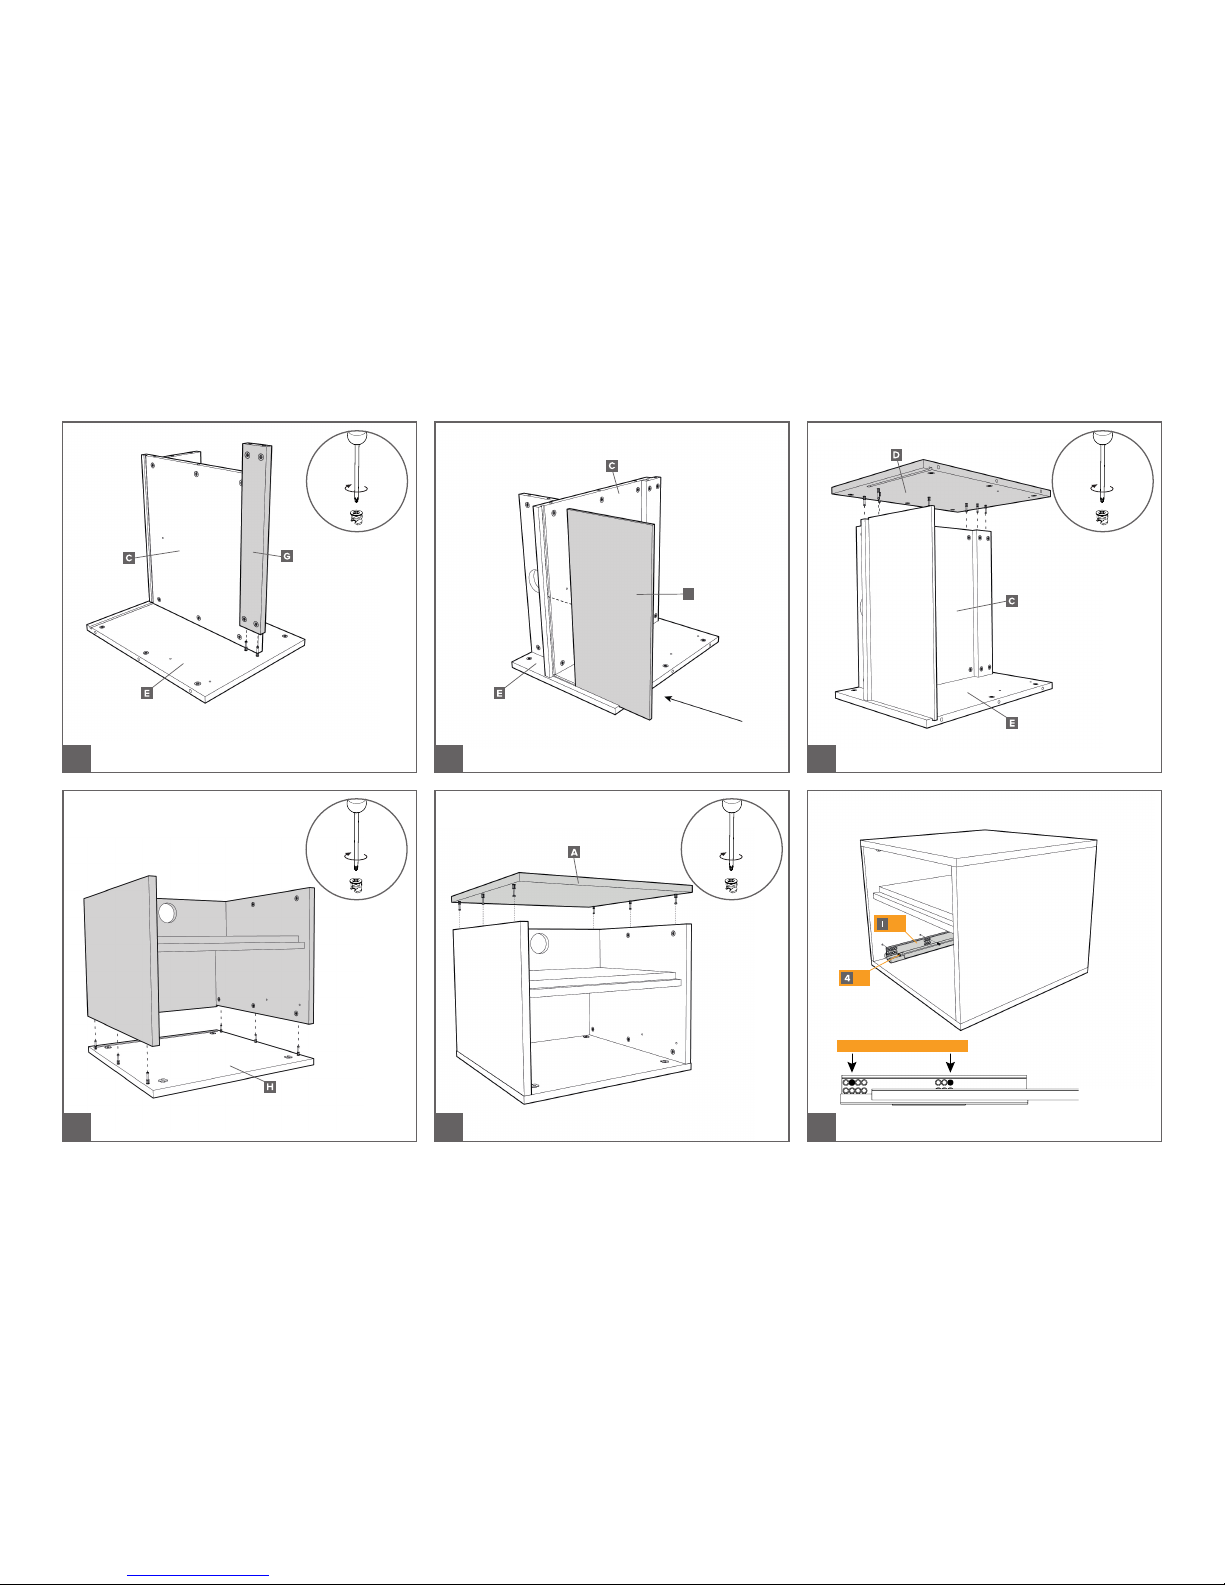
Screw through holes on both sides.
FIX THROUGH THESE HOLES
Back panel
Bottom panel
Top panel
Lay panel (H) on a flat surface.
Page 4
SPR_INSTRUC_BU_05.2016www.spacepro.co.uk/instructions-2/
13
14
15
16
Page 4 of 5
x4
x4
x4
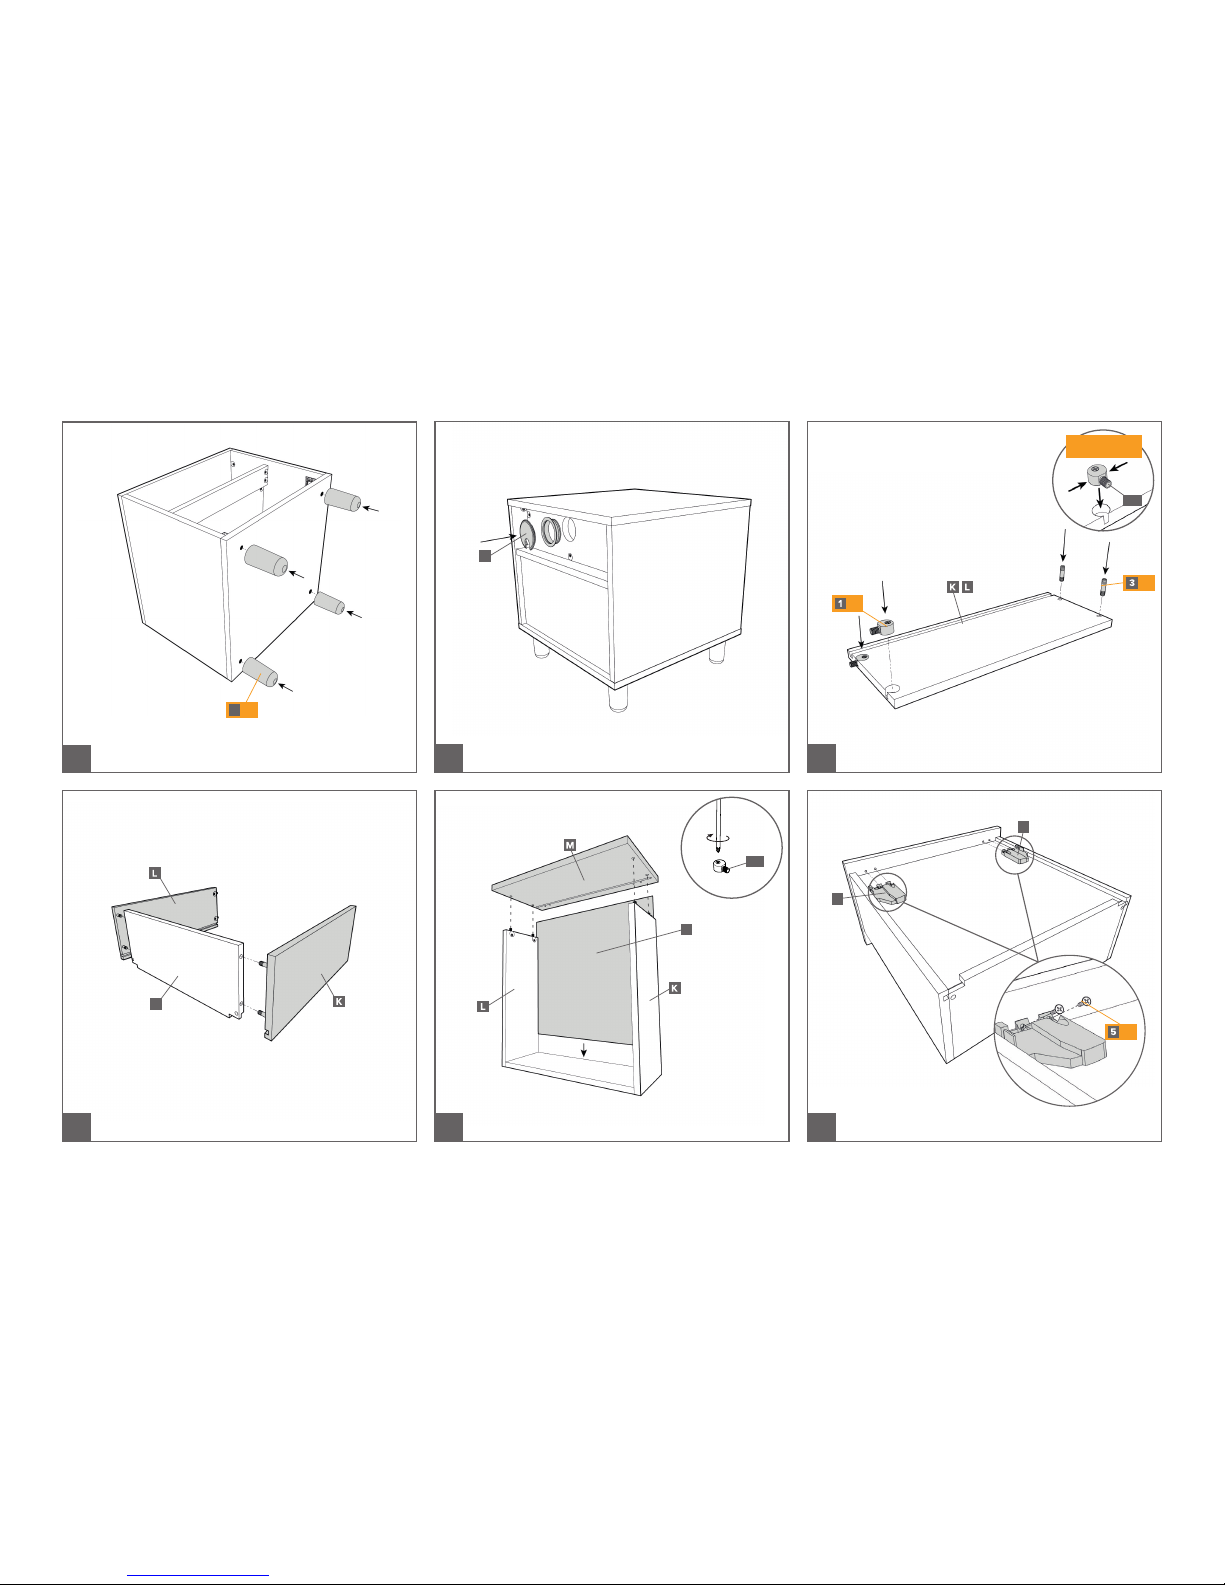
Lay the product on its back and then insert legs into the
holes and turn until tight.
Push/tap sides (L&K) onto back panel (J).
Insert the ring from the cable hole plug (6)
first, then apply the cover.
Tap plastic dowels gently into place with a hammer
(Repeat on all drawer sides).
17 18
x4
P
6
J
O
N
N
SQUEEZE SIDES
THEN INSERT
PIN
PIN
Drawer back
Repea t on all d rawers . (Drawer shown from underneath).
Page 5
SPR_INSTRUC_BU_05.2016www.spacepro.co.uk/instructions-2/
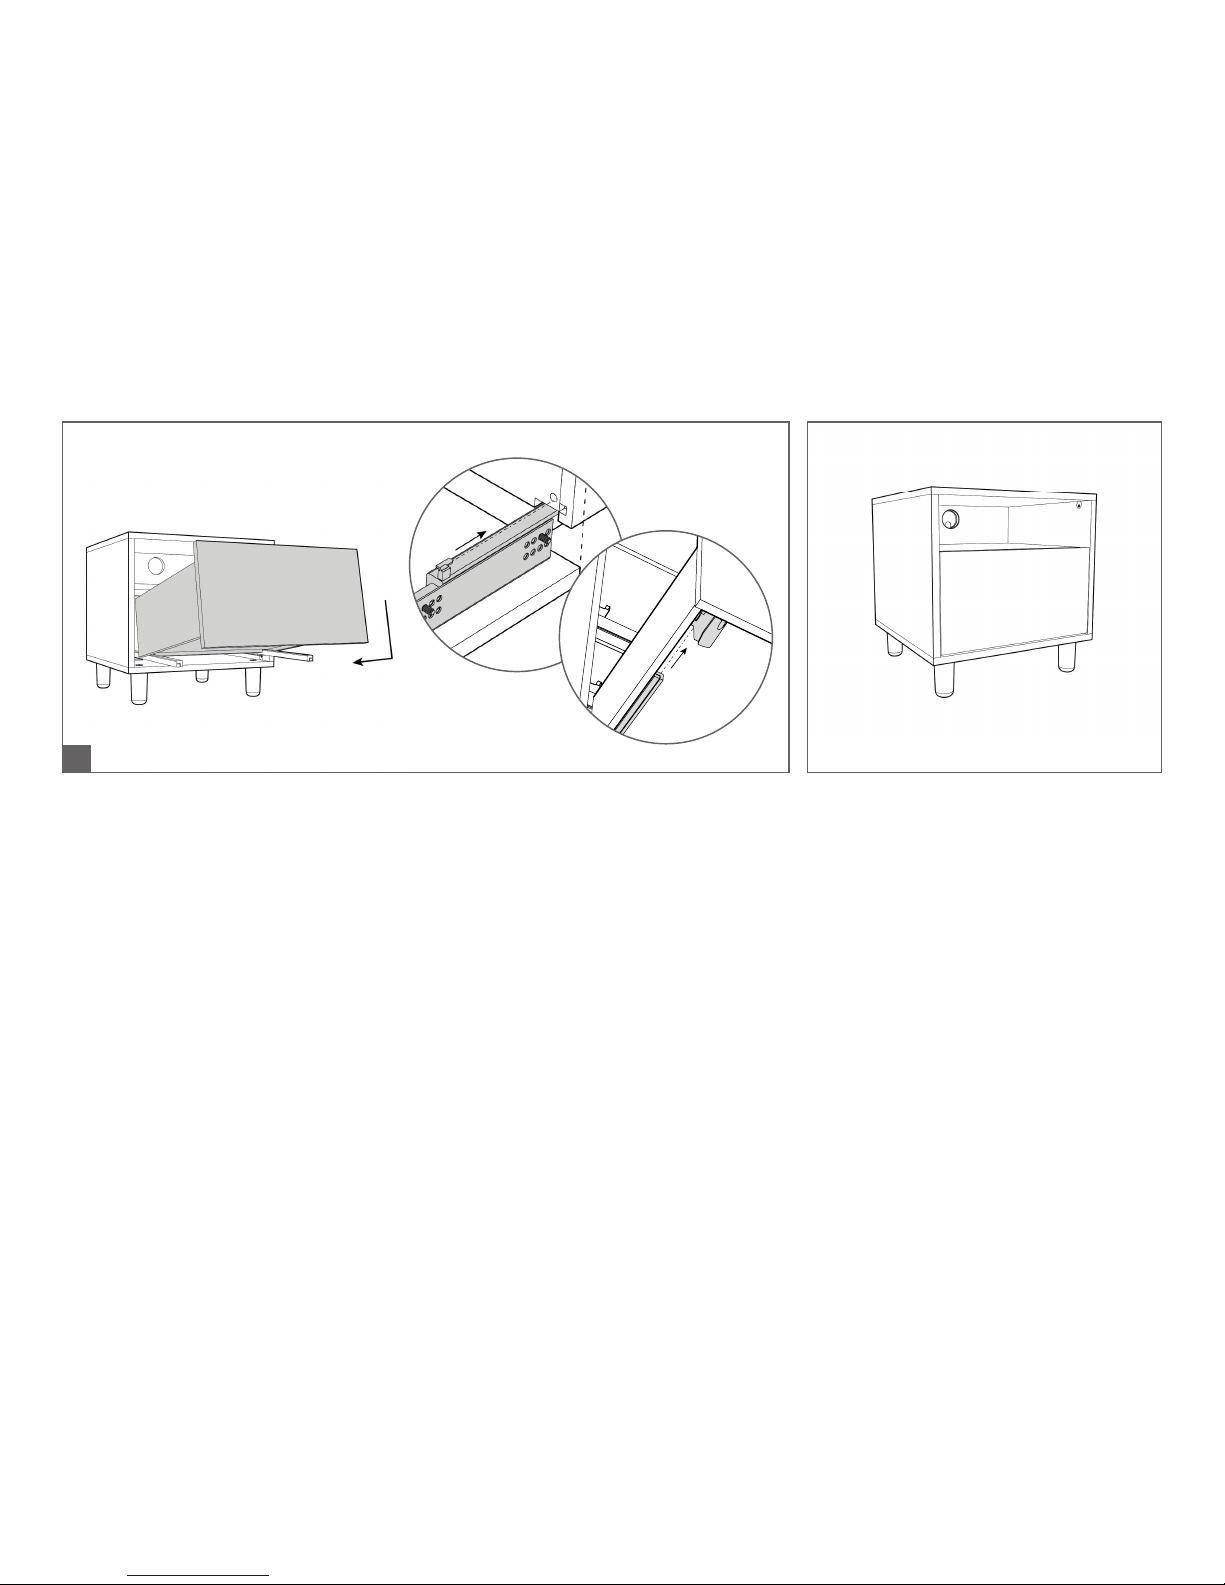
19
Page 5 of 5
1
2
1 – Slide the drawers so that the prong goes into the hole in the back of the drawer.
2 – Pull the sliders forward, until you hear a click, repeat on both sides.
 Loading...