

Page 1
WARNING
MODEL: PRF-100 PRF-150
Radon Mitigation Fan
INSTALLATION
CAUTION
CLEANING & MAINTENANCE
OPERATION
1. For general ventilating use only. Do not use to exhaust hazardous or explosive materials and vapors.
2. To avoid motor bearing damage and noisy and/or unbalanced impellers, keep drywall spray, construction dust,
etc. off power unit.
3. Please read specification label on product for further information and requirements.
The motor is permanently lubricated and never needs oiling.
Use an on/off switch to operate this fan. See “WIRING DIAGRAM” for details.
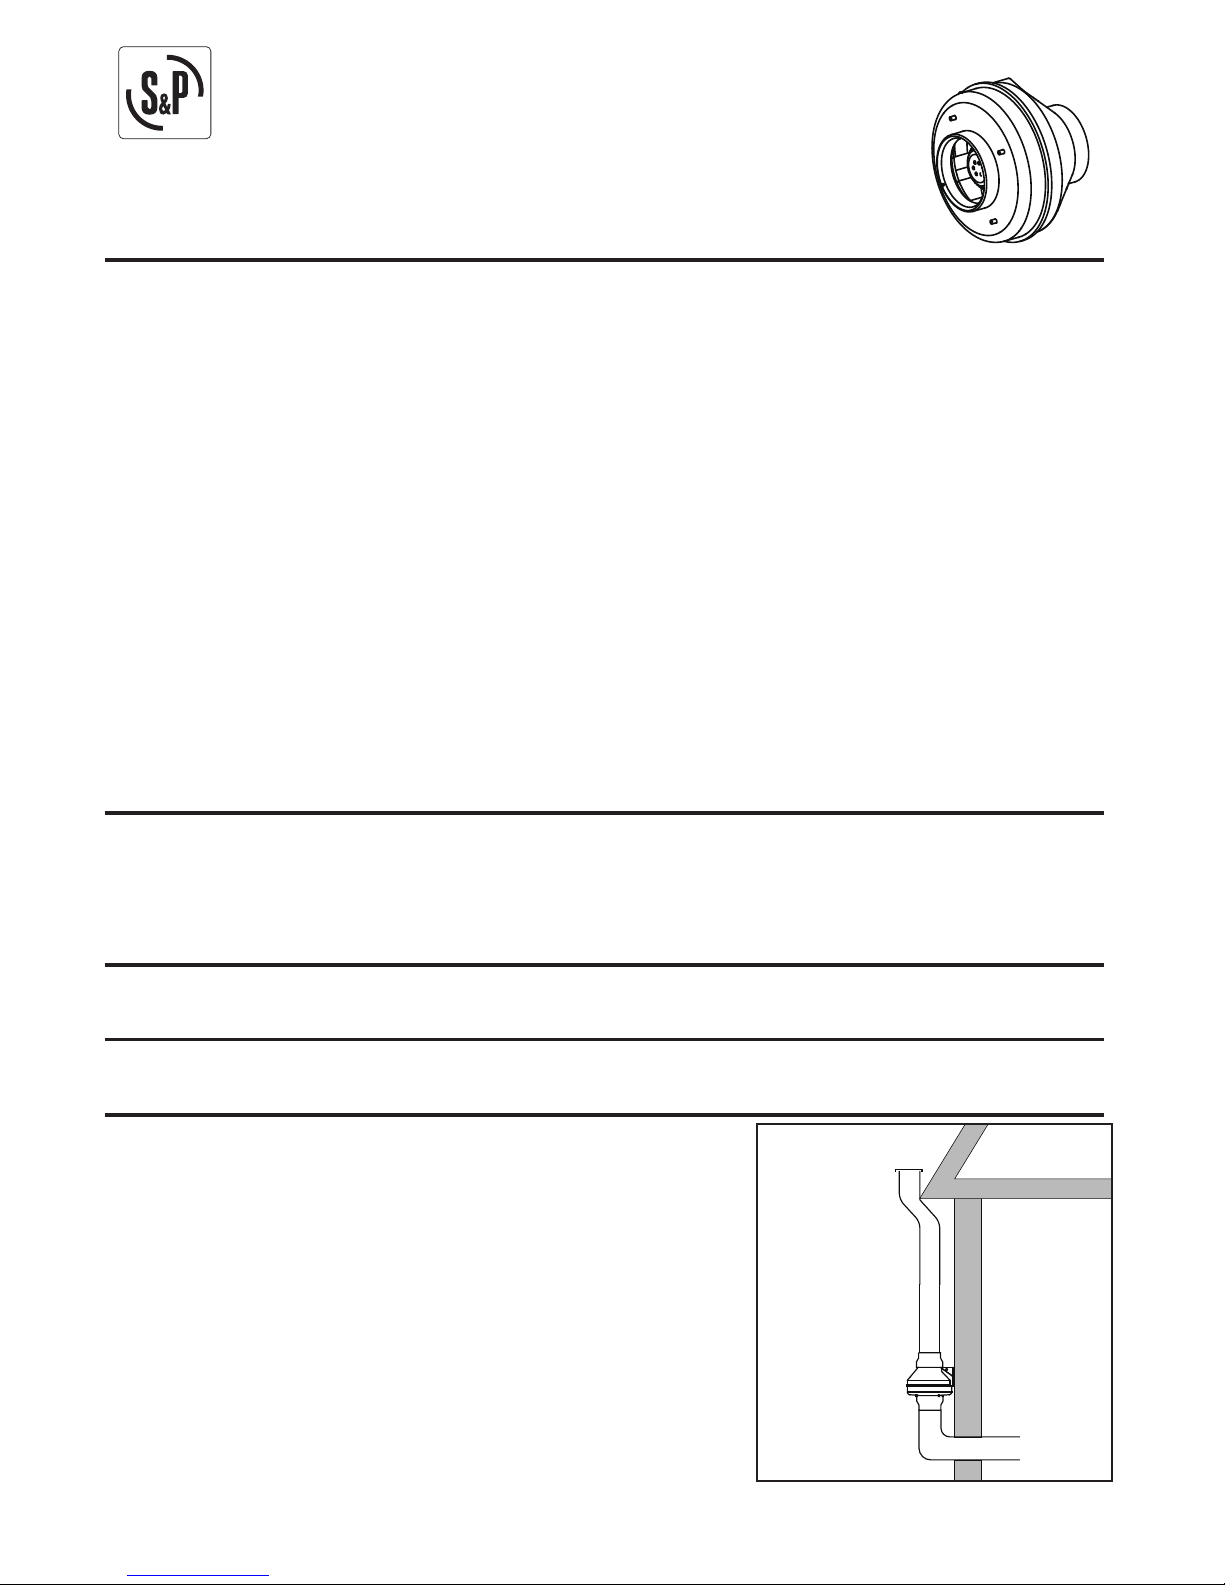
The Fan may be mounted indoors or outdoors.
The fan may be mounted directly on the system duct or mounted
with mounting bracket.
OUTDOOR INSTALLATION
When mounting directly on the system duct assure that the fan does
not contact any building surface to avoid vibration noise. Mount the
fan vertically with outlet up.
READ AND SAVE THESE INSTRUCTIONS
Installer: Leave this manual with the homeowner.
1
TO REDUCE THE RISK OF FIRE, ELECTRIC SHOCK, OR INJURY TO PERSONS, OBSERVE THE
FOLLOWING:
1. Use this unit only in the manner intended by the manufacturer. If you have questions, contact the
manufacturer.
2. Before servicing or cleaning unit, switch power off at service panel and lock the service disconnecting
means to prevent power from being switching on accidentally. When the service disconnecting means cannot
be locked, securely fasten a prominent warning device, such as a tag, to the service panel.
3. Installation work and electrical wiring must be done by a qualified person(s) in accordance with all
applicable codes and standards, including fire-rated construction codes and standards.
4. Sufficient air is needed for proper combustion and exhausting of gases through the flue (chimney) of fuel
burning equipment to prevent backdrafting. Follow the heating equipment manufacturer’s guideline and safety
standards such as those published by the National Fire Protection Association (NFPA), and the American
Society for Heating, Refrigeration and Air Conditioning Engineers (ASHRAE), and the local code authorities.
5. When cutting or drilling into wall or ceiling, do not damage electrical wiring and other hidden utilities.
6. Ducted fans must always be vented to the outdoors.
7. Acceptable for use over a tub or shower when connected to a GFCI (Ground Fault Circuit Interrupter) protected branch circuit .
8. This unit must be grounded.
9. To reduce risk of fire and to properly exhaust air, be sure to duct air outside – Do not vent exhaust air into
spaces within walls or ceilings or into attics, crawl spaces, or garages.
10. NEVER place a switch where it can be reached from a tub or shower.
11. Do not install this fan where the temperature may exceed 60 degrees Celsius (140 degrees Fahrenheit).
Cod:0060301412
Page 2
2
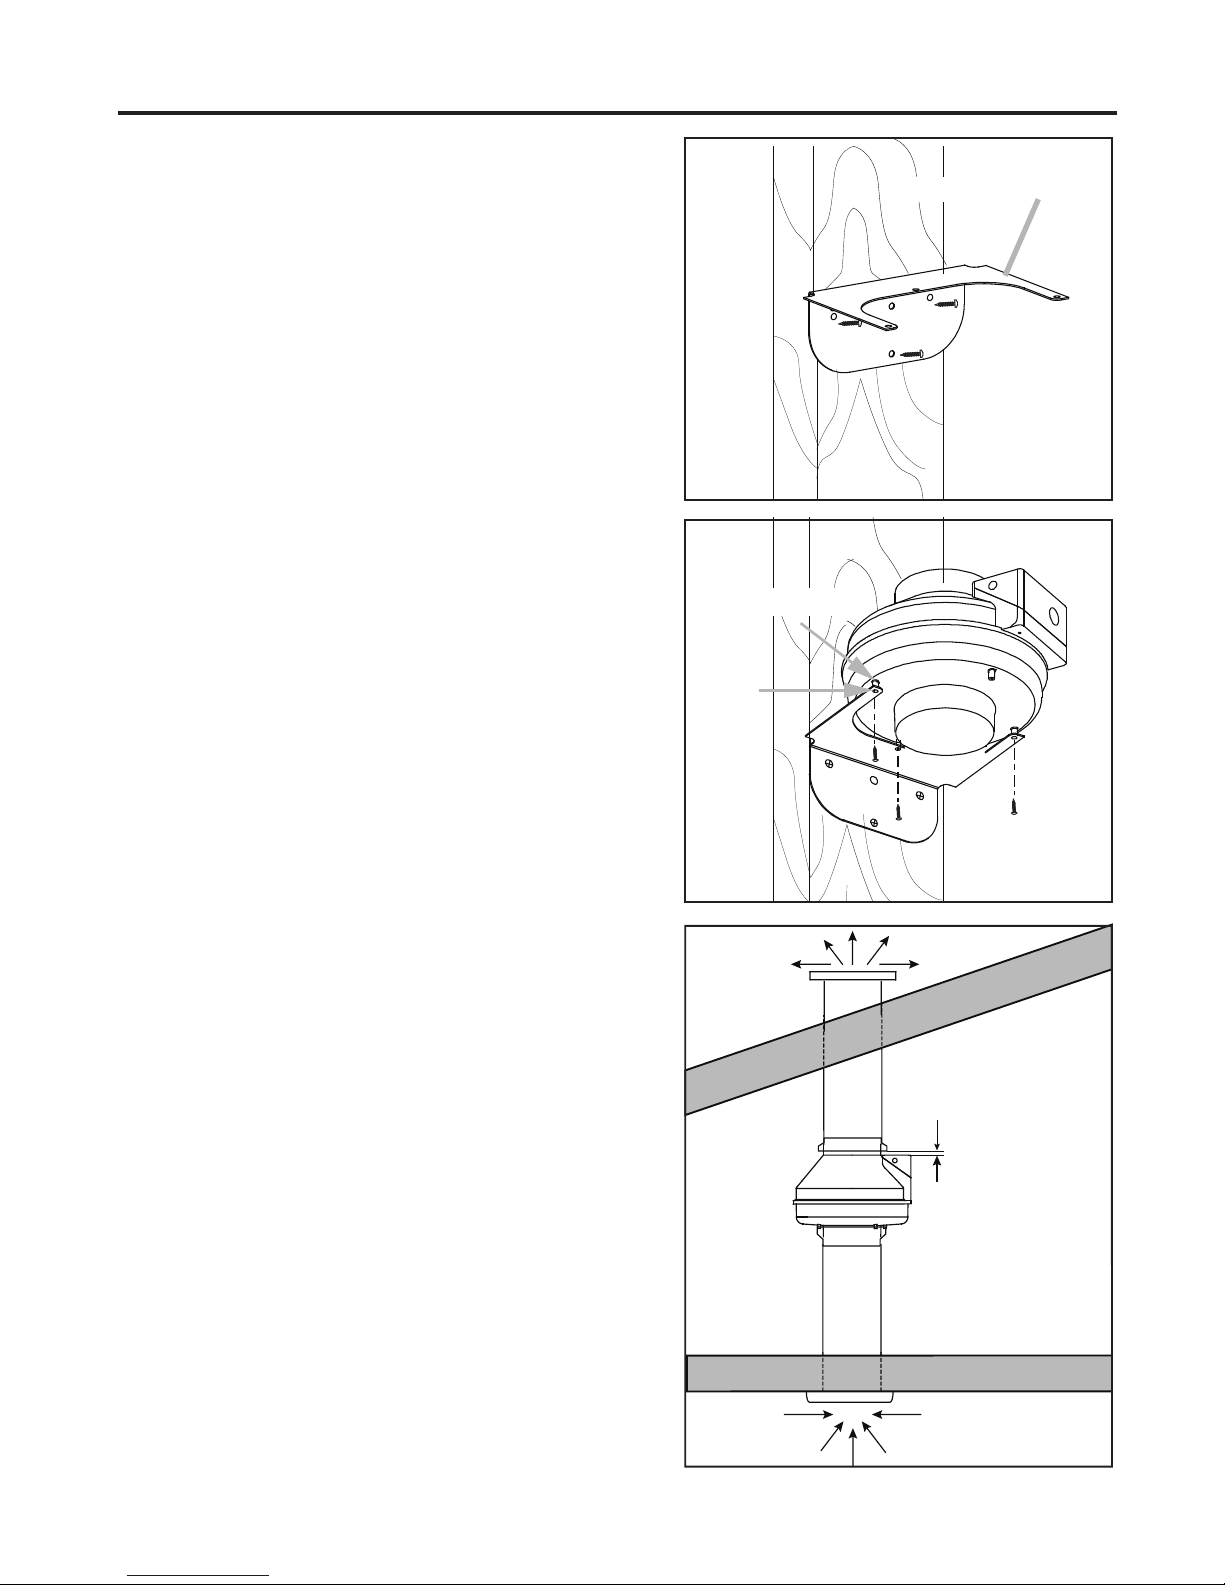
Insert the studs into the holes of the mounting bracket. Secure the
fan to the mounting bracket with self-tapping screws.The position
of the junction box should be convenient for wiring.
INSTALLATION
INDOOR INSTALLATION
Stud
Hole
Mounting Bracket
Select the location for fan mounting which minimizes noise
generated by fan operation,and allows sufficient access for
installation and maintenance. Secure the mounting bracket
to the support beam with screws.
Connect the ductwork. Use duct tape to secure all of
the ductwork connections so that they are air tight. A backdraft
damper installed at the outlet is highly recommended to prevent
cold air from entering the dwelling.
1/4"
Note: Install with enough clearance (1/4") between the coupling
and the top of the junction box to enable accessibility.
Page 3
3
INSTALLATION
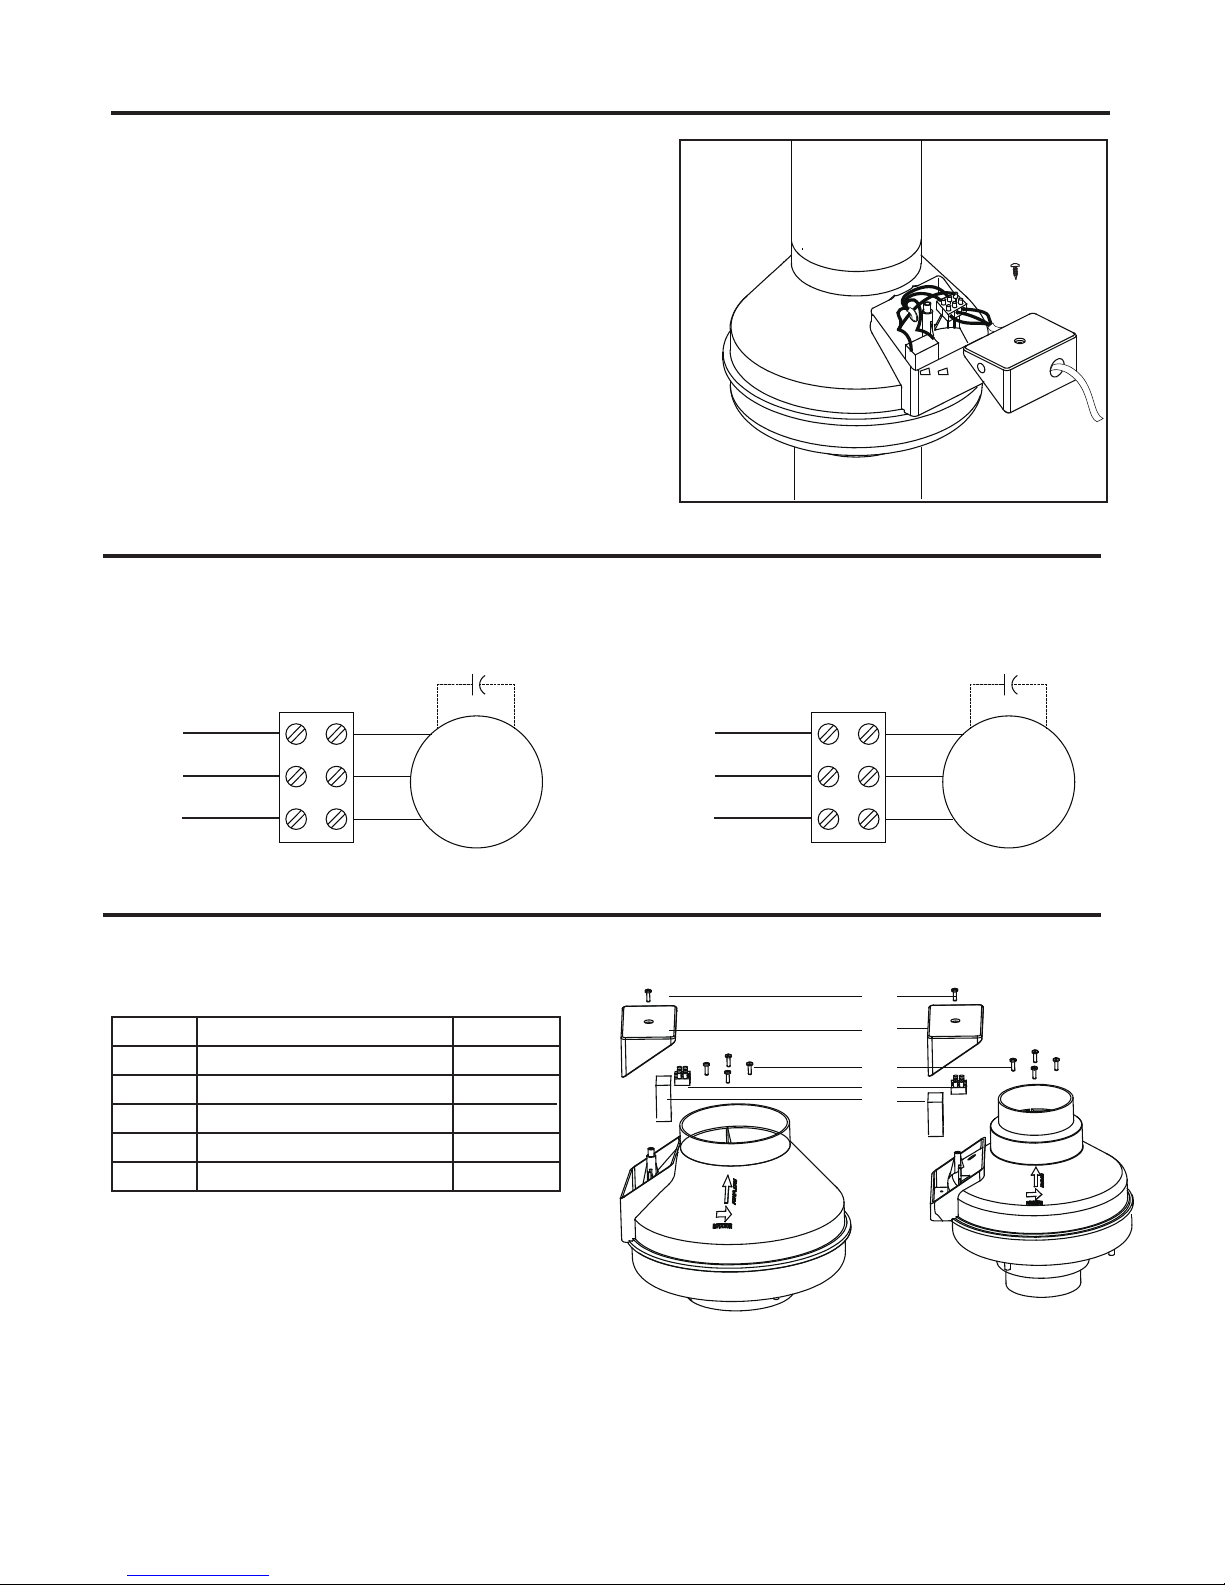
Remove junction box cover. Wire per Wiring Diagram
below.Replace the fan junction box cover use screws.
Run 120V AC house wiring to the location of the fan. Refer to the wiring diagram below, and connect
the wires as shown.
WIRING DIAGRAM
SERVICE PARTS
PART PART NAME Qty.
1
2
3
4
5
Screw
Screw
Motor capacitor
Junction box cover
1
1
4
1
1
1
2
3
4
5
Terminal block
PRF-150 PRF-100
BRN
LINE
IN
BLK
BLU
Motor
WHT
GRD
8uF
BRN
LINE
IN
BLK
BLU
Motor
WHT
GRD
10uF
PRF-100 PRF-150
Page 4

4
WARRANTY
S&P USA Ventilation Systems, LLC. & S&P Canada Ventilation Products, Inc. warrants to the original end user of its
products that our exhaust fans will be free from defects in materials and workmanship for a period of Five (5) years from
the date of original purchase. THERE ARE NO OTHER WARRANTIES, EXPRESSED OR IMPLIED, INCLUDING BUT
NOT LIMITED TO IMPLIED WARRANTIES OF SUITABILITY FOR A PARTICULAR PURPOSE.
During this five year period, S&P will, at its option, repair returned products or parts, or provide replacement products or
parts, without charge, for any product or part which is found to be defective under normal use.
This warranty does not cover normal maintenance and service or any parts that have been subject to misuse, negligence,
accident, improper maintenance or repair, faulty installation or installation contrary to recommended installation instructions.
S&P’s obligation to repair or replace, at S&P’s option, shall be the purchaser’s sole and exclusive remedy under this
warranty. No labor or materials are covered by this warranty. S&P shall not be liable for incidental damages arising out of
or in connection with product use or performance.
This warranty gives you specific legal rights. You may also have other rights which vary from state to state.
To qualify for warranty service, you must notify S&P at the address or telephone number stated below, provide the model
number and part identification, and describe the nature of any defect in product or part. You may be required to ship a
defective part to S&P. There will be no charge for shipping repaired or replacement parts from S&P to you if your address
is in the United States or Canada. At the time of requesting warranty service, you must present evidence of the original
purchase date.
S&P USA Ventilation Systems,LLC.
6393 Powers Avenue Jacksonville, FL 32217
P. 904-731-4711
F. 904-731-8322
www.spvg-northamerica.com
S&P Canada Ventilation Products, Inc.
5600 Ambler Drive Mississauga, ON L4W 2K9
P. 866-733-0233
F. 866-358-5346
www.solerpalaucanada.com
 Loading...