

Southwestern Bell InLine Plus 2-9193 Use And Care Manual
2-9193
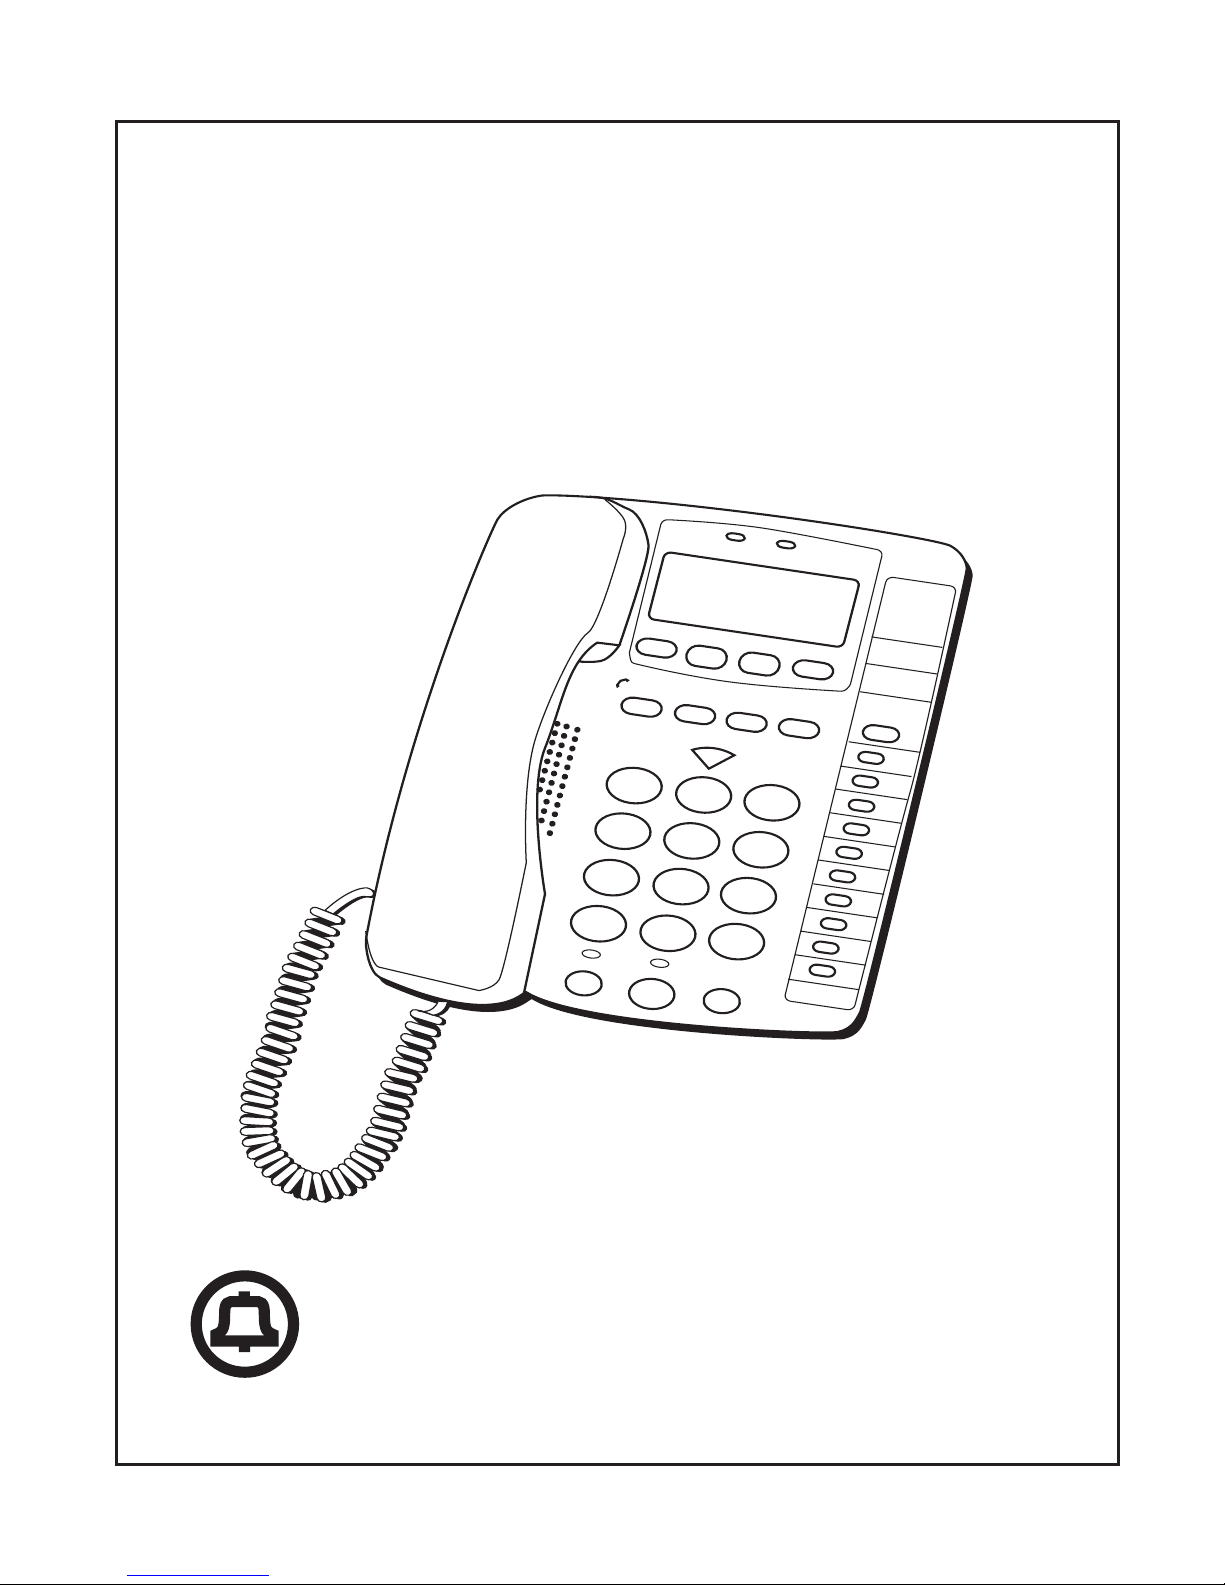
InLine® Plus
Caller ID on Call Waiting
Speakerphone
Use and Care Guide
Southwestern Bell
1
2
3
4
5
6
7
8
9
10
F
LA
S
H
P
H
O
N
E
N
O
.
A
R
E
A
C
O
D
E
H
O
LD
S
P
E
A
K
E
R
P
H
O
N
E
R
E
D
IA
L
M
E
M
D
IA
L
V
O
L
U
M
E
S
T
O
R
E
M
E
N
U
D
IA
L O
P
T
IO
N
S
D
E
L
E
T
E
R
E
V
IE
W
D
IA
L
N
E
W
C
A
LL
N
E
W
M
E
S
S
A
G
E
1 2 3
4 5 6
7 8 9
0 #
*
ABC
D
EF
G
H
I JK
L M
N
O
R
S
TU
V Y
Z
PO
W
X
T
O
N
E
O
P
E
R

2
FCC NUMBER IS LOCATED ON THE CABINET BOTTOM
REN NUMBER IS LOCATED ON THE CABINET BOTTOM
SAFETY INFORMATION
1. Read all instructions in this manual.
2. Observe all warnings and instructions marked on your
product.
3. Do not use your product near water, or when your hands are
wet. If the product comes into contact with any liquids, immediately
unplug the power supply. Do not plug your product back in until you
have thoroughly wiped it dry.
4. Unplug your product from all telephone jacks before cleaning.
Clean exposed areas with a soft, damp cloth. DO NOT USE LIQUID
OR AEROSOL CLEANERS TO CLEAN THIS PRODUCT.
5. Install the product in a secure location, where no one will step
or trip over the phone line or power cord.
6. Do not place objects on the phone or power cords which may
damage them.
7. If the product is not operating normally or if it is damaged,
please refer to the Limited Warranty. In all instances, do not
open the plastic housing. This may expose you to dangerous
electrical shock and other risks. Opening the plastic case will void
your warranty.
8. During thunderstorms, avoid using telephones except cordless
ones. The chances of electric shock from lightening does exist.
9. Never touch uninsulated telephone wires or terminals unless
the telephones lines have been disconnected.
10. Do not overload wall outlets and extension cords as this can
result in electrical shock.
Save these instructions

3
WARNING:
TO PREVENT FIRE
OR ELECTRICAL SHOCK HAZARD,
DO NOT EXPOSE THIS PRODUCT
TO RAIN OR MOISTURE.
SEE MARKING ON BOTTOM / BACK OF PRODUCT
CAUTION
RISK OF ELECTRIC SHOCK
DO NOT OPEN
THE EXCLAMATION
POINT WITHIN THE
TRIANGLE IS A
WARNING SIGN
ALERTING YOU OF
IMPORTANT
INSTRUCTIONS
ACCOMPANYING
THE PRODUCT.
THE LIGHTNING
FLASH AND ARROW HEAD WITHIN THE
TRIANGLE IS A
WARNING SIGN
ALERTING YOU OF
"DANGEROUS
VOLTAGE" INSIDE
THE PRODUCT.
CAUTION: TO REDUCE THE
RISK OF ELECTRIC SHOCK,
DO NOT REMOVE COVER
(OR BACK). NO USERSERVICEABLE PARTS INSIDE. REFER SERVICING
TO QUALIFIED SERVICE
PERSONNEL.
TABLE OF CONTENTS
SET UP ............................................... 4
INSTALLATION ...................................... 4
WALL MOUNT INSTRUCTIONS ........... 5
SETTING UP YOUR UNIT .......................6
FACTORY PRESETS .............................6
FEATURES ............................................ 8
USING THE PHONE ............................. 10
PULSE AND TONE DIALING .................. 10
RECEIVING A PHONE CALL .................. 10
PLACING A PHONE CALL .....................10
SPEAKERPHONE BUTTON ..................... 10
DURATION COUNTER ..........................11
TONE BUTTON ..................................11
AUTOMATIC MEMORY ......................... 12
TO STORE A PHONE NUMBER IN
MEMORY: ................................... 12
TO DIAL A PHONE NUMBER IN
MEMORY: ................................... 12
VOLUME BUTTON ..............................12
REDIAL BUTTON ................................ 13
HOLD BUTTON ..................................13
FLASH BUTTON ..................................13
CALL WAITING DISPLAY ...................... 13
USING THE CALLER ID FUNCTION ........ 14
MESSAGE LIGHT .................................14
MESSAGE WAITING ............................. 14
IF YOUR SERVICE IS FSK: .................14
RECEIVING CALLS ...............................15
IF YOU ARE IN AN AREA WHERE AN FSK
SIGNAL IS NOT AVAILABLE: ............ 15
REVIEWING CALLS ..............................16
DELETING CALLS ...............................16
CALLBACK .........................................17
DIAL OPTIONS BUTTON ..................18
MESSAGE ERROR ................................ 19
FORWARD CALL .................................. 19
TOLL CALL .......................................20
NO DATA SENT ..................................20
PRIVATE CALLS ..................................20
UNKNOWN CALLS ...............................21
GENERAL PRODUCT CARE .................... 21
QUESTIONS AND TROUBLESHOOTING ..... 22
4
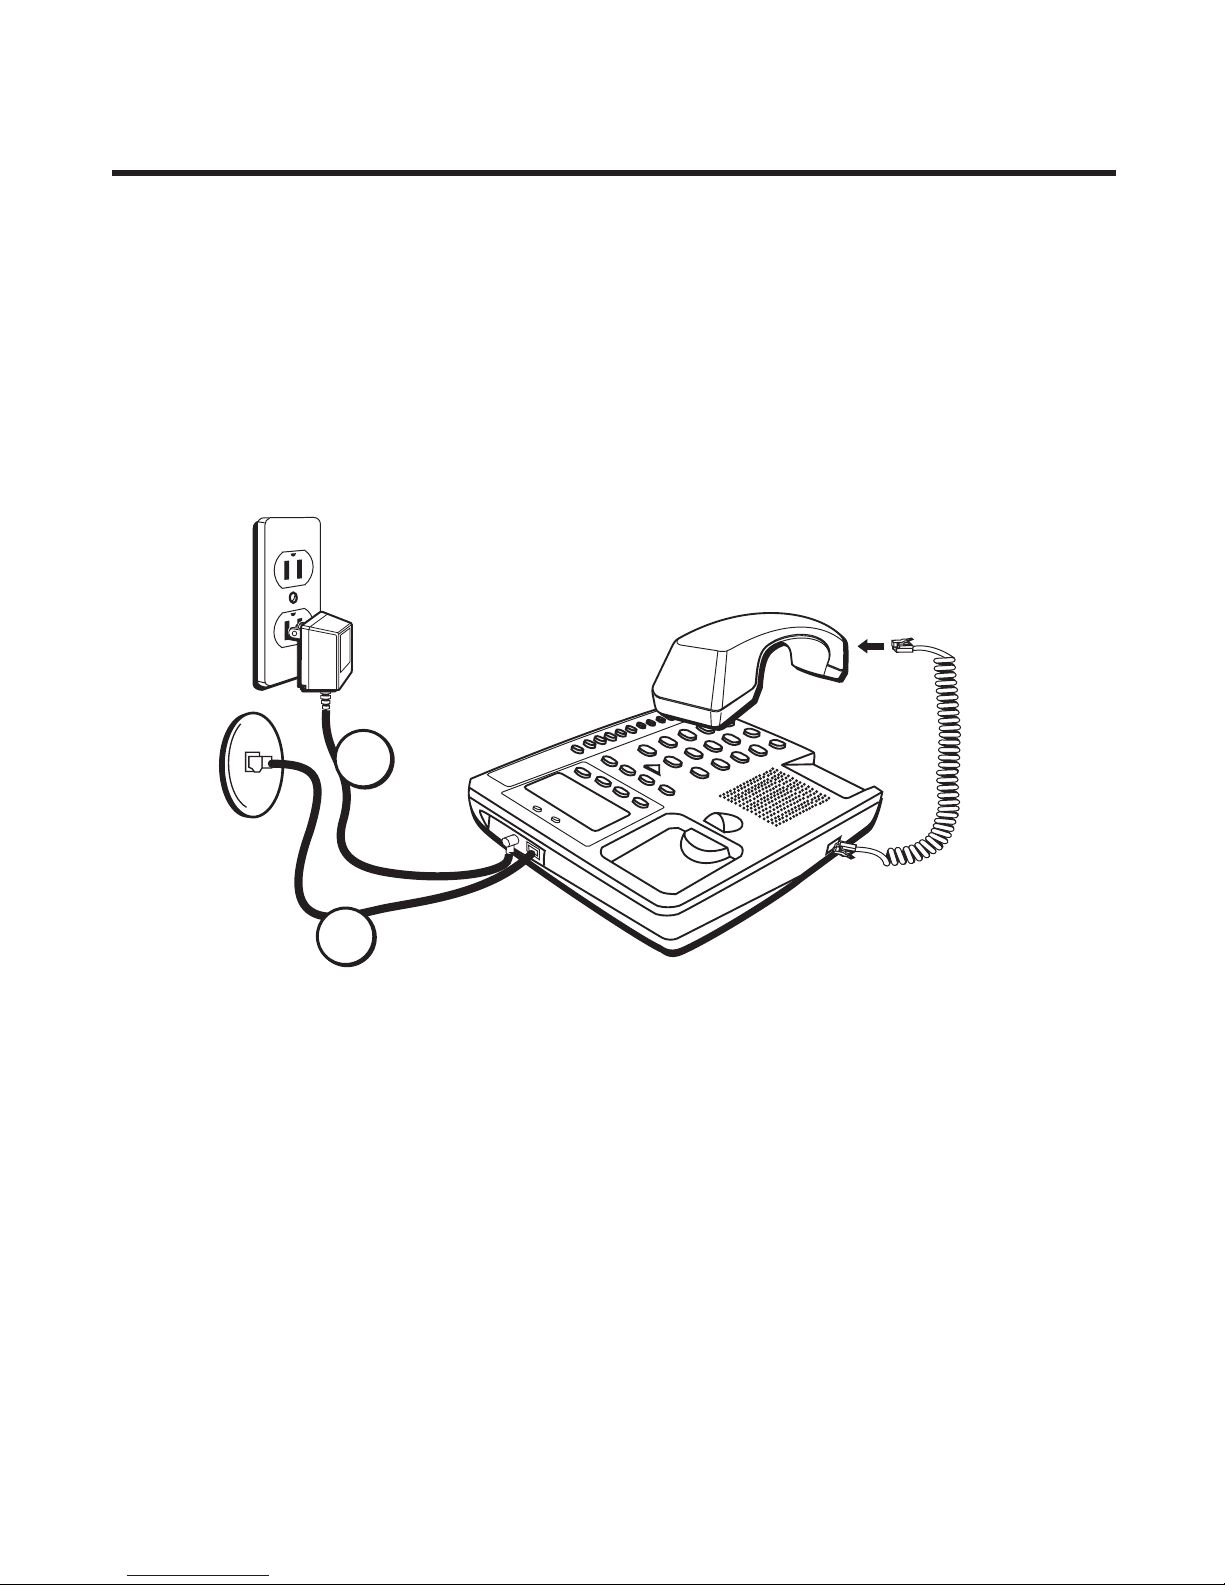
SET UP
1. Connect the adapter. Plug the large part of the adapter into the wall
outlet and the adapter tip to the jack at the rear side of unit. (Use only
9V DC, 300mA, Center negative Class 2 adapter.)
2. Connect the telephone line cord.
A. To connect without an answering machine.
• Take the new line cord supplied to connect the PHONE jack of
your new caller ID phone to the modular wall jack.
1
2
B. To connect with an existing answering machine.
• Use the existing line cord supplied to connect the LINE jack of
your answering machine to the wall modular line jack.
• Take the new line cord supplied to connect the telephone’s
jack of your new caller ID phone to the PHONE jack of your
answering machine.
• Set your answering machine to answer the phone after 2 or
more rings.
5
3. Follow the procedure
"Setting Up Your Unit
” to set up your unit.
4. Place the unit on a flat table or mount it onto a wall. If you desire to
place it onto a wall, please use the wall mount bracket and short line
cord supplied to accomplish the wall mounting.
3
Speaker Volume Low Med Hi Ringer Off Hi Low Pulse Tone
2
1
H
O
VOLUM
DE
L
NEW
C
*
GH
RS
PO
TO
N
Handset
Hook
4
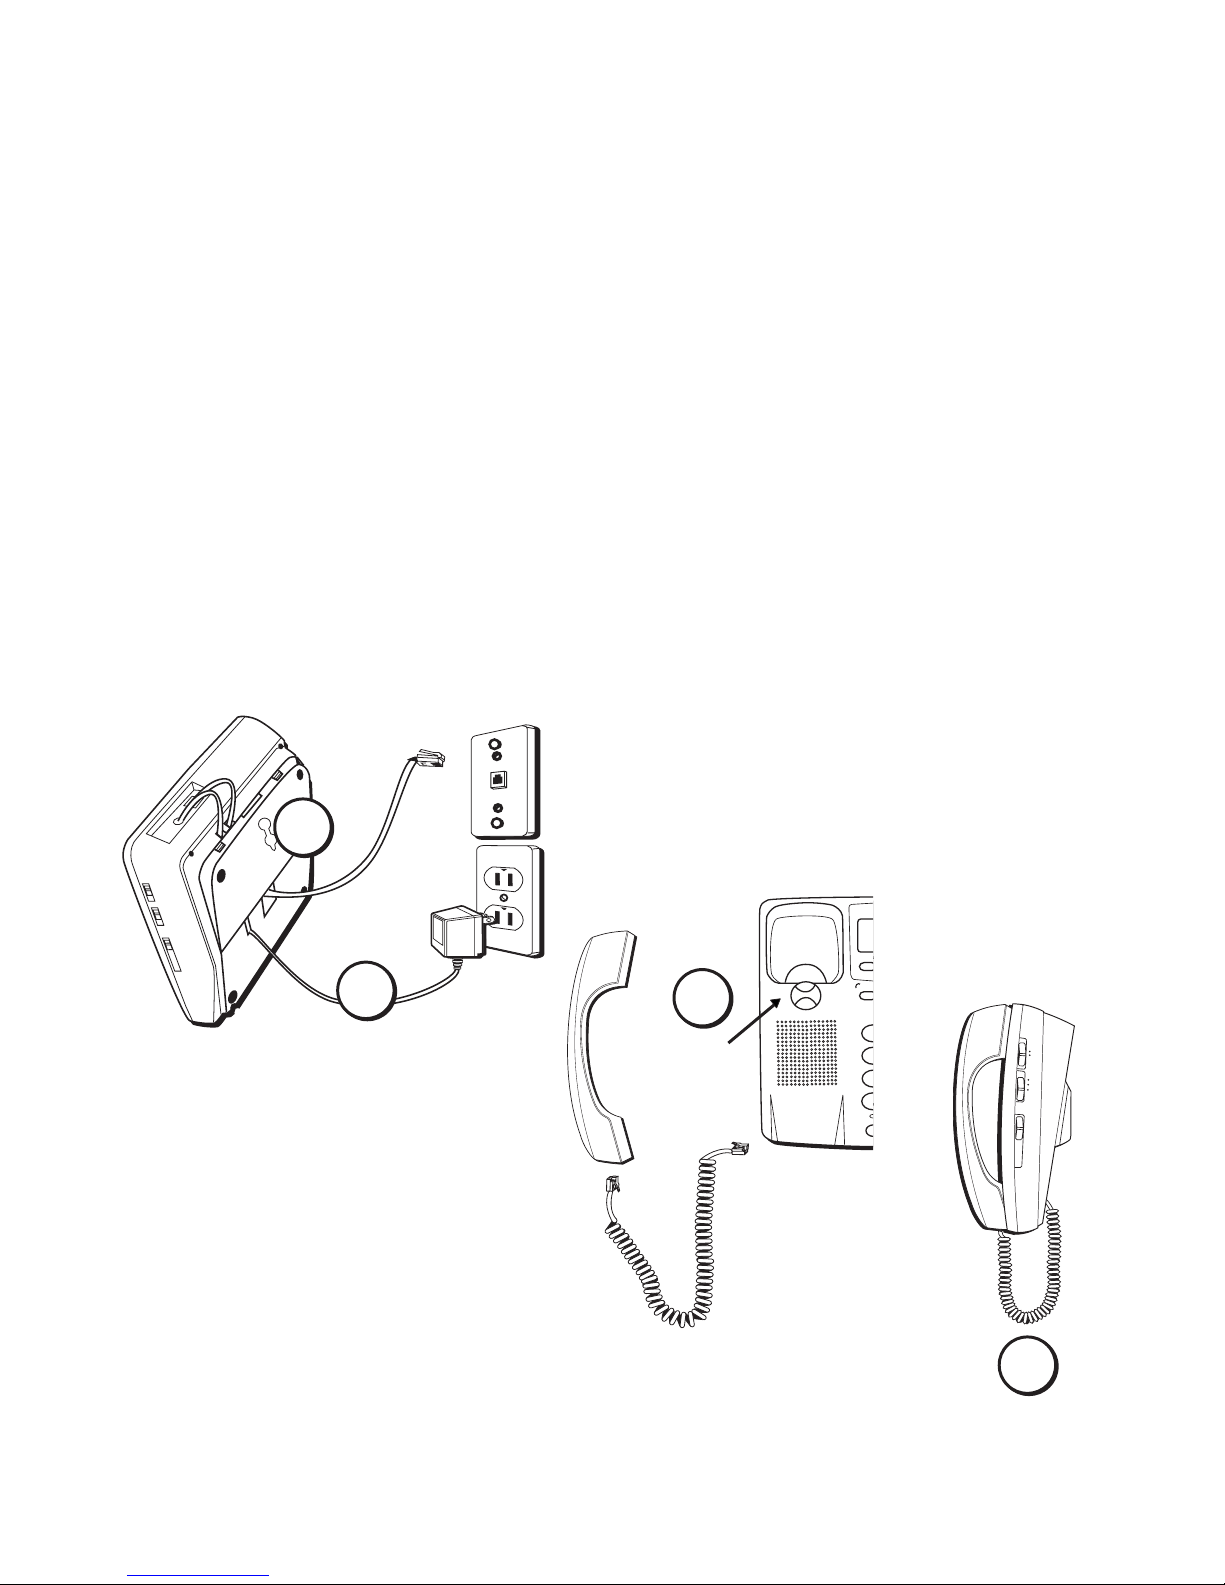
WALL MOUNT INSTRUCTIONS
1. Remove wall mount bracket and route cords as shown in diagram
below.
2. Connect the adapter and the line cord. See Steps 2 & 3 on preceding
page for specific instructions.
3. Rotate the handset hook, plug the coiled cord into the handset, and
then plug the other end of the cord into the base.
4. Place the handset on the base.
6
SETTING UP YOUR UNIT
FACTORY PRESETS
The following table shows you the factory settings for your unit:
Display Setting
Language English
LCD Contrast 1
Area Code no setting
LDS Code 1
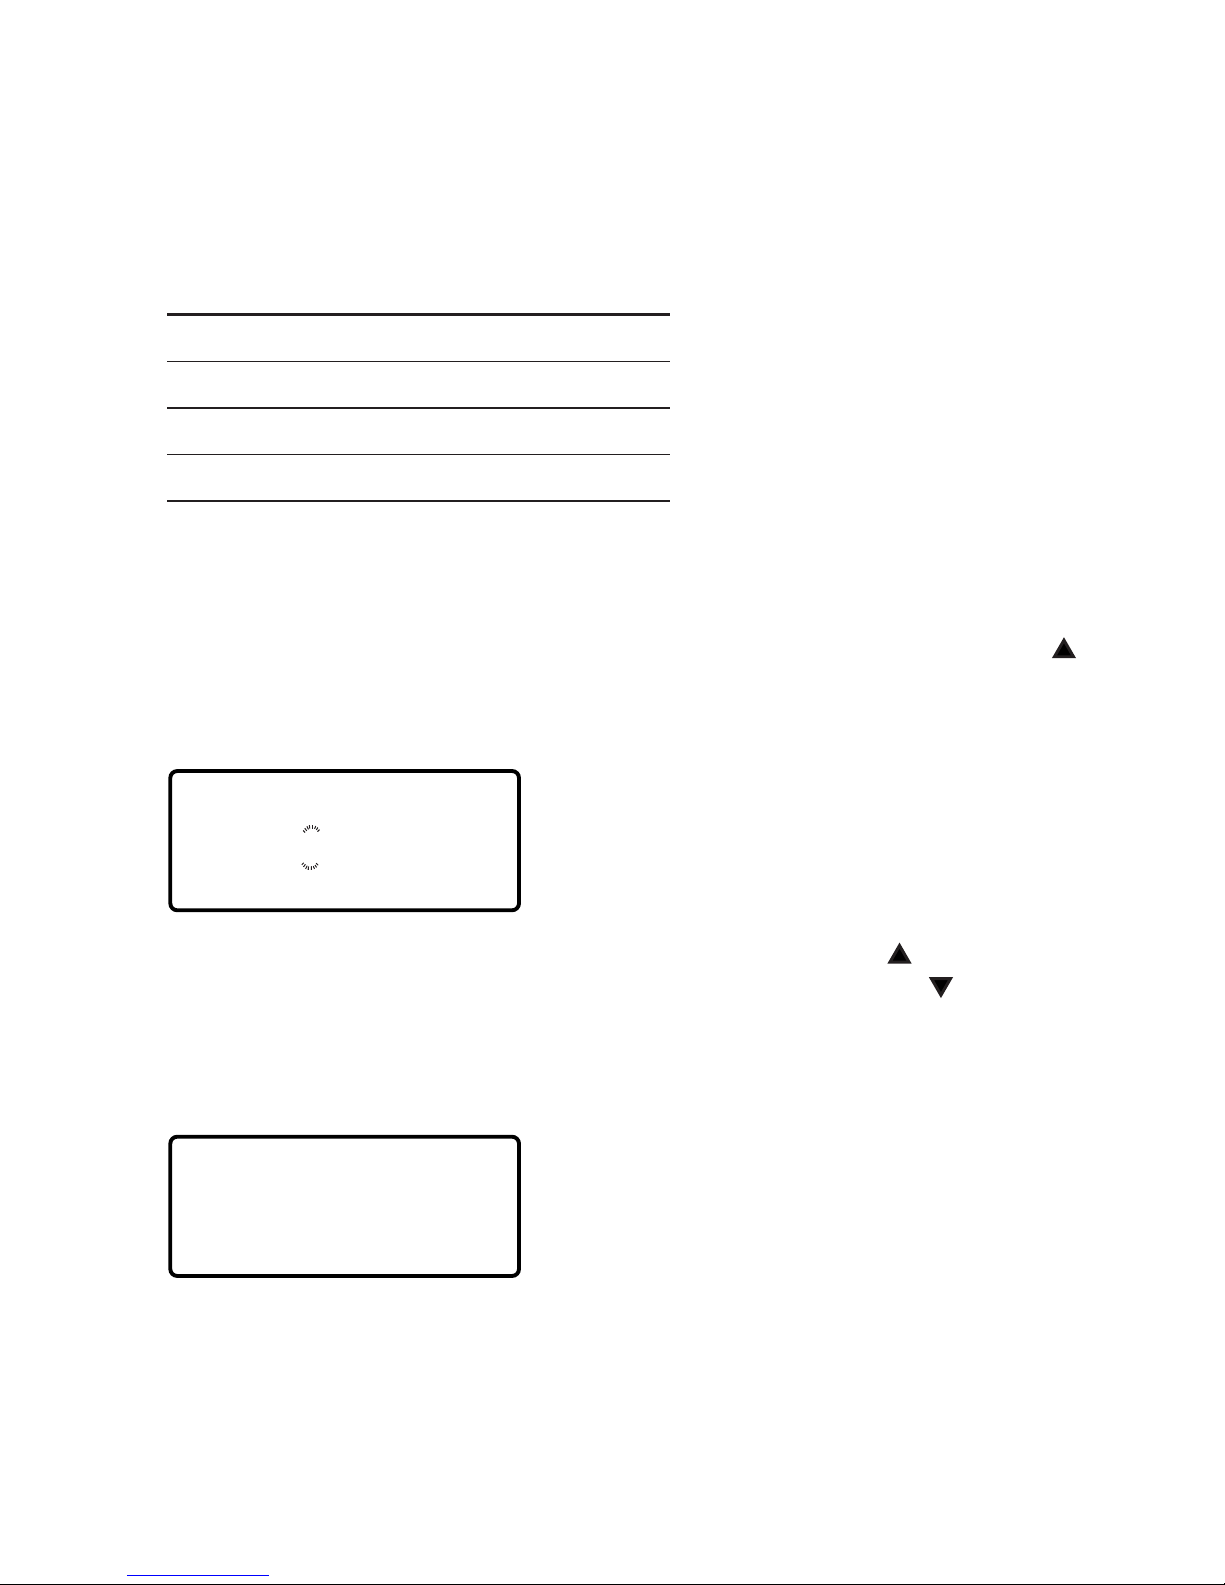
After the adapter is connected, the display will show as indicated below
for setting.
1. “
SET LANGUAGE
” appears on the display. Press the REVIEW UP ( )
button to select the language, E - English, F - French, S - Spanish, and
then press the DIAL button to confirm the selection.
12:00 1/01
E
AM
SET LANGUAGE
2. When “
LCD CONTRAST
” appears, press REVIEW UP ( ) to set the
contrast darker, and then you can press REVIEW DOWN ( ) to set the
contrast back to the preset. The preset value is “1” and “2” is darker.
When you are finished with this setting, press DIAL. The display will
indicate as shown below and is ready to let you set the area code.
12:00 1/01
2
AM
LCD CONTRAST
7
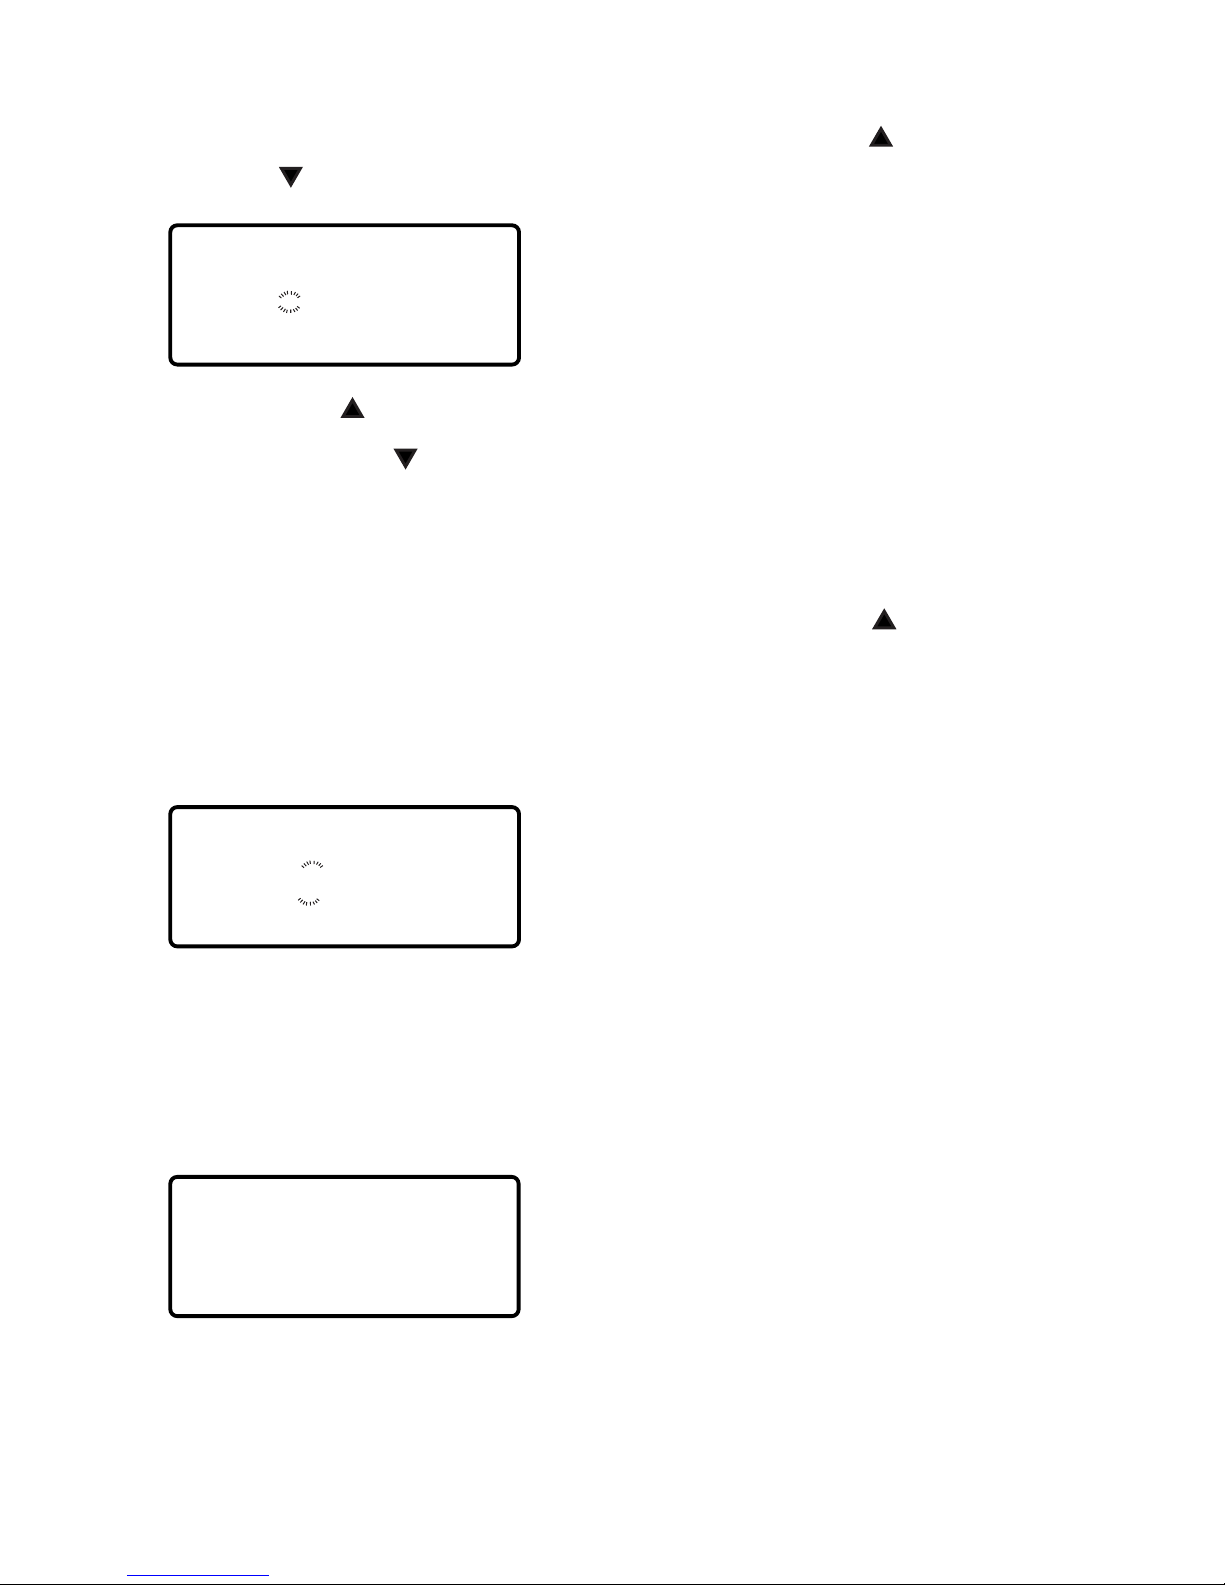
3. When “
SET AREA CODE
” appears, use REVIEW UP ( ) and REVIEW
DOWN (
) to set your local area code.
12:00 1/01
– – –
AM
SET AREA CODE
REVIEW UP ( ) button - to change the digit from -,0,1,2~9.
REVIEW DOWN (
) button - to move to the next digit.
When you are finished setting the local area code, press DIAL. The
display will indicate as shown below and will be ready to let you set
the LDS (long distance) code.
4. When “
SET LDS CODE
” appears, press REVIEW UP ( ) to change the
long distance code from -,0,1,2~9. When you are finished, press DIAL.
The display will indicate as shown (Stand-By Screen) and be ready to
receive incoming calls. You have to set the LDS code as “1” when you
are in the USA or Canada.
12:00 1/01
1
AM
SET LDS CODE
5. The time and date are automatically set when a caller ID (CID) number
is received. The unit will keep the current time accurately, and is
updated each time a CID number is received. After the time is initially
set, at the Stand-By Screen, you can press the MENU button to check
or reprogram the language, area code, and LDS code.
TOTAL CALLS 00
After you have set up the unit completely for the first time, use the MENU
button to review or reprogram the Language, Area Code or LDS Code.

8
FEATURES
1. HANDSET - Used for speaking and private listening during a telephone
conversation.
2. DELETE BUTTON - Erases the displayed caller ID records or erases all
records.
3. DISPLAY WINDOW - Displays the current time, the telephone numbers
you dialed, and information of the caller ID.
4. REVIEW UP AND REVIEW DOWN BUTTONS - Review the stored caller
ID records.
5 DIAL BUTTON - Dials the displayed telephone number.
6. MENU BUTTON - Use to review or change Language, LCD Contrast,
Area Code, LDS Code, or Time & Date settings.
7. DIAL OPTIONS BUTTON - Allows you to arrange the format of a
displayed telephone number before pressing the DIAL button.
8. FLASH BUTTON - Used for special services, including call waiting.
9. MEM DIAL BUTTON - Speed Dial any 10 phone numbers stored in the
keypad buttons.
10. 10 AUTO MEMORY BUTTONS - Speed Dial any 10 phone numbers at
the touch of a button.
11. REDIAL BUTTON - Redials the last telephone number you dialed.
12. SPEAKERPHONE INDICATOR - Lights during speakerphone operation.
13. SPEAKERPHONE BUTTON - Used to activate speakerphone.
14. HOLD BUTTON - Allows you to temporarily place a call on hold.
15. HOLD DICATOR- Indicates when a call has been placed on hold.
16. TONE BUTTON - Allows you to switch from pulse dialing to tone
dialing while PULSE/TONE switch is set to pulse position.
17. STORE BUTTON - Stores up to 10 important telephone numbers and
10 keypad memory locations.
18. VOLUME BUTTON - A built-in amplifier feature which allows you to
have a louder listening level from the receiver of the handset.
19. VOLUME CONTROL - Adjusts speakerphone volume level.
20. RINGER SWITCH - Selects ringer volume HI-LOW-OFF.
21. PULSE/TONE SWITCH - Allows you to select either pulse (rotary) or
tone dialing.
 Loading...