

Page 1
Quick guide For Connection on Android Devices
Android
Download APP
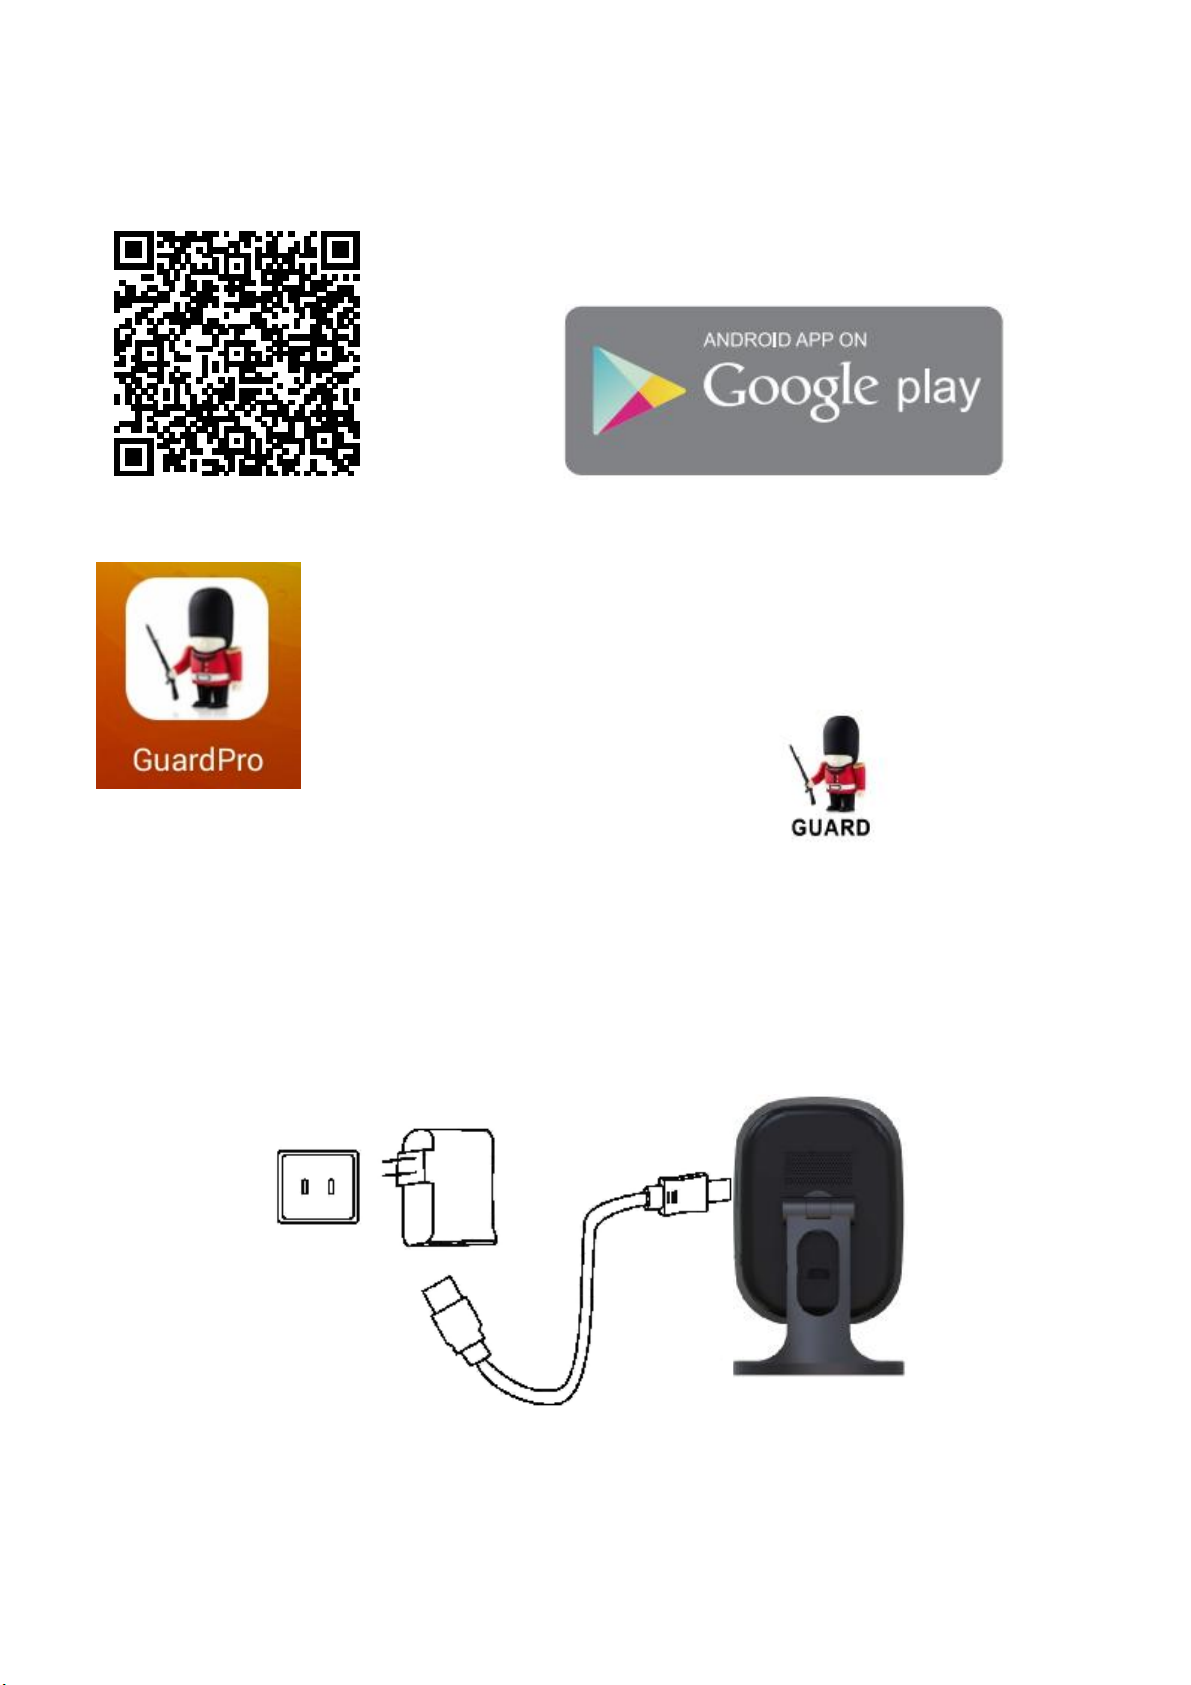
Please Download and install the APP GuardPro before setting the IP
Camera . Search “Guardpro” on Google play store or scan the QR Code
below to quickly get it
The following steps will guide you to complete the IP Camera connection.
Click the icon to launch the APP。
Page 2
Connect the power supply with the IP Camera,then the blue light will be on, after 2 seconds the red light is always on.
And 15 seconds later the red light will be off, then the IP Camera detection by itself.
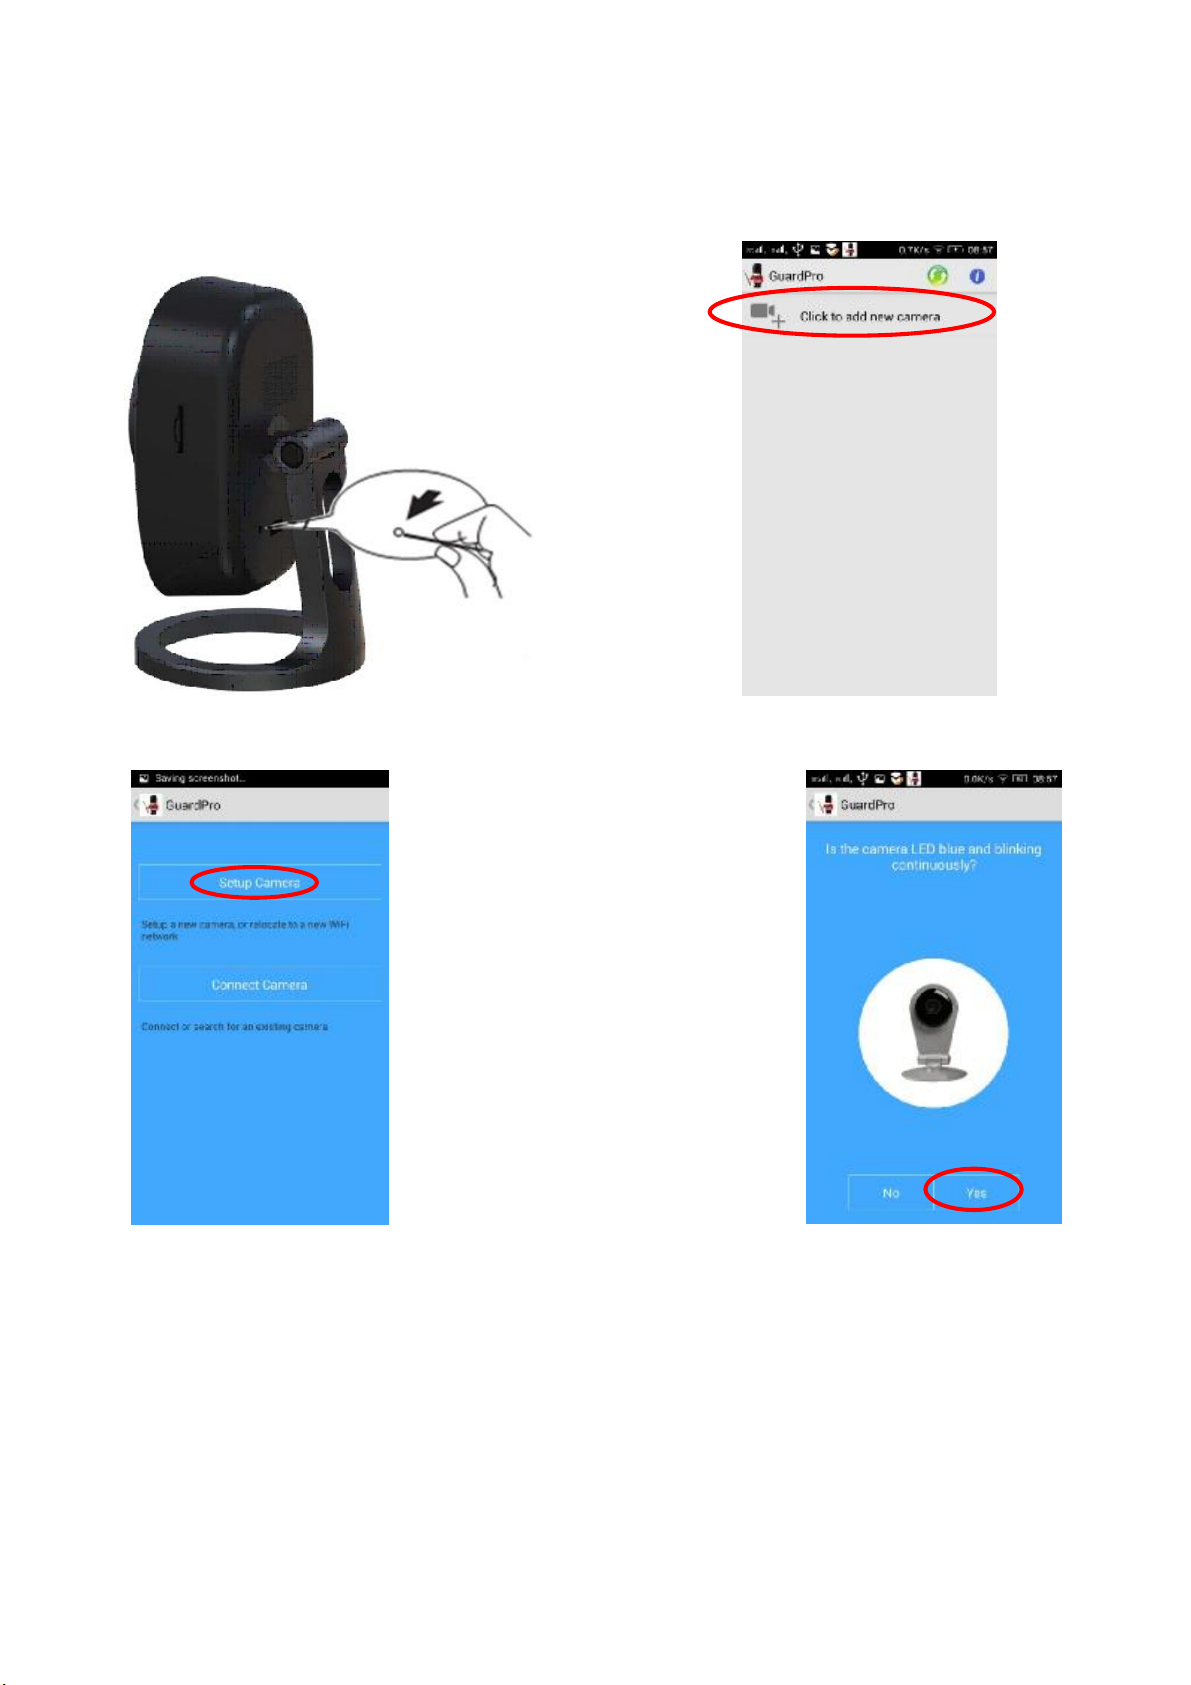
For first time to use Guardpro , Click the icon “Click to add new camera”.
And then click “Setup Camera”, if the blue
light is blinking, you can click “Yes”,
Else you need click “No”,follow the prompts
to reset the IP Camera.
Page 3
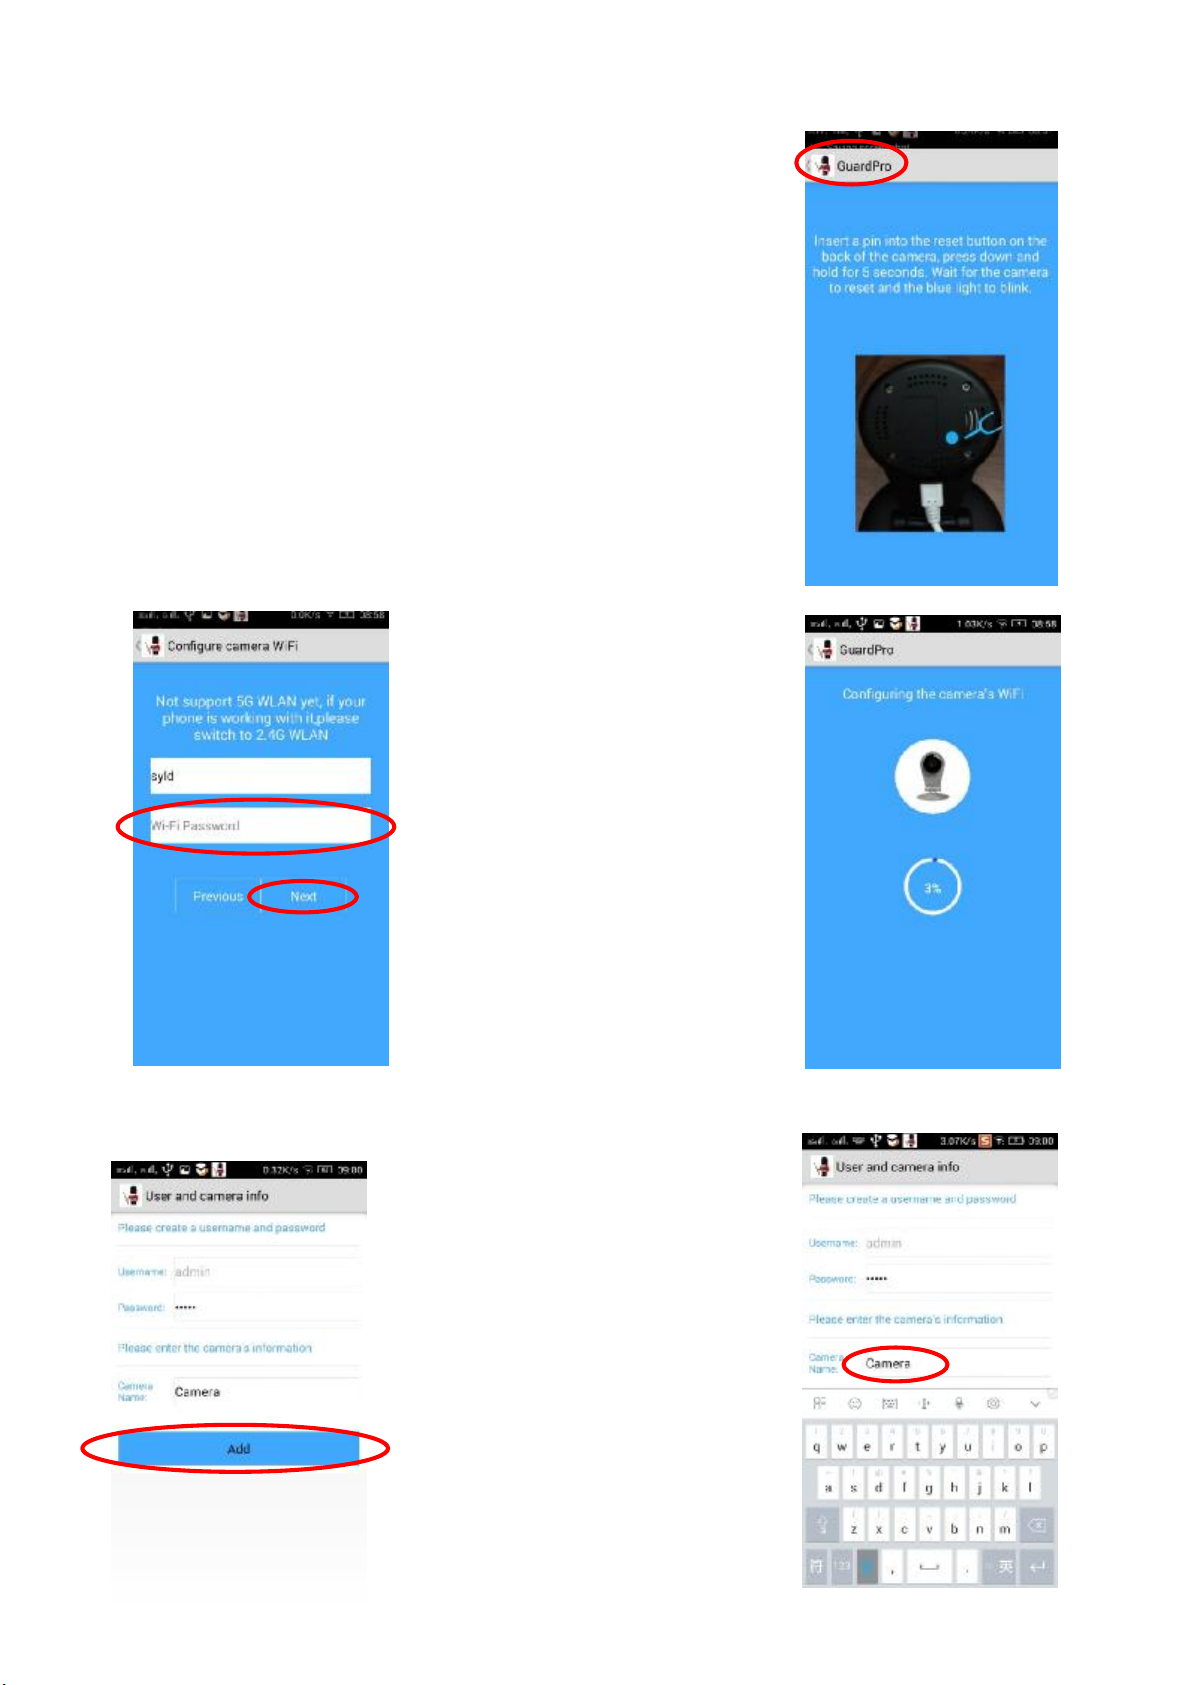
Insert a pin into the reset button on the back of the camera, press down and hold
for 5 seconds. Wait for the camera to reset and the blue light to blink.
Click the Guardpro icon to back to previous. Then click “Yes”.
Enter the Wi-Fi name and password, then
click “Next”.
If WiFi without password,you can click
“Next”.
About 15 seconds later, the blue light of
the IP Camera will be off, after another 5
seconds, the blue light will be always on.
Then the IP Camera is already on line.
You will see User and camera informations.
The default Username is “admin”; The
default Password is “admin”; The default
Camera Name is “Camera”.
Click the “Camera” icon, you can rename
the Camera Name.
Page 4
records
.
icon is
blue,y
ou can talk to the IP Camera
。
event to watch vedios on
IP camera.
Higher definition
1280
*720
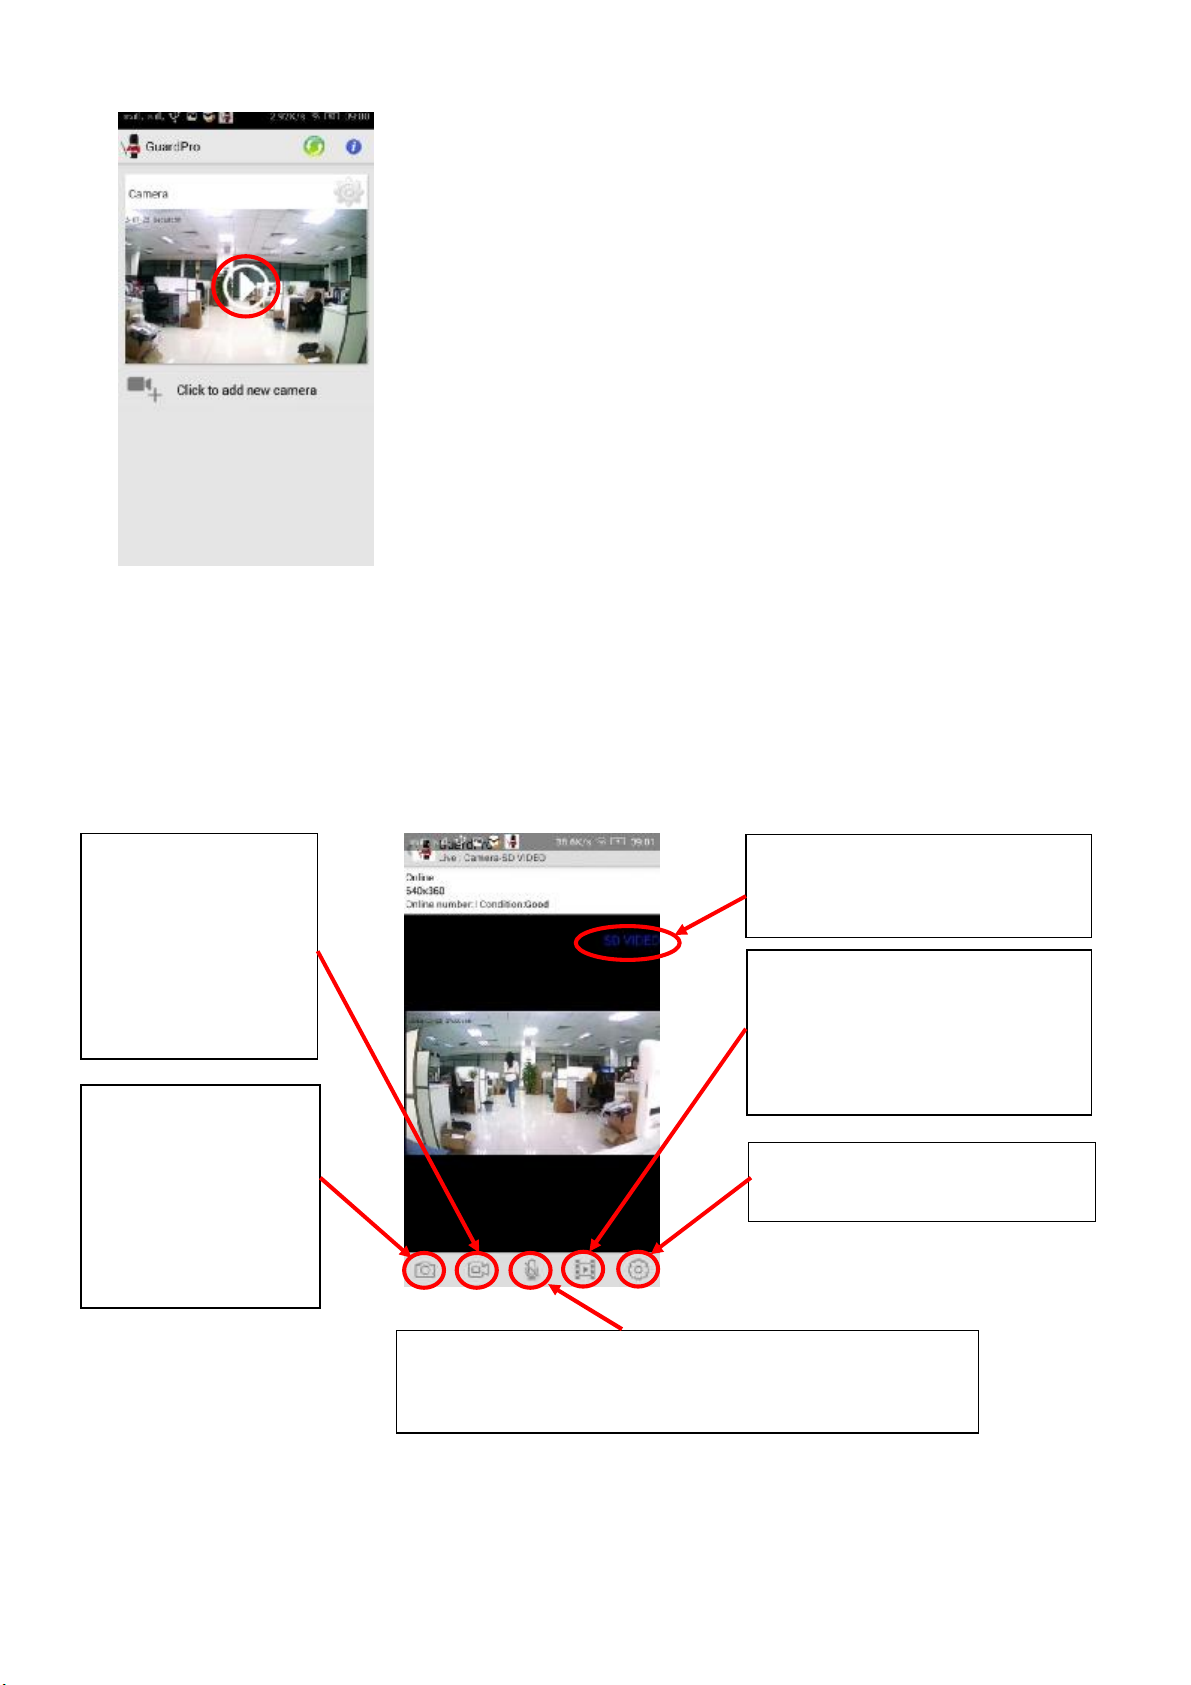
Click add icon, you will back to main screen. Now please click the preview icon to
enjoy the real-time monitoring.
Video record:
The Video records will be
saved in your Mobile
phone, you can click
video icon ,chose "Local
Album" to review these
snapshot:
The pictures will be saved
in your Mobile phone,
you can click video
icon ,select "Local
Album" to review these
Definition
Standard Definition 640*360
Video view:
You can select local album to watch
vedios and pictures on your mobile
phone. Or you can select device
Settings:
Here you can open settings.
voice:
When the icon is gray, you can hear from the IP Camera。When the
Page 5
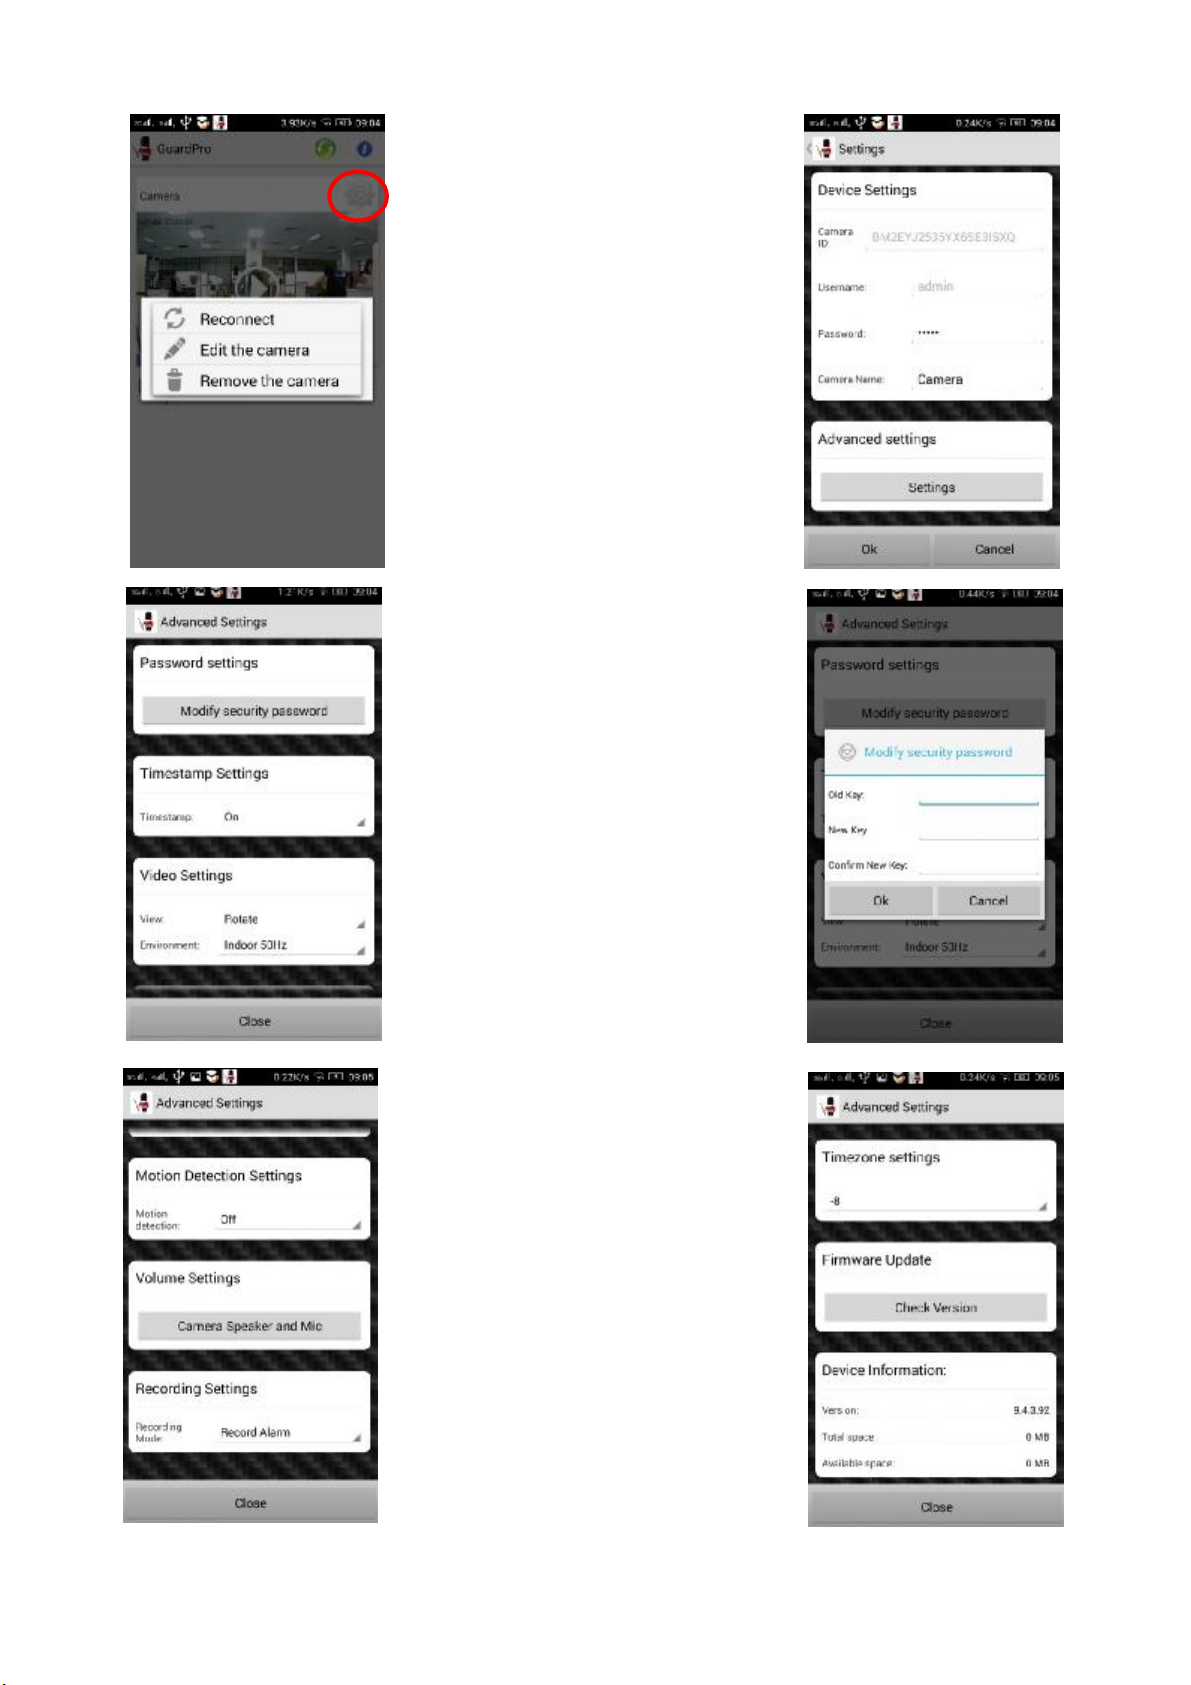
Click Settings,you will see this menu. Select
“Edit the Camera” to open Settings page.
Here you will see “Camera
ID:” , ”Username:” , ”Password:” , ”Camera
Name:” , and advanced settings icon.
“Reconnect” icon will Refresh the IP Camera
State .
”Remove the camera” to remove this IP
Camera.
For protect your privacy, you need to change
the password .click “settings” icon, and click
“Modify Security password” icon, Input the
Old key “admin” and input New key, Confirm
New Key. you can change the password
successful.
“Advanced Settings” you can also
change ”Motion Detection settings” ,
“Volume Settings” , “Recording Settings” ,
“Timezone settings”, and Update Firmware ,
check device information etc.
Page 6
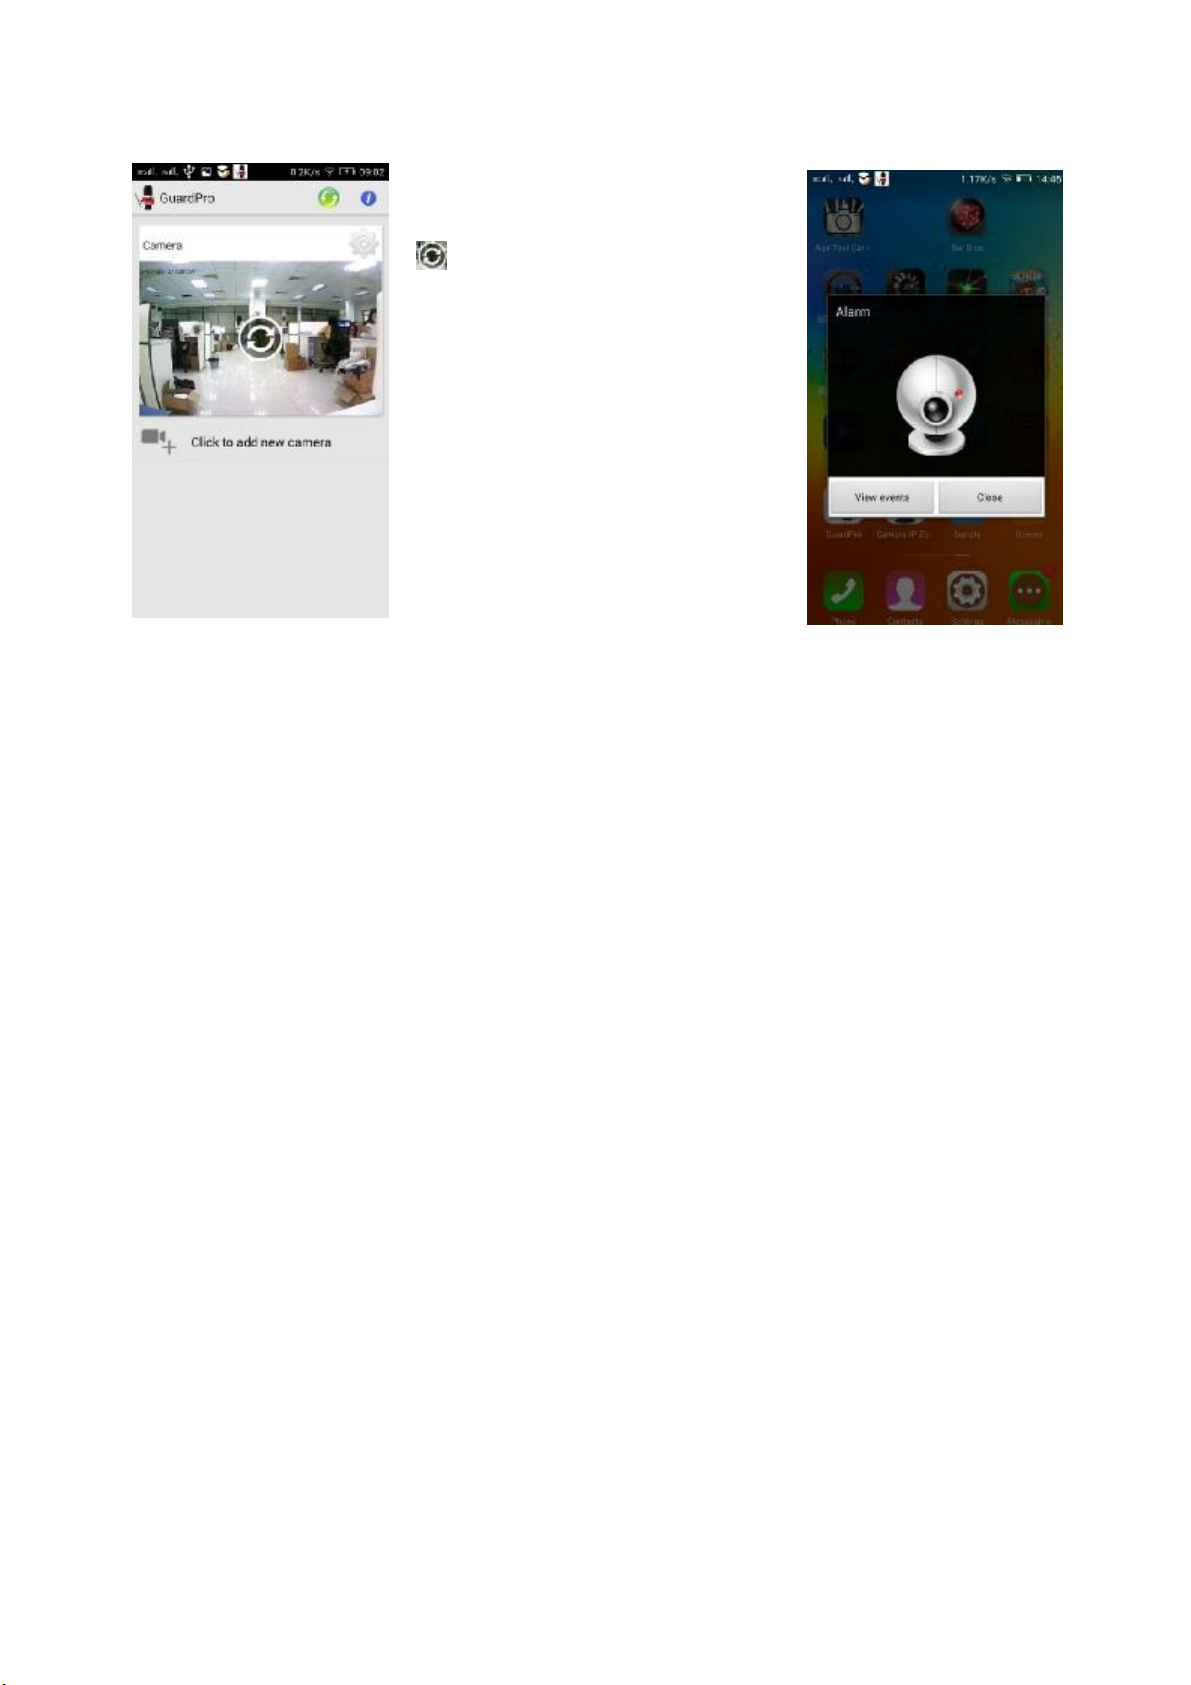
If you can not see the video , you need to
click “reconnect” icon,to Refresh the
IP Camera State .
When you set the motion detection on , you
will get the message when the IP Camera
detected something wrong . You can close it ,
or view events if the IP Camera with the
MicrSD in it.
Page 7
Quick guide For Connection on IOS Devices
IOS
Download APP
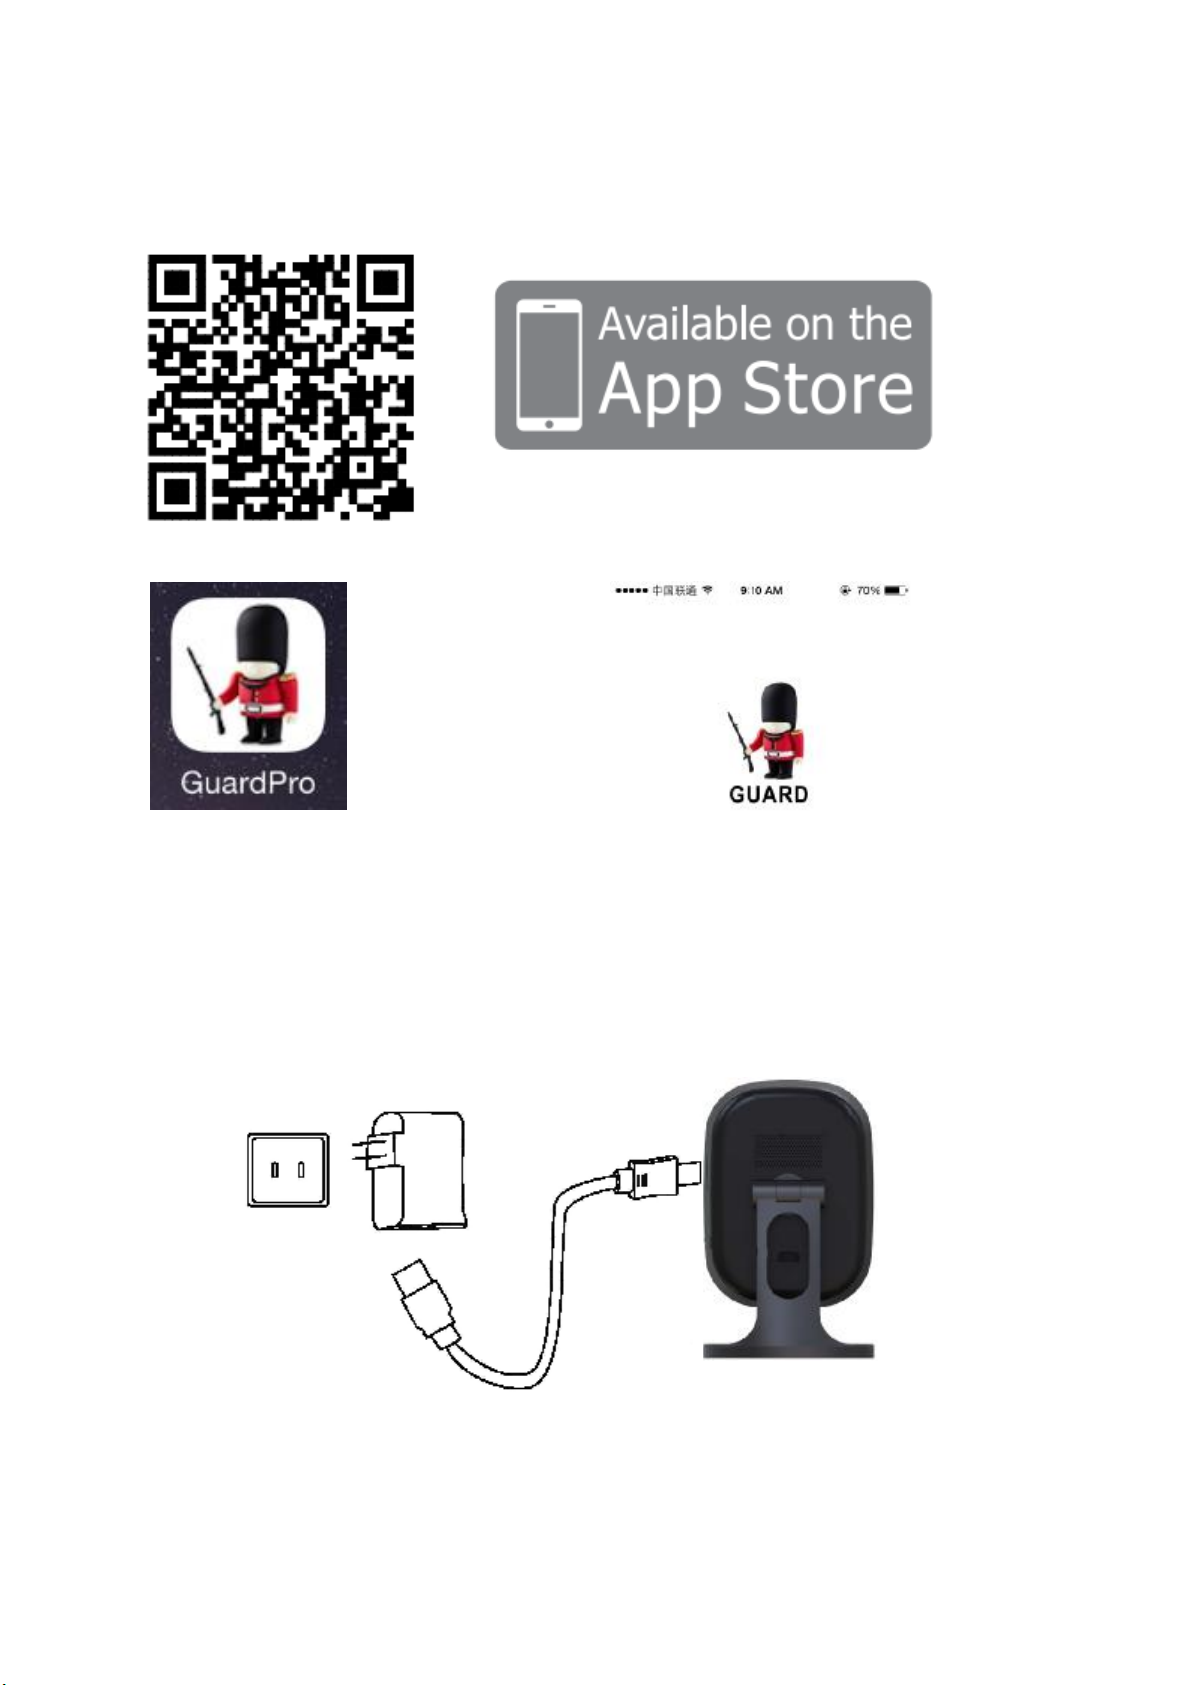
Please download and install the APP Guardpro before setting the IP Camera. Search “Guardpro” on APP store or scan the
QR Code below to quickly get it.
The following steps will guide you to complete the IP Camera connection.
Page 8
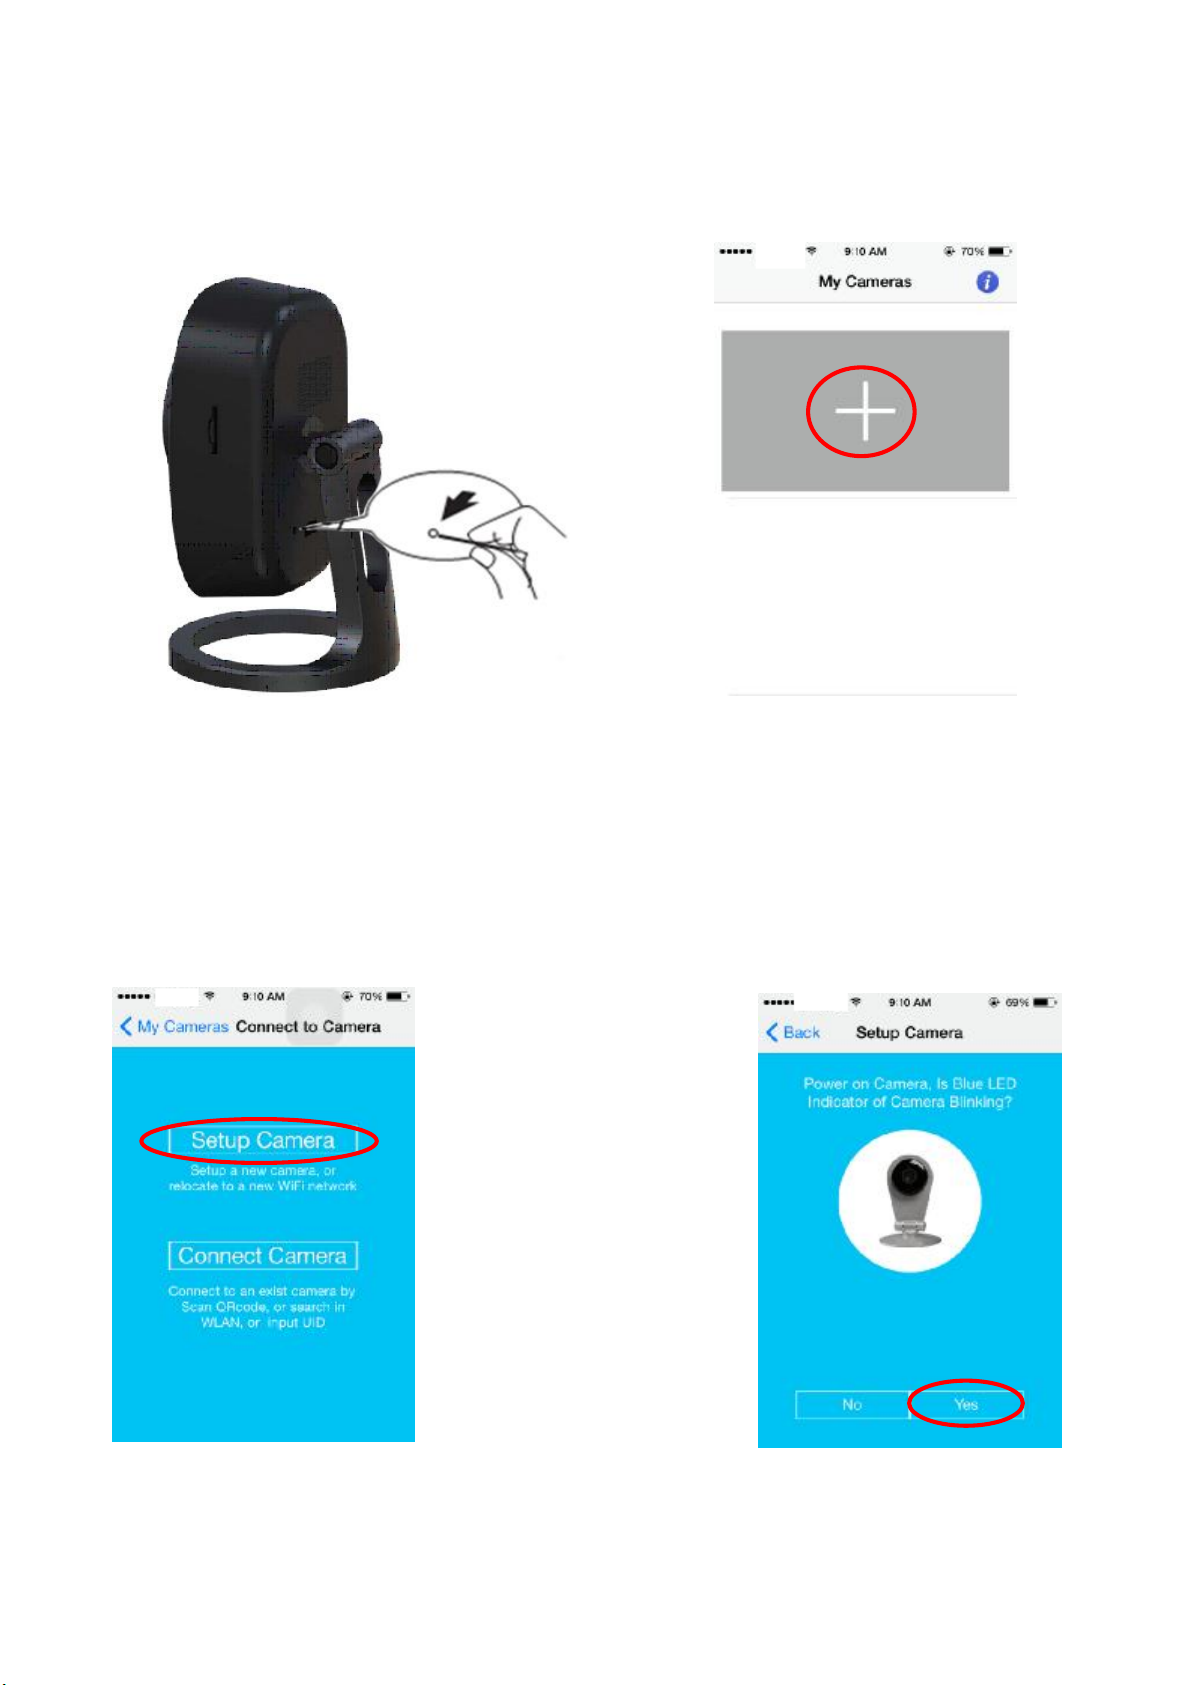
Connect the power supply with the IP Camera,then the blue light will be on, after 2 seconds the red light is always on.
And 15 seconds later the red light will be off, then the IP Camera detection by itself.
For first time to use Guardpro, Click the icon “+”.
And then click “Setup Camera”, if
the blue light is blinking, you can
click “Yes”,
Else you need click “No”,follow the
prompts to reset the IP Camera.
Page 9
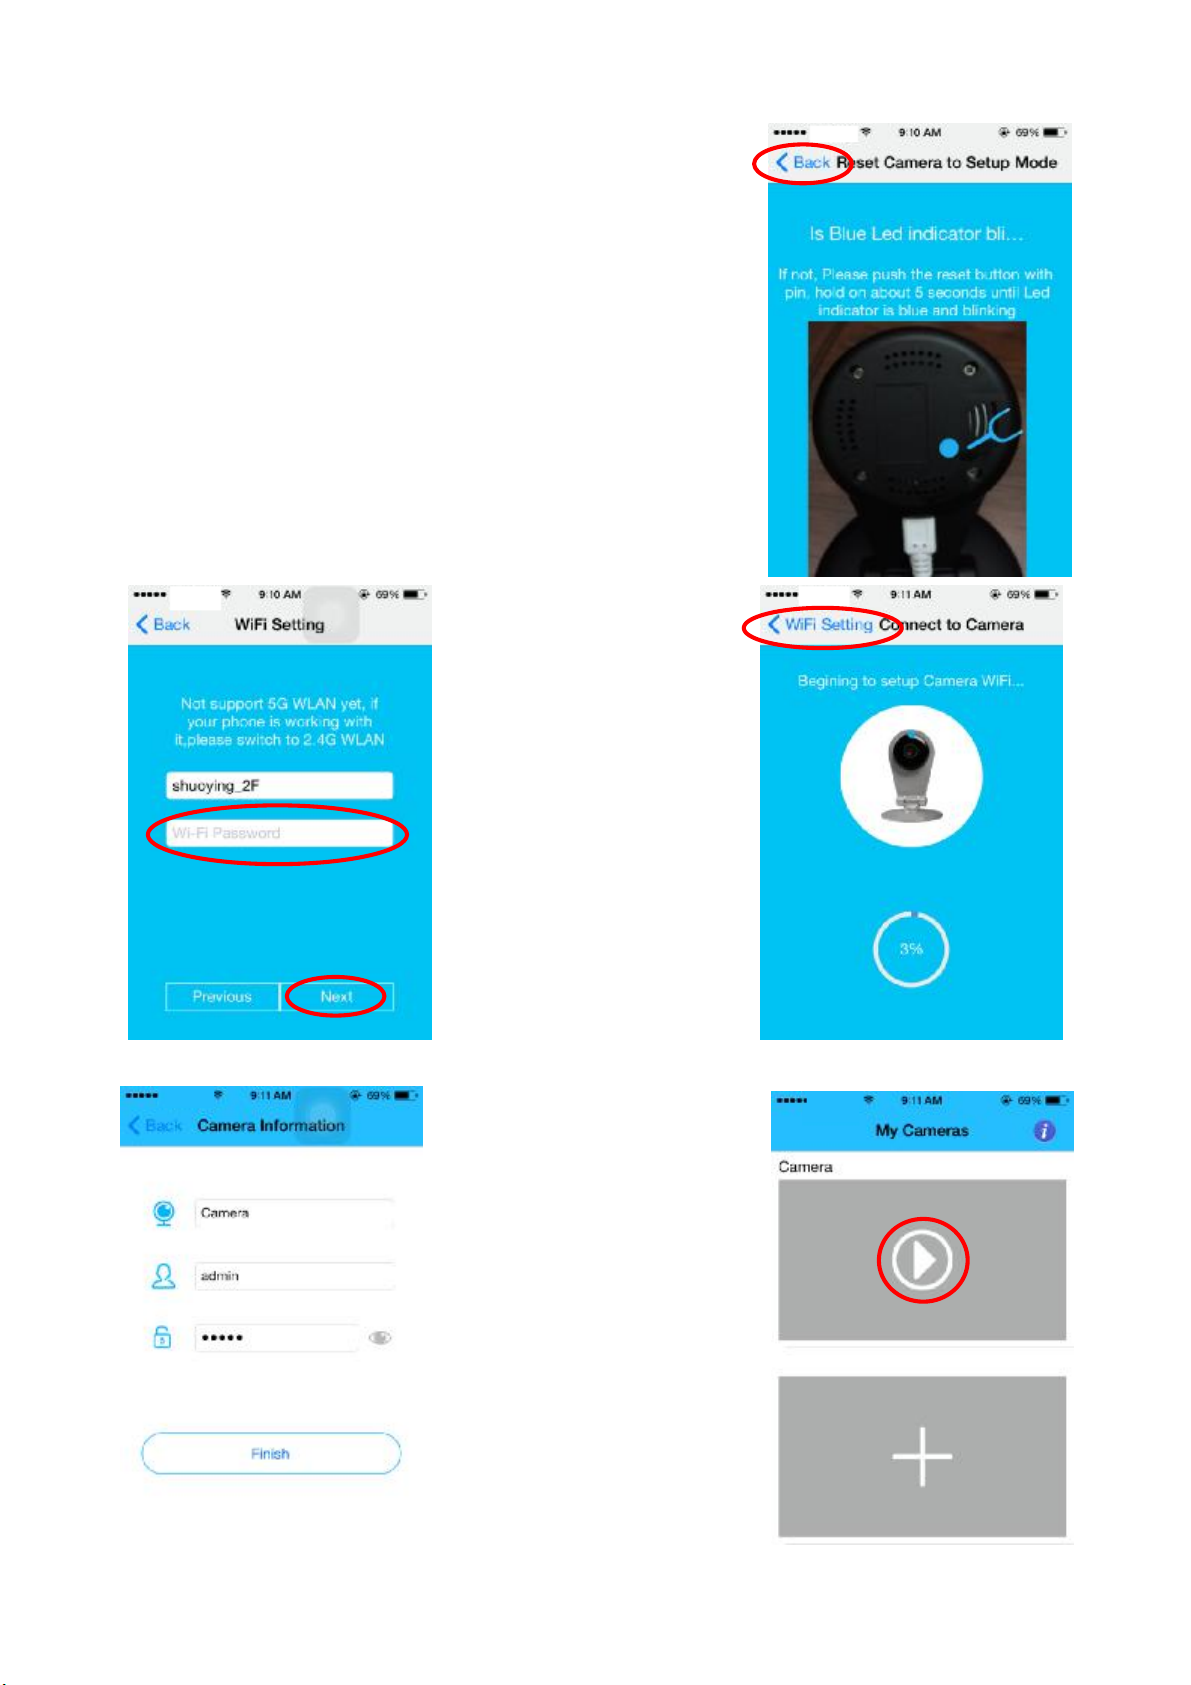
Insert a pin into the reset button on the back of the camera, press down and
hold for 5 seconds. Wait for the camera to reset and the blue light to blink.
Click the Guardpro icon to back to previous. Then click “Yes”.
Enter the Wi-Fi name and
password, then click “Next”.
If WiFi without password,you
can click “Next”.
About 15 seconds later, the
blue light of the IP Camera will
be off, after another 5 seconds,
the blue light will be always on.
Then the IP Camera is already
on line.
You will see User and camera
Informations. The default Username
is “admin”, The default Password is
“admin”. The default Camera Name
is “Camera”.
Page 10
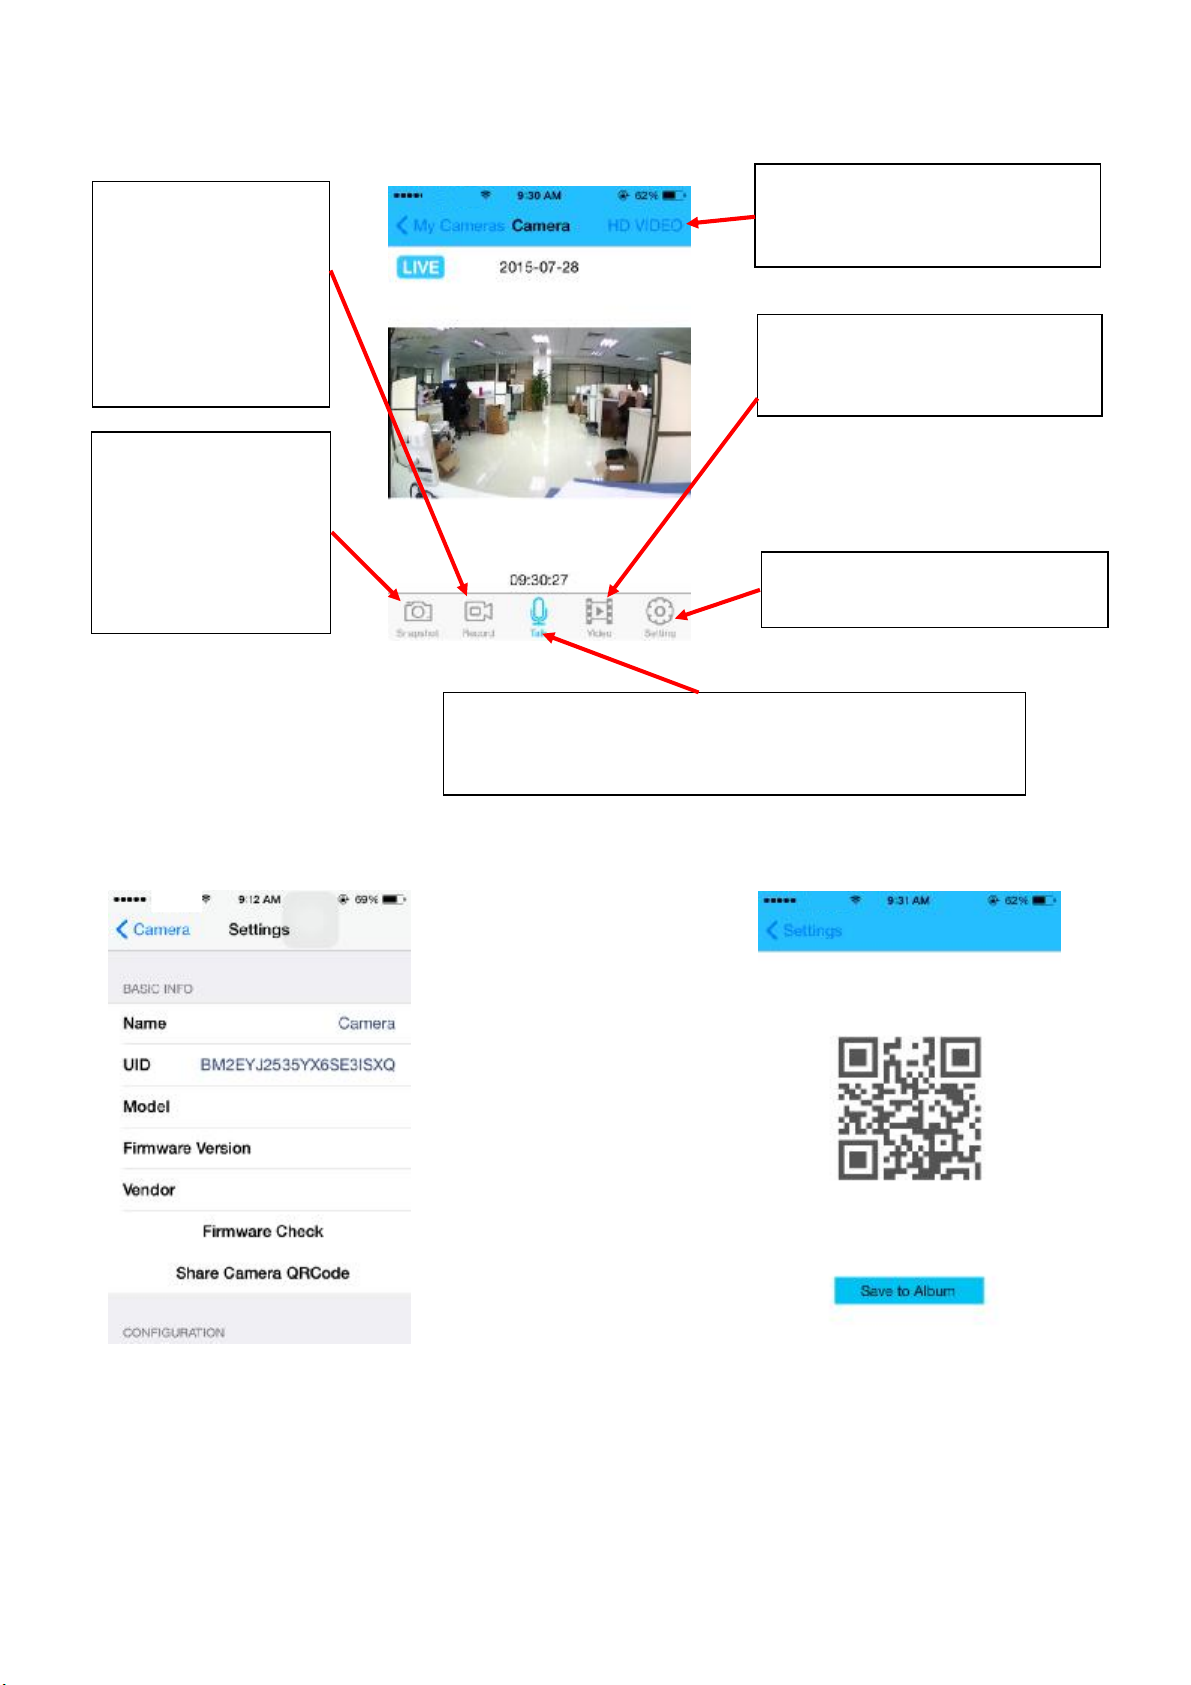
Click “Finish” icon, you will back to APP Main screen. Now please click the preview icon to enjoy the real-time
icon is
blue,y
ou can talk to the IP Camera
。
camera.
Higher definition
1280
*720
Video record:
The Video records will be
saved in your Mobile
phone, you can click
Photos icon on your
Mobile phone to review
snapshot:
The pictures will be saved
in your Mobile phone,
you can click Photos icon
on your Mobile phone to
review these pictures.
Definition
Standard Definition 640*360
Video view:
You can see a list of videos on you IP
Setting:
Here you can open settings.
voice:
When the icon is gray, you can hear from the IP Camera。When the
monitoring.
Click “Setting” icon,you can see
“Basic info”. Click “Share Camera QR
Code”, you can get the QR Code of
this IP Camera. You can share your
IP Camera to others by the QR Code.
Page 11
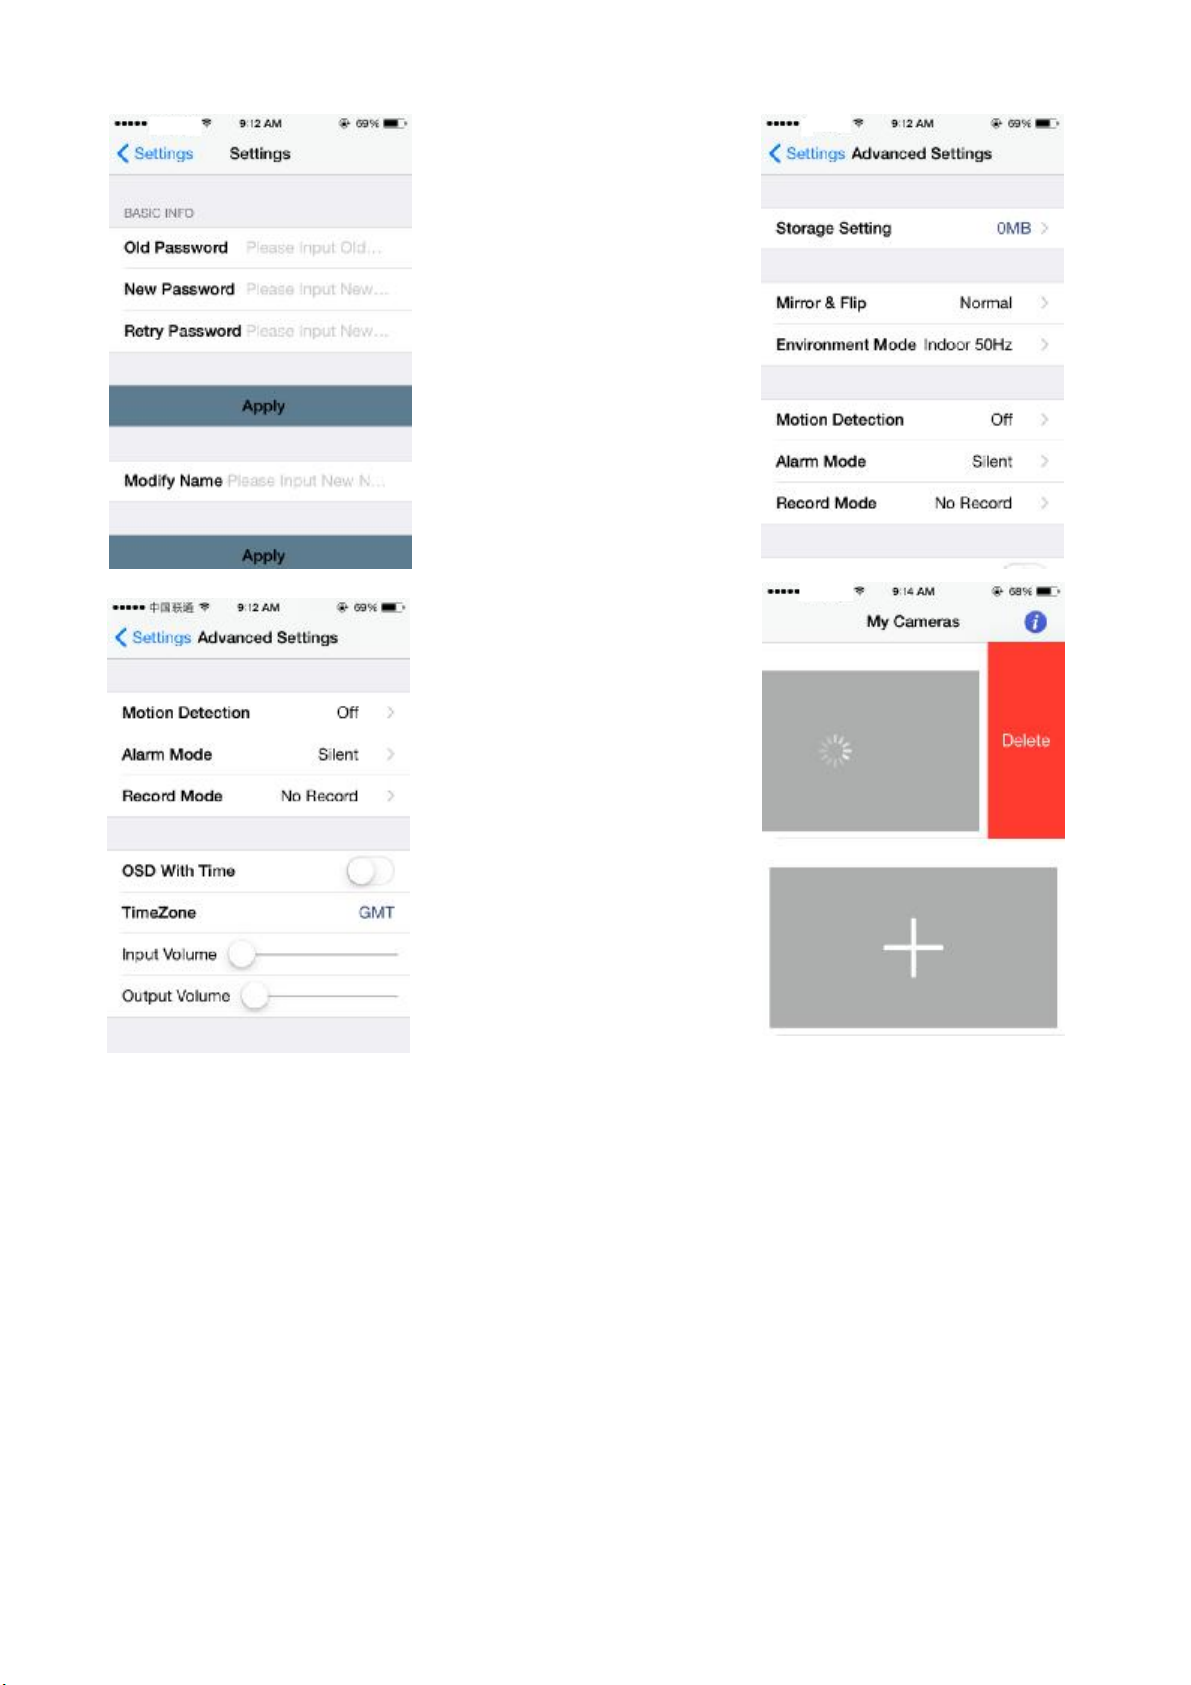
For protect your privacy, you need to
change the password .click “basic
settings” icon, input the Old
Password “admin”, input New
Password, and Confirm New
Password. You can change the
password successful.
You also can modify the IP Camera
Name here.
In “Advanced Settings”, you can
change “Mirror & Flip” ,
“Environment Mode” , ”Motion
Detection” , “Alarm Mode” , “Record
Mode” , “OSD” , “Timezone” , etc.
Slide to left, you can remove the IP
Camera here.
Page 12

Any Changes or modifications not expressly approved by the party responsible for compliance could void the user’s
authority to operate the equipment.
This device complies with part 15 of the FCC Rules. Operation is subject to the following two conditions: (1) This
device may not cause harmful interference, and (2) this device must accept any interference received, including
interference that may cause undesired operation.
This equipment complies with FCC radiation exposure limits set forth for an uncontrolled environment.
This transmitter must not be co-located or operating in conjunction with any other antenna or transmitter.
This equipment should be installed and operated with minimum distance 20cm between the radiator& your body.
Note: This equipment has been tested and found to comply with the limits for a Class B digital device, pursuant to part
15 of the FCC Rules. These limits are designed to provide reasonable protection against harmful interfere nce in a
residential installation. This equipment generates uses and can radiate radio frequency energy and, if not installed
and used in accordance with the instructions, may cause harmful interference to radio communications. However,
there is no guarantee that interference will not occur in a particular installation. If this equipment does cause harmful
interference to radio or television reception, which can be determined by turning the eq uipme nt off and on, the user is
encouraged to try to correct the interference by one or more of the following measures:
—Reorient or relocate the receiving antenna.
—Increase the separation between the equipment and receiver.
—Connect the equipment into an outlet on a circuit different from that to which the receiver is connected.
—Consult the dealer or an experienced radio/TV technician for help.
 Loading...