

Page 1

1
SoundW ave Pro 2000
Quick Installation Guide
04-0199A
Introducing the SoundWave Pro 2000
The SoundWave Pro 2000 is a high performance multimedia
sound card which takes full advantage of the PCI bus
architecture, while maintaining compatibility with legacy
software. It supports 64-voice XG capital wavetable
synthesis, DirectMusicTM, DirectSoundTM, and full hardware
SoundBlaster® Pro compatibility. Each sound in the
wavetable is derived from real instrument sounds, created
with wavetable synthesis and held to a professional
performance standard for the extensive sound library.
Features and Benefits
• Conforms to PCI 2.1 & 2.2 with bus mastering
• Fully ACPI 1.1, APM 1.2, and PPMI 1.1 compliant
• Supports AC '97 CODEC 3D enhancement
• Yamaha-XG technology delivers realistic sounds to
enhance enjoyment of the Internet, game software and
other multimedia applications
• Digital S/PDIF out for DVD content
• Hardware 64-voice wavetable synthesizer including GM
compatibility
• Hardware DirectSound and DirectMusic acceleration
• Full duplex playback and record with different sampling
rates
• Driver-support A3D emulation works with all types of
A3D games
• AC '97 support with full duplex, sample rate operation at
48Khz
• Legacy Audio
– MPU401 MIDI In/Out, FM synthesis and SoundBlaster
playback in DOS mode
- Legacy DMA support (DDMA)
Page 2

2
Interface Ports
• Joystick/MIDI
This is a 15 pin D-sub connector. It can be used with
standard MIDI adapters or joysticks.
• Speaker Out/Line Out
A stereo line output jack to connect Powered or Amplified
front speakers.
• Line In
Used for digital sound recording, a source to be mixed
with the Line Out signal, or both.
• Mic In
An 1/8-inch jack which provides a mono microphone
input.
• S/PDIF Out
Can be used to export digital sound to digital devices.
• Modem/TAD
Can be used to connect a modem audio line to the card.
• CD Audio Input
Stereo connectors which can be used to attach CD-ROM
audio cable. There are two different connectors. Select
the connector that matches your CD-ROM audio cable.
System Requirements
• Pentium or equivalent computer with one available
PCI slot
• Windows 95/98/98 SE/2000/NT4.0
• 16MB of available disk space
• 32 MB system memory
• CD-ROM drive
• Speakers or headphones
Package Contents
• SoundWave Pro 2000 board
• Driver software CD
• One 5-year warranty card
• This quick installation guide
Page 3

3
Hardware Installation
General instructions for installing the card are provided
below, since the design of computer cases and motherboards
vary. Refer to your computer’s reference manual for further
information, if needed.
Caution: Static electricity discharge may permanently
damage your system. To avoid possible static electricity
discharge during the installation, please follow the
guidelines below:
• Discharge any static electricity build up in your body
by touching a large grounded metal surface or the
computer’s case (if plugged in), for a few seconds.
• During the installation, avoid any contact with internal
parts. Handle cards only by their external edges.
1. Turn OFF the power to your computer and any other
connected peripheral devices.
2. Unplug the power cord from the back of the computer.
3. Remove your computer’s cover.
4. Remove the slot bracket from an available PCI slot.
5. To install the card, carefully align the card's bus connector
with the selected PCI slot bus connector on the
motherboard. Push the board down firmly, but gently,
until it is well seated.
6. Replace the slot bracket's holding screw to secure the
card.
7. Replace the computer cover and reconnect the power
cord.
Page 4

4
Software Installation
This section will guide you through the installation of the
following software drivers:
• Windows 95
• Windows 98/98 SE
• Windows 2000
• Windows NT 4.0
Windows 95/98/98 SE Driver Installation
1. After inserting the soundcard start the computer.
Windows will detect the soundcard and show the Add
New Hardware Wizard dialog box. By-pass the PnP
installation procedure by clicking Cancel in the dialog
box.
2. Insert the Xwave CD into your CD-ROM drive. If the CD
autostarts close the autostart window then proceed with
the installation.
3. Click Start, then Run. Type D:\Demo32.exe. Click OK.
(Assuming D: is the drive letter for the CD-ROM.)
4. Click Xwave-512, then Win 95/98 Driver. Click Next at
the Welcome dialog box to continue the setup.
5. Select Upgrade Drivers, then click Next.
6. Click Finish to restart the computer to initialize the
installed driver.
Page 5

5
Windows 2000 Driver Installation
1. After inserting the soundcard start the computer.
Windows will detect the soundcard and display the
Found New Hardware dialog box. By-pass the PnP
installation by clicking Cancel in the dialog box.
2. Insert the Xwave CD into your CD-ROM drive. If the CD
autostarts close the autostart window then proceed with
the installation.
3. Click Start/Run. Type D:\Allegro\WDM\Setup.exe.
(Assuming D: is the drive letter for the CD-ROM)
4. Click Next at the Welcome dialog box.
5. Click Yes at the Digital Signature dialog box.
6. Click Finish to complete the installation.
7. Restart Windows to initialize the installed driver.
Windows NT 4.0 Driver Installation
1. After you have installed the card, start the computer.
Insert the software CD into the CD-ROM drive
after Windows has finished booting.
2. From the Desktop click on Start/Run.
3. Type in D:\Allegro\NT40\Setup.exe, then click OK.
4. Click Next at the Welcome dialog box.
5. Choose Install, then click Next.
6. Select Restart, then click Finish.
Uninstall Soundcard Drivers
Run the Driver installation utility and select Uninstall to
remove the soundcard drivers. Please refer to the Driver
Installation instructions for your particular version of
Windows.
Page 6

Utilities Software
This section provides information on how to use your
SoundWave Pro 2000 with the utilities software provided on
the Xwave CD. The bundled software will give clear enhance
quality sound and allow advance editing for greater output.
The CD includes Yamaha's S-YXG50 SoftSynthesizer,
YStation to play different audio formats and XG Studio for
simultaneous playback of AVI and MIDI files with an
enhanced voice Synthesizer.
YStation for Windows 95/98/98SE/NT4.0/2000
YStation is a software that plays CD, Wave files (extension
.WAV files), and MIDI files (extension .MID files). The
YStation fully supports Reverb, Chorus, and 3D Spreader
effects through the use of user friendly interface.
To install YStation, follow the instructions below:
1. Insert the Drivers and Utilities CD into your CD-ROM.
Auto-run should start automatically.
Note If the Xwave dialog box does not display, click
Start, and then Run. Type in D:\Demo32.exe. (Assuming
D: is the drive letter for the CD-ROM)
2. Choose Xwave-512, then click Ystation32.
3. Follow the on-screen instructions to complete the setup.
To activate YStation, go to the taskbar and click
StartPrograms/YAMAHA YSTATION32/YSTATION32.
6
Page 7
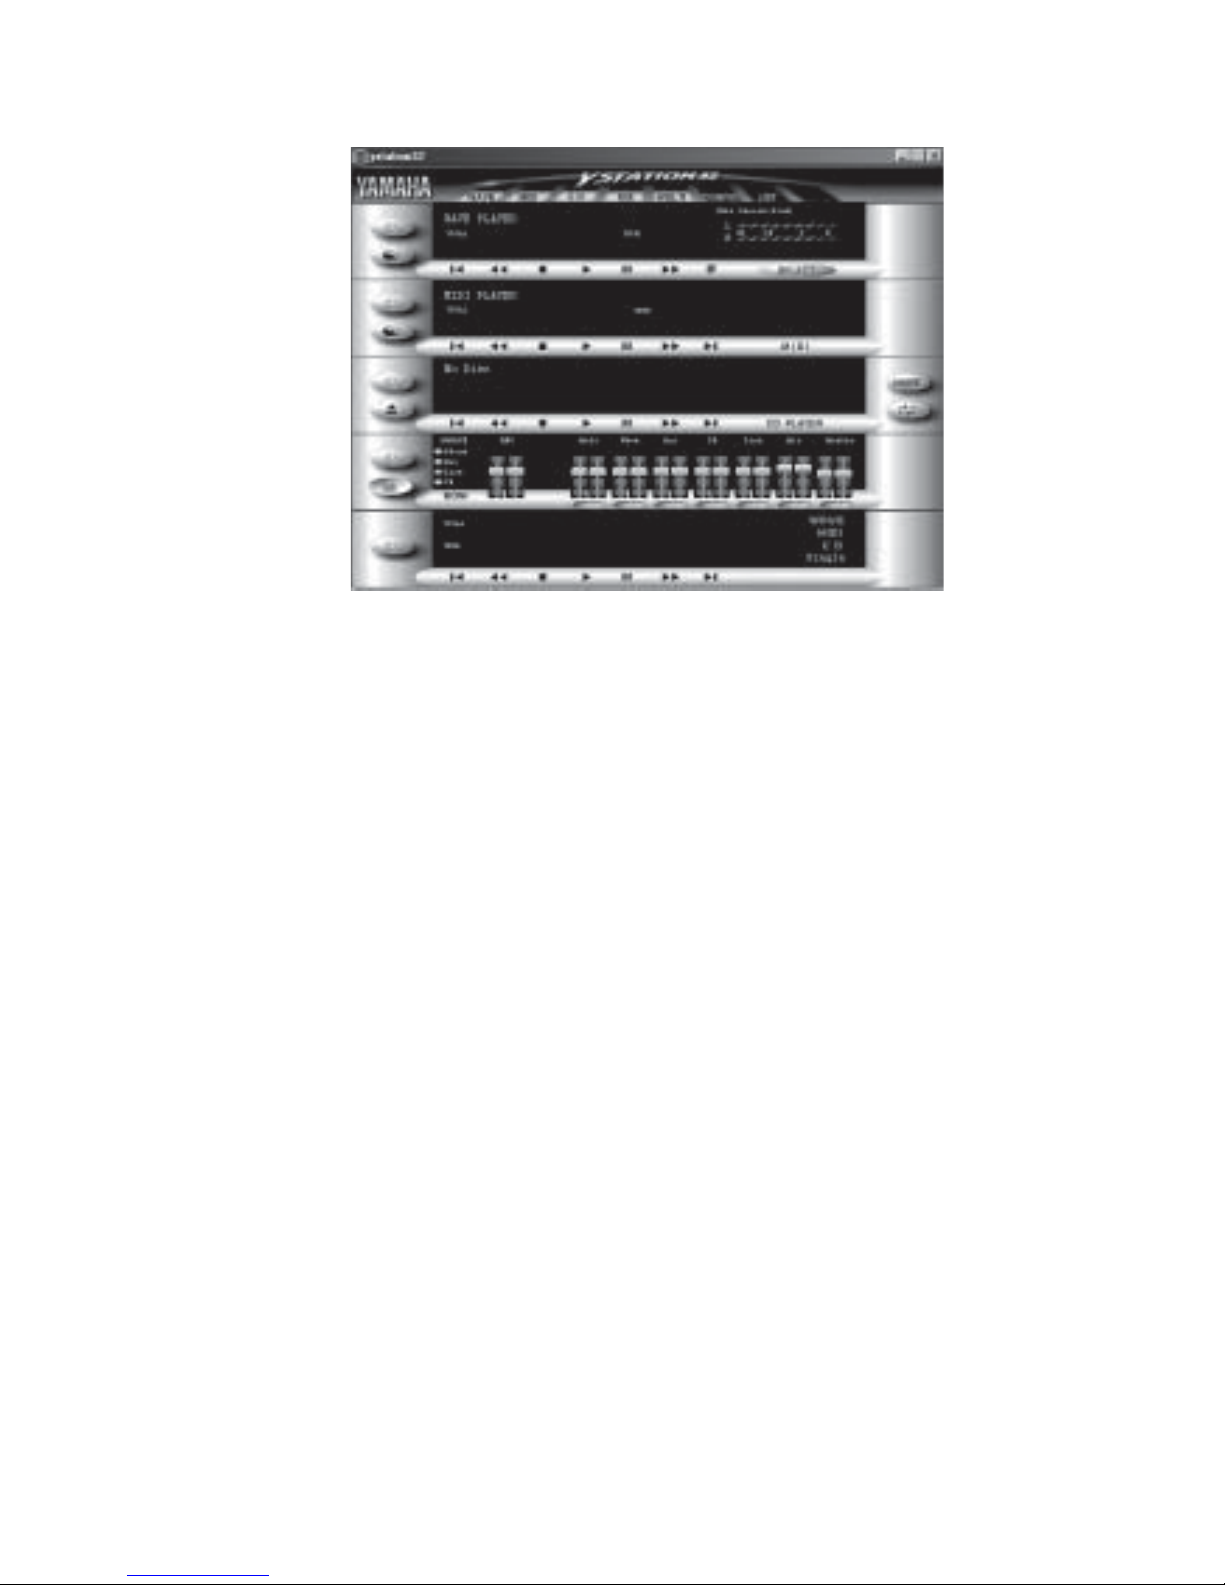
The YStation comes with the main control, Wave Player,
MIDI Player, Mixer, and Multi Player.
The main control have seven buttons to select from. Each
will activate different players in the YStation. For example,
to activate the CD Player, click CD button.
The Wave Player plays and records Wave format files.
Before recording, ensure that the recording source is selected
by using the Select button.
The MIDI Player plays the standard MIDI format files.
The CD Player plays music CD.
The Mixer allows you to control the volume for the type of
music you wish to played. For example, if you play Audio
CD, click the CD button and then adjust the volume to your
satisfaction. The master volume control on the far right of
the mixer allows you to control the volume for all players.
The Multi Player is a multi-purpose player that can play
from all sources including MIDI, Wave, and CD. This is
useful when creating a list of songs from different file
format.
7
Page 8

8
XG Studio for Windows 95/98/98SE/2000/NT4.0
The XGStudio will enrich and enhance the current FM
based or 64-voice audio board for improved performance
through the use of Enhanced 128-Voice Synthesizer.
With the XGStudio, you can enjoy playback of the
MIDI files along with AVI files simultaneously.
It provides 676 different sounds, 21 drum kits,
and 128-note simultaneous polyphony with three sound
effects (reverb, chorus, and variation). In addition, it
allows you to control each MIDI channel dynamically to
vary each instrumental outcome of the songs.
Note The XGStudio requires a minimum of
Pentium II 233 MHz, 64MB RAM or better.
Installing XG Studio
Before proceeding, make sure the SoundWave Pro 2000 and
drivers are installed.
To install XG Studio, follow the instructions below:
1. Insert the Xwave CD into your CD-ROM. Auto-run
should start automatically.
Note: If the Xwave dialog box does not display, click
Start, and then Run. Type in D:\Demo32.exe. (Assuming
D: is the drive letter for the CD-ROM)
2. Click Xwave-512.
3. Click S-YXG50.
4. Click XGSTUDIO.
5. Follow the on-screen instructions to complete the setup.
Page 9

9
S-YXG50 SoftSynthesizer Installation
S-YXG50 is a software synthesizer that provides 676
different sounds, 21 drum kits, and 128-note simultaneous
polyphony with three sound effects (reverb, chorus, and
variation).
To install S-YXG50 follow the instruction below:
1. Insert the Xwave CD into your CD-ROM. Auto-run
should start automatically.
Note: If the Xwave dialog box does not display, click
Start, then Run. Type in D:\Demo32.exe. (Assuming D:
is the drive letter for the CD-ROM.)
2. Click Xwave-512.
3. Click S-YXG50.
4. a. For Windows95/98/98 SE, click S-YXG50 for Win9x.
b. For Windows 2000/NT, choose S-YXG50 for NT4.0.
5. Click Next. Type in the serial number provided on the
XG Certificate of Authenticity.
6. Follow the on-screen instructions to complete the setup.
The utilities installed from the Xwave CD include an
uninstall option. This procedure will remove all software
previous installed in your system. To uninstall any of the
utilities, follow the steps below:
1. Go to the taskbar and click Start / Settings / Control
Panel.
2. From the Control Panel, double click Add / Remove
Program.
3. Click the utilities you wish to uninstall.
4. Click OK.
Utility uninstallation is now complete.
Uninstall Utilities
Page 10

10
Technical Support
QUESTIONS? SIIG’s Online Support has the answers! Simply
visit our web site at www.siig.com and clickon ONLINE
SUPPORT. Our online support database is updated daily with
new drivers and solutions. The answers to your problems could
be just a few clicks away
.
Return Merchandise Authorization (RMA)
SIIG warrants to the original buyer of the product that the hardware
is free of defects in materials and workmanship for a period of five
years from the date of purchase. If your product fails to be in good
working order during the warranty period, you may return it to
SIIG for repair or replacement at SIIG's option.
To return the product, you need to follow these steps.
Step 1: Contact SIIG's RMA Department
Toobtain an RMA number, SIIG's RMA Department can be reached
by phone at (510)413-5333 or fax at (510)657-5962 or email at
[email protected]. In order to issue an RMA number, the product
serial number is required. This number can be found on the side
of the box and on the back of the product.
Step 2: Complete the RMA form
• Fill out your Return Merchandise Authorization (RMA) form,
and include it in the package with the product.
• Properly pack the product for shipping. All software, cable(s)
and other accessories that came with the original package must
be included.
• Clearly write your RMA number on the top of the returned
package and on the accompanying RMA form.
SIIG will refuse to accept any shipping package, and not be
responsible for a product returned without a RMA number
posted on the outside of the shipping carton.
Step 3: Ship the Product
You are responsible for the cost of shipping back to SIIG at the
following address:
SIIG, Inc. RMA#_______________
6078 Stewart Ave.
Fremont, CA 94538
SIIG will ship the repaired or replaced product via UPS Ground
or US Mail at no cost to you.
Page 11

11
THE INFORMATION IN THIS DOCUMENT IS FOR
INFORMATION PURPOSES ONLY AND IS SUBJECT TO
CHANGE WITHOUT NOTICE.
THIS DOCUMENT CONTAINS PROPRIETARY INFORMATION THAT IS PROTECTED BY COPYRIGHT. ALL
RIGHTS RESERVED. NO PART OF THIS DOCUMENT
MAY BE PHOTOCOPIED, REPRODUCED, OR TRANSLATED TO ANOTHER LANGUAGE WITHOUT PRIOR
WRITTEN CONSENT.
FCC NOTICE
This equipment has been tested and found to comply with the limits for a
Class B Computing Device, pursuant to part 15 of the FCC Rules. These
limits are designed to provide reasonable protection against harmful
interference when the equipment is operated in a residential installation.
This equipment generates, uses, and can raidate radio frequency energy and
if not installed and used in accordance to the instructions, may cause
harmful interference to radio communications. However, there is no
guarnantee that interference will not occur in a particular installation. If this
equipment does cause harmful interference to radio and television reception, which can be determined by turning the equipment off and on, the user
is encouraged to try to corrrect the interference by one or more of the
following measures:
• Reorient or relocate the receiving antenna
• Increase the separation between the equipment and the receiver
• Connect the equipment into an outlet on a circuit different from that to
which the receiver is connected
• Consult the dealer or an experienced radio or TV technician for help
IMPORTANT
Any changes or modifications not expressly approved by the party
responsible for compliance could void the user's authority to
operate this equipment
This product requires the use of shielded cables in order to comply with
FCC requirements.
SoundWave Pro 2000 is a trademark of SIIG, Inc.
SIIG and the SIIG logo are registered trademarks of SIIG, Inc. Microsoft, Windows, and
Windows NT are registered trademark of Microsoft Corporation. Pentium is registered
trademark of Intel Coporation. Other names used in this publication are for identification
purposes only and may be trademarks of their respective companies.
August, 2000 Copyright 2000 by SIIG, Inc.
Page 12

12
 Loading...