

SoundTube SM52-EZ-BK, SM82-EZ-BK, SM52-EZ-WH, SM52-EZ-WX-BK, SM52-EZ-WX-WH Install Instructions Manual
...
SM-EZ
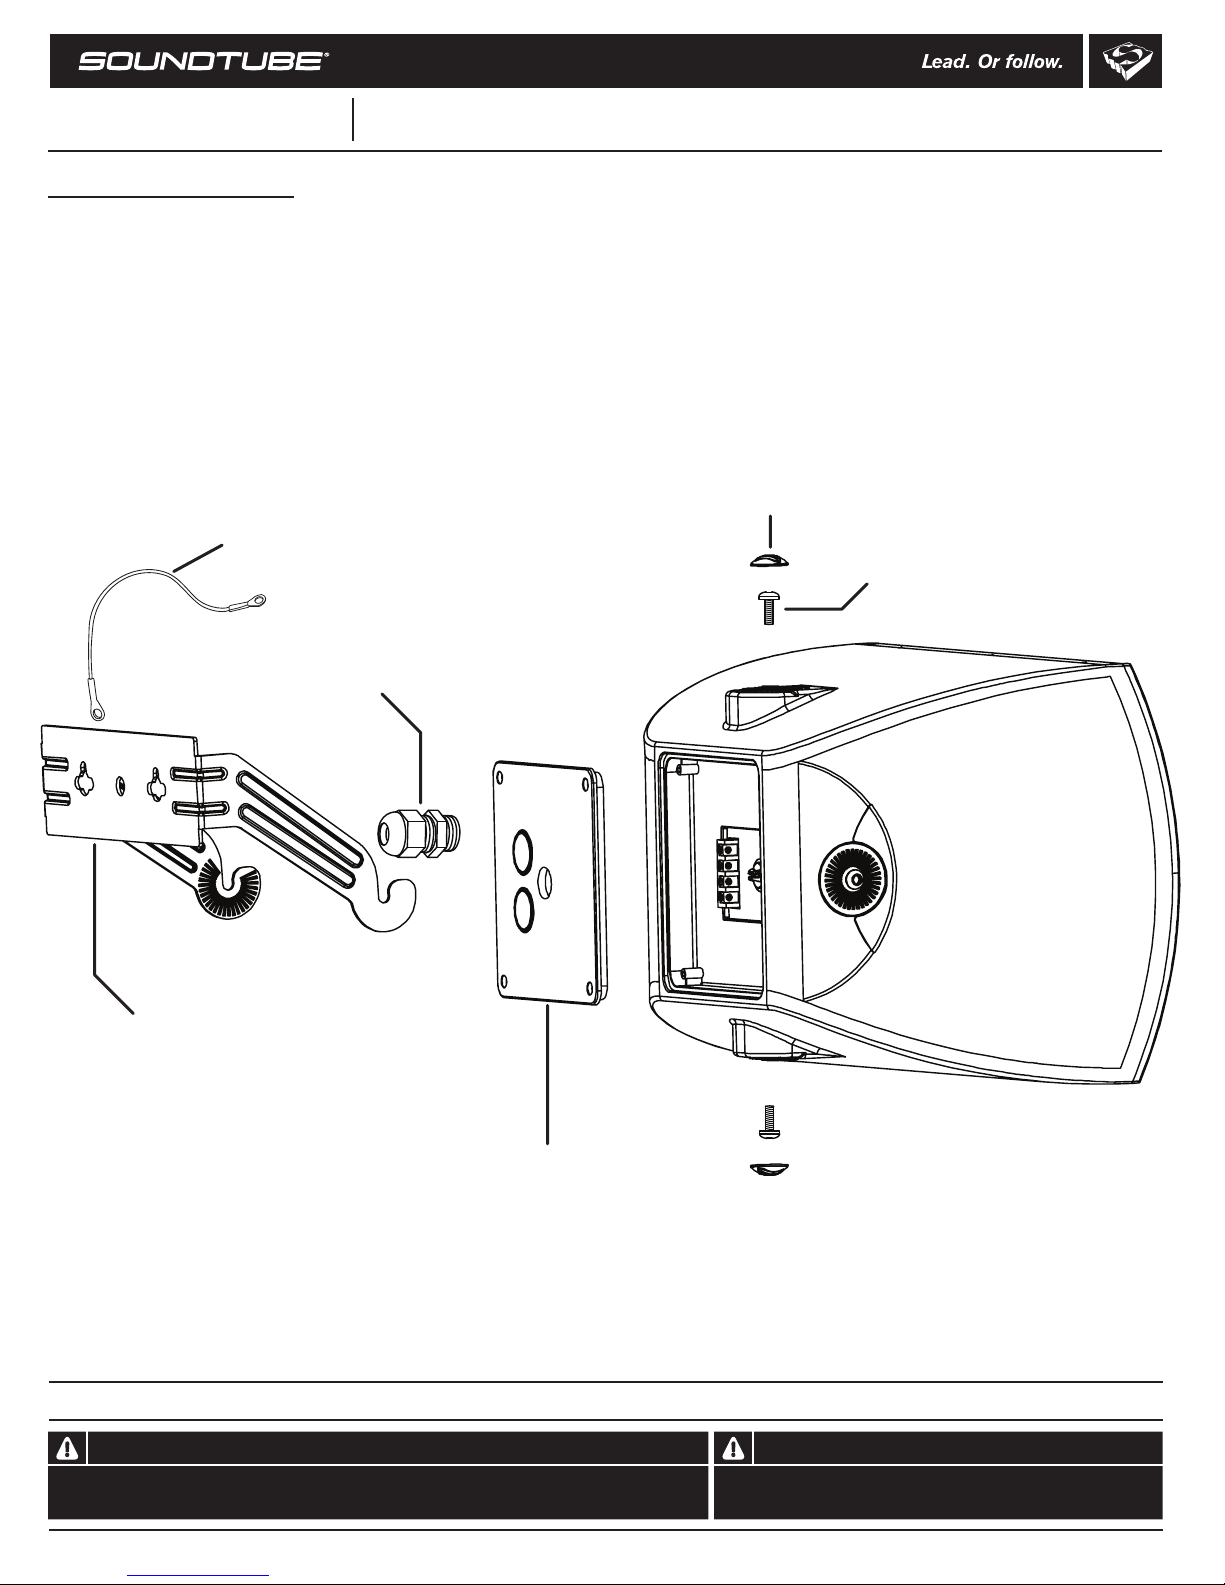
Box contents
1 Speaker
1 U-bracket
2 U-bracket screws
2 Screw caps
1 Allen wrench
1 Back plate
1 Port plug
1 Safety cable
1 Strain relief bushing
Series
Safety cable
Install Instructions For:
SM52-EZ-BK, SM52-EZ-WH, SM52-EZ-WX-BK, SM52-EZ-WX-WH,
SM82-EZ-BK, SM82-EZ-WH, SM82-EZ-WX-BK & SM82-EZ-WX-WH
Screw cap
U-bracket screw
U- bracket
Strain relief bushing
Back plate
Warning
SoundTube speakers must be installed by a professional audio installer/contractor. For safety and for
optimum audio performance, installer must follow all directions issued by SoundTube Entertainment.
1.435.647.9555| 800.647.TUBE |www.soundtube.com
© 2016 SoundTube Entertainment, Inc. All rights reserved. PN INS-SM -EZ Rev 02-10-2016
Warning
Do not spec or install speaker near support beam, ventilation duct or
other structure that may interfere with speaker function or dispersion.
SM-EZ
Series
Install Instructions For:
SM52-EZ-BK, SM52-EZ-WH, SM52-EZ-WX-BK, SM52-EZ-WX-WH,
SM82-EZ-BK, SM82-EZ-WH, SM82-EZ-WX-BK & SM82-EZ-WX-WH
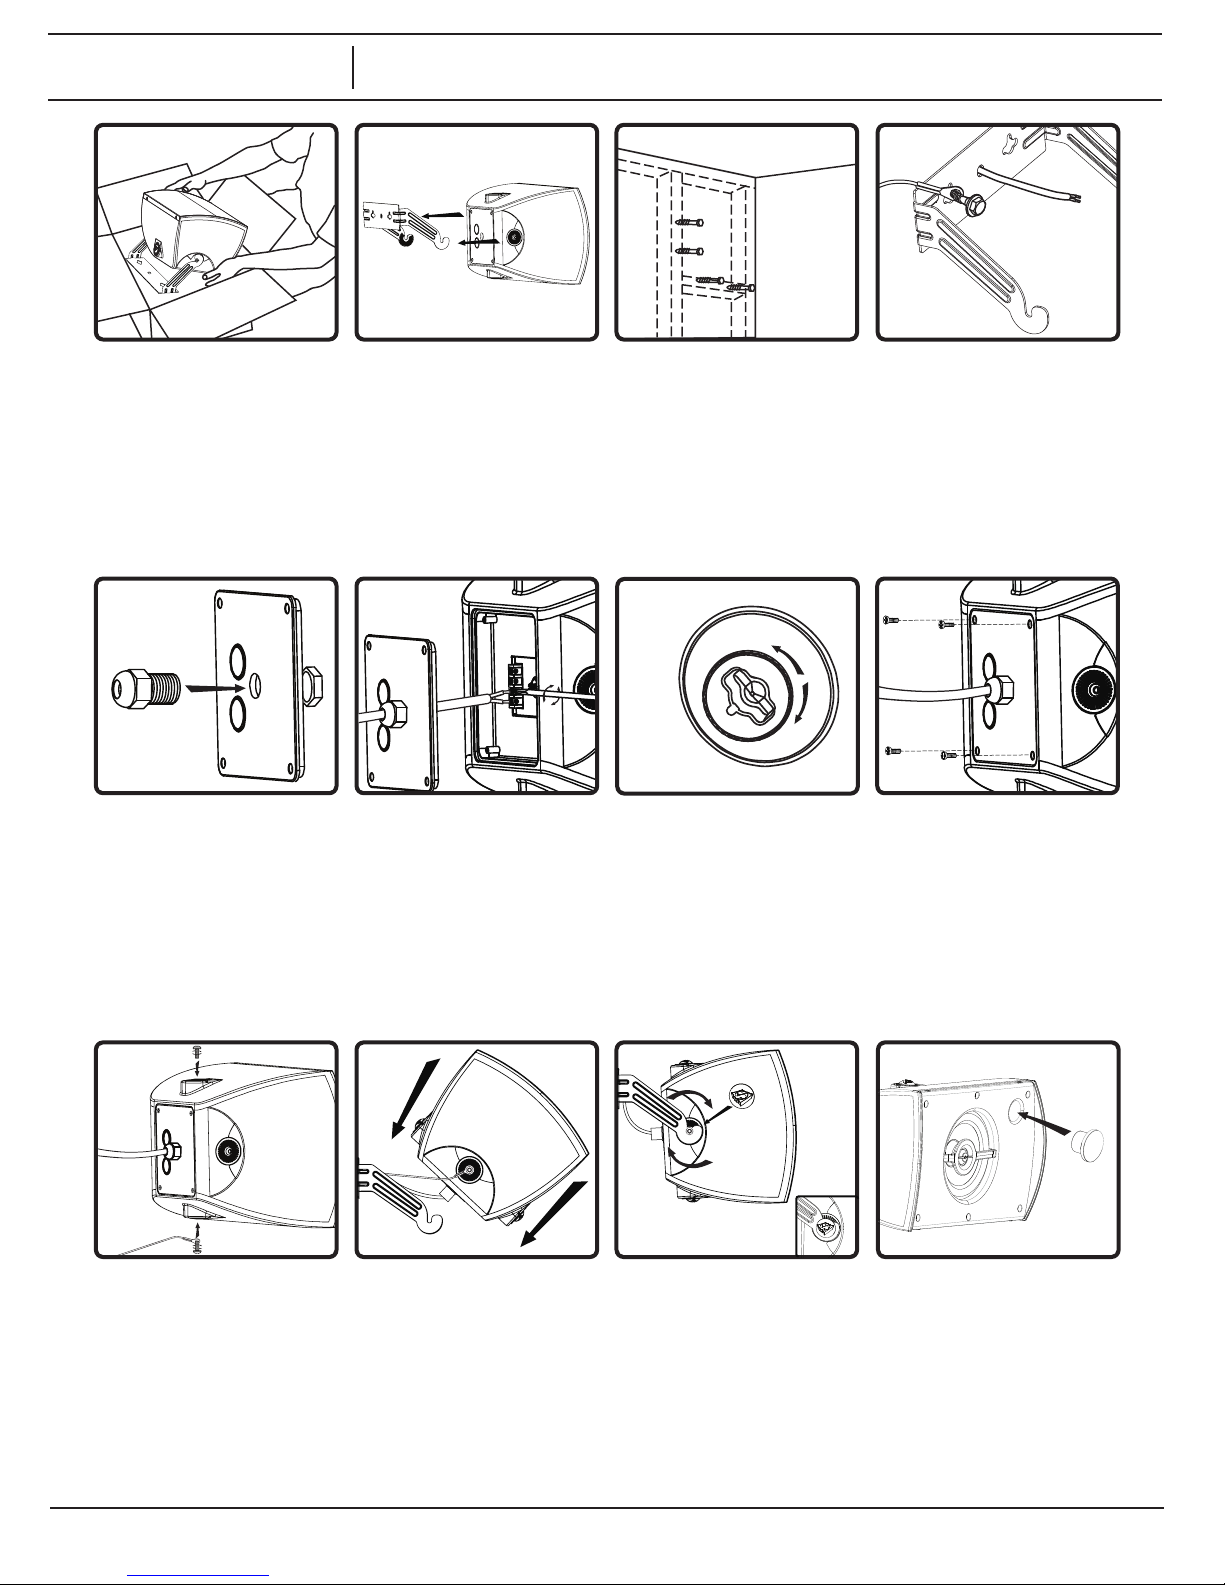
1. Unpack speaker and
mounting hardware.
4. If being installed per
EN54-24 regulations or in
instances where a water tight
strain relief bushing is necessary, attach the included strain
relief bushing to the back
plate. If it is not required, skip
this step.
3. Remove u-bracket from
cabinet.
5. Run signal wires through
cstrain relief bushing then
connect to ceramic terminal
strip. Two + (plus) and two (negative) connectors are
provided for daisy chaining.
2. Choose a secure mounting
surface with sufcient strength
to reliably hold the speaker.
The speaker may be mounted
in either the vertical or the
horizontal position with the
same U-bracket.
6. Select the tap position by
rotating the rotary switch
located on the back of the
speaker to desired setting. The
switch is preset to the
maximum tap setting in 70.7 V
mode (32W for the
SM52-EZ[-WX] and 64W for
the SM-82-EZ-II[-WX]).
3. Mount u-bracket with
clamping slots pointing
upward. Securely fasten
mounting bracket and safety
cable to surface (user must
supply fasteners).
Note: The safety cable will
attach to the U-bracket
clamping screw on one side of
the cabinet.
7. Install back plate and
secure with included fasteners.
8. Select desired location for
safety cable and remove the
U-bracket screw from that
side. Attach safety cable to the
clamping screw and reinstall
loosely.
9. Tilt speaker 45º (grille up)
and slide on to bracket.
10. Aim speaker and tighten
u-bracket screws. Once
tightened down, place the
screw caps on the screws.
Done!
Port protection for SM-EZ
To enhance protection of
internal components from
humidity and other potentially
corrosive elements, use
provided port plug to seal
enclosure. Use RTV silicone
around edge of the port plug
for increased protection. Note:
WX versions will come with the
port plug pre-installed.
 Loading...