

SoundTube SD1 Installation Guide

INSTALLATION
& USE GUIDE
FOR SOLIDDRIVE SD1 INTO WALLS AND
CEILINGS WITH EXISTING DRYWALL
Experience True
Audio Perfection
SolidDrive’s extensive line of
audio products makes it easy
to create the ultimate audio
system, regardless of installation
requirements. SolidDrive builds
these products with only the most
select components and materials;
and utilizes numerous unique and
proven technologies.
INSTALLATION OF SOLIDDRIVE SD1 INTO WALLS AND CEILINGS WITH
EXISTING DRYWALL
By utilizing these seven basic installation steps, you can install the
SolidDrive SD1 into walls and ceilings with existing drywall
to create sound for boardrooms, home theater,
and distributed audio.
GETTING STARTED WITH SOLIDDRIVE
Included with the SolidDrive SD1 for installation
into walls and ceilings before drywall:
One (1) SolidDrive SD1 unit and attached wiring harness with
Eurostyle connector. *Additional mounting materials may
need to be ordered with the SolidDrive SD1 or supplied by
the installer depending on the application.
For drywall: For in-wall and in-ceiling installation, you will
have ordered one (1) or more SolidDrive SD1s and one (1) or
more patented acoustic in-wall brackets (one [1] bracket per
SD1), which comes with four (4) #8-32 x 5/16” Phillips at
head machine screws for mounting the drive to the bracket.
At the time of order, you will have specied 16 in., 24 in.,
or 12 in.
*Installation also requires four (4) 1 3/8” drywall screws and
one (1) container of 3M® Super 77 Spray Adhesive (supplied
by the installer).
gure 1. Cut an opening large enough to
install the mounting bracket.
Attach the SolidDrive SD1
mounting bracket to wall
STEP
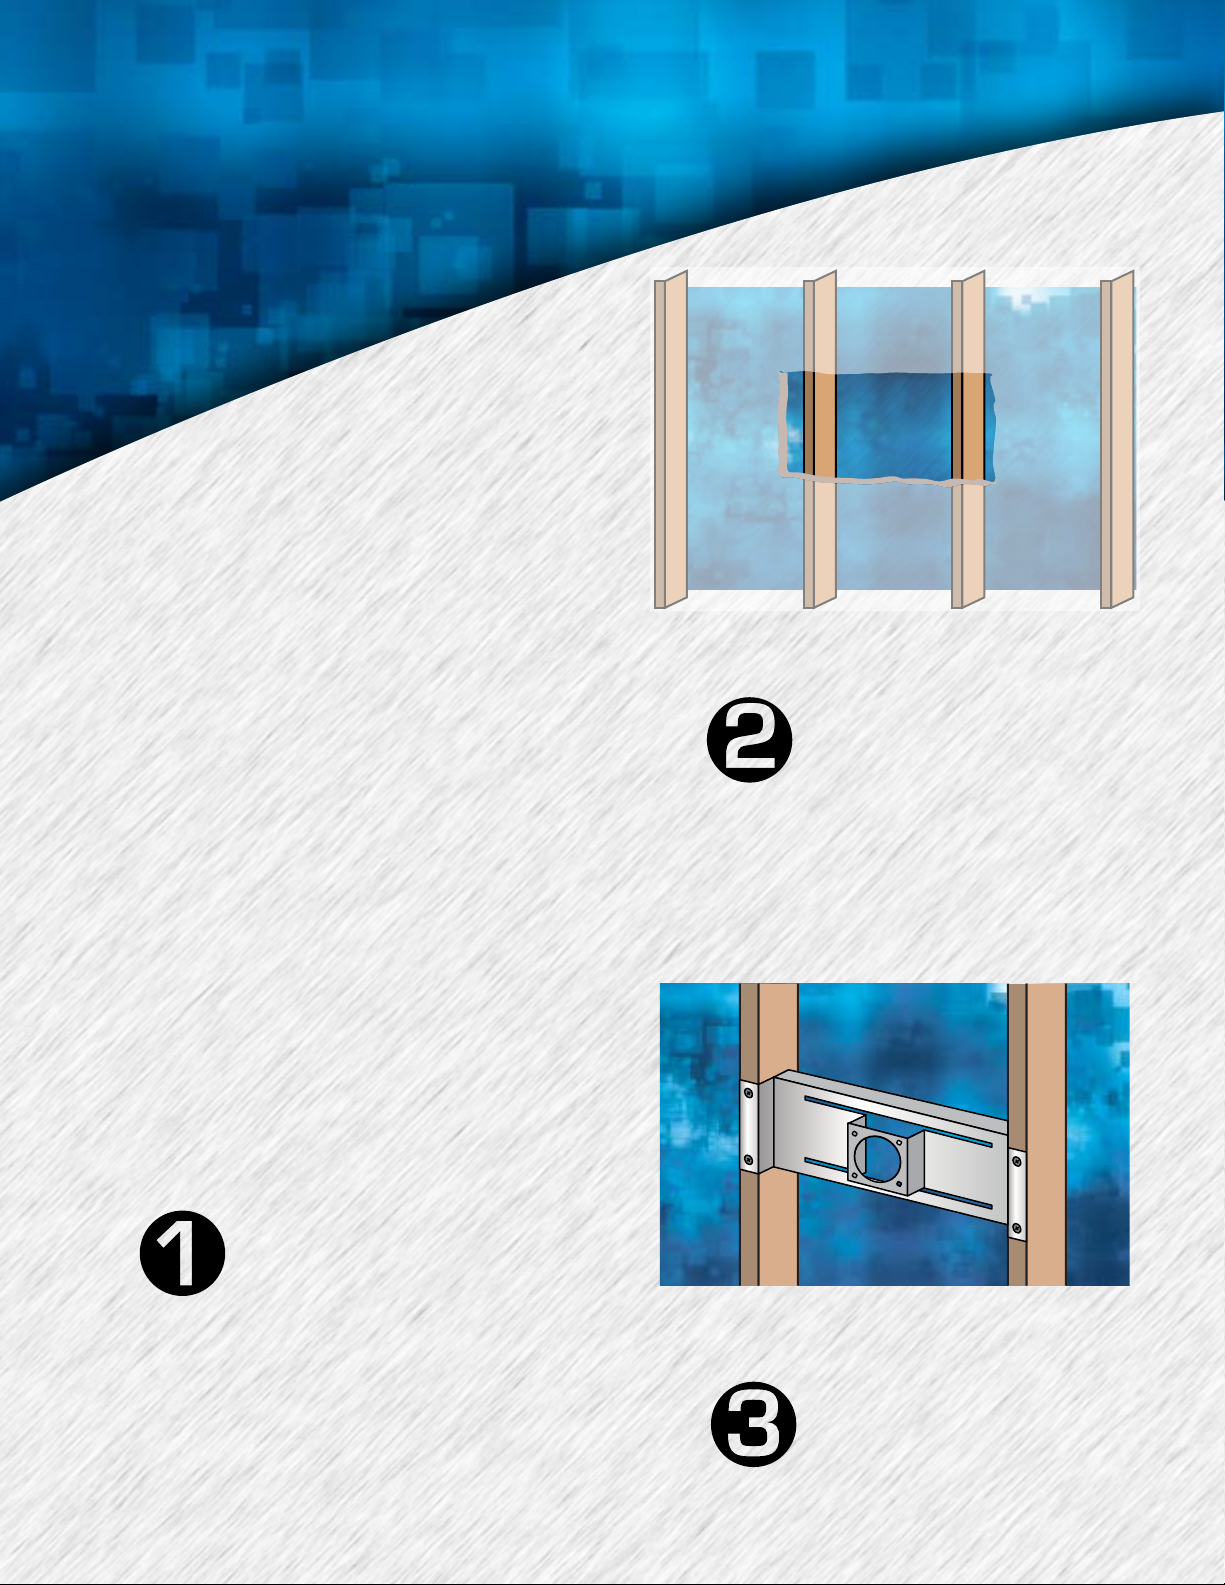
Place the mounting bracket between the wall studs or ceiling
joists and secure with two, 1 3/8” drywall screws. Insert the
screws through the 2 pre-drilled holes in each ange and
screw them into the face of each wall stud or ceiling joist
(Figure 2).The drywall screws need to be driven ush with
the surface of the ange so that the drywall sets ush on the
bracket ange.
studs or ceiling joists.
Cut a rectangular opening
in the wall.
STEP
For installing the SolidDrive SD1 mounting bracket into existing drywall, rst cut a rectangular opening in the drywall. The
minimum recommended opening size is approximately fteen
inches tall and beyond the width of the adjacent wall studs to
help attach the mounting bracket and help in feathering the
drywall back in and getting the drywall to meet at the seams
(Figure 1). This will allow proper distribution of sound and
the SolidDrive SD1 will function with optimum performance.
gure 2. Cut an opening large enough to
install the mounting bracket.
Install the SolidDrive SD1
into the bracket.
STEP
Feed the SolidDrive SD1 cable through the round opening in
the face of the mounting bracket. Insert the SolidDrive SD1
 Loading...