

Page 1

SoundCar
Digital Sound Decoder
Tsunami Digital Sound Decoder
SoundCar
®
™
™
User’s Guide
Software Release 1.01
Rev. B 11/4/14
Page 2

Notice
The information in this document is subject to change without notice.
SoundTraxx (Throttle Up!) shall not be liable for technical or editorial errors or omissions contained herein; nor for incidental or consequential
damages resulting from the furnishing, performance or use of this material.
This document contains information protected by copyright. No part of this document may be photocopied or reproduced in any form without the
prior written consent of Throttle Up! Corp.
Product names mentioned herein may be trademarks and/or registered trademarks of their respective companies.
SoundTraxx, Tsunami, SoundTraxx DCC, Digital Sound Decoder, Dynamic Digital Exhaust, Auto-Exhaust, Hyperlight, CurrentKeeper, Intelligent
Consisting, and SoundCar are trademarks of Throttle Up! Corp.
Page 3

Table of Contents
All Aboard! ...........................................................................................1
Overview ................................................................................................................1
Operation ..............................................................................................2
Using Your SoundCar Digital Sound Decoder .......................................................2
Basics of Programming ......................................................................5
Programming Procedure .......................................................................................5
Basic Programming ...........................................................................11
Step 1: Conguring the Address ..........................................................................11
Step 2: Conguring the Decoder .........................................................................12
Step 3: Function Mapping ....................................................................................14
Step 4: Conguring the Lighting Outputs .............................................................17
Step 5: Setting the Momentum ............................................................................22
Sound Programming .........................................................................23
Step 6: Modifying Sound Effects..........................................................................23
Consist Programming .......................................................................30
Step 7: Consist Operations .................................................................................30
Miscellaneous Features ....................................................................35
Step 8: Conguring the SoundCar’s Miscellaneous Features .............................35
Troubleshooting ................................................................................39
Appendix A .........................................................................................41
Appendix B .........................................................................................42
Appendix C .........................................................................................43
Appendix D .........................................................................................44
Page 4

Table Directory
Table A. Whistle Signals ...................................................................3
Table B. CV 29 – Conguration Register 1 ....................................12
Table C. Quick Reference for CV 29 Values ..................................13
Table D. SoundCar Function Mapping Table ..................................14
Table E. Hyperlight Control Mode Settings ....................................19
Table F. Sound Mixer CVs ..............................................................24
Table G. CV 115 – Airhorn/Whistle Select ......................................24
Table H. CV 227 – Bell Select ........................................................25
Table I. CV 117 – Rolling Stock Type Select ..................................28
Table J. CV 21 – Consist Function Control Group 1 ......................32
Table K. CV 22 – Consist Function Control Group 2 ......................33
Table L. Automatic Sound Function Enable ...................................36
Table M. CV 13 – Analog Function Enable 1..................................38
Table N. CV 14 – Analog Function Enable 2 ..................................38
Page 5

Overview
All Aboard!
Congratulations on the purchase of your SoundTraxx® Tsunami®
SoundCar™ Digital Sound Decoder™ (DSD). This User’s Guide will walk
you through the various aspects of programming your SoundCar DSD, as
well as provide some tips for troubleshooting. For advanced programming
techniques, refer to the Tsunami SoundCar Technical Reference, which
provides a comprehensive list of CVs available for use with the SoundCar,
including a description of the exact function and make‑up of each CV.
Technical Bulletins and Application Notes covering various topics are also
published periodically, and can be downloaded for free from our website at
www.soundtraxx.com.
Tsunami SoundCar User’s Guide Page 1
Page 6

Operation
Using Your SoundCar Digital Sound Decoder
Now your train doesn’t have to be limited to locomotive sounds! The 16‑bit
SoundCar DSD is the only DCC decoder to replicate railcar sounds like the
clickety‑clack, generator, brake cylinders, and more. The SoundCar DSD
uses sounds recorded from actual trains. Whether you want to include cab
cars, freight cars, reefers, passenger cars, or a caboose (or all!) in your train,
the SoundCar can reproduce the prototypical sounds appropriate to each car.
Your SoundCar DSD has been shipped with all CVs pre‑programmed so you
can begin using it immediately without having to make adjustments.
The SoundCar lets you use the function keys to re‑create the sounds
of typical actions that a train crew performs during operation, while
incorporating automated sequences for other prototypical train sounds like
the clickety‑clack, at spots, ange squeals, and wheel noise. Additionally,
certain related sounds, such as brake set up, application and release, are
grouped together and controlled by a single function key.
Note: Pay careful attention to the installation instructions and follow the
recommendation on the placement of the decoder in your model so that the
Intelligent Consisting sensor is easily accessible.
Default function assignments are as follows:
Function Key Effect
F0 Headlight On/Off
F1 Bell
F2 Airhorn/Whistle
F3 Short Airhorn/Whistle
F4 Unassigned
F5 FX5 Function Output
F6 FX6 Function Output
F7 Dimmer
F8 Audio Mute (4x Intelligent Consisting Enable)
F9 Generator
F10 Uncoupling and Glad Hand Release
F11 Apply/Release Brakes
F12 Coupler Clank
Although it’s not technically a function key, the emergency stop button also
activates the sound effect of the air being dumped from the brake line.
While these are the default settings, you may make changes to the function
mapping later. For now, set your controller to address 3, place the
SoundCar‑equipped model on the mainline, and start toggling through the
available functions to activate the effects.
Turn On the Lights
Press F0 on your cab to turn on the headlight of a cab car. Reverse the
direction and the headlight turns off as the backup light turns on. While
waiting on a siding, press F7 to dim the headlight for an oncoming train.
Tsunami SoundCar User’s Guide Page 2
Page 7

Operation
If you have wired the FX5 and FX6 function outputs for Hyperlight lighting
effects, pressing F5 or F6 will activate your selected effects. You can use
those outputs to incorporate lighting into the interiors of your cab cars and
passenger cars.
Ring the Bell
Engineers are required to ring the bell during yard movement. To ring the bell,
press F1 on your cab. This is an on/off function, i.e., once activated, the bell
will continue to ring until you press F1 again to turn it off.
Blow the Horn/Whistle
Engineers are required to blow various signals to warn of approaching trains,
as well as to notify passengers and train crew to the planned movement of
the locomotive. There are signals for crossings, stopping, moving forward,
backing up, and more.
Learning and using airhorn/whistle signals can add a lot of fun to your
operating sessions. Some of the more common signals are indicated in
Table A. To activate the airhorn or whistle, press F2 on your cab; the longer
you press the key, the longer the sound will play. While this feature allows
you to make long or short signals, F3 is designated as a “short” horn so those
signals will have that nice, crisp “toot” regardless of how responsive your cab
controls may be.
Table A.
Whistle Signals
Note: = Short Blast — = Long Blast
— — — Approaching grade crossing. (Hold final blast until crossing is occupied.)
— Flagman protect rear.
Brakes applied.
— — Release brakes, proceed forward.
When stopped, back up; when moving, stop.
Request signal from trainman.
— Warning signal (used when approaching areas with obstructed views,
approaching passenger or freight trains, and passing freight trains).
Start the Generator
By default, F9 controls the generator effect. While still in the railyard, a
crew member turns the generator on before the train leaves the station.
The generator will run automatically until shut off at its nal destination. You
can re‑create this scenario by setting the generator sound effect to play
automatically. In the “Sound Programming” section of this guide, we will
discuss how to congure the generator sound effect for prototypical operation
in refrigerator and passenger cars.
Tsunami SoundCar User’s Guide Page 3
Page 8

Operation
Activating Other Functions and Effects
Depending on the number of function keys on your cab, you may have
additional functions available to activate.
Mute the Sound
As with all SoundTraxx DSDs, pressing F8 will mute all sound effects – great
for when you need to take a quick break from the sounds of your layout.
Pressing F8 a second time will turn the sounds back on.
Brake Squeal/Release
The sound of squealing brakes are typically heard when the train line has
a brake set applied. Pressing F11 while the train is moving will initiate the
brake set, which includes the sounds of the brake cylinder being set up and
the brake shoes squealing as they make contact with the wheels. Press F11
again and the car will respond by producing the sounds of the retainer valve
and bleed‑off as the brakes are released. The brakes can also be set and
released when the train is idle using F11 – perfect for performing a standing
brake test prior to departure. Turn F11 on to hear the brakes set up and then
turn F11 off to release and hear the retainer bleed off.
Since F11 also controls the brakes in Tsunami DSDs, you can sync up the
braking effects of Tsunami‑equipped engines with SoundCar‑equipped rolling
stock. See “Miscellaneous Features” for more information on F11 braking and
CVs 3, 4 and 61.
Coupler Clank
Press F12 to activate the sound effect of the coupler engaging. Press F10 to
listen to the knuckle opening and the glad hands separating as the coupler
is released. See how well you can time these sound effects to the actual
coupling and uncoupling of your cars to the train!
Emergency Stop
Pressing the emergency stop button will play the sound of the air being
dumped from the emergency stop valve (also known as the “big hole”
application) to lock up the brakes.
Automated Sound Effects
Give your ngers a rest and let the SoundCar take over with automated
sound effects. Your decoder is defaulted to automatically play the
clickety‑clack and ange squeals in response to the throttle speed. Give
them a listen by increasing the throttle on your cab. Other sound effects,
such as the generator, bell and airhorn, can be programmed to turn on and
off automatically. Refer to the “Sound Programming” section for details on
setting up automated sound effects.
Tsunami SoundCar User’s Guide Page 4
Page 9

Basics of Programming
Programming Procedure
Because each DCC system is unique, the procedure for programming a
Conguration Variable (CV) differs among systems. Unfortunately, we cannot
provide detailed instructions to cover every available command station and
must assume that you have some level of understanding regarding the
capabilities and operating procedures specic to your system. For detailed
programming procedures, please consult your DCC system manual or
contact the manufacturer for support.
What is a CV?
Conguration Variable (CV) is the industry‑adopted term for a decoder’s
user‑programmable memory locations. CVs allow you to customize individual
decoder properties such as the address, volume, sound effects, lighting,
and much more. Once a CV has been programmed, the setting will be
permanently remembered even after the power is turned off. A CV can be
modied as often as necessary by simply reprogramming it with a new value.
With the large number of CVs available, rst inspection of the available
options may cause confusion and even a little panic. Relax! As previously
indicated, the DSD has been shipped with all CVs pre‑programmed so you
can begin using your SoundCar immediately without making adjustments.
The following sections break out the SoundCar’s CVs into various categories,
so it is only necessary to change a few CVs at a time if you want customized
operation. As you become comfortable with one set of CVs, move on to a
new category and begin exploring the available options and capabilities.
Detailed information related to any CV can be found in the Tsunami
SoundCar Technical Reference.
Bits and Bytes
One of the most confusing aspects of programming a CV is guring out
the meaning of all the different bits, bytes and x’s found in various decoder
manuals. This problem is further compounded by differences in each
command station manufacturer’s user interface.
If just reading about bits and bytes already has your head spinning, a short
math lesson is in order before proceeding (but don’t worry, there won’t be a
test). Each CV stores a numeric value that can be represented in one of the
following three forms:
Decimal – This is the most common and familiar numbering format, and the
one that most of us use in day‑to‑day life. Numbers are represented as a
sequence of digits comprising the numerals 0, 1, 2, 3, 4, 5, 6, 7, 8, and 9.
Hexadecimal – Also referred to as simply “hex,” this is a specialized number
representation that uses the characters A‑F in addition to numerals 0‑9.
An advantage of hexadecimal numbering is that it allows a given decimal
number to be more compactly represented. For example, the decimal number
Tsunami SoundCar User’s Guide Page 5
Page 10

Basics of Programming
127 converts to a simple 7F in hex. If your command station’s interface allows
a limited number of digits, hex numbering can allow your cab to display a
greater range of numbers.
Binary – Binary numbers get their name from the fact that they only use two
digits, 0 and 1, which are called “bits.” Binary is the fundamental numbering
system used by computers, including those found inside a digital decoder.
Because there are only two bit values, more digits are required to represent
a number when using binary. For example, the decimal number 127 is written
as 01111111 in binary notation. A “byte” is a binary number made up of eight
bits, and a “nibble” is one‑half of one byte, or four bits.
Each CV is made up of one byte (i.e., eight bits) and can store any number
from 0 to 255. Most CVs contain a single piece of data that can be easily
represented in any of the three number formats described above. For
example, CV 3 (Baseline Acceleration Rate) can be loaded with any value
from 0 to 255 and it will always and only affect one thing – the acceleration.
Now, a little more about those bits: Some CVs use the individual bits to
control various features. This keeps the number of CVs more manageable
and allows up to eight distinct features to be controlled using a single CV. Bit
variables require binary input and will only respond to input values of 0 and
1. For this reason, programming by the bits is usually reserved for simple
variables that are either ON or OFF, disabled or enabled, etc. Unfortunately,
bit variables are difcult to represent in any form other than binary while still
preserving their meaning. As most DCC system user interfaces don’t use
binary representation, programming by the bits using binary requires a little
bit of math (just simple addition though!) to convert values into the decimal or
hex representations used by most DCC systems.
To facilitate programming, we have tried to use decimal representation in this
manual when dening advisable values to program into a given CV; however,
you will occasionally nd binary values listed in the Tsunami SoundCar
Technical Reference.
Now, let’s try a programming example for CV 29 (Conguration Register 1),
which works best when programmed by the bits. When programming
individual bits, we suggest the following procedure to determine the correct
decimal value. Referring to the CV description in the Tsunami SoundCar
Technical Reference, write down the value that will produce the desired
response for each bit. In this example, we want to program this CV so that
speed tables and 28 speed‑step mode are enabled. As indicated in the
technical reference, bits 1 and 4 should both be set to 1 to enable the desired
features, with all of the other bits set to 0. Write down the individual bit
values as shown below:
bit 7 bit 6 bit 5 bit 4 bit 3 bit 2 bit 1 bit 0
Tsunami SoundCar User’s Guide Page 6
Page 11
Basics of Programming
We then look up the binary value determined above, 00010010, in Appendix A
and see that it corresponds to a decimal value of 18 (or hex value of 0x12).
Program the decimal value (18) into the CV to get the desired response.
If you don’t have the conversion chart available, or just feel compelled to
do some calculations in your free time, the CV value can be determined
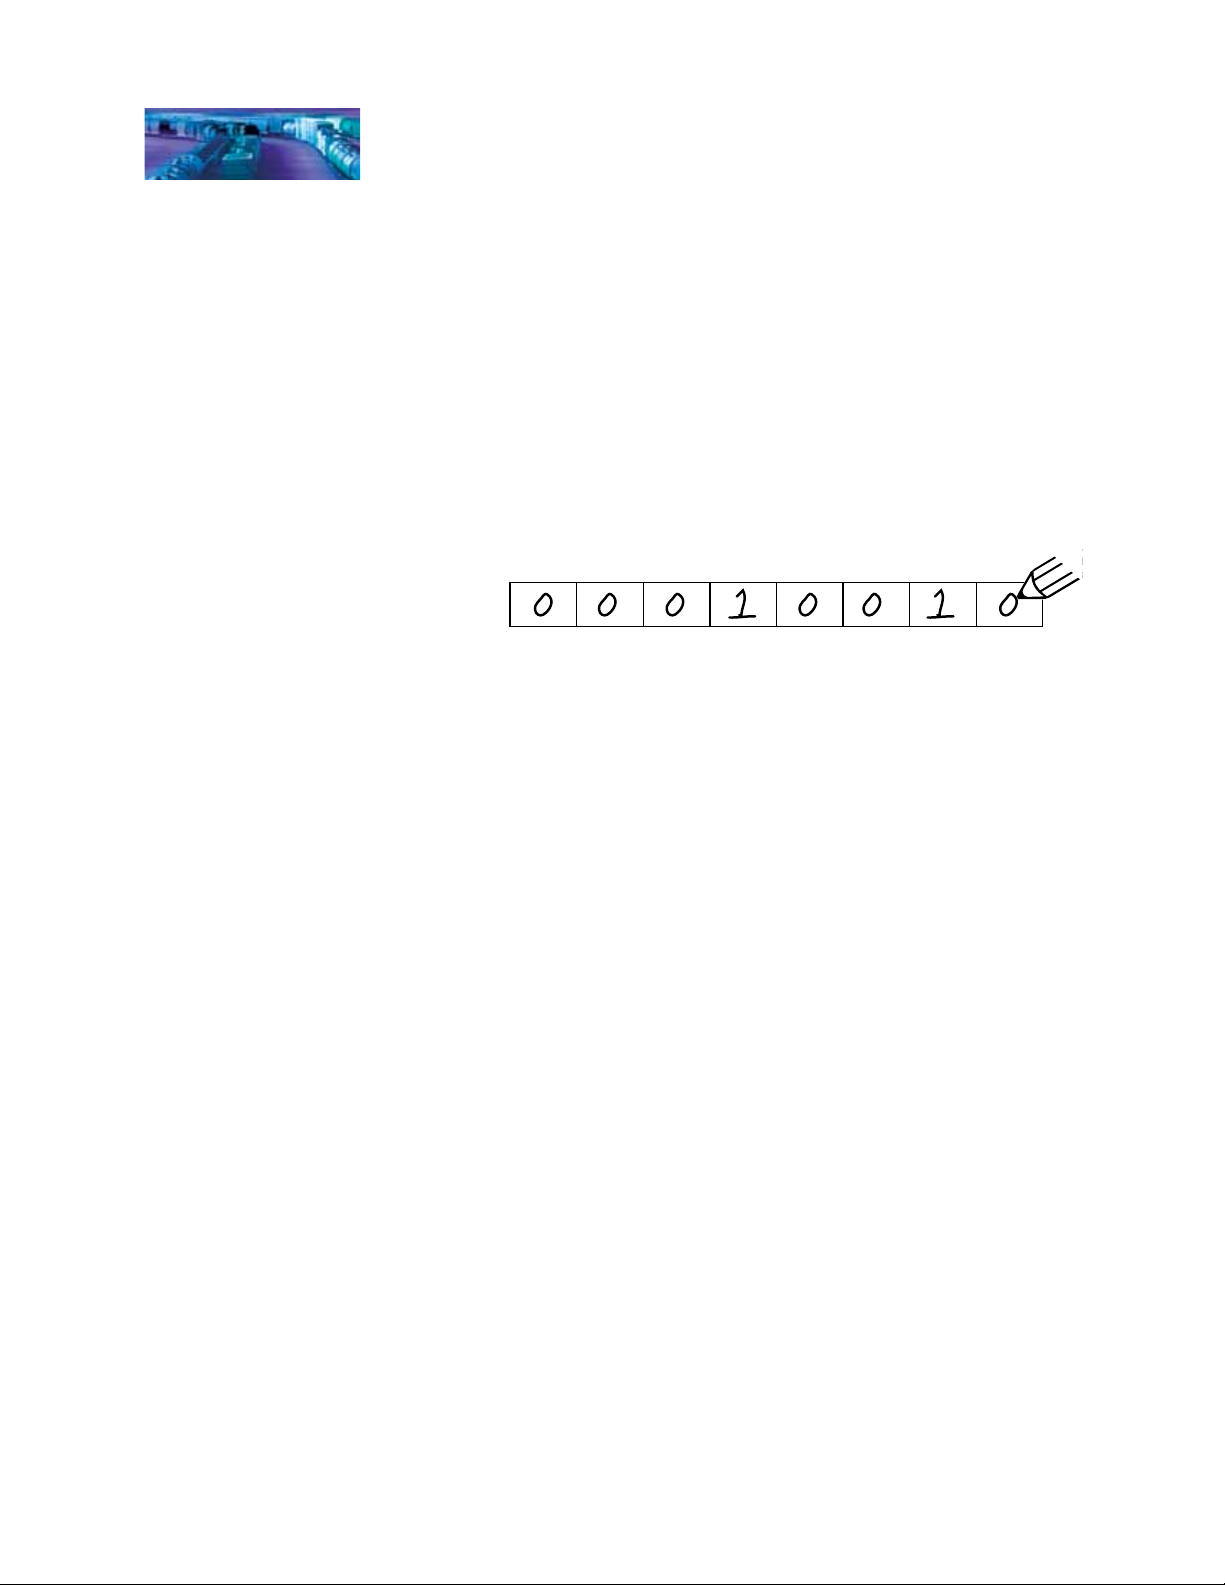
by an alternate method. Reading from right to left in the gure below, there
is a decimal value associated with each bit, beginning with 1 and doubling
in value for each successive bit (i.e., bit 0 = 1, bit 1 = 2, bit 2 = 4, bit 3 = 8,
bit 4 = 16, bit 5 = 32, bit 6 = 64, and bit 7 = 128). The decimal value
associated with each bit is only counted when that bit is set to 1. As reected
in the gure below, bit 1 has a value of 2 and bit 4 has a value of 16. Adding
these two numbers together gives the correct decimal value of 18.
bit 7 bit 6 bit 5 bit 4 bit 3 bit 2 bit 1 bit 0
When bit is
set to 1, value = 128 64 32 16 8 4 2 1
Therefore: 0 + 0 + 0 + 16 + 0 + 0 + 2 + 0 = 18
Programming Methods
There are two methods for programming CVs in your SoundCar DSD.
Operations Mode Programming – Sometimes called “Ops Mode”
or “programming on the main,” this programming mode allows CVs to
be changed while the car is operating on the layout, even when other
locomotives and rolling stock are present. The ability to program during
operation greatly enhances your ability to re‑create prototypical scenarios; for
example, you can increase the momentum of a locomotive after it couples to
a train.
One disadvantage of Ops Mode programming is that CV data cannot be
read back to verify values. To conrm the value of a CV that is programmed
in Operations Mode, the SoundCar DSD will audibly verify that it is properly
responding to your programmer by producing a short cowbell sound effect
when a command is received.
Service Mode Programming – This programming mode usually requires
connecting the car to a dedicated programmer or placing it on a special
programming track. SoundTraxx offers an advanced line of DSDs that
support the following four types of Service Mode instructions:
• Address Mode – Only CV 1 (Primary Address) may be changed.
• Register Mode – Only CVs 1, 2, 3, 4, 7, 8, and 29 may be changed.
• Paged Mode – Uses a page register to indirectly modify any CV.
• Direct Mode – Allows you to directly change any CV.
Tsunami SoundCar User’s Guide Page 7
Page 12

Basics of Programming
Reading CVs
Certain command stations permit you to read the value of a CV and verify its
setting in Service Mode programming. If you have trouble reading or verifying
CVs, the problem may exist in the design of your command station and not in
the decoder itself. Decoders of all types and brands communicate back to the
command station using something called an acknowledgment pulse, which is
dened in NMRA S‑9.2.3 as “an increased load on the programming track of
at least 60mA for at least 6ms ±1ms.” Your SoundCar DSD allows you to read
back CVs on the programming track by showing the value on the screen of
your command station to indicate an acknowledgement.
If you experience difculties while programming and/or reading CVs, try a
different programming mode. If your DCC system supports it, the best way to
program CVs is in Operations Mode, as it allows you to immediately see or
hear the results of your changes. It is important, however, to realize that not
all programming modes will work with all CVs. Ultimately, the programming
modes you will use depend on the type of DCC system you are using.
Many of the newer DCC systems can automatically select the appropriate
programming mode, so all you need to do is specify the CV number and
desired value. On the other hand, some DCC systems only support certain
programming modes and may restrict which CVs you can program. When
in doubt, refer to your DCC system’s manual or contact the manufacturer to
determine which programming modes they support.
Note: The SoundCar does not require a programming booster, such as the
PTB‑100.
Locking and Unlocking CVs
CV Lock/Unlock is a feature that allows you to program a decoder without
the danger of overwriting the programming in another decoder, which is
especially useful when you have multiple units in a consist equipped with
SoundCar decoders. This feature is controlled by the following CVs:
CV 15, CV Unlock Code
CV 16, CV Lock ID
CV 30, Error Information/Alternate Mode Selection
Note: Locking the decoder will not affect its ability to be added to a consist
using Intelligent Consisting, which is discussed in the “Consist Operations”
section of this document.
Before using the CV lock feature available in CVs 15 and 16, bit 0 of CV 30
(Error Information/Alternate Mode Selection) must be set to 1 (the default
value is 0). This ensures that you will not inadvertently lock the decoder when
the CV lock feature is not needed.
CVs 15 and 16 are used to lock and unlock your SoundCar DSD. CV 15
contains the unlock code and may be programmed with any value from 0
to 255, regardless of whether the decoder is locked or unlocked. CV 16
contains the lock code and may be set to any value from 0 to 7, but only
when the decoder is unlocked. Attempts to program CV 16 with a value
greater than 7 will be ignored.
Tsunami SoundCar User’s Guide Page 8
Page 13

Basics of Programming
The decoder is unlocked when the value in CV 15 matches the value in
CV 16. Otherwise, the decoder is locked and cannot be reprogrammed in
either Operations Mode or Service Mode. Moreover, a locked decoder cannot
be reset to its factory defaults until it is unlocked. SoundTraxx decoders are
shipped from the factory with all CVs unlocked (CVs 15 and 16 are both set
to 0).
Note: If the decoder is unlocked, changing the value in CV 16 will instantly
lock the decoder. You must then set CV 15 to the value programmed into
CV 16 to unlock the decoder again.
If you decide to use the CV locking feature for a multi‑decoder installation,
you must rst set the lock code in CV 16 in each decoder prior to installing
the next one. Otherwise, all of the decoders will have the same lock code
and the lock/unlock feature will not work. To ensure the lock/unlock feature
will work correctly in a multi‑decoder installation, install one decoder and
program its lock code. After you have locked the rst decoder, install the
second decoder and set its lock code. Because the rst decoder is locked, it
will be unaffected while you program the second decoder (unless you happen
to accidentally set the lock code of the two decoders to the same value. If
this happens, disconnect the second decoder and start over). Repeat this
procedure until all decoders have been installed and their respective lock
codes set.
It is a good idea to create a system to help you remember all those lock
codes. As an easy example, you might choose to set the lock code for motor
decoders to 1, sound decoders to 2, and function decoders to 3. In any event,
keeping CV 15 set to 0 will guarantee that the decoder stays locked until you
are ready to program.
If You Forget the Lock Code
As there are only eight possible combinations, you can easily determine a
forgotten lock code using trial and error with the following procedure:
Place the model on the programming track and set CV 15 to 0. Then, try to
read the value programmed into CV 16. If CV 16 does not read back, the
decoder is locked. Set CV 15 to 1 and try reading CV 16 once more. Again,
if CV 16 does not read back, the decoder is locked. Program CV 15 to 2 and
try reading CV 16 again. Continuing in this manner, you should eventually
nd the value programmed into CV 16, as it can only be a value from 0 to 7. If
you have set CV 15 to all eight values from 0 to 7 and the decoder still does
not respond, there may be a problem with the installation, the programming
track, or even the decoder itself. Investigate further and contact SoundTraxx
customer support as necessary.
If you do not have access to a programming track with read‑back capabilities
(or are uncertain if yours is working properly), you can also use Operations
Mode to determine the lock code. To do this, alternately program CV 15
and another CV to a value where there is a known response. For example,
changing CV 128 (Master Volume Control) should produce audible feedback
Tsunami SoundCar User’s Guide Page 9
Page 14

Basics of Programming
via a change in sound level if the decoder is unlocked. Begin by setting
CV 15 to 0 and CV 128 to 0. If the volume level does not fall to 0, the decoder
is locked. Next, set CV 15 to 1 and reprogram CV 128 to 0. Repeat this
process until you nd a value for CV 15 that results in the volume falling to 0
as reprogrammed into CV 128.
Troubleshooting Tip
Be aware that even if you do not plan on using the CV lock feature, it can
still be accidentally activated if CV 15 or 16 is programmed to a non‑default
value. If your DSD is otherwise working properly (i.e., making sound and
responding to function commands) but has stopped accepting CV changes,
run through the “If You Forget the Lock Code” procedure to determine if the
decoder is locked.
Resetting the CVs or Starting Over
Occasionally, something goes wrong and the SoundCar DSD will not respond
as expected. Usually this is caused by one or more CVs being programmed
to an unacceptable value. CVs can easily be reset to their factory default
values as follows:
1. Place the model on a powered section of track. Using either Service
Mode or Operations Mode, program CV 8 to 8, or CV 30 to 2.
2. If the model is already on the mainline, cycle power to the DSD by
turning power to the track off and then back on again.
Note: If you have a SoundTraxx CurrentKeeper™ or other device
intended to maintain power to the decoder, remove power for at least
1 minute to ensure that it is fully discharged.
3. If sounds start immediately after power is restored, the decoder did
not reset. Repeat Steps 1 and 2.
4. Approximately 6 seconds after power is restored, startup sounds
should begin, and the headlight and backup light (if connected) will
blink 16 times, indicating that CVs were successfully reset.
5. Your SoundCar DSD should now respond to primary address 3 just
like it did out of the package.
6. If you cannot get the decoder to reset, make sure it has not been
inadvertently locked (see “Locking and Unlocking CVs” for more
information).
Tsunami SoundCar User’s Guide Page 10
Page 15

Basic Programming
Step 1: Configuring the Address
The rst CVs you may want to change are those that set the SoundCar’s
address:
CV 1, Primary Address Control
CVs 17 and 18, Extended Address
The SoundCar DSD can be set up to recognize either the primary (“short”)
address or the extended (“long”) address. The primary address may be
programmed with any value from 1 to 127, while the extended address may
be programmed with any value from 0001 to 9999. Whether you choose to
use the primary or extended address will rst depend upon whether your
DCC system allows extended addressing (not all of them do, so when in
doubt, refer to your system’s user manual). It will also depend upon your
preferences and your personal numbering scheme for setting decoder
addresses. One advantage of using the extended address is that since it
uses four digits, you can use a model’s road number as the decoder address,
making it easy to remember.
Note: Both the primary and extended addresses can be changed at any time
using Service Mode programming.
Primary Address
To use the primary address, set CV 1 to the desired address from 1 to 127.
Some DCC systems will also allow the decoder address to be modied in
Operations Mode (consult your system manual for details). Please note that
when programming in Operations Mode, the following restrictions apply:
• If the decoder’s primary address is enabled (i.e., bit 5 is set to 0 in
CV 29), only the extended address may be changed using Operations
Mode programming.
• Alternately, if the decoder’s extended address is enabled (i.e., bit 5 is
set to 1 in CV 29), only the primary address may be changed using
Operations Mode programming.
Extended Address
The extended address is made up of two CVs, 17 and 18. Programming
these CVs is only advisable for experienced users, as a specic protocol
is required in order for the DSD to accept the new data (see the Tsunami
SoundCar Technical Reference for details). Most command stations that
support extended addressing will automatically generate the correct protocol;
simply follow their instructions for setting the extended address.
Once the extended address is stored in CVs 17 and 18, bit 5 of CV 29
(Conguration Register 1) must be set to 1 in order for the decoder to
recognize the extended address format. If bit 5 of CV 29 is set to 0, the
decoder will continue to respond only to its primary address. For more
information related to CV 29, see the next section, “Conguring the Decoder.”
Tsunami SoundCar User’s Guide Page 11
Page 16

Basic Programming
Step 2: Configuring the Decoder
The next CV you may want to customize is CV 29 (Conguration Register 1).
Customizing CV 29 requires setting its individual bit variables, as we briey
addressed in the “Bits and Bytes” section of this manual. CV 29 is used in
conjunction with other CVs to set a multitude of decoder characteristics, such
as direction and alternate power source enable.
Table. B.
CV 29 – Conguration Register 1
Bit 7 Bit 0
MD 0 EAM 0 ACK APS F0 DIR
Primary or Extended Address (EAM) – Bit 5 (EAM) of CV 29 determines
whether the decoder will respond to the primary address in CV 1 or the
extended address in CVs 17 and 18 (see “Conguring the Address” for more
information).
Alternate (Analog) Power Source (APS) – Bit 2 (APS) of CV 29 allows the
decoder to work with an alternate power source (such as DC) when a DCC
signal is not present as set by CV 12 (Alternate Power Source).
Note: The SoundCar is shipped from the factory with analog mode disabled.
Table C, on the following page, lists the correct decimal value to program
into CV 29 for a variety of operating modes. To use the table, locate the row
with the operating characteristics you desire and program CV 29 with the
associated value.
Note: Table C values are in decimal format. If your command station requires
hex inputs, you will need to convert using Appendix A.
Refer to the Tsunami SoundCar Technical Reference for more CV 29
details.
Tsunami SoundCar User’s Guide Page 12
Page 17

Basic Programming
Table C.
Quick-Reference Table for CV 29 Values
Address Type
Primary (CV 1) No No 14 Normal 0
Primary (CV 1) No No 14 Reversed 1
Primary (CV 1) No No 28/128 Normal 2
Primary (CV 1) No No 28/128 Reversed 3
Primary (CV 1) No Yes 14 Normal 4
Primary (CV 1) No Yes 14 Reversed 5
Primary (CV 1) No Yes 28/128 Normal 6
Primary (CV 1) No Yes 28/128 Reversed 7
Primary (CV 1) Yes No 14 Normal 16
Primary (CV 1) Yes No 14 Reversed 17
Primary (CV 1) Yes No 28/128 Normal 18
Primary (CV 1) Yes No 28/128 Reversed 19
Primary (CV 1) Yes Yes 14 Normal 20
Primary (CV 1) Yes Yes 14 Reversed 21
Primary (CV 1) Yes Yes 28/128 Normal 22
Primary (CV 1) Yes Yes 28/128 Reversed 23
Extended (CV 17:18) No No 14 Normal 32
Extended (CV 17:18) No No 14 Reversed 33
Extended (CV 17:18) No No 28/128 Normal 34
Extended (CV 17:18) No No 28/128 Reversed 35
Extended (CV 17:18) No Yes 14 Normal 36
Extended (CV 17:18) No Yes 14 Reversed 37
Extended (CV 17:18) No Yes 28/128 Normal 38
Extended (CV 17:18) No Yes 28/128 Reversed 39
Extended (CV 17:18) Yes No 14 Normal 48
Extended (CV 17:18) Yes No 14 Reversed 49
Extended (CV 17:18) Yes No 28/128 Normal 50
Extended (CV 17:18) Yes No 28/128 Reversed 51
Extended (CV 17:18) Yes Yes 14 Normal 52
Extended (CV 17:18) Yes Yes 14 Reversed 53
Extended (CV 17:18) Yes Yes 28/128 Normal 54
Extended (CV 17:18) Yes Yes 28/128 Reversed 55
Use Speed
Tables?
Analog
Mode?
Speed Steps
Locomotive
Direction
CV 29 Value
Tsunami SoundCar User’s Guide Page 13
Page 18

Basic Programming
Step 3: Function Mapping
What is Function Mapping?
Function mapping allows the DSD to be recongured from defaults to allow
sound effects and function outputs to respond to different function keys.
This is especially useful if your throttle has fewer than 13 function keys, as it
allows you to select which effects are active and which keys will control them
instead of being restricted to default function assignments.
There are 14 total function mapping CVs. Twelve of those CVs, 35‑46, are
used to assign control to function keys 1‑12, respectively. The remaining two
CVs, 33 and 34, relate to the F0 function. CV 33 controls which outputs are
active when F0 is on and the cab is set in the forward direction. Conversely,
CV 34 controls which outputs are active when F0 is on and the cab is set in
the reverse direction. If the same effect/output is selected for both CV 33 and
CV 34, that function will turn on whenever the F0 function is on, regardless of
direction.
Be aware that not all function keys can control all outputs or effects. Table D
shows which functions can be mapped to which outputs. Note that a function
key can be set up to control more than one output.
Table D.
SoundCar Function Mapping Table
Function Key
Control Key
Headlight
Backup Light
Horn/Whistle
Bell
FX5
FX6
Reserved
Short Horn/Whistle
Generator
Reserved
Dimmer
Mute
Uncoupling
Brakes
Coupler
F0 (f) 33
F0 (r) 34 1
F1 35 1 2 4
F2 36 1 2
F3 37 1 2 4 8
F4 38 1 2 4 8 16 32 64 128
F5 39 1
F6 40 1 2
F7 41 1 2 4 8
F8 42 1 2 4 8 16
F9 43 1 2
F10 44 1 2 4 8 16
F11 45 1 2 4 8 16 32
F12 46 1 2 4 8 16 32 64
Bold values indicate defailt settings.
2 4 8 16 32 64 128
1
4 8 16 32 64 128
2
16 32 64 128
8
8 16 32 64 128
4
4 8 16 32 64 128
2
4
32 64 128
16
8 16 32 64 128
16
8 16 32 64 128
4
32 64 128
64 128
32
64 128
32
64
128
128
Tsunami SoundCar User’s Guide Page 14
Page 19

Basic Programming
When an output is controlled by more than one function key, either function
key will turn on that output. However, the output will not turn off until both
function keys have also been turned off.
To determine the correct CV value for customizing function mapping:
1. Locate the column in Table D that corresponds to the output or sound
effect you wish to control.
2. Next, locate the row that corresponds to the function key you would
like to use to control the selected output or effect.
3. Note the number located in the box at the intersection of the row and
column you have selected.
4. Program the CV in the row selected in Step 2 with the value located
in Step 3.
Example: Swapping the Bell and Short Horn Functions
Some DCC systems label F3 on their cabs as the bell control, however, the
SoundCar’s default bell control is F1. Fortunately, if you happen to have a
cab with F3 labeled as bell control, you can use function mapping to reassign
the control so that the function label controls that utility in the decoder. Since
F3 controls the short horn function by default in the SoundCar, we will simply
swap it with F1 as follows:
1. First, reassign F3 to the bell. In Table D, locate the bell column.
Then locate the F3 row. Note the value, 1, found in the box at the
intersection of the bell column and F3 row. Now, program a value of 1
into CV 37, which controls F3. F3 should now control the bell sound
effect.
2. Next, reassign F1 to the short horn following the same procedure.
Locate the short horn column in Table D, and then locate the F1 row.
Note the value, 128, found in the box at the intersection of the short
horn column and F1 row. Program a value of 128 into CV 35, which
controls F1. Now, F1 should control the short horn sound effect.
Working With 8-Function Cabs
While the SoundCar can support 14 functions, some cabs are limited to
only 8 or 9 functions, which may leave you feeling like you can’t take full
advantage of the DSD’s features. In most cases, some clever function
mapping will allow you to access and use all of SoundCar’s available
features.
Instant Function Swapping
Entering a value of 4 into CV 30 (Error Information/Alternate Mode Selection)
will swap function assignments for F5‑F8 with the function assignments for
F9‑F12. Think of CV 30 as a sort of “shift” key when bit 2 is enabled:
F5 = Generator
F6 = Uncoupling and Glad Hand Release
F7 = Apply/Release Brakes
F8 = Coupler Clank
F9 = FX5 Function Output
F10 = FX6 Function Output
F11 = Dimmer
F12 = Audio Mute
Tsunami SoundCar User’s Guide Page 15
Page 20

Basic Programming
If you do not need the mute, dimmer or extra lighting functions, you can set
CV 30 to 4 and forget about it. Otherwise, programming CV 30 back and forth
with the values 0 and 4 can be quite inconvenient and a more sophisticated
solution is in order.
Example: Function Mapping With an 8‑Function Cab
In this example, we will presume that you want to use the FX5 output for
number board lights and FX6 for a cab light. The FX5 and FX6 outputs can
be doubled‑up on F0 so that these lighting effects will turn on whenever the
headlight or backup light is on, which will free up the F5 and F6 keys.
Using Table D, we can proceed to remapping the functions. Starting with F0,
congure the forward direction (F0[f]) to control the headlight, FX5 and FX6
outputs:
CV 33 = 1 + 16 + 32 = 49
For the reverse direction (F0[r]), set F0 to control the backup light, FX5 and
FX6 outputs:
CV 34 = 2 + 16 + 32 = 50
Working With Cabs That Have Fewer Than 8
Functions
By default, your SoundCar comes with Intelligent Consisting activated by
pressing F8 four times (on, off, on, off). You may move this to a different
function key of your choice by adjusting CV 228. This CV contains a value
of 1 to 12, which corresponds to the desired function key (default value is 8).
For example, if you want to activate Intelligent Consisting by pressing F7 four
times, you would change CV 228 to a value of 7.
For additional techniques and tips, see the “Function Mapping” section in the
Tsunami User’s Guide (steam or diesel).
Tsunami SoundCar User’s Guide Page 16
Page 21

Basic Programming
Step 4: Configuring the Lighting Outputs
The SoundCar has four function outputs to control the lighting effects. Each
can be congured for a variety of effects, including simple on/off lights.
Additionally, you can use Grade Crossing Logic to automatically activate a
selected lighting effect when you blow the airhorn or whistle.
The following CVs allow you to customize the lighting effects:
CV 49, Headlight Effect Select
CV 50, Backup Light Effect Select
CV 51, FX5 Effect Select
CV 52, FX6 Effect Select
CV 57, FX5, FX6 Directional Control Enable
CV 58, FX5, FX6 Lighting Override Enable
CV 59, Flash Rate
CV 60, Crossing Hold Time
Hyperlight™ Effects
Hyperlight Select – Each lighting output can be programmed to one of
several Hyperlight lighting effects as briey described below and listed in
Table E.
Rule 17 dimmable headlight – This function output is normally an on/off
output. When it is on, the output level will be reduced by approximately
60% when the dimmer function is on.
Mars Light – This effect simulates the sweeping gure‑8 pattern of this
popular warning beacon.
Pyle‑National Gyralite – The Gyralite is similar to the Mars Light, but
generates a slow, wide‑sweeping elliptical headlight pattern.
Oscillating headlights – Similar in appearance to the common
twin‑sealed‑beam headlight, the oscillating headlight uses a moving
reector to sweep the beam in a tight circular motion.
Single‑ and double‑ash strobes – The strobe effect simulates the
white‑hot burst of light associated with a xenon strobe.
Western‑Cullen D312 rotary beacon – This effect provides a spectacular
rendition of the revolving reector and bulb assembly found atop many
diesels from the 60s and 70s.
Prime Stratolite – The Stratolite is a new version of the rotary beacon,
with the prototype consisting of four individual lamps arranged in a
circular pattern, which electronically ash in a clockwise direction. The
Stratolite ashes in a mechanical “stepped” fashion, as opposed to the
smooth motion of the rotary beacon.
Tsunami SoundCar User’s Guide Page 17
Page 22

Basic Programming
Type I and Type II ditch lights – These operate identically. However, if
Grade Crossing Logic is enabled, the Type I ditch light will revert to a
steady “on” state when it is not ashing, whereas the Type II lights will
turn off.
Flashing rear‑end device (FRED) – Also known as an end‑of‑train
device, this red ashing marker light is mounted on the coupler of the
rear car or on the back of the caboose to warn following trains.
Exhaust icker – This effect produces a random icker with an intensity
that increases with the train’s speed. Use this effect in power generator
cars.
Firebox icker – This effect produces a random icker that resembles
a burning re and can be used by placing a lamp in the caboose to
simulate a wood‑burning stove. The effect is improved when two bulbs
are used (one yellow and the other red or orange), each connected to a
separate function output.
Dyno‑light – This effect for steam locomotives synchronizes the lamp
brightness to the output of the dynamo so that the lamp brightness
gradually increases as the dynamo builds up speed. For diesel
locomotives, the lights will fade on and fade off to simulate the heating
and cooling of the bulb laments.
Phase Select – Phase select alters the timing of an effect so that it is 180
degrees out‑of‑phase with other effects. This allows you to have two lighting
effects that blink back and forth by setting one effect to Phase A and the other
to Phase B.
Grade Crossing Logic – When Grade Crossing Logic is enabled, it causes
a selected lighting effect to become active only when the horn/whistle is
sounded (and the corresponding lighting function is also on). This can be
used to re‑create prototypical scenarios such as causing the ditch lights to
ash at a grade crossing. Grade Crossing Logic can be used with nearly
all of the Hyperlight effects without adversely affecting the on/off, dimmable
headlight, Dyno‑light, FRED, exhaust icker, or rebox icker effects. Other
effects will either turn off (e.g., strobes and beacons) or revert to a steady
“on” state (e.g., Mars Light, ditch lights, etc.) as appropriate to prototypical
practice.
Rule 17 Headlight Operation – This converts the headlight and backup
light to independent, non‑directional lights. When Rule 17 Mode is active, the
headlight is controlled as if it is FX5 and the backup light is controlled as if it
is FX6.
LED Compensation Mode – The SoundCar’s lighting effects are designed
to work with either LEDs or incandescent bulbs. However, because of the
different brightness characteristics of the two bulb types, some lighting
effects may appear less realistic when set up with an LED. You can enable
LED Compensation Mode to correct this, which will improve the contrast
of the lighting effect by automatically adjusting the function output level to
compensate for the brightness of LED bulbs.
Tsunami SoundCar User’s Guide Page 18
Page 23

Basic Programming
Setting the Hyperlight Effects
For each lighting output, there is a corresponding CV that determines its
operating characteristics. To set the Hyperlight CVs, proceed as follows:
1. Locate the CV value for the desired effect and operating mode from
Table E.
2. To enable Rule 17 Mode, add 64 to the table value. Otherwise,
proceed to Step 3.
3. If you are using LED bulbs, enable LED Compensation Mode by
adding 128 to the value from Step 1 (or Step 2 if using Rule 17
Mode). If you are using incandescent bulbs, skip to Step 4.
4. Program the nal sum for the selected function output into the
corresponding CV. Use CV 49 to congure the headlight, CV 50 for
the backup light, CV 51 for FX5, and CV 52 for FX6.
Table E.
Hyperlight Control Mode Settings
CV Value
Effect Type
On‑off 0 16 32 48
Dimmable 1 17 33 49
Mars Light 2 18 34 50
Gyralite 3 19 35 51
Oscillating Headlight 4 20 36 52
Single‑Flash Strobe 5 21 37 53
Double‑Flash Strobe 6 22 38 54
D312 Rotary Beacon 7 23 39 55
Prime Strarolite 8 24 40 56
Type I Ditch Light 9 25 41 57
Type II Ditch Light 10 26 42 58
FRED 11 27 43 59
Exhaust Flicker 12 28 44 60
Firebox Flicker 13 29 45 61
Dyno‑Light 15 31 47 63
Crossing Logic Off Crossing Logic On
Phase A Phase B Phase A Phase B
Note: Te SoundCar does not support the smart rebox icker lighting effect
available on other Tsunami Digital Sound Decoders.
Setting the Flash Rate and Hold Time
CV 59 (Flash Rate) is used to adjust the ash rate of Hyperlight effects and
can be programmed with any value from 0 to 15; 0 indicates the highest
frequency and 15 indicates the lowest frequency. When Grade Crossing
Logic is enabled, CV 60 (Crossing Hold Time) can be used to adjust the
Tsunami SoundCar User’s Guide Page 19
Page 24

Basic Programming
length of time in seconds that an effect will remain active after the horn/
whistle function key is released. CV 60 can be programmed with a value from
0 to 15, indicating the minimum and maximum number of seconds that the
effect will remain active.
Example 1: FRED (Flashing Rear‑End Device)
In this example, we will congure the FRED lighting effect as a backup light to
simulate the lighting mounted at the end of a freight train without a caboose.
We will also assume the use of LED bulbs and enable LED Compensation
Mode.
1. In Table E, locate the two values associated with the FRED effect
under the column labeled, “Crossing Logic OFF.” We will use the
Phase A value, 11, because the FRED effect is not designed to be
an alternating light.
2. Enable LED Compensation Mode by adding 128 to 11: 128 + 11 =
139.
3. Program CV 50 (Backup Light Effect Select) with a value of 139 to
congure the FRED effect as a backup light with LED Compensation
Mode enabled. The FRED effect will turn on when the F0 function
key (default) is pressed and the train direction changes from forward
to reverse.
Example 2: Alternating Single‑Flash Strobe Lights
In this example, we will assume use of incandescent and congure the FX5
and FX6 outputs as alternating strobe lights like those that can be found on a
cab car.
1. In Table E, locate the value associated with the single‑ash strobe
effect under the column labeled, “Crossing Logic OFF.” For the rst
of the alternating lights (FX5), we will use the Phase A value, which
is 5. To get our alternating effect, a second light (FX6) must be
programmed with the Phase B value, which is 21.
2. Program CV 51 (FX5 Effect Select) with a value of 5 and CV 52 (FX6
Effect Select) with a value of 21.
Example 3: Alternating Ditch Lights with Grade Crossing Logic
In this example, we will assume use of incandescent bulbs and congure the
FX5 and FX6 outputs as Type I ditch lights that ash when the horn is blown.
1. In Table E, locate the value associated with the Type I ditch light
effect under the column labeled “Crossing Logic ON.” The value for
Phase A is 41 and the value for phase B is 57.
2. To get the light to ash alternately, set CV 51 (FX5 Effect Select) to
41 and CV 52 (FX6 Effect Select) to 57.
3. Finally, set the grade crossing hold time to 5 seconds by
programming CV 60 (Crossing Hold Time) with a value of 5. Initially,
when F5 and F6 are turned on, the FX5 and FX6 lights should both
be steady “on.” When the airhorn is sounded, however, the two
lights will ash alternately. The lights will revert to a steady “on” state
approximately 5 seconds after the airhorn is turned off.
Tsunami SoundCar User’s Guide Page 20
Page 25

Basic Programming
Setting Directional Control
CV 57 (FX5, FX6 Directional Control Enable) is used to congure the
directionality of the FX5 and FX6 function outputs. FX5 directionality is
controlled by bits 0 (forward) and 1 (reverse), and FX6 is controlled by bits
4 (forward) and 5 (reverse). Setting a bit to 1 enables the corresponding
function in the specied direction. Either function may be made bi‑directional
by setting both the forward and reverse bits to 1.
CV 58 (FX5, FX6 Lighting Override Enable) is used to congure FX5 or
FX6 so that all other lighting function outputs automatically turn off when
the corresponding function is turned on. This is ideal when you need to
use the lighting function to activate an emergency light for simulating a red
signal when a stalled locomotive is occupying the mainline. In this case, the
emergency light would be turned on and all other lights would be turned off.
Tsunami SoundCar User’s Guide Page 21
Page 26

Basic Programming
Step 5: Setting the Momentum
The SoundCar decoder is designed to take into account any momentum you
have programmed into your locomotives in order to synchronize the rate of
certain sound effects with the train’s speed (such as wheel noise and braking
applications). If CVs 3 (Acceleration Rate) and 4 (Deceleration Rate) (or
CVs 23 [Consist Acceleration Rate] and 24 [Consist Deceleration Rate] if in
an active consist) are set to anything other than 0 in your locomotives, the
same value should be programmed into your SoundCar decoders to sync
the momentum to the locomotives. For more information, see “Consist Inertia
Control” in the “Consist Operations” section.
Tsunami SoundCar User’s Guide Page 22
Page 27

Sound Programming
Step 6: Modifying Sound Effects
One of the great features of your SoundCar DSD is the ability to adjust the
various sound effects to suit your ear and operating scenarios.
Sound Mixer Controls
The SoundCar DSD provides independent controls for setting the volume
level for each sound effect, similar to a modern sound studio mixing board. To
set the volume for a particular sound effect, set the corresponding CV to any
value from 0 (i.e., mute) to 255 (maximum volume).
For the best sound quality, we advise running the mixer as “hot” as possible
(audio jargon for maximizing the sound level). First, determine which sound
effect you would like to be the loudest (typically the airhorn/whistle) and set
its volume level to around 225. Then, adjust the volume levels for all other
sounds effects relative to the airhorn volume. Finally, use CV 128 (Master
Volume Control) to set the DSD’s overall volume to your desired level. Refer
to Table F for the CVs and default values for individual sound effects.
Note: The default value of CV 128 is 192, or 75% of full volume.
A degree of caution is recommended when adjusting mixer levels to avoid
a condition known as “clipping” or “limiting,” which occurs when the sum of
two or more signals exceeds the capacity of the associated output channel.
As the name implies, clipping causes the sound signal peaks to be lopped
off and manifests as distortion accompanied by some degree of clicking or
popping sounds.
To avoid a clipping situation, consider which sounds are likely to be played
at the same time and take care to ensure that their mixer levels are not
too high. For example, the airhorn and bell are usually heard together,
and you will likely want both to be as pronounced as possible. Rather than
simply cranking both sounds up to the maximum level, start by setting one
mixer close to, but not quite at the maximum level (this leaves a little extra
“headroom”). Then, gradually increase the setting of the second mixer
channel to your desired level. If you start to hear distortion, simply decrease
the setting of one mixer channel or the other until the distortion fades away.
The individual sound channels may also be used to disable sounds that are
not accurate to your particular car or operating scenario, or that you prefer
not to hear.
Sound Control CVs
CV 128, Master Volume Control
CVs 129‑134, Sound Mixer
Tsunami SoundCar User’s Guide Page 23
Page 28

Sound Programming
Table F.
Sound Mixer CVs
CV Mixer Channel Sound Effect Default
129 Mixer Channel 0 Airhorn/Whistle 225
130 Mixer Channel 1 Bell 64
131 Mixer Channel 2 Clickety‑Clack 64
132 Mixer Channel 3 Generator 25
133 Mixer Channel 4 Flange Squeal 16
134 Mixer Channel 5 Flat Spot 64
135 Mixer Channel 6 Wheel Noise 32
136 Mixer Channel 7 Uncoupling 64
137 Mixer Channel 8 Coupling 64
138 Mixer Channel 9 Brake Set 32
139 Mixer Channel 10 Brake Squeal 64
140 Mixer Channel 11 Retainer Valve 32
141 Mixer Channel 12 Emergency Brake Valve 192
142 Mixer Channel 13 Hand Brake Set 128
143 Mixer Channel 14 Hand Brake Release 128
Airhorn/Whistle Control
The SoundCar’s factory settings utilize F2 to control the primary airhorn (or
whistle) and F3 to control a short airhorn (or whistle). The following CVs allow
you to adjust and control the airhorn/whistle:
CV 115, Airhorn/Whistle Select
CV 129, Airhorn/Whistle Volume
Airhorn/Whistle Select
Each SoundCar DSD comes with two airhorns and one whistle. To select
one, program CV 115 with the appropriate value from 0 to 2 as indicated in
Table G.
Table G.
CV 115 – Airhorn/Whistle Select
Airhorn/Whistle CV 115 Value
Wabco E2 0 (default)
Nathan K5LA 1
Hancock Air Whistle 2
Note: If CV 115 is programmed with a value other than 0, 1, or 2, it will
automatically default to a value of 0.
Tsunami SoundCar User’s Guide Page 24
Page 29

Sound Programming
Airhorn/Whistle Volume
CV 129 sets the airhorn/whistle volume and may be programmed with any
value from 0 to 255. The default is 225.
Bell Control
By default, the SoundCar uses F1 to control the bell sound effect. The
following CVs allow you to adjust and control the bell:
CV 114, Bell Ring Rate
CV 130, Bell Volume
CV 227, Bell Select
Bell Ring Rate
CV 114 may be programmed with a setting from 0 to 15, allowing you to
adjust the bell ring rate over 16 steps to simulate the sound of an air‑rung or
hand‑rung bell. A setting of 0 yields the fastest ring rate (like an air‑ringer),
while higher values produce increasingly slower ring rates. The default value
for CV 114 is 3, but you can always experiment with other values to get the
best overall sound effect for your specic model.
Bell Volume
CV 130 controls the bell volume and may be set to any value from 0 to 255.
The default is 64.
Bell Select
CV 227 allows you to select between the SoundCar’s three available bells:
cast, electronic and gong. To select a particular bell, simply program CV 227
with the appropriate value from 0 to 2 as indicated in Table H.
Table H.
CV 227 – Bell Select
Bell CV 227 Value
Cast 0 (default)
Electronic 1
Gong 2
Generator Control
The following CVs allow you to control the generator sound effect:
CV 112, Sound Conguration 1
CV 132, Generator Volume
CV 202, Generator Probability
Function-Controlled or Automatic Generator
Bit 0 of CV 112 controls whether the generator sound effect is activated by
a function key or if it is always on. A setting of 0 (default) enables the sound
effect to be controlled by pressing F9. If you prefer the sound to always be on
Tsunami SoundCar User’s Guide Page 25
Page 30

Sound Programming
(such as in a passenger car), a setting of 1 will enable the effect.
Note: When activating F9, the generator sound will play according to the
settings in CV 202.
Generator Volume
CV 132 controls the generator volume and may be set to any value from 0 to
255. The default is 25.
Generator Probability
CV 202 allows you to set the frequency of the generator sound effect,
enabling you to re‑create prototypical scenarios appropriate to your railcars.
CV 202 may be programmed with any value from 0 to 255. A value of
0 will cause the generator to never turn on, suitable for non‑refrigerator
cars. Conversely, a value of 255 will cause the generator to run constantly,
suitable for passenger cars where generators run non‑stop for climate control
purposes. Or, select a value somewhere in‑between to re‑create the sound of
a generator in a refrigerator car turning on and off according to the heat of the
day.
Clickety-Clack Control
The clickety‑clack sound effect can be adjusted to match the type of car and
the type of rail. The following CVs control the clickety‑clack sound effect:
CV 112, Sound Conguration 1
CV 116, Moving Sound Scalar
CV 131, Clickety‑Clack Volume
Clickety‑Clack Sound Conguration
Bits 1 and 2 in CV 112 allow you to set the number of axles per truck and
trucks per car to synchronize the clickety‑clack rate for your model.
Use bit 1 to set the number of axles per truck. For two axles per truck, keep
bit 1 at its default setting of 0. For three axles per truck, set bit 1 to 1.
Bit 2 controls the number of trucks per car. For two trucks per car, keep bit 2
at its default setting of 0. For one truck per car, set bit 2 to 1.
Examples: If you have a bobber caboose, which only has one truck with two
axles, you will set CV 112 to 4 (bit 1 = 0 + bit 2 = 4).
For a sleeper car that has two trucks with three axles, set CV 112 to 2
(bit 1 = 2 + bit 2 = 0). To keep your passengers comfortable, you may want
to also enable the generator to always be on, so add a value of 1 to enable
bit 1, which will give you a total CV 112 value of 3.
Moving Sound Scalar
To further ne‑tune the clickety‑clack rate (as well as at spots), use CV 116
to set the proportion between the speed step and the scale speed in feet per
second (ft/s). This CV can be programmed with any value from 0 to 255 to
Tsunami SoundCar User’s Guide Page 26
Page 31

Sound Programming
determine the frequency of the clickety‑clack rate based on the scale speed
of the car and the distance between rail joints. A value of 1 corresponds to
0.01ft/s. Higher values correspond to faster scale speeds, and a value of 0
will disable the clickety‑clack and at spot sound effects.
Clickety-Clack Volume
CV 131 controls the clickety‑clack volume and may be set to any value from
0 to 255. The default is 64.
Flange Squeal Control
The following CVs control the ange squeal sound effect:
CV 133, Flange Squeal Volume
CV 201, Flange Squeal Probability
Flange Squeal Volume
CV 133 controls the ange squeal volume and may be set to any value from
0 to 255. The default is 16.
Flange Squeal Probability
The ange squeal is set to run automatically using CV 201, which allows you
to set the frequency of occurrence between ange squeals based on your
operating speed and scenario. It may be desirable to set this to lower values
if your layout has a great deal of straight track and higher values if your
layout has multiple curves. The ange squeal can be disabled by setting this
CV to a value of 0.
Using Quiet Mode
The SoundCar’s quiet mode can be used to turn on sound only after the
decoder is placed into service. It will also automatically turn the sound off
when the decoder is not being used. This is particularly useful when you have
a large number of sound‑equipped trains on your layout and don’t want to
have them running sound all at once.
To activate quiet mode, simply program CV 113 (Quiet Mode Time‑out
Period) to any value from 1 to 255. This value determines the amount of time,
in one‑quarter of a second, the decoder will wait before turning off the sound.
Thus, a setting of 120 corresponds to 30 seconds.
When quiet mode is active, the SoundCar will remain silent when it is rst
powered up and then will automatically turn on the sound once it receives
a function command (other than mute). It will automatically mute the audio
whenever all functions are turned off and the time set in CV 113 has elapsed.
Setting CV 113 to 0 disables quiet mode, and sounds will begin immediately
when the decoder is powered up.
Tsunami SoundCar User’s Guide Page 27
Page 32

Sound Programming
Customizing Other Sound Effects
CV 117 (Rolling Stock Type Select) allows you to enable the following
rolling stock sound effects: at spot, generator, coupler, airhorn and bell,
clickety‑clack, ange squeal, wheel noise, and brake sounds. Customizing
CV 117 requires setting its individual bit variables, as addressed in the “Bits
and Bytes” section of this manual.
The CV default is 254 (only the at spot sound effect is disabled). The sounds
provided by CV 117 can be specically congured to simulate different types
of cars. See Table I for the value to turn on individual sound effects. We have
also included examples listing the appropriate sounds and corresponding CV
values for simulating cab cars, passenger cars, freight cars, refrigerator cars,
and cabooses.
Table I.
CV 117 – Rolling Stock Type Select
Flat Spot Enable
Generator Enable
Coupler Enable
Horn and Bell Enable
Clickety-Clack Enable
Flange Squeal Enable
Wheel Noise Enable
Sound Effect Values 1 2 4 8 16 32 64 128
Common Rolling Stock Types
Cab Car x x x x x x
Cab Car (with generator) x x x x x x x
Passenger Car x x x x x
Passenger Car (with generator) x x x x x x
Freight Car x x x x x
Freight Car (with at spot) x x x x x x
Mechanical Refrigerator Car x x x x x x
Mechanical Refrigerator Car (with at spot) x x x x x x x
Caboose x x x x x x
Note: If your train runs on welded rail, disable the clickety‑clack sound effect
by subtracting 16 from the values listed in the examples.
Example 1: Cab Car
Cab cars serve as a control car on push‑pull trains, which run in “reverse”
along commuter lines rather than switching the locomotive. Since they serve
as the “cab” of the train, these cars are equipped with headlights, airhorns,
and bells. The sounds commonly emitted from a cab car include the coupler,
airhorn and bell, clickety‑clack, ange squeal, wheel noise, and brake
Brake Sounds Enable
CV 117 Value
255
252
254
244
246
244
245
246
247
252
Tsunami SoundCar User’s Guide Page 28
Page 33

Sound Programming
sounds. The generator effect can be either enabled or disabled depending
upon the model. Use the default value of 254 in CV 117 to enable these
sound effects, including the generator effect. Otherwise, enter a value of 252
into CV 117 to disable the generator sound effect.
Example 2: Passenger Car
The sounds made by a passenger car include the coupler, clickety‑clack,
ange squeal, wheel noise, brake sounds, and the generator effect can be
either enabled or disabled depending upon the model. Enter a value of 246
into CV 117 to enable these sound effects, including the generator effect.
Otherwise, enter a value of 244 into CV 117 to disable the generator sound
effect.
Note: The generator is used on passenger cars that are not hooked into the
locomotive’s head‑end power (HEP) to supply electricity for air conditioning,
lighting, and appliances.
Example 3: Freight Car
Freight car sounds consist of the coupler, clickety‑clack, ange squeal, wheel
noise, and brake sounds. Enter a value of 244 into CV 117 to enable these
sound effects. Since these cars are heavily used, you may also want to add
the at spot effect by entering a total value of 245.
Example 4: Mechanical Refrigerator Car
The sounds you hear from a mechanical refrigerator car, or reefer, are the
same as a freight car plus the generator. Enter a value of 246 into CV 117 to
enable these sound effects.
Example 5: Caboose
The sounds from a caboose include the coupler, air whistle, clickety‑clack,
ange squeal, wheel noise, and brake sounds. Enter a value of 252 into
CV 117 to enable these sound effects. The bell function key (F1 by default)
should be off and the airhorn/whistle function key (F2 by default) should be
on to play the warning whistle equipped on a caboose.
Tsunami SoundCar User’s Guide Page 29
Page 34

Consist Programming
Step 7: Consist Operations
What is a Consist?
A consist is a group of locomotives and/or rolling stock set up to respond
to throttle commands as a single unit (i.e., a train). There are two methods
for setting up a consist with the SoundCar: Intelligent Consisting™ and
advanced consisting.
Advanced consisting is a traditional method that uses CV 19 to program each
car into or out of a consist by setting them to the same consist address.
Since you will most likely have more than one SoundCar‑equipped model
(based on our experience, we recommend installing a SoundCar in every
third or fourth unit in a train for the best results), traditional consisting
methods can be cumbersome and time‑consuming. We developed Intelligent
Consisting as a simpler option for quickly adding and removing cars from a
train without having to do any CV programming. By reducing the number of
steps required to set up consists, Intelligent Consisting represents a 90%
time‑savings over the traditional method!
Before adding cars to a consist, we recommend that you rst program each
SoundCar decoder to create its specic prole, such as consist address,
momentum (match values to those in the locomotive’s decoder), selected
sound effects and parameters, and lighting effects. The decoder will retain
this prole when the car is added to a consist. You can also adjust the
momentum and enable certain functions for the cars as part of the consist,
which is discussed later in this section.
Now, let’s get consisting! When you’re ready to set up your consist, your
rst step is to choose the method you want to use – Intelligent Consisting or
advanced consisting.
Option 1: Intelligent Consisting – DCC Consisting
With the Wave of a Wand
This easy‑to‑use feature lets you add and remove cars from your train
without all of the programming and reprogramming of individual cars required
with traditional consisting. This method requires a magnet (serving as your
“brake club”) to activate Intelligent Consisting mode, and is synchronized
with prototypical sounds. (Any common household magnet will work.) With
Intelligent Consisting, you essentially get to play the role of the brakeman!
Here’s how it works:
1. To initiate Intelligent Consisting mode, wave a magnet over the
models you want to add to the train. The sound of the hand brake
being untied will play to indicate that the decoders are waiting
(deactivated after 1 minute) for a signal from the command station to
add them to the consist.
2. Select the address of the locomotive or consist to which you want to
add the SoundCar‑equipped models.
Tsunami SoundCar User’s Guide Page 30
Page 35

Consist Programming
3. Press F8 (Note: This function assignment can be remapped via
CV 228) four times to send a command to the SoundCar decoders
to add them to the train. The decoders will conrm that the cars are
hooked into the locomotive’s train line by playing the sound of the air
bleed‑off from the retainer.
4. To remove a car from the consist, simply wave the magnet over it
again. Only the cars over which the “brake club” has been waved
will be removed from the consist. When the car is released from the
consist, the sounds of the hand brake being tied down and set is
played to acknowledge that it is no longer part of the train.
Note: If you do not hear the sound effects, check to ensure that the
decoder is installed in the model according to the recommendations in the
instructions. Proper placement is imperative for the sensor to be accessible.
With Intelligent Consisting, the SoundCar decoder also monitors the active
DCC signals and remembers the status of all active addresses to instantly
synchronize the function state and throttle speed with the locomotive or
consist that it just joined. When the train pulls away, the SoundCar will create
the clickety‑clacks, ange squeals, brake sequence sounds, and more just
like any car on a prototype train.
Intelligent Consisting Example: In this example, we’re going to add three
SoundCar‑equipped models to a consist led by a locomotive with extended
address 1513. After coupling the cars and the locomotive, set your cab to the
locomotive’s address, 1513, and wave a magnet over the three SoundCar
units. Listen for the sound of the hand brakes untying and press F8 on your
cab four times. The sound of air bleeding off from the retainer conrms that
your cars are now part of the consist. To remove the cars from the consist,
simply wave the magnet over them again.
Option 2: Advanced Consisting
In addition to its Intelligent Consisting capabilities, the SoundCar DSD
also supports advanced consist operations to add and remove cars from a
train using CV 19 (Consist Address). This CV allows the SoundCar DSD to
recognize a new address assigned to the consist without changing the DSD’s
primary or extended addresses.
By programming CV 19 to a value from 1 to 127, each unit in the consist will
be assigned the same consist address. To deactivate the consist and restore
normal operation, program CV 19 to 0.
Note that when the consist address is set, the DSD will continue to respond
to instructions sent to its primary or extended address, except for speed and
direction data. The DSD will not respond to programming commands sent to
its consist address in Operations Mode; if programming in Operations Mode,
commands must be sent to the primary or extended address.
Advanced Consisting Example: This example will use the same
SoundCar‑equipped models and locomotive No. 1513 as in the Intelligent
Tsunami SoundCar User’s Guide Page 31
Page 36

Consist Programming
Consisting example. We’re going to set these models to consist address
2 using CV 19. In each SoundCar model, as well as locomotive No.1513,
set CV 19 to a value of 2. Your cars and locomotive will now respond to
commands sent to the consist address. To remove the cars from the consist,
reprogram CV 19 in each decoder back to 0.
Programming Cars in the Consist
Now that you have added cars to your train using Intelligent Consisting or
advanced consisting, let’s set up your cars to respond prototypically in the
consist.
Consist Function Enable
Consist Function CVs allow each unit in the consist to have different function
properties, allowing you to better mimic prototypical operation, e.g., blowing
the air whistle on a caboose when in reverse. This function uses the following
CVs:
CV 21, Consist Function Group 1
CV 22, Consist Function Group 2
CVs 21 and 22 allow you to dene how each unit in the consist responds to
function commands sent to the consist address. When consisting is enabled,
CV 21 controls functions 1‑8, and CV 22 controls F0(f), F0(r) and functions
9‑12. This feature enhances your ability to run prototypical scenarios, such
as a train that includes passenger cars and a caboose, with separately
controlled lighting and sound effects for each unit in the consist. The default
value in CV 21 is 128 (F8 mute enabled). CV 22 is defaulted to 16 so that the
F11 train brake application is enabled.
CVs 21 and 22 are only functional when the consist address is set in CV 19.
When function commands are sent to the DSD’s primary or extended
address, the functions will operate according to default settings (see “Using
Your SoundCar Digital Sound Decoder”) or custom settings in CVs 33‑46
(Function Output Map), regardless of the values in CVs 21 and 22.
Use Tables J and K to calculate the appropriate values for CVs 21 and 22,
respectively. Refer to Table J to determine which functions you want active in
your consist, and circle the corresponding number. When you have selected
all of your desired functions, add up the circled numbers and program that
total into CV 21.
Table J.
CV 21 – Consist Function Control 1
F1 F2 F3 F4 F5 F6 F7 F8
1 2 4 8 16 32 64 128
Tsunami SoundCar User’s Guide Page 32
Page 37

Consist Programming
Now look over Table K and do the same: Add up all the numbers associated
with your desired functions and program the sum into CV 22.
Table K.
CV 22 – Consist Function Control 2
F0(f) F0(r) F9 F10 F11 F12
1 2 4 8 16 32
Note that you will have to individually program CVs 21 and 22 for each DSD
in your consist; each DSD may require a different set of values for CVs 21
and 22 depending on your model’s requirements.
Consist Function Control Example: In this example, let’s say that you want
to add a SoundCar‑equipped reefer and caboose to your train. You want the
generator sound to be function‑controlled in the reefer car. For the caboose,
you want the FRED (FX5) to ash and the air whistle enabled. You also want
to enable the train brake, coupling and uncoupling sounds in all cars, as well
as the mute function.
Refrigerator Car – Using Table J, program CV 21 with the value
corresponding to F8 (mute), which is 128. Likewise, using Table K,
program CV 22 with the values corresponding to F9 (generator), F10
(uncoupling), F11 (brakes), and F12 (coupling). Thus, set CV 22 to 60
(4 + 8 + 16 + 32 = 60).
Caboose – Referring to Table J, select the values for F2 (airhorn/whistle),
F3 (short horn), F5 (FX5 output), and F8 (mute) and enter their sum of
150 (2 + 4 + 16 + 128 = 150) in CV 21. Then refer to Table K and select
the values for F10 (uncoupling), F11 (brakes), and F12 (coupling). Enter
their sum of 56 (8 + 16 + 32 = 56) in CV 22.
Tip: In cab car scenarios, set CV 129 to 0 in your locomotive to mute the
airhorn during reverse movements so that only the horn from the rear car
is heard when F2 is pressed.
Note: If you are programming on the mainline, you will hear a quick
cowbell sound after changing a CV value as an acknowledgement.
Consist Inertia Control
CV 23, Consist Acceleration Rate
CV 24, Consist Deceleration Rate
CVs 23 (Consist Acceleration Rate) and 24 (Consist Deceleration Rate) can
be used to increase or decrease the acceleration and braking responses of
SoundCar‑equipped models when part of a consist. CV 23 calculates a new
acceleration rate for the consist by adding the value of CV 23 to the value
of CV 3 (Baseline Acceleration Rate). Likewise, CV 24 calculates a new
braking rate for the consist by adding the value of CV 24 to the value of CV 4
(Baseline Deceleration Rate). When CV 19 (Consist Address) is set to 0, CVs
23 and 24 are inactive.
Tsunami SoundCar User’s Guide Page 33
Page 38

Consist Programming
CVs 23 and 24 may be set to any value from ‑127 to +127. Positive values
produce slower throttle responses, while negative values result in quicker
throttle responses.
If the sum of the values of CV 23 and CV 3 exceeds 255, then the nal
consist acceleration rate will be set to the maximum value of 255. If the sum
of CVs 23 and 3 is negative, the nal consist acceleration rate will be set to
the minimum value of 0.
To set a positive value, simply program the CV with the desired value from 0
to 127. To set a negative value, rst remove the negative sign from the value
and add 128. Thus, to program a value of ‑5, add 5 to 128 (5 + 128 = 133),
and program the total of 133 into the appropriate CV.
Notes: A value of 128 is equivalent to a setting of 0 and will have no effect.
When operating Intelligent Consisting, it is best to leave the values in CVs
23 and 24 at 0 unless all of the locomotives pulling the cars are set up using
advanced consisting.
Tsunami SoundCar User’s Guide Page 34
Page 39

Miscellaneous Features
Step 8: Configuring the SoundCar’s
Miscellaneous Features
F11 Train Brake
As you know by now, F11 turns the SoundCar’s brake sound effect set on
and off. What you may not realize is that you can use F11 to sync up the
braking effects of Tsunami‑equipped locomotives with SoundCar‑equipped
rolling stock by setting CVs 3 (Baseline Acceleration Rate), 4 (Baseline
Deceleration Rate), and 61 (F11 Braking Rate) to the same values in your
locomotive and SoundCar decoders. For more information, please refer to
the Tsunami SoundCar Technical Reference, as well as the Tsunami
Technical Reference for your locomotive. If CV 61 is set to a non‑zero value,
pressing F11 will slow down the locomotive and cars without needing to
adjust the throttle, which creates an actual functioning brake.
Automatic Sound Features
The SoundCar provides the ability to generate several sound functions
automatically. This is especially useful when your cab has fewer than 14
function keys to control all of the available functions and effects, or when you
are operating on a DC (analog) layout where there are no function controls at
all.
The following CVs allow you to control the SoundCar’s automatic sound
functions:
CV 193, Automatic Bell ON Set Point
CV 194, Automatic Bell OFF Set Point
CV 195, Grade Crossing Airhorn/Whistle Sensitivity
CV 197, Analog Mode Automatic Sound Conguration
CV 198, DCC Mode Automatic Sound Conguration
Automatic Sound Conguration Register
CV 197 controls which automatic sound effects are enabled when the
decoder is operating in DC (analog) mode. Likewise, CV 198 controls which
automatic sound features are enabled for DCC operation.
The following automatic sound effects are available with the SoundCar:
Automatic airhorn/whistle signals – Whenever the train is stopped or
started, the SoundCar will produce the airhorn signal appropriate to the
direction of travel as follows:
One short toot = stop
Two long blasts = forward
Three short toots = reverse
Tsunami SoundCar User’s Guide Page 35
Page 40

Miscellaneous Features
Automatic grade crossing signal – When enabled, the SoundCar will play
a grade crossing signal (two long horn blasts followed by one short blast and
one more long blast) triggered by a sudden upward spike to the throttle.
Automatic bell – The SoundCar can be programmed to turn the bell on and
off at preset speed points such as may occur when passing through a yard or
station platform.
Automatic sound functions can be enabled as follows: Refer to Table L and
circle the numbers corresponding to the sound effects you would like to
function automatically. Then, add up the circled numbers and program that
value into CV 197 (for analog mode) or CV 198 (for DCC mode).
Table L.
Automatic Sound Function Enable – CV 197 (Analog Mode)
or CV 198 (DCC Mode) Suggested Settings
Automatic Bell Enable 4
Automatic Whistle Signal 2
Automatic Grade Crossing Enable 1
Now, you can set CVs 193‑195 to ne‑tune the operation of each of the
automatic sound functions.
Automatic Bell Set Points
CVs 193 and 194 determine the speed steps (or equivalent throttle voltage
in analog mode) at which the automatic bell turns on and off, respectively.
These CVs can be programmed with any value from 0 to 126, corresponding
to the speed step of the same value. CV 194 must be set to a value greater
than CV 193, or the bell will not turn on.
Example: Set CV 193 to 5 and CV 194 to 10. With these settings, the bell will
initially be off when the train is stopped. As the speed increases, the bell will
turn on once the throttle setting reaches speed step 5. The bell will remain on
as long as the engine is operated between speed steps 5 and 10. Increasing
the throttle beyond speed step 10 or below speed step 5 will turn the bell off.
Once the bell has been turned off, lowering the speed to the same setting as
programmed into CV 193 can turn it back on.
Automatic Grade Crossing Airhorn/Whistle Sensitivity
The automatic grade crossing airhorn/whistle is activated whenever there is
a sudden increase in the throttle setting (or track voltage in analog mode)
as set by the value in CV 195. This CV can be set to any value from 0 to
126, but for practical purposes, you will likely want to use a value from 3 to
10. Setting CV 195 too low will result in the airhorn going off at every speed
increase and setting it too high will require an extreme throttle change to
trigger the sound effect.
A CV 195 setting of 5, for example, requires you to quickly increase the
throttle by at least ve speed steps before the airhorn will sound.
Tsunami SoundCar User’s Guide Page 36
Page 41

Miscellaneous Features
Analog Mode
While the SoundCar is rst and foremost a DCC decoder, it may be used on
a DC‑powered layout with certain limitations by enabling the analog mode
feature using the following CVs:
CV 12, Power Source Conversion
CV 29, Conguration Register 1
First, set CV 12 to 1 to enable analog mode, and then set bit 3 of CV 29 to
enable an alternate power source. Be sure to also set CV 29 for any other
desired parameters, such as the address range as discussed earlier in this
manual in “Step 2: Conguring the Decoder.”
Analog Mode Operation
When analog mode is enabled, you may control the SoundCar using an
ordinary powerpack, although operation will be a little different than when
running non‑decoder equipped units.
With the powerpack’s throttle set to 0, the SoundCar will be silent, as it has
no power. The throttle must be turned up to approximately 5 volts to provide
sufcient voltage to power‑up SoundCar’s internal circuitry. Increase the
throttle to around 7.5 volts and the SoundCar will be ready to roll.
When operating in analog mode, be careful not to exceed the SoundCar’s
input voltage rating of 27 volts. When your track exceeds 21 volts, the
SoundCar will automatically shut down and begin ashing Error Code 10 on
the lighting outputs (if connected). If you experience this, back down on the
throttle immediately.
Important: The SoundCar will work best in analog mode when using
a high‑quality, electronically regulated powerpack, preferably one that
supplies smooth, ltered DC power. Older rheostat‑style powerpacks and
pulse powerpacks will result in erratic and unreliable operation and are not
recommended for use with Tsunami DSDs. If your powerpack has a pulse
power switch, leave it in the OFF position.
Analog Mode Options
Along with CVs 12 and 29, the following two CVs control analog mode
operation:
CV 13, Analog Function Enable 1
CV 14, Analog Function Enable 2
These CVs allow you to force a function input to the ON state whenever
the SoundCar switches over to analog mode. This is most useful for turning
on lighting effects when running on a DC‑powered layout. Sound functions
may be turned on in analog mode as well, but this is less useful as they will
either run continuously or sound just once when the decoder is powered up.
Instead, use automatic sound functions (CV 197) to generate sound effects in
analog mode, as discussed earlier in this section.
Tsunami SoundCar User’s Guide Page 37
Page 42

Miscellaneous Features
To enable any of the functions from F1‑F8 for analog operation, refer to
Table M. Circle the numbers corresponding to any functions you want to
enable, and then add up the circled numbers and program the sum into
CV 13.
Table M.
CV 13 – Analog Function Enable 1
F1 F2 F3 F4 F5 F6 F7 F8
1 2 4 8 16 32 64 128
Likewise, to enable functions F0 (forward and reverse) and F9‑F12, refer to
Table N. Circle the numbers corresponding to functions you want to enable,
and then add up the circled numbers and program the sum into CV 14.
Table N.
CV 14 – Analog Function Enable 2
F0(f) F0(r) F9 F10 F11 F12
1 2 4 8 16 32
Note: When you enable a particular function for analog mode operation, it
has the same effect as pressing the equivalent function key on your DCC
cab. The SoundCar’s function mapping settings will ultimately determine
which output or sound effect is activated by the enabled function.
Tsunami SoundCar User’s Guide Page 38
Page 43

Troubleshooting
If you have any difculties with the operation of your Tsunami SoundCar
Digital Sound Decoder, rst check this section for hints on troubleshooting.
We have found that most problems are caused by an errant CV value and
are easily corrected. When all else fails, reset the CV values back to defaults
(see the “Basic Programming” section) and try again.
SoundCar does not appear to be working.
• Address has been accidentally changed.
• Consist Address (CV 19) or Intelligent Consisting was accidentally
set.
• CV 29 has been changed to select other address type.
• Mute function (F8) is on.
• Another function is remapped to the mute function.
• Sound Volume CVs have been set to zero.
• All sound effects are disabled in CV 117 (Rolling Stock Type Select).
• Broken track pickup wire.
• Decoder is wired incorrectly.
• Speaker wire is broken.
• Speaker is burned out.
Lights and sound effects are not working in a consist.
• Consist functions are disabled. Set CV 21 and 22 to activate desired
functions (see Step 7, “Consist Operations”).
• Consist function assignments have been remapped; check
CVs 33‑46.
• Unit is not in consist.
SoundCar is not responding to Intelligent Consisting.
• Speaker is too close to the Intelligent Consisting sensor and
interfering with its operation.
• Magnet is not close enough to the sensor to activate it.
• Magnet is not powerful enough to activate the sensor.
Lights do not work.
• Function mapping is improperly set.
• Light bulbs are burned out.
• If using LEDs or 1.5‑volt microbulbs, resistor value is too large.
• If using LEDs, polarity is wired incorrectly.
• Lamp wires are broken.
SoundCar ashes lighting outputs (if connected).
• See “Diagnostic Codes” section.
Sound works for a while then quits.
• Decoder is overheating; lower track voltage.
• Speaker is damaged; replace speaker.
Speaker sounds “crackly.”
• Sound volume is too high for speaker.
• Speaker is not properly bafed.
• Speaker wire is loose.
• Speaker is damaged.
Tsunami SoundCar User’s Guide Page 39
Page 44

Troubleshooting
Decoder will not program.
• Try using Operations Mode programming.
• CVs are locked; see “Basic Programming” section.
• CurrentKeeper or other similar device is interfering with
Service Mode programming.
Diagnostic Codes
Fault Light
During normal operation, Tsunami monitors a number of its input signals and
if a fault is found, reports an error code by ashing the lights (if connected).
The number of times the lights ash corresponds to the number of the error
code. The error codes that can usually be solved by the user are:
Code 10 – Over-Voltage Fault
An over‑voltage fault indicates that the track voltage is greater than 22 volts.
When this error occurs, sound will be shut off and the error code will ash
periodically until the voltage is brought below 22 volts. Note: Tsunami’s
absolute maximum voltage input is 27 volts! Track voltages exceeding 27
volts may cause permanent damage to the decoder.
Code 16 – CVs Reset to Default
This code is informational only and indicates that all CVs have been reset to
their factory defaults.
On rare occasions, the SoundCar DSD may also report the following error
code, which cannot be remedied by the user and must be returned to the
factory for repair:
Code 5 – EEROM Checksum Failure
Tsunami SoundCar User’s Guide Page 40
Page 45

Appendix A
Decimal-Hex-Binary Conversion Table
DECIMAL HEX BINARY
(76543210)
0 00 00000000
1 01 00000001
2 02 00000010
3 03 00000011
4 04 00000100
5 05 00000101
6 06 00000110
7 07 00000111
8 08 00001000
9 09 00001001
10 0A 00001010
11 0B 00001011
12 0C 00001100
13 0D 00001101
14 0E 00001110
15 0F 00001111
16 10 00010000
17 11 00010001
18 12 00010010
19 13 00010011
20 14 00010100
21 15 00010101
22 16 00010110
23 17 00010111
24 18 00011000
25 19 00011001
26 1A 00011010
27 1B 00011011
28 1C 00011100
29 1D 00011101
30 1E 00011110
31 1F 00011111
32 20 00100000
33 21 00100001
34 22 00100010
35 23 00100011
36 24 00100100
37 25 00100101
38 26 00100110
39 27 00100111
40 28 00101000
41 29 00101001
42 2A 00101010
43 2B 00101011
44 2C 00101100
45 2D 00101101
46 2E 00101110
47 2F 00101111
48 30 00110000
49 31 00110001
50 32 00110010
51 33 00110011
52 34 00110100
53 35 00110101
54 36 00110110
55 37 00110111
56 38 00111000
57 39 00111001
58 3A 00111010
59 3B 00111011
60 3C 00111100
61 3D 00111101
62 3E 00111110
63 3F 00111111
DECIMAL HEX BINARY
(76543210)
64 40 01000000
65 41 01000001
66 42 01000010
67 43 01000011
68 44 01000100
69 45 01000101
70 46 01000110
71 47 01000111
72 48 01001000
73 49 01001001
74 4A 01001010
75 4B 01001011
76 4C 01001100
77 4D 01001101
78 4E 01001110
79 4F 01001111
80 50 01010000
81 51 01010001
82 52 01010010
83 53 01010011
84 54 01010100
85 55 01010101
86 56 01010110
87 57 01010111
88 58 01011000
89 59 01011001
90 5A 01011010
91 5B 01011011
92 5C 01011100
93 5D 01011101
94 5E 01011110
95 5F 01011111
96 60 01100000
97 61 01100001
98 62 01100010
99 63 01100011
100 64 01100100
101 65 01100101
102 66 01100110
103 67 01100111
104 68 01101000
105 69 01101001
106 6A 01101010
107 6B 01101011
108 6C 01101100
109 6D 01101101
110 6E 01101110
111 6F 01101111
112 70 01110000
113 71 01110001
114 72 01110010
115 73 01110011
116 74 01110100
117 75 01110101
118 76 01110110
119 77 01110111
120 78 01111000
121 79 01111001
122 7A 01111010
123 7B 01111011
124 7C 01111100
125 7D 01111101
126 7E 01111110
127 7F 01111111
DECIMAL HEX BINARY
(76543210)
128 80 10000000
129 81 10000001
130 82 10000010
131 83 10000011
132 84 10000100
133 85 10000101
134 86 10000110
135 87 10000111
136 88 10001000
137 89 10001001
138 8A 10001010
139 8B 10001011
140 8C 10001100
141 8D 10001101
142 8E 10001110
143 8F 10001111
144 90 10010000
145 91 10010001
146 92 10010010
147 93 10010011
148 94 10010100
149 95 10010101
150 96 10010110
151 97 10010111
152 98 10011000
153 99 10011001
154 9A 10011010
155 9B 10011011
156 9C 10011100
157 9D 10011101
158 9E 10011110
159 9F 10011111
160 A0 10100000
161 A1 10100001
162 A2 10100010
163 A3 10100011
164 A4 10100100
165 A5 10100101
166 A6 10100110
167 A7 10100111
168 A8 10101000
169 A9 10101001
170 AA 10101010
171 AB 10101011
172 AC 10101100
173 AD 10101101
174 AE 10101110
175 AF 10101111
176 B0 10110000
177 B1 10110001
178 B2 10110010
179 B3 10110011
180 B4 10110100
181 B5 10110101
182 B6 10110110
183 B7 10110111
184 B8 10111000
185 B9 10111001
186 BA 10111010
187 BB 10111011
188 BC 10111100
189 BD 10111101
190 BE 10111110
191 BF 10111111
DECIMAL HEX BINARY
(76543210)
192 C0 11000000
193 C1 11000001
194 C2 11000010
195 C3 11000011
196 C4 11000100
197 C5 11000101
198 C6 11000110
199 C7 11000111
200 C8 11001000
201 C9 11001001
202 CA 11001010
203 CB 11001011
204 CC 11001100
205 CD 11001101
206 CE 11001110
207 CF 11001111
208 D0 11010000
209 D1 11010001
210 D2 11010010
211 D3 11010011
212 D4 11010100
213 D5 11010101
214 D6 11010110
215 D7 11010111
216 D8 11011000
217 D9 11011001
218 DA 11011010
219 DB 11011011
220 DC 11011100
221 DD 11011101
222 DE 11011110
223 DF 11011111
224 E0 11100000
225 E1 11100001
226 E2 11100010
227 E3 11100011
228 E4 11100100
229 E5 11100101
230 E6 11100110
231 E7 11100111
232 E8 11101000
233 E9 11101001
234 EA 11101010
235 EB 11101011
236 EC 11101100
237 ED 11101101
238 EE 11101110
239 EF 11101111
240 F0 11110000
241 F1 11110001
242 F2 11110010
243 F3 11110011
244 F4 11110100
245 F5 11110101
246 F6 11110110
247 F7 11110111
248 F8 11111000
249 F9 11111001
250 FA 11111010
251 FB 11111011
252 FC 11111100
253 FD 11111101
254 FE 11111110
255 FF 11111111
Tsunami SoundCar User’s Guide Page 41
Page 46

Appendix B
List of Configuration Variables (CVs)
The following is a quick reference list of CVs used by the SoundCar Digital
Sound Decoder. See the Tsunami SoundCar Technical Reference for
detailed information related to each CV.
CV 1 Primary Address Control
CV 3 Baseline Acceleration Rate
CV 4 Baseline Deceleration Rate
CV 7 Manufacturer Version ID
(read‑only)
CV 8 Manufacturer ID
CV 11 Packet Time‑out Value
CV 12 Power Source Conversion
CV 13 Analog Function Enable 1
CV 14 Analog Function Enable 2
CV 15 CV Unlock Register
CV 16 CV Lock ID Code
CV 17 Extended Address
CV 18 Extended Address
CV 19 Consist Address
CV 21 Consist Function Group 1
CV 22 Consist Function Group 2
CV 23 Consist Acceleration Rate
CV 24 Consist Deceleration Rate
CV 29 Conguration Register 1
CV 30 Error Information/
Alternate Mode Selection
CV 33 F0(f) Output Location
CV 34 F0(r) Output Location
CV 35 F1 Output Location
CV 36 F2 Output Location
CV 37 F3 Output Location
CV 38 F4 Output Location
CV 39 F5 Output Location
CV 40 F6 Output Location
CV 41 F7 Output Location
CV 42 F8 Output Location
CV 43 F9 Output Location
CV 44 F10 Output Location
CV 45 F11 Output Location
CV 46 F12 Output Location
CV 49 Headlight Effect Select
CV 50 Backup Light Effect Select
CV 51 FX5 Effect Select
CV 52 FX6 Effect Select
CV 57 FX5, FX6 Directional
Control Enable
CV 58 FX5, FX6 Lighting
Override Enable
CV 59 Flash Rate
CV 60 Crossing Hold Time
CV 61 F11 Braking Rate
CV 105 User Identier #1
CV 106 User Identier #2
CV 112 Sound Conguration 1
CV 113 Quiet Mode Time‑out Period
CV 114 Bell Ring Rate
CV 115 Airhorn/Whistle Select
CV 116 Moving Sound Scalar
CV 117 Rolling Stock Type Select
CV 118 Recovery Speed
CV 128 Master Volume Control
CV 129 Airhorn/Whistle Volume
CV 130 Bell Volume
CV 131 Clickety‑Clack Volume
CV 132 Generator Volume
CV 133 Flange Squeal Volume
CV 134 Flat Spot Volume
CV 135 Wheel Noise Volume
CV 136 Uncoupling Volume
CV 137 Coupler Volume
CV 138 Brake Set Volume
CV 139 Brake Squeal Volume
CV 140 Retainer Valve Volume
CV 141 Emergency Brake Valve Volume
CV 142 Hand Brake Set Volume
CV 143 Hand Brake Release Volume
CV 193 Bell ON Set Point
CV 194 Bell OFF Set Point
CV 195 Grade Crossing Airhorn/
Whistle Sensitivity
CV 197 Analog Mode Automatic
Sound Conguration
CV 198 DCC Mode Automatic
Sound Conguration
CV 201 Flange Squeal Probability
CV 202 Generator Probability
CV 227 Bell Select
CV 228 Intelligent Consisting Function
Output Location
Tsunami SoundCar User’s Guide Page 42
Page 47

Appendix C
License Agreement
Please read this license agreement carefully before opening the package that
contains the Tsunami SoundCar Digital Sound Decoder. Breaking the seal on
the package indicates your acceptance of these license terms. If you have
received the Tsunami Digital Sound Decoder pre‑installed from your dealer,
then use of the product indicates your acceptance of the agreement. If you
do not agree with the terms, you should return the package unopened to the
dealer from whom you received the package within thirty (30) days and your
money will be refunded.
SoundTraxx Software License Agreement
SoundTraxx provides the computer software/rmware embedded within the
Tsunami SoundCar Digital Sound Decoder and any modications, updates,
revisions or enhancements received by you from SoundTraxx or its dealers
and licenses its use within the terms set below:
A. You are granted a nonexclusive, nontransferable license to use the
software/rmware included with your Tsunami sound system only with the
Tsunami sound system hardware that you purchased.
B. Title and ownership of the software/rmware, sound recordings,
documentation and accompanying materials, if any, and all associated
intellectual property rights remain with SoundTraxx.
C. The structure, organization, and code of the software/rmware are
the valuable properties of SoundTraxx. You may not make copies of the
hardware, software/rmware, code, or any portions thereof. You are not to
modify, adapt, translate, reverse engineer, de‑compile, disassemble or create
derivative works based on the hardware or software/rmware.
D. Unauthorized copying of the software/rmware or documentation,
or failure to comply with the above restrictions, will result in automatic
termination of this Agreement. This Agreement does not grant you any
intellectual property rights.
Tsunami SoundCar User’s Guide Page 43
Page 48

Appendix D
Service and Warranty Policy
90-Day Safety-Net Service Warranty
Each SoundTraxx Digital Sound Decoder is tested thoroughly before it is
shipped and warranted to be in good working order and free of manufacturing
defects. However, in the event that a mistake does occur during installation,
SoundTraxx will cover the repair under our Safety‑Net Service Warranty. If
during the rst ninety (90) days you damage your Digital Sound Decoder or it
fails to operate, SoundTraxx will repair or replace the system free‑of‑charge if:
• The original sales receipt showing purchase from an authorized
SoundTraxx dealer accompanies the decoder. Receipt must show
purchase date to be within the last 90 days. Your original receipt will be
returned with your repaired unit.
• There is no damage resulting from unauthorized repairs or modications.
This includes but is not limited to:
o Removing the shrink tubing from the decoder
o Drilling or enlarging circuit board holes
o Cutting or trimming the circuit board
• The Digital Sound Decoder is returned properly packaged, postage paid
and insured; SoundTraxx is not responsible for product lost or damaged
in transit.
Limits of Liability
The foregoing shall constitute the sole and exclusive remedy of any owner
of this product for breach of warranty including the implied warranties of
merchantability and tness. IN NO EVENT SHALL SOUNDTRAXX BE
LIABLE FOR SPECIAL OR CONSEQUENTIAL DAMAGES OR FOR THE
REPRESENTATIONS OF RETAIL SELLERS.
See the “Support” section of our website at www.soundtraxx.com for
complete warranty information.
Contacting Support
Our service department is available Monday ‑ Friday, 9 a.m. ‑ 5 p.m.
(Mountain Time).
SoundTraxx Service Department
210 Rock Point Drive
Durango, CO 81301, USA
Phone: (970) 259‑0690
support@soundtraxx.com
Tsunami SoundCar User’s Guide Page 44
Page 49

©2005, 2006, 2007, 2014 Throttle Up! Corp.
DCC
®
New Dimensions in Digital Sound Technology
All Rights Reserved.
COMPATIBLE WITH
THE NMRA DCC STANDARDS
AND RECOMMENDED
PRACTICES
Tsunami SoundCar User’s Guide Page 45
210 Rock Point Drive, Durango CO 81301, U.S.A.
(970) 259-0690 • Toll Free: (888) 789-7637 • Fax: (970) 259-0691
www.soundtraxx.com • sales@soundtraxx.com
 Loading...