

Soundstream VR-622HB User Manual
SeUNDSTREAM
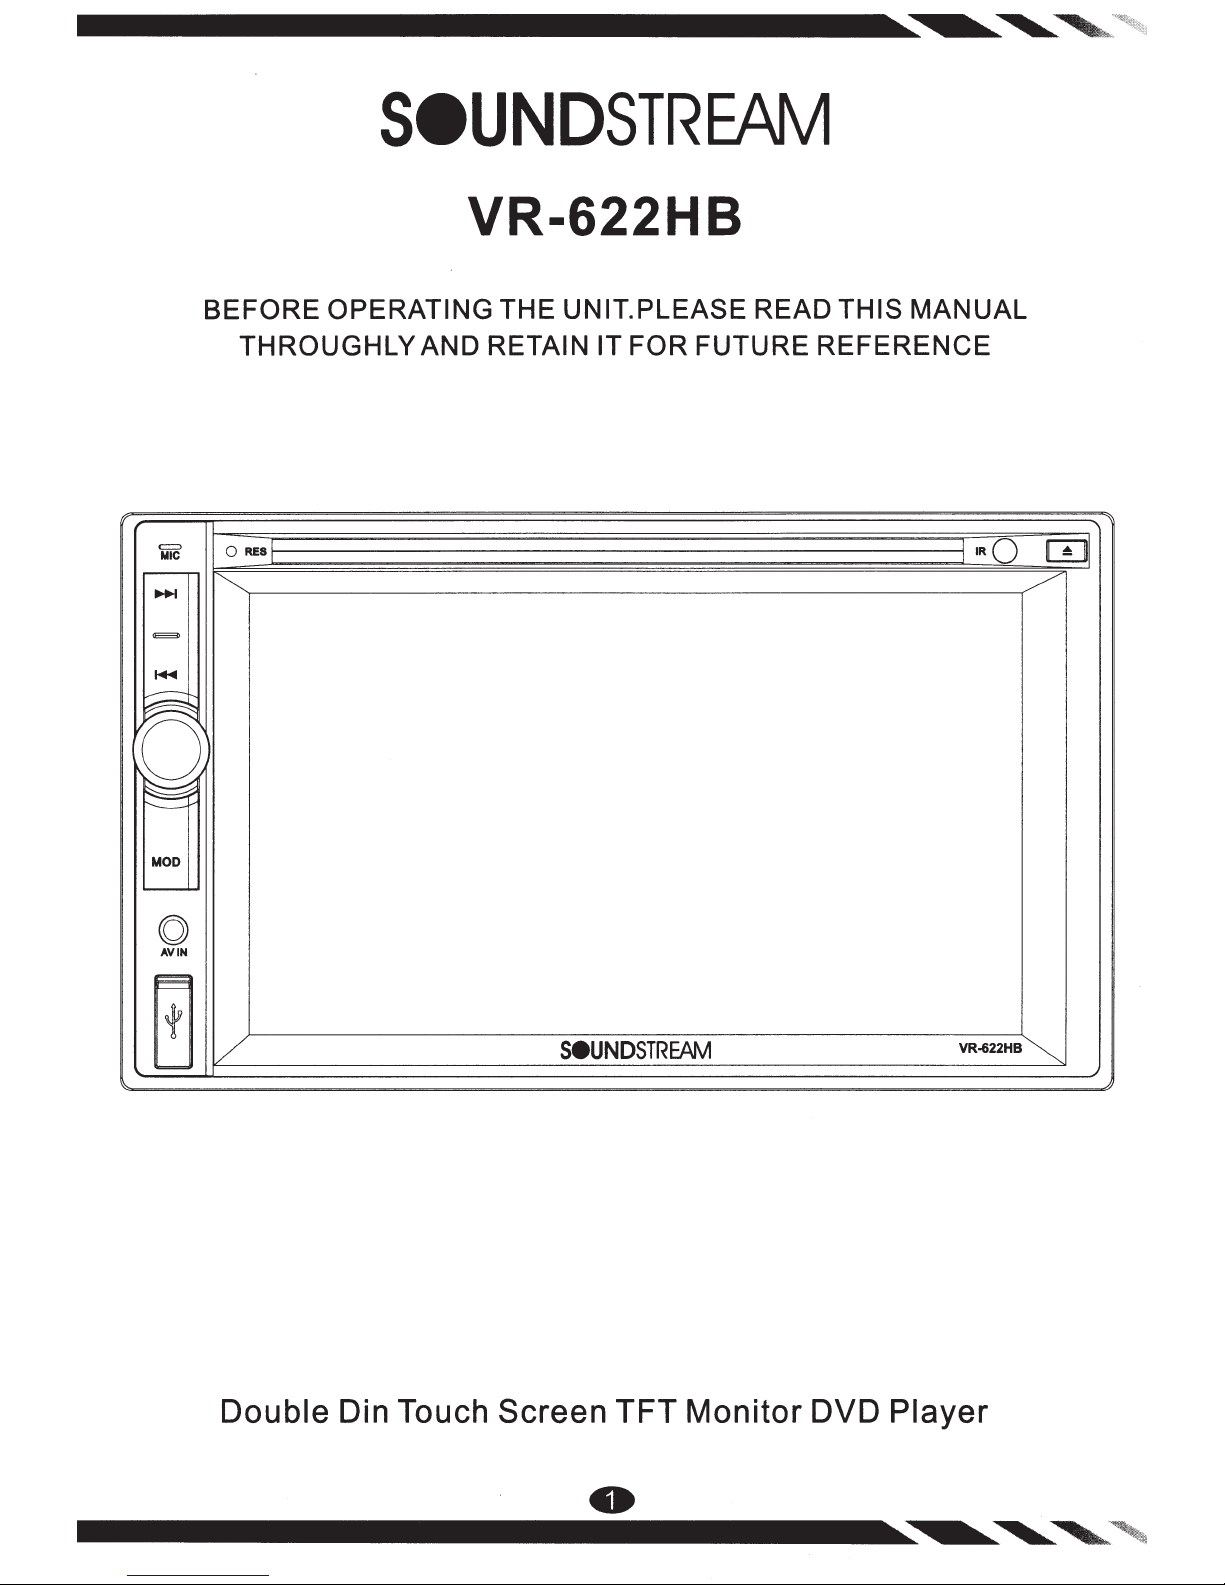
VR-622HB
BEFORE OPERATING THE UNIT. PLEASE READ THIS MANUAL
THROUGHLY AND RETAIN IT FOR FUTURE REFERENCE
=
MIC
-
.....
CE::3)
~
--=-
[j
~~
~;;..
-......____
MOD
-
(Q)
AVIN
[!]
0 RES
~
v
SeUNDSTREAr\11
'•RQ
VR-622HB~
ml
/
Double Din Touch Screen TFT
-
Monitor
DVD Player
Contents
NOTES ON INSTALLATION
PRECAUTIONS
PANEL
REMOTE
REMOVE
WIRING DIAGRAM
MAIN
• RADIO
CONTROL
BATTERY
MENU
MOBILE
•
• BLUETOOTH
• DISC
• USB
AVIN
•
• SETTING
OTHER
INSTALLATION
ACCESSORIES
SPECIFICATION
Notes
LINK
FUNCTIONS
installation
on
The unit is designed for 12V DC, negative ground operation
system only. Before installing the unit, make sure your vehicle is
connected to 12V DC negative grounded electrical system.
The negative battery terminal must be disconnected before
making connections, which can reduce damaging to the unit due to
short circuit.
Be sure to connect the speaker (-) leads to the speaker (
terminal. Never connect the left and right channel speaker cables
each other or to the vehicle body. Do not block vents or radiator
panels. Blocking the will cause heat to build up inside and may
result in fire.
After the completion
unit (including replacing the battery), please press the reset button
on the front panel with pointed objects (such as ball pen) to set the
unit to initial status.
-)
the installation and begin to operate the
of
•
Precautions
The unit can play the following disc only
Type
of
DVD
VCD
CD
MPEG4/DIVX
MP3/
WMA/JPEG
Note:
The
unit
Disc
Label On The Disc
DVDVIDEO
VIDEO
DISC COMPACT
DIGITAL AUDIO
MPEG4 VIDEO DIVX
DISC COMPACT
CD
DIGITAL VIDEO
MP3
is compatible with DVD,DVD+/-R,
Recorded Material
Video and Audio
Video and Audio
Audio
Video and Audio
Compressed
Digital Audio
v·cD
1.0/2.0/3.0, SVCD, CD, CD-R, CD-RW
Size
12cm
12cm
12cm
12cm
12cm
of
and
disc
JPEG
0
DO
NOT ATTEMPT TO MODIFY THE UNIT, MODIFYING THE UNIT MAY CAUSE AN
ACCIDENT.
0 STOP
INTERFERE WITH YOUR DRIVING.
0 DO
OF
THE
NOT
-20C
VEHICLE BEFORE CARRYING OUT ANY OPERATION THAT COULD
TURN
TO
60C.
ON
THE
UNIT IF THE TEMPERATURE INSIDE THE VEHICLE IS OUT
0 THIS PRODUCT IS DESIGNED FOR ONE SINGLE VIDEO OUTPUT, PLEASE USE A
SPLITTER IF YOU WOULD LIKE TO CONNECT
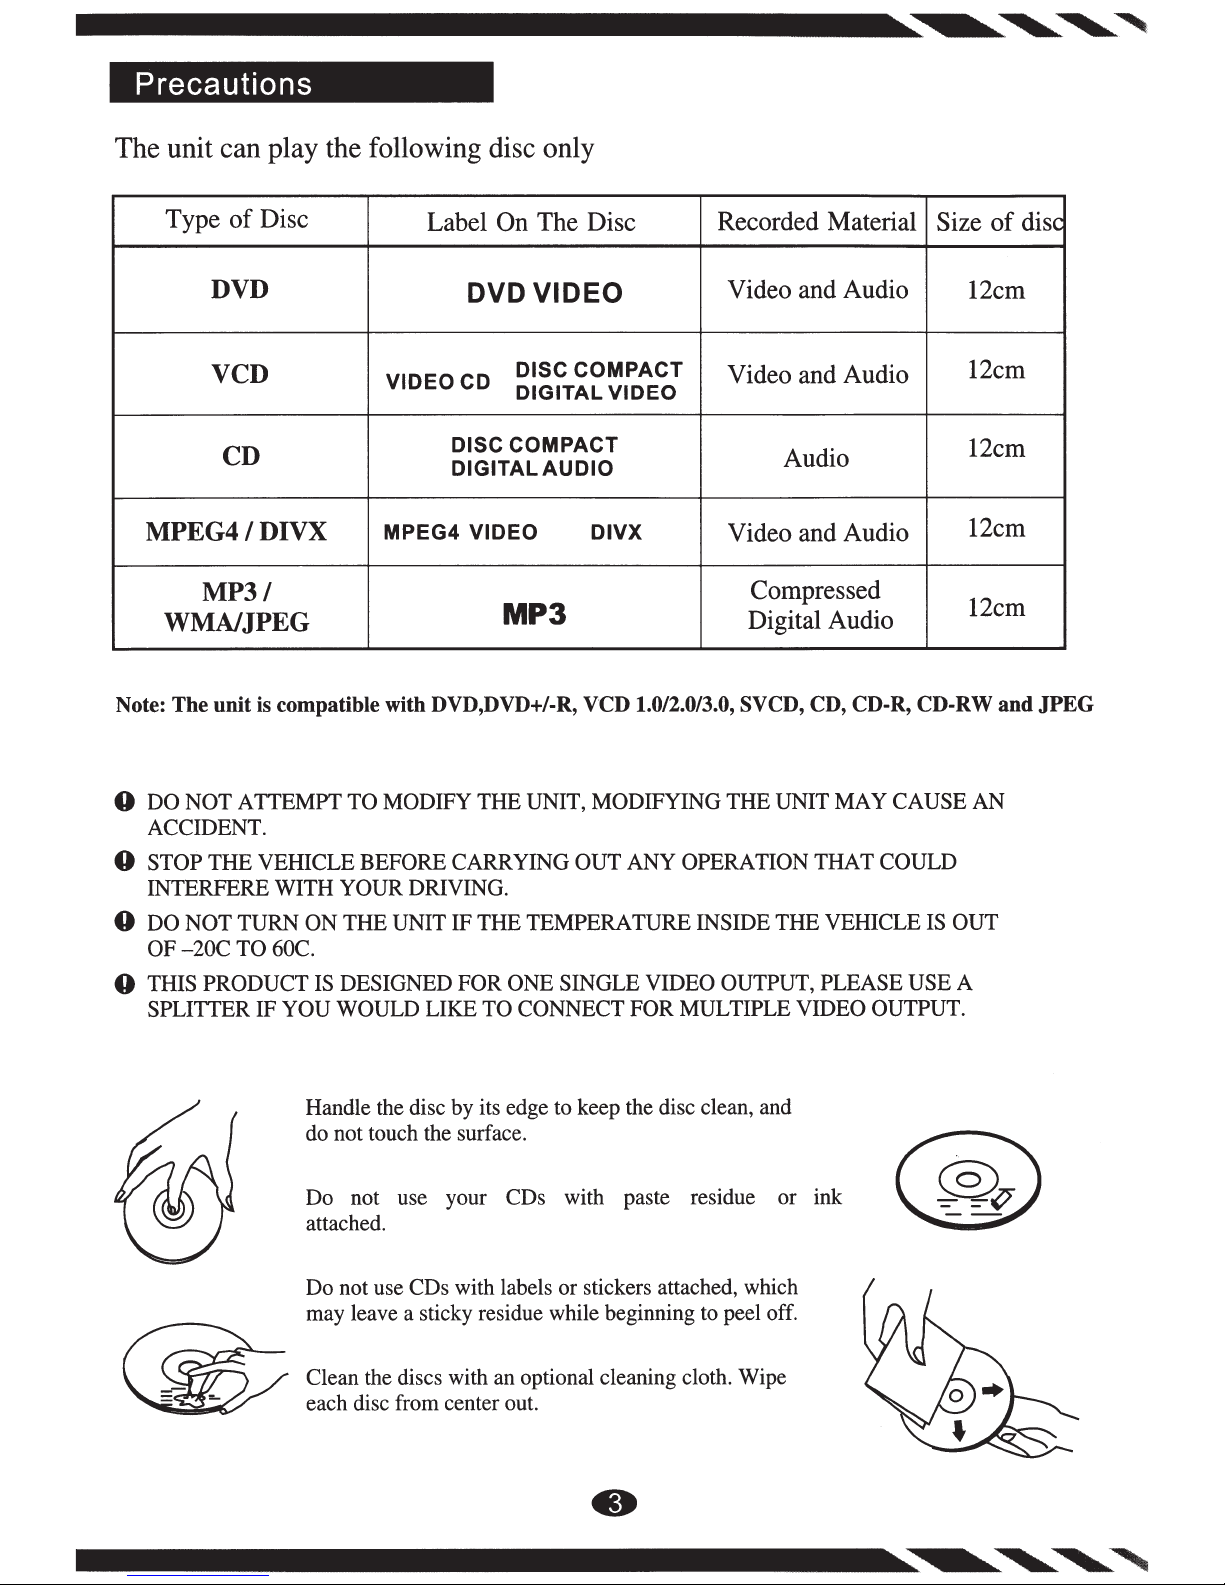
Handle the disc by its edge to keep the disc clean, and
do not touch the surface.
Do not use your CDs with paste residue or ink
attached.
Do not use CDs with labels or stickers attached, which
may leave a sticky residue while beginning to peel off.
Clean the discs with an optional cleaning cloth. Wipe
each disc from center out.
FOR
MULTIPLE VIDEO OUTPUT.
•
Panel
12
0
REar----------"--------;
LJ
7~~~----------~
.-------
11
seuNDSTREAtv1
10
IR
_....,_....,......._
VR-622HB
......
8
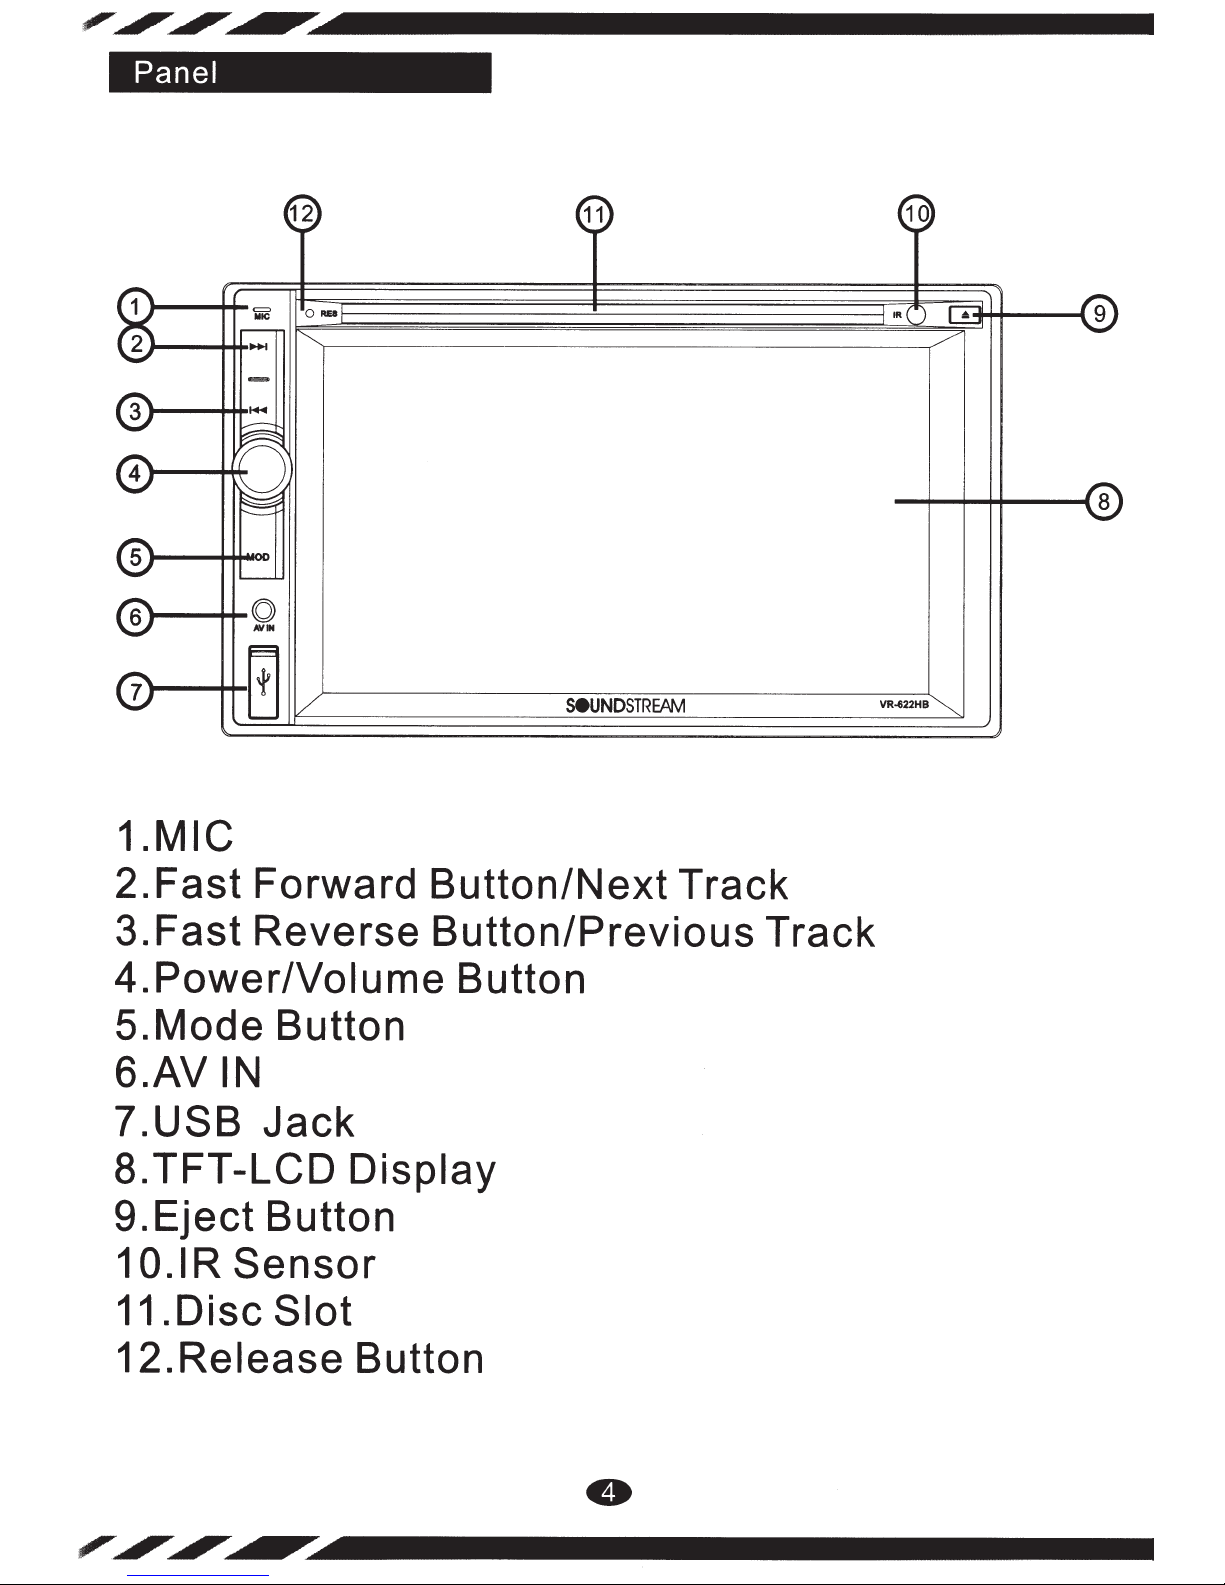
1.MIC
2.
Fast
3.Fast
Forward
Reverse
Button/Next
4.Power/Volume
5.Mode
6.AV
?.USB
8.TFT-LCD
9.Eject
1 O.IR
Button
IN
Jack
Display
Button
Sensor
11.DiscSiot
12.
Release
Button
Track
Button/Previous
Button
Track
•

Remote
Control
1
2
5
6
9
10
13
14
17
18
21
22
25
26
29
30
l.Power
Button(TFr
ON/OFF)
2.MODE Button
Button
11
...
.
3
4.MUTE /EJECT Button
S.BAND Button
+ Button
6.
7.TITLE(in DVD playing)
PBC(in
VCD playing) Button
8.Sub-T Button
9 .• Button
Button
10.0K
Button
..
11.
12.Setup Button
Button
•n
13.
• Button
14.
.Angle (long press)/EQ (short press)
15
16.0pen Button
searching)
.AMS (in radio &
17
TV
RPT (in DVD/CD!MP3 repeated) Button
18.ST (in radio)/PROG (in DVD/CD/MP3) Button
4
3
8
7
12
11
16
15
20
19
24
23
28
27
32
31
19.VOL+Button
20.ZOOM
2l.LOC
Button
(a remote in radio)/RDM
(a random broadcast in DVD/CD/MP3)Button
Button
22.SEEK
23.SEL
24.SEEK
25.CLK (for time
26.
27.VOL-
/I••
.,.,1
I
Button
Button
LOUD
I
switching) """ (for answering in BT) Button
(in DVD) I..:.. (for cutting
OSD
Button
in BT) Button
off
28.AUDIO (for channel switching in DVD/CD/
Mp3)/DEL(in BT) Button
29.1-9 Number Button
/SWT Number Button
30.0
31.10+(the selection key for DVD)/* (in BT) Button
32.GOTO
(the selection
key
DVD)/#(in
for
BT)
Button
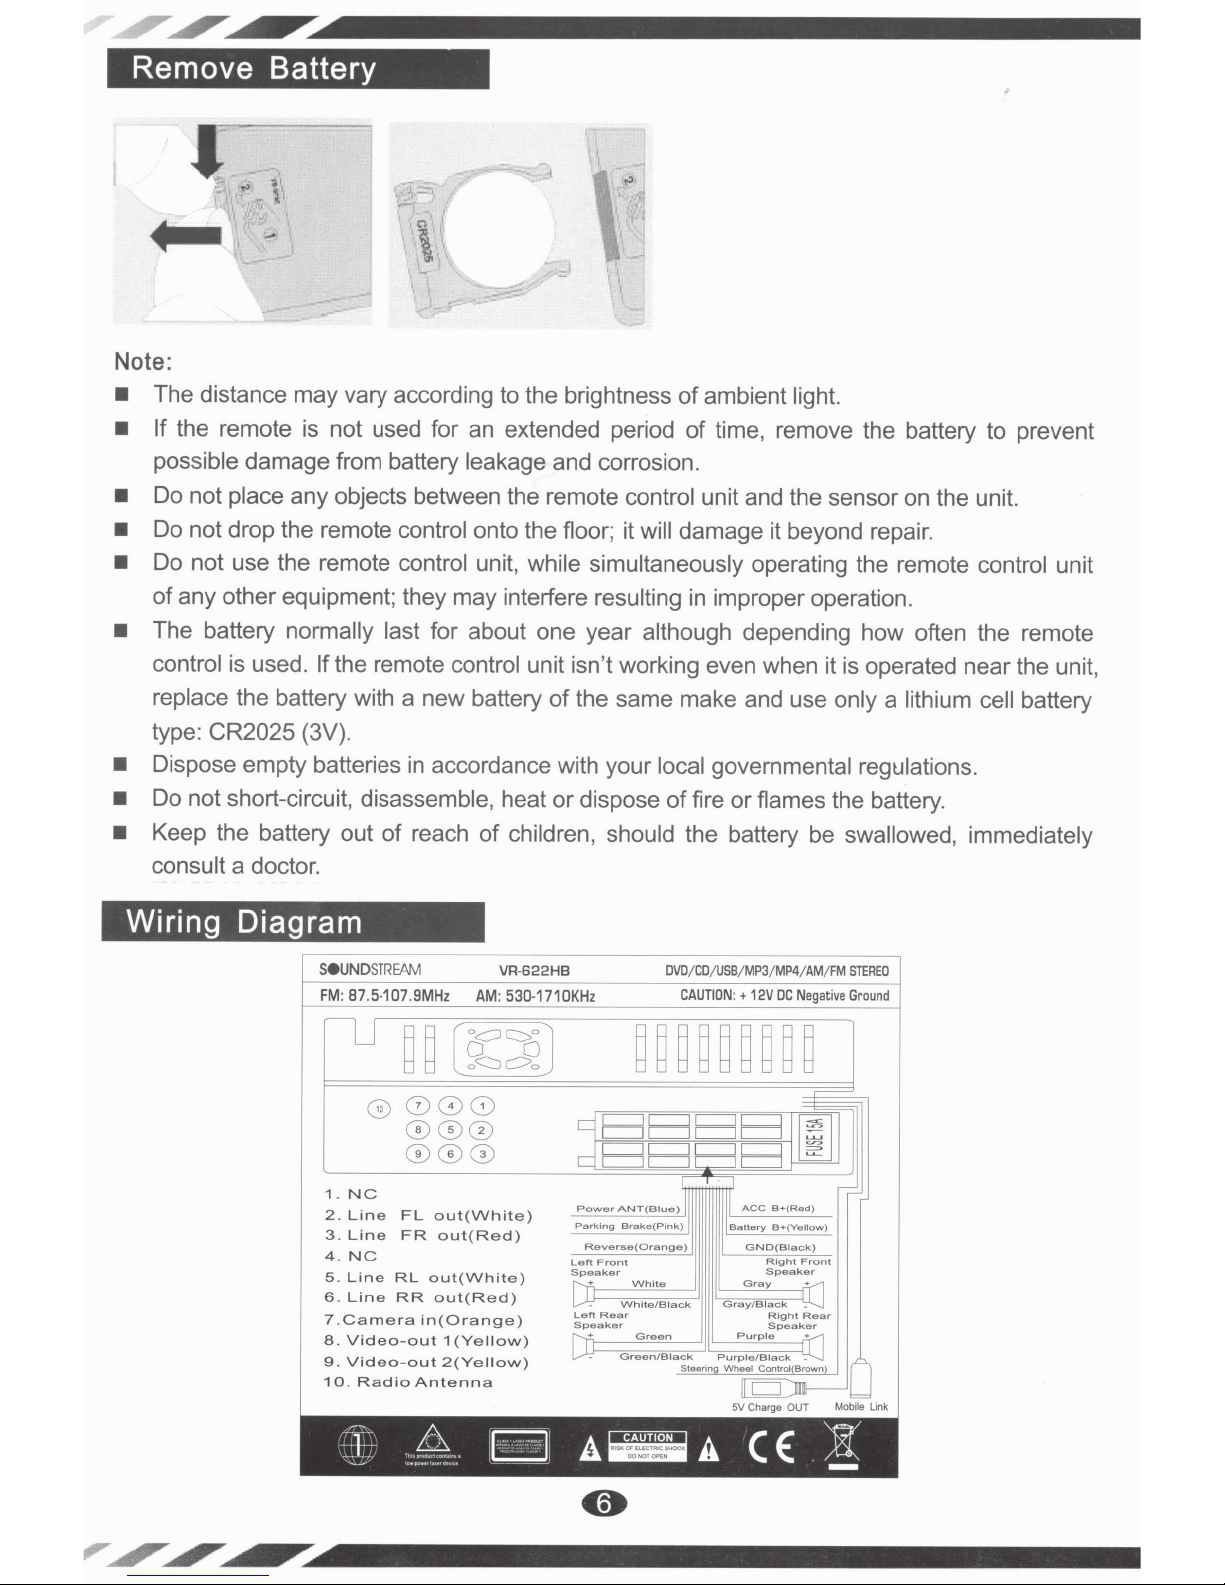
Remove Battery
Note:
• The distance may vary according to the brightness
• If
•
•
•
• The battery normally last
•
•
•
the remote is not used for an extended period
possible damage from battery
Do not place
Do not drop the remote
any objects between the remote
control
Do not use the remote control
of
any other equipment; they may interfere
leakage
and corrosion.
onto the floor; it
unit,
while simultaneously
resulting
for about one year
control
replace
type:
Dispose empty batteries
Do not short-circuit, disassemble,
Keep the battery out
consult
is
used.
If
the remote control
the battery with a new battery
CR2025
(3V).
in
accordance with your
of
reach
a doctor.
unit isn't working even when it is operated near the unit,
of
the same make and use
heat
or
dispose
of
children, should
control unit and the sensor on the unit.
will damage it beyond repair.
although
local governmental regulations.
of
ambient
of
time, remove the battery to prevent
light.
operating the remote
control
in improper operation.
depending how often the remote
of
fire
or
flames the battery.
the battery be
only a
lithium cell
swallowed, immediately
unit
battery
Wiring Diagram
SeUND
FM:
87
lJ
1 .
NC
2.
Line
3 .
Line
4 .
NC
5 .
Line
6 .
Lin
? .
Camera
8 .
Video
9 .
Video
10
.
~
=
+-
STRE.AM
.5-107 .9MHz AM:
~
~
[~~]
008
0
000
000
FL
out(White)
FR
out(Red)
RL
out
(
o
ut(R
in(Orange)
out
1
(Y
out
2(Yellow)
Antenna
~
White)
e
Radio
RR
-
-
VR-622HB
530
e
d)
e
llow)
E2l
DVD
/
CD
-1710KHz
CAUTION
~~~~~~~~~
ElElElB
dBE
Powe'
ANT(Biue)
Parking
B r
Reverse(Orange)
Left
Front
Speake
r
White/Black
Left
Rear
Speaker
I I
G '
A~
ake(Pink)
Wh
i
te
Green
een/B
lElB
TI
i
ack
Stee•lng
/
USB
/
:
+
rr
Battery
Gray/B
Purple
P u
,ple/B
Whi~~o
5V Charge
A
MP3
/
MP4
12V
DC
Negative
m
ACC
B+(Red)
B+(Yellow)
GND(B
i
ack)
Right
Speaker
Gray
l
ack
Righ
t
Speaker
i
ack
l
~
OUT
CE
/
AM
Front
+
Rear
-
/
FM
--=
Mobile
)t
-
STEREO
Ground
f~
'==='
Link
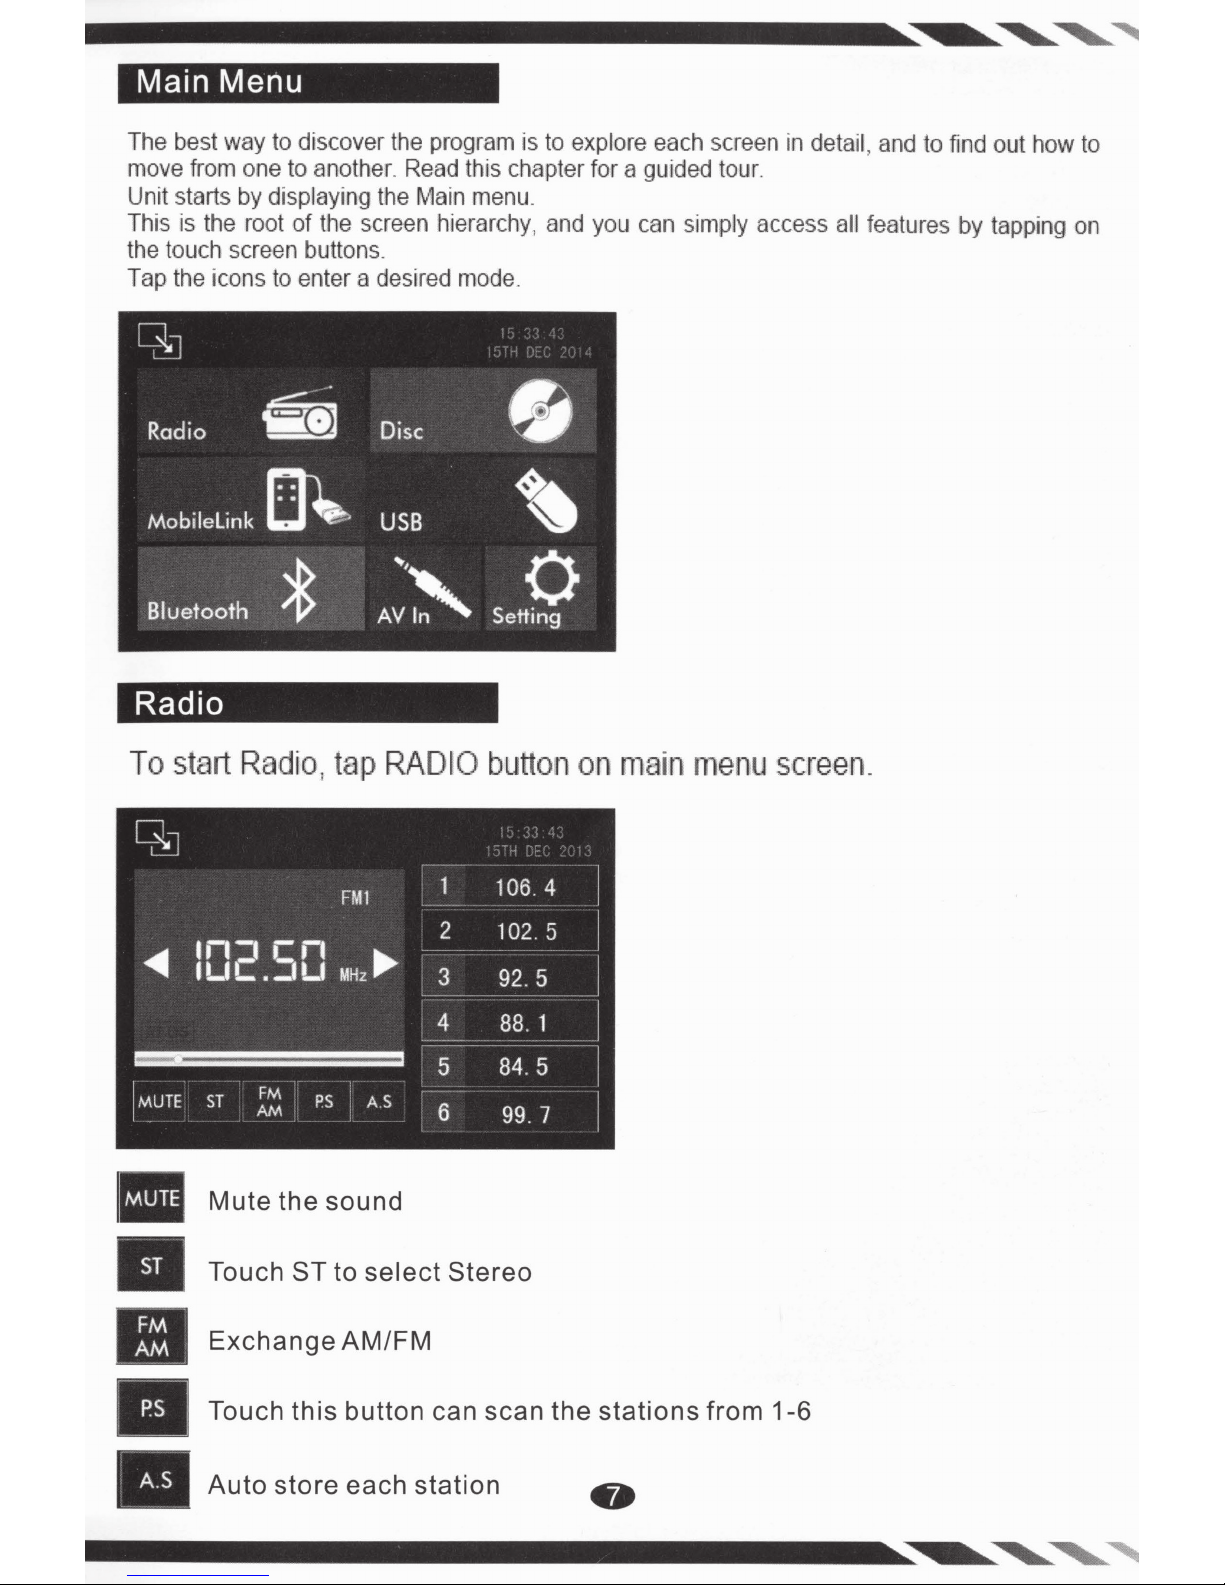
Main Menu
The best way to discover the program is to explore each screen in detail, and to find out how to
move from one to anothe
Unit starts by displaying the Main menu.
of
This is the root
the touch screen buttons.
Tap the icons to enter a desired mode.
the screen hierarchy , and you can simply access all features
r.
Read this chapter for a guided tour.
by
tapping on
Radio
To
start
Radial tap
Mute the sound
Touch
ST
RADIO
to select Stereo
button
on
ma
in
menu
screen_
Exchange AM/FM
this
Touch
Auto
store each station
button can scan the stations from 1-6
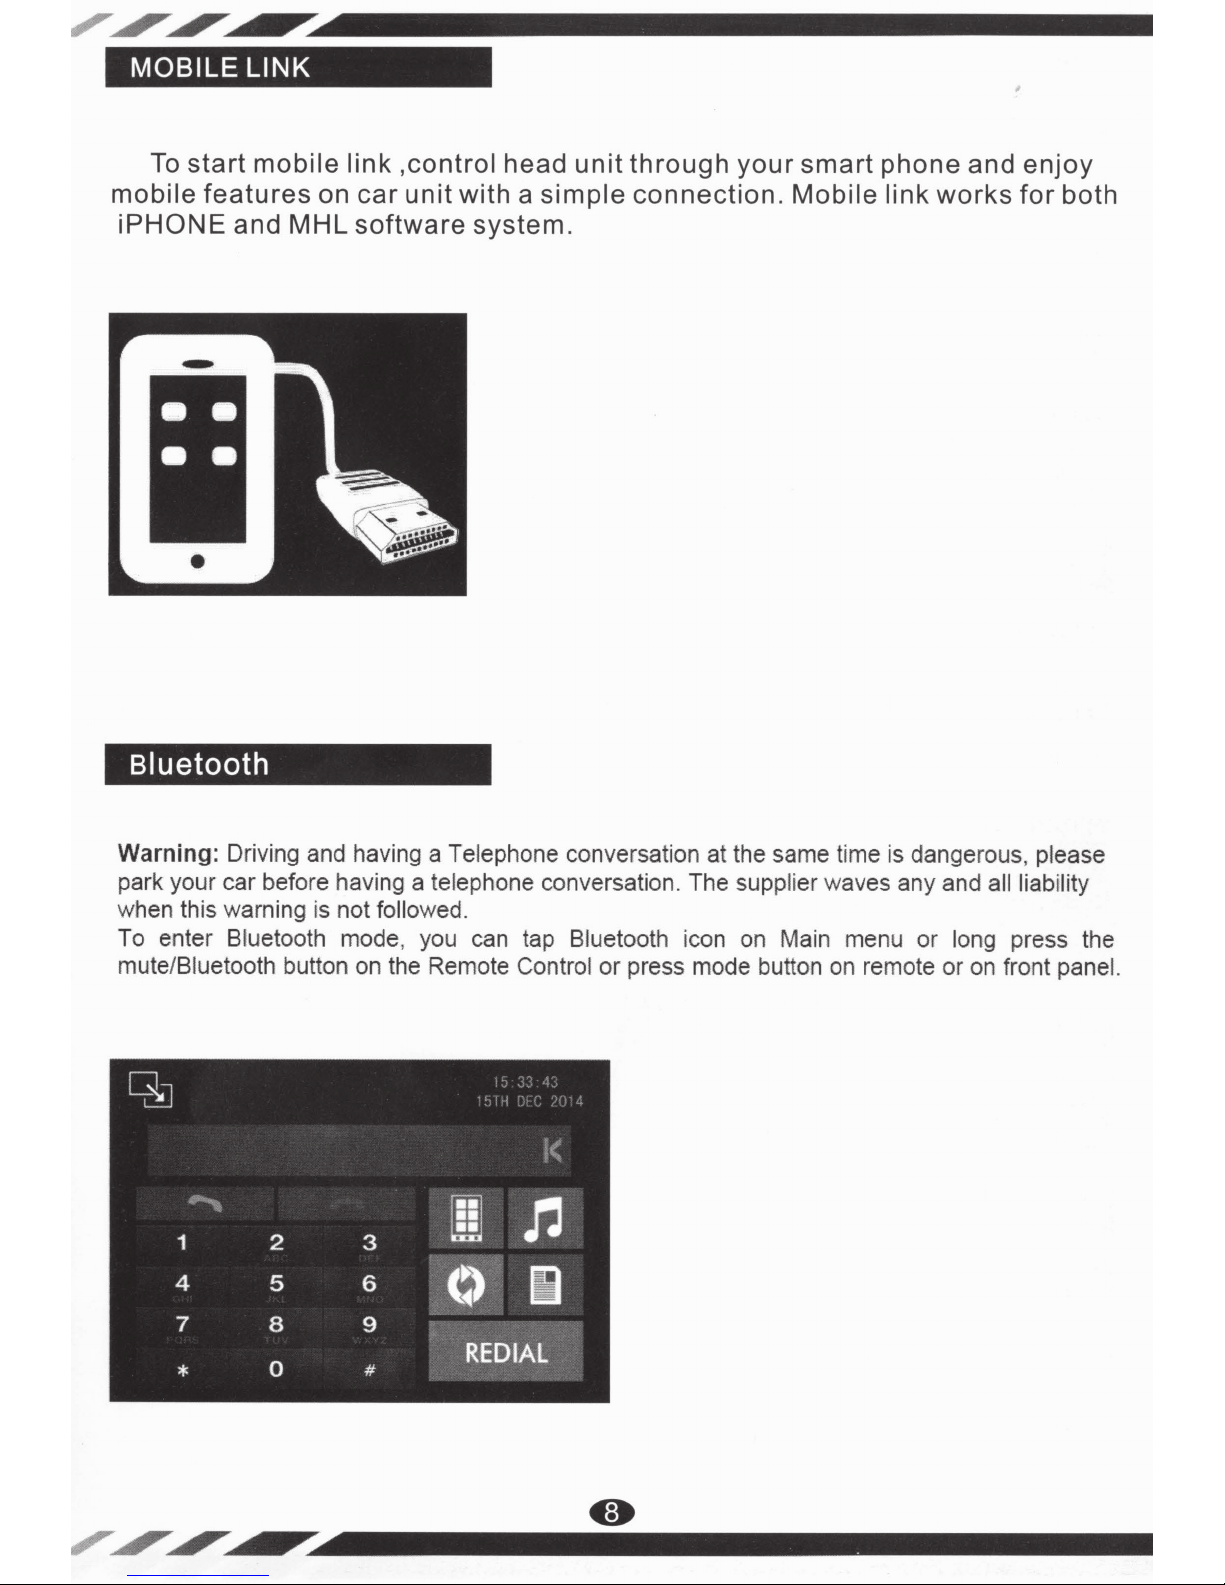
MOBILE
To
mobile
iPHONE and
LINK
start
mobile
features
-
•
link
,control head
on car unit with a
MHL
software system.
unit
simple
through
connection.
your
smart
Mobile link
phone and
works
enjoy
for
both
Bluetooth
Warning: Driving and having a Telephone conversation at the same
park your car before having a telephone conversation. The supplier waves any and all liability
when this warning is not followed.
To enter Bluetooth mode, you can tap Bluetooth icon on Main menu or long press the
mute/Biuetooth button on the Remote Control or press mode button
ti
me is dangerous, please
on
remote or on front pane
l.
 Loading...