

Soundstream VCM-88D Owner's Manual
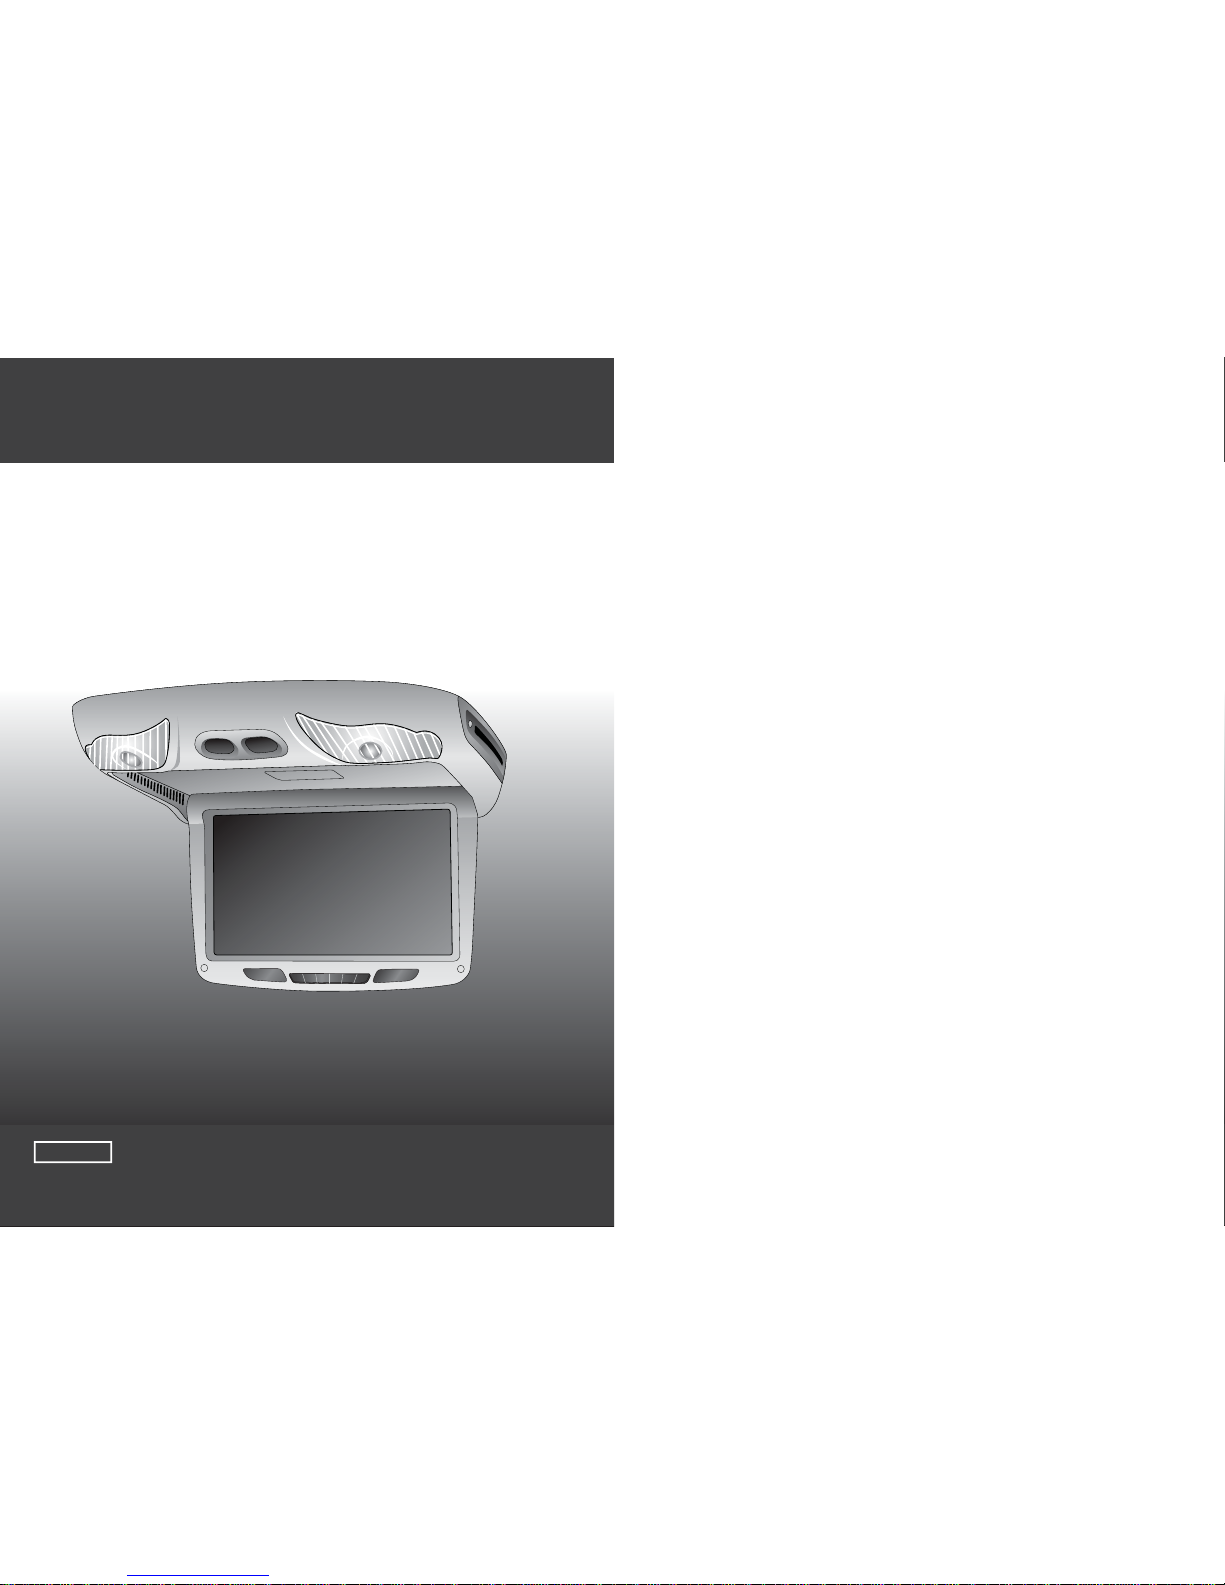
OWNER'S MANUAL
8.8" TFT-LCD SCREEN WITH
DVD PLAYER
OVERHEAD COMBO
Changes or modifications not expressly approved by the party responsible
for compliance could void the user's authority to operate the equipment.
CAUTION
A grade screens constitute no more than 3 missing pixels.
WARNING
Installation of all TV monitors
must be out of the driver’s
field of sight.
Do not try and service these
products yourself, seek only
a qualified service center or
factory sevice center.
Be careful not to drop or
apply under pressure to the
front panel of your video
monitor. If the screen cracks
due to misuse, your warranty
will be void!
Be careful not to overload your
cigarette lighter plug by adding
more than one device at a time.
Use extra caution with any liquids
in your car. If you or your child
spill any liquid on these products,
pull your vehicle to the roadside
and turn the key off to disconnect
or wipe the products with a towel. Do not
operate the equipment until all liquids have
either evaporated or you have had the monitor
inspected at a service center by a qualified
technician. Severe harm or danger can
be occured.
Do not mount the product where
it will obstruct the deployment of
the airbag or in an area where it
would affect the vehicular control.
Also be careful to avoid mounting
the product where it can become
hazardous during sudden stops or
in the event of an accident.
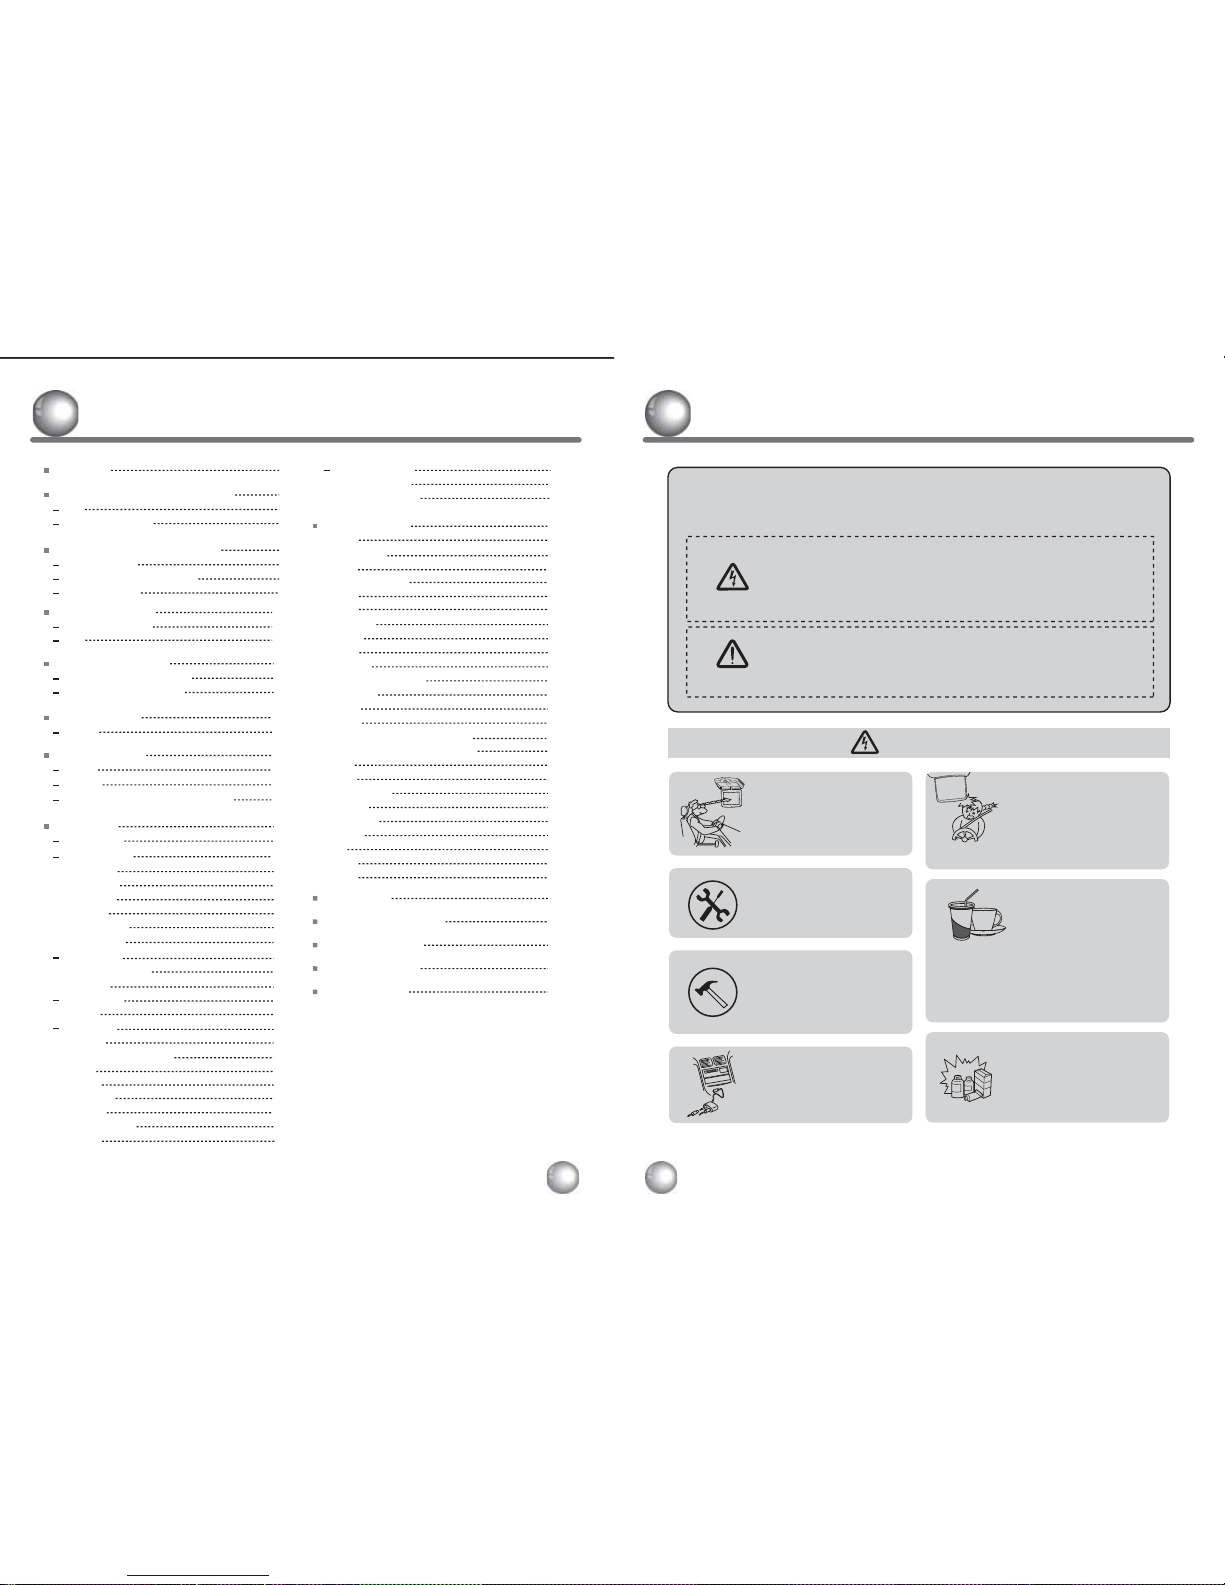
The exclamation point within an equilateral triangle is intended
to alert the user to the presence of important operating and
maintenance (servicing) instructions in the literature accompanying
the product.
The lightening flash with arrowhead symbol within an equilateral
triangle is intended to alert the user to the presence of
"dangerous voltage" within the product's enclosure that may be
of sufficient magnitude to constitute a risk of electric shock to
people.
CAUTION
WARNING
Please read and observe all warnings and instructions in this owner’s manual
and those marked on the unit. Retain this booklet for future reference.
There are two kinds of alarm symbols as f ollows:
Use only a damp cloth to clean
the screen and use only purified
water on the cloth, wring out all
excess water prior to wiping the
screen. Do not use any cleaners
or chemicals to clean the screen.
In most cases a dry cloth will do!
BENZENE
alcohol
Caution
4
4
Caution
9
How To Operate The Monitor
6
9
9
Power On/Off
Monitor Angle Adjustment
Mute Function
9
Name And Function Of Each Parts
6
8
Unit
Remote Controller
11
Selecting The Mode
11
12
How To Select DVD Mode
How To Select AV Mode
10
10
Switch The Menu
Remote Controller
Unit
10
14
Picture Control
14
Game
Screen
CONTRAST/BRIGHT/COLOR/TINT
15
16
13
Extra Function
13
FM TX
34
Installation
35
Connection Diagram
36
Disc Information
37
Troubleshooting
38
Specifications
17
17
DVD Setup
Setup Menu
18
18
18
18
19
General Setup
TV Display
Angle Mark
OSD Lang
Captions
Screen Saver
Last Memory
19
Audio Setup
Dolby Digital Setup
Equalizer
19
20
21
Video Setup
Quality
21
23
Preference
TV Type
PBC (Play Back Control)
23
23
25
25
25
Password Setup
Password Mode
Password Change
19
19
26
DVD Functions
26
26
26
26
26
27
27
27
27
28
28
29
29
29
30
30
31
31
31
32
32
32
33
33
33
EJECT
VOL+ / VOLMUTE
PLAY OR PAUSE
AUDIO
STOP
ARROWS
SETUP
MENU
DISPLAY
NUMBER BUTTONS
SUBTITLE
TITLE
SLOW
FAST REVERSE SEARCHING
FAST FORWARD SEARCHING
PREV
NEXT
REPEAT A-B
REPEAT
NTSC/PAL
ANGLE
PBC
ZOOM
GOTO
23
24
23
24
24
24
Audio
Subtitle
Disc Menu
Parental
Country Region
Default
Contents
3
CAUTION
Quality installations are best
performed by qualified and
certifled installers.
Watching the monitor for an
extended period of time
without the engine running
may deplete the vehicle's
battery charge.
Don't touch the unit there is a
flash of lightening. It may
receive an electric shock.
Do not cover or stop up heater
ducts or vents. It may be the origin
of a fire or receives an electric
shock.
This product is designed for
operation with a 12 Volt DC,
negative ground vehicle. It
is not suitable for operation
under other conditions or
voltages.
1.
2.
3.
4.
5.
6.
The operating temperature of this product is limited to -10℃ ~ 55℃.
Your vehicle can reach temperatures up to 100℃ in the summertime.
Do not open covers and repair yourself. Refer servicing to qualified personnel.
DVD Players use an invisible laser beam which can cause hazardous radiation
exposure. Be sure to operate the unit correctly as instructed.
Do not cut the car power supply off while a disc is playing. It can cause
damage to the DVD Player.
Check Point
Your optimum picture quality is achieved when you are directly in front of the
monitor (+/-30 degrees).
From time to time when your vehicle is extremely hot or cold you must allow
time for your air conditioner or heater to cool or heat the vehicle and for
operating temperatures to return to normal operating ranges. Your monitor will
return to its normal functions when these operating ranges are achieved.`
Caution
5
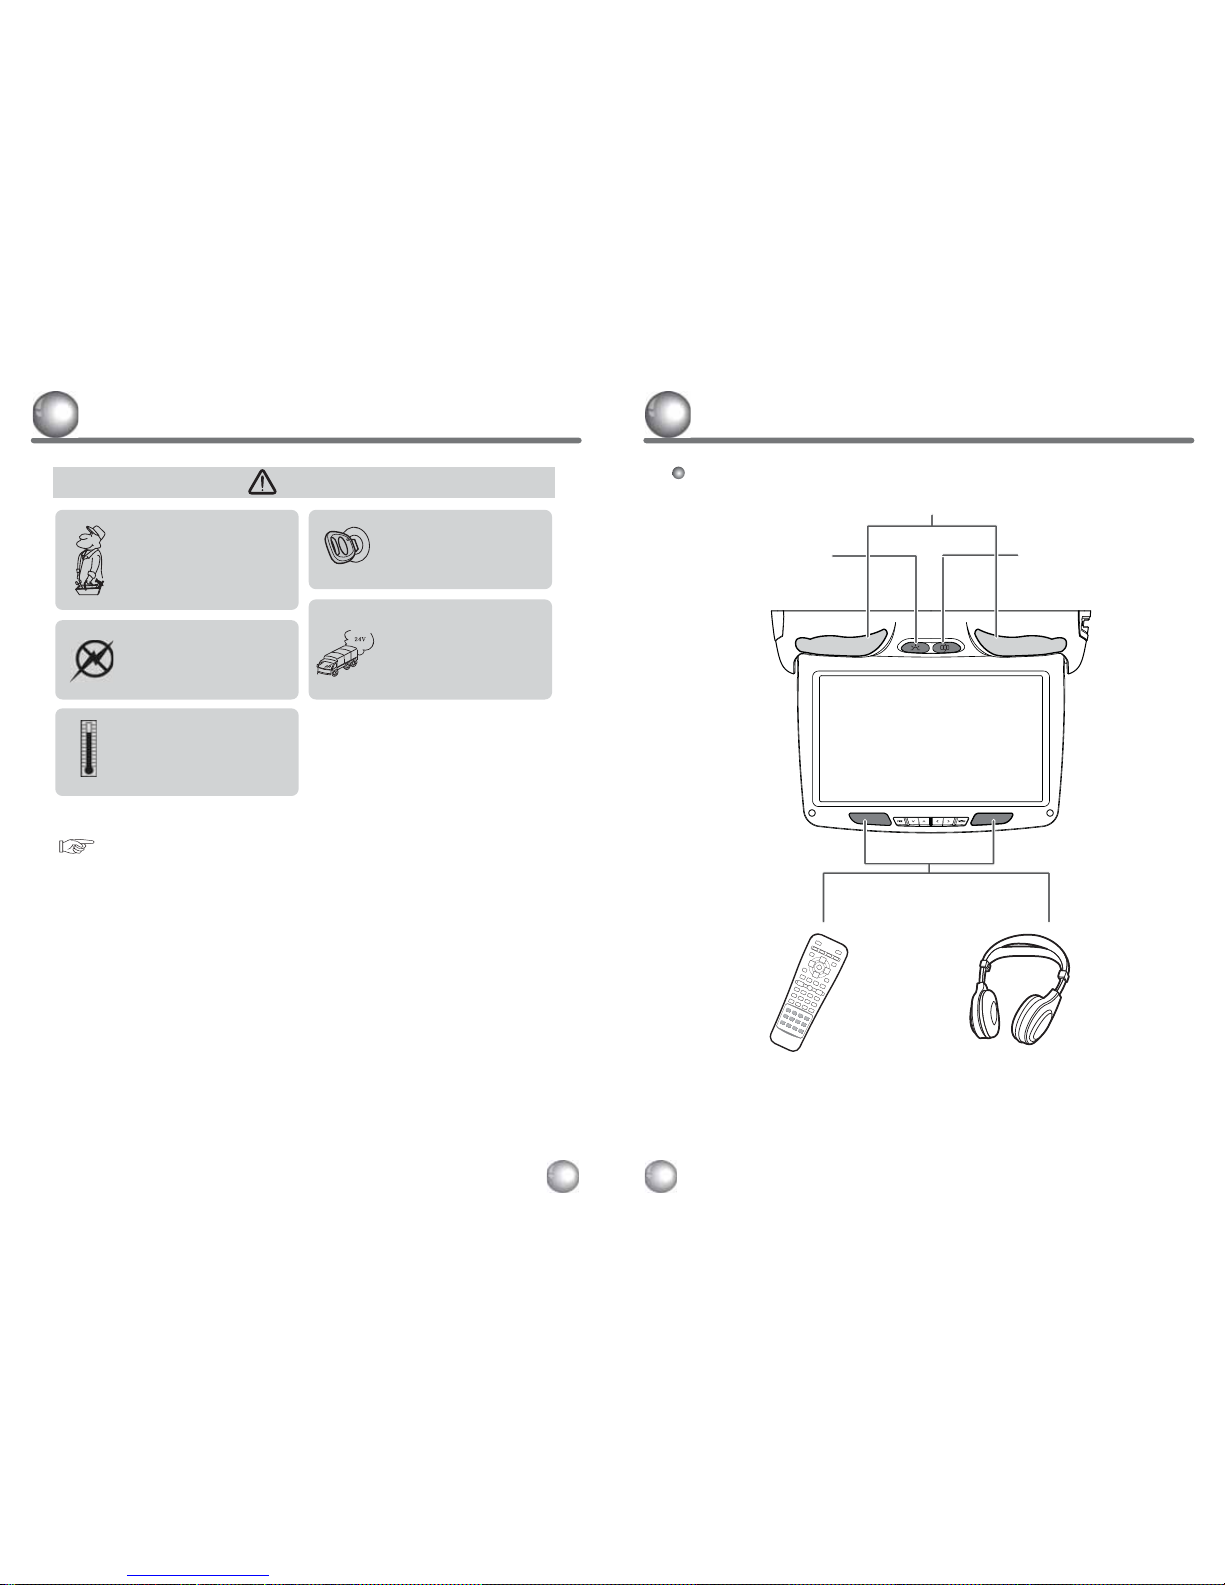
Name And Function Of Each Parts
6
Unit
ROOM LAMP button
When push the button,
Room lamp is on, push again
the button, Room lamp is off.
DOOR button
Room lamp is automatically
ON/OFF when door is
opened/closed
LAMP
Remote control eye.
This allows transmitting of the
remote control's IR signals for
controlling all functions of your
monitor.
Wireless Infrared Receiver
You can hear the sound of
audio sound by using
wireless infrared headphone.
(Wireless IR headphone is
optional accessory)
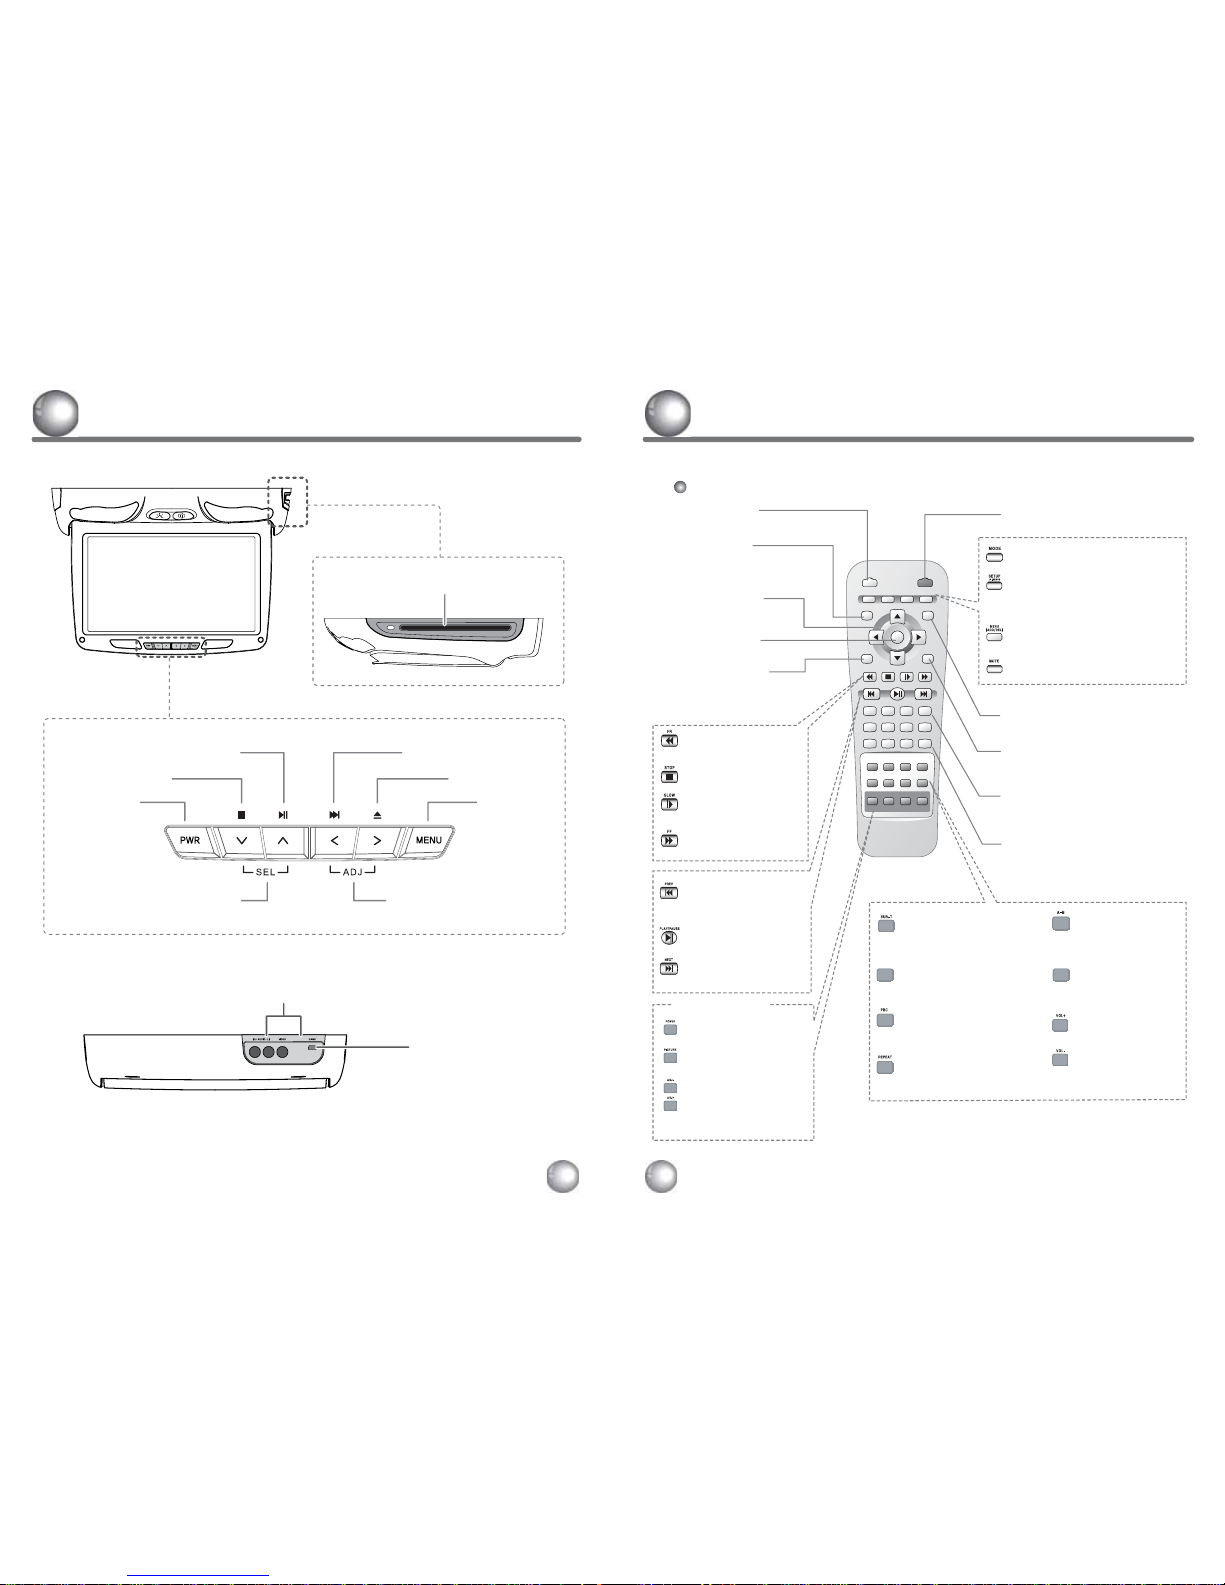
Remote Controller
MONITOR
POWER PICTURE ADJ - ADJ +
REPEAT A-B VOL -
SUB-T
1
PREV
FR
DISPLAY AUDIO
TITLE
MODE
SETUP
(A.MEMO)
MENU
(ADD/DEL)
MUTE
EJECT POWER
ZOOM
STOP SLOW FF
PLAY/PAUSE NEXT
4
7
2
5
8
3
6
9
GOTO
+10
0
NTSC/PAL PBC
ANGLE
VOL +
ENTER
MONITOR CONTROL
EJECT button
OPEN/CLOSE the disc tray.
DISPLAY button
Shows information of
elapsed or remaining
time of a chapter or a
title.
ADJ button
Adjustment in each mode.
PLAY/PAUSE button
Begins/pauses disc play.
NEXT button
Use to move to the next
Chapter or track.
PREVIOUS button
Use to move to the
previous chapter of
track.
FF button
Use to play forward
silently.
STOP button
Stops disc play.
SLOW button
Use to play slow
silently.
FR button
Use to play reverse
silently.
ARROW button
Use to move to the
desired menu.
ENTER button
Use to select the menu item.
TITLE button
Use to display the title
menu of the loaded
DVD disc.
POWER button
Turns on the Monitor.
POWER button
Turns the DVD Player & Unit on or off.
ZOOM button
Zoom in on picture.
GOTO button
Use to search a title or a chapter
of your DVD disc.
NUMERIC button
Use when making a selection on
the menu screen.
AUDIO button
selects the setting of the desired
audio output.
MODE button
Changes each Play mode.
MUTE button
Use to cut the sound on or off.
SETUP button
Use to set various functions
according to your individual preference.
(Auto Memory : Not use)
MENU button
Shows the menus.
(ADD/DEL :
Not use
)
NTSC/PAL button
Select the NTSC/PAL in
condition of DVD mode.
SUB-T button
Changes the subtitle
language to another
(available) language.
A-B button
Repeat the selected
segment.
(Audio or Video)
ANGLE button
This button can
control the preseted
camera angle.
REPEAT button
Repeats part or all of a
chapter, title or track,
or an entire disc.
PBC (Play Back Control) button
When you play a VCD 2.0 disc
the root menu screen will be
displayed on the monitor.
VOL DOWN button
Decreases the volume.
VOL UP button
Increases the volume.
(These functions are valid for only
some products.)
PICTURE button
Use to adjust the picture
settings.
NTSC/PAL
ANGLE
Name And Function Of Each Parts
8
Name And Function Of Each Parts
7
Disc Slot
External Connection
Mini USB Game Port
POWER button MENU button
STOP button
EJECT button
NEXT button
ADJ Down / Up buttons
SEL Down / Up buttons
PLAY/PAUSE button
SETUP
SETUP
Input
Input
FM TX
FM TX
Screen
Screen
Next Menu
Next Menu
DVD
DVD
Off
Off
Wide
Wide
◀▶
◀▶
Game
Game
Off
Off
PICTURE
PICTURE
Contrast
Contrast
Bright
Bright
Color
Color
Tint
Tint
88
88
87
87
70
70
50
50
◀▶
◀▶
Prev Menu
Prev Menu
PICTURE
PICTURE
Contrast
Contrast
Bright
Bright
Color
Color
Tint
Tint
88
88
87
87
70
70
50
50
◀▶
◀▶
Prev Menu
Prev Menu
SETUP
SETUP
Input
Input
FM TX
FM TX
Screen
Screen
Next Menu
Next Menu
DVD
DVD
Off
Off
Wide
Wide
◀▶
◀▶
Game
Game
Off
Off
It is a function which the MENU moves toward the button on the remote control.
◈ SETUP ----> PICTURE
◈ PICTURE ----> SETUP
Remote Controller
Switch The Menu
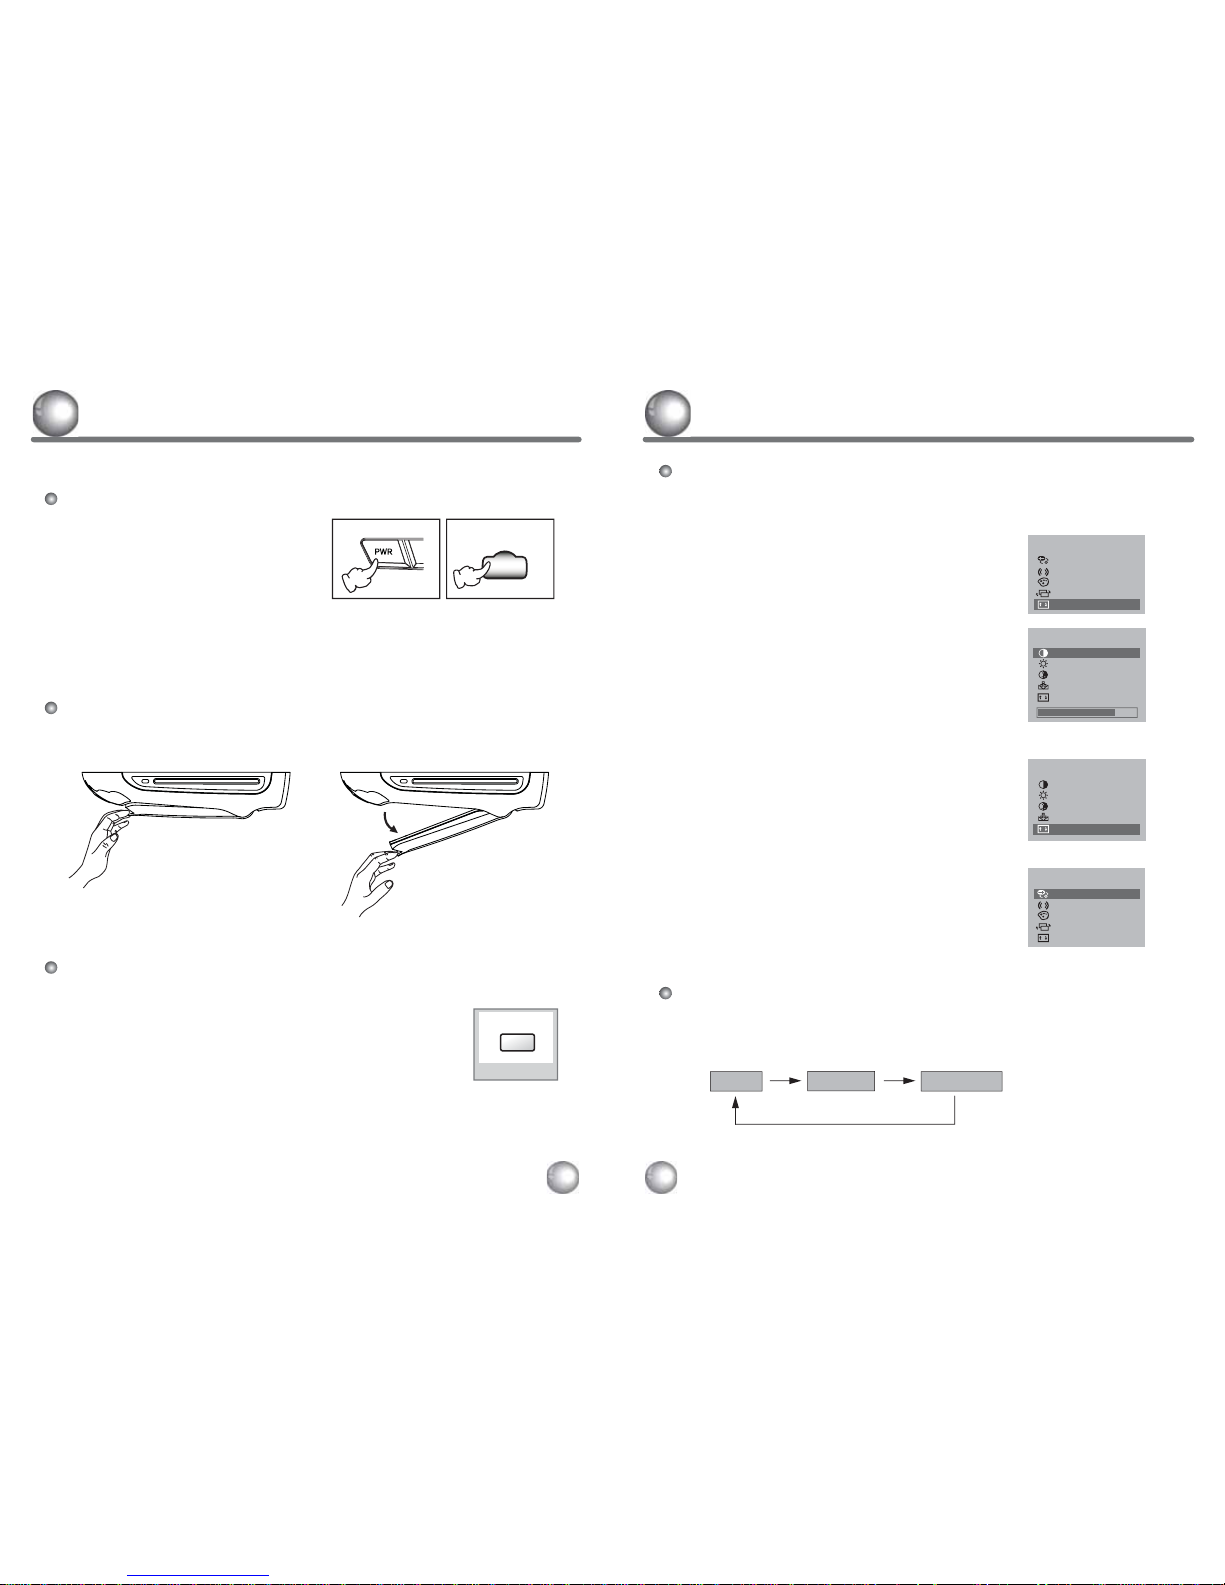
The monitor opens when the handle is pulled down.
Monitor Angle Adjustment
1. Press the POWER button on either
the remote controller or the unit once
to turn the power on.
Press the same
POWER button to
turn the power off.
Power On/Off
UNIT
REMOTE CONTROLLER
POWER
How To Operate The Monitor
9
10
3. Move the PICTURE menu by pressing
the
ADJ - / +
buttons on the remote controller.
1. Bring up the on-screen SETUP menu
by pressing the PICTURE button on the
remote controller.
It is a function which the MENU moves toward the button on the unit.
Unit
1. Whenever press MENU button on the unit.
menu will be changed as follows;
2. Select the Next Menu by pressing the
PICTURE button on the remote controller.
1. When display the PICTURE menu,
select the Prev Menu by pressing
the PICTURE button on the remote controller.
2. Move the PICTURE menu by pressing
the
ADJ - / +
buttons on the remote controller.
SETUP
PICTURE
MENU OFF
Remote Controller
Mute the audio sound.
1. Press the MUTE button on the remote controller
to mute the audio.
2. When the mute is on, press the MUTE button again on the
remote control to play the audio.
Mute Function
MUTE
SETUP
SETUP
Input
Input
FM TX
FM TX
Screen
Screen
Next Menu
Next Menu
AV1
AV1
Off
Off
Wide
Wide
◀▶
◀▶
Game
Game
Off
Off
SETUP
Input
FM TX
Screen
Next Menu
DVD
Off
Wide
◀▶
Game
Off
PICTURE
Contrast
Bright
Color
Tint
88
87
70
50
◀▶
Prev Menu
PICTURE
Contrast
Bright
Color
Tint
88
87
70
50
◀▶
Prev Menu
SETUP
Input
FM TX
Screen
Next Menu
DVD
Off
Wide
◀▶
Game
Off
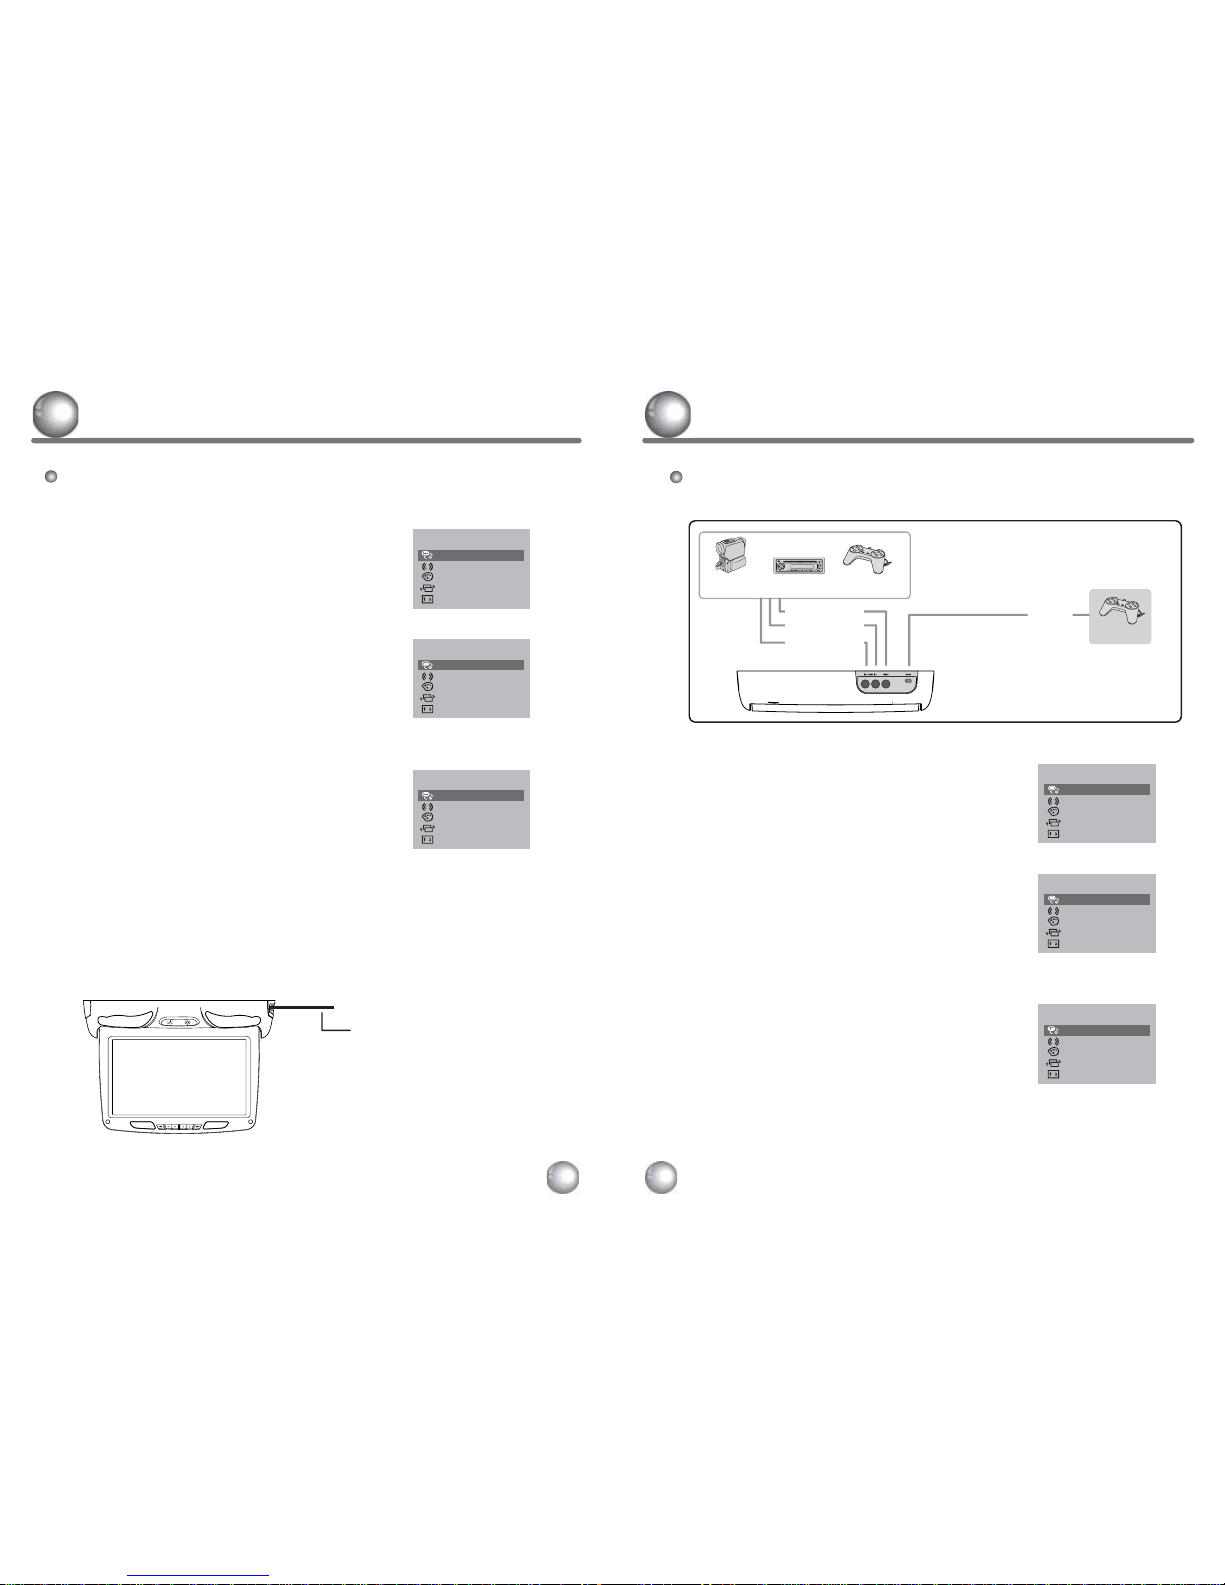
You can connect several external devices,
as shown in the diagram.
2. Turn on the power to the UNIT and other devices.
6. Play an external device.
1. Connect all devices as shown in the diagram. Shut off all power prior to connection.
GAMEDVDCAMCORDER
5. Adjust the current settings with the ADJ
-
/ + buttons
on the remote controller or the
ADJ
< / >
>
buttons
on the unit to achieve the desired
AV1 mode.
3. Bring up the on-screen SETUP menu
by pressing
the
PICTURE
button on the remote controller
or
the
MENU button on the unit.
How To Select AV Mode (External Connection)
4. Select the Input menu by pressing the PICTURE button
on the remote controller or the
SEL∨/∧ buttons
on the unit to move cursor window up or down.
Highlight the Input menu.
Selecting The Mode
11 12
Press the MODE button on the remote control to achieve the desired mode.
How To Select DVD Mode
4. Load a disc in the disc loading slot with the label side up.
Insert a disc in the disc loading slot and it will be played automatically.
3. Adjust the current settings with the
ADJ - / + buttons
on the remote controller or the
ADJ
< / >
>
buttons
on the unit to achieve the desired
DVD mode.
1. Bring up the on-screen SETUP menu by pressing
the
PICTURE button on the remote controller or
the
MENU button on the unit.
2. Select the
Input menu by pressing the PICTURE button
on the remote controller or the
SEL∨/∧ buttons
on the unit to move the cursor window up or down.
Highlight the Input menu.
Selecting The Mode
DISC
(RED) AUDIO (R)
(WHITE) AUDIO (L)
(YELLOW) VIDEO
SETUP
SETUP
Input
Input
FM TX
FM TX
Screen
Screen
Next Menu
Next Menu
AV1
AV1
Off
Off
Wide
Wide
◀▶
◀▶
Game
Game
Off
Off
SETUP
SETUP
Input
Input
FM TX
FM TX
Screen
Screen
Next Menu
Next Menu
DVD
DVD
Off
Off
Wide
Wide
◀▶
◀▶
Game
Game
Off
Off
SETUP
SETUP
Input
Input
FM TX
FM TX
Screen
Screen
Next Menu
Next Menu
DVD
DVD
Off
Off
Wide
Wide
◀▶
◀▶
Game
Game
Off
Off
SETUP
SETUP
Input
Input
FM TX
FM TX
Screen
Screen
Next Menu
Next Menu
DVD
DVD
Off
Off
Wide
Wide
◀▶
◀▶
Game
Game
Off
Off
SETUP
SETUP
Input
Input
FM TX
FM TX
Screen
Screen
Next Menu
Next Menu
AV1
AV1
Off
Off
Wide
Wide
◀▶
◀▶
Game
Game
Off
Off
※ It is impossible to use Mini USB
Game Port and AV1 together
at a time.
Mini USB
Game Port
Supplied
Game Machine
 Loading...