

Soundstream VCD-32B Owner's Manual

VCD-328
5
UND
STRE.AJvl
VCD-328
A
u
X
Owner's
Take
the
time
to
read
through
Familiarity
Performance
with
installation and operation procedures
from
your
new
this
owner
CO-receiver.
's manual.
Manual
will
help you obtain the best
(;()~lrE:~lr~
(;A
E:
R
P
~ ~
E:
A(;(;
ALLA
I~~,-
G D
I~
R
WI
R
lr
~
(;()
I(;
BA~
()WE:
P
----------------------------------------------------------------------------------------------01
-------------------------------------------------------------------------------
~
()
lrl
U
-------------------------------------------------------------------------------------0 3
~,-
~
~-1
(U
()~
RAM
L
E:
()
lrl
------------------------------------------------------------------------------------0
--------------------------------------------------------------------------05
---------------------------------------------------------------------
------------------------------------------------------------------------------------0
~
()
()
()
L
P
lrl
E:
R
RY
lAG
PA~
RA
ALLA
lrl()~)
2
-0
--
------------------------------------------------------04
-------0
6
7
7
~E:~~()R
IR
Dl~(;
L(;
lr-D~/lr-UP-~-~------------------------------------------------------------------------------------------------07
BAN~
MODE
1 \
2 \
3 \
~L()lr
I~
D D
--------------------------------------------------------------------------------------------------0
fllla
PAU~E:
------------------------------------------------------------------------------------08
l~lr
--------------------------------------------------------------------------------------------------08
RPlr
----------------------------------------------------------------------------------------------07
------------------------------------------------------------------------07
PLAY
-----------------------------------------------------------------------------0 7
7
------------------------------------------------------------------------------------------07
PLAY----------------------------------------------------------------------------------------------07
\
4 \ RDM--------------------------------------------------------------------------------------------08
-------------------------------------------------------------------------------------------------------08
5
---------------------------------------------------------------------------------------------------08
6
E:Cl
M
~
V
------------------------------------------------------------------------------------------08
-----------------------------------------------------------
lr
()I~
lr
c;
E:
L
E:
ME:
U
L
()
--------------------------------------------------------------------------------------
---------------------------------------------------------------------------------------0 8
----------------------0
8
0 8
L()lJD-----------------------------------------------------------------------------------------------08
(;Lt<
~M~-----------------------------------------------------------------------------------------------------08
-----------------------------------------------------------------------------------------------------08
MLJlrE:------------------------------------------------------------------------------------------------------09
~()(;t<E:lr--------------------------------------------------------------------------------------------------------09
LJ~B
________
-------------------------------------------------------------------------------------------
N
()
--------------------------------------------------------------------------------------------------
L
lrlJ
FE~
&
----------------------------------------------------------------------------
G
~
lrH
~
C()
lrl
C~
H
E:~
---------Clrl
E
~
()
lrR
()~
()()lrl
I~
X
lJ
~
()()
Elr
L U
B
lrE:
()
M
RE:
I
IF
E C
~p
B L
lJ
lrR()
_______
.:;.:.
RE
--------------------------------------------------------------0
-------------------------------------------------------------------
Page-
1
9
0
1
11
12
13
This unit is designed and manufactured with consideration
use or operation may result
this
manual thoroughly and adhere to the following
in
a certain hazard or misuse. So it is highly recommended to read
precaution.
of
user's safety, however any improper
SAFETY PRECAUTION
-¢-
To
prevent
-¢-
In
any case
service centre.
-¢-
Do not expose to any water drop and put under the heavy moisture, high humidity
an
electrical
of
malfunctioning,
shock, do not open the housing
only have the unit serviced by an approved and qualified
of
the unit.
environment or operate when your hands are wet. I may cause
-¢-
For safety driving, keep the volume
-¢-
Do
not clean the unit with
-¢-
If
the unit has been kept
before turning
-¢-
Do not use the unit for a long time without running vehicle's engine, it may drain the battery
on
the unit.
alcohol, only
in
high temperature
low
in
order to concentrate
clean with a soft and dry cloth.
or
high humidity area,
electrical
on
traffic condition.
shortage.
cool
down the car interior
and the vehicle may not be able to start engine.
-¢-
Before final installation into indash
hole,
connect the wiring and make sure the unit is working
properly.
-¢-
Use only
-¢-
Do
-¢-
When replacing fuse, be sure to use
the parts provided with the unit to ensure proper installation.
not route wiring
in
places that get hot if the insulation of the wiring may be melted
only
the same rating fuse prescribed on this unit
OPERATION PRECAUTIOIN
-¢-
Please dispose empty batteries used to Remote Controller
your country.
-¢-
If
the unit is disconnected with the battery, the unit
will
lose memorized data.
according to the regulations
in
•
Design and specification may vary
in
the operation manual from the actual product.
Page-
2
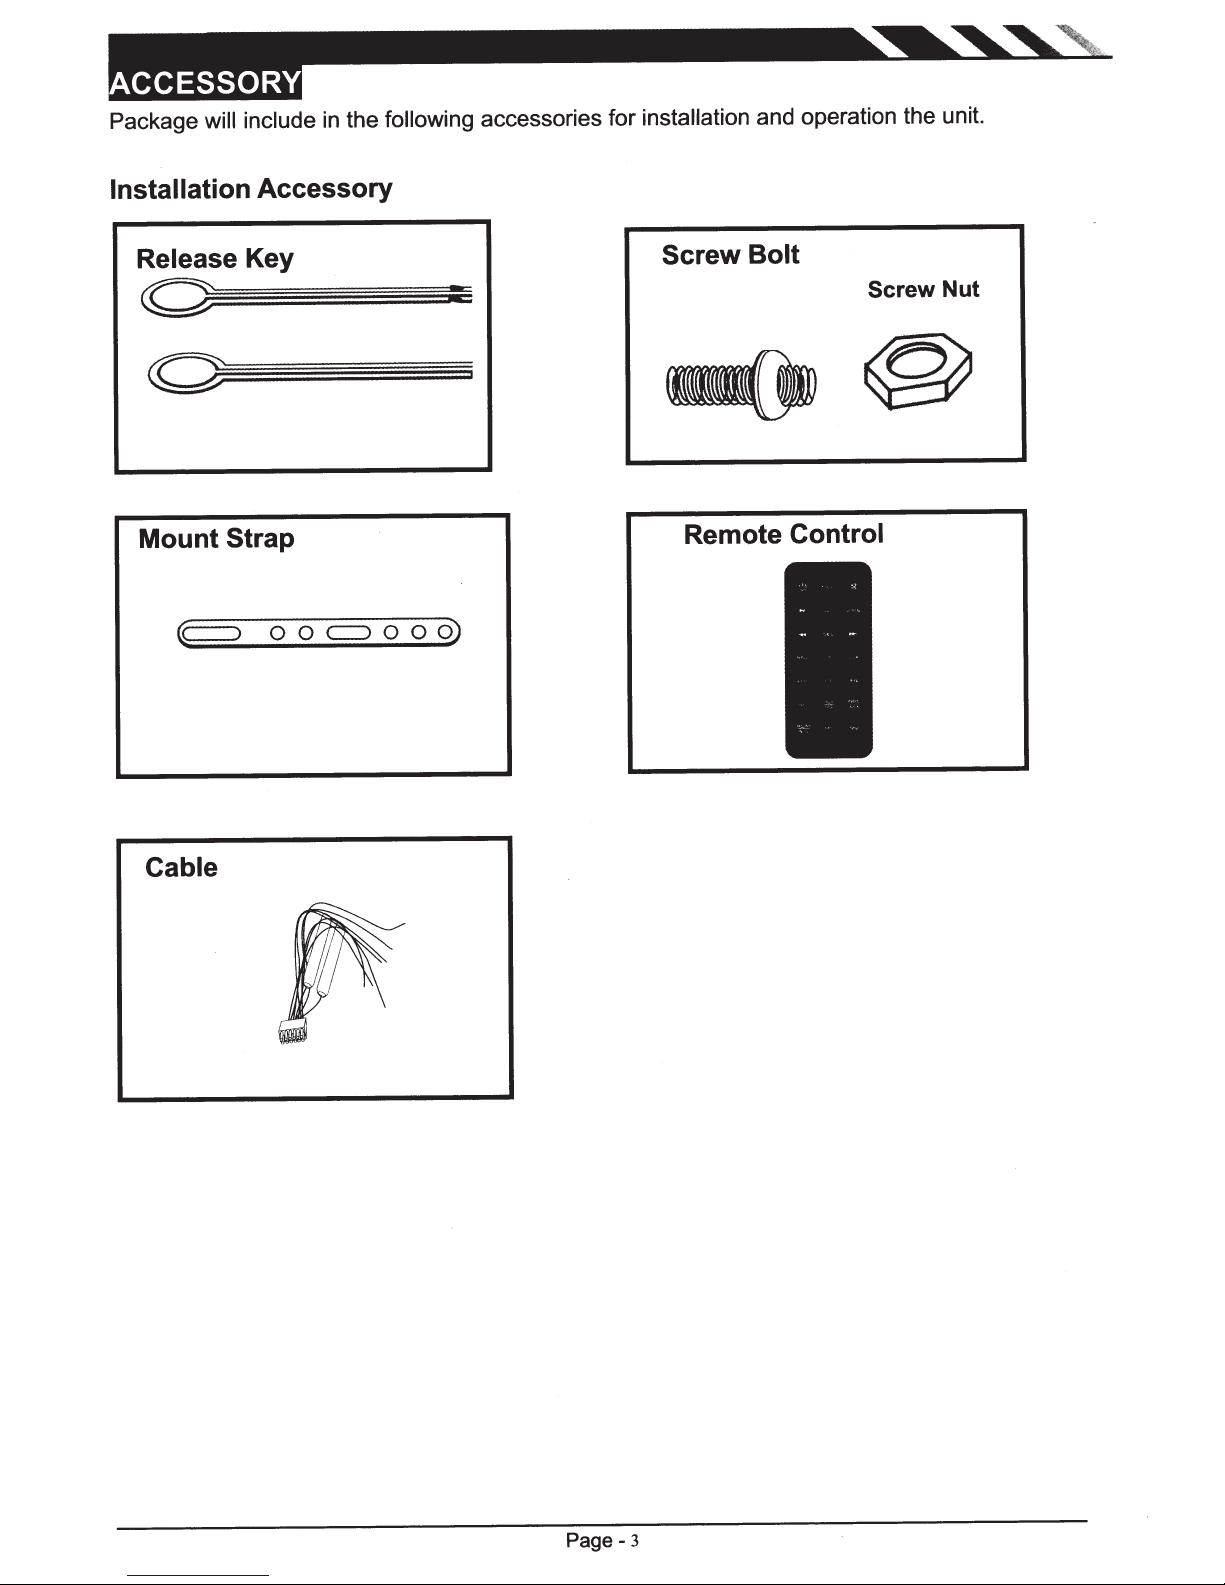
Package
will include
in
following accessories for
the
installation
and operation the unit.
Installation
Release
Accessory
Key
o~~~~====ot
o~========~
~
Strap
o o
c::::>
o o
o)
Mount
Screw
Remote
Bolt
Control
Screw
Nut
Cable
Page-
3
First complete the electrical connections, and then check them for correctness.
I nstallation/Un-installation
Mounting
Method A
2k~'
3
If
n~uary,
to sec:Ln the back of
unit In place. The
be
bent by
desirecle"9le
hand
use
tM
atrt~P
lo
the
strap
tM
can
Put the mounting sleeve into the daahboa.rd
into the dashboard a
se<:ure
To
remove
the release
aicHta
puft the unit out from the
dashboard
the
of
the
______
for
mounting
unit,
in•rt
keY$
on
both
unit and then
_,
Page- 4
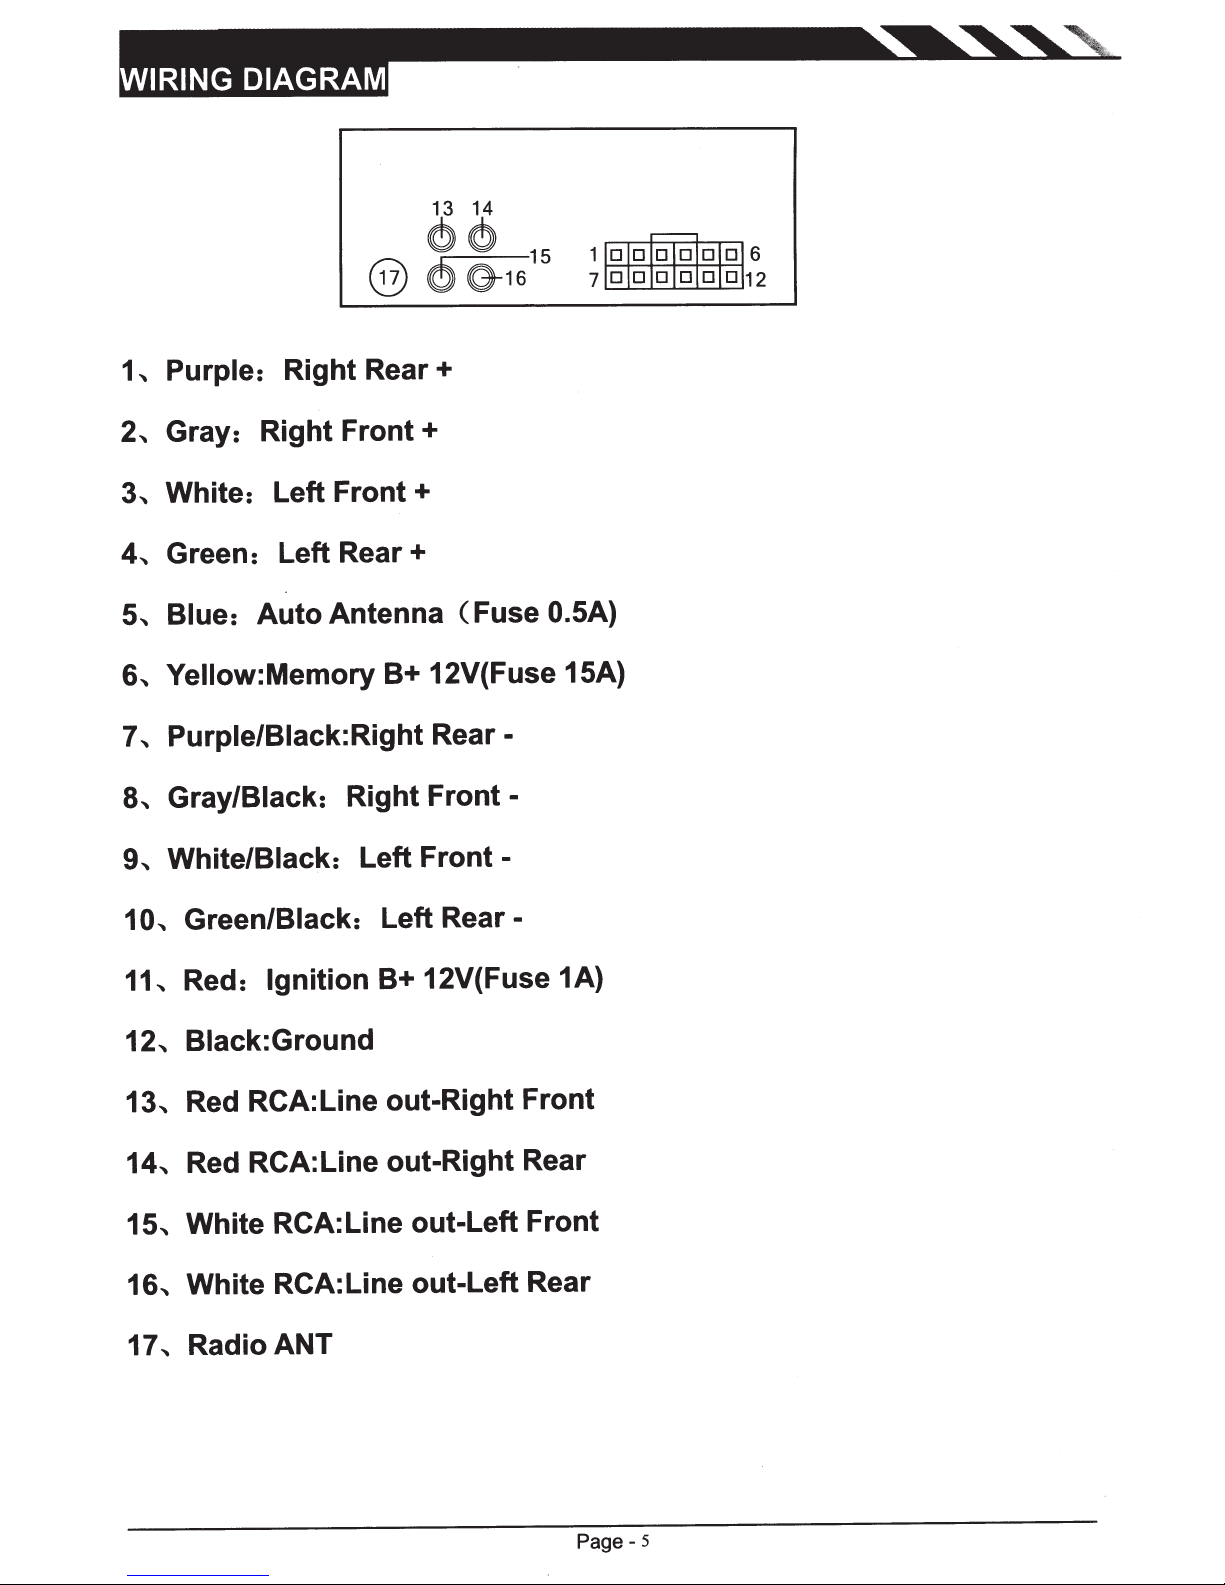
13 14
@
Purple: Right
1,
Gray: Right Front +
2,
White: Left
3,
Green: Left
4,
Blue:
5,
Yellow:Memory
6,
Purple/Black: Right Rear -
7,
Gray/Black: Right Front -
8,
Auto
Rear+
Front+
Rear+
Antenna (Fuse 0.5A)
B+ 12V(Fuse 15A)
66
{)-16
6
15
White/Black: Left Front -
9,
10,
11,
12,
13,
14,
15,
Green/Black: Left
Red:
Ignition
B+ 12V(Fuse 1A)
Black:Ground
Red RCA:Line out-Right Front
Red RCA:Line out-Right Rear
White RCA:Line out-Left Front
Rear-
16, White RCA:Line out-Left Rear
17,
Radio ANT
Page-
5
 Loading...