

Soundstream H-200MDi User Manual

1-EN
Contents
Important Safety Instructions ..........................2
Safety .................................................................2
Warning
...........................................................2/3
Identifying The Parts.......................................4
Main Unit ............................................................4
Remote Control ...............................................5/6
Connections....................................................6
Connect to FM Antenna .....................................6
Connect to TV ....................................................6
Connect to an External Device ..........................7
Connect to Speakers .........................................7
Connect to Headphone ......................................8
Connect Power ..................................................8
Install Remote Control Batteries .....................8
Battery Installation ............................................8
Precautions Concerning Batteries .....................8
Basic Operation ..............................................9
Power On/Off .....................................................9
Select the Correct TV System ...........................9
Change System Menu Language ......................9
Setting the Clock ................................................9
Adjust Volume Level ..........................................9
Select a Preset Sound Effect .............................9
Super Bass Boost ..............................................9
Select Surround sound ......................................9
Mute Sound ........................................................9
Adjust Brightness of Display Panel ....................9
Play.................................................................9
Play a Disc .........................................................9
Play iPad/iPhone/iPod .....................................10
Play From USB/SD Card .................................10
Play MP3/WMA/Picture Files ........................... 11
Play Control .....................................................11
Play Options .....................................................11
Picture View Options ........................................12
Adjust Settings..............................................12
Introduction ......................................................12
General Setup Page ........................................12
Audio Setup Page ............................................13
Video Setup Page ............................................13
HDMI Setup Page ............................................13
Preference Setup Page ...................................14
Listening to the FM Radio.............................15
Tuning in a Station ...........................................15
Presetting Stations ...........................................15
Tune to a Preset Radio Station ........................15
RDS Timer Sync ..............................................15
Show RDS Information ....................................15
Other Features .............................................15
Set the Clock ....................................................15
Set the Alarm Timer
.........................................15
Set the Sleep Timer .........................................16
Troubleshooting ............................................16
Specications
...............................................17
Standard Accessories ..................................17
2-EN
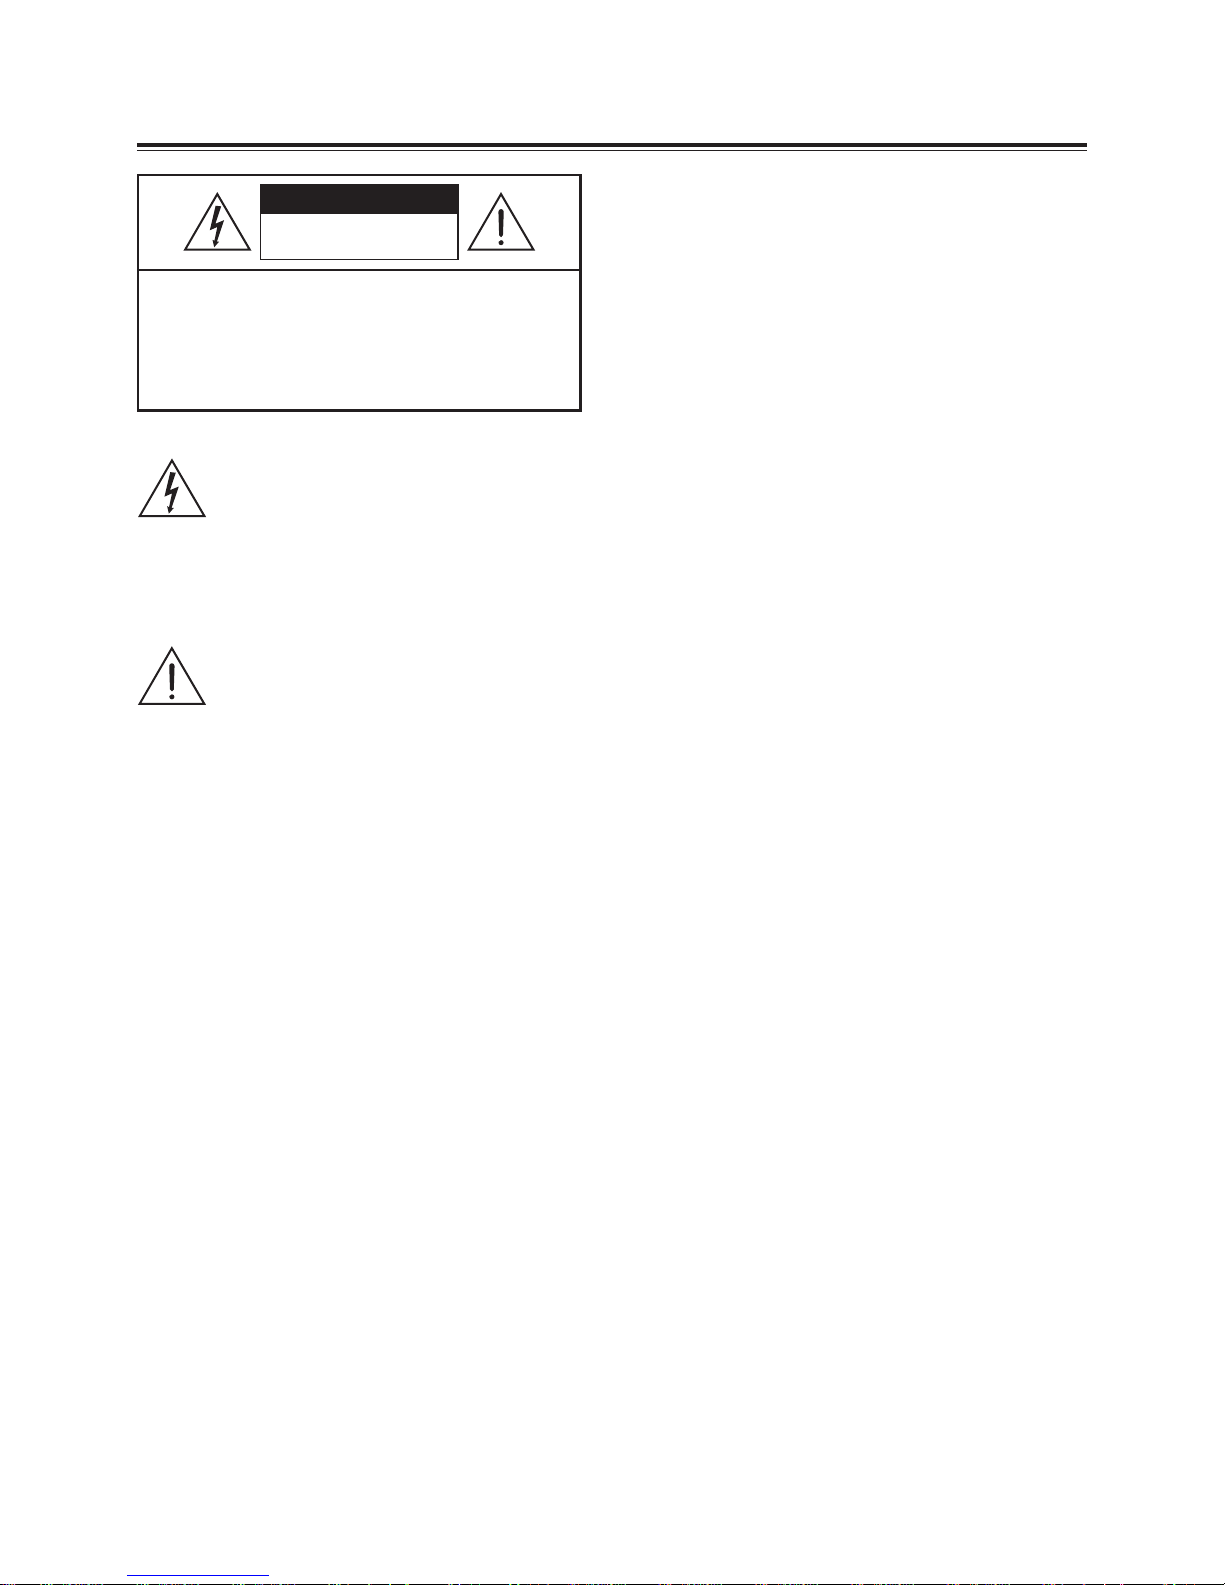
Th e lig ht ni ng f la sh w it h ar r o w h e a d
symbol, within an equilateral triangle, is
intended to alert the user to the presence
of uninsulated “dangerous voltage” within
the product’s enclosure that may be of
sufficient magnitude to constitute a risk of
electric shock to persons.
The exclamation point within an equilateral
triangle is intended to alert the user to
the presence of important operating and
maintenance (servicing) instructions in the
literature accompanying the appliance.
SAFETY
1) Read these instructions.
2) Keep these instructions.
3) Heed all warnings.
4) Follow all instructions.
5) Do not use this apparatus near water.
6) Clean only with dry cloth.
7) Do not block any ventilation openings. Install in
accordance with the manufacturer’s instructions.
8) Do not install near any heat sources such as
radiators, heat registers, stoves, or other apparatus
(including amplifiers) that produce heat.
9) Protect the power cord from being walked on or
pinched particularly at plugs, convenience
receptacles, and the point where they exit from
the apparatus.
10) Only use attachments/accessories specified by
the manufacturer.
11) Use only with the cart, stand, tripod, bracket, or
table specified by the manufacturer, or sold with
the apparatus. When a cart is used, use caution
when moving the cart/apparatus combination to
avoid injury from tip-over.
12) Unplug this apparatus during lightning storms or
when unused for long periods of time.
13) Refer all servicing to qualified service personnel.
Servicing is required when the apparatus has
been damaged in any way, such as power- supply
cord or plug is damaged, liquid has been spilled or
objects have fallen into the apparatus, the apparatus
has been exposed to rain or moisture, does not
operate normally, or has been dropped.
14) Battery usage CAUTION - To prevent battery
leakage which may result in bodily injury, property
damage, or damage to the apparatus:
- Install all batteries correctly, + and - as marked
on the apparatus.
- Do not mix batteries (old and new or carbon
and alkaline, etc.).
- Remove batteries when the unit is not used for
a long time.
15) The batteries shall not be exposed to excessive
heat such as sunshine, fire or the like.
16) Do not expose the apparatus to any dripping or
splashing and make sure no object filled with
liquids, such as vases, etc., are placed on them.
17) Do not place any sources of danger on the
apparatus (e.g. liquid filled objects, lighted candles).
18) This product may contain lead and mercury.
Disposal of these materials may be regulated due
to environmental considerations.
WARNING
Before operating this system, check the voltage of
this system to see if it is identical with the voltage
of your local power supply.
The ventilation should not be impeded by
covering the ventilation openings with items such
as newspaper, table-cloths, curtains etc. Make
sure there is at least 20 cm of space above and at
least 5 cm of space on each side of the unit.
The apparatus shall not be exposed to dripping or
splashing and that no objects filled with liquids,
such as vases, shall be placed on the apparatus.
To prevent fire or shock hazard, do not expose
this equipment to hot places, rain, moisture or dust.
Don’t get close to the water source when using
this unit, such as near bathtub, bath slot, ish-washing
slot, washing machine to use it; also don’t use this
unit on damp plinth or nearby swimming pool or
similar close to the water source.
Do not place this unit close to strong magnetic field.
Do not place the unit on the amplifier or receiver.
Don’t place this unit close to the damper, or the
moisture will affect the life of the laser head.
WARNING
CAUTION: TO REDUCE THE RISK OF ELECTRIC
SHOCK, DO NOT REMOVE COVER (OR BACK).
NO U S E R - S E R V I C E A B L E PA R TS I NS I D E .
REFER SERVICING TO QU ALIFIED SERVICE
PERSONNEL.
RISK OF ELECTRIC SHOCK
DO NOT OPEN
IMPORTANT SAFETY INSTRUCTIONS

3-EN
If the system is brought directly from a cold to a
warm location, or is placed in a very damp room,
moisture may condense on the lens inside the
player. Should this occur, the system will not operate
properly. Remove the disc and leave the system
turned on for about an hour until the moisture
evaporates.
To keep the laser pickup clean, do not touch it,
and always close the disc tray.
Do not attempt to clean the unit with chemical
solvents as this might damage the finish. Use a
clean, dry or slightly damp cloth.
When removing the power plug from the wall outlet,
always pull directly on the plug, never yank on the
cord.
Depending on the electromagnetic waves used by
a television broadcast, if a TV is turned on near
this unit while it is also on, lines might appear on
the TV screen. Neither this unit nor the TV are
malfunctioning. If you see such lines, keep this unit
well away from the TV set.
The mains plug is used as the disconnect device,
the disconnect device shall remain readily operable.
Do not move the unit during playback
During playback, the disc rotates at high speed. Do
NOT lift or move the unit during playback. Doing so
may damage the disc or the unit.
Manufactured under license from Dolby Laboratories.
Dolby and the double-D symbol are trademarks of
Dolby Laboratories.
To establish a safe volume level:
Set your volume control at a low setting.
Slowly increase the sound until you can hear it
comfortably and clearly, without distortion.
Listen for reasonable periods of time:
Prolonged exposure to sound, even at normally
‘safe’ levels, can also cause hearing loss.
Be sure to use your equipment reasonably and
take appropriate breaks.
Be sure to observe the following guidelines when
using your headphones.
Listen at reasonable volumes for reasonable periods
of time.
Be careful not to adjust the volume as your hearing
adapts.
Do not turn up the volume so high that you can’t
hear what’s around you.
You should use caution or temporarily discontinue
use in potentially hazardous situations. Do not use
headphones while operating a motorized vehicle,
cycling, skateboarding, etc.; it may create a traffic
hazard and is illegal in many areas.
Ke e p the childre n away f r o m top “PUS H ” panel
operation to avoid his finger being stuck in the panel
gap.
This apparatus includes this label:
When moving this unit
When changing places of installation or packing the
unit for moving, be sure to remove the disc and return
the disc tray to its closed position in the player. Then,
press the power switch to turn the power off, and
disconnect the power cord. Moving this unit with the
disc loaded may result in damage to this unit.
Hearing safety
Listen at a moderate volume.
Using headphones at a high volume can, impair
your hearing. This product can produce sounds
in decibel ranges that may cause hearing loss for
a normal person, even for exposure less than a
minute. The higher decibel ranges are offered for
those that may have already experienced some
hearing loss.
Sound can be deceiving. Over time your hearing
‘comfort level’ adapts to higher volumes of sound.
So after prolonged listening, what sounds ‘normal’
can actually be loud and harmful to your hearing.
To guard against this, set your volume to a safe
level before your hearing adapts and leave it there.

4-EN
Identifying the Parts
Main Unit
Top view
1
Display Panel
Show the current status.
2
Turn on this product or switch to Eco Power
standby mode.
3
FUNCTION
Select a source.
4
iR
Remote control sensor
5
K
Open or Close disc compartment.
6
BF
Start or pause play.
7
VOLUME + / VOLUME -
Adjust volume level
8
Power Light
Indicate mode of power
9
Disk Compartment
10
Dock for iPad/iPhone/iPod
Load an iPad/iPhone/iPod.
11
SD card Socket
Connect to SD card
12
USB Socket.
13
Headphone Socket
14
Cover of iPad/iPhone/iPod Dock
Back view
1
SPEAKER Sockets
Connect to speakers
2
HDMI Socket
Connect to a TV
3
AV OUT Terminal
Connect to a TV
4
COMPONENT Socket
Connect to a TV
5
FM Antenna Socket
Connect to a FM Antenna.
6
AUX IN Terminals
Connect to an external audio device
7
AC~
Connect to power cord
8
SCART OUT Socket
Connect to a TV
9
Power ON/OFF Switch
5-EN
8
- Navigate up through menus.
- Tune to a radio station.
- Rotate a picture.
9
D
,
- Navigate left through menus
- Search backward within a track/disc.
- Tune to a radio station by searching backward.
10
ENTER
Confirm a selection.
11
- Navigate down through menus.
- Tune to a radio station.
- Rotate a picture.
12
SETUP
Press this button to enter the setup menu where
you can setup the parameters of the unit.
13
TITLE
Access the title menu.
14
SUBTITLE
Select a subtitle language during video play.
15
REPEAT
Select repeat play modes.
16
A-B
Repeat a specific section within a track/chapter.
17
BASS
Enable and adjust bass level.
18
EQ
Select a preset sound effect:
FLAT, Pop, Classic, Rock, Jazz.
19
K
Open or close disc compartment.
20
CLOCK
- In standby mode hold and press to activate
clock setup.
- Display current clock
21
TIMER
Set the alarm timer.
22
SLEEP
Set the sleep timer.
23
PROG
- Program titles/chapters for DVD playback
- Program tracks for VCD playback
- Program radio stations
24
MUTE
Mute or resume sound.
25
RDS/OSD
In DISC or USB mode:
Press this button to display information about the
currently playing disc.
In TUNER mode:
Press this button to view the RDS information.
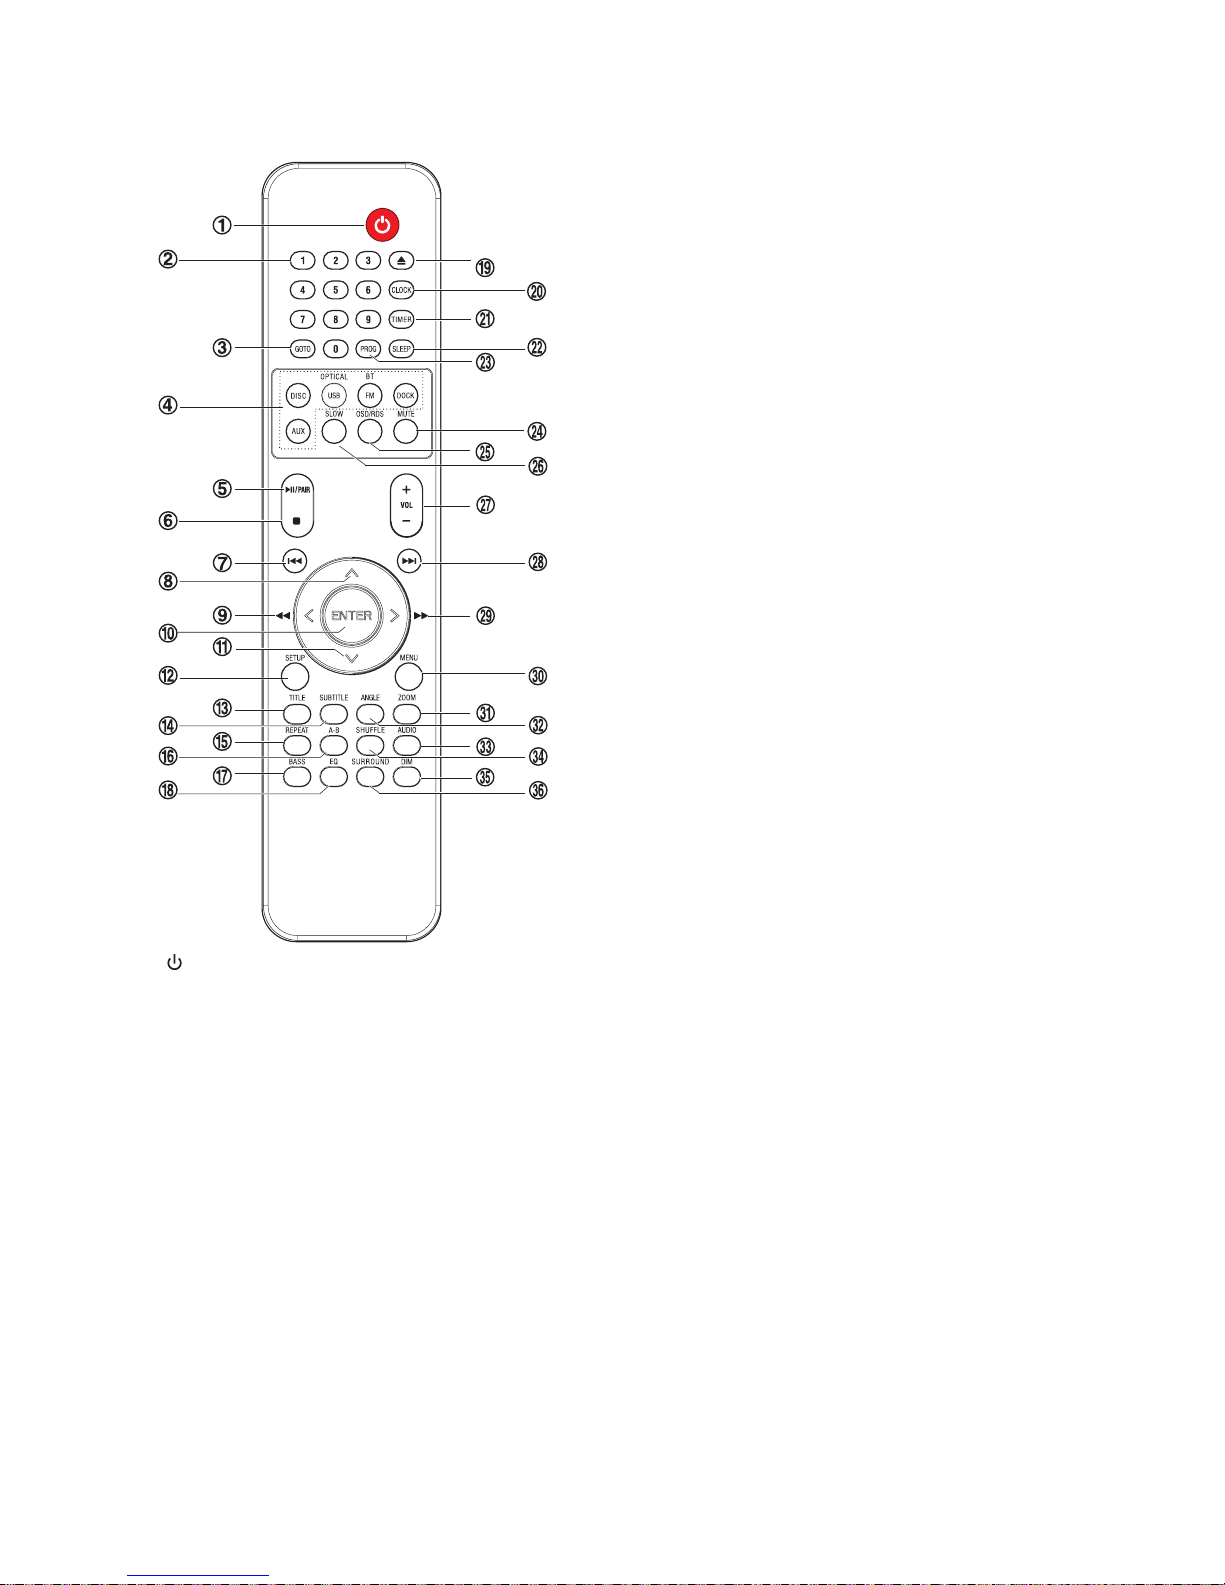
Remote Control
1
Press this button to turn on or switch to the Eco
Power standby mode.
2
Numeric keypad (0~9)
- Select a title/chapter/track
- Select a preset radio station.
3
GOTO
Access quick menu for title/chapter/track time/
DISC time selection.
4
FUNCTION buttons
Select a source.
5
BF
/Pair
- Start or pause playback.
- Pair the bluetooth-enabled device.
6
L
Press this button to stop playback.
7
H
- Skip to previous title/chapter/track
- Select previous radio station.

6-EN
26
SLOW
During playback, press this button repeatedly to
select slow play forword/backward.
27
VOL+/- (Volume)
Adjust volume level.
28
G
- Skip to next title/chapter/track.
- Select next preset radio station.
29
,
C
- Navigate right through menus
- Search forward within a track/disc.
- Tune to a radio station by searching forward.
30
MENU
- Switch between the folder list and the file list
for iPhone/iPod.
- Return to the upper-level menu.
- Back to the DVD root menu.
- Enable/disable the PBC menu for VCD.
31
ZOOM
Zoom in image on screen.
32
ANGLE
Select a camera angle to view video play.
33
AUDIO
Select an audio channel during video play.
34
SHUFFLE
Select shuffle play mode.
35
DIM
Adjust brightness level of display panel.
36
SURROUND
Press this button to turn on or turn off surround
sound.
Connect to FM Antenna
Connect the supplied FM wire antenna to the FM
Antenna socket on the unit.
If reception is poor, connect the outside antenna.
Note:
Before attaching a 75 ohm coaxial lead (the kind with
a round wire going to an outside antenna), disconnect
the supplied FM wire antenna.
Caution:
To avoid noise, keep antennas away from the system,
the connecting cord and the AC power cord.
Connect to TV
IMPORTANT!
- You only need to make one video connection from
the following options, depending on the capabilities
of your TV.
Note:
- Connect the DVD system directly to the TV.
Connections
 Loading...