

Page 1
HK Hanging Kit
Hang Mounting from Above
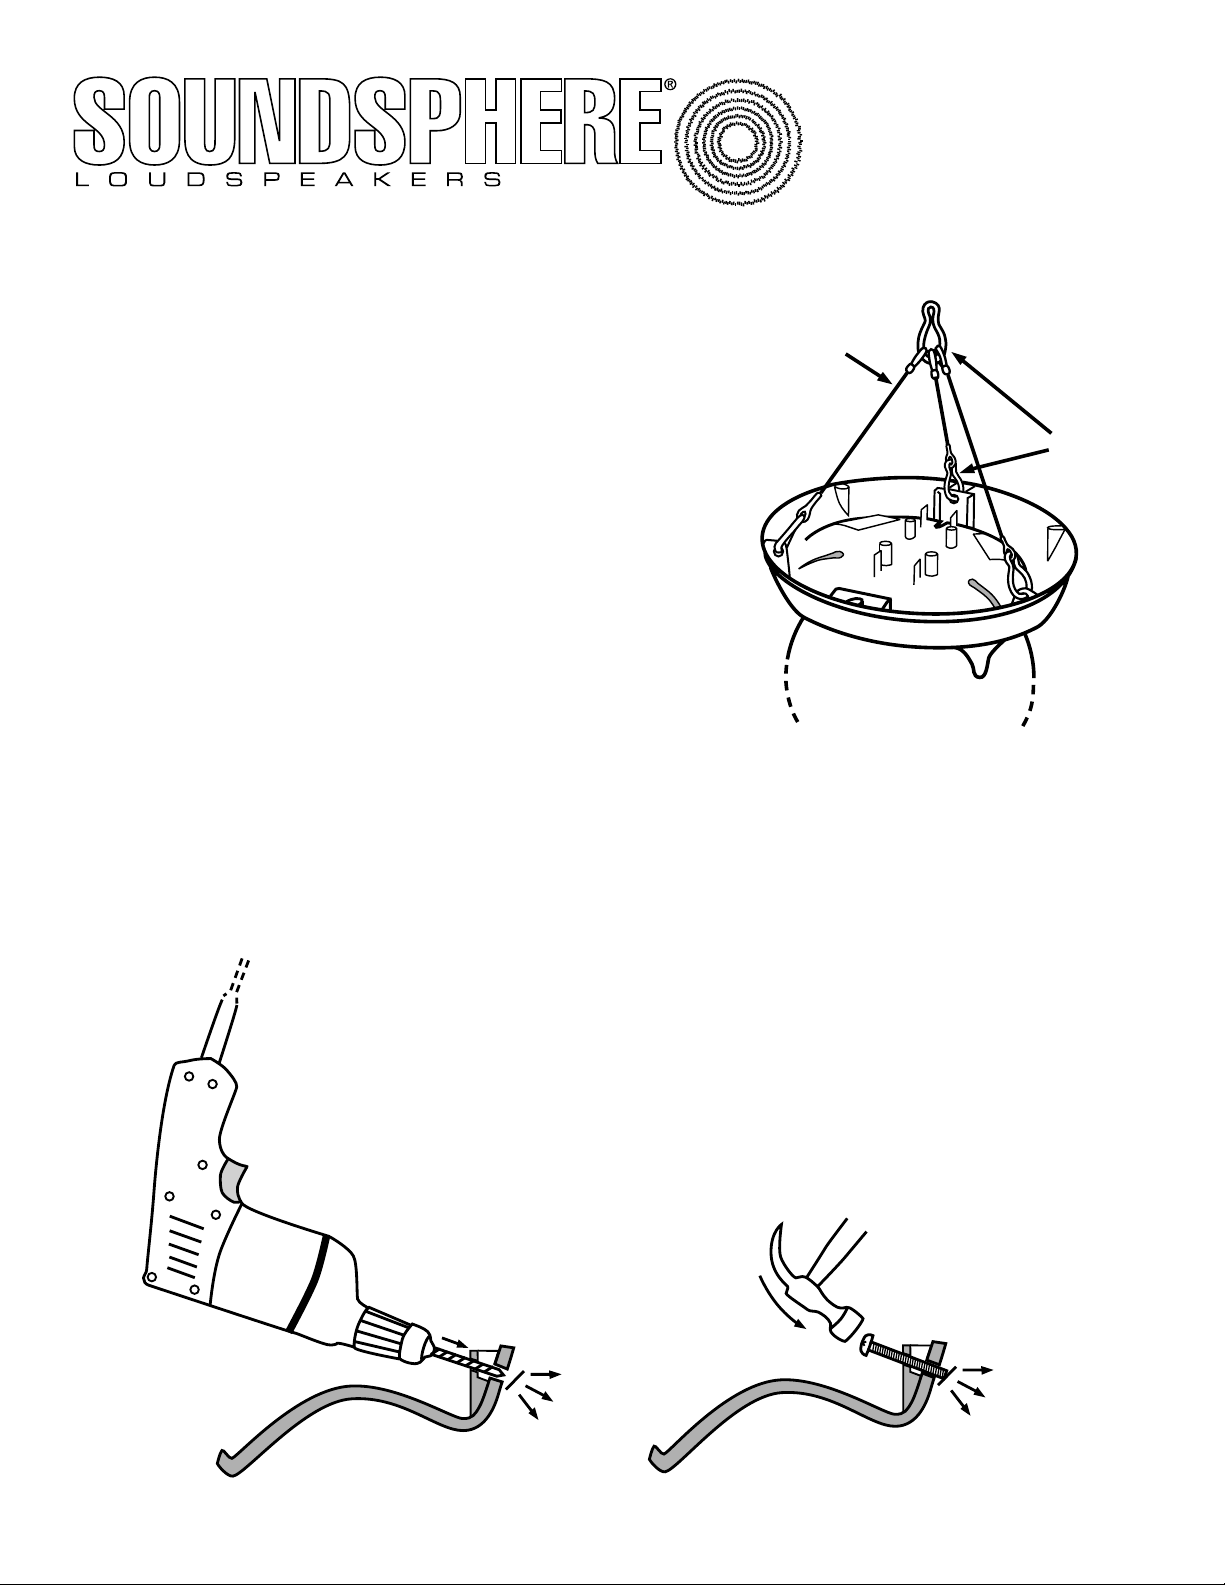
The hanging kit is attached when ordered with the speaker from
the factory. If ordered separately, attach as shown in figure 1:
a. Hold the main hook above so the wires and 3 hooks will
be straight as they are clipped on the speaker.
b. Insert the spring clips into the bracket holes as shown.
Attach the top clip to the mounting point making sure
that the clips and cable are not twisted.
MBS Mounting Bracket
Preparing the Speaker
The speaker is prepared for use with the MBS mounting
bracket when both are ordered together from the factory. If ordered separately, prepare the speaker
as shown in figures 2 or 3, and 4.
a. Begin by removing the plastic flashing from the hole in the reflector
rim so that the screw can be inserted from the outside. Flashing can be
removed with a
1
/4" drill bit (figure 2), or it can easily be punched
through using a hammer (figure 3). If using a
1
/4" drill bit, be careful
not to remove any material other than the flashing, or the speaker will
not install correctly.
Instructions Continued – See Reverse Side
Mounting Instructions for Soundsphere Model 110B and Q-6 Loudspeakers
10 Research Drive
Stratford, CT 06615, USA
Tel: (203) 386-9200
www.soundsphere.com
HK
Spring Clips
Knock out flashing
Strike firmly
Reflector
Figure 1
Figure 3
Figure 2
Page 2
MBS Mounting Bracket (Continued from Front)
Preparing the Speaker
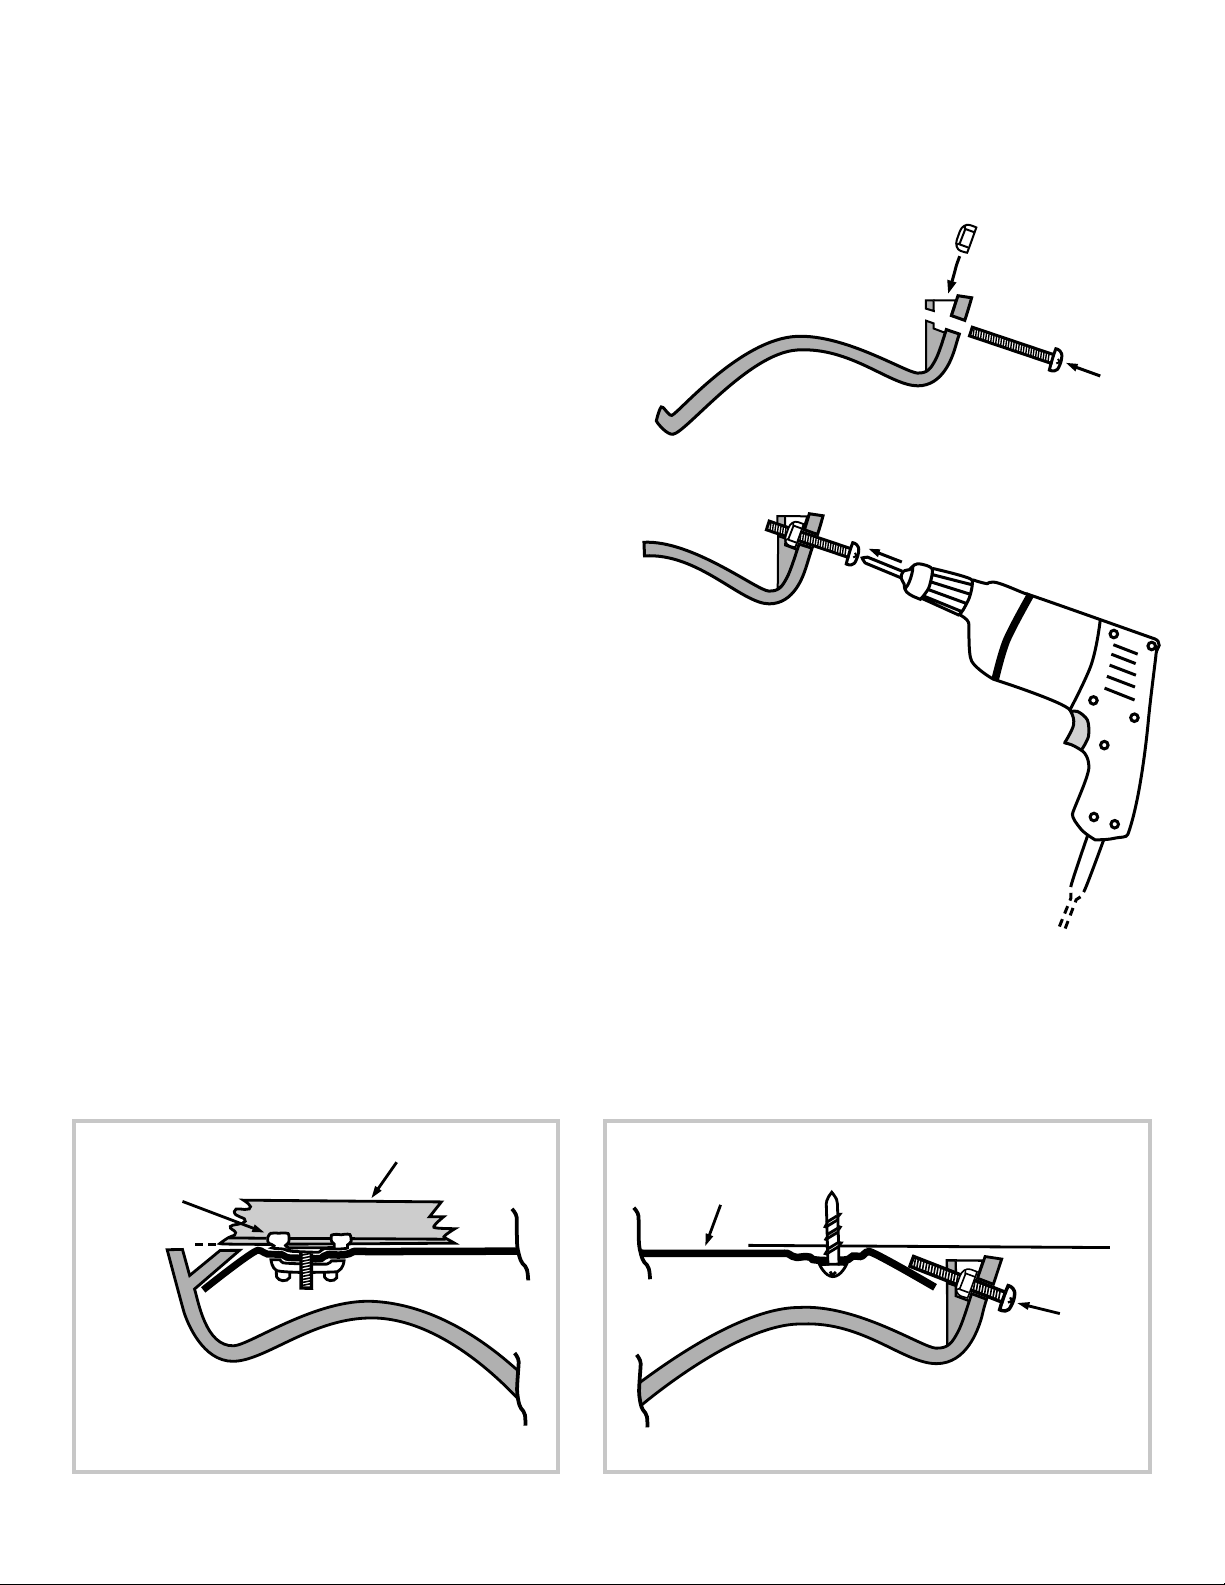
b. Place the stop nut in the pocket as shown in figure 4. Start screw through
outside hole, through stop nut contained in the pocket, and slightly
beyond the interior hole (see figure 5).
Installing the Speaker
(see Figures 6 & 7)
The steel bracket is pre-fastened to the
ceiling or wall, then the speaker is placed on the
bracket and secured in the following steps:
a. Fasten the bracket in the desired location, mak-
ing sure that it is properly and safely mounted.
b. Slide the side of the reflector opposite
the screw over one end of the installed
bracket.
c. While holding the screw side against the surface,
tighten the screw until the speaker is resting
firmly in position.
Suspended Ceiling T-bar Mounting
(see Figure 6)
Two Caddy Twist Clips and Twist Nuts are provided for connecting to suspended
ceiling T-bars. Please refer to the enclosed Caddy Clip T-bar mounting instructions for
more details.
a. Place the clips about 8
3
/4" apart on the T-bar. Check to be sure they have snapped on
the bar correctly.
b. Slide them into final position to fit through the holes in the mounting bracket. Tighten
the thumb nuts securely.
c. Secure the speaker per steps b and c (above), "Installing the Speaker".
Figure 7Figure 6
Reflector
T-bar
Twist Clip
Screw in
Ceiling
Mounting
Bracket
2.
Figure 5
Figure 4
 Loading...