

Page 1

1
SM-DVD5111
DVD PLAYER DVD ПЛЕЕР
Instruction manual Руководство по эксплуатации
Page 2

2
Contents
Contents ..................................................................................................................................... 2
Important safeguards ................................................................................................................... 3
Important notes........................................................................................................................... 3
Features...................................................................................................................................... 4
Accessories.................................................................................................................................. 6
Disk features ............................................................................................................................... 6
Panel ........................................................................................................................................ 11
Connection ................................................................................................................................ 15
System setup............................................................................................................................. 18
Troubleshooting guide ................................................................................................................. 30
Specification.............................................................................................................................. 31
Page 3
3
Important safeguards
The lightning flash is intended to alert the user to the presence of dangerous voltage within
the product's enclosure, and touching the inner parts may result in a risk of electric shock to
persons.
The exclamatory mark is intended to alert the user to the presence of important operating
instructions.
To reduce the risk of electric shock or fire, do not open the cover. Refer servicing to qualified
service personnel.
This mark indicates this unit belongs to class 1 laser product. The laser beam may produce
radiation harm to the directly touching human body.
Important notes
· Please read through the manual carefully before connection and operation.
· Do not open the cover or touch any internal components for non-professional.
· Turn off the power when the unit is not being used. (Unplug the power cord if the unit is not used for a
long time).
· Don't expose this unit to direct sunlight. Keep away the heating sources or equipments.
· Don't expose this unit to the rain or moisture.
· Place the unit on a horizontal level. Keep the unit ventilated. Don't block the heat hole. Overheat may
cause malfunction.
· Clean the cabinet with soft cloth. Detergent or alcohol is forbidden.
· This book is only a guide for user’s operation, not a criterion for configuration.
Page 4

4
Features
Thank you for purchasing our product. Please go through this manual carefully before connection and
operation. Please keep this manual for future reference.
DVD player SOUNDMAX is a new generation home player, which can produce high quality video and audio.
Its performance is much better than that of any previous home video playing equipment. As the best signal
source of home theatre system, it will give you the uppermost enjoyment!
· Slim loader
· Supports: DVD-R/-RW, DVD+R/+RW, CD-R/-RW
· Support of MPEG4 (DivX)
· Compatible with: DVD, DVCD, Super VCD, VCD, HDCD, CDDA, MP3, WMA, Kodak Picture CD, JPEG
· Progressive scan
· Video connections: composite, S-video, component (YUV), SCART
· Audio connections: coaxial, optical
· Russian and English OSD
· Power supply: 110-240 V, 50/60 Hz
Page 5
5
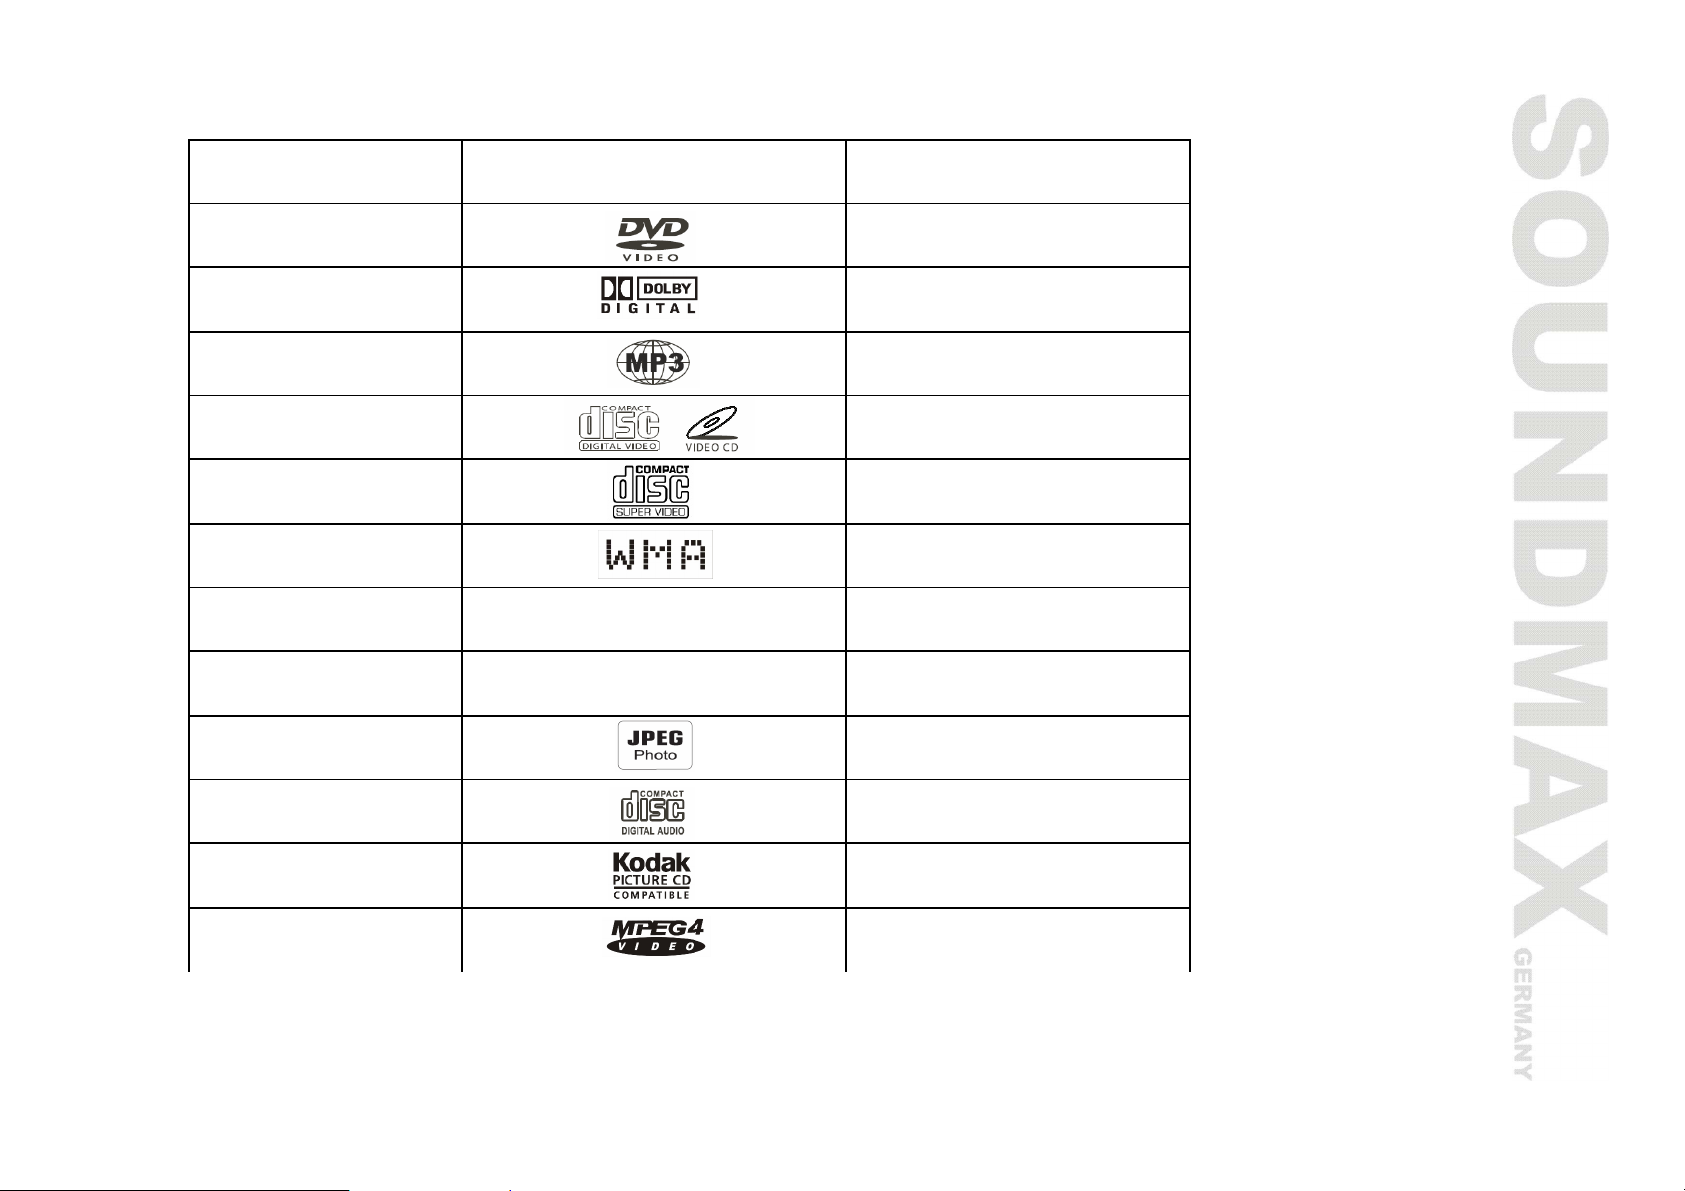
This unit can play the following types of discs
Disc types Symbol Contents
DVD Audio + Video
AC-3 Dolby Digital Audio
MP3 Audio
Video-CD
(VCD)
SVCD Audio + Video
WMA Audio
DVCD Audio + Video
HDCD Audio
JPEG Digital Photo
CDDA Audio
Kodak Picture
CD
MPEG4 Audio + Video
Audio + Video
Digital Photo
Page 6

6
Accessories
User manual Remote control A/V Cable
Disk features
· DVD 5 (single side, single layer)
· DVD 9 (single side, double layer)
· DVD 10 (double side, single layer)
· DVD 18 (double side, double layer)
· VCD 1.0/1.1/2.0
· Picture CD
· MPEG4
· DVCD
· HDCD
· CDDA
· MP3
· CD-R
· CD-RW
Page 7
7
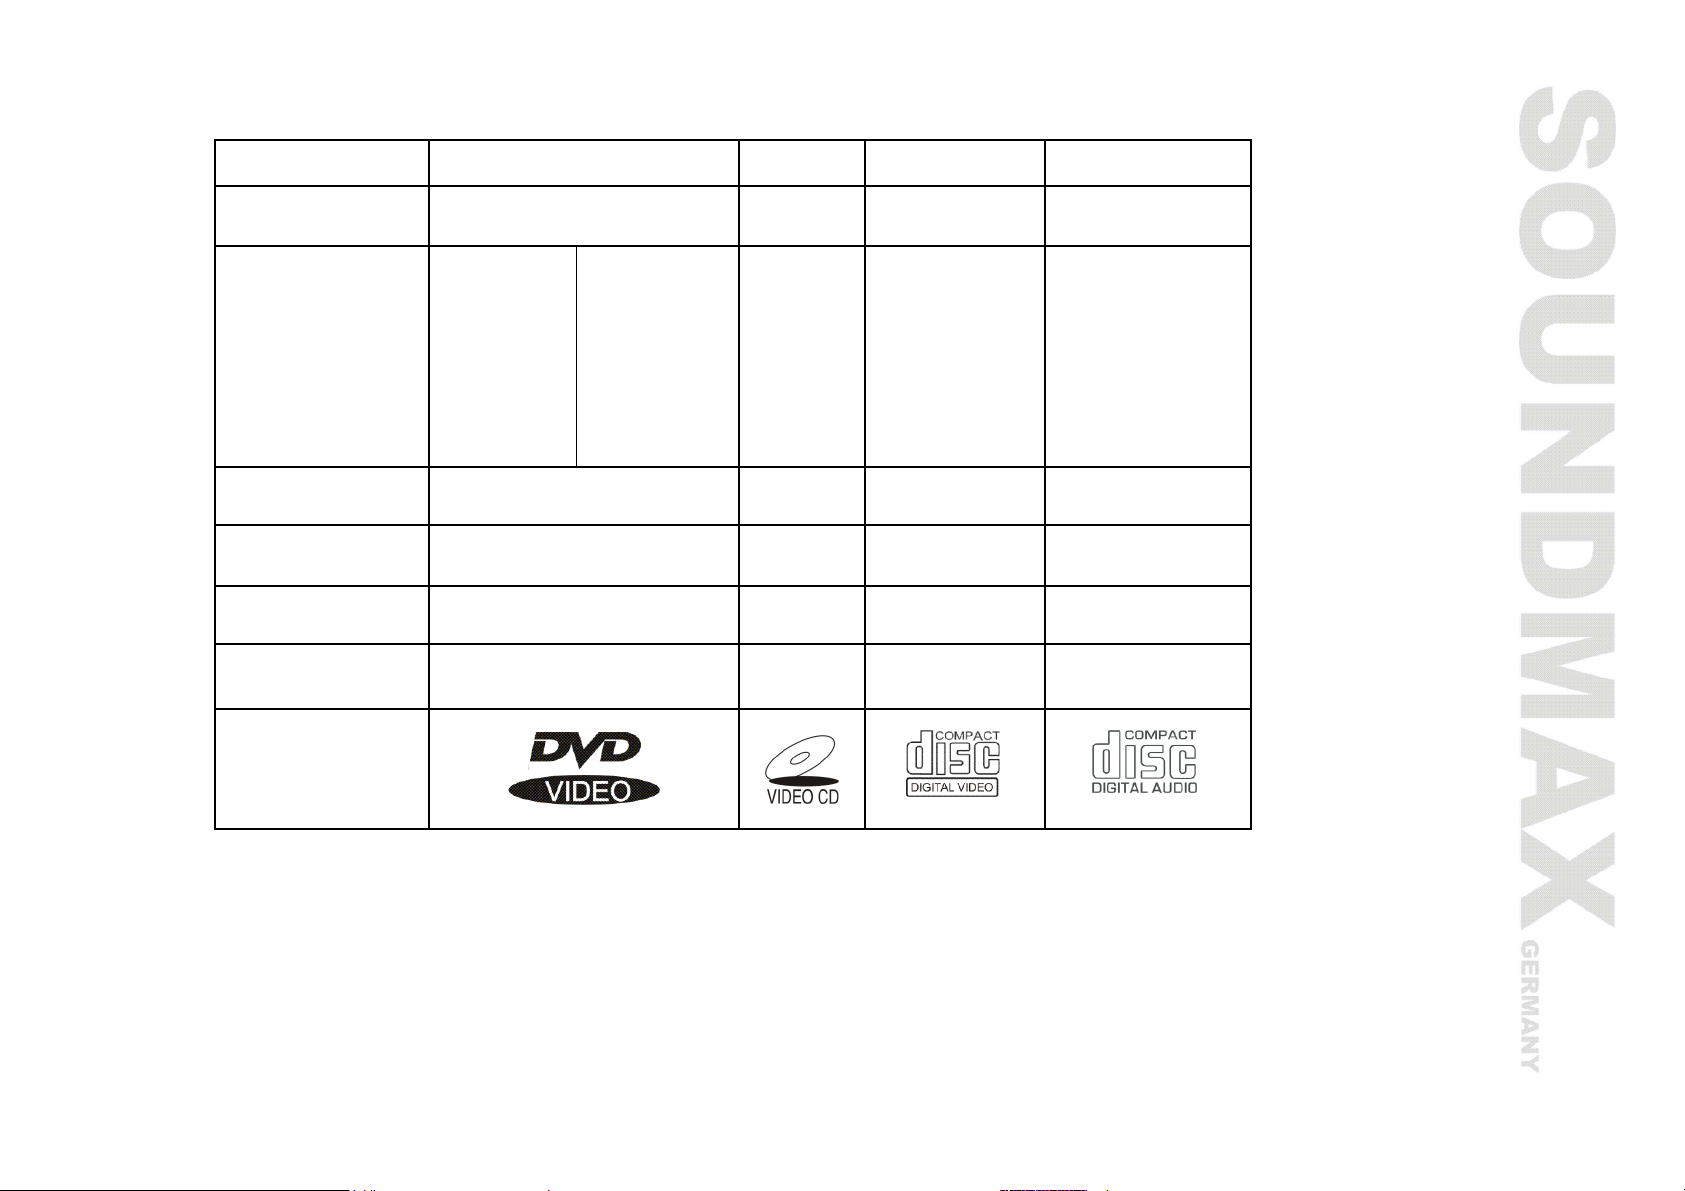
Disc information
TYPE DVD VCD SVCD CD
RECORD
FORMAT
CAPACITY
Single side
Single layer
4.7 GB = 2
Hr
single sides
Double
layer
8.5 GB = 4
Hr
MPEG 2 MPEG I MPEG II DIGIT
double side
Single layer
9.4 GB = 4.5
Hr
Double sides
Double layers
17 GB = 9 Hr
650 M
74 min.
650 M
45 min.
650 M
74 min.
DISC SIZE 12 cm / 8 cm 12 cm 12 cm 12 cm / 8 cm
HORIZONTAL
≥ 500 lines
RESOLUTION
SUBTITLE Up to 32 kinds
LANGUAGE Up to 8 kinds 2 4
≥ 240
lines
―
≥ 350 lines ―
8
―
―
SYMBOL
Page 8

8
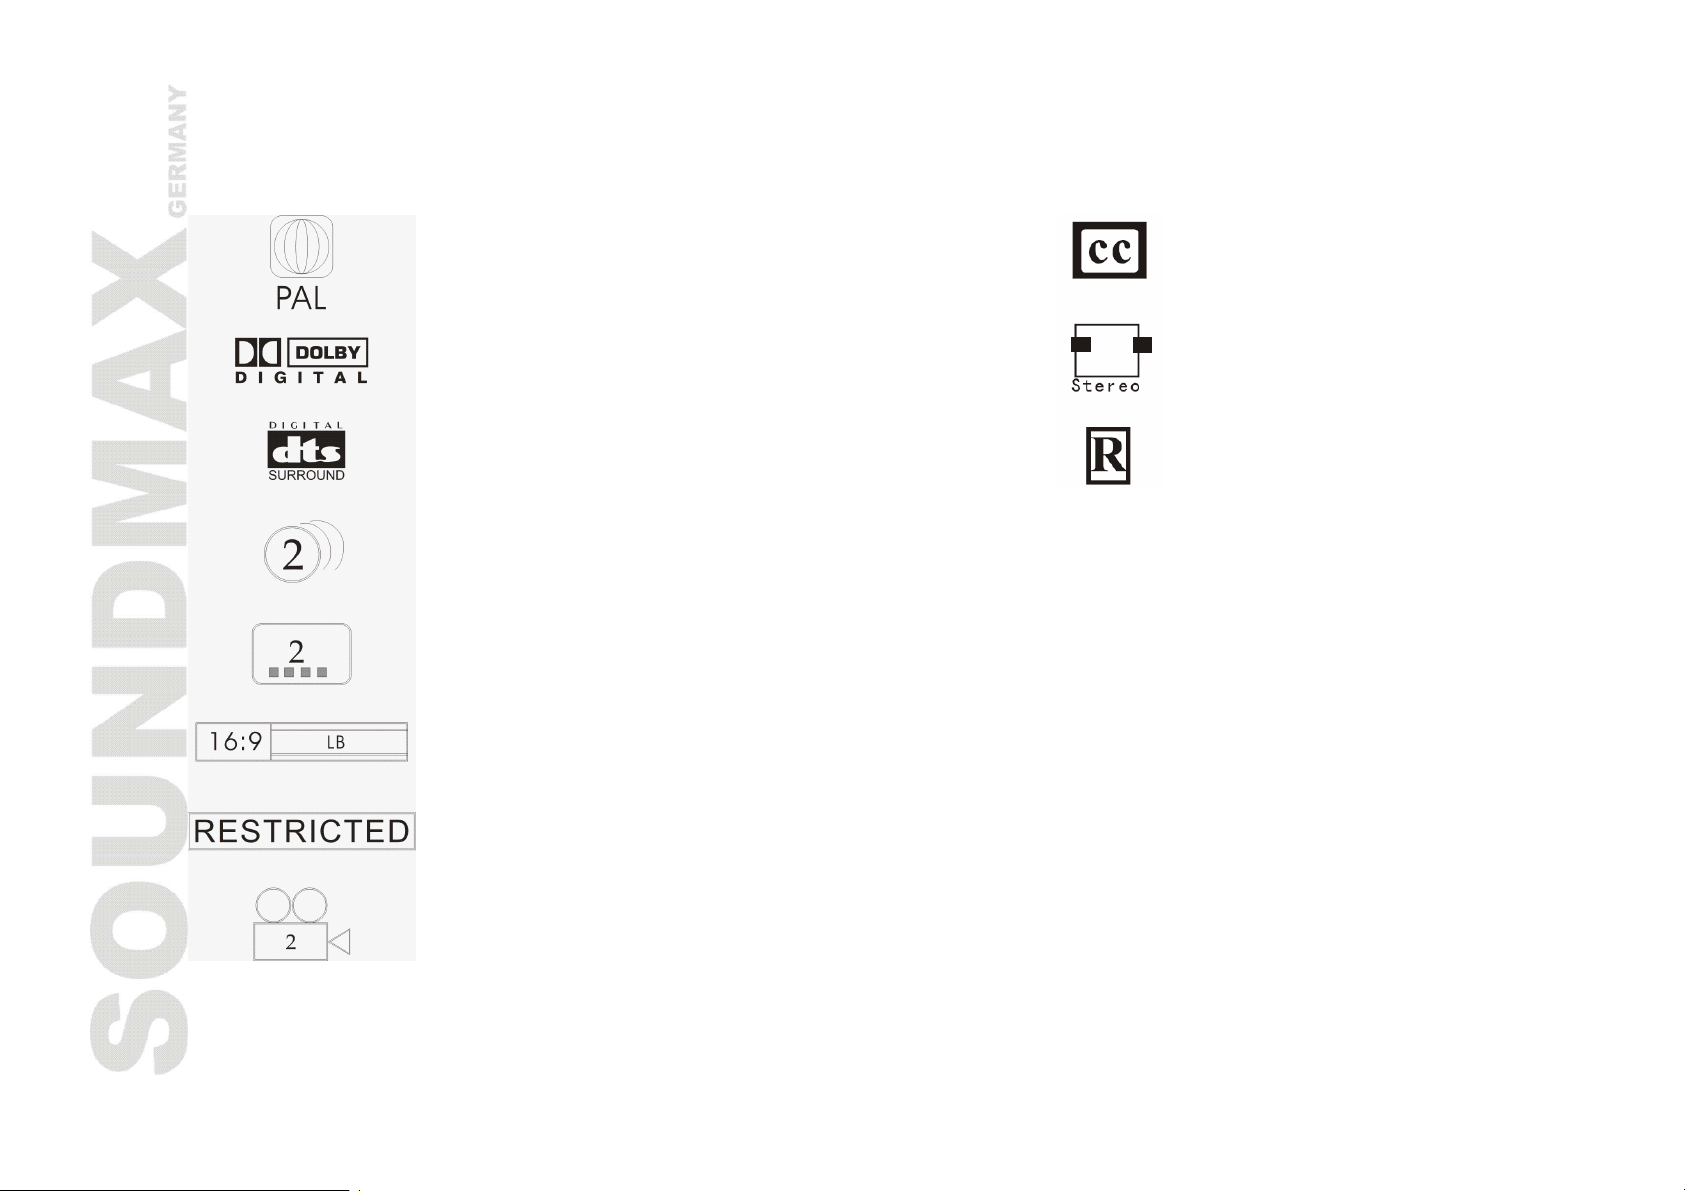
Different DVD discs have different combination of features, this is because of the different design created
by the order and manufacturer, the following symbols indicate some features of the DVD disc.
Regional code and the video output system Hiding subtitle
Dolby digital surround Two-channel stereo
DTS digital cinema surround Restriction
Subtitle
Audio track
Video aspect ratio
Parental lock
Angle
Page 9
9
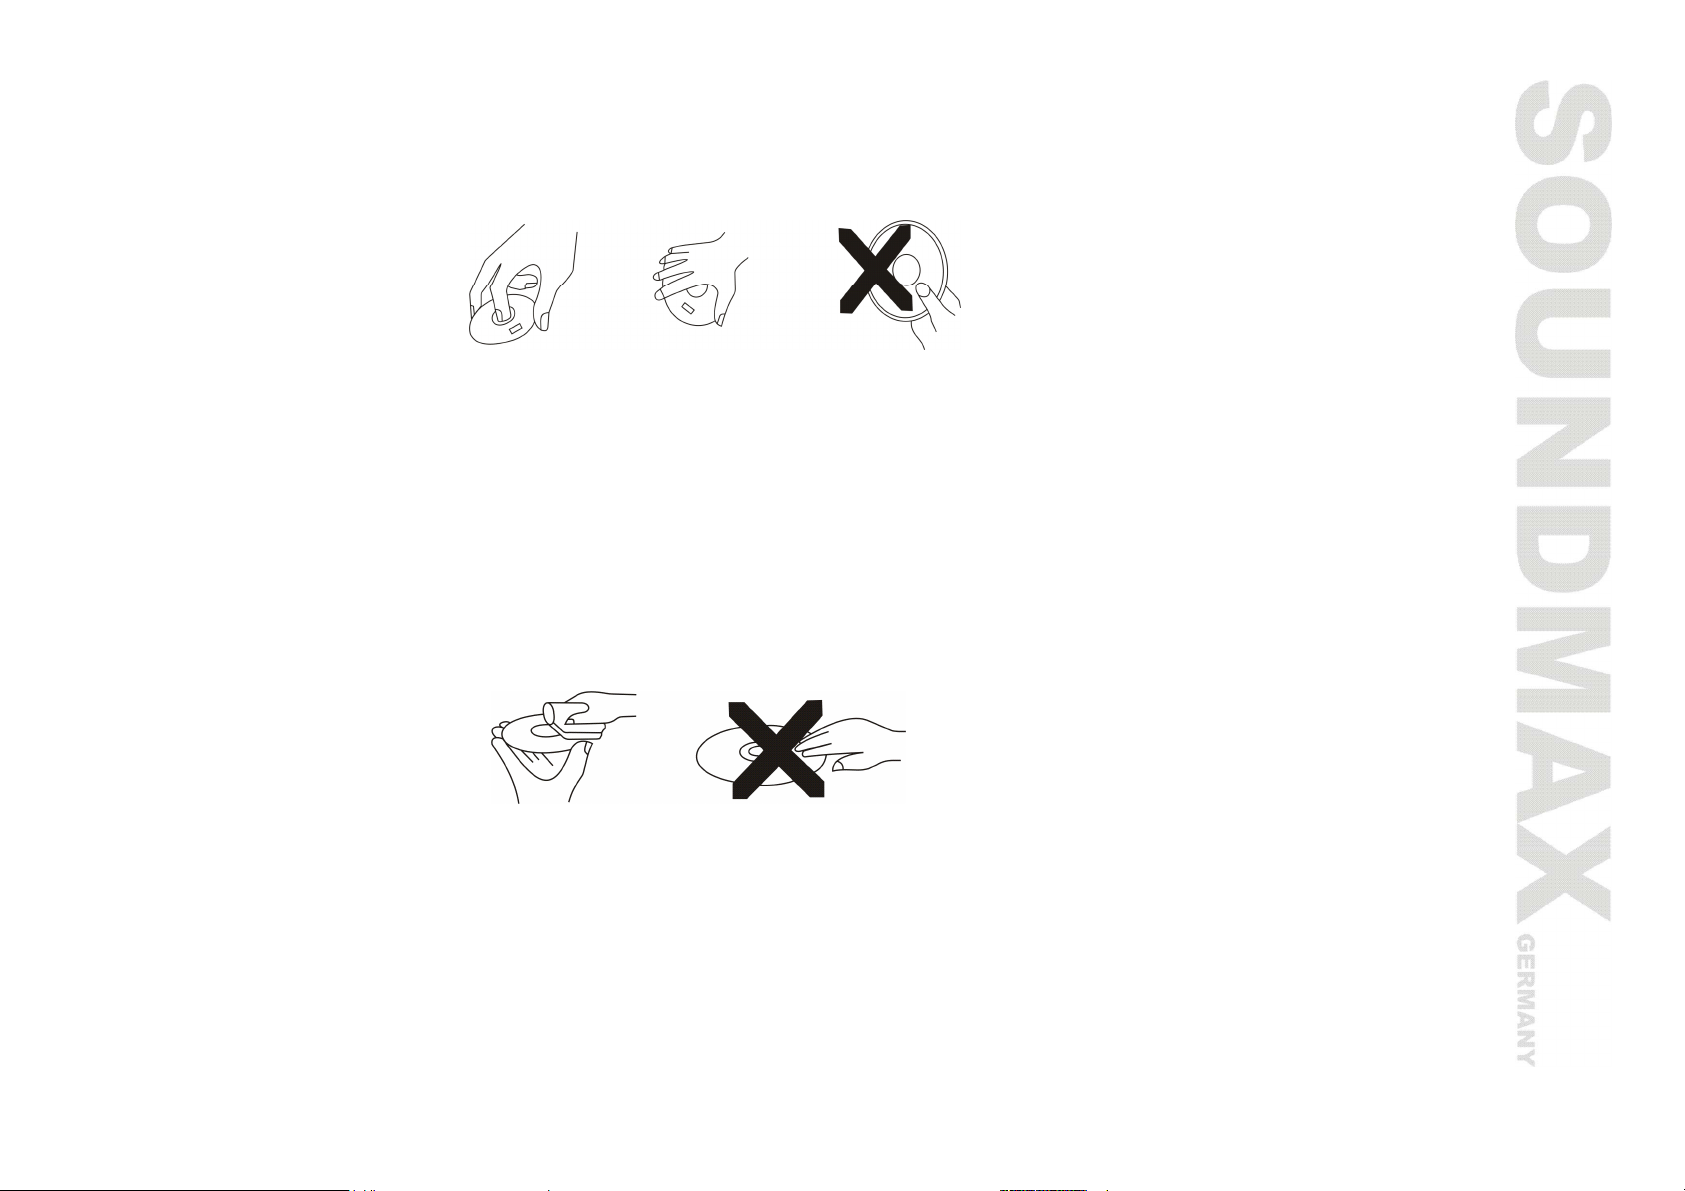
Handling discs
· When holding a disc, please hold it by its rim.
· When holding a disc, be sure the label side should be upwards
· Do not grasp the non-label side of the disc.
Disc storage
· Never store discs in the place with high temperature, strong light or humidity.
· Put the disc back to the case after playback.
Cleaning
· Wipe the discs from time using a soft cloth. Always wipe from the center towards the edge.
· Do not use daily used detergent to clean the disc.
· Protect discs against any fingerprint, do not stick or white anything on the surface of the disc.
Page 10

10
Disc Terms
Title
Generally, pictures or music compressed on a DVD are divided into several sections that is “TITLE”.
Chapter
The smaller section unit of picture or music in a DVD under the title, usually one title is comprised of one or
more chapters and each of them is numbered for easy searching. But some discs may not have a recording
chapter.
Track
A segment of picture or music on a SVCD, VCD or CD. Each track is numbered for searching.
Scene
VCD with playback control function, on which active and stillness picture divided into certain portions is
called scene, and every scene will be showed on screen menu with a scene number that can be easily
found while on playing. A scene usually is formed with one or several tracks.
PBC function (SVCD, VCD)
If a SVCD or a VCD is played a content menu may be showed on screen, this is what we Called “Playback
control” viz. PBC function.
Disc sort Functions
VCD without PBC function (1.1
version)
SVCD/VCD with PBC function
(2.0 version)
Supports both music and images.
In order to play pictures from VCD the menu indicated on the screen
can be used.
Page 11

11
Panel
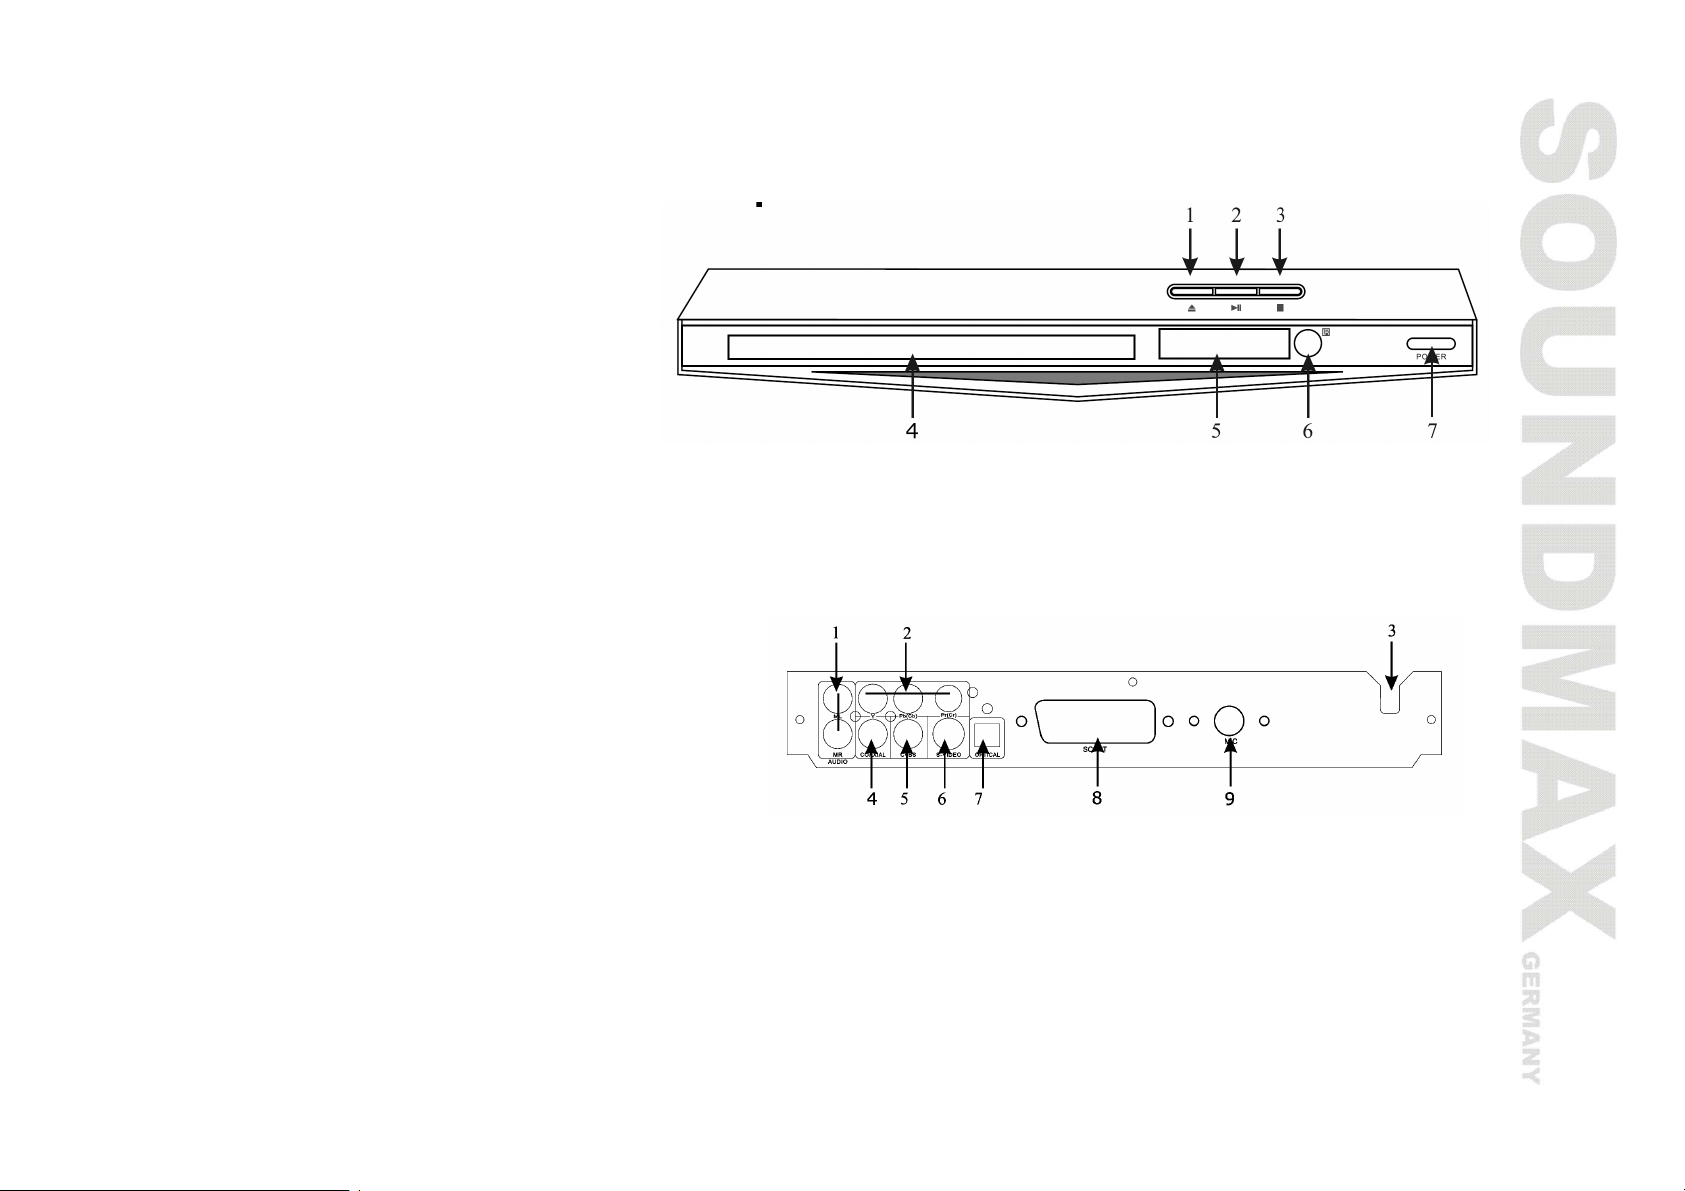
Front panel
1. OPEN/CLOSE button
2. PLAY/ PAUSE button
3. STOP button
4. Disc tray
5. Display
6. IR sensor
7. POWER (on/off) button
Rear panel
1. Down-mix right/ left
2. Component output
3. Power cord
4. Coaxial output
5. Composite video output
6. S-Video output
7. Optical digital output
8. SCART output
9. Mic jack
Page 12
12
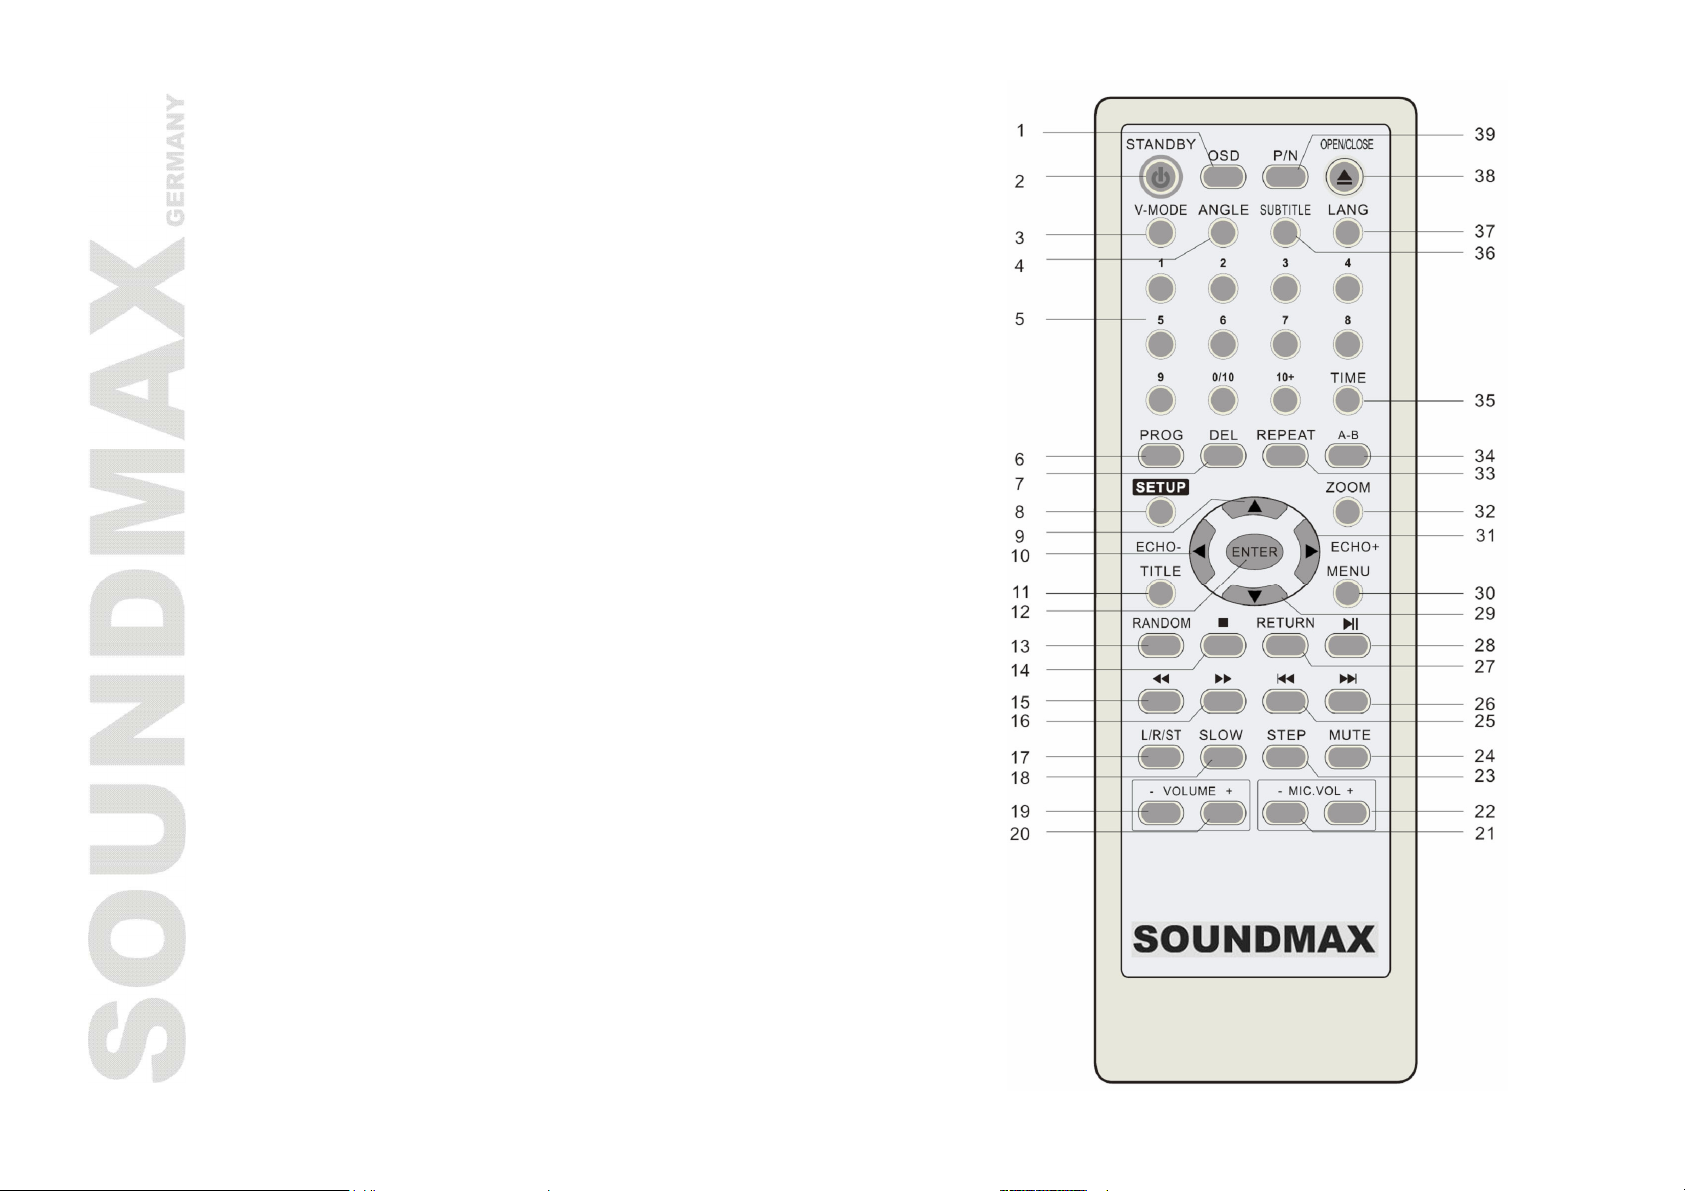
Remote control
1. OSD button
2. STANDBY button
3. V-MODE button (VIDEO-MODE)
4. ANGLE button
5. NUMBER buttons
6. PROG button (PROGRAM)
7. DEL button
8. SETUP button
9. UP cursor button
10. LEFT cursor button/ECHO -
11. TITLE button
12. ENTER button
13. RANDOM button
14. STOP button
15. FAST BACKWARD SEARCH button
16. FAST FORWARD SEARCH button
17. L/R/ST button
18. SLOW button
19. VOLUME - button
20. VOLUME + button
21. MIC. VOLUME - button
22. MIC. VOLUME + button
23. STEP button
24. MUTE button
25. PREV button
26. NEXT button
27. RETURN button
28. PLAY/PAUSE button
29. DOWN cursor button
30. MENU button
31. RIGHT cursor button/ECHO +
32. ZOOM button
Page 13

13
33. REPEAT button
34. A-B button
35. TIME button
36. SUBTITLE button
37. LANG button (LANGUAGE)
38. OPEN/CLOSE button
39. P/N button
Page 14
14
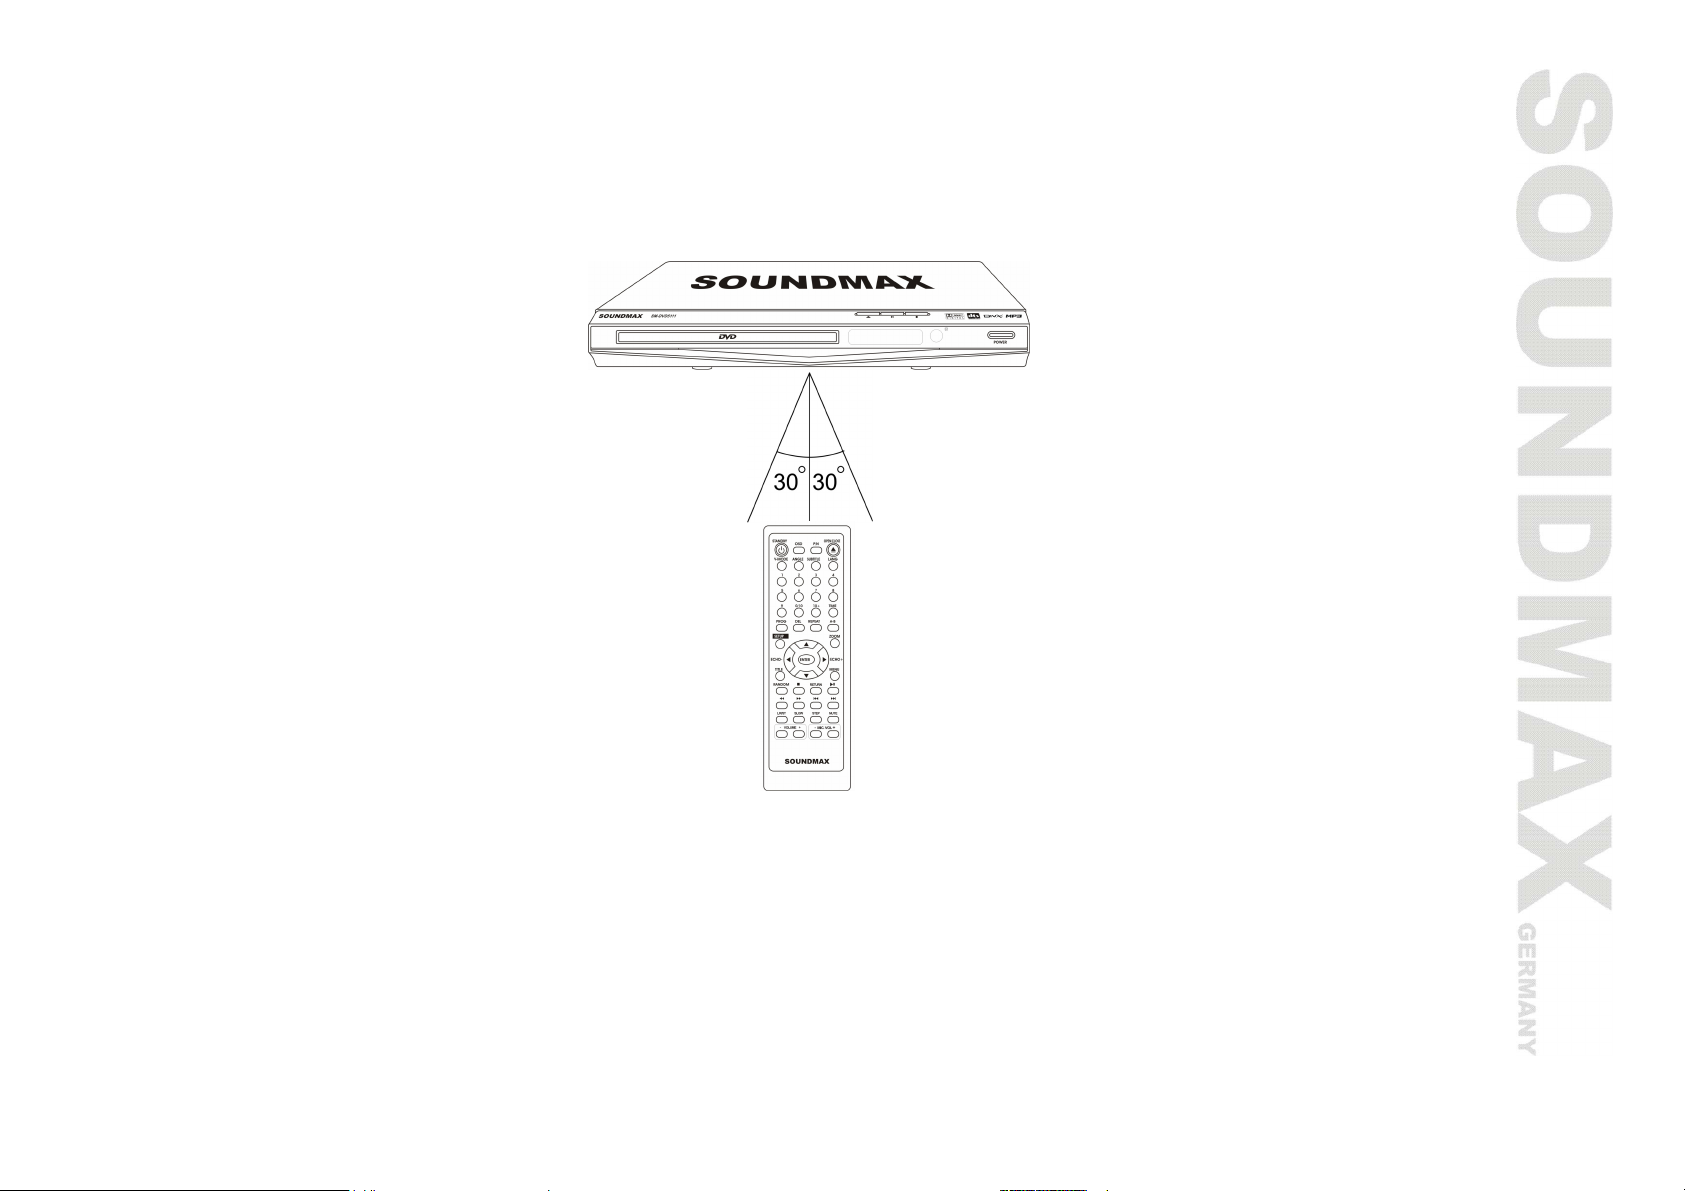
Remote control operation
· Insert the batteries into the cell box. The remote control points at remote sensor within 8 meters and
within 30 degree at left or right side.
· Take the battery out of the control if it is not used for a long time.
Page 15
15
Connection
video input
video output
output
input
Attention: Before connection disconnect the AC power supply cord.
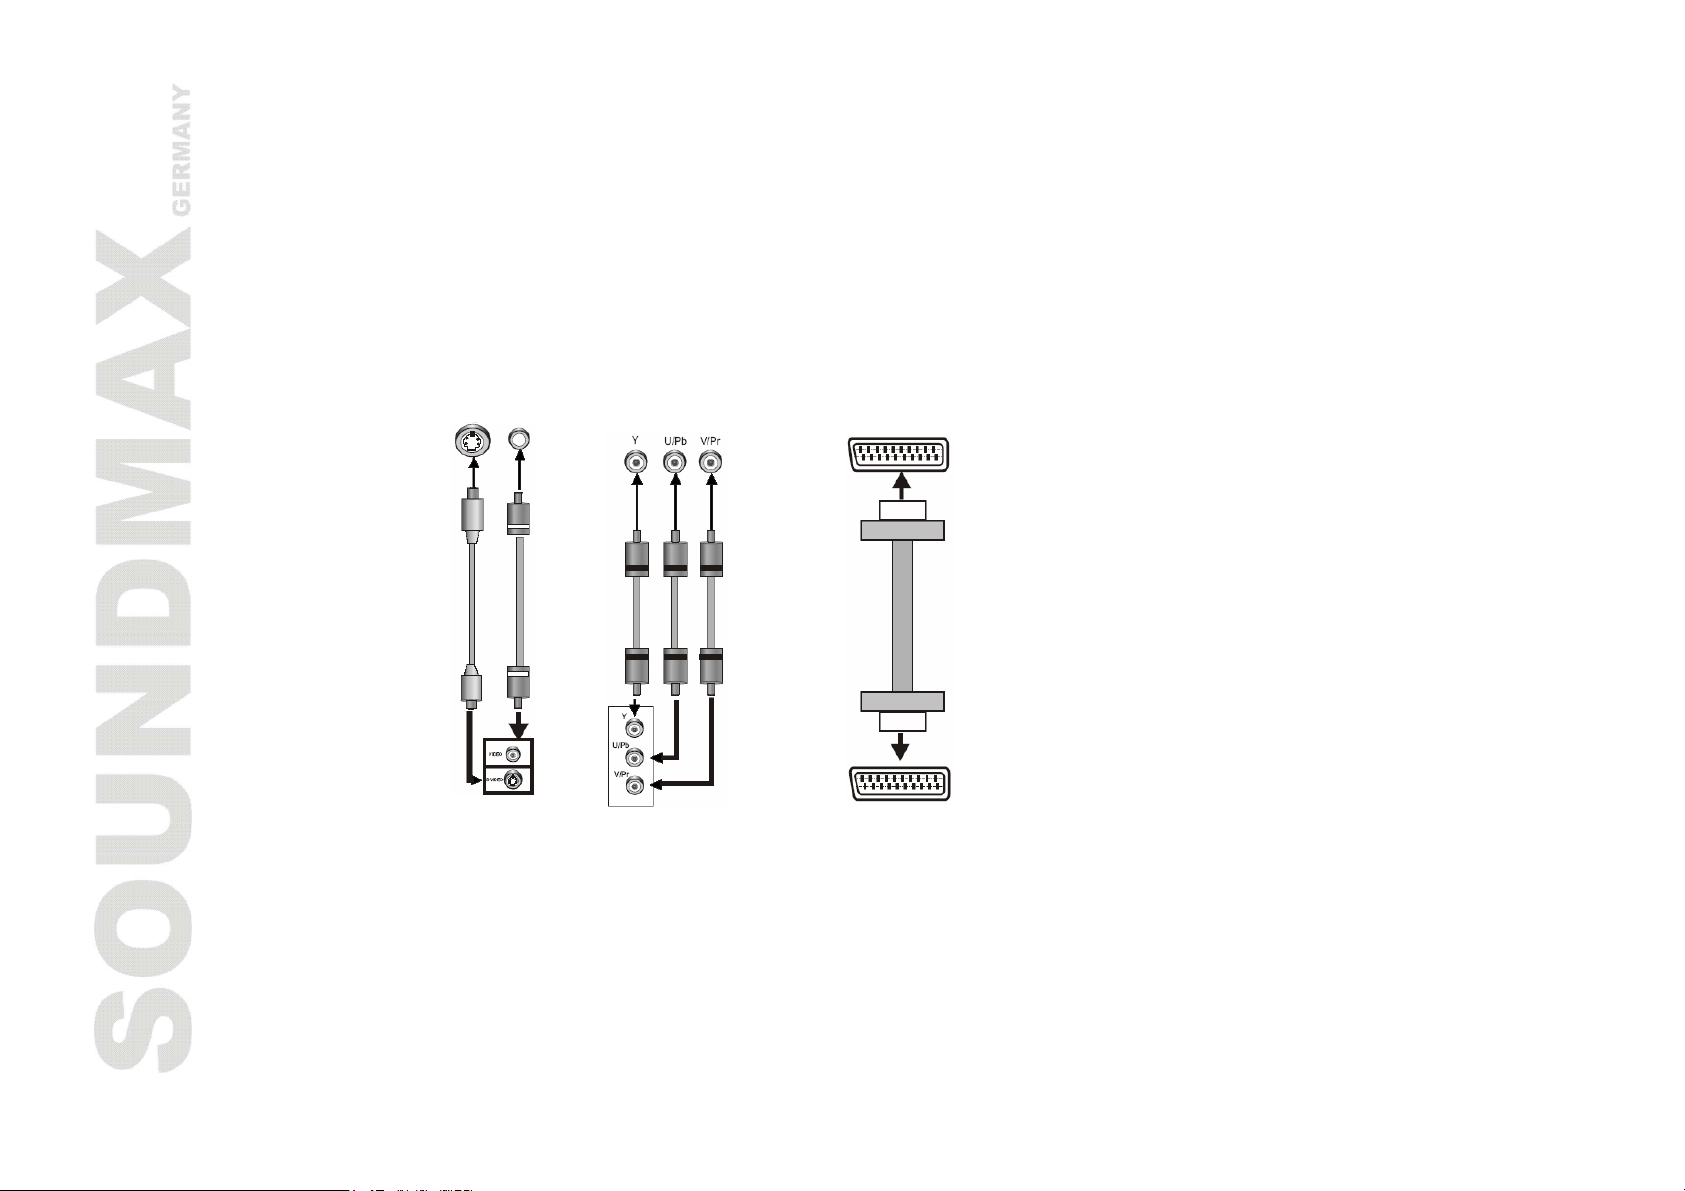
Video system connection
The following video outputs are available for this unit.
S-Video Video
Video and S-Video
outputs
Component
Component
SCART
SCART
Composite video
Use the AV cable (yellow terminal) to connect composite VIDEO output of this unit to the TV/monitor
video input.
S-Video
Page 16

16
Use the S-video cable to connect the S-VIDEO output of this unit to the TV/monitor S-video input.
Component video (YUV)
Use 3-core AV cable to connect the component output terminals of this unit to the corresponding
TV/monitor input.
SCART
Use a 21-pin SCART cable to connect the SCART output to the TV/monitor SCART input terminal.
Notes:
· Which connection depends on the TV/monitor input terminal.
· Don't use all connections at one time; otherwise the picture will be affected.
· Only the physical connection conforms to the video setting can produce the normal picture (reference to
the Video setup in System setup).
Page 17
17
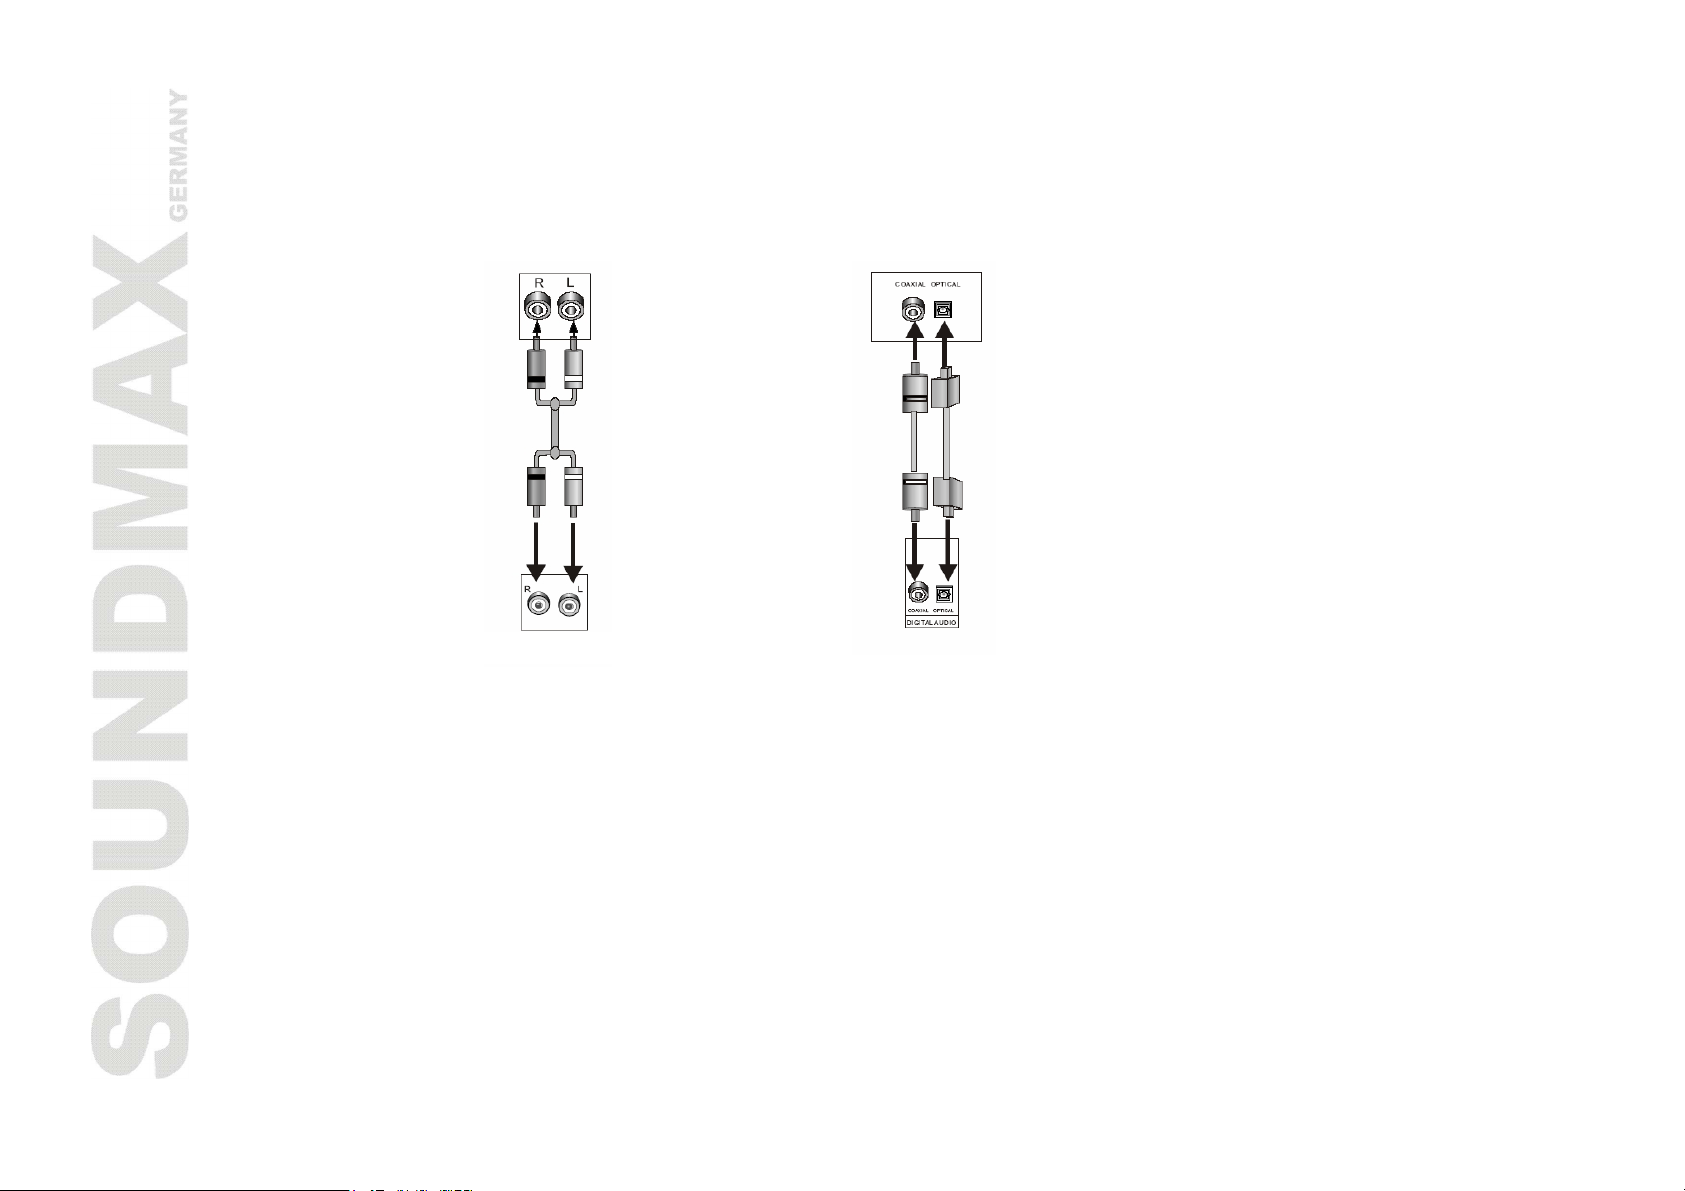
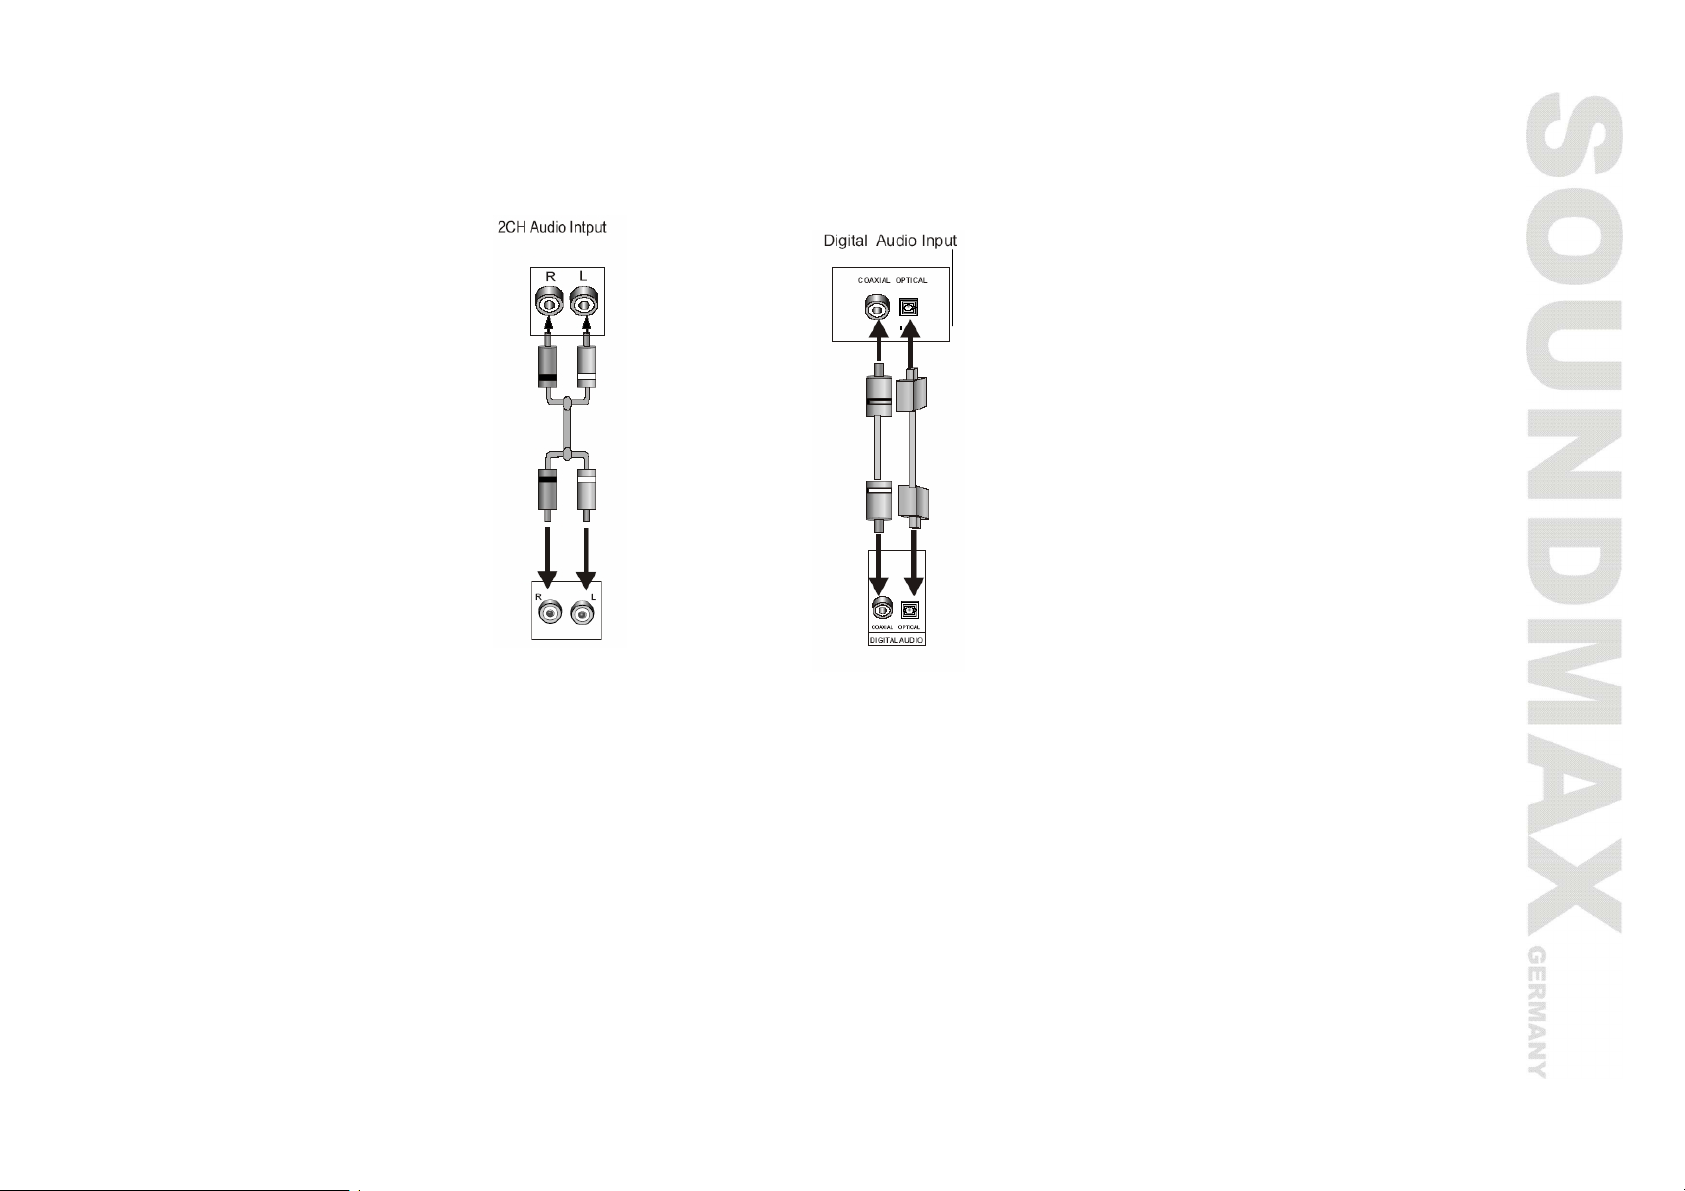
Audio connection system
Two types of audio output systems: analog audio and digital audio. Analog audio includes 2-channel stereo.
Digital audio includes optical and coaxial output.
2 CH audio inputs
2 CH audio outputs
Digital audio inputs
Optical and coaxial
outputs
Stereo audio
Use a pair of AV cables (red for right/white for left) to connect the stereo audio outputs of this unit to the
TV or a stereo input of power amplifier.
Coaxial digital audio
Use the special coaxial cable to connect the coaxial output of this unit to the coaxial input of power
amplifier.
Optical digital audio
Use the special optical cable to connect the optical audio output of this unit to the optical input of power
amplifier.
Note: The physical connection should accord to the audio output setup of this unit. Please refer to Audio
setup in System setup.
Page 18
18
System setup
1. Press SETUP to enter the setup menu. In Setup mode, press SETUP button again to quit the setup
page.
2. Use the LEFT/RIGHT buttons to choose the setup page: General setup page, Speaker setup, Audio setup
page, Video setup page, Preference page, Exit setup.
3. Press the DOWN button to enter the setup page selected.
4. Use the UP and DOWN buttons to select the option you want to adjust.
5. Press RIGHT to enter the adjustment list. Use the UP and DOWN buttons to select the adjustment and
press ENTER to confirm and return to options list.
6. To return to setup page list press the LEFT button in the options list.
Note: Some setup items are concerning the present modes. The items in gray can't be set up.
The setup is memorized and kept after power off.
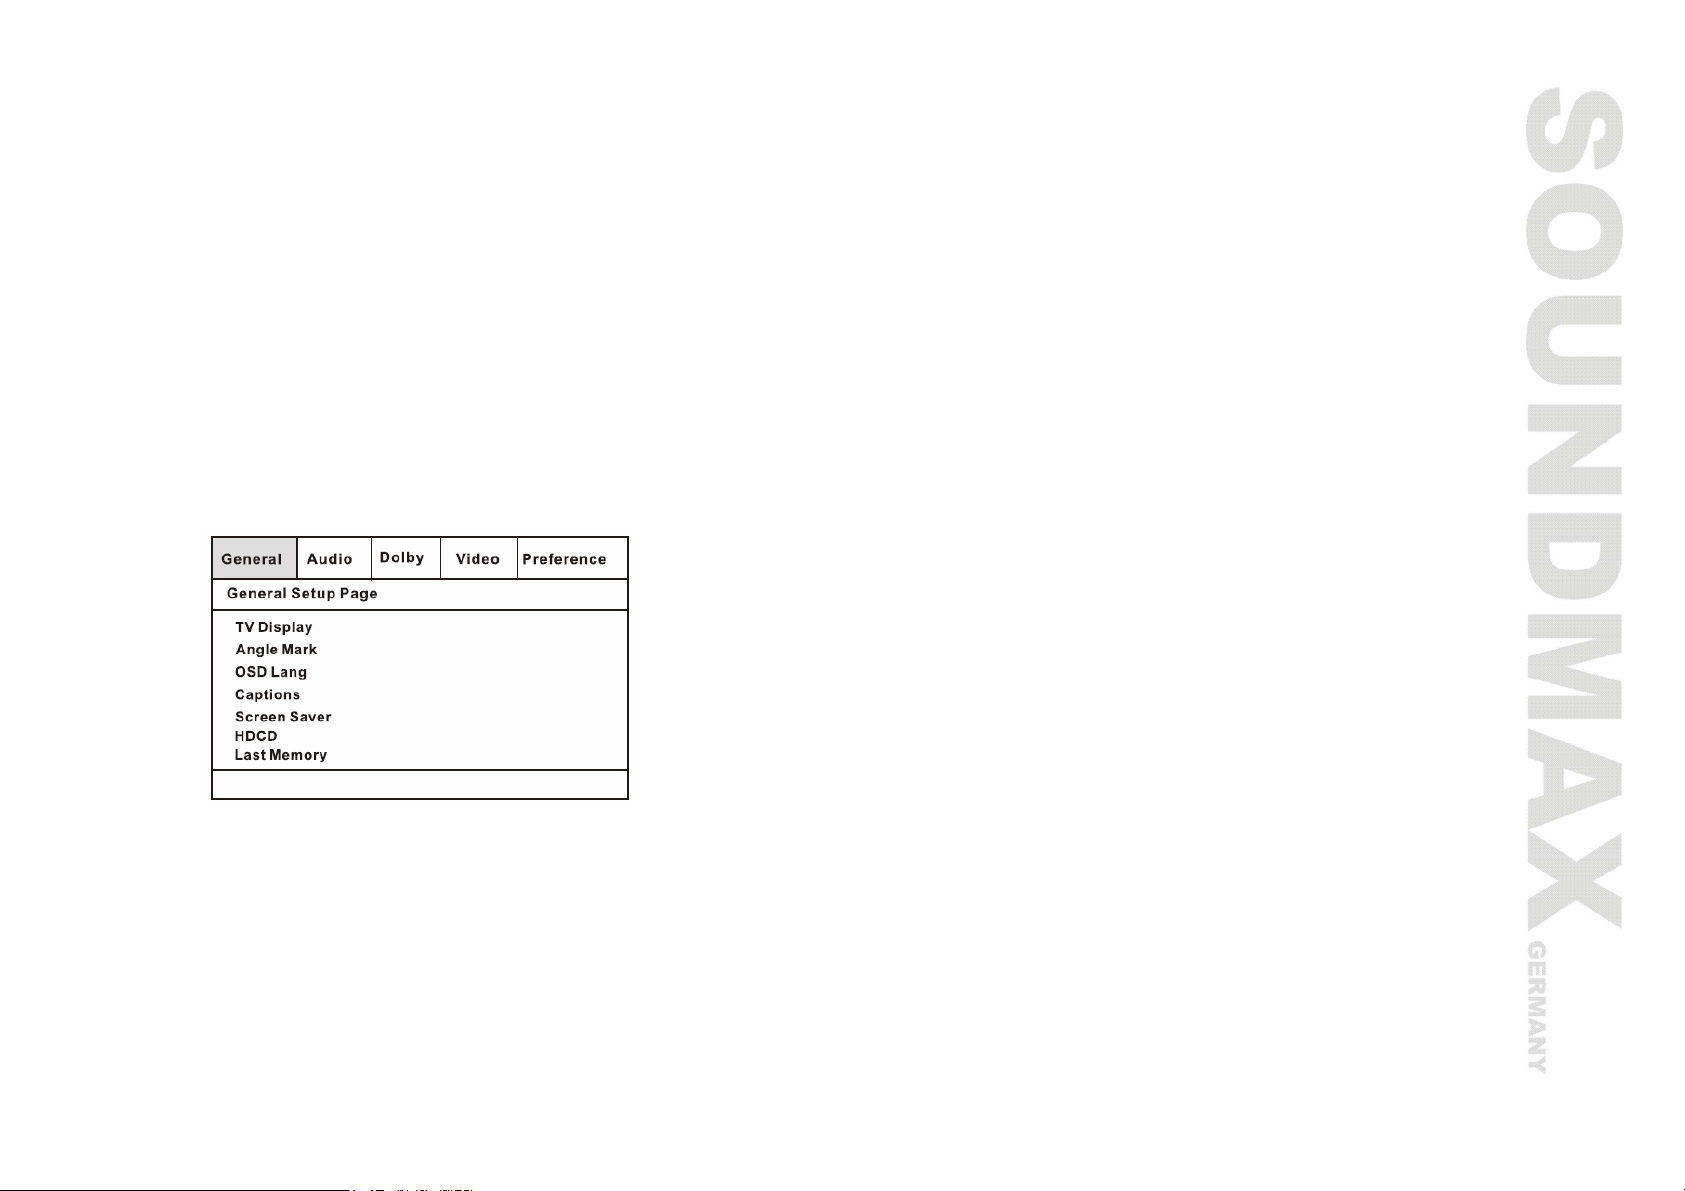
General setup page
· TV Display
Normal/PS: When the unit is connected to the normal TV set, the wide-screen image is shown on the
full screen, but some part is cut off.
Normal/LB: When the unit is connected to the normal TV set, the wide-screen image is shown and
black bars appear on the top and bottom of screen.
Wide: Use this item when the unit is connected to the normal TV set, if you want to squeeze the
picture.
· Angle Mark
When playing DVD disc with multi-angle view, if selected ON, the ANGLE mark is shown.
Page 19
19
· OSD Lang
Select on-screen display language.
· Captions
This function doesn't work when the disc is without caption. If the caption is OFF, press SUBTITLE
button on the remote control to make caption on. The default setup is CAPTION ON.
· Screen Saver
If the SCREEN SAVER is set ON and the unit is turned on without a disc playing for several minutes, a
moving picture appears on the screen, and the unit will go to standby mode after 20 minutes. You can
press STANDBY button on the remote control to wake it up.
· HDCD (Not available in 2CH DVD mode)
You can select the digital filter at lx or 2x. The initial factory setup is off.
· Last Memory
When this function is on, the unit can memorize the time elapsed from the last time you played the
disc. Then at the next playing, it will resume playing from the memorized time.
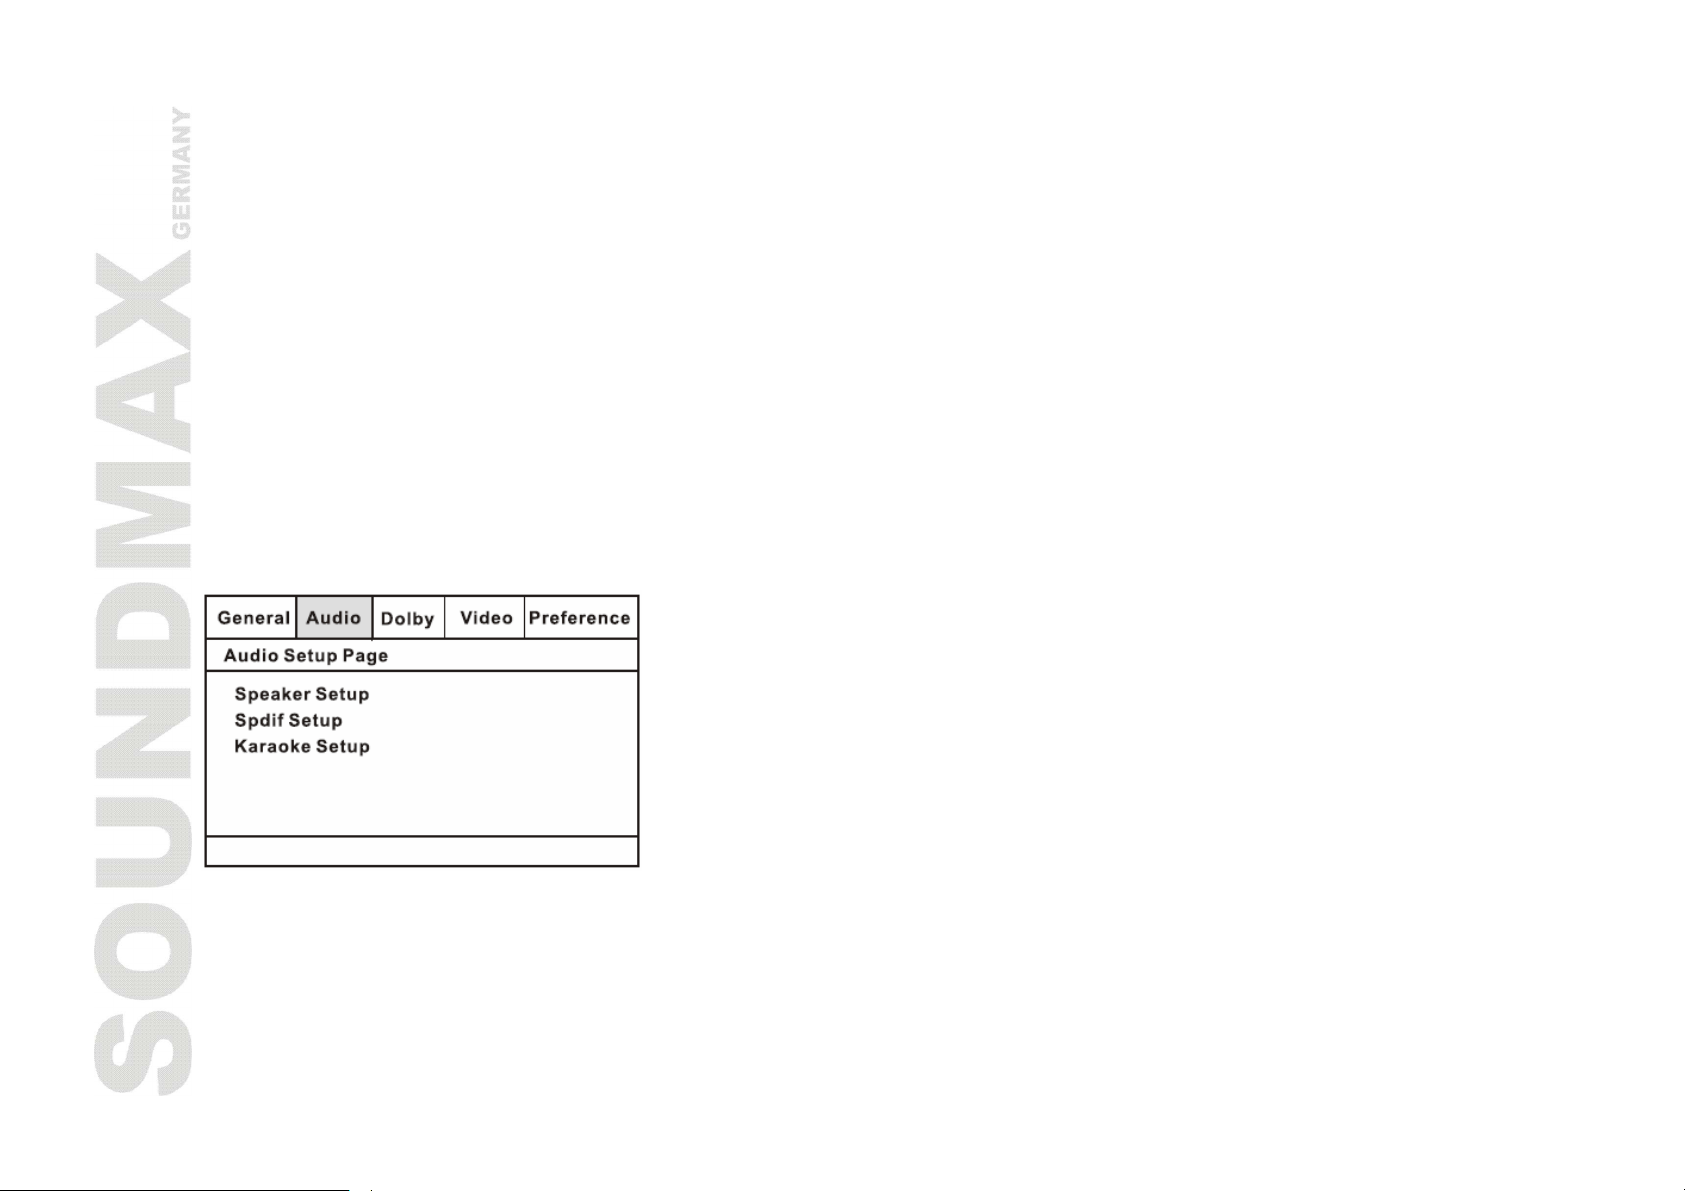
Audio setup
1. Speaker Setup
· - DOWNMIX
LT/RT: The audio out is Left and Right channels format even if the original sound is 5.1CH format.
STEREO: The audio out format is stereo even if the original sound is 5.1CH.
Page 20
20
5.1 CH: Turn off downmix function. If playing 5.1CH discs or the unit is connected with 5.1 channel
amplifier, this item should be selected (for 5.1 channel devices only).
2. Spdif Setup
SPDIF OFF: no digital signal out (optical or coaxial output off), only analog audio output.
SPDIF RAW: no decoding on the amplifier digital signal input.
SPDIF PCM: the amplifier must be supported by PCM decoding or Dolby digital decoding function.
3. Karaoke setup
You can switch the microphone on or off, adjust the mic threshold, mic volume and echo.
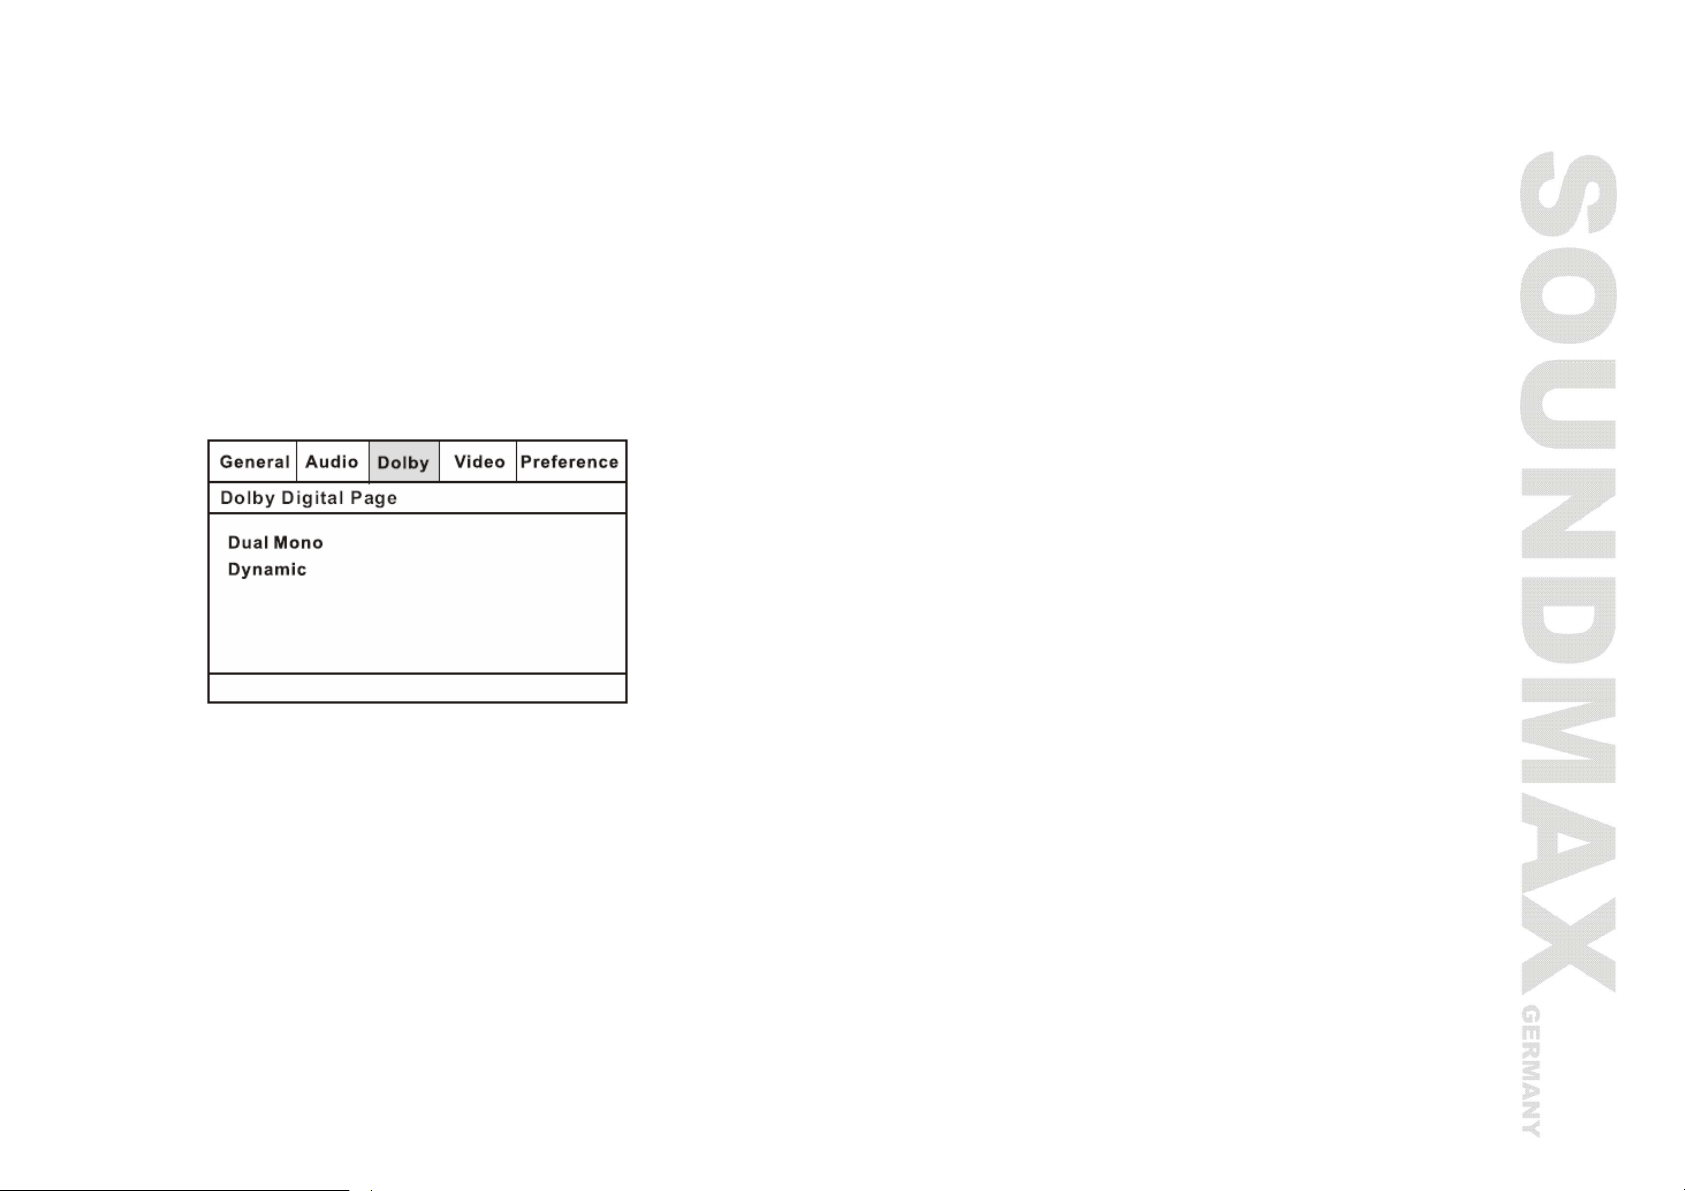
Dolby setup
· Dual Mono
Stereo: stereo output signal,
L-Mono: left output signal,
R-Mono: right output signal,
Mix-Mono: left and right output average signal.
· Dynamic
If watching large dynamic scope movie program at night, selecting this mode you can reduce the
volume to a very low level, at the same time, to keep the fine details sound. In this case, this doesn't
disturb the family and keep the quality sounds.
Page 21
21
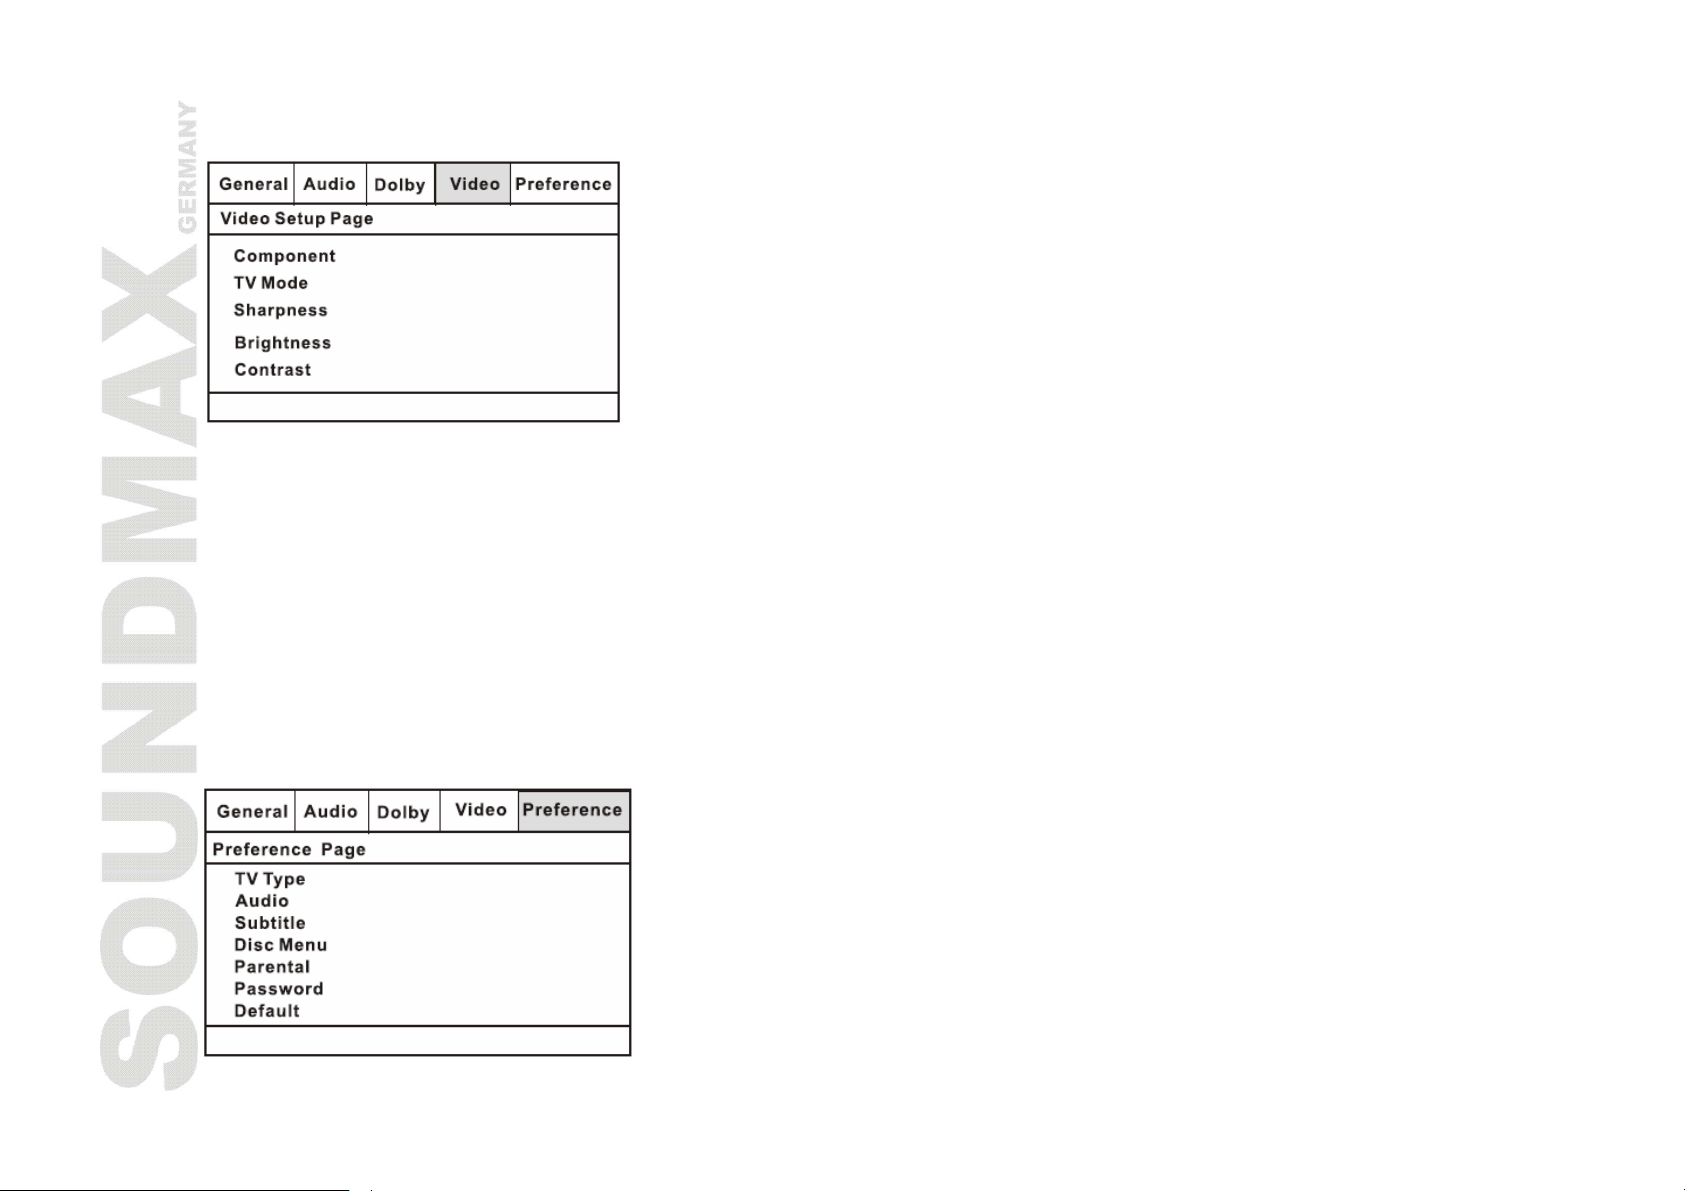
Video setup
· Component
YUV: set video output in analog component video format when connecting to Y/U/V terminals
RGB: set video output in Red/Green/Blue format when connecting to SCART terminals
VGA: set to this item when connecting to VGA terminals
The player is always with signal output under all conditions, and if it is connected to a composite video
display equipment, suggesting the linkage be set on "OFF".
· TV Mode
You can choose between progressive and interlaced output when playing with "YUV" or "RGB" Mode.
· Sharpness, Brightness, Contrast
You can set the SHARPNESS, BRIGHTNESS, CONTRAST, according to your preference.
Preferences
Page 22

22
· TV Type
This unit is suitable for all kinds of TV systems. You can select one of the PAL, NTSC or AUTO.
PAL: this system is used in CHINA, EUROPE, HONGKONG etc.
AUTO: the TV system is auto switched according to the disc system.
NTSC: this system is used in USA, TAIWAN, JAPAN etc.
· Audio, Subtitle, Disc Menu
These are the initial settings by your preference. If a setting is supported by disc content, it will work.
Otherwise the disc default value works. And these settings can be changed respectively by pressing
button [AUDIO] [SUBTITLE] when playing.
· Parental
The control level is for parental to control playing content and protect your children from violence and
erotic. The disc, the level of which is higher than the setting level cannot be played.
· Password
Change the password. The initial factory password is 137900. You can set your own password. If you
forget your own password, you can use 137900 as general password.
· Default
Restore the initial factory settings.
Page 23

23
Operations
OPEN/CLOSE
· Press OPEN/CLOSE button when power is on, the disc tray is pushed out. Put the disc on the tray with
the title faced up. Press OPEN/CLOSE again to close the disc tray and the unit starts playing
automatically. (Auto-play function is not available for MP3 and JPEG discs).
POWER
· When playing, press POWER button to turn off the unit and standby mode will be activated; Press
POWER again, to turn on the unit and it will start playing.
Warning: The power is not fully turned off in standby state. If the unit will not be used for a long time,
turn off the power by pressing the POWER button on the front panel.
TITLE
· When playing DVD disc, press TITLE to return to the main title play.
V-MODE
· Press V-MODE button to switch the video output mode.
SUBTITLE
· When playing the disc with multi-subtitle, press SUBTITLE continually, the subtitles are changed in a
circle, and you can select one.
ANGLE
· When playing the disc with multi-angle, it's convenient to change the view angle.
L/R/ST
· When playing super VCD, VCD, CD disc with multi-channel, press L/R/ST button to select left
channel/right channel/stereo/mix audio output.
MENU
· When playing DVD disc, press MENU once to return to sub-menu. Press MENU again to return to the
main menu.
Page 24

24
· When playing SVCD, VCD2.0 disc, press MENU and the disc menu will be shown. You can select contents
in the menu. After loading the disc, the unit will enter MENU automatically. Press MENU button, the TV
screen shows PBC OFF. In this mode, the menu will not appear, press digit button to select the track
directly. VCD1.1, CDDA and Mp3 have no PBC menu.
PLAY/PAUSE
· When playing the disc, press PLAY/PAUSE once to pause, press PLAY/PAUSE again to return to normal
play.
NAVIGATION
· Press cursor buttons to navigate in menu (submenu).
ENTER
· Press ENTER button for confirmation of chosen options.
STOP
· When playing DVD, SVCD, VCD, CD disc, press STOP once, the unit will memorize the previous ending
point. Press PLAY button to go on the playing. Press STOP for the second time to stop the playing and
end memory.
STEP
· When playing DVD, SVCD, VCD disc, press STEP once, the picture changes to next frame. Press PLAY to
resume normal play.
F.FWD►►/REW SEARCH◄◄
· Press this button for quick forward search.
· Press this button for quick rewind search.
PREV/NEXT
· When playing DVD disc, press PREV 9 to go to the previous chapter.
· When playing SVCD, VCD, CD disc, press PREV 9 to go to the previous track.
· When playing DVD disc, press NEXT: to go to the next chapter.
· When playing SVCD, VCD, CD disc, press NEXT: to go to the next track.
Page 25

25
PROGRAM (PROG)
· If the disc contains 2 or more tracks, chapters or titles, set up the playing order to your preference.
Press this button to enter program menu.
· Press digit button to input the number of the track, title or chapter. If the programmed tracks are over
ten, press NEXT : to go on programming (Maximum 20 programmable items). Use the cursor buttons
to move the cursor to the START. Press PLAY to start PROGRAM play.
Note: For MP3 disc, this function is not available.
SLOW
· Press SLOW button to activate slow forward or slow rewind function, continually press the button to
select different speed of playback.
SETUP
· Press SETUP button to enter or exit DVD player setup menu.
N/P
· Press this button to choose PAL/Multi/NTSC video mode.
REPEAT
· Press REPEAT button to repeat a title, chapter, track or the whole disc.
· When playing DVD disc, press REPEAT button continually, the TV screen shows chapter => Title => All
=> OFF.
· When playing SVCD, VCD, CD disc, the turn is following: Track => All => OFF.
· When playing MP3 disc, the turn is: Folder => Single => Repeat one => Repeat folder.
A - B
· Press A-B button on the start point (A) and the ending point (B) to select the repeat part.
· Press A-B the third time to cancel A-B repeat and return to normal play.
LANGUAGE (LANG)
· When playing DVD with more than one audio stream, press LANG button to select the needed language.
Page 26

26
ZOOM
· When playing DVD, SVCD, VCD disc, press ZOOM to zoom in or zoom out the picture.
· In zoom in mode, press cursor buttons to move the picture for viewing. The picture cannot be moved in
zoom out mode.
VOLUME
· Press VOL + to adjust volume up.
· Press VOL - to adjust volume down.
MICROPHONE VOLUME
· Press MIC.VOL + to adjust volume up.
· Press MIC.VOL - to adjust volume down.
MUTE
· Press MUTE button, the sound will be turned off and the mute symbol will be displayed on the TV
screen. Press MUTE again, MUTE OFF will be displayed and the sound will resume.
OSD
· Press the DISPLAY button, the relative information of the disc will be displayed on the TV screen.
TIME
· Press TIME button to set up current time.
S.EFFECT (This function is optional)
· Press S.EFFECT button to change the surround sound effect.
VIEW
· Press VIEW button to enter the menu for viewing the disc content.
EQ (This function is optional)
· Press EQ button to chose EQ mode.
DEL
Page 27

27
· Press DEL button to delete incorrectly dialed numbers when programming.
RETURN
· When playing super VCD, VCD2.0 discs and PCB function is on, press return button, to return to VCD
menu. This function is unavailable when PBC is turned off.
RANDOM
· Press this button to activate random play, The unit will play the content in random mode.
ECHO+/-
· Press ECHO- (►) button to decrease the depth of the Echo function.
· Press ECHO+ (◄) button to increase the depth of the Echo function.
Page 28

28
KARAOKE
· Karaoke disc should be in DVD VCD format. This disc should content music and subtitles. Karaoke disc
should show to the users the fragments and when they should sing song. It is necessary to use one or
two microphones (is not included).
· Connect microphones to MIC cutoff points on the rear panel of DVD player.
· Press up/down direction button to adjust microphone volume in the setup menu.
· Press up/down direction button to adjust the echo level in the setup menu.
· Put Karaoke disc into DVD-player and the reproduction will start automatically at once.
MP3 PLAYBACK
· MP3 is the third audio compression format of international standard MPEG, which compresses the audio
signal at the rate of 12:1. Using MP3 format, one disc can contain more than 600 minutes of music, the
timbre of which is similar with that of CD discs.
· There are many different formats for storing MP3 songs. Usually, one MP3 disc includes many folders
(directories) and every folder includes files (songs).
· Use the UP/DOWN directional navigation arrows to select the directory you want and press the PLAY
button to enter it. Press the PLAY button to play the song you selected.
PLAY PICTURE CD DISC
· Press STOP button to enter file directory.
· Press UP/DOWN buttons to select the needed picture.
· Press ENTER button to play it and to launch slideshow.
Button functions are as follows:
[NEXT]: next picture;
[PREV]: previous picture;
[UP]: mirror image in vertical;
[DOWN]: mirror image in horizon;
[LEFT]: to rotate 90 degrees anticlockwise;
[RIGHT]: to rotate 90 degrees clockwise;
Page 29

29
[ZOOM]: enter zoom mode;
[FAST FORWARD]: to zoom in the picture;
[FAST REWIND]: to zoom out the picture;
[UP/DOWN/LEFT/RIGHT]: to move zoom center,
Select EXIT to exit.
Page 30

30
Troubleshooting guide
Symptom Cause(s) Solution
No power The power cord is not connected. Connect the power cord properly.
No picture
No sound
Unable to play
Remote control does not
work
done
TV video setup is not correct. Select the suitable setup.
Player video setup is not correct. Select the suitable setup.
Video cable is not connected well. Connect the cable properly.
Audio cable is not connected well. Connect the cable properly.
Power off for the connected equipment. Turn on power.
Audio setup is not correct. Select the suitable audio setup.
Dirty disc. Clean the disc.Distorted picture
In fast forward or fast rewind mode. Sometimes, the tiny distortion appears. It
is normal.
Without disc. Load the disc.
Disc is bad. Clean or replace the disc.
Disc is put upside down. Load the disc properly.
Dirty disc. Clean the disc.
There is condensate on the laser head. Leave the player in power off mode for 1
hour.
There is menu on TV screen. Use SETUP to turn off menu.
Parental control is working. Set up parental off or change the setup.
Microphone is not connected Connect the microphoneMicrophone doesn’t work
Microphone volume level is too low Adjust the microphone volume level
Remote control is not pointed at the
sensor.
Remote control is too far from DVD unit. Operate the remote control within 8
Batteries are weak. Replace the batteries.
CD is recorded incorrect. Wait for 5-10 seconds, then replace disc.Some operations cannot be
The wrong buttons have been pressed. Repeat operation again pressing correct
Point the remote control at the sensor.
meters.
buttons.
Page 31

31
Specification
Loader Slim
Appearance
Compatibility
Audio
Video
Connectors
Front panel Black
Color Black
Formats of disks: DVD, DVD-R/-RW/+R/+RW, CD-R/-RW +
Formats of playback: DVD, DVCD, SVCD, VCD, CDDA, MP3, HDCD,
JPEG, KODAK PICTURE CD
Support DVD disks of all zone +
Dolby Digital decoder +
DTS digital out +
Support of MPEG4 (DivX) +
Progressive scan +
Support NTSC / PAL +
S-Video +
Composite +
Component (YUV) +
SCART +
Stereo +
Coaxial +
Optical +
+
Screen saver +
Zoom +
Functions
Additional Remote control, RCA Cable +
Children lock +
Multi-shooting angle +
Multilanguage OSD +
Power supply 110-240V, 50/60Hz
Page 32
32
* It may not be possible to play certain DivX disc due to the configuration and characteristics of the disc or
condition of the recording.
Specifications are subject to change without notice.
Page 33

33
Содержание
Содержание.............................................................................................................................. 33
Меры предосторожности............................................................................................................ 34
Важные замечания по обеспечению безопасности ....................................................................... 34
Особенности DVD-проигрывателя............................................................................................... 35
Комплект поставки .................................................................................................................... 37
Особенности DVD дисков........................................................................................................... 37
Элементы управления ............................................................................................................... 42
Подключение ............................................................................................................................ 46
Настройка системы.................................................................................................................... 49
Операции ................................................................................................................................. 54
Устранение неисправностей....................................................................................................... 61
Технические характеристики ..................................................................................................... 63
Page 34

34
Меры предосторожности
Знак молнии используется для предупреждения о наличии высокого напряжения внутри
изделия. Прикосновение к внутренним деталям может повлечь удар током.
Восклицательный знак используется для предупреждения о наличии важных инструкций по
применению.
Для снижения риска поражения электрическим током или пожара, не открывайте корпус
изделия. Обращайтесь к квалифицированному персоналу.
Этот знак означает, что изделие принадлежит к лазерной продукции 1 класса. Лазерный луч
может вызвать повреждение при попадании на тело человека.
Важные замечания по обеспечению безопасности
· Перед тем, как подключить DVD-проигрыватель и начать работу с ним, внимательно прочтите,
пожалуйста, настоящее руководство.
· Не вскрывайте корпус и не прикасайтесь ни к каким внутренним компонентам.
· Когда устройство не используется, выключайте его (при долгих перерывах в работе нужно извлечь
вилку из электрической розетки).
· Не подвергайте устройство воздействию прямых солнечных лучей, держите его вдали от
источников тепла и другого оборудования.
· Защищайте устройство от дождя и влаги.
· Устанавливайте устройство горизонтально; обеспечивайте хорошую вентиляцию, не закрывайте
отверстия, предназначенные для отвода тепла, - перегрев проигрывателя может нарушить его
работоспособность.
· Для чистки корпуса применяйте только мягкую ткань; использовать для этого чистящие средства и
спирт запрещается.
· Настоящее руководство предназначено только для пользователей.
Page 35

35
Особенности DVD-проигрывателя
Спасибо за покупку нашего изделия. Пожалуйста, прочитайте внимательно это руководство прежде,
чем начать подключение и использование изделия. Пожалуйста, сохраните это руководство для
использования в будущем.
DVD плеер SOUNDMAX – это новое поколение домашних устройств, обеспечивающих воспроизведение
высококачественного изображения и звука. Характеристики DVD плеера значительно превосходят
характеристики любого существовавшего ранее оборудования для воспроизведения видео. Он
является наилучшим источником сигнала для систем домашнего кинотеатра и обеспечит Вам
максимальное удовлетворение от просмотра.
· Тонкий загрузочный механизм
· Поддержка носителей: DVD-R/-RW, DVD+R/+RW, CD-R/-RW
· Поддержка формата MPEG4 (DivX)
· Воспроизведение форматов: DVD, DVCD, Super VCD, VCD, HDCD, CDDA, MP3, WMA, Kodak Picture
CD, JPEG
· Прогрессивная развертка
· Видео выходы: композитный, S-video, компонентный (YUV), SCART
· Аудио выходы: коаксиальный, оптический
· Экранное меню на русском и английском языках
· Рабочее напряжение: 110-240 В, 50/60 Гц
Page 36

36
Этот плеер может воспроизводить следующие типы дисков:
Типы дисков Символы Содержание
DVD Аудио + Видео
AC-3 Dolby Digital Аудио
MP3 Аудио
Video-CD
(VCD)
SVCD Аудио + Видео
WMA Аудио
DVCD Аудио + Видео
HDCD Аудио
JPEG Цифровое фото
CDDA Аудио
Kodak Picture
CD
MPEG4 Аудио + Видео
Аудио + Видео
Цифровое фото
Page 37

37
Комплект поставки
Руководство по Пульт дистанционного Аудио-видео кабель
эксплуатации управления
Особенности DVD дисков
· DVD 5 (односторонний однослойный)
· DVD 9 (односторонний двухслойный)
· DVD 10 (двухсторонний однослойный)
· DVD 18 (двухсторонний двухслойный)
· VCD 1.0/1.1/2.0
· CD с изображениями
· MPEG4
· DVCD
· HDCD
· CDDA
· МР3
· CD-R
· CD-RW
Page 38

38
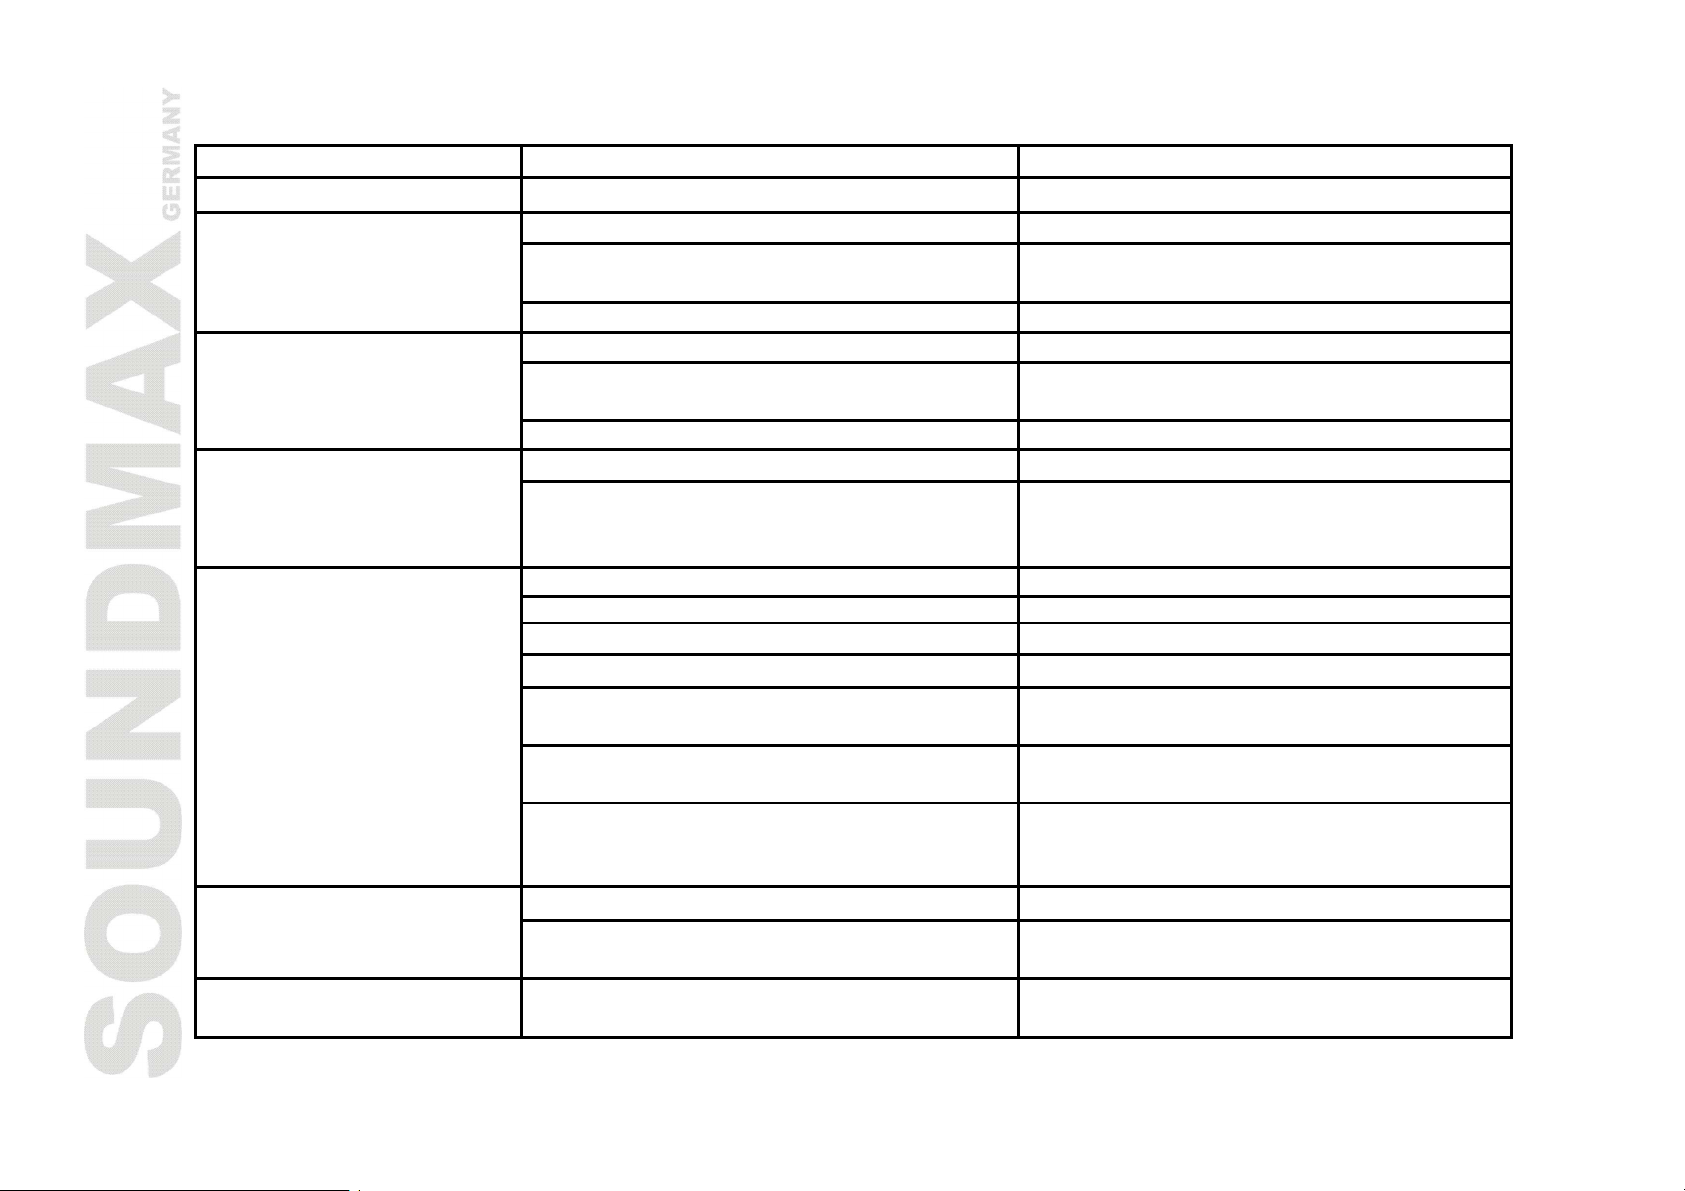
Информация о дисках
ТИП DVD VCD SVCD CD
ФОРМАТ ЗАПИСИ MPEG 2 MPEG I MPEG II DIGIT
Односторонний,
однослойный
ЁМКОСТЬ
РАЗМЕР, см 12/8 12 12 12/8
4,7 Гб – 2 часа
Односторонний,
двухслойный
8,5 Гб – 4 часа
Двухсторонний,
однослойный
9,4 Гб – 4,5
часа
Двухсторонний,
двухслойный
17 Гб – 9 часов
650М
74 мин
650М
45 мин
650М
74 мин
ГОРИЗОНТАЛЬНОЕ
РАЗРЕШЕНИЕ
СУБТИТРЫ до 32 видов - 8 -
ЯЗЫК до 8 2 4 -
ОБОЗНАЧЕНИЕ
$500 линий $240 линий $350 линий
-
Page 39
39
DVD-диски разных производителей обладают различными свойствами, которые обозначаются
следующими символами:
Региональный код и система входа видео Скрытие субтитров
Dolby digital surround Двухканальное стерео
DTS система записи Ограничения
Субтитры
Аудио запись
Формат изображения
Защита производителя
Ракурсы просмотра
Page 40

40
Обращение с дисками
· Берите диски только за края.
· Вставляйте диск надписью вверх.
· Не прикасайтесь к обратной (без надписи) стороне диска.
Хранение
· Не храните диски при ярком свете и в условиях высокой температуры и влажности.
· После окончания просмотра уберите диск в специальную упаковку.
Очистка
· Периодически протирайте диски мягкой тканью от центра к краям.
· Не пользуйтесь обычными моющими средствами.
· Не оставляйте на дисках следов от пальцев, ничего на них не пишите и не приклеивайте.
Page 41

41
Термины, относящиеся к дискам
Заголовок
Обычно изображение или музыка, записанная на DVD-диски, делится на несколько частей, каждая из
которых называется "заголовок".
Раздел (фрагмент)
Минимальный фрагмент изображения или музыки на DVD-диске в пределах композиции, обычно одна
композиция состоит из одного и более разделов, которые для облегчения поиска пронумерованы. Но
на некоторых дисках разделы могут отсутствовать.
Трек
Часть изображения или музыки на диске SVCD, VCD или CD. Для облегчения поиска все треки
пронумерованы.
Сцена
Диски VCD, поддерживающие функцию контроля воспроизведения и содержащие "живое" и статичное
изображение, делятся на части, называемые сценами. Каждая сцена может быть легко найдена по
номеру и может быть отображена на экране. Одна сцена обычно состоит из одного или нескольких
треков.
Функция PBC (SVCD,VCD)
Во время воспроизведения диска SVCD или VCD на экране может быть отображено меню содержимого
диска, которое мы называем функцией контроля воспроизведения или функцией РВС.
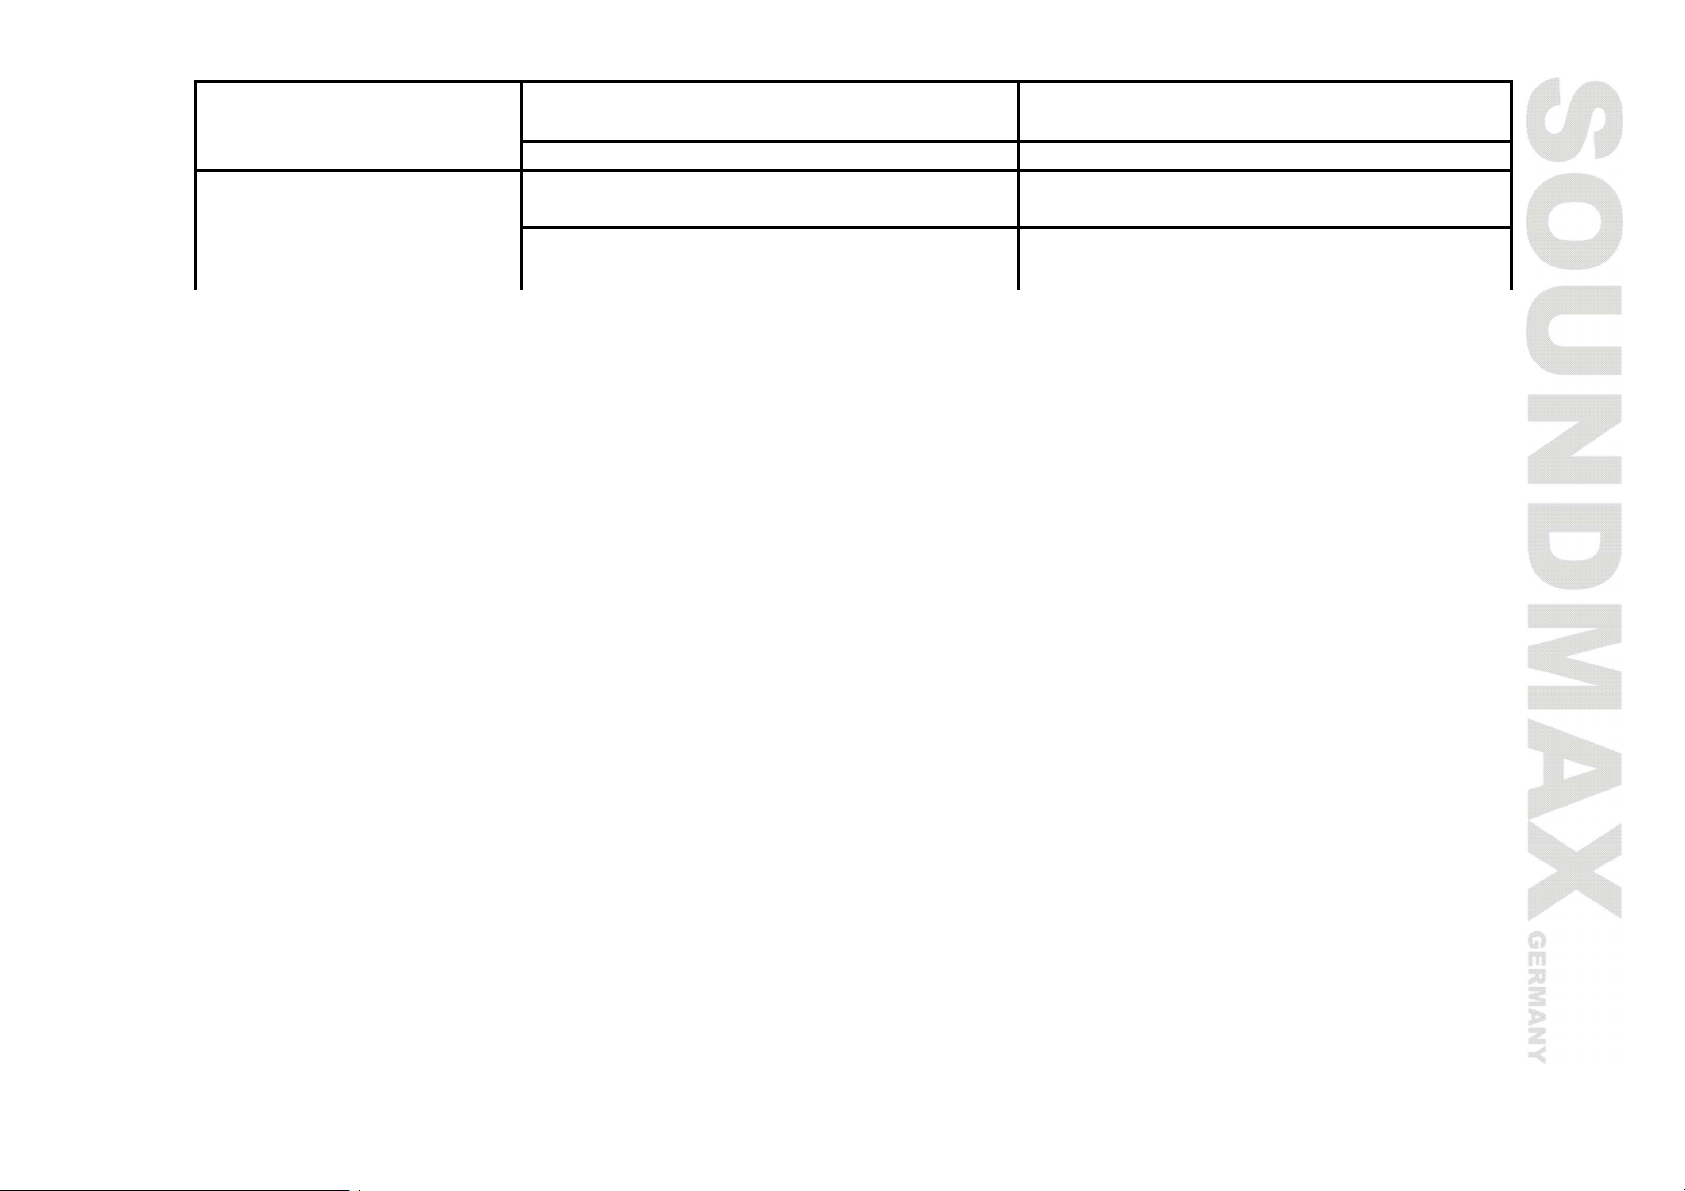
Тип диска Функции
Диски VCD, не поддерживающие
функцию PBC (версия 1.1)
Диски SVCD/VCD, поддерживающие
функцию PBC (версия 2.0)
Воспроизведение как музыки (звука), так и изображения.
Для воспроизведения изображения с VCD может
использоваться меню, которое отображается на экране.
Page 42
42
Элементы управления
Передняя панель
1. Кнопка OPEN/CLOSE
2. Кнопка PLAY/ PAUSE
3. Кнопка STOP
4. Лоток для дисков
5. Дисплей
6. Инфракрасный сенсор
7. Кнопка POWER
Задняя панель
1. Правый и левый аудио разъемы
2. Компонентный разъем
3. Кабель питания
4. Коаксиальный разъем
5. Композитный видео выход
6. Разъем S-Video
7. Оптический цифровой разъем
8. Разъем SCART
9. Разъем Miс
Page 43

43
Пульт дистанционного управления (ПДУ)
1. Кнопка OSD
2. Кнопка STANDBY
3. Кнопка V-MODE (видео режим)
4. Кнопка ANGLE
5. Цифровые кнопки
6. Кнопка PROG
7. Кнопка DEL
8. Кнопка SETUP
9. Кнопка курсора «Вверх»
10. Кнопка курсора «Влево»/Кнопка ECHO -
11. Кнопка TITLE
12. Кнопка ENTER
13. Кнопка RANDOM
14. Кнопка STOP
15. Кнопка FAST BACKWARD
16. Кнопка FAST FORWARD
17. Кнопка L/R/ST
18. Кнопка SLOW
19. Кнопка VOLUME -
20. Кнопка VOLUME +
21. Кнопка MIC. VOL. -
22. Кнопка MIC. VOL. +
23. Кнопка STEP
24. Кнопка MUTE
25. Кнопка PREV
26. Кнопка NEXT
27. Кнопка RETURN
28. Кнопка PLAY/PAUSE
29. Кнопка курсора «Вниз»
30. Кнопка MENU
31. Кнопка курсора «Вправо»/Кнопка ECHO +
32. Кнопка ZOOM
Page 44

44
33. Кнопка REPEAT
34. Кнопка A-B
35. Кнопка TIME
36. Кнопка SUBTITLE
37. Кнопка LANG
38. Кнопка OPEN/CLOSE
39. Кнопка P/N
Page 45

45
Операции с ПДУ
· Вставьте батарейки в соответствующий отсек ПДУ. ПДУ обеспечивает мощность сигнала,
необходимую для приемного датчика на расстоянии до 8 метров и в пределах 30 градусов влево и
вправо.
· Извлеките батарейки, если Вы не собираетесь использовать ПДУ длительное время.
Page 46

46
Подключение
Компонентный
видео вход
вход
видео выход
выход
Внимание: Перед началом подключения DVD-плеера к другому оборудованию, убедитесь, что
электропитание DVD-плеера и другого оборудования отключено.
Подключение к видео выходу
Для данного устройства используется следующая схема подключения.
S-Video Video
Video и S-Video
выходы
Компонентный
SCART
SCART
Композитный видео сигнал
Для соединения композитного видео выхода VIDEO устройства с входом телевизора или монитора
используется аудио-видео кабель с желтыми штекерами на концах.
Page 47

47
S-Video
Выходной разъем S-Video устройства соединяется с таким же входным разъемом на телевизоре или
мониторе посредством кабеля S-Video.
Компонентный видеовыход (YUV)
Для подключения компонентного выхода устройства к входным разъемам на телевизоре или мониторе
используются все три провода аудио-видео кабеля.
Разъем SCART
Для подключения разъема SCART устройства к такому же разъему на телевизоре или мониторе
используется 21-проводной кабель SCART.
Примечания:
· Параметры настройки должны соответствовать тому входному разъему телевизора или монитора, к
которому подключено устройство.
· Подключать сразу все видеовыходы нельзя – это может ухудшить качество изображения.
· Хорошее изображение можно получить только при правильном подключении и корректной
настройке системы (см. пункт «Настройки видео» в разделе «Страница общих настроек»).
Page 48
48
Подключение к аудио выходу
На устройстве имеются аудио выходы аналогового и цифрового звукового сигнала. Аналоговый
сигнал выводится по двуканальному стерео выходу, а цифровой – через оптический и коаксиальный
разъемы.
2 CH аудио вход
2 CH аудио выход
Цифровой аудио вход
Коаксиальный и
оптический выходы
Стерео аудио выход
Для подключения звуковых входов телевизора или аудио-видео усилителя к аудио разъемам
устройства используется пара проводов аудио кабеля (красный штекер соответствует правому каналу,
а белый – левому).
Коаксиальный цифровой аудио выход
Для соединения этого выхода устройства с разъемом на усилителе мощности используется
специальный коаксиальный кабель.
Оптический цифровой выход
Для соединения оптического выхода устройства с оптическим разъемом на усилителе мощности
используется специальный оптический кабель.
Примечание: Параметры настройки должны соответствовать разъему, через который устройство
подключается к внешним устройствам (см. пункт «Настройки видео» в разделе «Страница общих
настроек»).
Page 49

49
Настройка системы
1. Нажмите кнопку SETUP, чтобы войти в меню настроек системы. Для выхода из меню повторно
нажмите кнопку SETUP.
2. При помощи кнопок курсора «влево/вправо» выберите страницу настроек: Страница общих
настроек, Настройки аудио, Настройки Dolby Digital, страница настроек видео, Пользовательские
настройки.
3. Нажмите кнопку курсора «вниз», чтобы войти в выбранное меню настроек.
4. При помощи кнопок курсора «вверх/вниз» выберите настройку, которую хотите отрегулировать.
5. Нажмите кнопку курсора «вправо», чтобы войти в перечень настроек. При помощи кнопок
курсора «вверх/вниз» выберите пункт настройки и нажмите кнопку ENTER, чтобы подтвердить
настройку и вернуться к перечню настроек.
6. Чтобы вернуться к выбору страниц настроек, нажмите кнопку курсора «влево» в перечне
настроек.
Примечание: Некоторые пункты меню, соответствующие предустановленным режимам, помечены
серым и не могут быть выбраны. Введенные установки сохраняются после выключения питания.
Страница общих настроек
· Экран ТВ
Норма/PS: Когда устройство подключено к обычному телевизору, широкоэкранное изображение
воспроизводится на всем экране, но часть его обрезается.
Норма/LB: Когда устройство подключено к обычному телевизору, широкоэкранное изображение
воспроизводится так, что сверху и снизу появляются черные полосы.
Page 50

50
Широкий: Используйте этот пункт, если устройство подключено к широкоэкранному телевизору
· Метка угла
При воспроизведении DVD диска, содержащего сцены, снятые в нескольких ракурсах, выберите
ВКЛ для отображения угла камеры.
· Язык OSD
Выберите язык экранного меню.
· Тексты
Если диск не содержит субтитров, данная функция работать не будет. Если данная опция
установлена в положение ВЫКЛ, нажмите кнопку SUBTITLE на ПДУ, чтобы включить субтитры. По
умолчанию опция установлена на ВКЛ.
· Заставки
Если функция «Заставки» включена, устройство включено, и диск не воспроизводится в течение
нескольких минут, то на экране появляется движущаяся картинка, и через 20 минут устройство
переходит в спящий режим. Вы можете нажать кнопку STANDBY на ПДУ, чтобы устройство вышло
из спящего режима.
· HDCD (не доступно в двухканальном DVD режиме)
Вы можете выбрать режим двухканального фильтра 1х или 2х. По умолчанию опция отключена.
· Посл. сохр.
При включении данной функции устройство запомнит истекшее время диска, когда он
воспроизводился в последний раз. В следующий раз воспроизведение этого диска начнется с
момента времени, сохраненного в памяти устройства.
Настройки аудио
Page 51
51
Наст. динам.
· Смешивание
Лев/Пр: Аудио сигнал будет воспроизводиться через левый и правый канал, даже если источник
сигнала имеет пятиканальный формат.
Стерео: Аудио сигнал будет воспроизводиться в режиме стерео, даже если источник сигнала
имеет пятиканальный формат.
5.1 Кан: Отключение функции смешивания. Если устройство подключено к пятиканальному
усилителю, выберите этот пункт (только для 5.1 канального устройства).
Наст. Spdif
ВЫК SPDIF: отсутствует цифровой выходной сигнал (коаксиальный/оптический выход отключен),
задействован только аналоговый аудио выход.
SPDIF RAW: декодирование на цифровом входе усилителя отсутствует.
SPDIF PCM: в усилителе должна поддерживаться функция PCM декодирования или Dolby digital
декодирования.
Настр. караоке
Вы можете включить или отключить микрофон, настроить разрешение, громкость микрофона и
эхо.
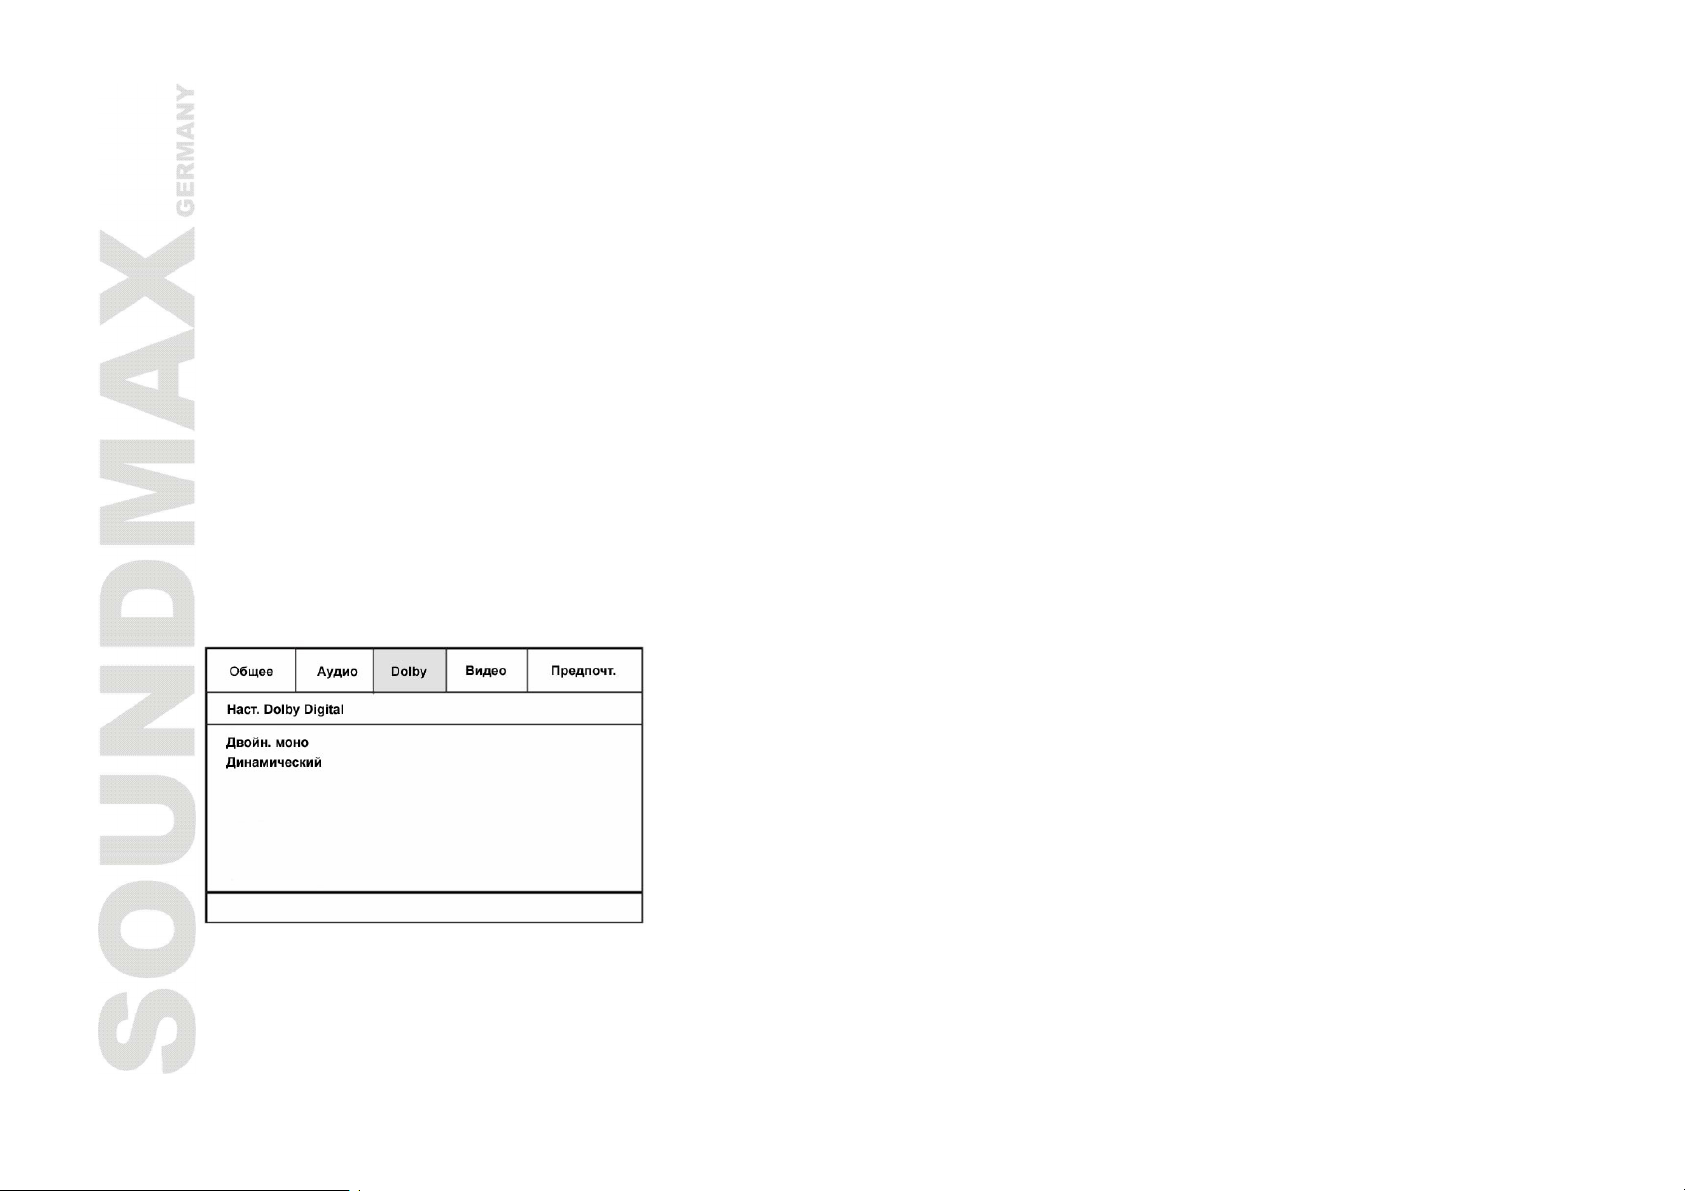
Настройки Dolby Digital
· Двойн. моно
Стерео – выходной стерео сигнал,
Л-моно – выходной сигнал левого канала,
Page 52

52
П-моно – выходной сигнал правого канала,
Смеш. моно – усредненный выходной сигнал левого и правого каналов.
· Динамический
При просмотре в ночное время программ с высоким динамическим диапазоном звука выбор этого
режима позволит Вам установить такой формат обработки звука, который позволит сохранить
качество и детали звукового сопровождения. Это даст Вам возможность не беспокоить остальных
членов семьи и сохранить высокое качество звука.
Страница настроек видео
· Компонентный
YUV: установка для аналогового компонентного видеовыхода при подключении к Y/U/V
компонентному разъему.
RGB: установка видеовыхода в формат Красный/Зеленый/Синий при подключении к SCART
разъему.
VGA: установка видеовыхода при подключении к VGA разъему.
Если устройство подключено к оборудованию, воспроизводящему композитный видео сигнал,
выберите «ВЫКЛ».
· Режим ТВ
Вы можете выбрать прогрессивную или чересстрочную развертку в режиме «YUV» или «RGB».
· Резкость, Яркость, Контраст
Вы можете отрегулировать резкость, яркость и контраст в соответствии с Вашими предпочтениями.
Page 53

53
Пользовательские настройки
Цифровые настройки
· Тип ТВ
Данное устройство подходит для всех разновидностей телевизионных систем. Вы можете выбрать
PAL, NTSC или Авто.
PAL: эта система используется в Китае, Европе, Гонконге и пр.
Авто: система ТВ автоматически переключается в соответствии с системой, в которой записан
диск.
NTSC: эта система используется в США, Тайване, Японии и пр.
· Аудио, Субтитры, Меню диска
Эти параметры могут быть изначально установлены в соответствии с Вашими предпочтениями.
Если установленные Вами параметры поддерживаются содержанием диска, то воспроизведение
будет происходить с учетом Ваших настроек. В противном случае будут использоваться установки
диска, заданные по умолчанию. При воспроизведении эти установки могут быть изменены
соответствующими нажатиями кнопок AUDIO и SUBTITLE.
· Контр. дост.
Эта функция предназначена для контроля родителями за содержанием дисков при их
воспроизведении и защищает Ваших детей от сцен насилия и эротики. Диск, уровень которого
выше, чем установленный с помощью данной функции, не будет воспроизведен.
· Пароль
Изменение пароля. Заводской пароль по умолчанию – 137900. Вы можете установить собственный
пароль. Если Вы забыли собственный пароль, Вы можете использовать заводской пароль 137900.
· По умолч.
Возврат к заводским настройкам.
Page 54

54
Операции
OPEN/CLOSE (ОТКРЫТЬ/ЗАКРЫТЬ ЛОТОК ДИСКА)
· Нажмите кнопку OPEN/CLOSE, лоток для дисков откроется. Поместите диск в лоток надписью
вверх. Нажмите кнопку OPEN/CLOSE повторно, чтобы закрыть лоток для дисков, и устройство
автоматически начнет воспроизведение. (Для дисков МРЗ и JPEG функция автоматического
воспроизведения отсутствует.)
POWER (ПИТАНИЕ)
· При воспроизведении нажмите кнопку POWER, чтобы отключить питание устройства. Нажмите на
кнопку POWER на панели или на ПДУ, чтобы включить питание устройства.
Внимание: В режиме ожидания питание отключается не полностью. Если устройство не будет
использоваться длительное время, отключите питание кнопкой POWER на передней панели.
TITLE (ЗАГОЛОВКИ)
· При воспроизведении DVD диска нажмите кнопку TITLE для воспроизведения главного заголовка.
V-MODE (ВИДЕО РЕЖИМ)
· Нажмите кнопку V-MODE для переключения на видео режим.
SUBTITLE (СУБТИТРЫ)
· При воспроизведении DVD диска с субтитрами на нескольких языках, нажимая кнопку SUBTITLE
можно изменять их циклически и выбрать требуемый.
ANGLE (УГОЛ)
· При воспроизведении DVD диска со сценами, записанными под более чем одним углом зрения,
нажимайте кнопку ANGLE для выбора требуемого угла.
L/R/ST (ЛЕВЫЙ/ПРАВЫЙ/СТЕРЕО)
· При воспроизведении Super-VCD (SVCD), VCD, CD дисков с многоканальным аудио сигналом
нажмите кнопку L/R/ST для выбора левого или правого каналов, стерео или смешанного аудио
выхода.
Page 55

55
MENU (МЕНЮ)
· При воспроизведении DVD диска нажмите кнопку MENU один раз для перехода к подменю.
Нажмите эту кнопку еще раз для возврата в главное меню.
· При воспроизведении SVCD, VCD2.0 дисков нажмите кнопку MENU, появится меню диска. В меню
вы можете выбрать содержание. После загрузки диска плеер автоматически высветит меню.
Нажмите кнопку MENU, на телевизионном экране появится надпись PBC OFF (Выключено). В этом
режиме меню не появляется, вы можете выбрать номер трека, нажав соответствующую цифровую
кнопку. В форматах VCD1.1, CDDA и Mp3 PBC меню отсутствует.
PLAY/PAUSE (ВОСПРОИЗВЕДЕНИЕ/ПАУЗА)
· При воспроизведении диска нажмите кнопку PLAY/PAUSE для приостановки воспроизведения;
нажмите повторно эту кнопку для возобновления воспроизведения.
NAVIGATION (НАВИГАЦИЯ)
· Используйте кнопки курсора для перемещения по меню (подменю).
ENTER (ВВОД)
· Нажимайте кнопку ENTER для подтверждения выбранной опции.
STOP (СТОП)
· При воспроизведении DVD, SVCD, VCD, CD дисков, нажмите кнопку STOP один раз - устройство
запомнит точку остановки. Нажмите кнопку PLAY для продолжения воспроизведения. Нажмите
кнопку STOP повторно для полной остановки воспроизведения.
STEP (ШАГ)
· При воспроизведении DVD, SVCD, VCD дисков нажмите кнопку STEP один раз, будет воспроизведен
следующий кадр. Нажмите кнопку PLAY для возврата к воспроизведению.
F.FWD►►/REV◄◄ (ПРОКРУТКА ВПЕРЕД/НАЗАД)
· Нажмите эту кнопку для быстрой прокрутки вперед.
· Нажмите эту кнопку для быстрой прокрутки назад.
PREV/NEXT (ПРЕДЫДУЩИЙ/СЛЕДУЮЩИЙ ТРЕК)
Page 56

56
· При воспроизведении DVD дисков нажмите кнопку PREV для перехода к предыдущему заголовку.
· При воспроизведении SVCD, VCD, CD дисков нажмите кнопку PREV для перехода к предыдущему
треку.
· При воспроизведении DVD дисков нажмите кнопку NEXT : для перехода к следующему заголовку.
· При воспроизведении SVCD, VCD, CD дисков нажмите кнопку NEXT : для перехода к следующему
треку.
PROG (ПРОГРАММА)
· Если диск содержит два или более треков, разделов или заголовков, с помощью кнопки PROGRAM
Вы можете запрограммировать порядок воспроизведения. При нажатии этой кнопки Вы входите в
меню программирования.
· С помощью цифровых кнопок введите номер трека, раздела или заголовка. Если записей более 10,
нажмите кнопку NEXT для продолжения программирования (максимально возможно
запрограммировать 20 записей). Используйте кнопки курсора для перемещения курсора на СТАРТ.
Нажмите кнопку PLAY для запуска воспроизведения программы.
Примечание: Для МРЗ дисков программирование невозможно.
SLOW (ЗАМЕДЛЕННОЕ ВОСПРОИЗВЕДЕНИЕ)
· Нажмите кнопу SLOW, чтобы включить режим замедленного воспроизведения. Нажимайте эту
кнопку, чтобы изменить скорость воспроизведения.
SETUP (УСТАНОВКИ)
· Нажмите кнопку SETUP для входа и выхода из меню настроек устройства.
N/P
· Нажмите кнопку N/P для выбора режима видео PAL/Auto/NTSC.
REPEAT (ПОВТОР)
· Нажмите кнопку REPEAT для повторного воспроизведения трека, раздела, заголовка или всего
диска.
· При воспроизведении DVD диска нажимайте кнопку REPEAT; на экране Вам будут предложены
операции в следующем порядке: повтор раздела => повтор заголовка => повтор всего диска =>
отмена повтора.
Page 57

57
· При воспроизведении SVCD, VCD, CD диска предлагаются операции в следующем порядке: повтор
трека => повтор всего диска => отмена повтора.
· При воспроизведении МРЗ диска предлагаются операции повтора в следующем порядке: повтор
папки => один => повтор одного => папка.
А-В
· Нажмите кнопку А-В для выбора начальной точки (А). Нажмите повторно кнопку А-В для выбора
конечной точки (В).
· Нажмите А-В кнопку в третий раз для отмены повтора и возврата к обычному воспроизведению.
LANGUAGE (ЯЗЫК)
· При воспроизведении DVD диска с несколькими языками аудио, нажмите кнопку LANGUAGE для
выбора требуемого языка.
ZOOM (МАCШТАБ)
· Во время воспроизведения DVD, SVCD, VCD дисков нажмите кнопку ZOOM для изменения размеров
изображения.
· Используйте кнопки курсора для перемещения по изображению. При уменьшении размера
изображения перемещение по изображению невозможно.
VOLUME (ГРОМКОСТЬ)
· Нажимайте кнопки VOL +/- для увеличения или уменьшения громкости звука.
MICROPHONE VOLUME (ГРОМКОСТЬ МИКРОФОНА)
· Нажимайте кнопки MIC.VOL +/- для увеличения или уменьшения громкости микрофона.
MUTE (ОТКЛЮЧЕНИЕ ЗВУКА)
· Нажмите кнопку MUTE; звук перестанет воспроизводиться, и на экране появится соответствующий
символ. Нажмите кнопку MUTE повторно для восстановления звука; на экране отобразится надпись
MUTE OFF.
OSD
· Нажмите кнопку DISPLAY, на экране появится информация о диске.
Page 58

58
TIME
· Нажмите кнопку TIME, чтобы установить текущее время.
S.EFFECT (ЭФФЕКТ «ЗВУК ВОКРУГ») (Данная функция является опцией)
· Нажмите кнопку S.EFFECT, чтобы изменить эффект «Surround sound» («Звук вокруг»).
VIEW (ПРОСМОТР)
· Нажмите кнопку VIEW, чтобы войти в меню для просмотра содержимого диска.
EQ (ЭКВАЛАЙЗЕР) (Данная функция является опцией)
· Нажмите кнопку EQ, чтобы выбрать режим эквалайзера.
DEL (УДАЛИТЬ)
· Нажмите кнопку DEL, чтобы удалить ошибочно введенные цифры при программировании.
RETURN (ВОЗВРАТ)
· При воспроизведении дисков super VCD, VCD2.0 и PCB нажмите кнопку RETURN, чтобы вернуться к
меню VCD. Эта функция не работает если выключен режим PBC.
RANDOM
· Нажмите эту кнопку для воспроизведения содержимого диска в произвольном порядке.
ECHO+/- (ЭХО +/-)
· Нажмите кнопку ECHO- (►), чтобы увеличить значение эха.
· Нажмите кнопку ECHO+ (◄), чтобы уменьшить значение эхо.
Page 59

59
КАРАОКЕ
· Караоке диск – это диск в формате DVD VCD, на котором записана музыка и субтитры,
показывающие пользователю, в какой момент нужно начинать петь тот или иной фрагмент песни.
Для пения необходимо использовать один или два микрофона (не входят в стандартную
комплектацию).
· Подключите микрофоны в разъем MIC, расположенный на задней панели DVD плеера.
· Нажмите кнопку вверх/вниз для настройки уровня громкости звука микрофонов.
· Нажмите кнопку вверх/вниз для настройки уровня эхо.
· Вставьте караоке диск в DVD-плеер, воспроизведение начнется автоматически.
ВОСПРОИЗВЕДЕНИЕ MP3
· MP3 представляет собой третий формат сжатия звука международного стандарта MPEG, который
сжимает звук в 12 раз. Используя формат MP3, на один диск может быть записано до 600 минут
музыки с качеством, близким к качеству компакт-дисков.
· Существует множество различных форматов сохранения песен формата MP3. Обычно один диск
MP3 содержит несколько папок, а каждая папка содержит несколько файлов (песен).
· Нажатием на кнопки курсора вверх/вниз выберите нужную папку, а затем нажмите кнопку PLAY,
чтобы войти в эту папку. Нажмите повторно кнопку PLAY, чтобы воспроизвести выбранную песню.
Воспроизведение диска с изображениями
· Нажмите кнопку STOP, чтобы войти в папку с файлами.
· Используйте кнопки курсора вверх/вниз для выбора нужного изображения.
· Нажмите кнопку ENTER для воспроизведения выбранного изображения и перехода к SLIDE SHOW.
Кнопки выполняют следующие функции:
[NEXT (СЛЕДУЮЩИЙ)]: следующая картинка;
[PREV (ПРЕДЫДУЩИЙ)]: предыдущая картинка;
[UP (ВВЕРХ)]: зеркальное отражение картинки вверх;
[DOWN (ВНИЗ)]: зеркальное отражение картинки вниз;
[LEFT (ВЛЕВО)]: поворот картинки на 90 градусов против часовой стрелки;
Page 60

60
[RIGHT (ВПРАВО)]: поворот картинки на 90 градусов по часовой стрелке;
[ZOOM (МАСШТАБ)]: изменение масштаба изображения;
[FAST FORWARD (ПРОКРУТКА ВПЕРЕД)]: увеличение масштаба изображения;
[FAST REWIND (ПРОКРУТКА НАЗАД)]: уменьшение масштаба изображения;
[UP/DOWN/LEFT/RIGHT (ВВЕРХ/ВНИЗ/ВЛЕВО/ВПРАВО)]: перемещение центра увеличенного
изображения.
Выберите ВЫХОД для выхода из меню инструкций.
Page 61
61
Устранение неисправностей
Неправильн
ая настройка звука.
Выберете соответствующую настройку.
Иногда при ускоренном воспроизведении
Диск
не вставлен.
Вставьте диск.
Диск поврежден.
Замените или очистите диск.
Неверное направление ПДУ на сенсорные
Признак неисправности Причина неисправности Устранение неисправности
Нет электропитания Силовой кабель не включен в розетку. Включите силовой кабель в розетку.
Нет изображения
Нет звука
Диски не читаются
Не работает ПДУ
Неправильная настройка ТВ видео. Выберите подходящую настройку.
Настройка не соответствует реальному
подключению.
Видео кабель подключен плохо. Подключите кабель заново.
Плохо подключен аудио кабель. Подключите кабель заново.
Подсоединенные устройства не
включены.
Диск загрязнен. Почистите диск.Искажение изображения
Режим ускоренного воспроизведения.
Диск вставлен неправильно. Переверните диск.
Диск загрязнен. Очистите диск.
Конденсат на лазерной головке плеера. Оставьте DVD-плеер без диска на один
На дисплее экранное меню. Нажмите на кнопку SETUP, чтобы
Включен режим контроля. Войдите в меню ПРЕДПОЧТИТЕЛЬНЫЕ
Микрофон не подключен. Подключите микрофон.Микрофон не работает
Низкий уровень громкости звука
микрофона.
экраны системы.
Выберите подходящую настройку.
Включите питание подсоединенных
устройств.
появляются шумы в изображении. Это
нормально.
час включенным.
закрыть меню.
НАСТРОЙКИ и выключите функцию
КОНТРОЛЯ.
Отрегулируйте уровень громкости звука
микрофона.
Используйте ПДУ под углом 30° к
сенсорному экрану плеера.
Page 62
62
Некоторые функции
системы не работают
Расстояние от ПДУ до сенсорных экранов
системы превышает 8 метров.
Разряжены батарейки ПДУ. Замените батарейки.
Диск записан некорректно. Подождите 5-10 секунд и система
Нажата неверная последовательность
кнопок.
Используйте ПДУ на расстоянии 8 м.
возвратиться в нормальное состояние.
Повторите операцию еще раз в
соответствии с руководством.
Page 63
63
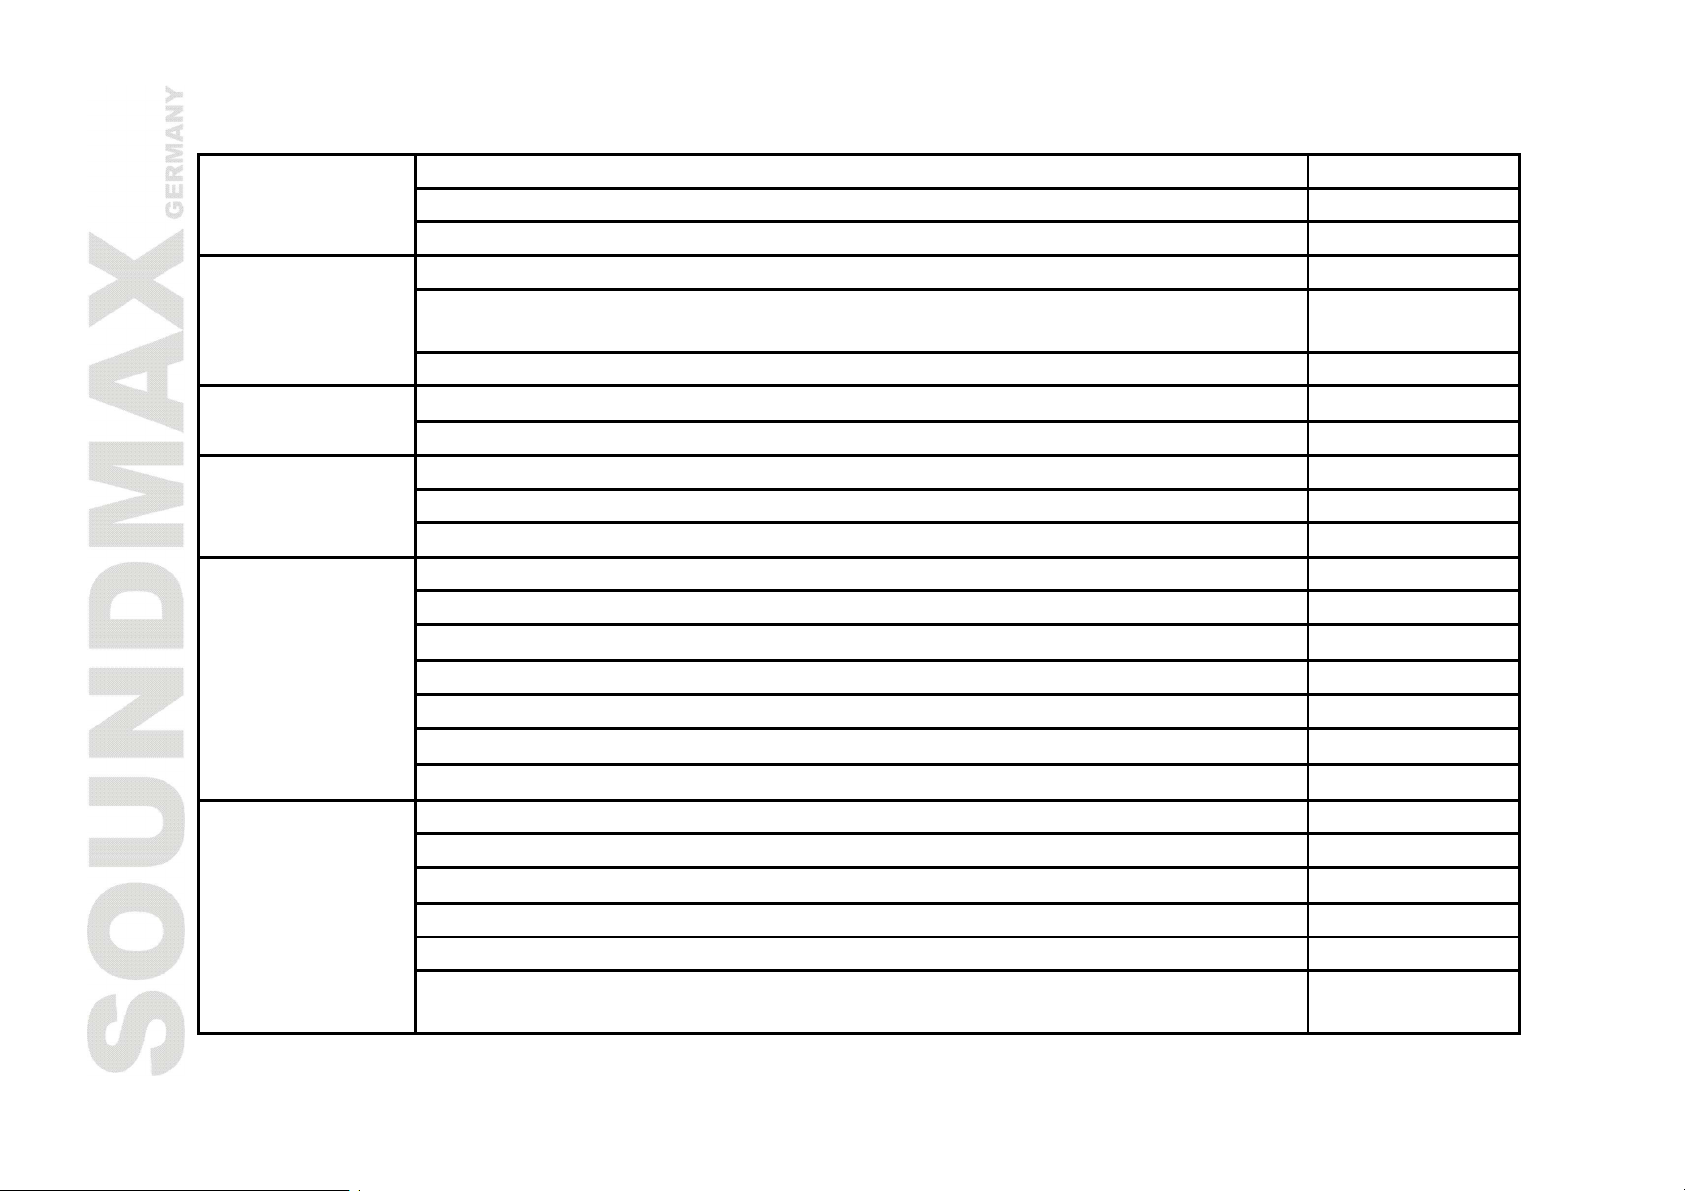
Технические характеристики
Совместимость с
Механизм загрузки дисков Ультратонкий
Внешний вид
форматами
Передняя панель Черный
Цвет Черный
Поддержка форматов дисков: DVD,DVD-R/-RW/+R/+RW, CD-R/-RW +
Воспроизведение форматов: DVD, DVCD, SVCD, VCD, CDDA, MP3,
HDCD, JPEG, KODAK PICTURE CD
Поддержка DVD дисков всех регионов +
+
Аудио
Видео
Терминалы
Функции
Встроенный декодер Dolby Digital +
Выход DTS Digital +
Воспроизведение формата MPEG4 (DivX) +
Прогрессивная развёртка +
Поддержка NTSC/PAL +
Композитный видеовыход +
S-Video выход +
Компонентный видеовыход (YUV) +
SCART выход +
Стерео аудио выход +
Коаксиальный цифровой аудио выход +
Оптический цифровой аудио выход +
Скринсейвер +
Изменение масштаба изображения +
Защита от детей +
Выбор угла просмотра эпизодов +
Многоязычное экранное меню +
Питание от сети
~110-240 В,
50/60 Гц
Page 64
64
Дополнительные
параметры
* Воспроизведение некоторых дисков DivX может оказаться невозможным в зависимости от их
конфигурации и параметров, а также условий записи.
Технические характеристики могут быть изменены заводом изготовителем без
предварительного уведомления.
Пульт дистанционного управления, аудио-видео кабель RCA
+
 Loading...