

Page 1
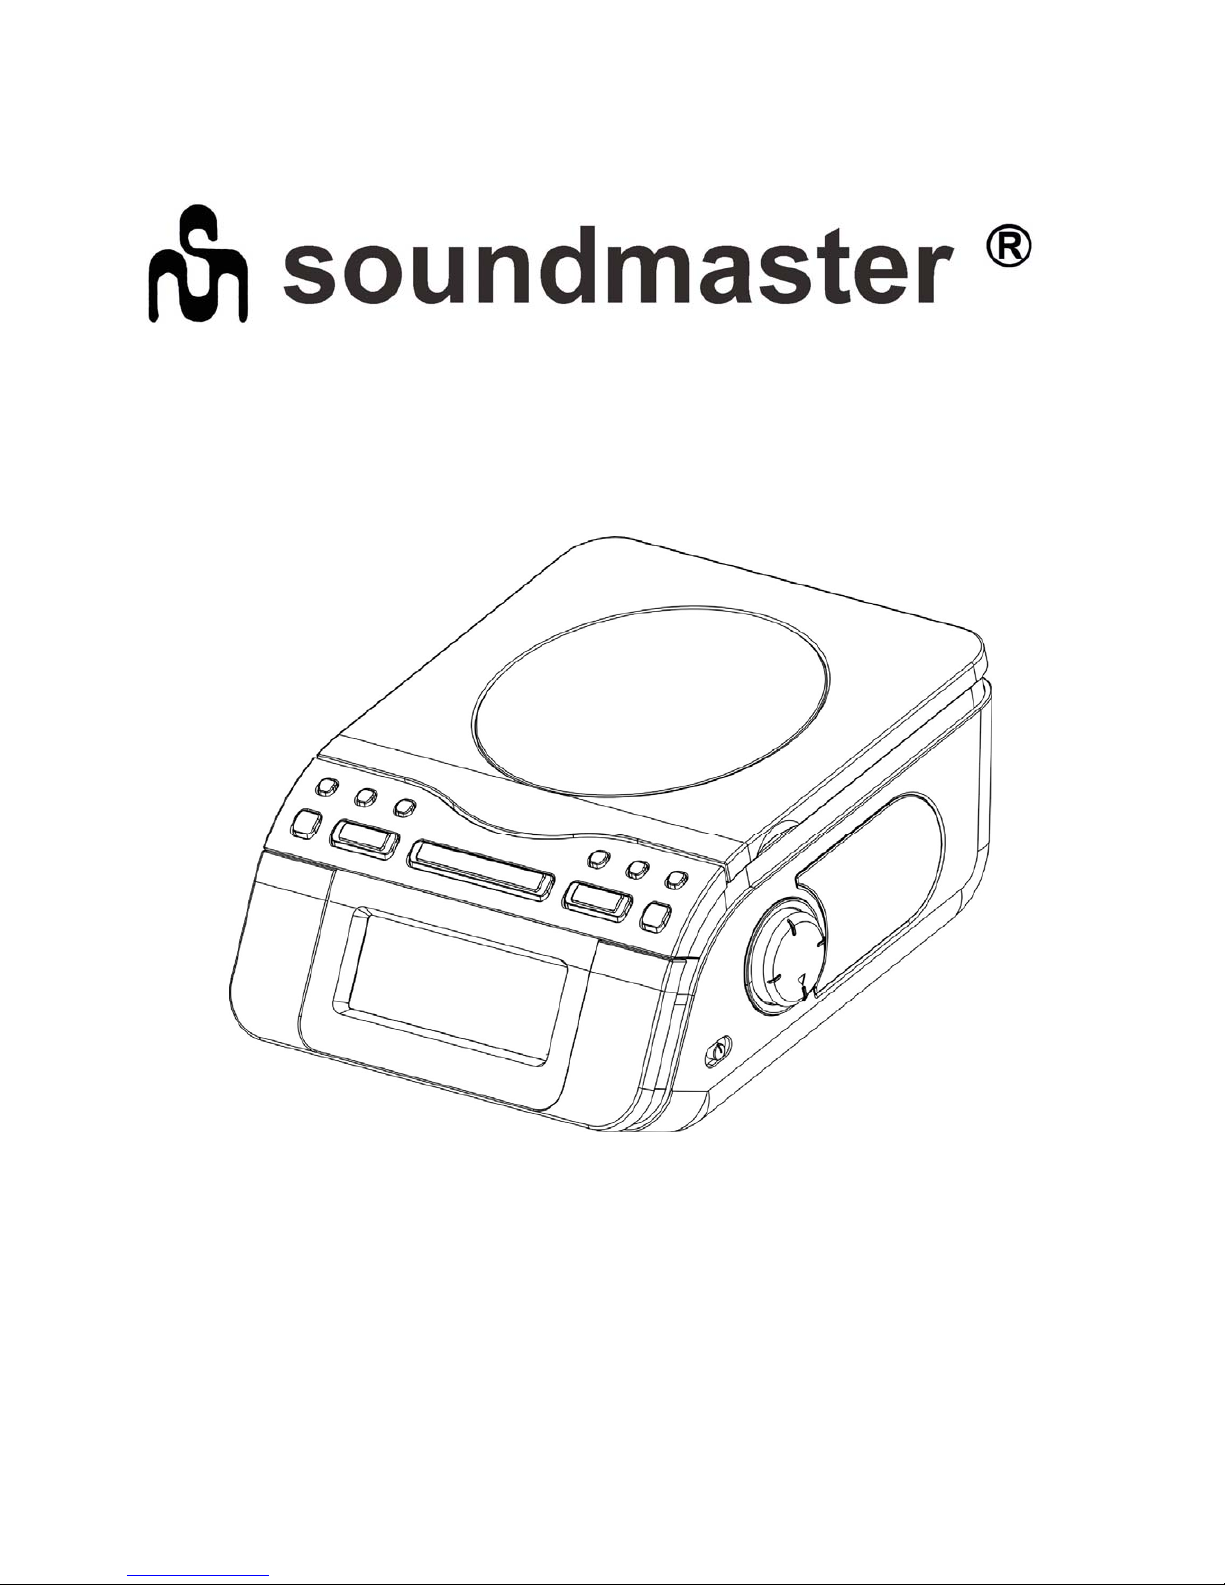
Modell URD-800
Bitte vor Inbetriebnahme sorgfälltig lessen
Read instructions carefully before using the unit
Avant de metre en service votre appareil, lisez attentivement ce instructions
Page 2
ENGLISH
Page 3

3
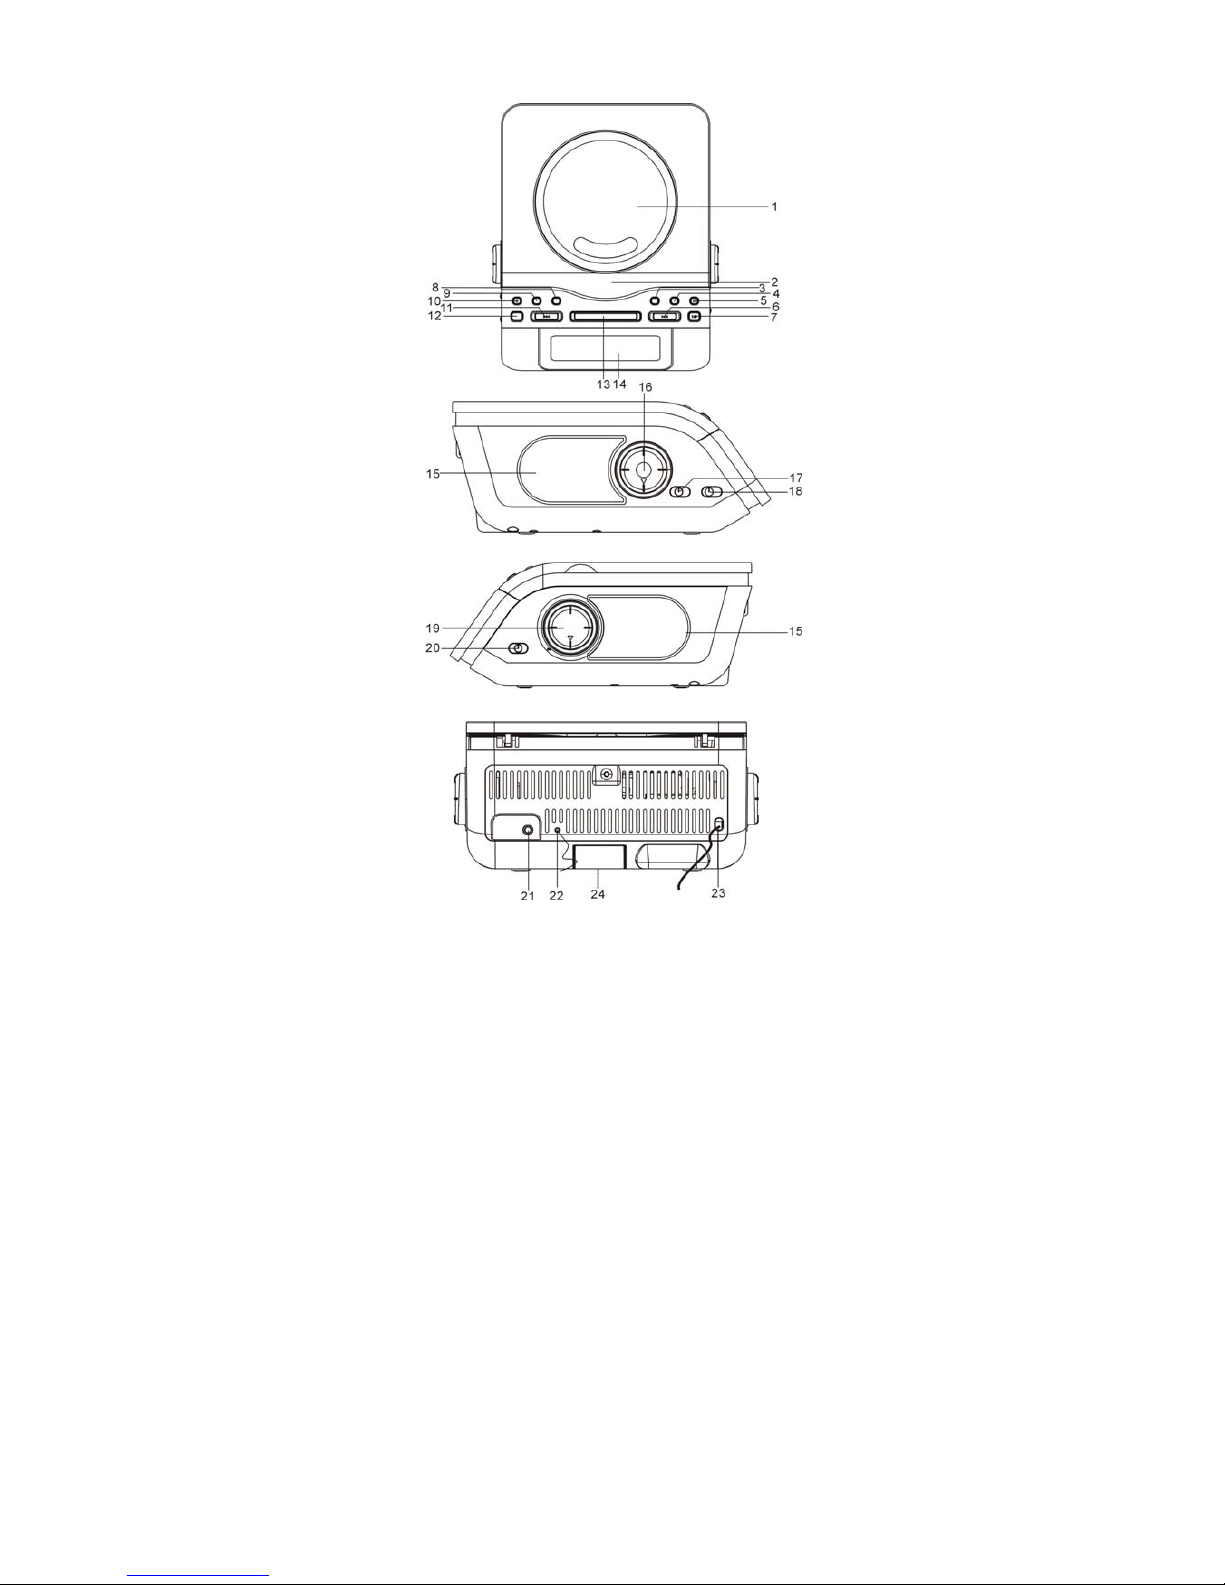
1. CD COMPARTMEN
2. SNOOZE BUTTON
3. PROGRAM BUTTON
4. CD REPEAT/RANDOM BUTTON
5. CD STOP/CLOCK ADJ. BUTTON
6. CD SKIP UP BUTTON
7. CD PLAY/PAUSE BUTTON
8. AL. 2 SET BUTTON
9. AL. 1 SET BUTTON
10. POWER/AL. OFF BUTTON
11. CD SKIP DOWN BUTTON
12. CD DISPLAY BUTTON
13. SLEEP BUTTON
14. LED DISPLAY
15. SPEAKERS
16. VOLUME CONTROL
17. DIMMER SWITCH
18. FUNCTION SWITCH
19. TUNING CONTROL
20. BAND SWITCH
21. PHONES JACK
22. FM ANTENNA WIRE
23. AC POWER CORD
24. BATTERY COMPARTMENT
MAINS POWER
Plug the AC MAINS POWER PLUG into the standard household AC 230V 50Hz.
Warning: Before insert the MAINS POWER PLUG into the household receptacle, please make
sure the AC VOLTAGE SELECTOR MUST be set to your local voltage.(optional)
BATTERY STANDBY
Connect a 9V battery (note: not supplied) into the 9V BATTERY COMPARTMENT to keep the
clock running and memorizing when the mains power is disconnected.
HEADPHONE SOCKET
This is a facility specially provided for private listening. Connect a 3.5mm Headphone Jack Plug
of your Headphones/Earphones (note: not supplied) into the HEADPHONE SOCKET, and
adjust the ROTARY VOLUME CONTROL to a desired level. During the use of headphones/
earphones, the built in speakers are automatically disconnected.
DIMMER SWITCH - TO CONTROL CLOCK BRIGHTNESS
Set the DIMMER SWITCH to HIGH or LOW location to control the brightness of the clock LED
display.
TIME SETTING
When the unit first time connect to the AC power the display will show 12:00 (CPU defaulted at
12 hr.)
1. Press and hold the CLOCK ADJ. button about 3 second .
2. Clock will change to 24:00 show on the display.
If you want change back to 12:00 hr. format please repeat step 1.
While the display is flashing, press the SKIP UP BUTTON to set the hour and press SKIP
DOWN BUTTON to set the minute. Then press the CD ST OP/CLOCK ADJ. BUTTON to confirm
the time setting (press CD STOP/CLOCK ADJ. BUTTON to set again).
Note: If the PM indicator is “ON” the hour displayed is PM.
Page 4

4
ALARM OPERATION
ALARM TIME SETTING
Press the AL. 1 or AL. 2 SET BUTTON, the hour digit flashing on the display. And then press
SKIP UP OR DOWN BUTTON to desired hour(same as time setting), when the hour digit
flashing, press the AL. 1 or AL. 2 SET BUTTON once again to finish the alarm time setting.
Press the POWER /AL. OFF button to turn off the alarm while the alarm sounds.
ALARM SETTING
1. Press the POWER/AL. OFF BUTTON to switch off the CD or RADIO playing.
2. Set the FUNCTION SWITCH to BUZZ position.
3. To the set alarm time, alarm (buzz) will sound automatically. To pause the alarm temporarily
and sleep another 9 minutes, press the SNOOZE BUTTON, the buzz stops and resume in 9
minutes.
4. To stop the alarm a nd switch to CD or Radio playback, pr ess the POWER/AL . OFF BUTT ON,
set the FUNCTION SWITCH to CD or RADIO position.
SLEEP FUNCTION
To switch off the CD or RADIO playing automatically in any time from 15 minutes to 90 minutes
before you fall asleep, start RADIO or CD playback, press the SLEEP BUTTON to set sleep
time to 15 minutes or 90 minutes, the “ SLEEP ” appear on the display.
After 15 minutes or 90 minutes, the playback will stop automatically, “ SLEEP ” disappear.
To resume playing, press SLEEP BUTTON once again.
To stop sleep, press the SLEEP BUTTON until the “ SLEEP ” disappear on display.
WAKE UP TO MUSIC (CD or radio)
1. Set the alarm time as ALARM TIME SETTING described.
2. Set the FUNCTION SWITCH to CD or RADIO position.
3. Tune to desired broadcasting program follow steps of RADIO OPERATION. Or Start CD
playing follow steps in CD OPERATION.
4. To the pre-set alarm time, RADIO or CD turns on automatically. To pause the music
temporarily and sleep another 9 minutes, press the SNOOZE BUTTON.
5. Press the POWER/AL. OFF BUTTON to terminate the music playing.
RADIO OPERATION
1. Press the POWER/AL. OFF button.
2. Set the FUNCTION SWITCH to the RADIO position.
3. Set the BAND SELECTOR to the desired band: AM/FM/FM ST..
4. Tune in to the desired station by turning the TUNING CONTROL.
5. Adjust the volume level via the VOLUME CONTROL.
6. Extend the FM ANTENNA WIRE or adjust the direction and position of the whole
unit to obtain the best possible radio reception.
CD OPERATION
LOADING A DISC
1. Set the FUNCTION switch to CD position.
2. Open the CD door (lift the compartment to open).
3. Place an audio CDs into the tray with the label side facing up.
4. Close the CD door. The total number of tracks will appear in the display after 5 seconds.
5. To remove the CDs, open the CD compartment lid, grasp the CDs by its edges, and
carefully take it out.
Page 5

5
Note:
y To ensure good system performance; wait until the disc tray completely reads the disc before
proceeding.
y If no disc loaded into the compartment, or the disc is placed upside down, the display w ill show
00.
PLA YING A COMPA CT DISC
1. Press PLAY/PAUSE button to start playback.
The playback starts from track 1, the track number will flash on and off on the display.
To interrupt playback, press PLAY/PAUSE button.
To resume playback, press PLAY/PAUSE button again.
2.
To stop playback, press STOP/CLOCK ADJ. button, The display will show all the tracks on
the disc.
SELECTING A DESIRED TRACK/PA SSAGE
To select a desired track
y Press SKIP UP/DOWN button repeatedly in stop mode or during playing until the desired
track appears on the display.
y Press PLAY/PAUSE button to start play.
To search for a particular passage during playback ( track scanning at high speed)
Press and hold SKIP UP/DOWN button to scan the current playing track at high speed until
desired point (passage), then release the button, playback will start again from this point.
PROGRAM TRACKS
Program tracks of disc are possible when playback is stopped. Up to 20 tracks can be stored in
the memory in any order.
1. In stop mode, press PROGRAM button to enter program setting, the “ PROG ” will flash and
the P01 will show on the display.
2. Press SKIP UP button to select the first desired track to be programmed.
3. Press PROGRAM button to enter. The display changes to show P02.
4. Repeat steps 2 & 3 to store other desired tracks until all tracks programmed.
5. Press PLAY/PAUSE button to start playback in the order you programmed.
6. Press STOP button to stop program playback.
To Erase the Memory (Program)
To clear the memory (program), you may have two ways:
1. Press STOP/CLOCK ADJ. button when the disc stopped, or
2. Open the CD compartment lid, program will be erased.
REPEAT PLAY
You can play one track or all tracks on the disc repeatedly.
To Repeat a Single Track
1. Press CD REPEAT/RANDOM BUTTON once in play, The “ REP ” will flash on and off. The
current track will be played over and over again till you press STOP/CLOCK ADJ. button.
2. To cancel repeat play, press REPEAT button twice again. The “ REP ” goes off.
Page 6

6
To repeat all the Tracks
1. Press CD REPEAT/RANDOM BUTTON twice in play, The “ REP ” will be steady on. All
tracks on the disc will be played over and over again till you press STOP/CLOCK ADJ.
button.
2. To cancel repeat play, press REPEAT/RANDOM button once again. The “ REP ” goes off.
Note: Repeat function also can be done in stop mode.
RANDOM PLAY
Press the CD REPEAT/RANDOM BUTTON three times during play, “RAN” appears
on the display, playback start randomly from this track, then select another in
random order until all tracks are played over and then stop. To cancel random
function, press the REPEAT/RANDOM button until the “ RAN ” disappear on CD
display.
SPECIFICATIONS
Power Requirement AC 230V~50 Hz
DC 9V for backup
Power consumption
14 Watts
Operation temperature +5ºC - +35ºC
RECEIVER SECTION
Receiving Bands AM/FM
Tuning Range AM 530 - 1600 KHz
FM 87,5 - 108 MHz
COMPACT DISC SECTION
Optical Pickup 3-Beam Laser
Frequency Response
100Hz - 16KH z
Specifications are subject to change for performance improvement without notice.
 Loading...