

Page 1
DEUTSCH
NORSK
ENGLISH
DANSK
FRANÇAIS
SVENSKA
NEDERLANDS
ČEŠTINA
ITALIANO
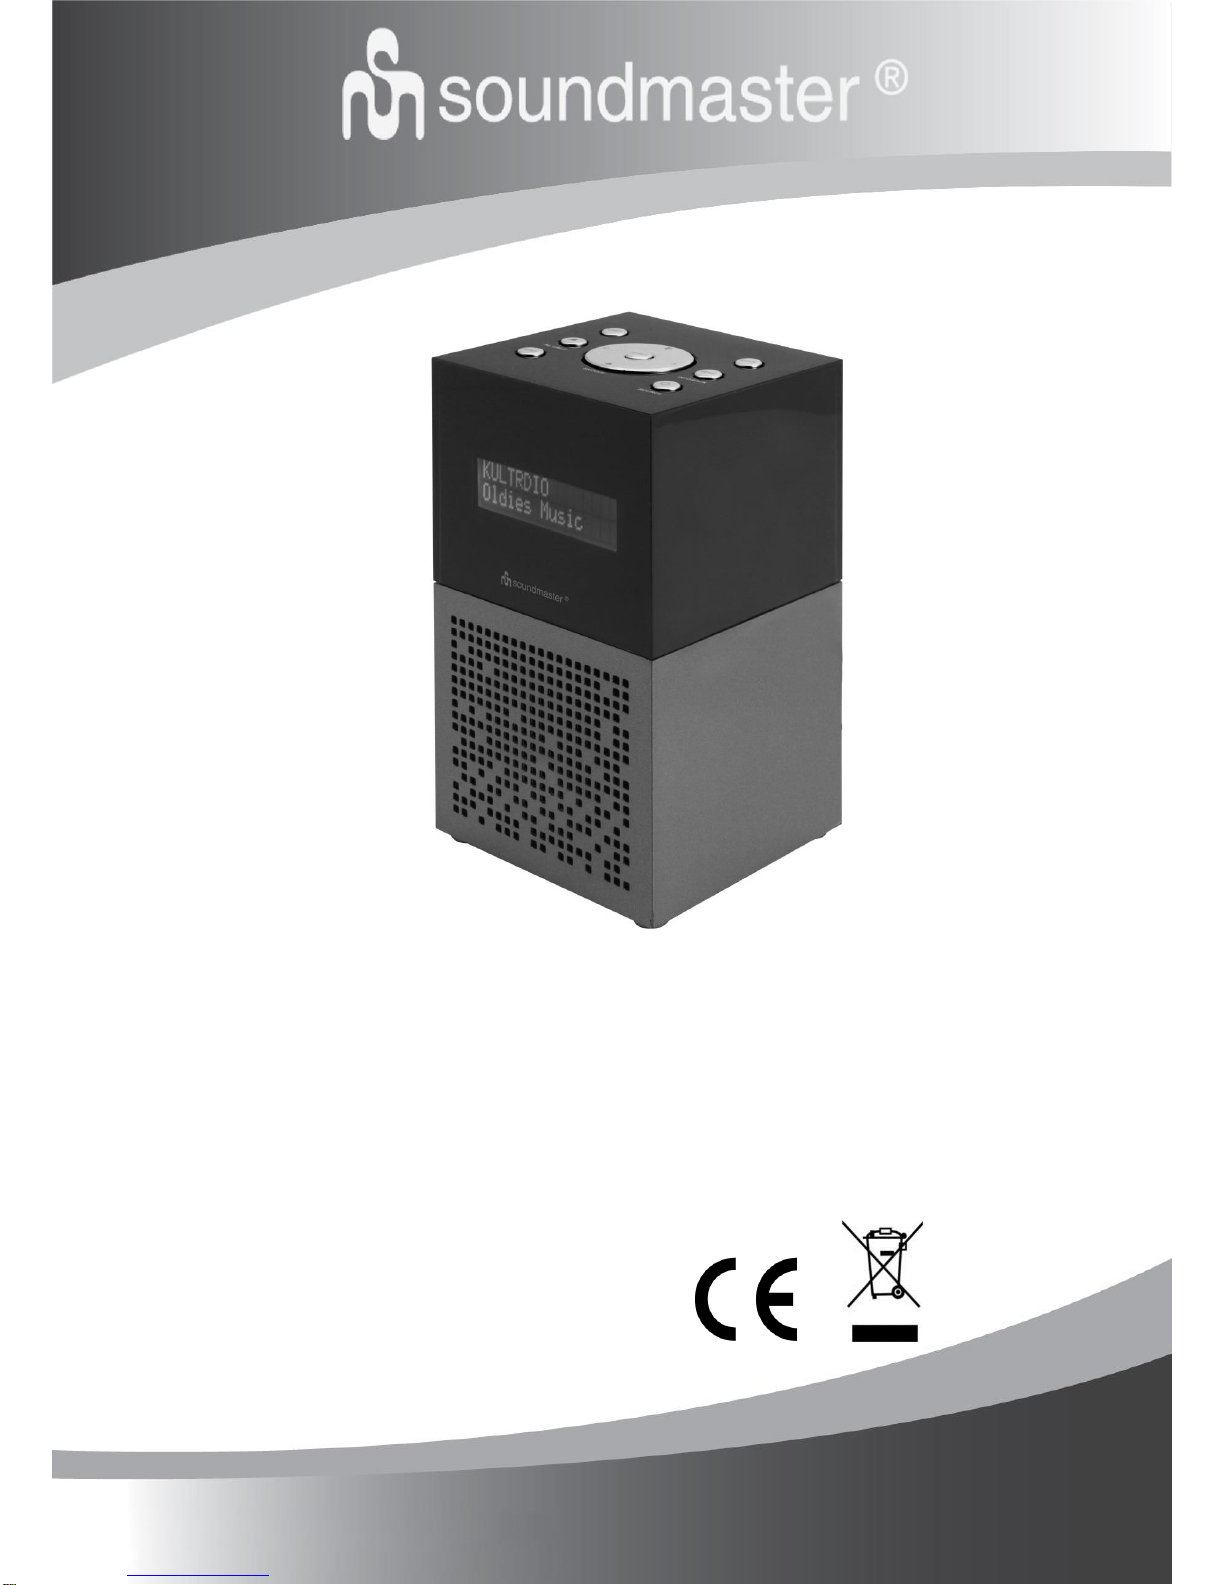
UR210
Hersteller
Wörlein GmbH Tel.: +49 9103/71670
Gewerbestrasse 12 Fax.: +49 9103/716712
D 90556 Cadolzburg Email. [email protected]
GERMANY Web: www.woerlein.com
Page 2
Safety, Environmental and Setup Instructions
EN
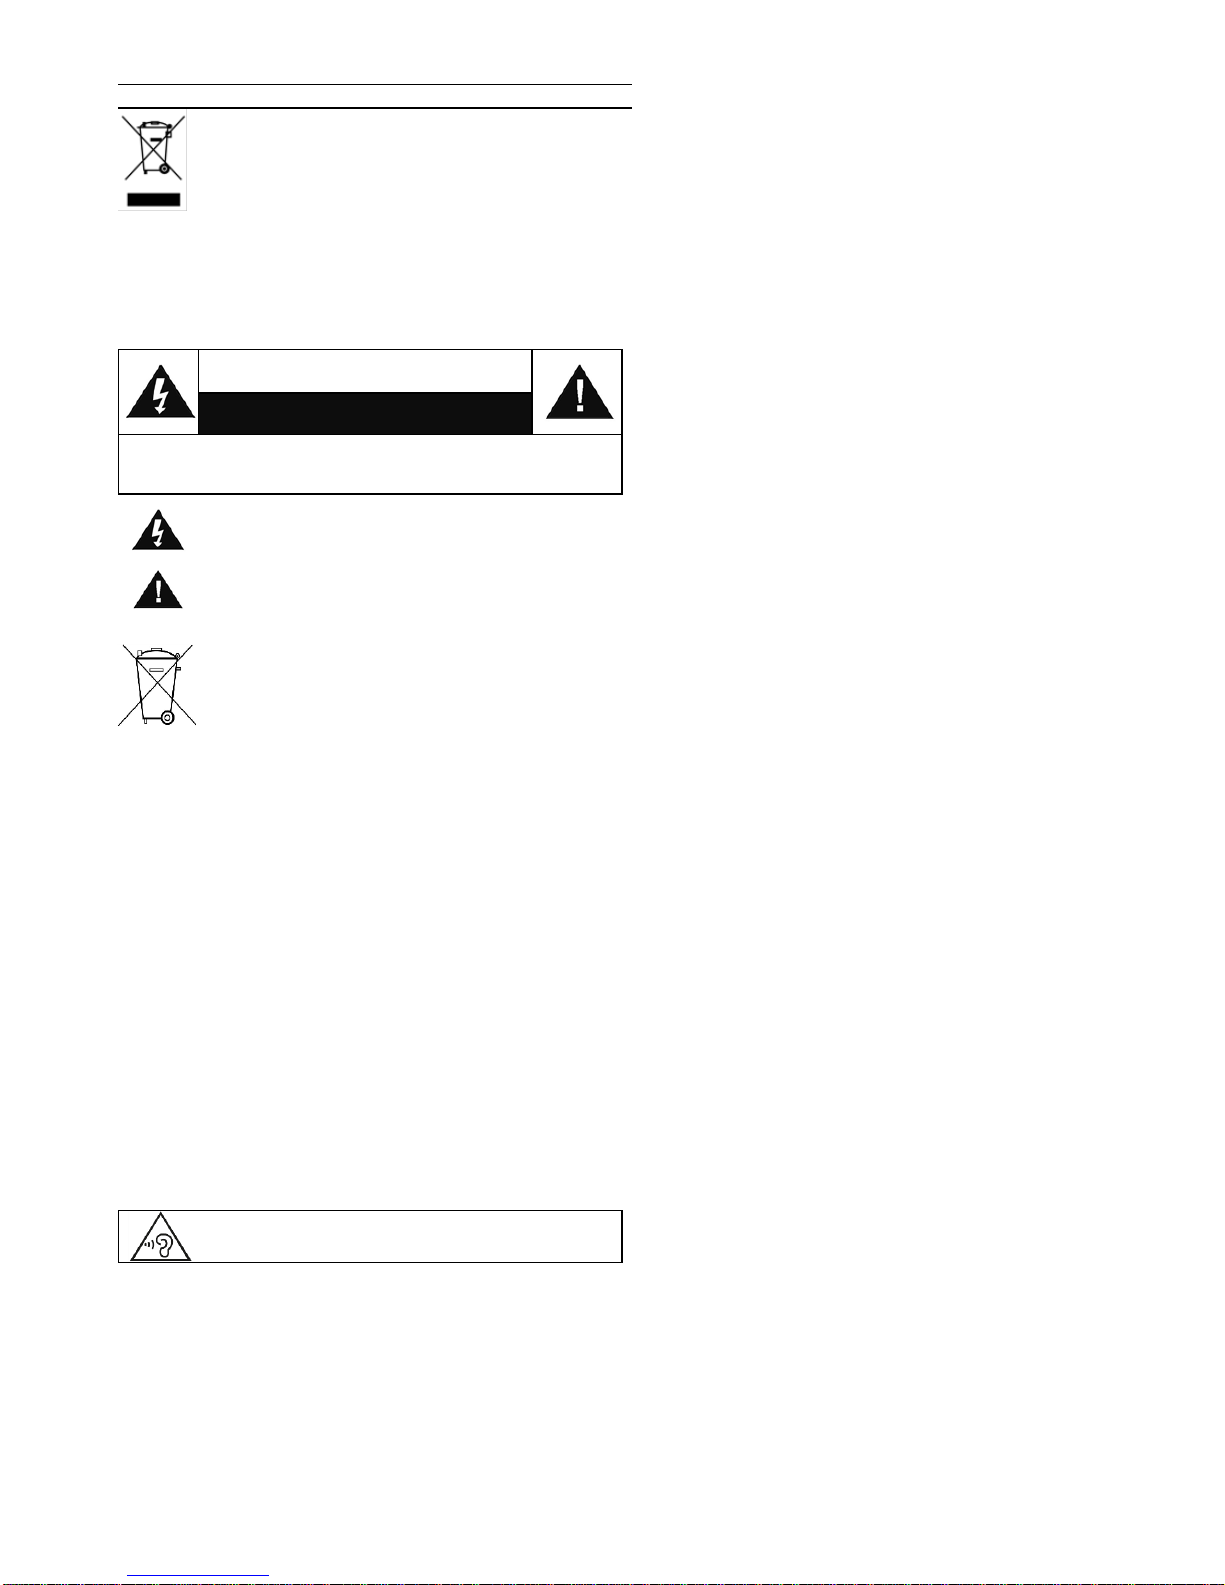
ENVIRONMENTAL PROTECTION
Do not dispose of this product with the normal household
waste at the end of its life cycle. Return it to a collection
point for the recycling of electrical and electronic devices.
This is indicated by the symbol on the product, user
manual or packaging
The materials are reusable according to their markings. By
reusing, recycling or other forms of utilization of old devices you
make an important contribution to the protection of our
environment.
Please contact your local authorities for details about collection
points.
WARNING
Risk of electric shock
Do not open!
Caution: To reduce the risk of electric shock, do not remove the
cover (or back). There are no user serviceable parts inside.
Refer servicing to qualified service personnel.
This symbol indicates the presence of dangerous
voltage inside the enclosure, sufficient enough to
cause electric shock.
This symbol indicates the presence of important
operating and maintenance instructions for the device
Used batteries are hazardous waste and NOT to be
disposed of with the household waste! As a
consumer you are legally obligated to return all
batteries for environmentally responsible recycling –
no matter whether or not the batteries contain harmful
substances*)
Return batteries free of charge to public collection points in your
community or shops selling batteries of the respective kind.
Only return fully discharged batteries
*) marked Cd = cadmium, Hg = mercury, Pb = lead
Only use mercury and cadmium-free batteries.
Used batteries are hazardous waste and NOT to be
disposed of with the household waste!!!
Keep batteries away from children. Children might
swallow batteries.
Contact a physician immediately if a battery was
swallowed.
Check your batteries regularly to avoid battery
leakage.
Batteries shall not be exposed to excessive heat such
as sunshine, fire or the like.
CAUTION: Danger of explosion if battery is incorrectly
replaced
Replace only with the same or equivalent type
To prevent possible hearing damage, do not
listen at high volume levels for long periods
Use the device in dry indoor environments only.
Protect the device from humidity.
This apparatus is for moderate climates areas use,
not suitable for use in tropical climates countries.
No objects filled with liquids, such as vases, shall be
placed on the apparatus.
The mains plug or an appliance coupler is used
as the disconnect device, the disconnect devices
shall remain readily operable.
Connect this device to a properly installed and
earthed wall outlet only. Make sure the mains
voltage corresponds with the specifications on
the rating plate.
Make sure the mains cable stays dry during
operation. Do not pinch or damage the mains
cable in any way.
A damaged mains cable or plug must
immediately be replaced by an authorized service
center.
In case of lightning, immediately disconnect the
device from the mains supply.
Children should be supervised by parents when
using the device.
Clean the device with a dry cloth only.
Do NOT use CLEANING AGENTS or ABRASIVE
CLOTHS!
Do not expose the device to direct sunlight or
other heat sources.
Install the device at a location with sufficient
ventilation in order to prevent heat accumulation.
Do not cover the ventilation openings!
Install the device at a safe and vibration-free
location.
Install the device as far away as possible from
computers and microwave units; otherwise radio
reception may be disturbed.
Do not open or repair the enclosure. It is not safe
to do so and will void your warranty. Repairs only
by authorized service/ customer center.
No naked flame sources, such as lighted
candles, should be placed on the unit.
When you are necessary to ship the unit store it
in its original package. Save the package for this
purpose.
In case of malfunction due to electrostatic
discharge or fast transient (burst), remove and
reconnect the power supply.
If the unit is not using for a long period of time,
disconnect it from the power supply by
unplugging the power plug. This is to avoid the
risk of fire.
Page 3
UR210 / English Instruction Manual
1
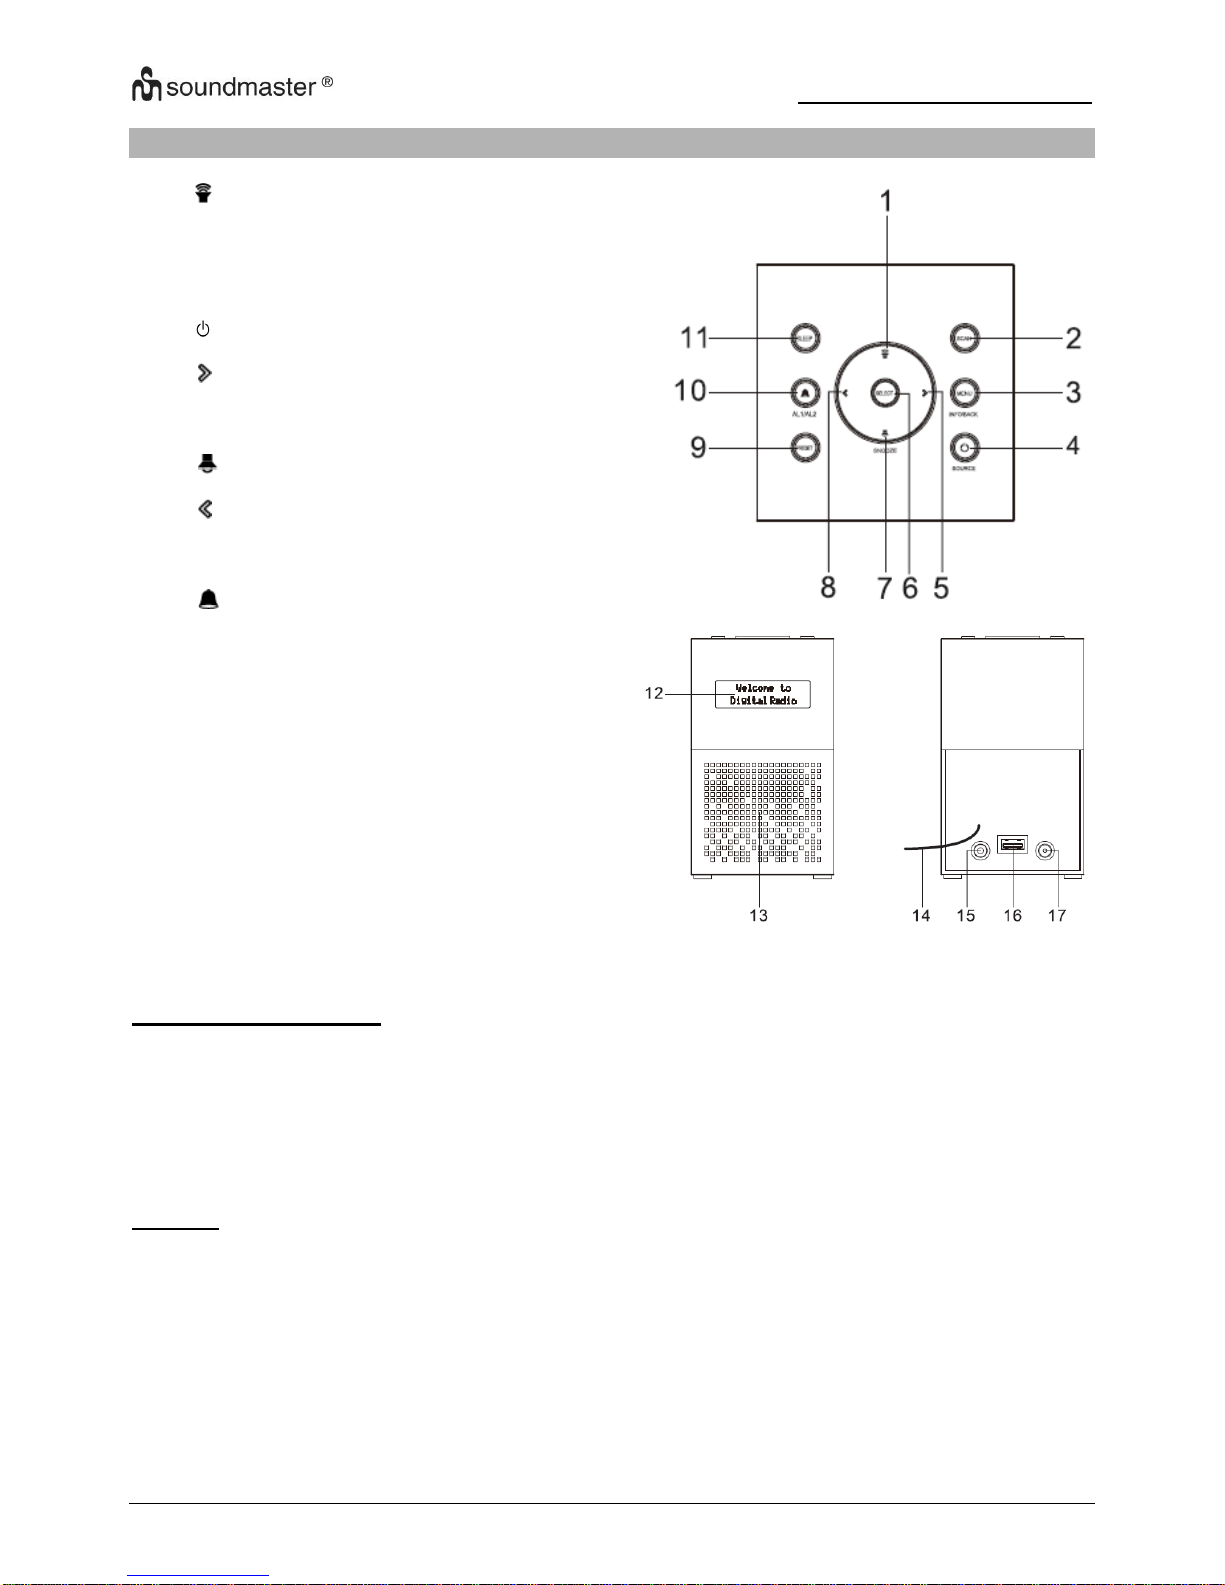
LOCATIONS OF CONTROLS
1
Volume + button
2 SCAN button
3 MENU / INFO / BACK button
4 / SOURCE button
5 Forward button
6 SELECT button
7 Volume - button
8 Backward button
9 PRESET button
10
Alarm button (AL1/AL2)
11
SLEEP button
12
Display
13
Speaker
14
Antenna
15
Headphone jack
16
USB jack (for charging external devices)
17
DC IN jack
Care and maintenance
Clean the radio with a soft damp cloth and let all parts dry completely after cleaning.
Do not use any aggressive cleaners, brushes with nylon bristles, sharp or metallic cleaning
utensils, knives, hard scrapers and the like. They could damage the surfaces of the radio.
Do not immerse the radio in water and do not let water getting into the housing of the radio.
Storage
Unplug the power adapter and clean the radio before storage.
Always store the radio in a dry and clean place.
Page 4
UR210 / English Instruction Manual
2
GETTING STARTED
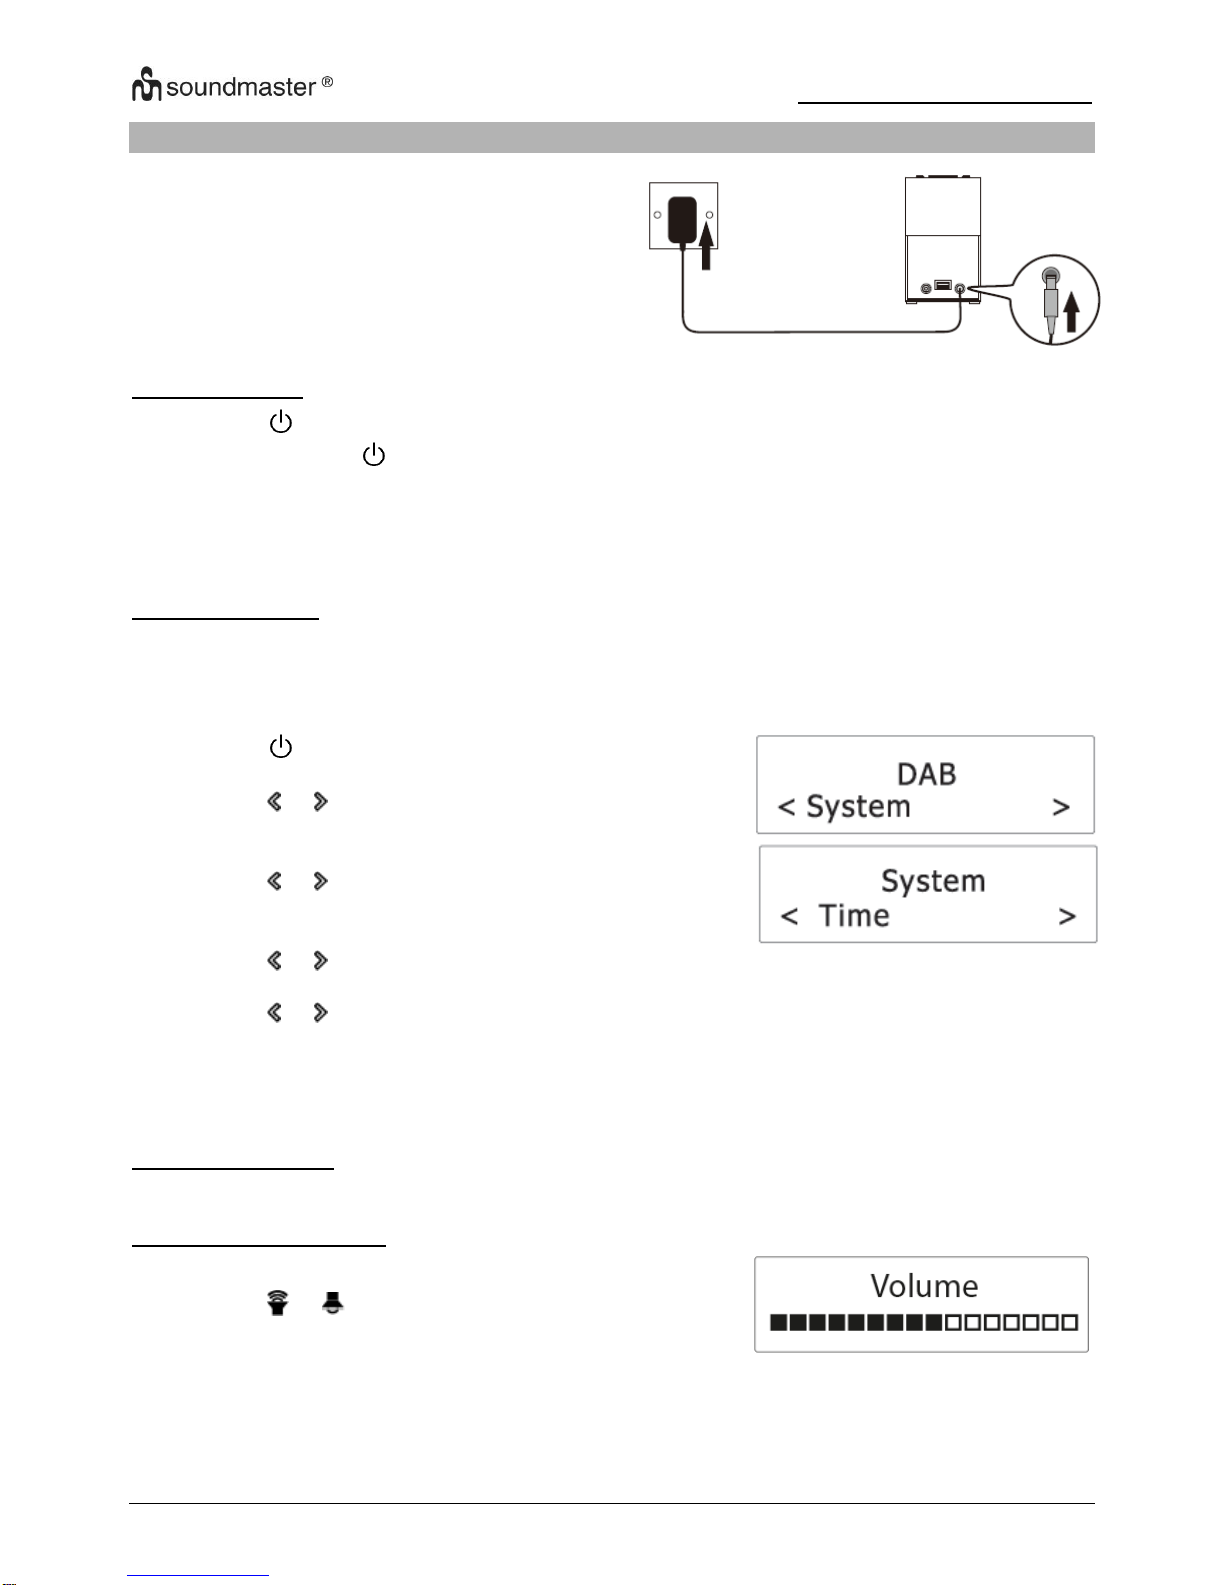
1. Connect the cord of the power adapter to
the DC IN jack of the radio.
2. Connect the plug of the power adapter to
a wall socket.
The radio is powered and in standby mode
when you see the display is switched on.
Power on or off
1. Press the /”SOURCE” button (4) in standby mode to turn the radio on.
2. Press and hold the /”SOURCE” button (4) when the radio is turned on to switch it to
standby mode. The time and date show on the display in standby mode.
To completely disconnect the radio from power, remove the plug of the power adapter from the
wall socket.
Setting the clock
The date and time of the radio is automatically set once it receives radio broadcast signals (and
when such info is available). You may also set the date and time through the setting menu. To
do so:
1. Press the /”SOURCE” button (4) to turn the radio on.
2. Press and hold the “MENU” (3) button.
3. Press the or button (8/5) until you see “System” on
the display and then press the “SELECT” button.
4. Press the or button (8/5) until you see “Time” on the
display and then press the “SELECT” button.
5. Press the or button (8/5) until you see “Set Time/Date” on the display and then press the
“SELECT” (6) button.
6. Press the or button (8/5) to set hour time and then press the “SELECT” button (6) to
confirm.
7. Repeat step 6 to continue setting minute time, date, month and year.
For more date and time settings, see chapter “Time”.
Using the antenna
Unroll and extend the antenna to improve DAB/ FM signal reception.
Controlling the volume
Press the or button (1/7) to adjust the volume.
Page 5
UR210 / English Instruction Manual
3
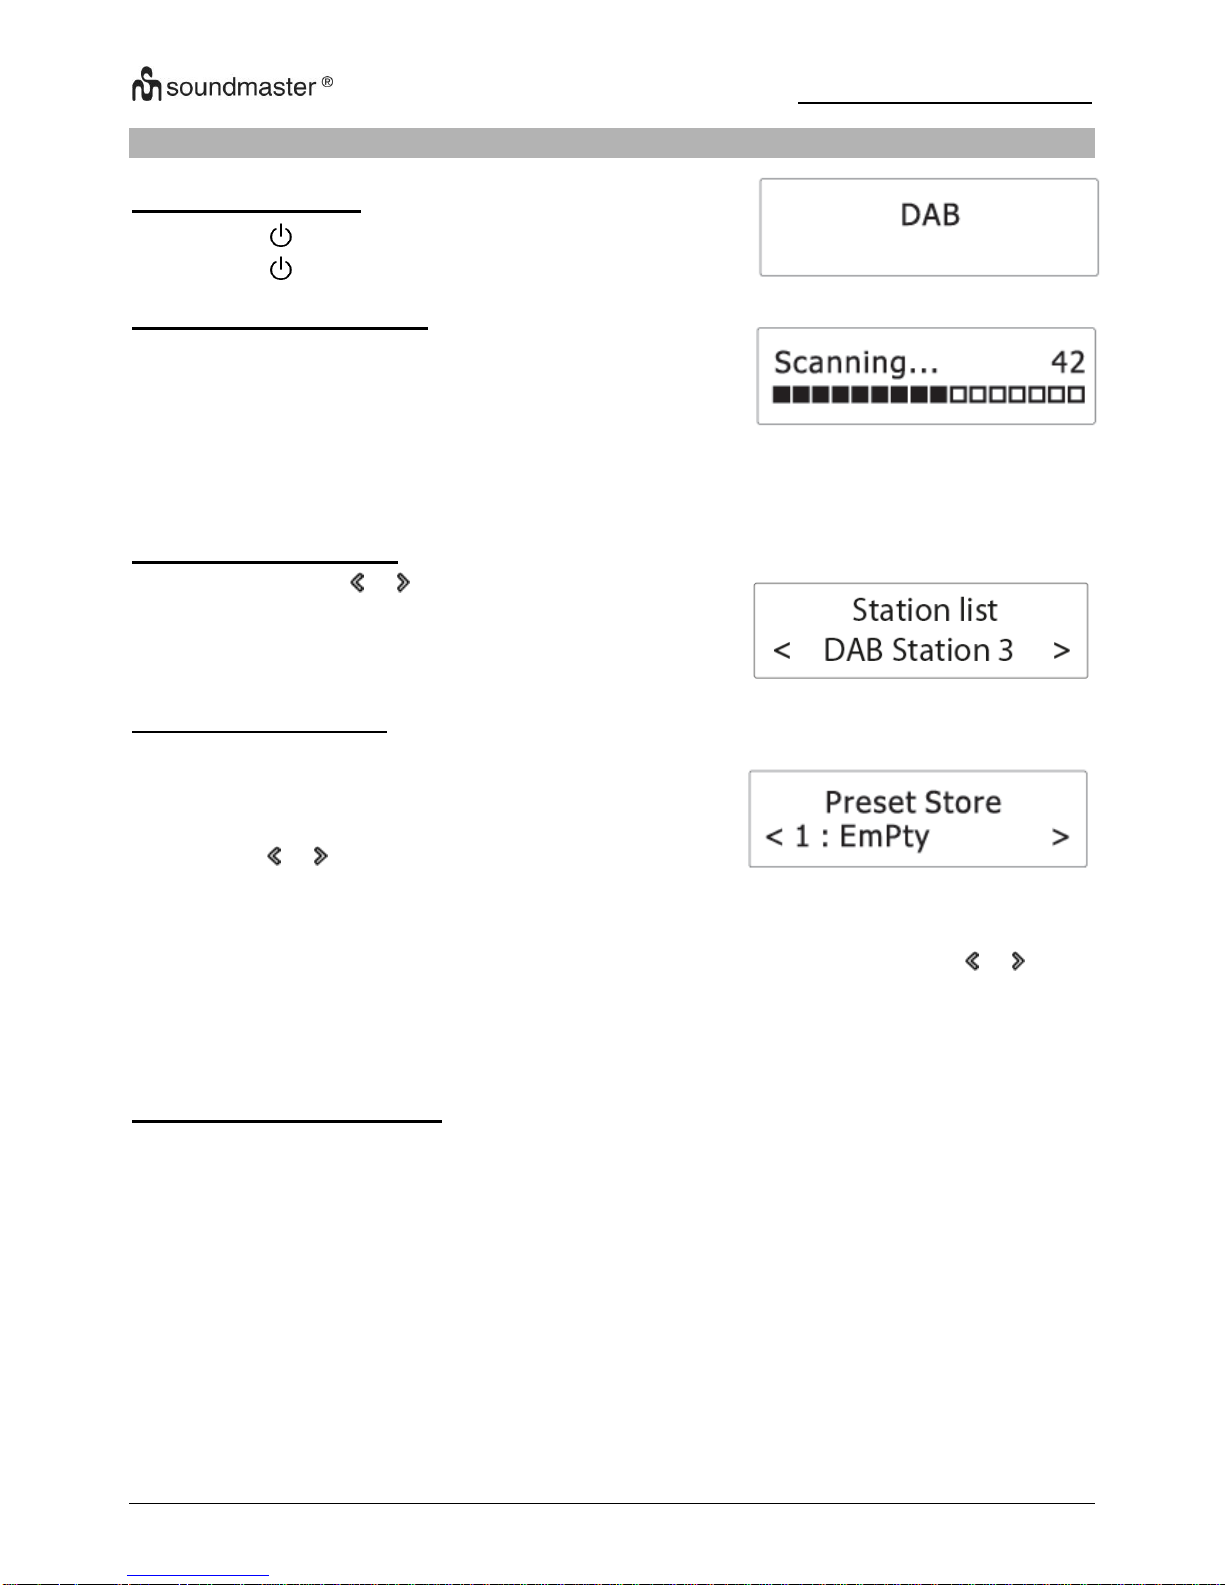
LISTENING TO DAB BROADCASTS
Selecting DAB mode
1. Press the /”SOURCE” button (4) to turn the radio on.
2. Press the /”SOURCE” button (4) to select DAB mode.
Scanning for DAB stations
The first time you use the radio, or if the station list is empty,
the radio automatically performs a station search. You may
also perform a station search manually. To do so:
In DAB mode, press the “SCAN” button (2) to activate
the automatic station search.
The radio automatically stores radio stations with sufficient signal strength.
After the search is complete, the first stored station is broadcast automatically.
Tuning to a DAB station
1. In DAB mode, the or button (8/5) to cycle through
the DAB stations in the station list.
2. Press the “SELECT” button (8/5) to tune to the selected
DAB station.
Storing preset stations
You can store up to 10 DAB stations as preset stations.
1. Tune to a DAB station.
2. Press and hold the “PRESET” button (9) until “Preset
Store” shows on the display.
3. Press the or button (8/5) to select a preset number.
4. Press the “SELECT” button (6) to confirm.
The DAB station is stored with the selected preset number.
Repeat steps 1-4 to store more preset stations.
5. To tune to a preset station, press the “PRESET” button (9) once, then press the or
button (8/5) to cycle through the list of preset stations and then press the “SELECT” button
(6) to confirm the selection.
To change the DAB station assigned to a preset number, repeat steps 1 to 4 above to overwrite
the existing DAB station.
Displaying DAB information
Press the “INFO” button (3) repeatedly to cycle through the following information (if available).
Dynamic label segment (DLS)
Signal strength
Program type (PTY)
Ensemble name
Frequency
Signal error rate
Bitrate codec
Time
Date
Page 6
UR210 / English Instruction Manual
4
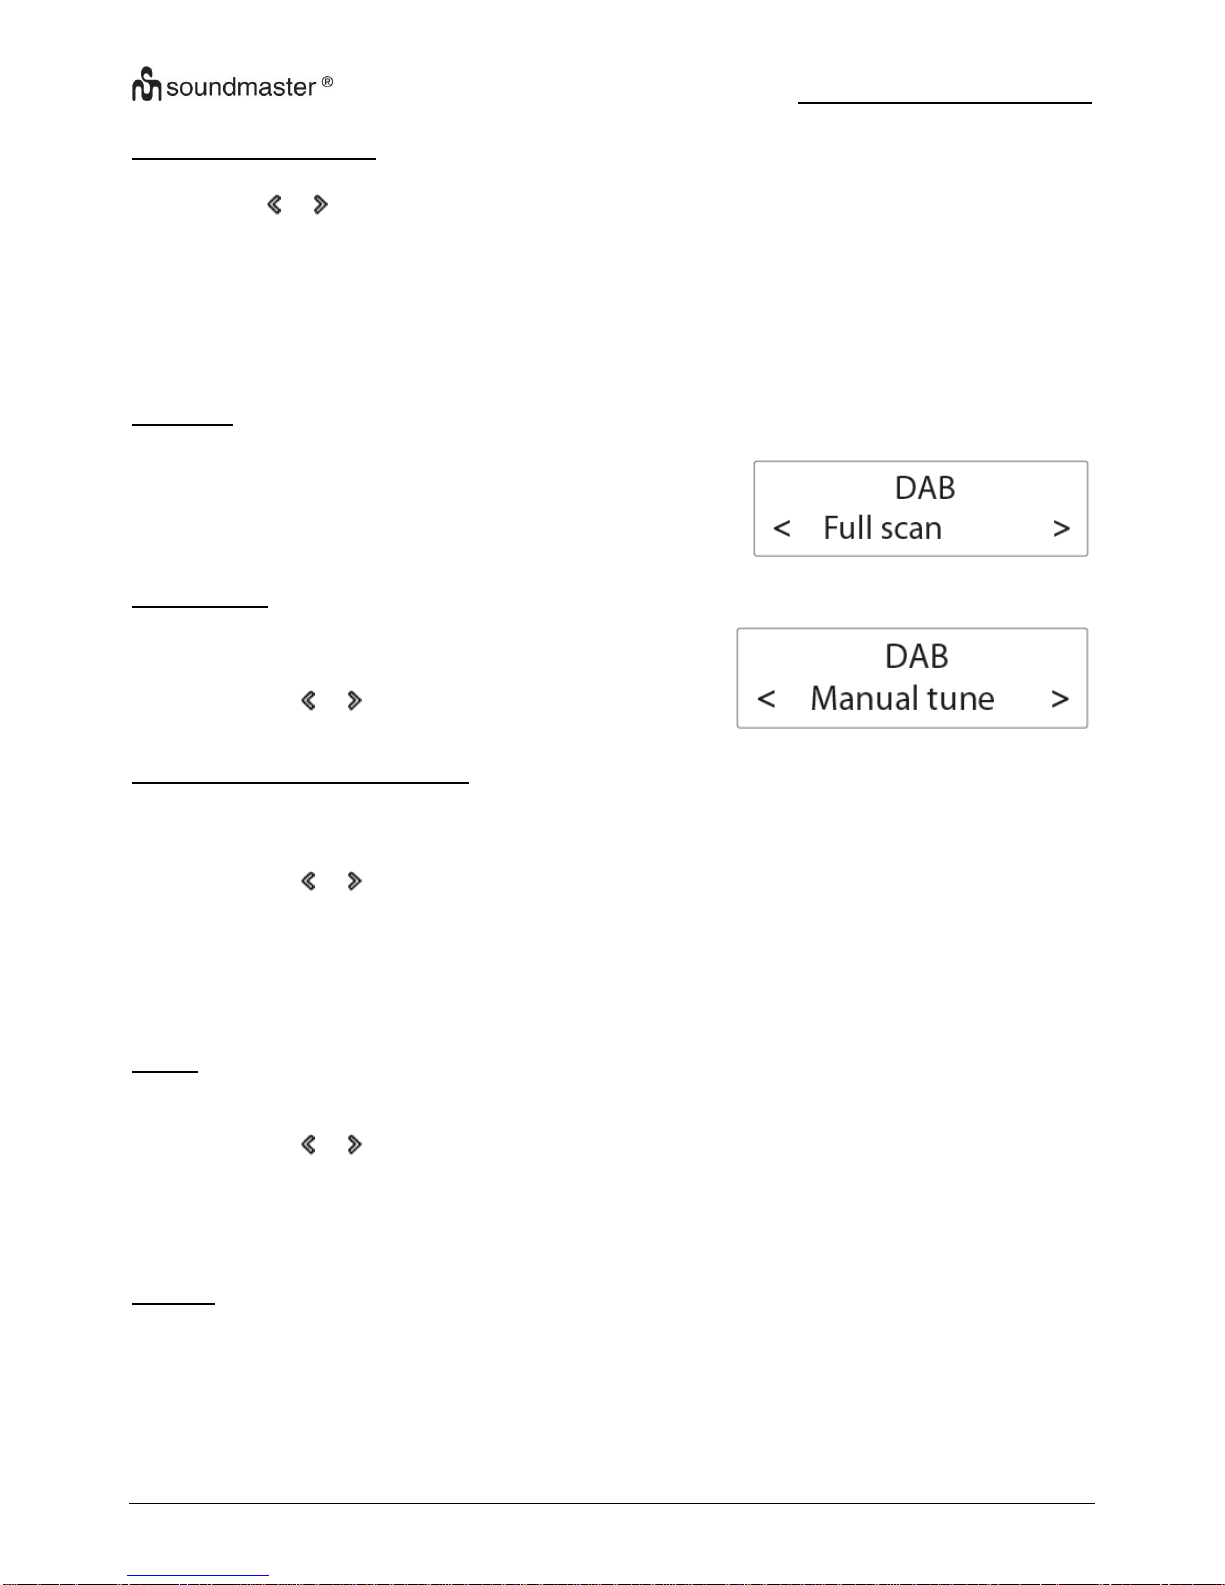
Using the DAB menus
1. In DAB mode, press and hold the “MENU” button (3) to access the DAB menus.
2. Press the or button (8/5) to cycle through the below options.
Full scan
Manual tune
DRC
Prune
System
See below for details of each option.
Full scan
Full scan is used to perform a wide range search for DAB stations.
Press the “SELECT” button (6) to start scanning for
available DAB stations. After the scanning is
complete, the first detected station is broadcast
automatically.
Manual tune
1. Press the “SELECT” button (6) to confirm the
selection “Manual tune”.
2. Press the or button (8/5) to tune the frequency
manually.
DRC (Dynamic Range Control)
DRC adds or removes a degree of compensation for the differences in the dynamic range
between radio stations.
1. Press the “SELECT” button (6) to confirm the selection “DRC”.
2. Press the or button (8/5) to cycle through the below options. The asterisk behind the
option indicates the current setting.
DRC off: No compensation applied.
DRC low: Medium compensation applied.
DRC high: Maximum compensation applied.
3. Press the “SELECT” button (6) to confirm the selected option.
Prune
This feature removes any stations that are in the list but have no service in your area.
1. Press the “SELECT” button (6) to confirm the selection “Prune”.
2. Press the or button (8/5) to cycle through the below options.
No: Return to the previous menu.
Yes: Remove invalid stations from the station list.
3. Press the “SELECT” button (6) to confirm the selected option.
System
See chapter “System menu” for details.
Page 7
UR210 / English Instruction Manual
5
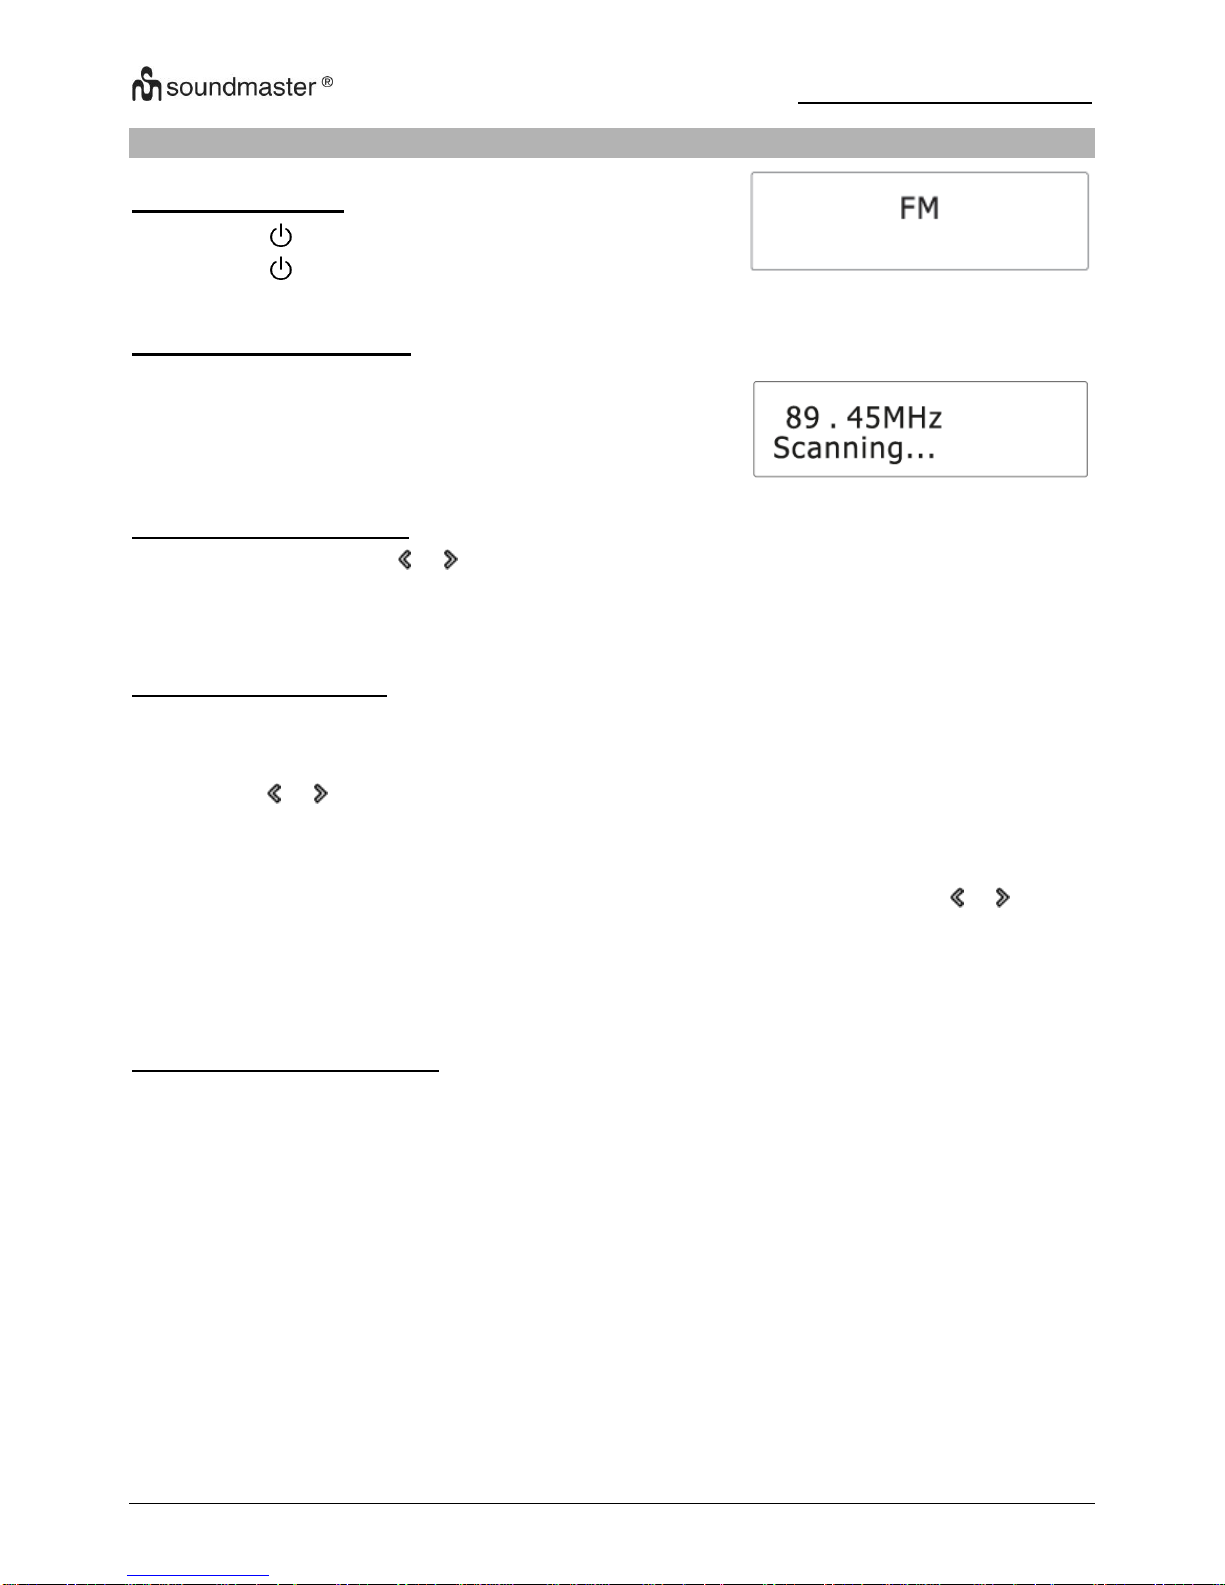
LISTENING TO FM BROADCASTS
Selecting FM mode
1. Press the / “SOURCE” button (4) to turn the radio on.
2. Press the / ”SOURCE” button (4) to select the FM
mode.
Scanning for FM stations
In FM mode, press the “SCAN” or “SELECT” button (2
or 6) to activate the automatic search for the next
available FM station.
After a strong FM radio station is detected, the search
stops. The FM radio station is broadcast.
Tuning the FM frequency
In FM mode, press the or button (8/5) to tune down or up the frequency.
Once you have tuned up or down the frequency, press the “SCAN” or “SELECT” button (2 or
6) to activate the automatic search for the next available FM station in the selected tune up
or down direction.
Storing preset stations
You can store up to 10 FM stations as preset stations.
1. Tune to an FM station.
2. Press and hold the “PRESET” button (9) until “Preset Store” shows on the display.
3. Press the or button (8/5) to select a preset number.
4. Press the “SELECT” button (6) to confirm.
The FM station is stored with the selected preset number.
Repeat steps 1-4 to store more preset stations.
5. To tune to a preset station, press the PRESET button (9) once, then press the or button
(8/5) to cycle through the list of preset stations and then press the “SELECT” button (6) to
confirm the selection.
To change the FM station assigned to a preset number, repeat steps 1 to 4 above to overwrite
the existing FM station.
Displaying RDS information
Radio Data System (RDS) is a service that allows FM stations to transmit additional information.
When you tune to an FM radio station that transmits RDS signals, the station name is displayed.
Press the “INFO” button (3) repeatedly to cycle through the following RDS information (if
available).
Radio text
Program type (such as NEWS, SPORT, POP M,….)
Program service
Time
Date
Page 8
UR210 / English Instruction Manual
6
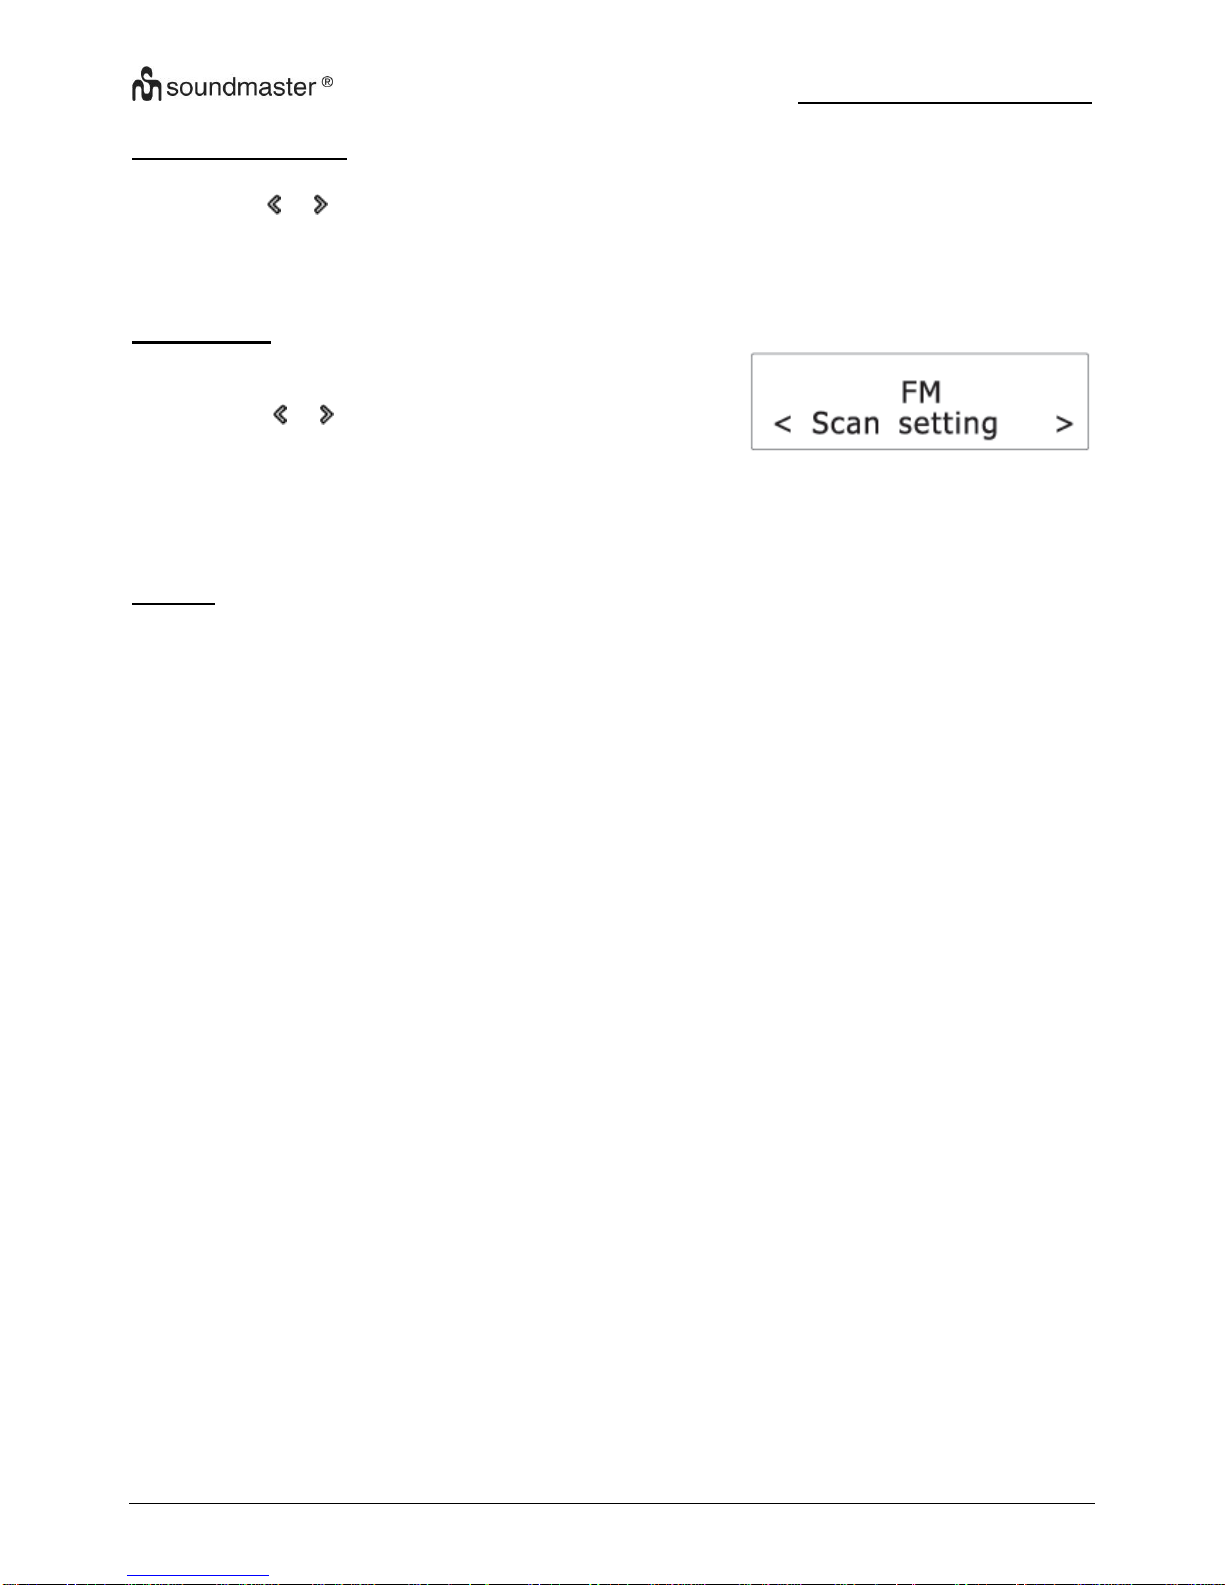
Using the FM menu
1. In FM mode, press and hold the “MENU” button (3) to access the FM menus.
2. Press the or button (8/5) to cycle through the below options.
Scan setting
System
See below for details of each option.
Scan setting
1. Press the “SELECT” button (6) to confirm the selection
“Scan setting”.
2. Press the or button (8/5) to cycle through the below
options. The asterisk behind the option indicates the
current setting.
Strong stations only: Search for strong stations only.
All stations: Search for all stations regardless of the signal strength.
3. Press the “SELECT” button (6) to confirm the selected option
System
See chapter “System menu” for details.
Page 9
UR210 / English Instruction Manual
7
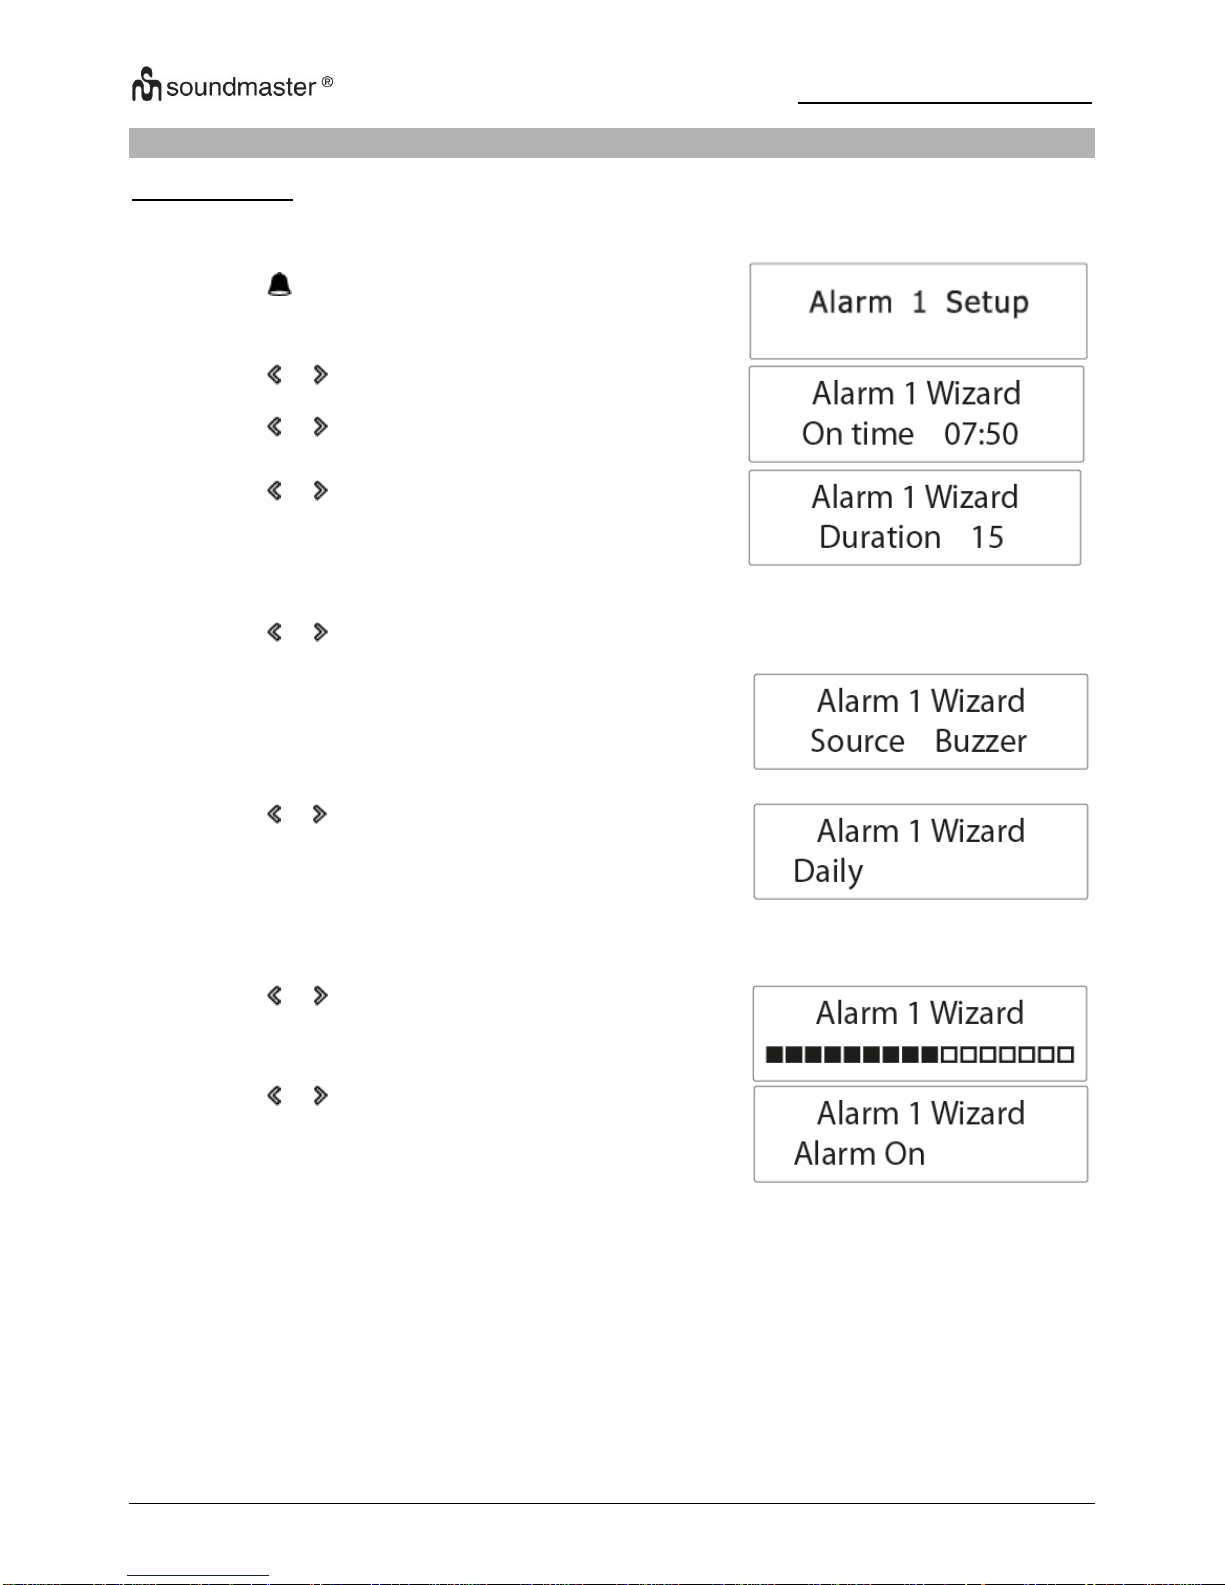
USING THE ALARMS
Setting alarms
The radio lets you have 2 alarm settings.
To set the alarm:
1. Press the button(10) to select between Alarm 1 and
Alarm 2 and then press the “SELECT” button (6) to
confirm the selection.
2. Press the or button (8/5) to set the hour time of the
alarm and then press the “SELECT” button (6).
Press the or button (8/5) to set the minute time of
the alarm and then press the “SELECT” button (6).
3. Press the or button (8/5) to cycle through the
duration options and then press the “SELECT” button
(6) to confirm the selection
The duration defines the time before the radio returns to standby mode if the alarm is not
deactivated. Duration options: 15, 30, 45, 60, 90 and 120 minutes.
4. Press the or button (8/5) to cycle through the source options and then press the
“SELECT” button (6) to confirm the selection.
The source defines the sound source of the alarm.
Source options: DAB, FM and Buzzer.
If DAB or FM is selected, you will also be prompted to
select the last played station or one of the preset
stations (if set) as the alarm.
5. Press the or button (8/5) to cycle through the interval
options and then press the “SELECT” button (6) to
confirm the selection
The interval defines on which days the alarm is active.
Interval options: Daily, Once, Weekends and Weekdays.
If “Once” is selected, you will also be prompted to set a
specific date.
6. Press the or button (8/5) to adjust the volume level
and then press the “SELECT” button (6).
This setting defines the sound volume of the alarm.
7. Press the or button (8/5) to select alarm on or off
and then press the “SELECT” button (6) to confirm the
selection.
When the alarm setting is active, the corresponding alarm icon “A1” for alarm 1 and “A2” for
alarm 2 will show on the display.
At the set time, the alarm will sound. The volume will increase gradually until it reaches the set
volume level. The corresponding alarm icon will also flash on the display.
Page 10
UR210 / English Instruction Manual
8
Turning the alarms on or off in standby mode
1. In standby mode, press the button (10) repeatedly to cycle through the alarm on or off
settings. See the table below for details.
Pressing
Alarm 1
Alarm 2
1×
”Off“ (Off)
”Off“ (Off)
2×
”On“ (On)
”Off“ (Off)
3×
”Off“ (Off)
”On“ (On)
4×
”On“ (On)
”On“ (On)
2. Press the “SELECT” button (6) to confirm the setting.
When the alarm setting is active, the corresponding alarm icon (A1) for alarm 1 and( A2 ) for
alarm 2) will show on the display.
Deactivating a sounding alarm
Press the / “SOURCE” button (4) or button (10) to switch the radio to standby mode.
Snooze
“Snooze buttons”: or or or or “SELECT” (button1 or 8 or 5 or 7 or 6).
To temporarily silence a sounding alarm, press one of the “SNOOZE” buttons. To change
the snooze period, press one of the “SNOOZE” buttons repeatedly (options: 5, 10, 15 or 30
minutes).
The radio will return to standby mode during the snooze period. The alarm will sound again
when the snooze period is over.
To cancel the snooze period and the alarm, press the / “SOURCE” button (4).
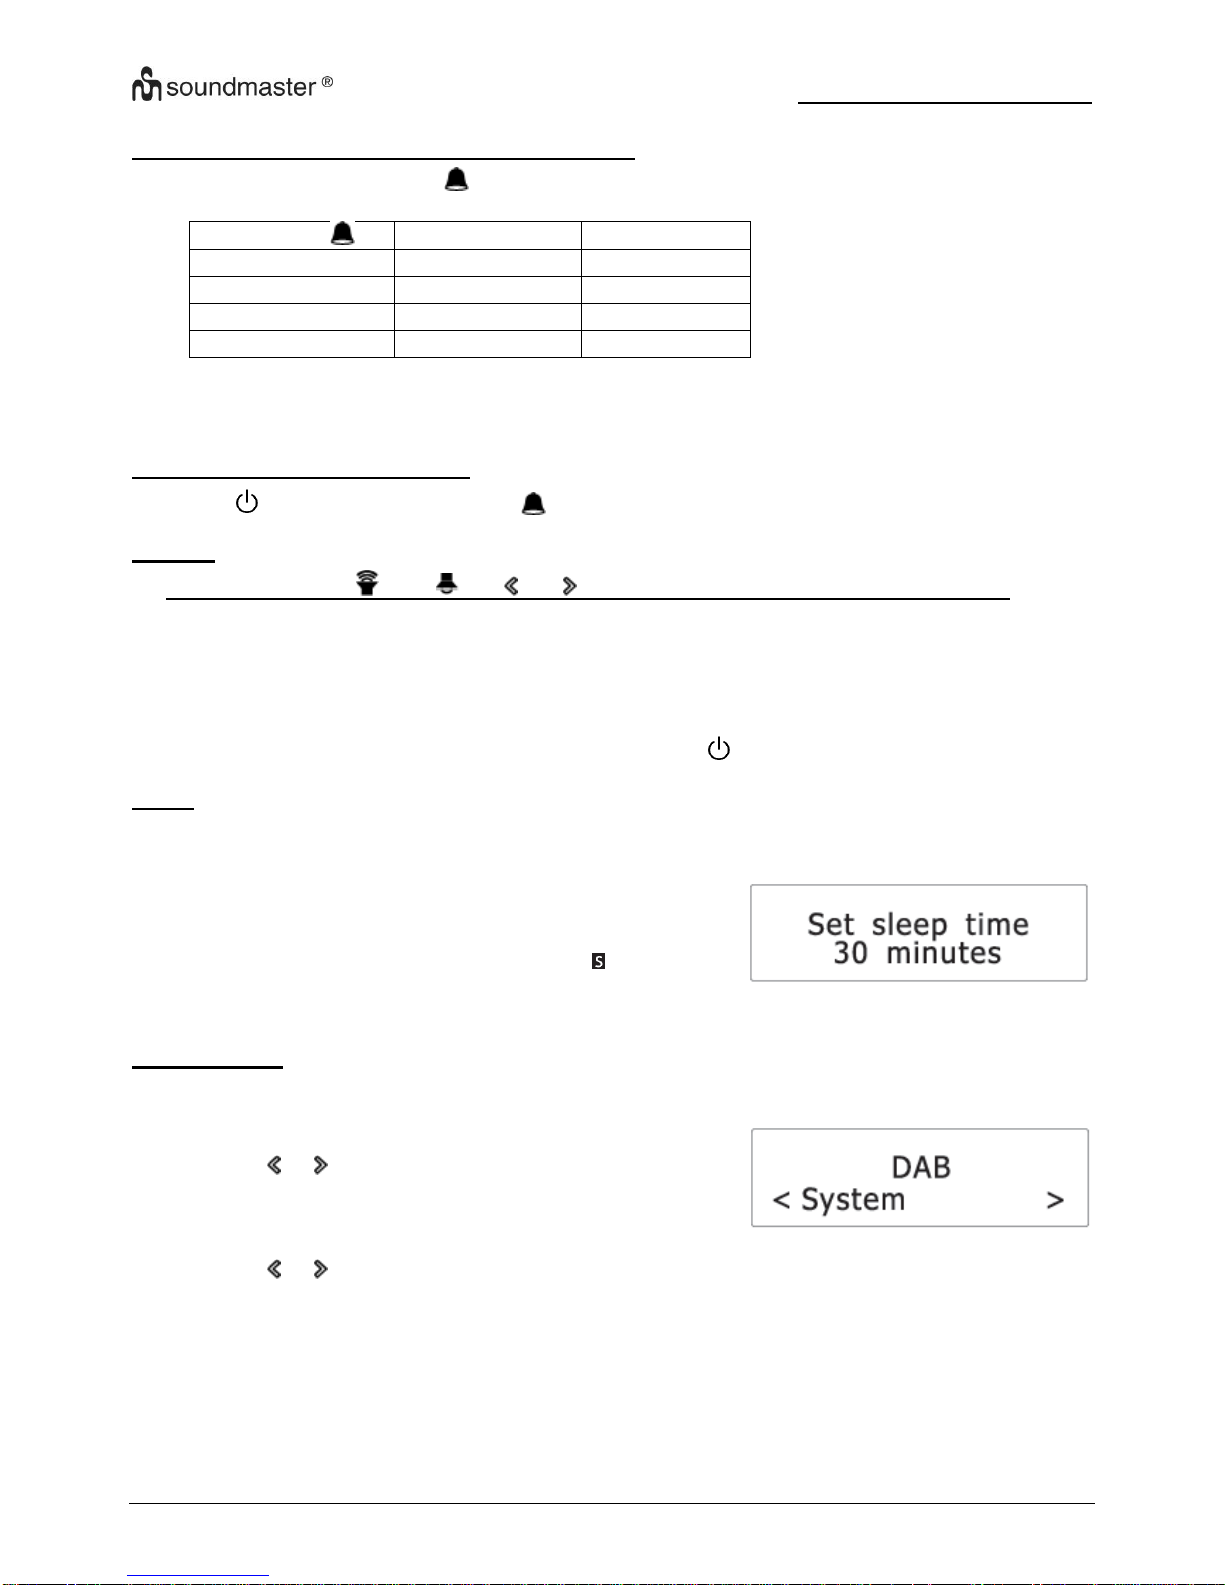
Sleep
This sleep function defines the duration of time before the radio switches itself off automatically.
1. When the radio is switched on, press the “SLEEP”
button(11) repeatedly to select a sleep period
(Options: Off, 15, 30, 45, 60 and 90 minutes).
2. Press the “SELECT” button (6) to confirm the selection.
Once a sleep period is set, the sleep icon ( ) will show
on the display. The radio will automatically switch off
when the sleep period is over.
System menu
To access the system menu:
1. Press and hold the “MENU” button (3) in DAB or FM
mode.
2. Press the or button (8/5) to cycle through the
options until you see “System”.
3. Press the “SELECT” button (6) to confirm the selection
“System”.
4. Press the or button (8/5) to cycle through the below options.
Time
Backlight
Inactive Standby
Language
Factory Reset
Software Version
See below for details of each option.
Page 11
UR210 / English Instruction Manual
9
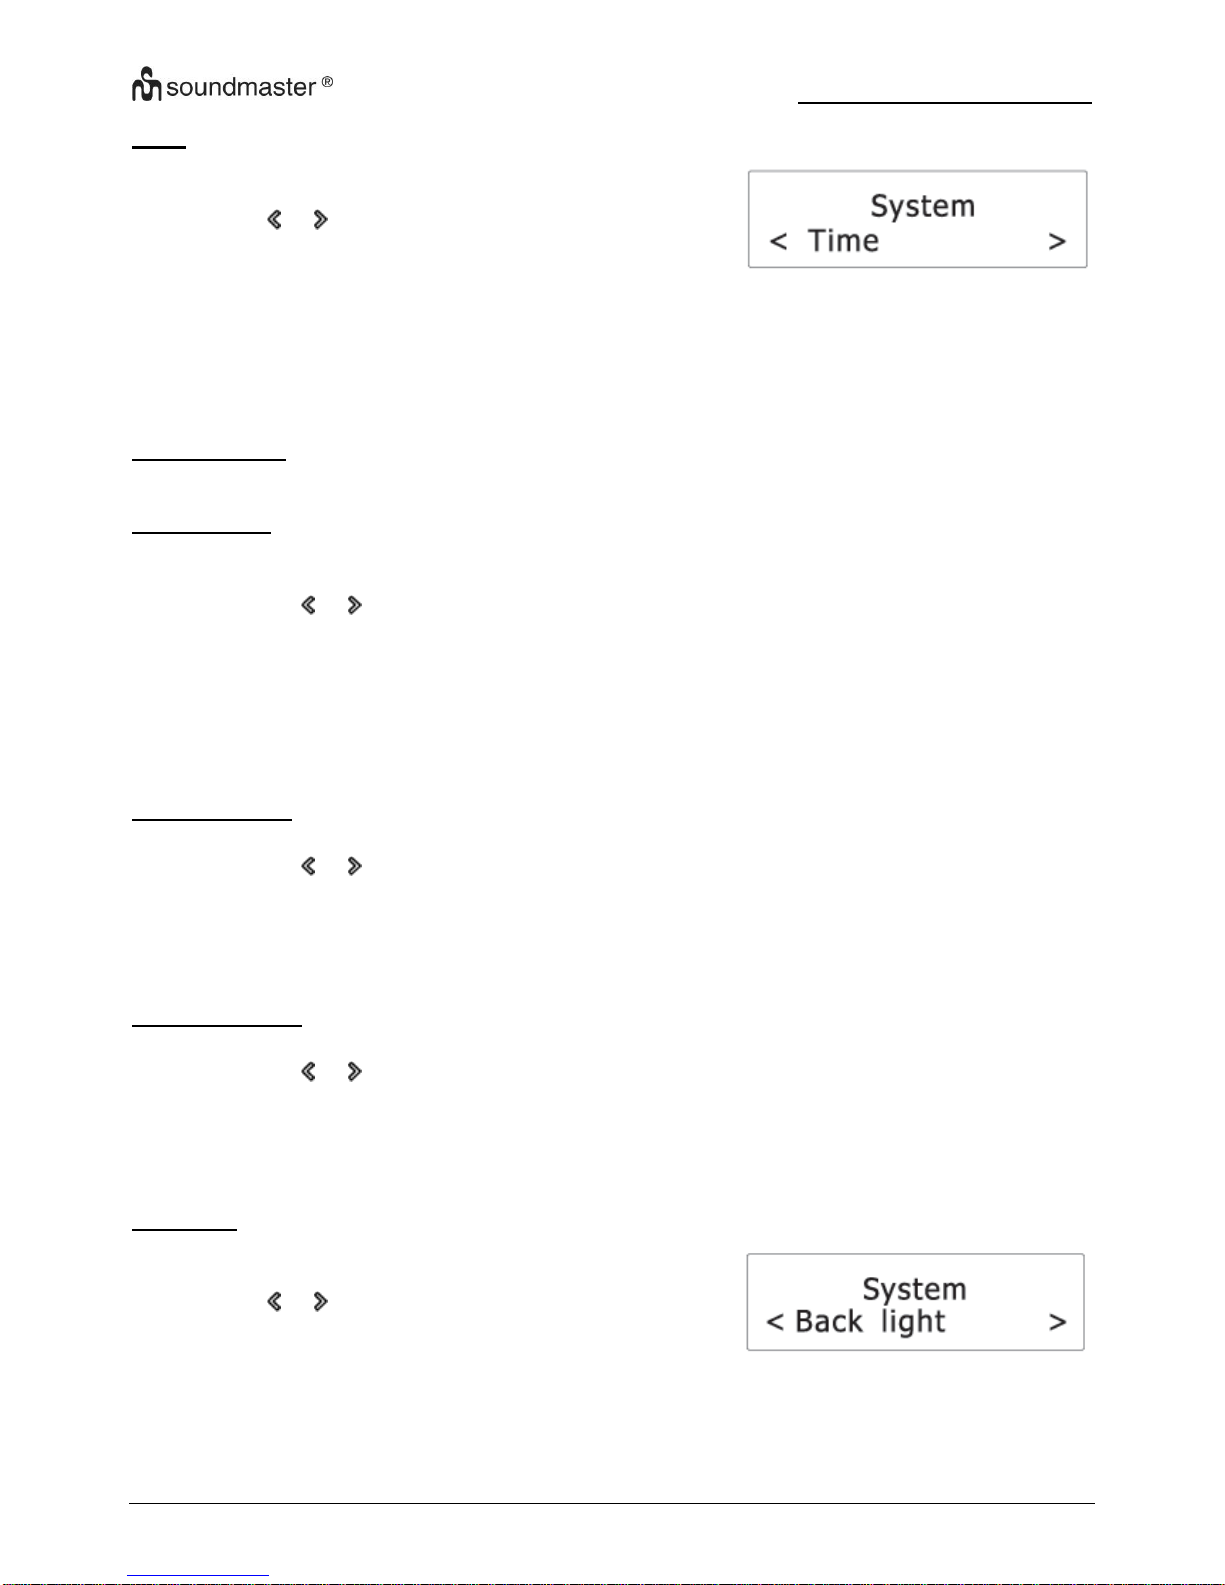
Time
1. Press the “SELECT” button (6) to confirm the selection
“Time”.
2. Press the or button (8/5) to cycle through the below
options. The asterisk behind the option indicates the
current setting.
Set Time/Date
Auto Update
Set 12/24 hour
Set date format
See below for details of each option.
Set Time/Date
See chapter “Setting the clock”.
Auto Update
This setting defines how the radio updates the time and date information.
1. Press the “SELECT” button (6) to confirm the selection “Auto Update”.
2. Press the or button (8/5) to cycle through the below options. The asterisk behind the
option indicates the current setting.
Update from Any: Update the time and date from any available signals.
Update from DAB: Update the time and date from DAB signals.
Update from FM: Update the time and date from FM signals.
No update: Do not update the time and date.
3. Press the “SELECT” button (6) to confirm the selected option.
Set 12/24 hour
1. Press the “SELECT” button (6) to confirm the selection “Set 12/24 hour”.
2. Press the or button (8/5) to cycle through the below time format options. The asterisk
behind the option indicates the current setting.
12: Show the time in 12-hour format.
24: Show the time in 24-hour format.
3. Press the “SELECT” button (6) to confirm the selected option.
Set date format
1. Press the “SELECT” button (6) to confirm the selection “Set date format”.
2. Press the or button (8/5) to cycle through the below date format options. The asterisk
behind the option indicates the current setting.
DD-MM-YYYY
MM-DD-YYYY
3. Press the “SELECT” button (6) to confirm the selected option.
Backlight
1. Press the “SELECT” button (6) to confirm the selection
“Backlight”.
2. Press the or button (8/5) to cycle through the below
options. The asterisk behind the option indicates the
current setting.
Timeout
On level
Dim level
See below for details of each option.
Page 12
UR210 / English Instruction Manual
10
Timeout
This setting defines the duration of the backlight before it is dimmed.
1. Press the “SELECT” button (6) to confirm the selection “Timeout”.
2. Press the or button (8/5) to cycle through the below timeout options (in seconds).
The asterisk behind the option indicates the current setting.
On (the backlight does not dim)
10 sec
20 sec
30 sec
45 sec
60 sec
90 sec
120 sec
180 sec
3. Press the “SELECT” button (6) to confirm the selected option.
On level
This setting defines the brightness level when the backlight is switched on.
1. Press the “SELECT” button (6) to confirm the selection “On level”.
2. Press the or button (8/5) to cycle through the below brightness levels. The asterisk
behind the option indicates the current setting.
Low
Medium
High
3. Press the “SELECT” button (6) to confirm the selected option.
Dim level
This setting defines the brightness level when the backlight is dimmed.
1. Press the “SELECT” button (6) to confirm the selection “Dim level”.
2. Press the or button (8/5) to cycle through the below brightness levels. The asterisk
behind the option indicates the current setting.
Low
Medium
High
3. Press the “SELECT” button (6) to confirm the selected option.
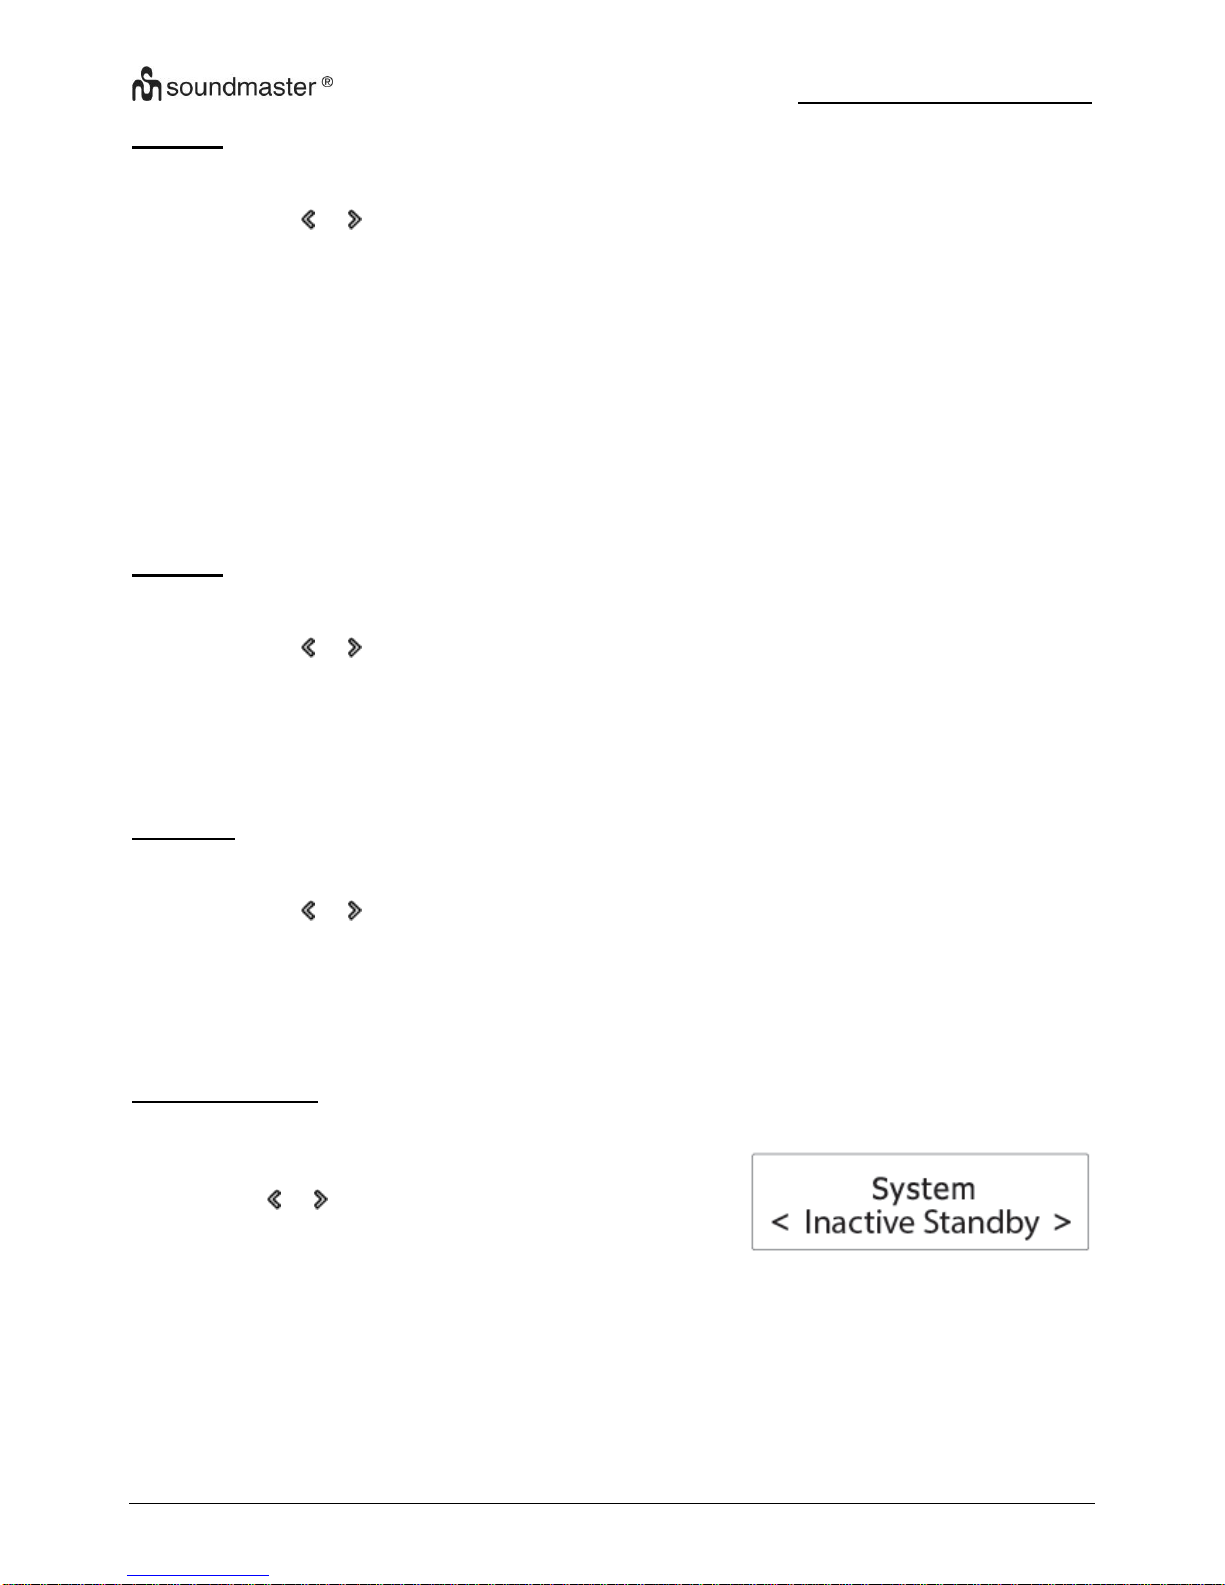
Inactive Standby
This setting defines the duration of time before the radio switches itself on automatically.
1. Press the “SELECT” button (6) to confirm the selection
“Inactive Standby”.
2. Press the or button (8/5) to cycle through the below
time options. The asterisk behind the option indicates
the current setting.
Off
2 hour
4 hour
5 hour
6 hour
3. Press the “SELECT” button (8/5) to confirm the selected option.
Page 13
UR210 / English Instruction Manual
11
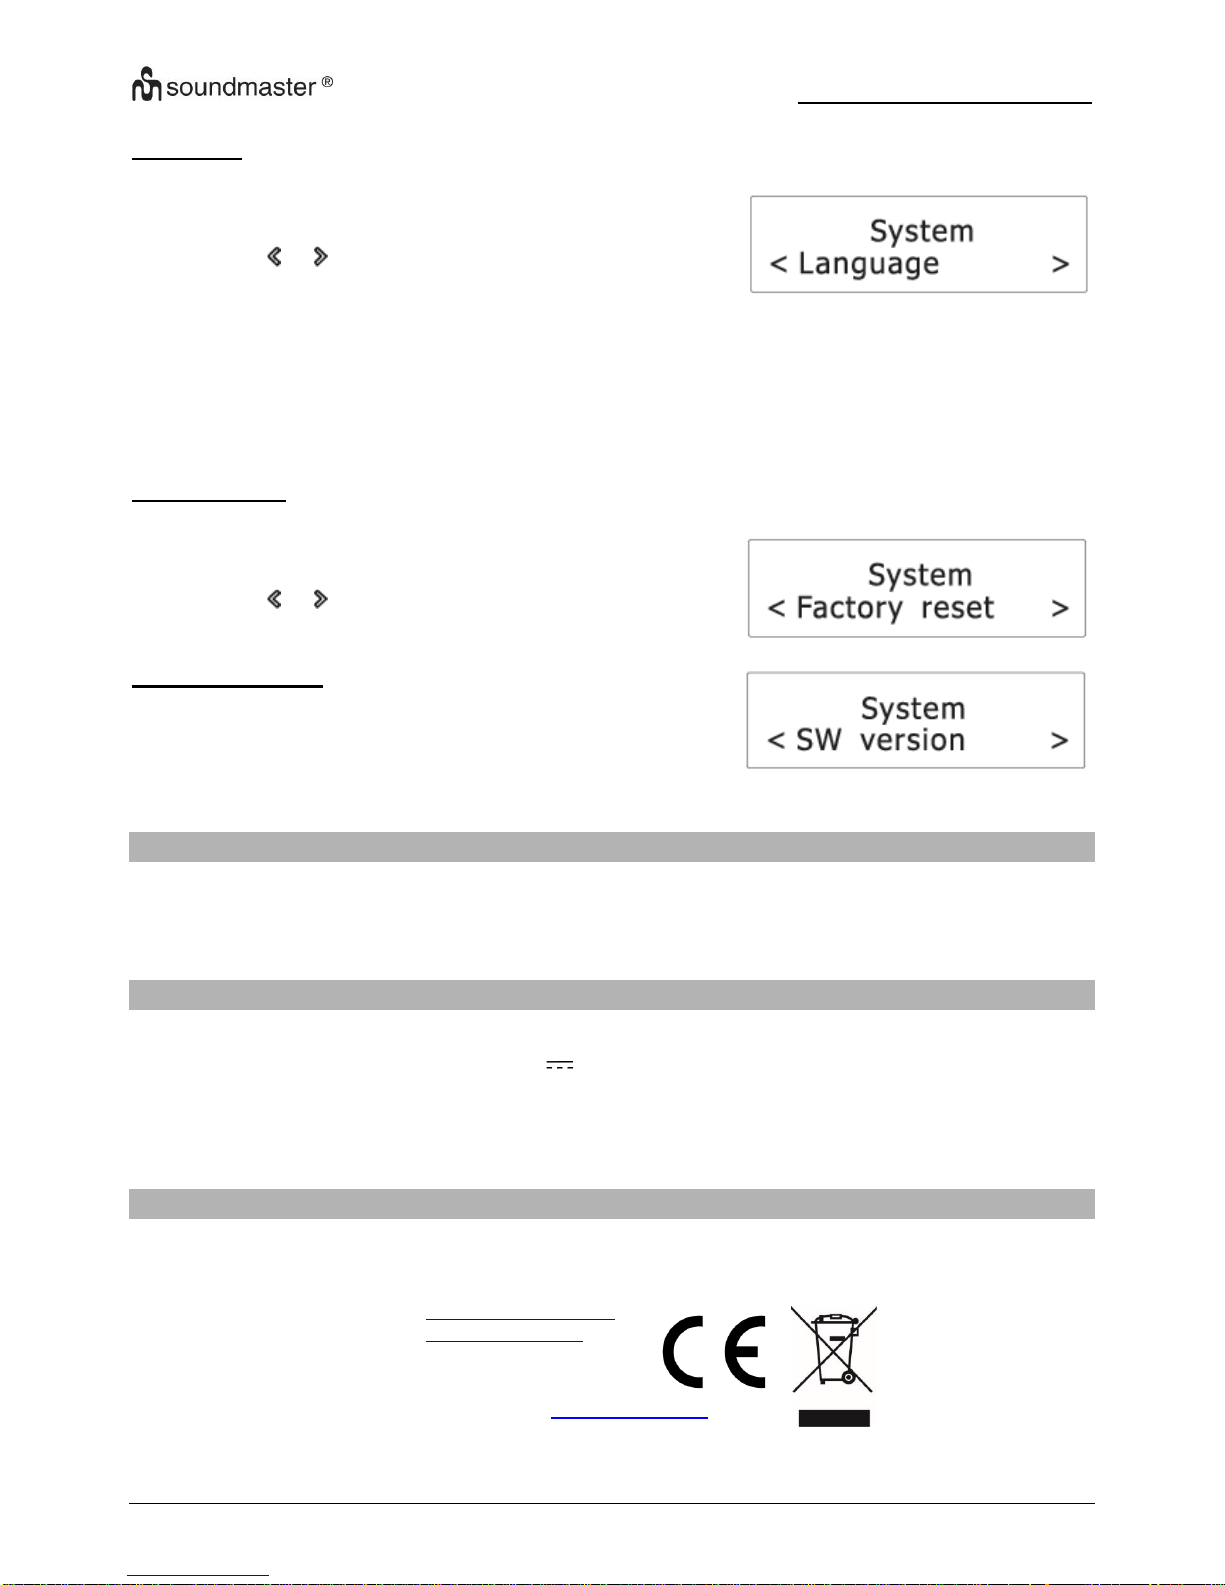
Language
This setting defines the language used in the menus.
1. Press the “SELECT” button (6) to confirm the selection
“Language”.
2. Press the or button (8/5) to cycle through the below
language options. The asterisk behind the option
indicates the current setting.
English
Français (French)
Deutsch (German)
Italiano (Italian)
3. Press the “SELECT” button (6) to confirm the selected option.
Factory Reset
This setting clears all user-defined settings and replaces them with the original default settings.
1. Press the “SELECT” button (6) to confirm the selection
“Factory Reset”.
2. Press the or button (8/5) to select “Yes” and then
press the “SELECT” button (6) to confirm factory reset.
Software Version
This option displays the current software version.
Press the “SELECT” button (6) to confirm the selection
“SW version”.
CHARGING EXTERNAL DEVICE
Connect an external device (e.g. smartphone, mp3 player) via a USB cable (not provided) to the
USB jack on the back of the radio for charging. The radio cannot access the contents in the
connected external device.
TECHNICAL SPECIFICATIONS
AC power adapter Input: AC 100 – 240V, 50/60Hz (use only supplied adaptor)
Output: DC 5 V 1,5A
Frequency Coverage FM 87.5 – 108 MHz
DAB 174.928 - 239.200 MHz
Number of preset radio stations. 10 (FM), 10 (DAB)
IMPORTER
Wörlein GmbH Tel.: +49 9103 71 67 0
Gewerbestrasse 12 Fax.: +49 9103 71 67 12
D 90556 Cadolzburg Email: [email protected]
Germany Web: www.woerlein.com
Technische Änderungen und Druckfehler vorbehalten
Copyright by Woerlein GmbH, 90556 Cadolzburg, www.woerlein.com
Vervielfältigung nur mit ausdrücklicher Genehmigung der Woerlein GmbH
Page 14

Hiermit bestätigt Wörlein GmbH, dass sich dieses Gerät
in Übereinstimmung mit den grundlegenden
Anforderungen und den übrigen einschlägigen
Bestimmungen der Richtlinie 2014/53/EU befindet.
Eine Kopie der Konformitätserklärung kann unter
folgender Adresse bezogen werden.
Wörlein GmbH, Gewerbestrasse 12, D 90556 Cadolzburg,
Germany
Email: [email protected]
Tel.: +49 9103 71 67 0
Hereby, Wörlein GmbH declares that this device is in
compliance with the essential requirements and other
relevant provisions of Directive 2014/53/EU.
A copy of the Declaration of Conformity may be
obtained at the following location:
Wörlein GmbH, Gewerbestrasse 12, D 90556 Cadolzburg,
Germany
Email: [email protected]
Tel.: +49 9103 71 67 0
Par la présente, Wörlein GmbH déclare que cet appareil
est conforme aux exigences principales et autres clauses
applicables de la Directive 2014/53/EU.
Vous pouvez demander de recevoir une copie de la
déclaration de conformité en écrivant à l'adresse
suivante :
Wörlein GmbH, Gewerbestrasse 12, D 90556 Cadolzburg,
Germany
Email: [email protected]
Tel.: +49 9103 71 67 0
Wörlein GmbH verklaart hierbij dat dit apparaat in
overeenkomst is met de essentiële vereisten en andere
relevante bepalingen van de Richtlijn 2014/53/EU.
Er kan een kopie van de Conformiteitsverklaring worden
verkregen op de volgende locatie:
Wörlein GmbH, Gewerbestrasse 12, D 90556 Cadolzburg,
Germany
Email: [email protected]
Tel.: +49 9103 71 67 0
Con la presente, Wörlein GmbH dichiara che questo
dispositivo è conforme ai requisiti essenziali e altre
disposizioni contenute nella Direttiva 2014/53/EU.
Una copia della Dichiarazione di conformità è disponibile
al seguente indirizzo:
Wörlein GmbH, Gewerbestrasse 12, D 90556 Cadolzburg,
Germania
Email: [email protected]
Tel .: +49 9103 71 67 0
Härmed Wörlein GmbH deklarerar att denna enhet är i
överensstämmelse med de grundläggande kraven och
andra relevanta bestämmelser i direktiv 2014/53/EU.
En kopia av försäkran om överensstämmelse kan erhållas
på följande plats:
Wörlein GmbH, Gewerbestrasse 12, D 90.556
Cadolzburg, Tyskland
E-post: [email protected]
Tel .: +49 9103 71 67 0
Herved Wörlein GmbH erklærer, at denne enhed er i
overensstemmelse med de væsentlige krav og øvrige
relevante krav i direktiv 2014/53/EU.
En kopi af Overensstemmelseserklæringen kan fås på
følgende placering:
Wörlein GmbH, Gewerbestrasse 12, D 90556 Cadolzburg,
Tyskland
E-mail: [email protected]
Tel .: +49 9103 71 67 0
Tímto Wörlein GmbH prohlašuje, že toto zařízení je ve
shodě se základními požadavky a dalšími příslušnými
ustanoveními směrnice 2014/53/EU.
Kopii Prohlášení o shodě lze získat v následujícím
umístění:
Wörlein GmbH, Gewerbestrasse 12, D 90556 Cadolzburg,
Německo
E-mail: [email protected]
Tel .: +49 9103 71 67 0
Por este meio, Wörlein GmbH declara que este
dispositivo está em conformidade com os requisitos
essenciais e outras disposições da Directiva 2014/53/EU.
Uma cópia da Declaração de Conformidade pode ser
obtida no seguinte local:
Wörlein GmbH, Gewerbestrasse 12, D 90556 Cadolzburg,
Alemanha
Email: [email protected]
Tel .: +49 9103 71 67 0
 Loading...