


Table of Contents
About iMON
Features of iMON
In Your Package
Installing from iMON Installation CD
Connecting iMON Station
Checking if the iMON Station Driver is Installed
Getting Started with iMON Manager
Using iMON RC (Dedicated Remote Controller)
Settings
Registering the Remote Controller
Setting Program Commands
Setting Windows Commands
Customized Windows Commands
Setting Macros
Setting Launcher
Printing
Exchanging the Setting Files
Setting Options
Using iMON
Starting the Application Launcher
Starting the Task Switcher
Controlling the Application
Using Timer
Visiting iMON Web Site

FCC Information
This device complies with Part 15 of the FCC Results. Operation is subject to the
following two conditions:
(1) This Device may not cause harmful interface, and
(2) This device must accept any interference received, including interference that
may cause undesired operation.
Note: This equipment has been tested and found to comply with the limits
for CLASS B digital device, pursuant to Part 15 of FCC Rules. These
limits are designed to provide reasonable protection against harmful
interference when the equipment is operated in a commercial environment.
This equipment generates, uses and can radiate radio frequency energy
and, if not installed and used in accordance with the instructions, may
cause harmful interference to radio communications. However, there is no
guarantee that interference will not occur in a particular installation. If this
equipment does cause harmful interference to radio or television reception,
which can be determined by turning the equipment off and on, the user is
encouraged to try correct the interference by one or more of the following
measures:
1.1. Reorient or relocate the receiving antenna.
1.2. Increase the separation between the equipment and receiver.
1.3. Connect the equipment into an outlet on a circuit different from
that to which receiver is connected.
1.4. Consult the dealer or experienced radio/TV technician for help.
WARNING
Changes or modifications not expressly approved by the manufacturer could void the user’s authority to
operate the equipment.
About iMON
/
iMON is a new standard for HTPC (Home Theater PC) that transforms your PC into
true AV system such as TV, VTR, DVDP, or Audio System. With a single remote controller,
iMON allows you the full control over all your applications. It also offers the excellent
features for you presentation. Have your own true HTPC with iMON that enables
you to control your PC conveniently with a remote controller.
Specifications
1. Operating Systems: Windows XP, 2000, ME, 98
2. System Requirements: Pentium CPU of 266MHz or better, 1 USB port, and CD-ROM
3. Supported Remote Controller: iMON RC (dedicated remote controller) and other remote
controllers for home use that uses 38kHz carrier frequency.
4. Maximum Distance: 15M
5. Signal Reception Angle: 30 degrees in all directions or narrower
6. Connection Type: USB (Cable Length: 1.5M, extensible with using USB cable extension)
7. Dimensions: iMON Station : Diameter 47mm, iMON RC: 165*50*20, 47key buttons
8. Weight: 50g
9. Certifications: CE, FCC, and MIC
10. Country of Origin: Republic of Korea

Features of iMON
Complete control over music, DVD, and video playback programs with a remote control
Convenient setup and use of iMON RC through automatic setup wizard of the application
program hot-keys.
Maximize of the remote controller button application by generating the different hot-key
of the same remote controller button under different application programs.
Application Launcher function for the immediate load of the application program
Task Switcher function for the activation of the loaded program.
Macro Function for the setup and execution of the complicated command like Log In,
composition work of mouse and keyboard, and so on.
Convenient supplemental functions such as PC Power Off, Screen Saver, Scheduled
Shutdown, and Alarm.
Remote Control on PowerPoint presentation with your remote controller
Excellent signal reception of iMON Station as long as 15m and as wide as 30 degrees
in all direction
Ordinary remote controller for home appliance can be registered and used for
iMON through remote controller registration and set up wizard.

In Your Package
iMON Station
Analyze the IR signal received from the remote contro l l er an d deliver the result to PC.
Use the enclosed mount and dual-faced tape to install this product on the inclined
surface. When you use the mount, you can use the hole at the bottom of the product to
adjust the signal reception angle.
iMON RC (Remote Controller, "RC” hereinafter)
This RC is designed to maximize the convenience in the Windows environment. It consists
of mouse function buttons, keyboard buttons, program setting buttons, and
customized buttons.
iMON Manager & Driver Installation CD
The iMON Installation CD includes the iMON Manager that is required to use your iMON
and the files to instal l the iMON Station driver. iMON Manager is a integrated iMON
manager that analyze the signal received from iMON Station to control the
application, as well as performs registration/selection process for remote
controller and setting procedure for applications. It consists of set up window, RC
signal indicator that indicates the state of signal input, Application Launcher, and Task
Switcher.
Two RC Batteries (AAA)
Installation and User’s Guide
This small guide is for installation of iMON Manger and iMON Station. For details, click Help
button at the bottom of iMON Manager after you install it.
Installing from iMON Installation CD
Now, let’s install your iMON in your PC. The installation will automatically start when you
insert the CD in the CD-ROM drive. If your CD-ROM does not support automatic start, run
iMONSetup.exe (“D:SSSSiMONSetup.exe”, if the driver letter of your CD-ROM drive is D)
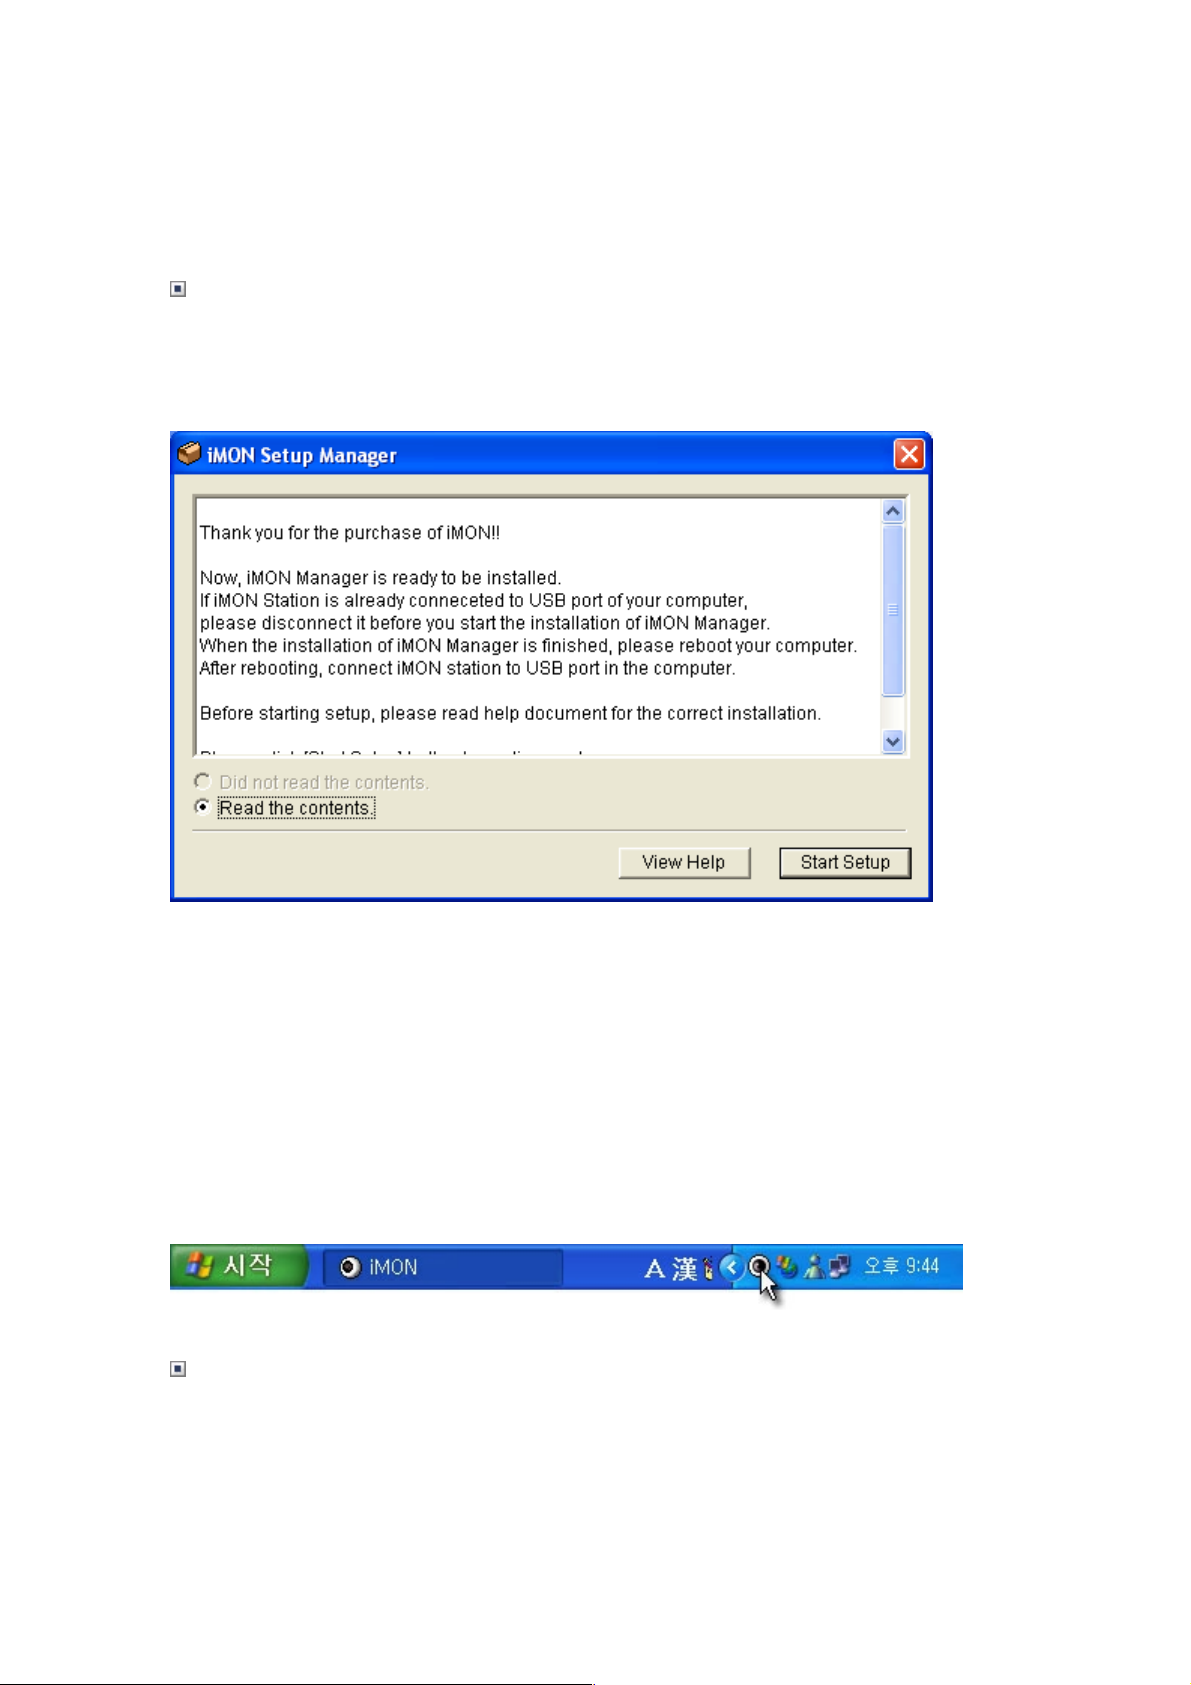
in the CD-ROM. Do the followings as instructed by the Setup Manager.
Read the contents in the Setup Manager and click ‘Start Setup’ button. It is simple and
easy to install iMON Manager and the drivers. If you already have an iMON installed,
be sure to exit from the current iMON program before you start installation.
iMON RC Manager will scan your PC to set the programs that provides the default setting
values.
After you complete the iMON Manager and driver installation, restart the system as
prompted. Your iMON Manager will start automatically with Windows. You can see the
shortcut icon for your iMON Manager on the system tray at the bottom right of the
Windows desktop.
Connecting iMON Station
Connect the USB cable of your iMON Station to the USB port of the PC, as
shown in the figure below.
Once the iMON Station is connected to the USB port, Windows detects your iMON Station
automatically and performs required process. Please see the installation guide for the
OS installed on your PC.
Shortcut: Windows XP | Windows 2000 | Windows ME, Windows 98SE, Windows
98
Windows XP
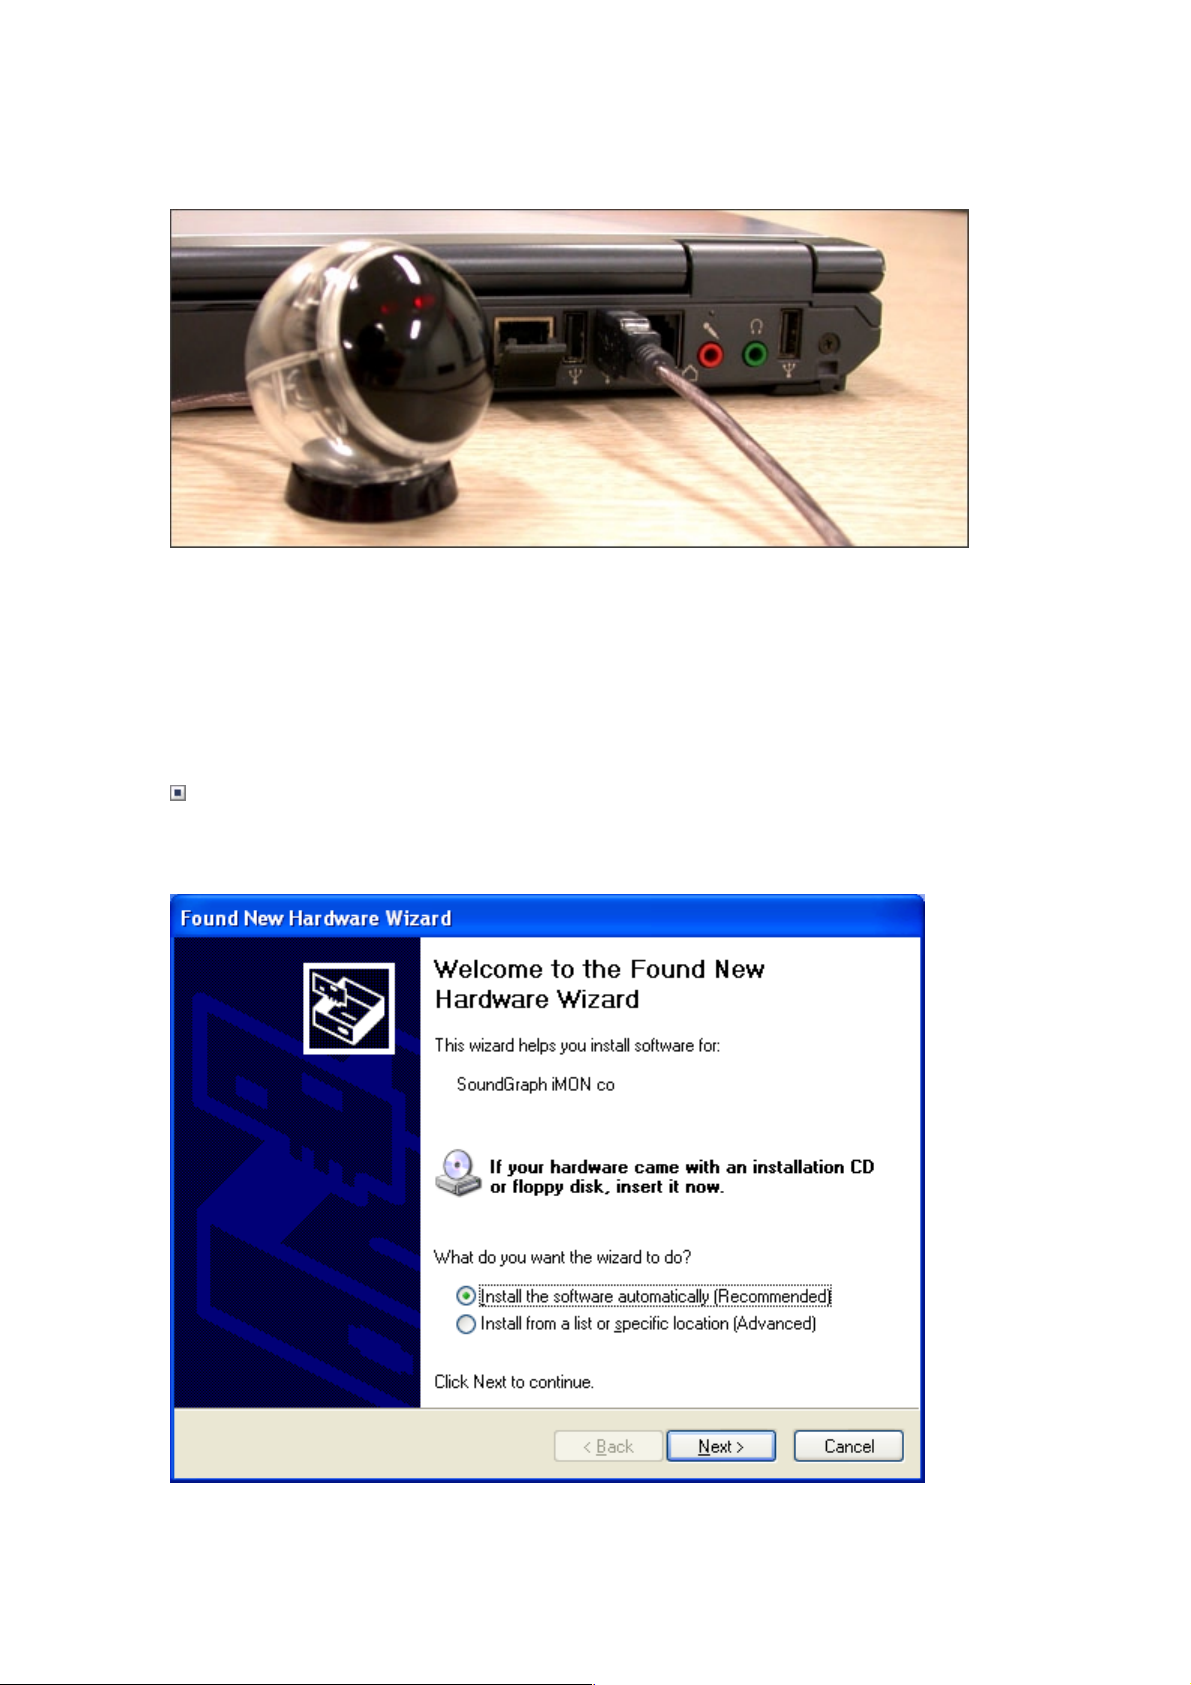
When iMON Station is connected to the USB port, Windows detects your iMON Station
automatically and starts ‘Add New Hardware Wizard’ as the following.

Check if 'Install the software automatically (Recommended)’ is selected and click ‘Next’
button. After Windows display automatic iMON driver installation process on the monitor,
the following window appears.
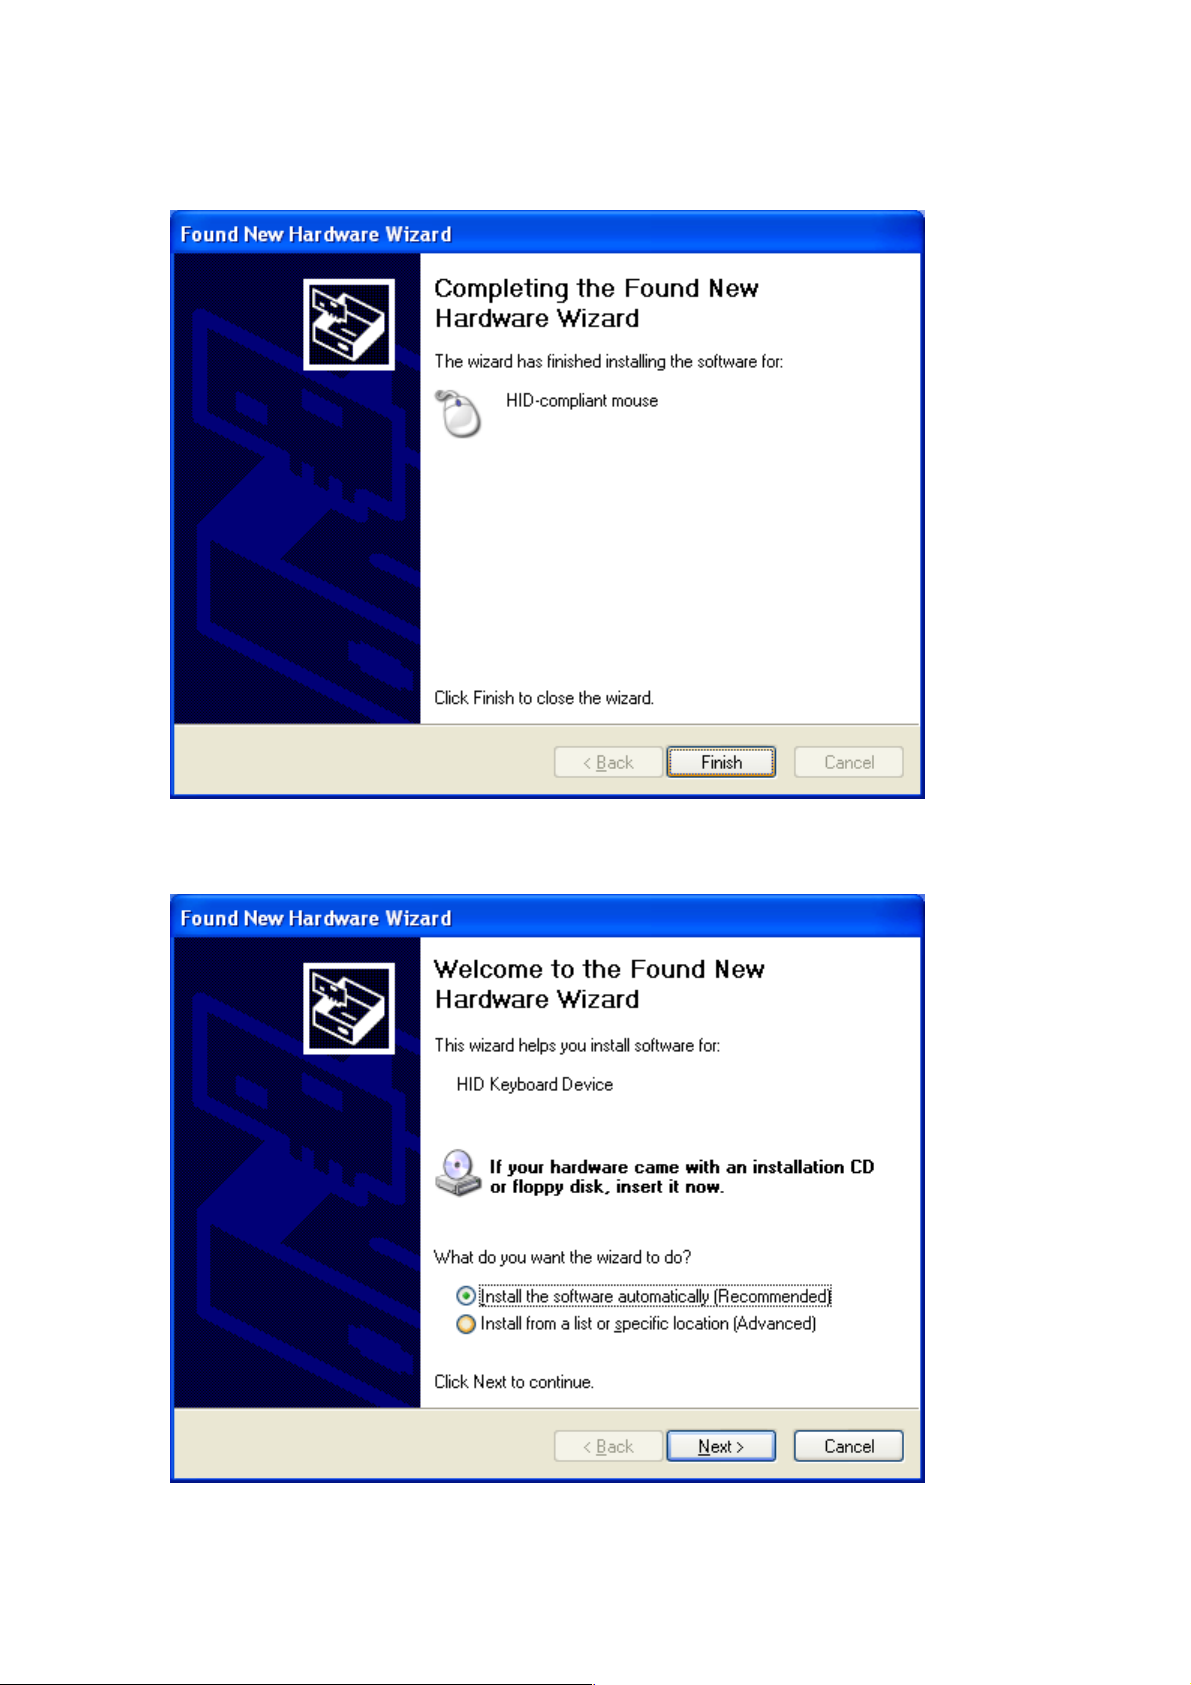
Click ‘Finish’ button. In a short moment, the following window appears. (Installing iMON
mouse driver)

Check if ‘Install the software automatically (Recommended)’ is selected and click ‘Next’
button. After Windows display automatic driver installation process on the monitor, the
following window appears.
Click ‘Finish’ button. In a short moment, the following window appears. (Installing iMON
keyboard driver)
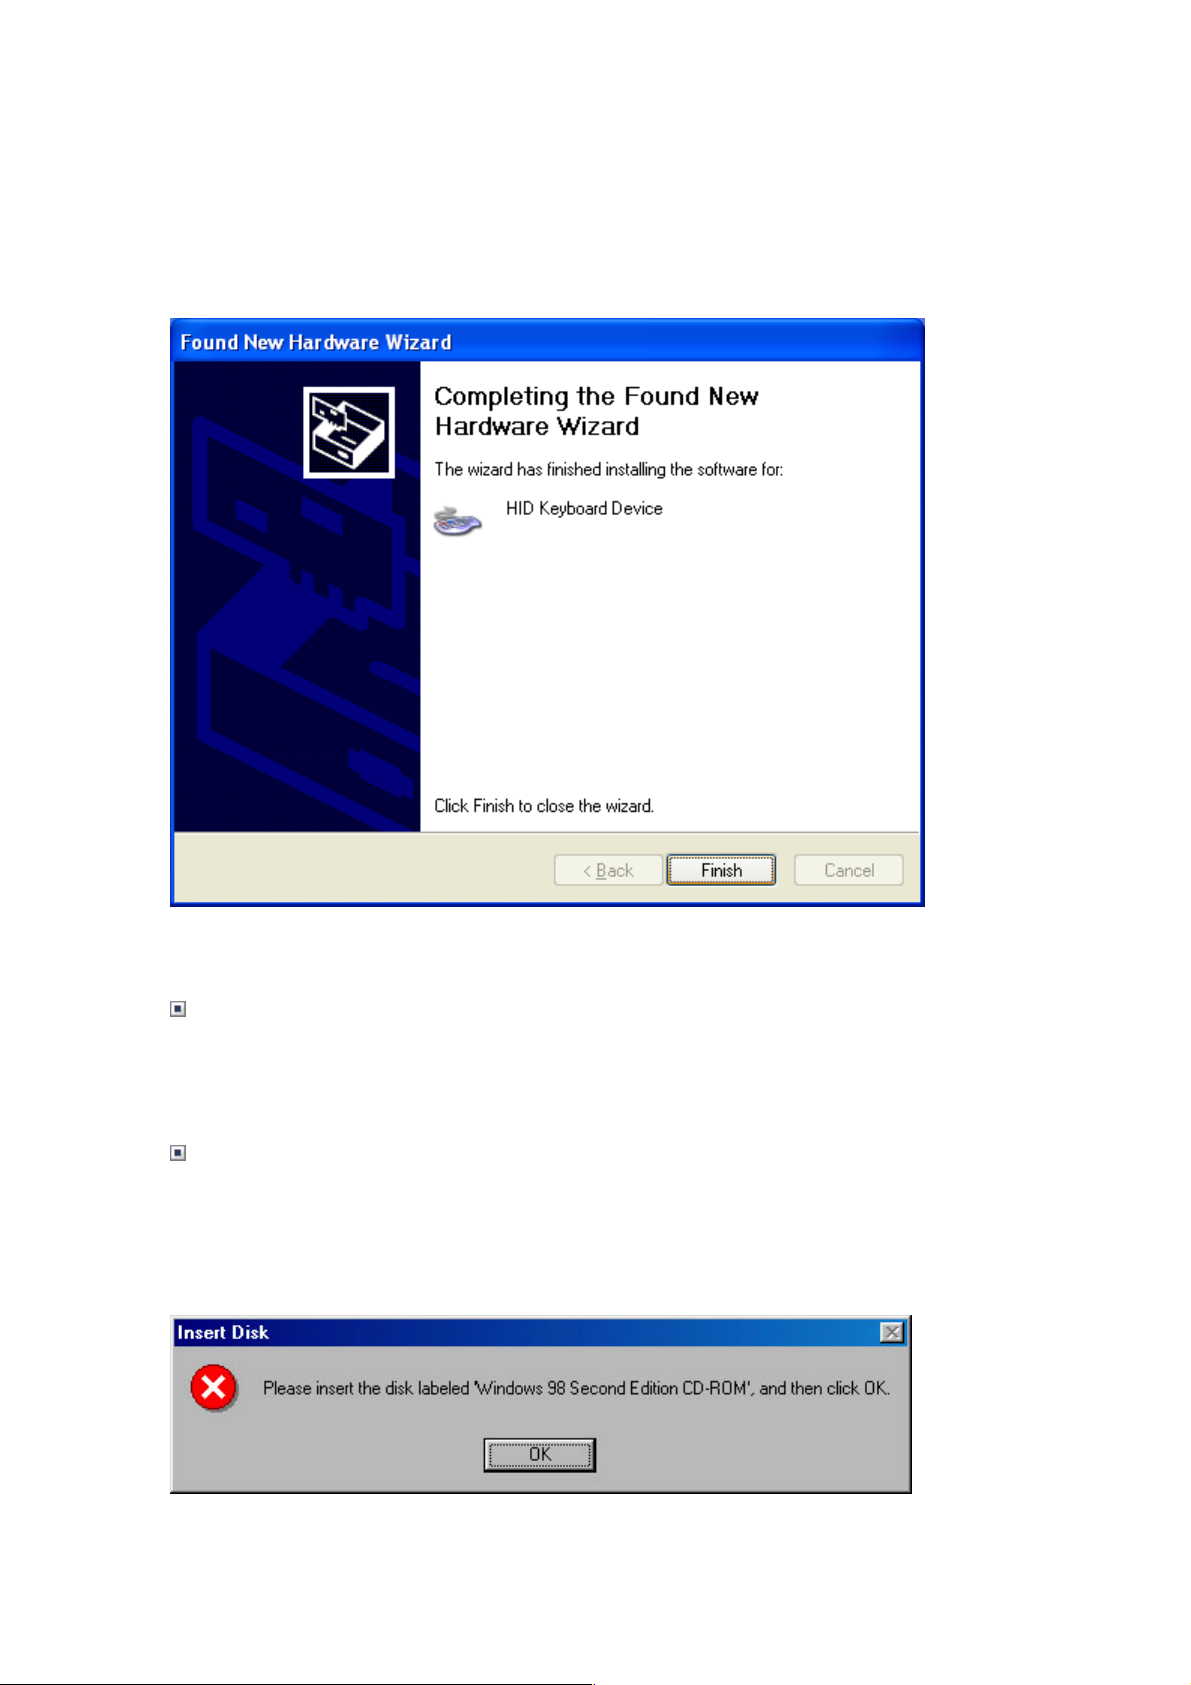
Check if ‘Install the software automatically (Recommended)’ is selected and click ‘Next’
button. After Windows display automatic driver installation process on the monitor, the
following window appears.
Click ‘Finish’ button to complete the installation.
Windows 2000
The installation in Windows 2000 is almost the same as in Windows XP. You can refer to
the Windows XP installation procedure to install your iMON without any problem.
Windows ME, Windows 98SE, Windows 98
If you use the Windows ME, 98, or 98SE, the installation procedure may ask you for the
Windows installation CD before it finishes installing the iMON Station Driver. In this case,
the following window appears.
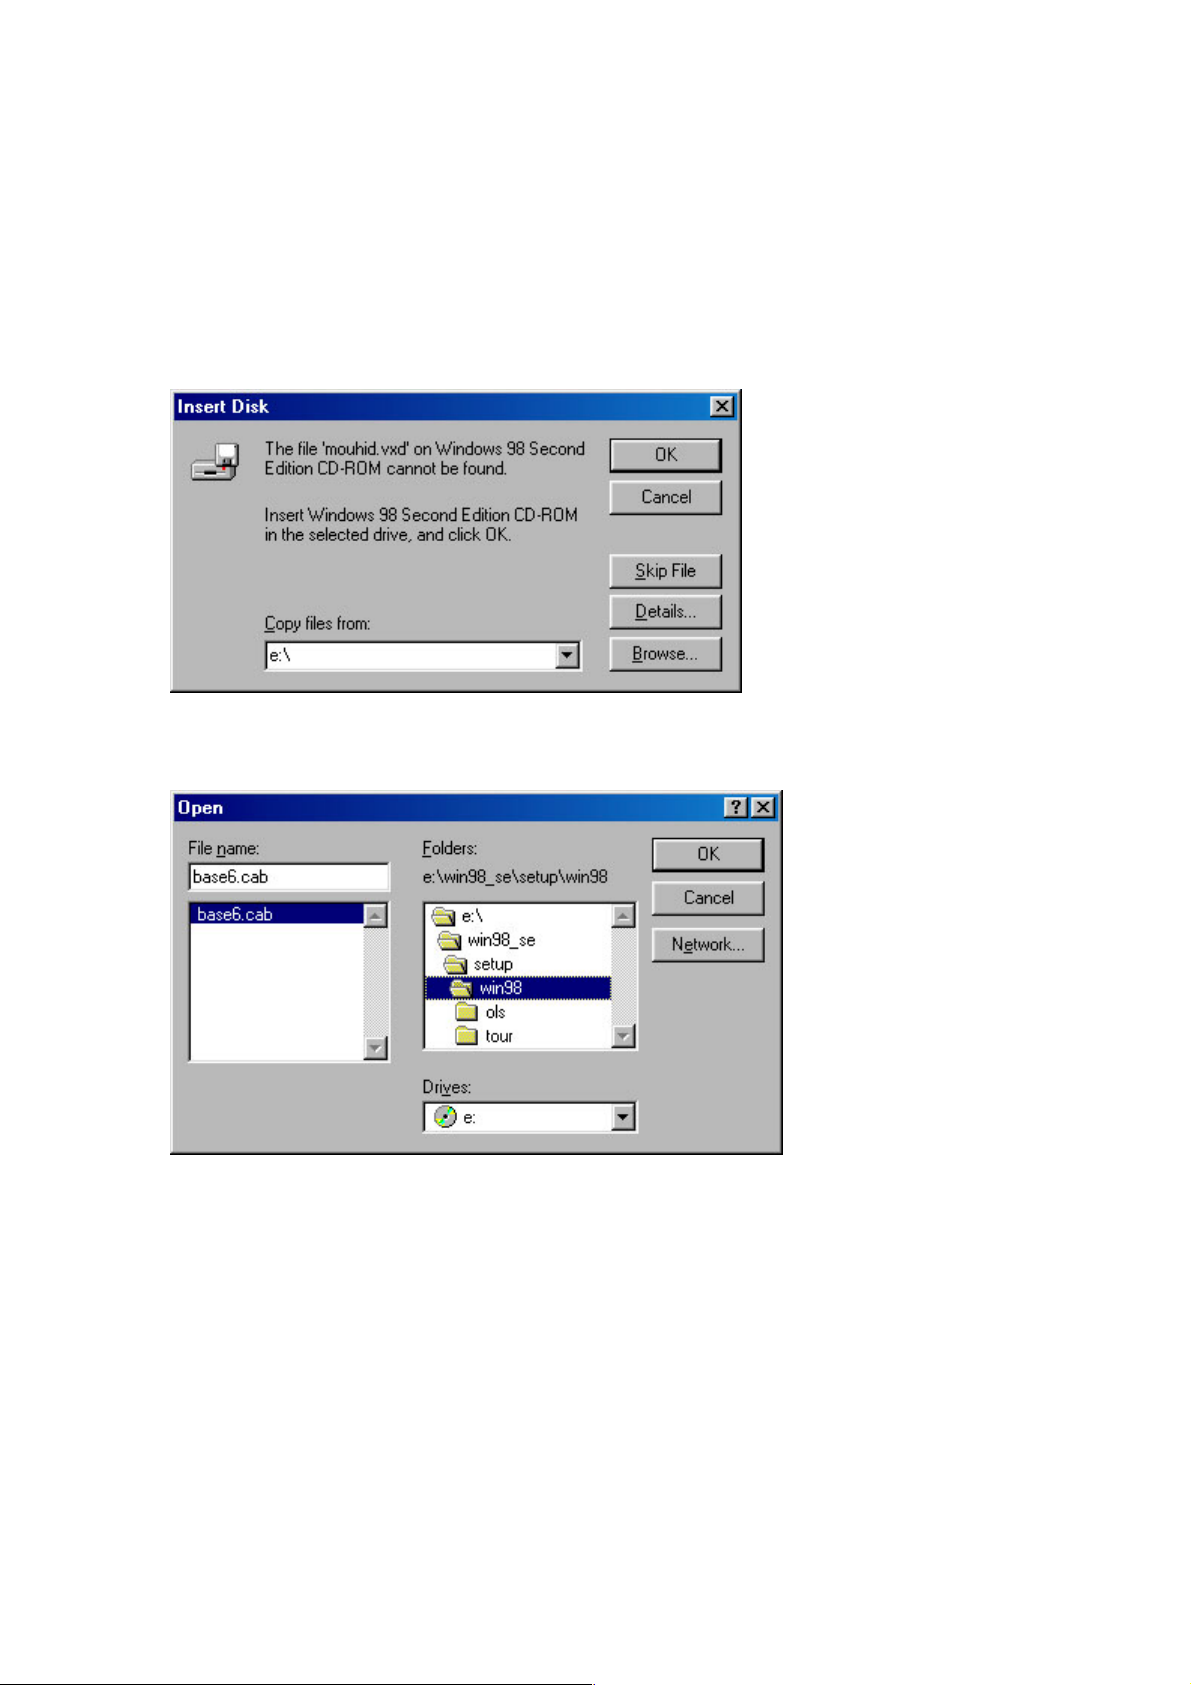
Insert the Windows installation CD in your CD-ROM drive and click ‘OK’ button. The
following window appears. (If you don’t have the Windows installation CD, please click the
‘browse’ button, and select the same folder with your OS version under the ‘support’ folder
in the iMON installation CD)
Click Browse button.
Specify the location of Windows installation files and click OK button. (If you don’t have the
Windows installation CD, please click the ‘browse’ button, and select the same folder with
your OS version under the ‘support’ folder in the iMON installation CD)
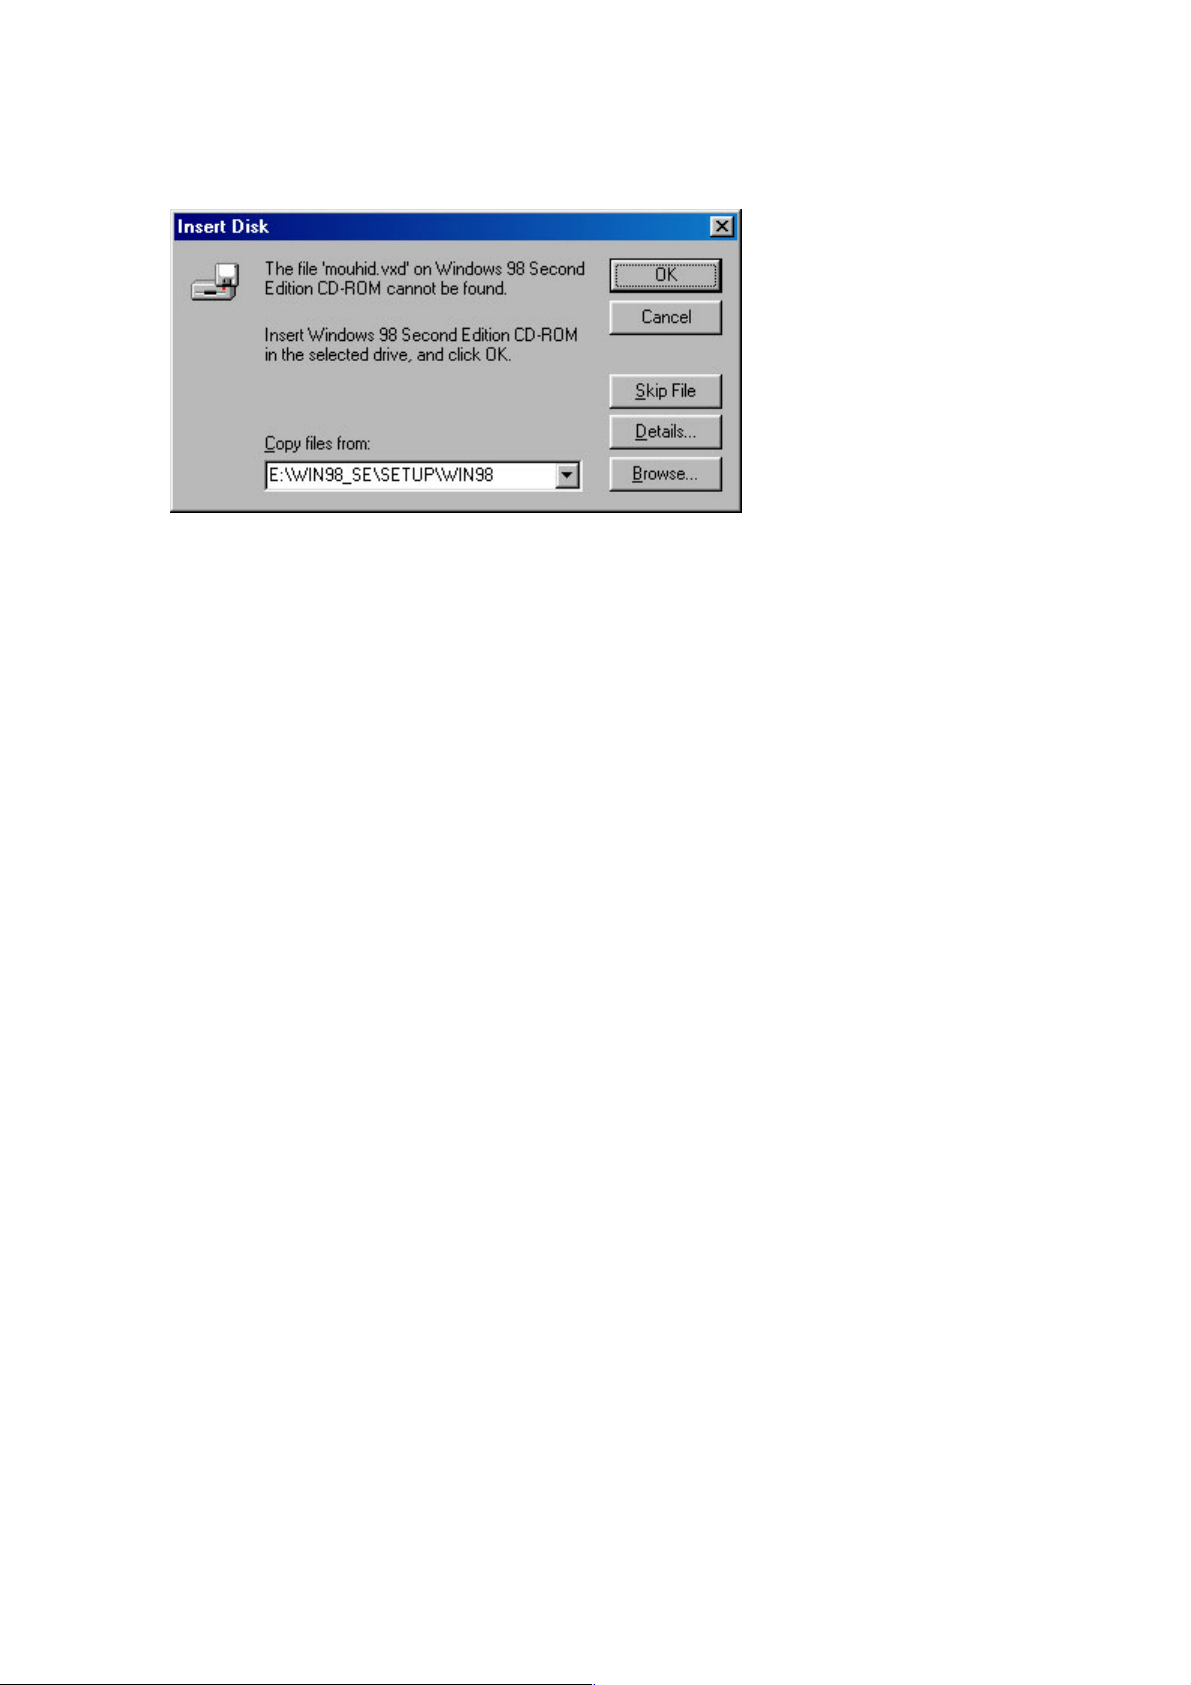
Click OK button again to complete the installation.
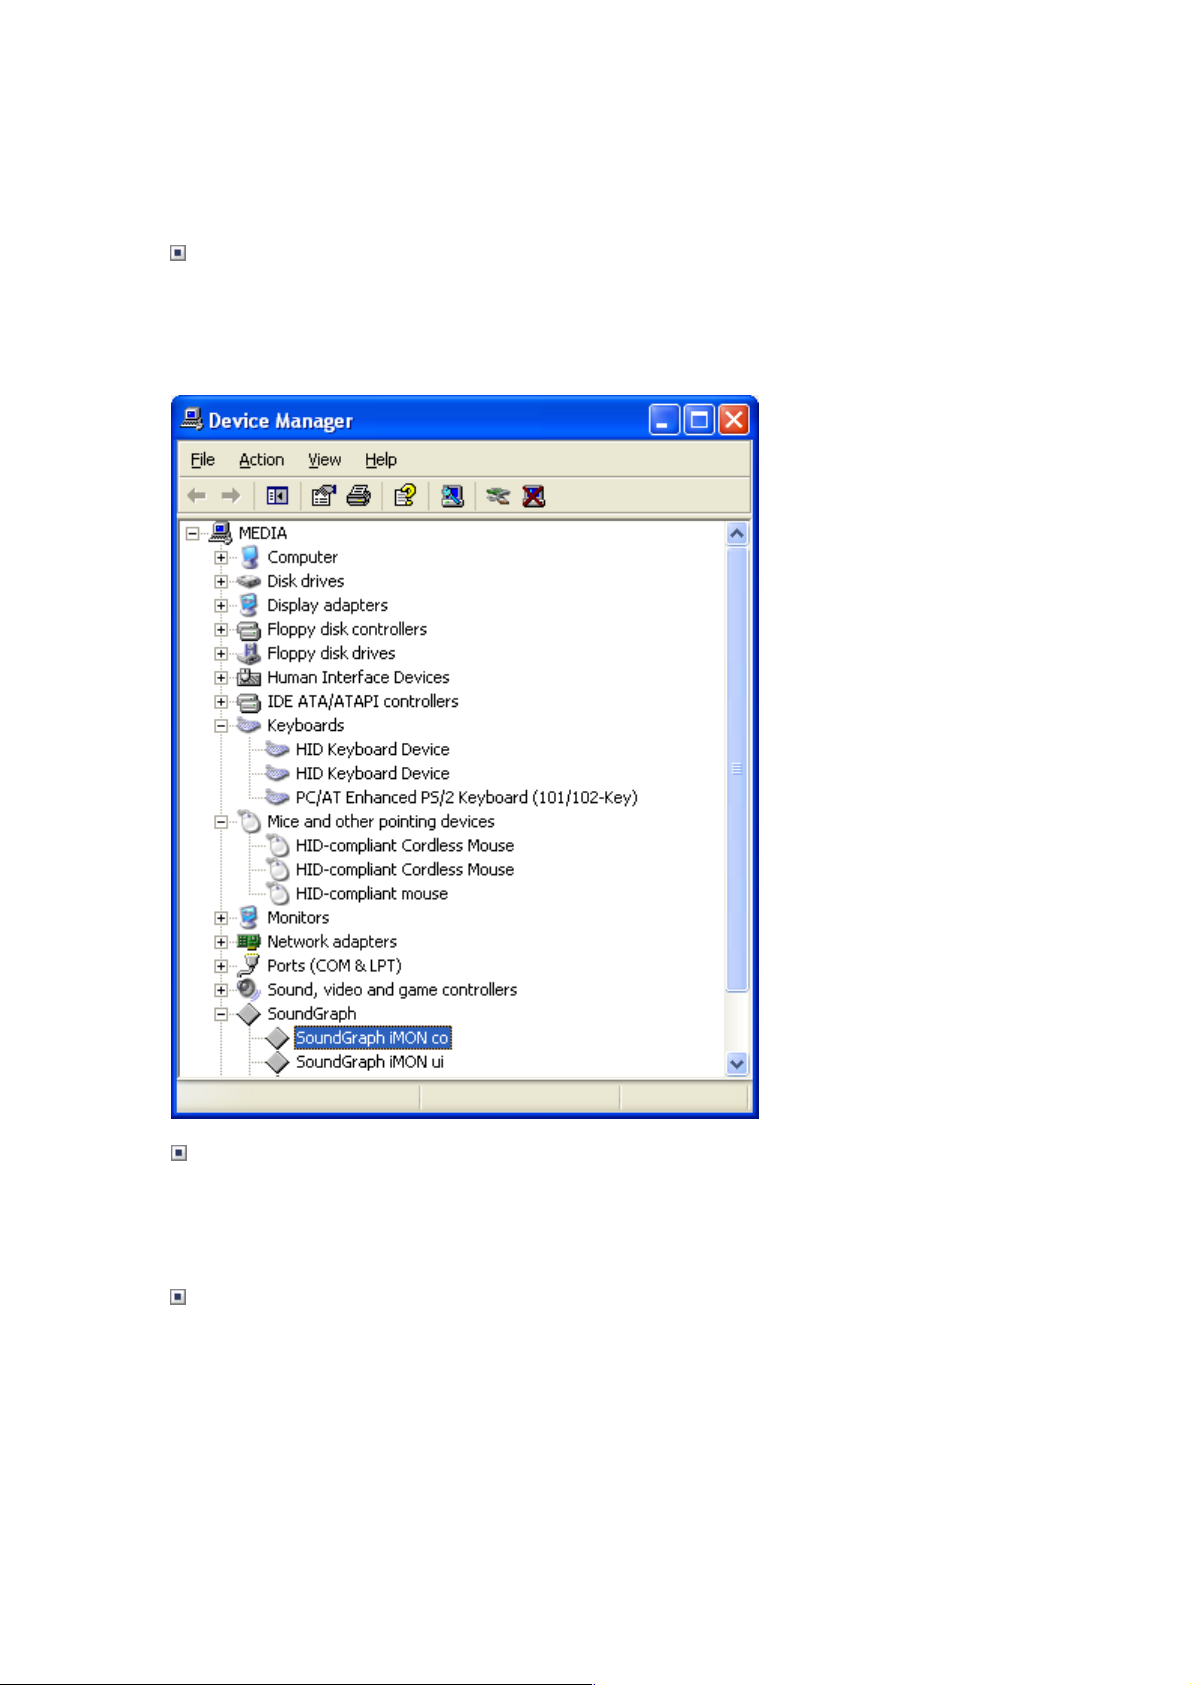
Checking if the iMON Station Driver is Installed
Now, the installation is complete. Let’s use Device Manager in Control Panel to check if
your iMON Station is correctly installed. (To launch Device Manager, select System tab in
the Control panel in Windows 98 and ME, or select System in Control Panel and click Device
Manager in Hardware tab in Windows 2000 or XP.)
You can see the installation is successful with items, such as ‘SoundGraph iMON co’
and ‘SoundGraph iMON ui’ under ‘SoundGraph’ category, ‘HID Keyboard Device’
under ‘Keyboards’, and ‘HID-compliant Mouse’ under ‘Mice and Other Pointing
Device’, as shown in the figure above.
When connected to the USB port of the PC, the red LED at the front of the iMON
station lights. Press any button on the remote controller at this time. The LED flashes, as
like in the figure below, to indicate the signal reception from the remote controller.


Getting Started with iMON Manager
When you reboot the system, you will see the program runs as shown in the figure
below. iMON Manager is registered in the Starting Programs to be started when the
Windows is started. iMON Manager is a integrated iMON manager that analyze the
signal received from iMON Station to control the application, as well as performs
registration/selection process for remote controller and setting procedure for
applications.
Add Remote Controller Button
Allows you to register an additional remote controller.
Delete Remote Controller Button
Allows you to delete the existing remote controller.
Remote Controller Selection Window
Lists remote controllers that are registered, so you can select one of them.
Tray Option Check Box

Use this check box to determine whether to put the iMON Manager program on the system
tray automatically on system booting. For normal use, select this button to put iMON
Manager on the system tray.
Go To Tray Button
Use this button to move the iMON Manager on the system tray after setup.
Remote Controller Command Setup Button
Use this button to set the shortcut key for Windows and programs to the registered remote
controller button.
Option Button
Use this button to set the execution options of iMON Manager.
Help Button
Select this button to see the Help.
When you put iMON Manager on the tray, iMON Manager always operates at the bottom
right of the Windows Taskbar, as shown in the figure above. Double click this icon to bring
up iMON Manager, or right click it to select the menu as shown in the figure above. To
terminate the iMON Manager, select ‘Exit’ menu from above menus.
Using iMON RC (Dedicated Remote Controller)
The biggest benef it of using iMON RC, which is the dedicated remote controller, is that

your iMON Manager already knows the button names for each IR signal, so that
it can perform the program commands setup or Windows commands setup
automatically. Also, iMON RC can compensate the speed of IR signal that is relative
slower. For example, you can use iMON for the game that you need to press remote
controller buttons fast with satisfactory results.
Click Add Remote Controller button and enter ‘iMON RC’ for the name. Then, use
automatic registration for the program that includes iMON RC signals.
iMON Manager interprets the settings for remote controller with name ‘iMON
RC’ as for the iMON dedicated remote controller and process IR signal from the
remote controller fast.
iMON Manager can use an ordinary remote controller for home appliance, rather
than dedicated iMON RC, for various functions. You can use these remote controllers
to control multimedia programs – music and video playback – conveniently as you control
your ordinary home electronic appliance. However, ordinary remote controller may result
relatively slower response than iMON RC because they are designed to prevent any
interference between different IR signals.
Setting Up – Registering the Remote Controller
One of the advantages of iMON is that you can register ordinary remote controller for
home electronic appliances, not only iMON RC, to control your PC. Also, you can register
several remote controllers. iMON RC is already set up with programs that are installed in
your PC. You can use automatic scan function to use your iMON RC immediately. Use iMON
Manager to see settings of your iMON RC.

Here, we will explain how to register other remote controllers than iMON RC. Use
the following steps to register your favorite remote controller. Now, choose your own
remote controller and register it.
Click Add Remote Controller button to bring up a window as shown below.
Enter the new remote controller name and select Scan function and whether to
register the iMON RC signal. Check the automatic registration check box to use the scan
function that iMON Manager scans for supported applications in your PC and register the
corresponding functions automatically. Check iMON RC signal registration check box
only when you have purchased the iMON RC, which sets the IR signal values for
iMON RC. If you have not registered signals for iMON RC, it only retrieves the shortcut
values for programs. Therefore, you need to set the IR signal value for the remote
controller separately using your registered remote controller.
Click ‘OK’ button. You will see the remote controller is registered as shown in the figure
below.
Likely, you can register several additional remote controllers.

Caution: When you register several remote controllers, you need to select one that
you want to use from the Remote Controller Selection list. If you use a remote
controller other than currently selected from the selection list, the signal will be interpreted
as wrong signal. The following figure shows selecting one remote controller from several
remote controllers.
Next step is to assign remote controller buttons for program shortcuts or Windows basic
commands. First, select the remote controller to set and click ‘Setup’ button.

Setting – Setting Program commands
The automatic scan function of iMON Manager automatically provides
settings for programs that support default setting values. Also, if you use iMON RC,
you can use basic playback functions without any separate setting procedures. Here, we
will explain how to set a particular function using a separate remote controller.
You can use Custom button on the iMON RC. If you change the default button value, follow
the following steps.
Press ‘Add Program’ button to bring up a list for currently running applications as
shown in the figure below. This function allows you to select the application that you want
to register from the currently running applications. You can register the application that you
want without knowing the exact location of it.

Select the program if it is in the list and click ‘OK’ button.

After you add the program, click ‘Retrieve -> Import’ button to bring up a window as
shown below.

Click ‘Open’ button after selecting the setting file. You can see the contents of the file as
shown in the figure below.
The Preview window shows the shortcut key value of the setting value. If you
want to import only functions and shortcut key value, select Import Values for
“Function” and “Shortcut” field. “RC Button Name” and “RC Setup” are options that

import stored remote controller signals. They are useful when you have backed up the
remote controller setting or when you use the remote controller settings from other user
who uses the same remote controller.
When you click Import button to complete importing, you can see various functions of
WinAmp are listed as shown below.
In the above figure, select the item that you want and set it for the remote controller.
Select ‘Play’ function with your mouse and click Modify button to bring up ‘Remote
Controller Button Registration Wizard’ as shown below.

If you have imported the basic settings, you do not need to modify the function name since
the application commands are already registered. If you want to change the name, you can
enter the new name (such as Play -> Playback). After you enter the name, click ‘Next’
button to go to Shortcut Key Setting as shown in the figure below.
The above figure shows the area that you enter the shortcut key setting. The shortcut key
for WinAmp ‘Play’ function is ‘X’ key. Since you have imported the basic setting file, the
function name and the shortcut key information is already registered. Click ‘Next’ button
to go to the area to set the remote controller.
Enter the name written on the remote controller or any name you can easily remember for

the WinAmp ‘Play’ command. For example, if you want to specify the button named ‘John’s
TV Remote Controller’ for the ‘Play’ command, enter ‘Play’ in the input field as shown in
the figure above and press ‘Next’ button.
Now, let’s register the remote c ontroller signal.
Press the remote controller button to execute WinAmp play command twice toward iMON
Station. If you have made mistake, press Reset button and enter the remote signal again.
When two black bar in the above figure turns into red bars by receiving the remote
controller signal, click ‘Finish’ button to complete the setup process.

The remote setting field of ‘Play’ is set ‘O’ that indicates that the remote
controller signal is registered.
Use the same method as described above to set your favorite commands for Windows.
Generally, you do not need to specify all application commands to the remote controller. In
case of WinAmp, you may register basic player related commands (play, pause, stop,
next, previous, volume up, and down) and commands such as ‘file open’ to enjoy the
music on your PC. However, if you want to set several other functions, you can use the
above steps for WinAmp shortcut key settings.
Caution: Since iMON Manager compares the button signal from the remote
controller with the currently active application command list to execute
the corresponding function of the application, you can share the same
remote controller button among different applications. That is, even though the

playback shortcut keys are different from WinAmp and Windows Media player,
you can set the same play button for the remote controller to play either of both
programs.
However, you cannot use the remote controller buttons that are assigned for
Windows command for the application. Again, you cannot register the same
remote controller button for two functions in the same program. If you try to
assign the same remote controller button that is already assigned for Windows
command or if you try to assign the same remote controller button that is
already assigned for other function of the same application, the following
warning window pops up to prompt you to set the button again.
If you want to use this remote controller button, you need to remove the
settings for ‘Play’ command first. To remove the set function, select ‘Play’
function and press ‘Modify’ button. Then, press ‘Finish’ button without entering
any remote controller signal at the final stage.
For now, we have described how to set the remote controller when the function names and
shortcut keys are provided as a file. If you want to use iMON for other program that
the preset file is not provided, add the application by pressing ‘Add Program’
button in the ‘Program Commands’ of iMON Manager setup window. Then, press
manual ‘Add’ button and register the shortcut keys for the application (see
shortcut key function menu).

Setting – Setting Windows Command
The Windows commands are the set of functions that are commonly applied to
all programs regardless the program that is currently active on the desktop, such
as mouse function, keyboard functions including Application Launcher, Windows shutdown,
timer setting, and power management functions. If you use iMON RC, you can use iMON
Manager scan function to set the functions on iMON RC immediately without any separate
procedure. Here, we will explain how to set Windows commands using a separate remote
controller.
You cannot use the remote controller that is assigned for Windows command for other
application. Therefore, it is recommended to set up the required functions first depending
on the number of remote controller buttons that you want to use. However, be sure to set
buttons for ‘Launch Application Launcher’ and ‘Launch Task Switcher’, supporte d by
iMON Manager, and arrow buttons, and Enter button since they are required for
convenient use of iMON.
Press ‘Setup' button of iMON Manager and select ‘Windows Command’ tab to bring up a
window as shown below.

Select the function to register and click ‘Modify’ button to register the remote
controller button. You can use the same methods for ‘setting program commands’.

Setting – Setting Customized Windows Command
iMON provides the set of commands so that you can use your remote controller to
control ‘Windows commands’ conveniently. If you want to add a function that is not
included in ‘Windows Commands’ but is applied for all programs regardless of
the program that is currently active on the desktop, you can add the function in
‘Customized Windows Command’. ‘Customized Windows Command’ is also, like
‘Program Commands’, applied commonly for all programs. Therefore, you cannot use the
same remote controller button as ‘Program Comma nds’.
Now, let’s find out how to enter the shortcut key value in the iMON setting window.
You can use the same methods for ‘setting program commands’.

Setting – Setting Macro
For ‘Windows Command’ or ‘Program Commands’ you cannot register the shortcut key
that consists of four or more keys. Most of shortcuts used generally in PC consist of three
or less key combinations. For complex functions such as you need to use mouse
buttons and keyboard keys to enter ID and password for web site login, you can
use macro for your convenience.
The method is basically the same as other command setting as shown in the figure below.
However, there are few differences from ‘Program Command’ or ‘Windows Command’
setting.
First, press ‘Add’ button to start ‘Registration Wizard for RC Buttons’ as shown in the
figure below.

Here, we will enter the login information for iMON homepage (iMON.soundgraph.com).
First, enter ‘iMON Homepage Login’ for the function name.
Press ‘Next’ button to bring up the window where you set the macro. The virtual
keyboard/mouse will be displayed along with the window. Use your mouse to click the
required virtual keyboard key or mouse button. If your iMON homepage
membership information is ID: Korea and PASSWORD: 2333, enter as shown above. Most
login procedure for web site is in the order of ID input -> Tab -> password input.
You can use your creativity to solve inconvenient authentication procedure by
using macro. However, we do not recommend you to use this function for
Internet banking because other people can see your password and other
security information from your PC.

The following steps are identical with the registration of ‘Program Commands’. When you
complete ‘Registeration Wizard for RC Buttons’, you can see that your macro is registered
as shown below. . ‘Macro Command’ is also applied for all programs as
‘Customized Windows Command’ and ‘Program Commands'. Therefore, you
cannot use the same remote controller as ‘Customized Windows Command’,
‘Windows Commands’, and ‘Program Commands’.

Setting – Setting Launcher
You can use Shortcuts to register programs for ‘Application Launcher’. With
‘Application Launcher’, you can start any application with your remote controller. If you
have use Scan function when you register a new remote controller, iMON Manager scans
all applications that it supports for default settings and register them to Shortcuts
automatically. If you use ‘Add Program’ from program commands to add the program in
iMON Manager, you will see the window that prompts for confirmation. Select ‘Yes’ to
register the program in Launcher automatically.
You can also use ‘Add’ button from the Launcher to register the program manually.
Click ‘Add’ button to bring up the list of the applications that are currently running on the
Windows. If you want to add Microsoft Window Media Player to Launcher , for example,
click ‘Add’ Shortcuts button while Microsoft Window Media Player is running. iMON
Manager also provides the method that you can search for the execution file. Click
‘Search by file name’ button to bring up the file open window, as shown below,
where you can search for the execution file and register it.


Setting - Print
Sometimes, when you use iMON to register programs, you may forget which remote
controller button is assigned to what program function. Especially when you register many
programs and functions to the remote controllers, you may need to check the remote
controller button in the setting window until you are familiarized with buttons.
In this case, the Print button is provided so that you can print out the program
shortcut key information. Use this function to print out each registered program
function to use your iMON more conveniently.
In addition, this Help screen is designed for print out. Therefore, you can print out this
screen if you need.

Setting – Exchanging the Setting File
When we compare the case with basic setting file and the case when setting new keys,
we can see that using the basic setting file is far more convenient. Also, when you use
iMON for the first time, you may want to see other users experience on which key to assign
to what function. iMON allows you to exchange the setting files with other users
easily. You can use ‘Import’ function described in the basic setting to import the shortcut
key settings that other user has set for a new program. If you use the same remote
controller as others, you can easily import the signal that is assigned to the remote
controller.
Your setting file is located at ‘iMON program installation folderSSSSsetupSSSSRemote
Controller Name’ folder. For example, the files you have set so far are stored in
‘c:Sprogram filesSsoundgraphSimonSsetupSmy audio remote controller’. You can
exchange this remote control setting file easily with other users.
The official iMON web site http://iMON.soundgraph.com has the bulletin board
for users to exchange these setting files among users as well as the bulletin
board to solve any questions for using iMON.

Setting – Option Settings
Now, let’s see how we can set the options in the iMON setting screen.
As shown in the figure above, click ‘Options’ button in the iMON initial screen to bring up
the option settings.

Using as WinAmp Only Mode
Using as WinAmp Only Mode option is useful when you listen to music from
WinAmp while you do other task such as documentation. For example, you do not
need to bring up WinAmp and use your mouse or remote control to adjust the music
volume during working with word processor. Instead, you can send all commands from the
remote controller directly to WinAmp. Therefore, checking this checkbox allows you to use
your remote controller to control WinAmp once you launch it just like you operate home
audio system, while you work on the PC word processor. However, the remote controller
button will not operate on other program once you set this option. Uncheck this option if
you want to use your remote controller for several programs. Since this option uses the
remote controller buttons registered for WinAmp, you need to register remote control
buttons for WinAmp functions first in the program setup.
You can select the WinAmp version you are currently using in your PC from WinAmp 2.x
version and the newly released 3.0 version. If you use the WinAmp as default, the remote
input indicator on the desktop changes to the following to indicate that WinAmp is set as
default.
: WinAmp Default Mode Off
: WinAmp Default Mode On
Remote Controller Input Display on the Desktop
This option is useful when you see animation or display presentation. For example,
sometimes you wonder if the TV remote controller signal reaches the TV while you are
watching it. When you use this option, iMON shows the following figure on the PC monitor
screen to indicate whether the remote controller signal is good while you use iMON to see
video or display presentation in a distance.
When there is no remote controller signal, the screen is as shown in the first figure with
yellow light. When you press the remote controller button, the yellow light turns into
green light, if the remote controller signal is registered for active program, to indicate
that the command is sent to the program correctly. The light turns to red if you press the
button that is not registered, if the distance between the remote controller and iMON is too
far, or if the signal is not delivered correctly due to other trouble. When you see the red

light, check if the remote button is registered. If so, adjust the iMON receiver
angle and the distance.
: Normal
: Registered remote controller signal is received.
: Registered remote controller signal is not received or there is problem
in receiving the signal.
Adding Sound Effect
The Sound Effect option sounds when the remote controller input on the
desktop triggers green light or red light so that you can see the remote signal
input better. When you think it is annoying during listening to music or enjoying video,
clear the checkbox to stop the sound.
Green light: Sound
Red light: Sound
To change the default sound, press ‘Find’ button to set any wav file that you want.

You can use the same method to change the options for ‘mouse,’ ‘keyboard,’ and
‘timer’. In iMON Manager Version 1.0, the sensitivity adjustment for virtual mouse and
keyboard used in iMON is shared with the mouse and keyboard system properties.
However, in iMON Manager Version 2.0, these are adjusted in this option window.

Using - Starting the Application Launcher
So far, we have explained how to set the program commands, to set Windows
commands and macros, to register your favorite programs in Launcher, and to adjust
various options. Now, let’s actually use your iMON.
Let’s start Application Launcher. While iMON Manger is running, press the remote
controller button that is assigned for ‘Run Application Launcher’ in Windows Command. The
‘Application Launcher’ will start as shown in the figure below. ‘Application Launcher’
and ‘Task Switcher’, described in the next chapter, are useful function that
allows you to use your remote controller for basic Windows functions to launch
the application on the Windows and to switch the application by using ALT+TAB
key. To use this function well, you need to register four arrow keys and Enter key in
Windows command setup to iMON Manager first. You can use arrow keys to select the
program you want and press Enter key to activate the program.

Using - Starting the Task Switcher
Next, let’s start ‘Task Switcher’. This function is similar to ‘ALT+TAB’ key
combination that you use to activate other window while using another active
Windows program. In Windows command setup, press the button registered in ‘Run
Launch Task Switcher’. The ‘Task Switcher’ window appears as shown in the figure below.
This window shows the program icons that is currently open in the Windows. Use arrow
key to select the program to activate and press Enter key. Also as in ‘Application Launcher’,
to use this function well, you need to register four arrow keys and Enter key in Windows
command setup to iMON Manager first.

Using – Application Control
Now, once you have activated the program that you want using ‘Application Launcher’
and ‘Active Program Selection Task Switcher’, you can use your registered remote
controller button to control the program. For example, if you want to control WinAmp,
activate WinAmp and send the signal by the remote controller. You can easily use functions
of WinAmp such as Play/Pause/Stop/Next/Previous/Volume Control. The point you
should remind is that the command that is performed is different depending on
what program is active. Use ‘Task Switcher’ when you activate the program without
mouse or keyboard.

Using - Timer
iMON Manager includes the alarm function that shuts down the PC at the
defined time or sounds alarm after a certain time. To use the timer function, the
‘Timer Setup’ function of Power Management command from Windows Commands and four
direction arrow keys should be registered in iMON Manager in advance.
There are three modes: Sleep, Alarm, and None. Sleep mode shuts down the PC after a
certain period of time. Alarm mode sounds the alarm after a certain period of time. And,
NONE is use to cancel any timer function that is already set.
Time offers two modes: ABS. and REL. Use ABS to enter a certain time and use REL to
enter the relative time to the current time. You can also use arrow keys to set the time.
To register the timer, press the timer button on the remote controller and use up/down
arrow button to select MODE/TIME/Hour/Minute, or use Left/Right arrow button to adjust
the value of each item. Then, press the timer button again. The remote input signal
indicator changes as shown below to indicate the time that the ‘SLEEP/ALARM’ function will
start.
: Timer function Off

: Timer Function On
: Timer Function On and WinAmp default mode.
To cancel the timer, press the timer button and select the NONE mode. Then,
press the timer button again.
Visiting iMON Web Site
The homepage for iMON is http://iMON.soundgraph.com where you can find inquires,
experiences, suggestions, setup file exchange and iMON Manager upgrade. Please visit
iMON homepage to register your iMON and find out various informations about iMON.
When you sign in for iMON homepage, you can receive upgrades for iMON Manger and
drivers, as well as news for iMON.
SoundGraph Co., Ltd.
Address
SoundGraph, Hanyang Institute of Technology Rm 501, Hanyang University, 17, HandangDong, Sungdong-Gu, Seoul, Korea
Telephone
02-2298-2374~5
Fax
02-2282-6378
http://iMON.soundgraph.com
http://www.soundgraph.com
For any inquiry, send us a e-mail to the following address.
iMON Development Team: iMON@soundgraph.com
1. It is strictly prohibited to copy or publish this user’s manual online without consent of
SoundGraph Co., Ltd.

2. The contents of this manual is subject to change without any prior notice for product
function addition and performance enhancement.
3. IMON is the registered trademark for USB IR reception device of SoundGraph Co., Ltd.
4. Other mentioned software band names are registered trademarks of each owner.
 Loading...