

Sony ericsson S700I Imaging Manual
G
s
Imaging with S700
Taking, handling and sharing pictures
etting
tarted
August 2004

Getting started Imaging with S700
Introduction
S700 has a 1,3 megapixel digital camera and digital video recorder. You can take pictures, record video
clips, view them and send them in picture messages via MMS (Multimedia Messaging Service) or as email
attachments. To use email and MMS, you must subscribe to these services. Please check with your
network operator.
You can also use a picture as a screen saver or wallpaper, or save it together with a contact in your
phonebook so that the picture appears when that person calls.
The pictures and video clips can be saved on the Memory Stick Duo™ or in the phone memory. You can
easily transfer files between the different memories. Please see the Getting Started Guide Managing files
in S700.
You can save your camera pictures in four different sizes: 1280x960, 640x480, 320x240 or 160x120 pixels.
Your video clips can be saved in two different sizes: 176x144 and 128x96 pixels. This allows you to decide
the quality of your pictures and video clips, as well as the number of pictures/video clips that can be saved
(this depends on the size) in the phone memory or on the Memory Stick Duo.
As soon as you take pictures or video clips, you can send them in a picture message, using MMS. You can
also exchange them using Bluetooth, Infrared, cables or email.
The camera has an external photo light that can be activated using the light switch on the side of the
phone or via the camera settings menu.
Before taking a picture, you can change settings and add effects or frames. After taking a picture, you can
edit your pictures by adding effects, frames or clipart objects. With S700 you can easily create your own
personal pictures!
For information on phone overview, using the menus, entering letters, quick keys, Memory Stick Duo™,
file manager, please see the chapter Getting to know your phone in the S700 user guide.
2 August 2004
Getting started Imaging with S700
Activating the camera and video recorder
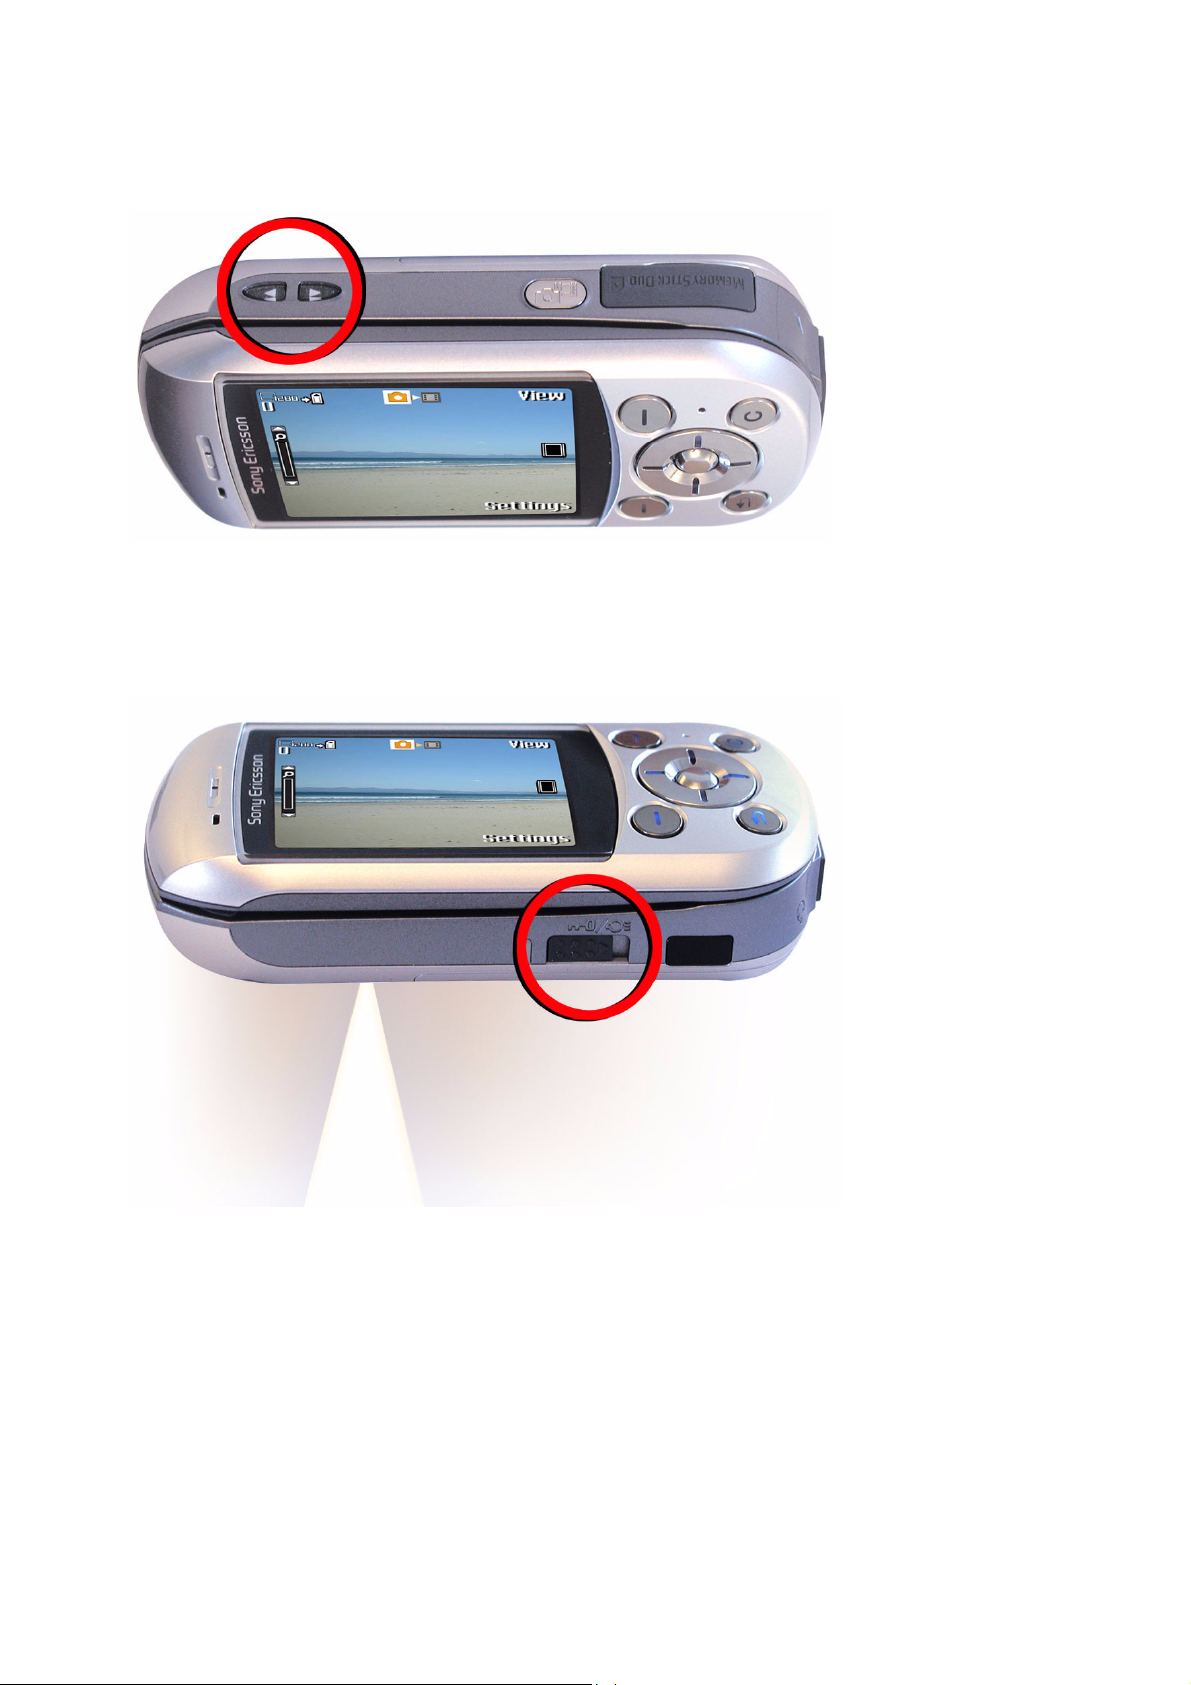
The camera and the video recorder can be activated in two ways, either by sliding the lens cover lock,
or by selecting Camera in the menu overview.
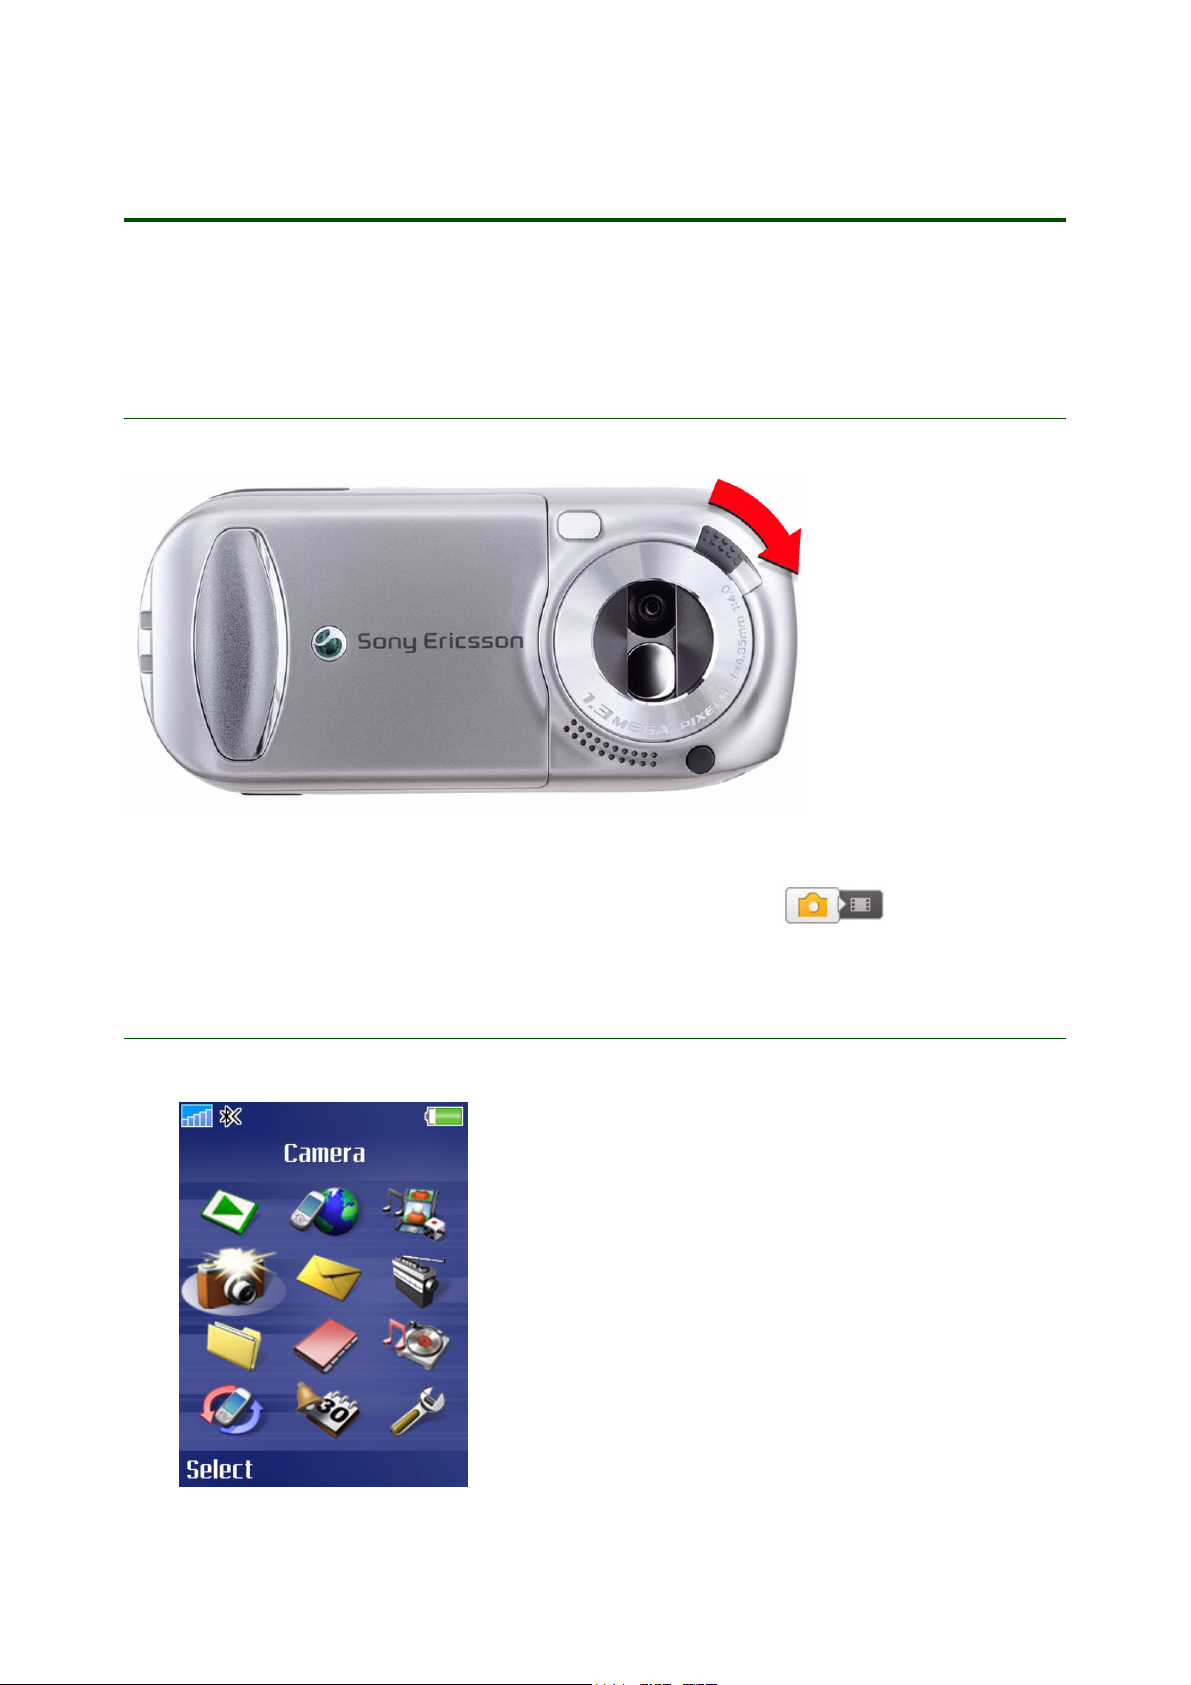
1. Activation by sliding the lens cover lock
The camera, as well as the video recorder, is activated by sliding the lens cover lock.
1. Close the phone (do not turn it off).
2. While in standby, slide the lens cover lock to open the cover. The view finder is now activated.
Use the navigation key to switch between camera and video recorder .
2. Activation by selecting Camera in menu overview
}
Camera. A message appears on the screen, asking you to open the lens cover.
3 August 2004
Camera
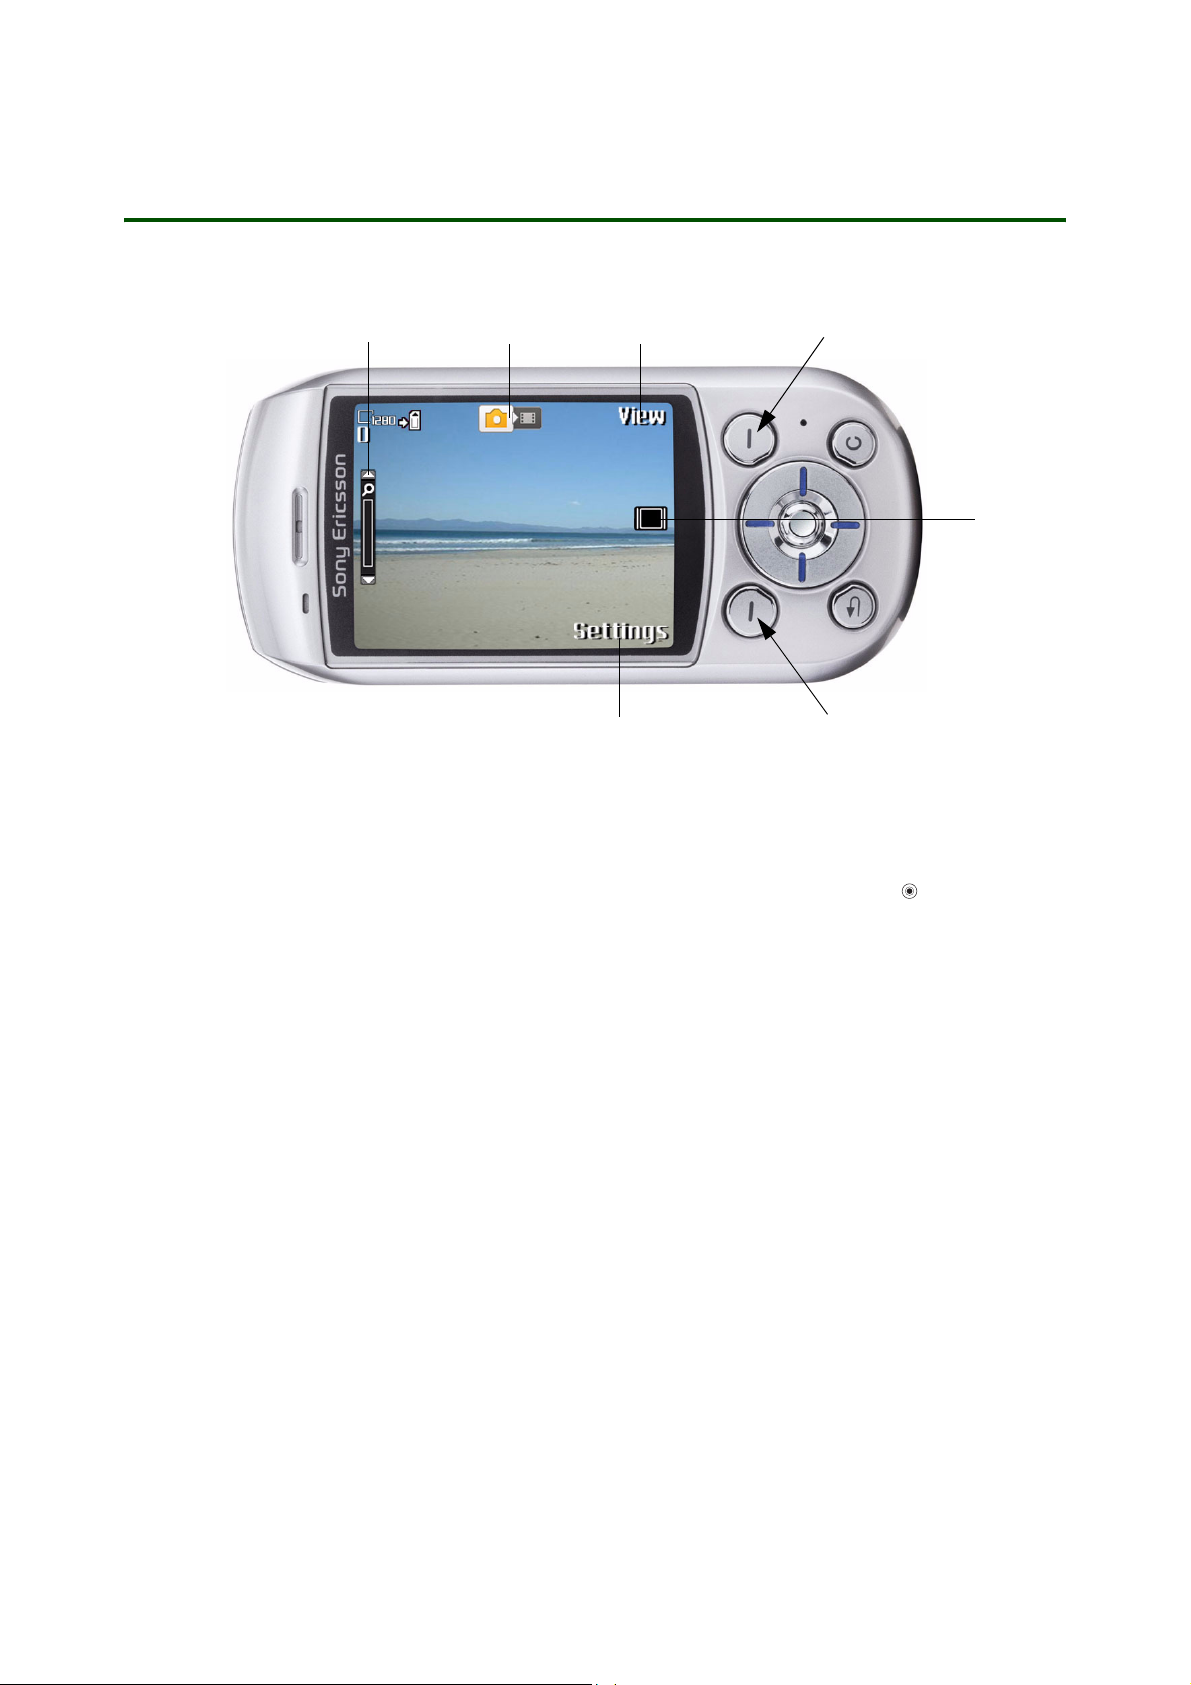
Keys used in camera mode
Getting started Imaging with S700
5
1, 3 Areas used for displaying functions such as
displayed in these areas, press the relevant selection key.
2 Two types of icons are displayed in this area, one for showing or hiding all icons on the screen and the
other for viewing recorded video clips. To select the function of a displayed icon, press .
4
1
3
Selection key
Selection key
View, Settings, and Select. To select the function
2
4 The left or right arrow is displayed. Use the navigation key to switch between camera and
video recorder.
5 The up and down arrows are displayed. Use the navigation key to zoom in and zoom out.
4 August 2004
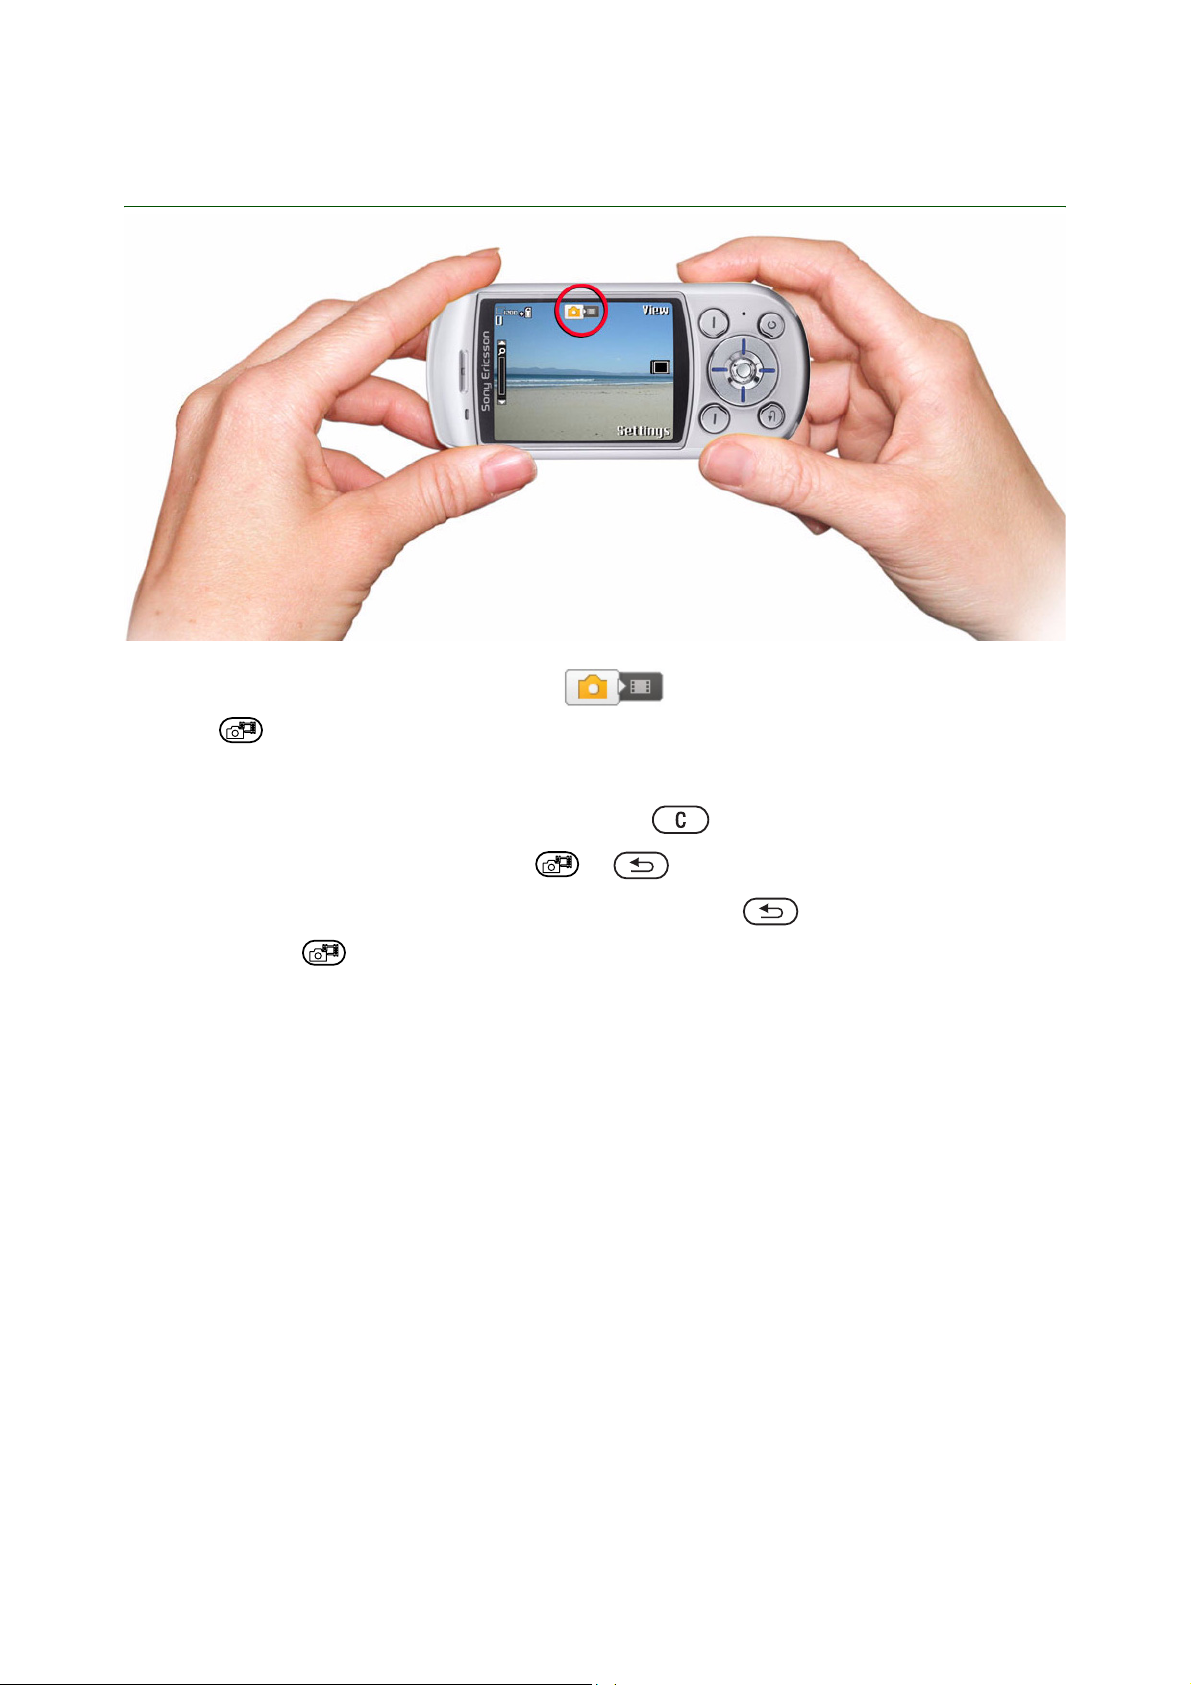
Taking a picture
Getting started Imaging with S700
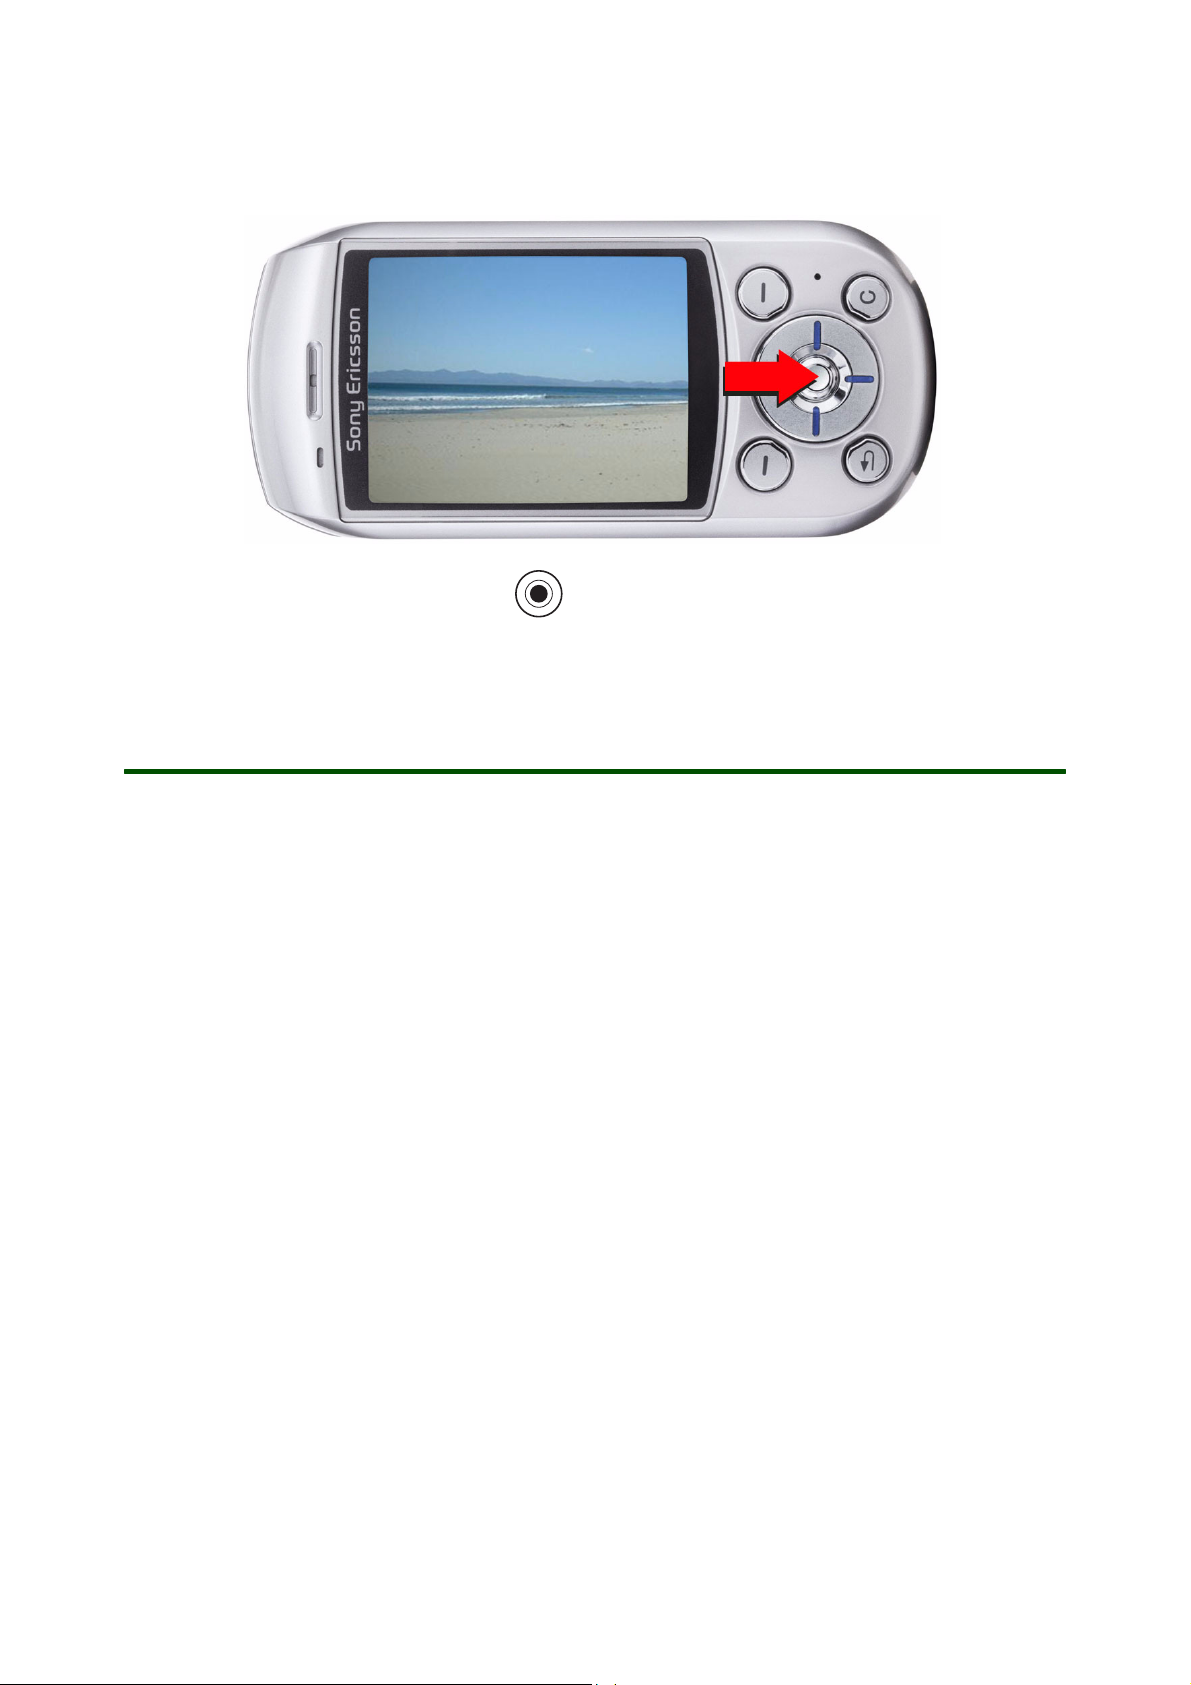
1. Activate the camera. Make sure the camera ( ), and not the video recorder is activated.
2. Press to take a picture.
3. The picture is saved on the Memory Stick Duo as default (to save the picture in the phone memory,
you have to select this before taking the picture, see “Save to” on page 17).
If you want to delete the picture immediately, press the button.
If you want to take another picture, press or to get back to the view finder.
4. To deactivate the camera, close the lens cover or press and hold . To reactivate the camera,
press and hold .
5 August 2004

Getting started Imaging with S700
Camera functionality
The camera has different functions allowing you, for example, to take a self-portrait, or to get the best
picture quality with reference to your surroundings. You can zoom in on an object, adjust the brightness or
use the photo light when lighting conditions are poor. If you find the icons in the display irritating, you can
easily hide them, see “To show or hide icons” on page 8.
Take a self-portrait
Hold the phone so that you can see your reflection in the mirror next to the lens. Press to take the
picture. You can also use the self-timer, see “Self-timer” on page 25.
To use the zoom
Press to zoom in on the subject. To zoom in continuously, press and hold .
Press to zoom out. To zoom out continuously, press and hold .
6 August 2004
Getting started Imaging with S700
To adjust the brightness
Use the volume buttons on the side of the phone to increase or decrease the brightness. The brightness
determines how much white is added to each colour in the picture.
To turn on the photo light
To take pictures in a dimly lit environment, slide the lock/light switch (placed on the side of the phone) to
turn on the photo light. To turn off the photo light, slide the switch again.
7 August 2004
To show or hide icons
To show or hide icons on the screen, press .
Getting started Imaging with S700
Camera options
When taking a picture, you can select between different settings to personalize or change the appearance
of the picture. You can, for example, use frames to decorate the picture or use the
four pictures in rapid succession to capture movement.
You can also select the
night mode prolongs the exposure time to give better pictures in dark environments. The
it easy to take a photo with yourself in the picture when you’re on your own. The
several colour selections to choose from and the
according to the surroundings. The
centre of the subject of the picture.
There are also settings for
save battery power),
saved to the Memory Stick Duo or in the phone memory.
Picture size for saving your picture:1280x960, 640x480, 320x240 or 160x120. The
White balance setting gives you the best colour rendition
Spot photometry setting adjust the exposure with reference to the
Shutter sound, Auto camera off (the camera is turned off after a certain time to
Reset file number and Save to – here you decide whether your pictures should be
To enter the settings menu
When the camera is activated, } Settings to view more options before you take a picture:
Burst 4 function to take
Self-timer makes
Effects settings give you
8 August 2004
Getting started Imaging with S700
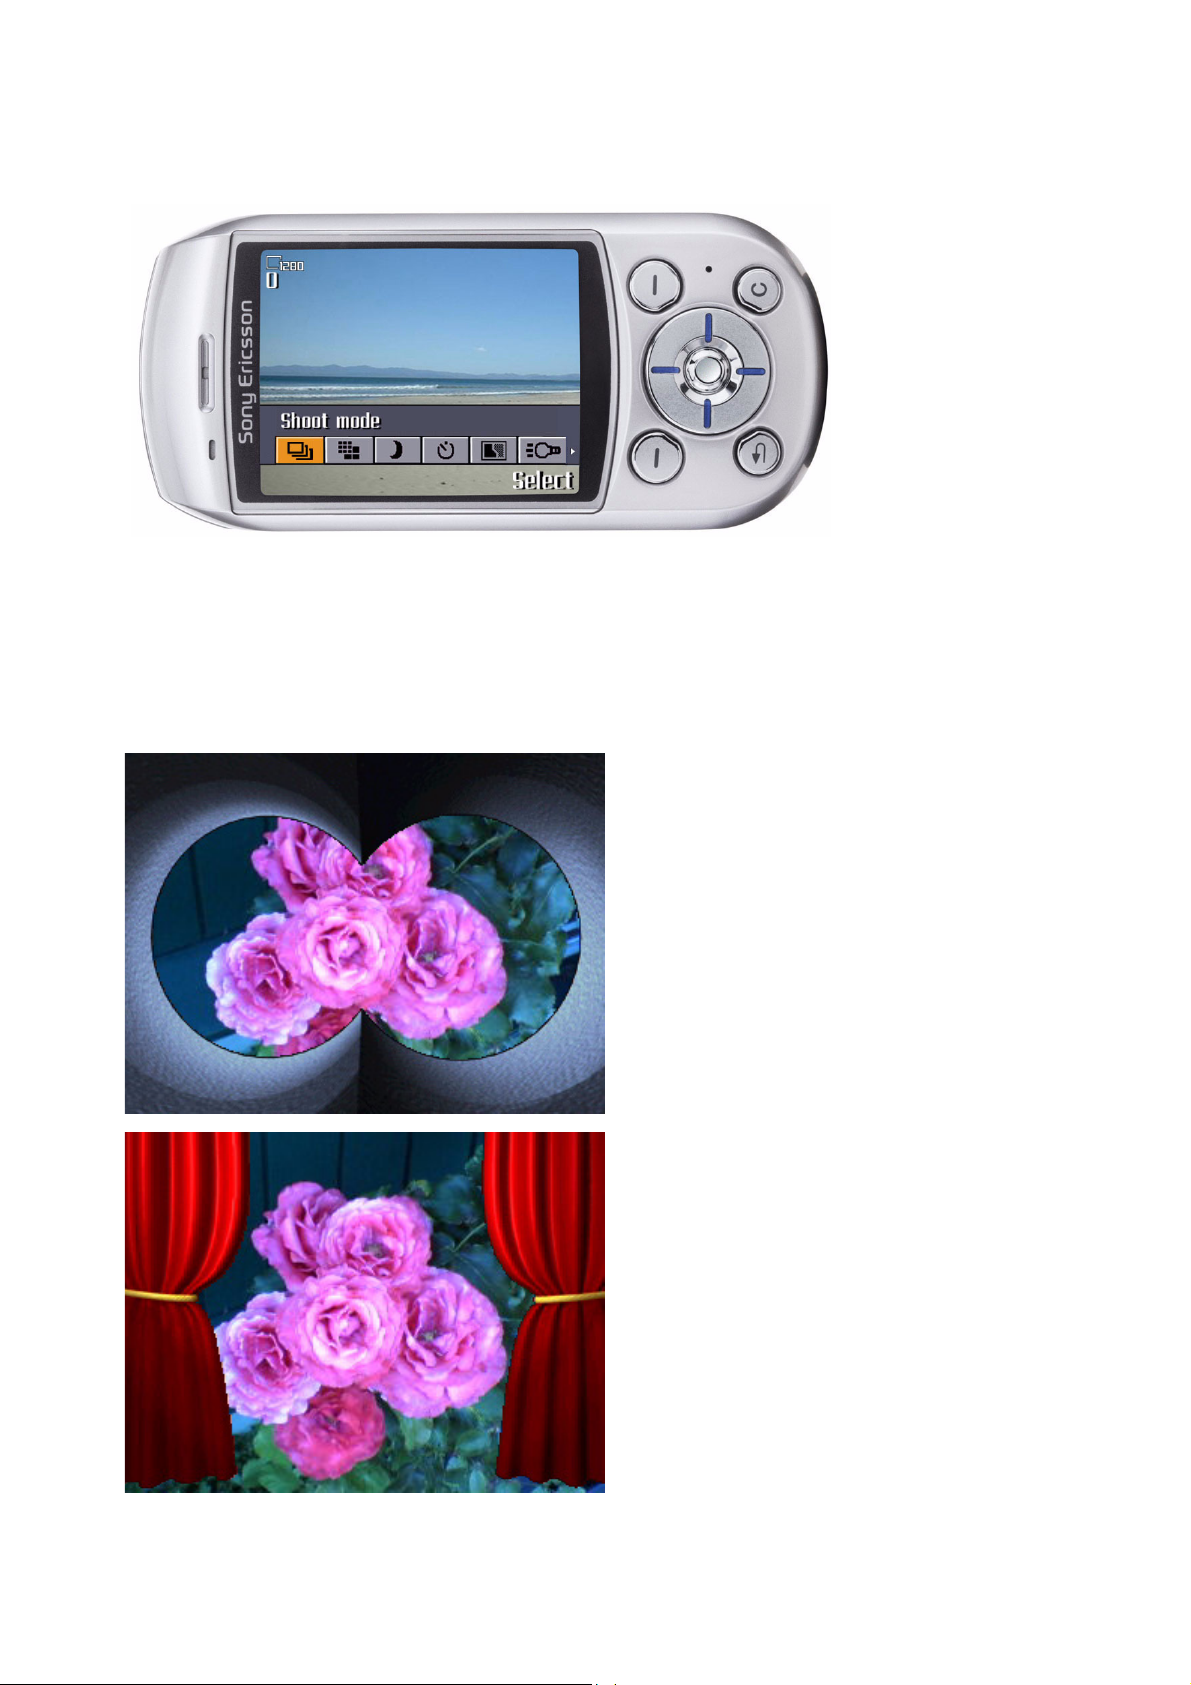
Shoot mode
• Normal for no frame.
•
Burst 4 to take four pictures in rapid succession. When you select Burst 4, the picture size is
automatically changed to 320x240 pixels.
With frame to add a frame to your picture. When you have selected With frame, a frame is shown on the
•
screen. Use the navigation key to scroll through the frames. When you select
size is automatically changed to 320x240 pixels.
Examples of frames:
With frame, the picture
9 August 2004
Getting started Imaging with S700
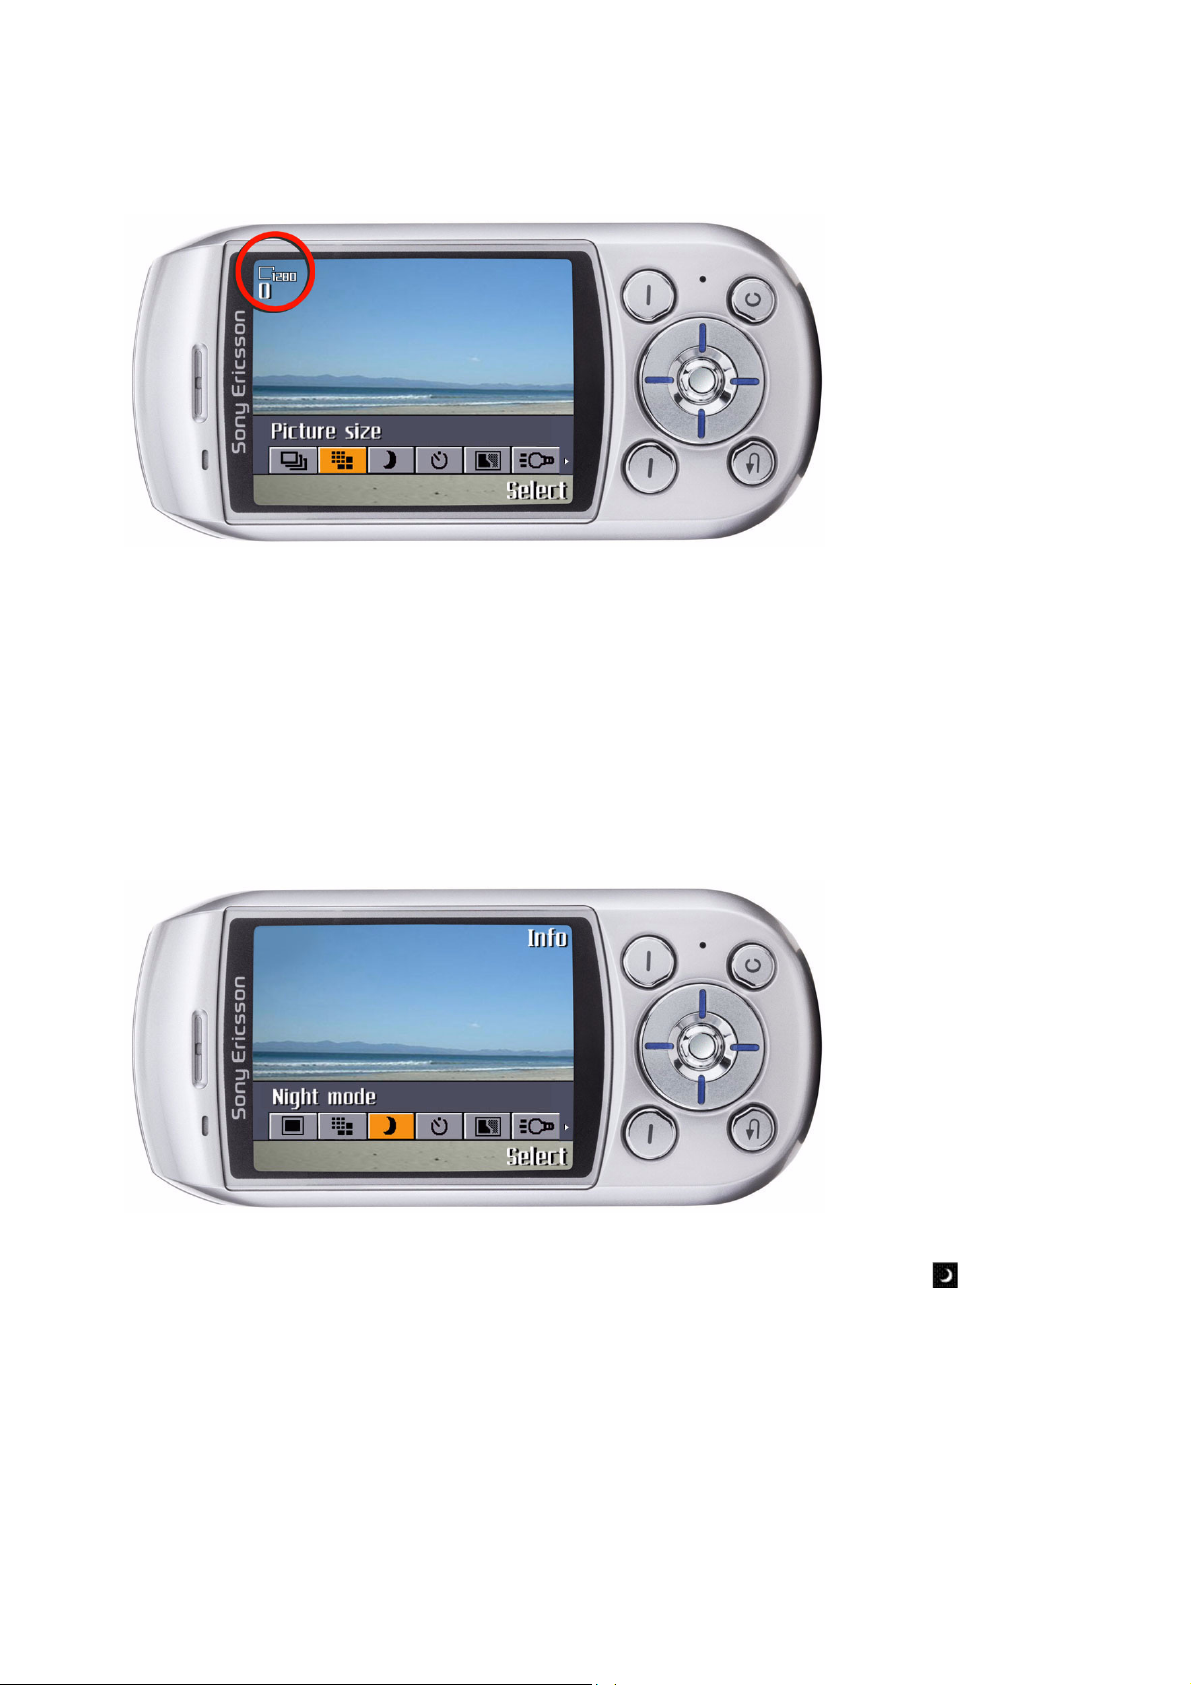
Picture size
Choose between 1280x960, 640x480, 320x240 and 160x120 pixels. If you are going to send a picture
message using MMS, please note that some phones that support pictures cannot receive picture sizes of
more than 160x120. The best picture sizes to view on a PC are 1280x960 and 640x480. To be able to edit
pictures taken with the camera, you must select 160x120 or 320x240. For editing pictures, see “To edit
and save a picture” on page 17.
In the upper left corner you can see the number of pictures that can be saved in the phone memory or on
the Memory Stick Duo (depending on where you have chosen to store the picture). Note that this number
changes, as you change the picture size. If you select a smaller picture size, you can save more pictures
than if you select a bigger picture size.
Night mode
In dark environments, the night mode effect enhances picture quality with longer exposure time. Please
note that due to the longer exposure time, the camera is more sensitive to movement. The icon in the
display indicates that night mode is activated.
10 August 2004
 Loading...