

Page 1
Company Internal
Rev 1
Label Make II
Install guideline
Client handbook
Page 2
Company Internal
Rev 2
To be able to run Labelmake II you have to have a service card installed
on the pc, the same as for EMMA II. (hardlock is not required).
To install Labelmake II use this link:
http://emma.extranet.sonyericsson.com/labelmake/
Click on Install and follow the instructions.
Page 3

Company Internal
Rev 3
Page 4

Company Internal
Rev 4
Click
Install !
Page 5
Company Internal
Rev 5
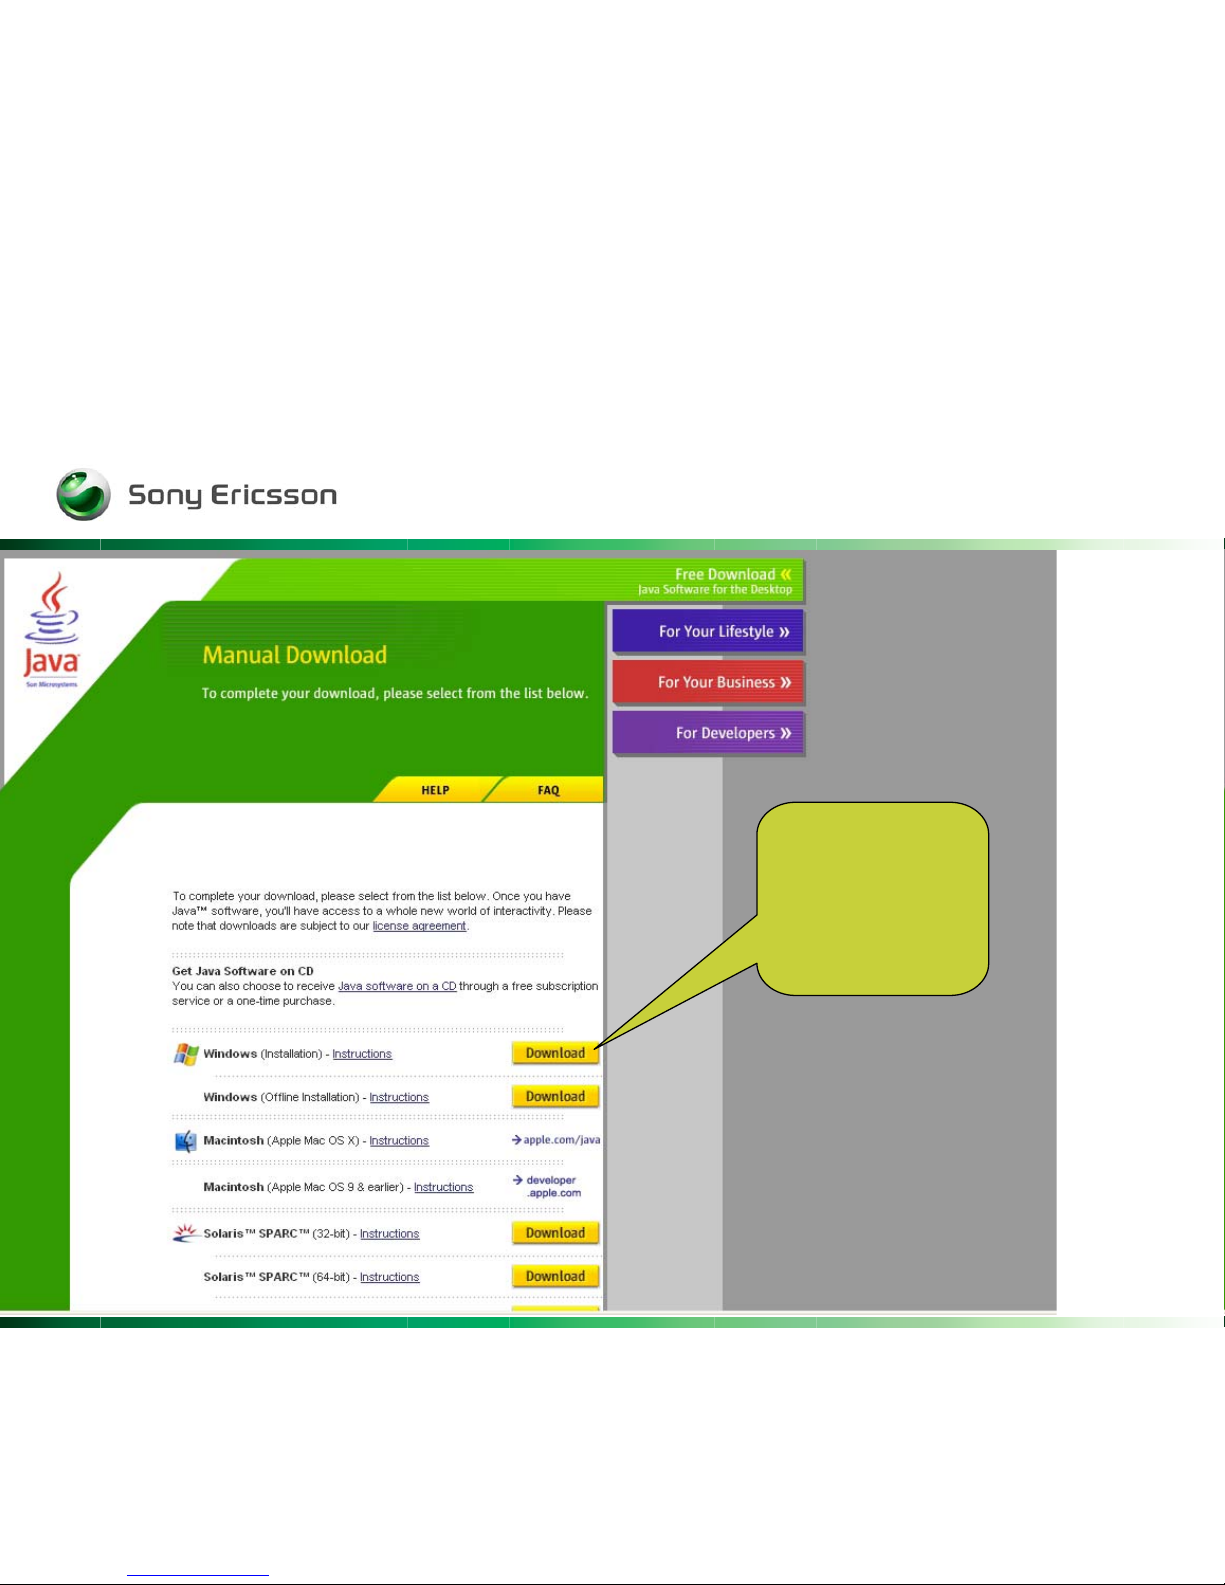
Click on
download !!
Page 6
Company Internal
Rev 6
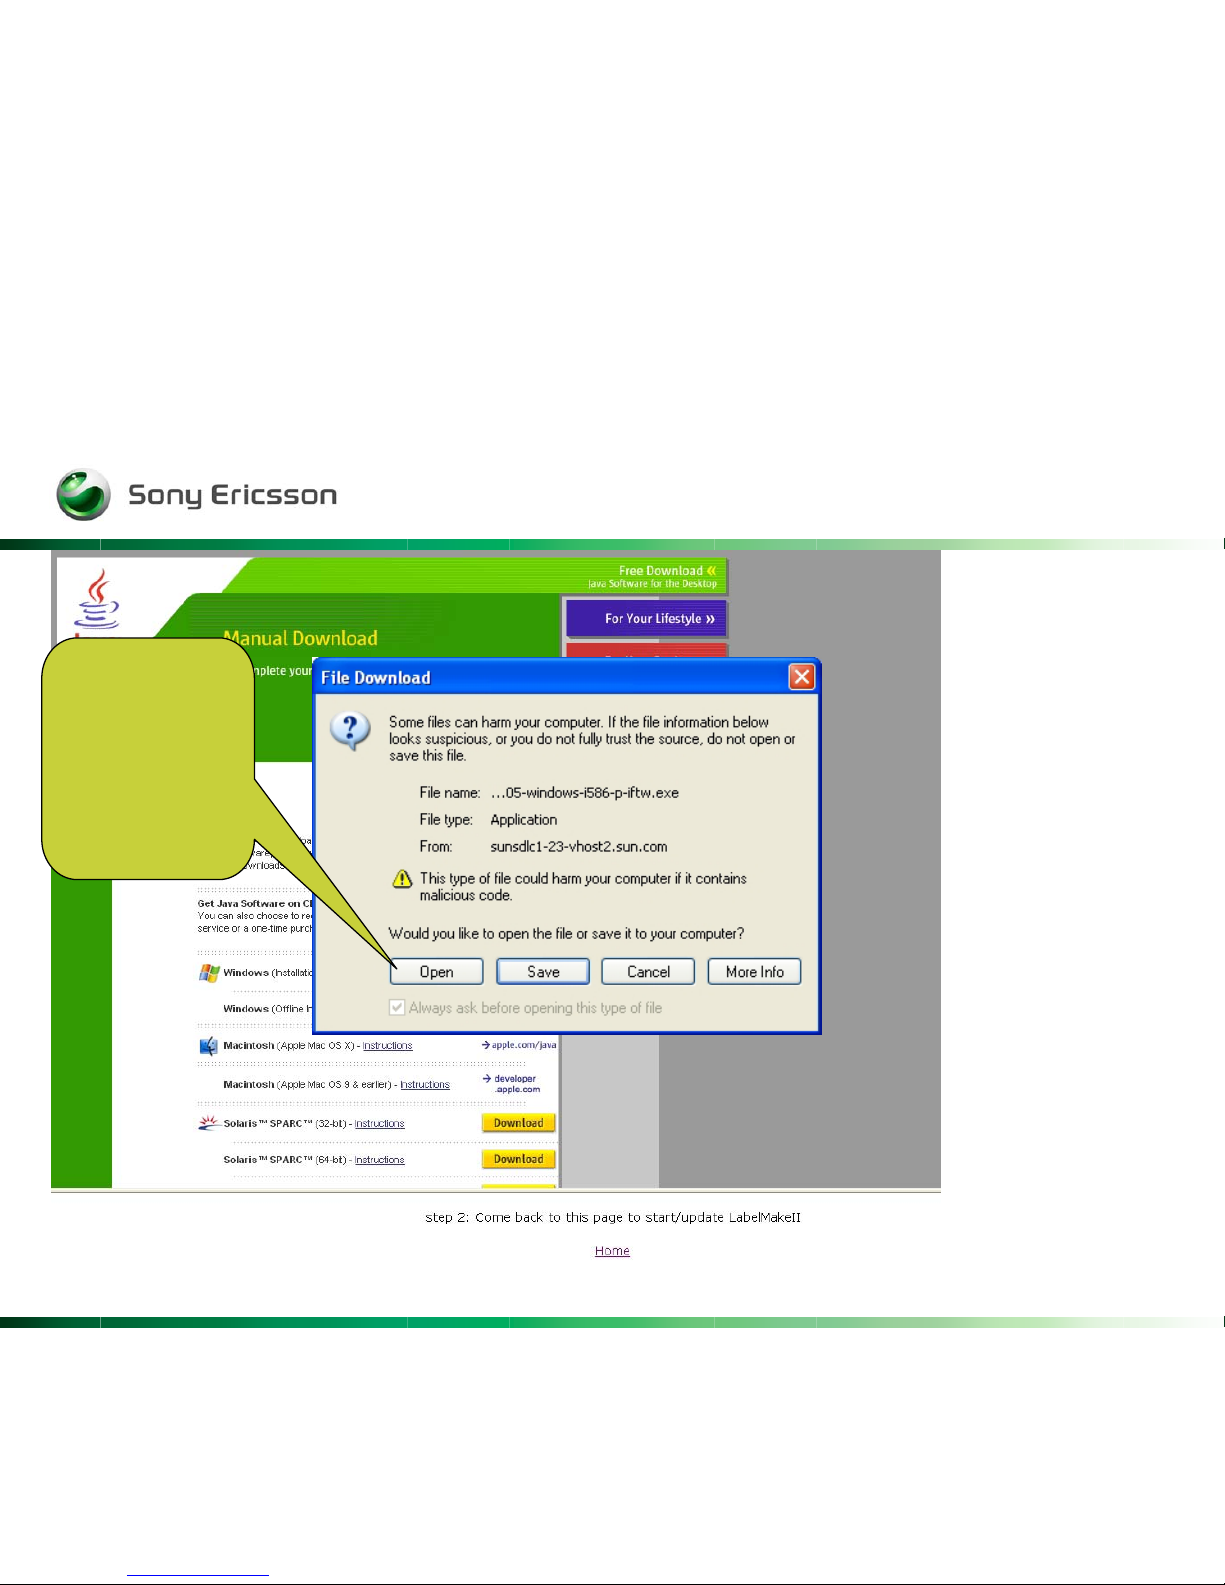
Choose
Open.
Page 7

Company Internal
Rev 7
Accept the
terms and click
Next >
Page 8
Company Internal
Rev 8
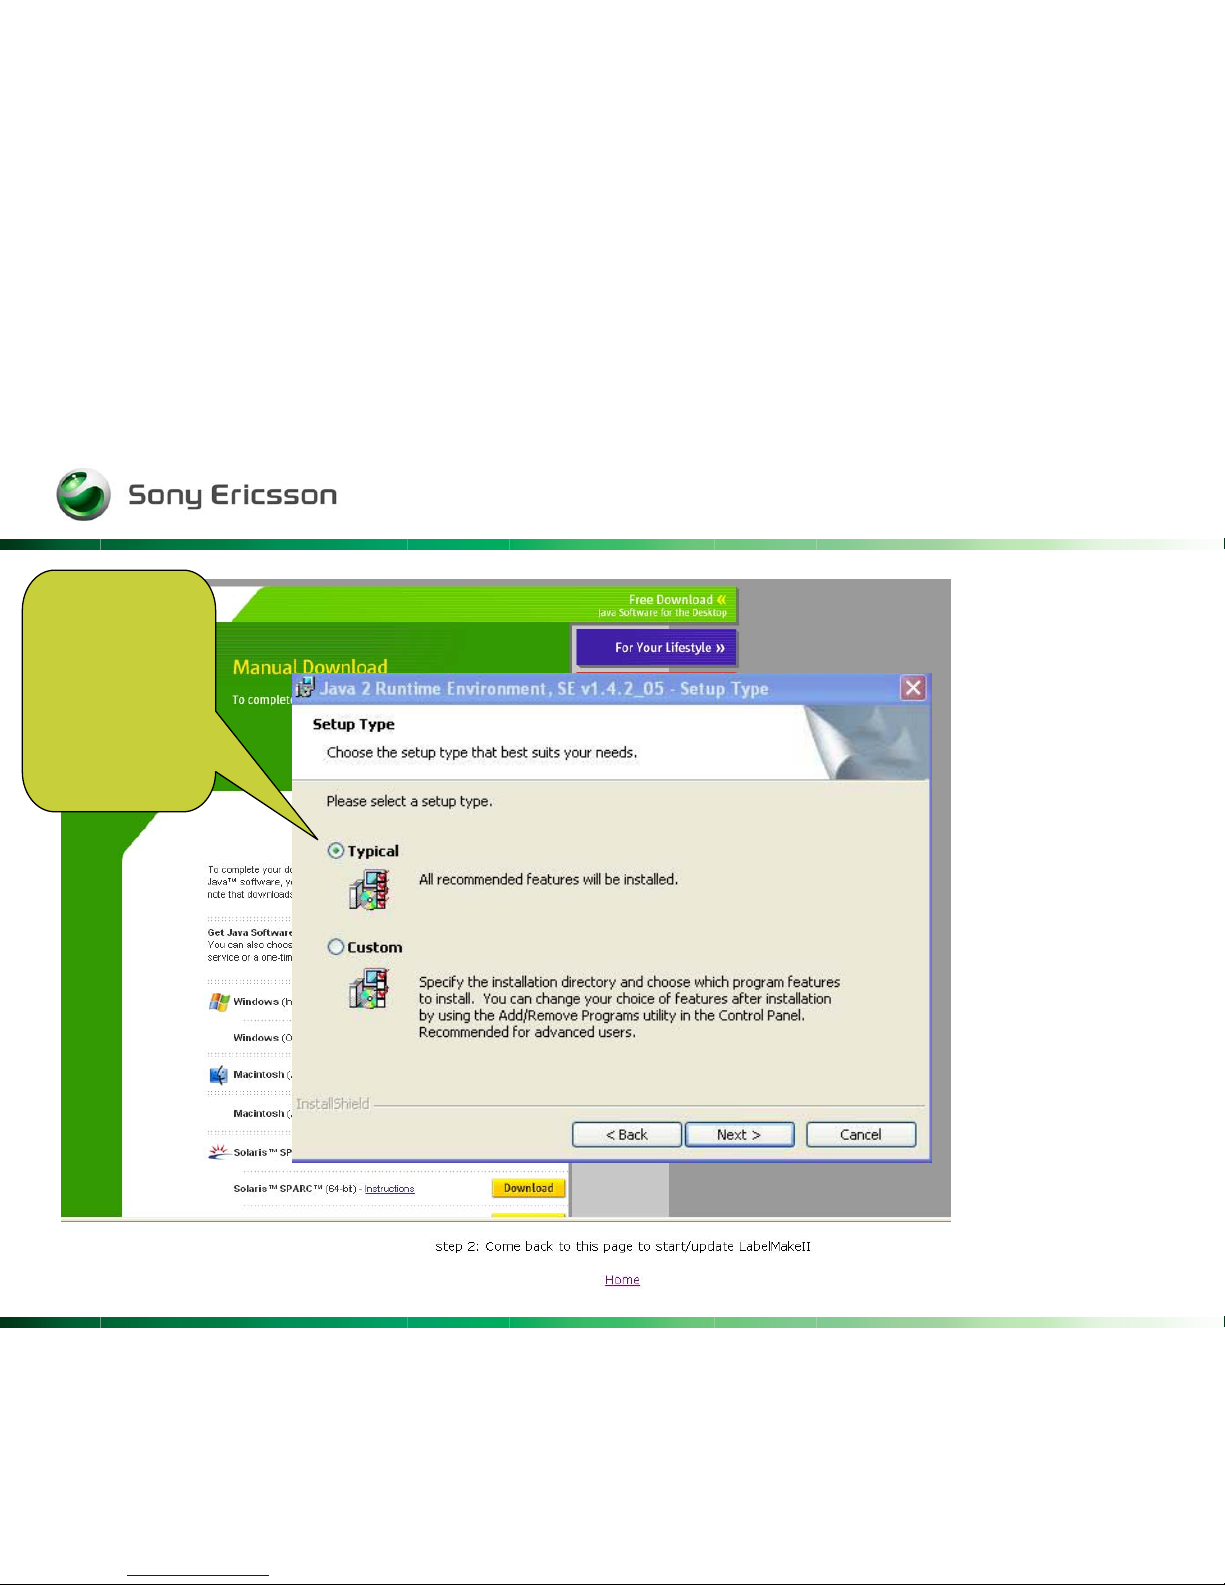
Choose
Typical
and click
Next >
Page 9
Company Internal
Rev 9
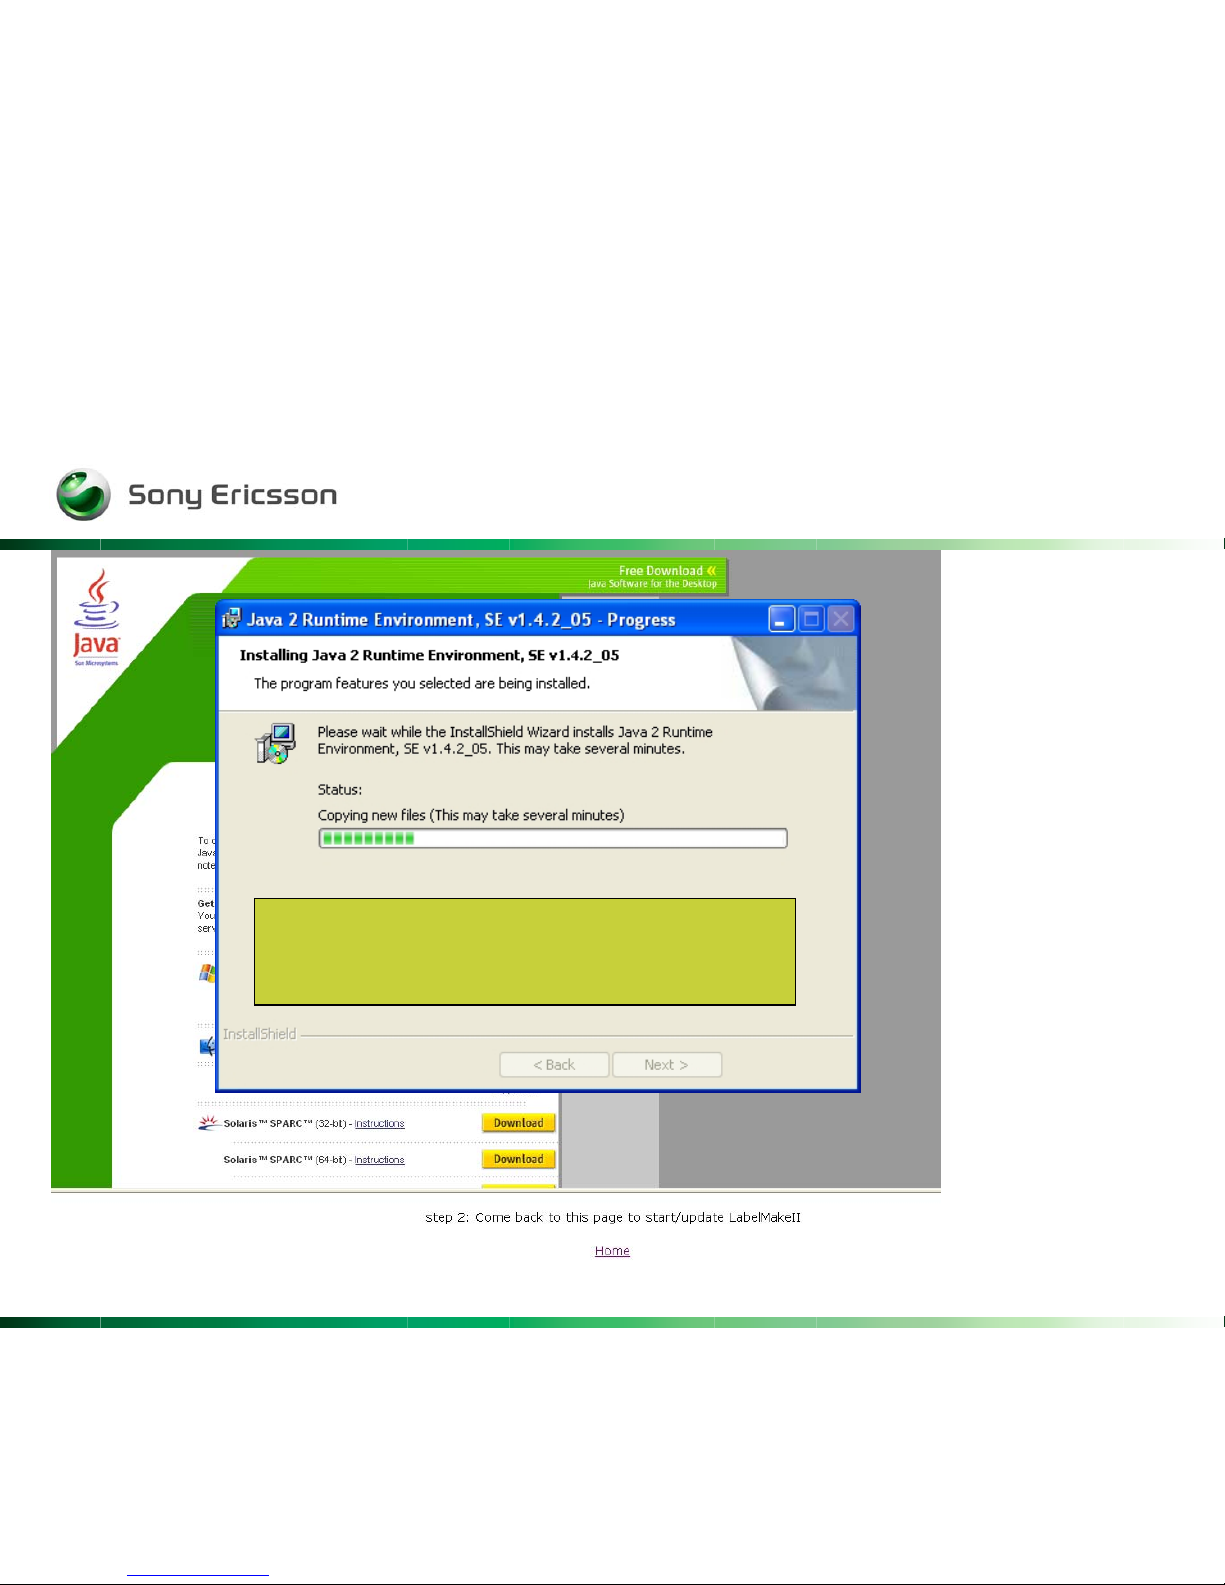
This part may take several minutes.
So please be patient.
Page 10
Company Internal
Rev 10
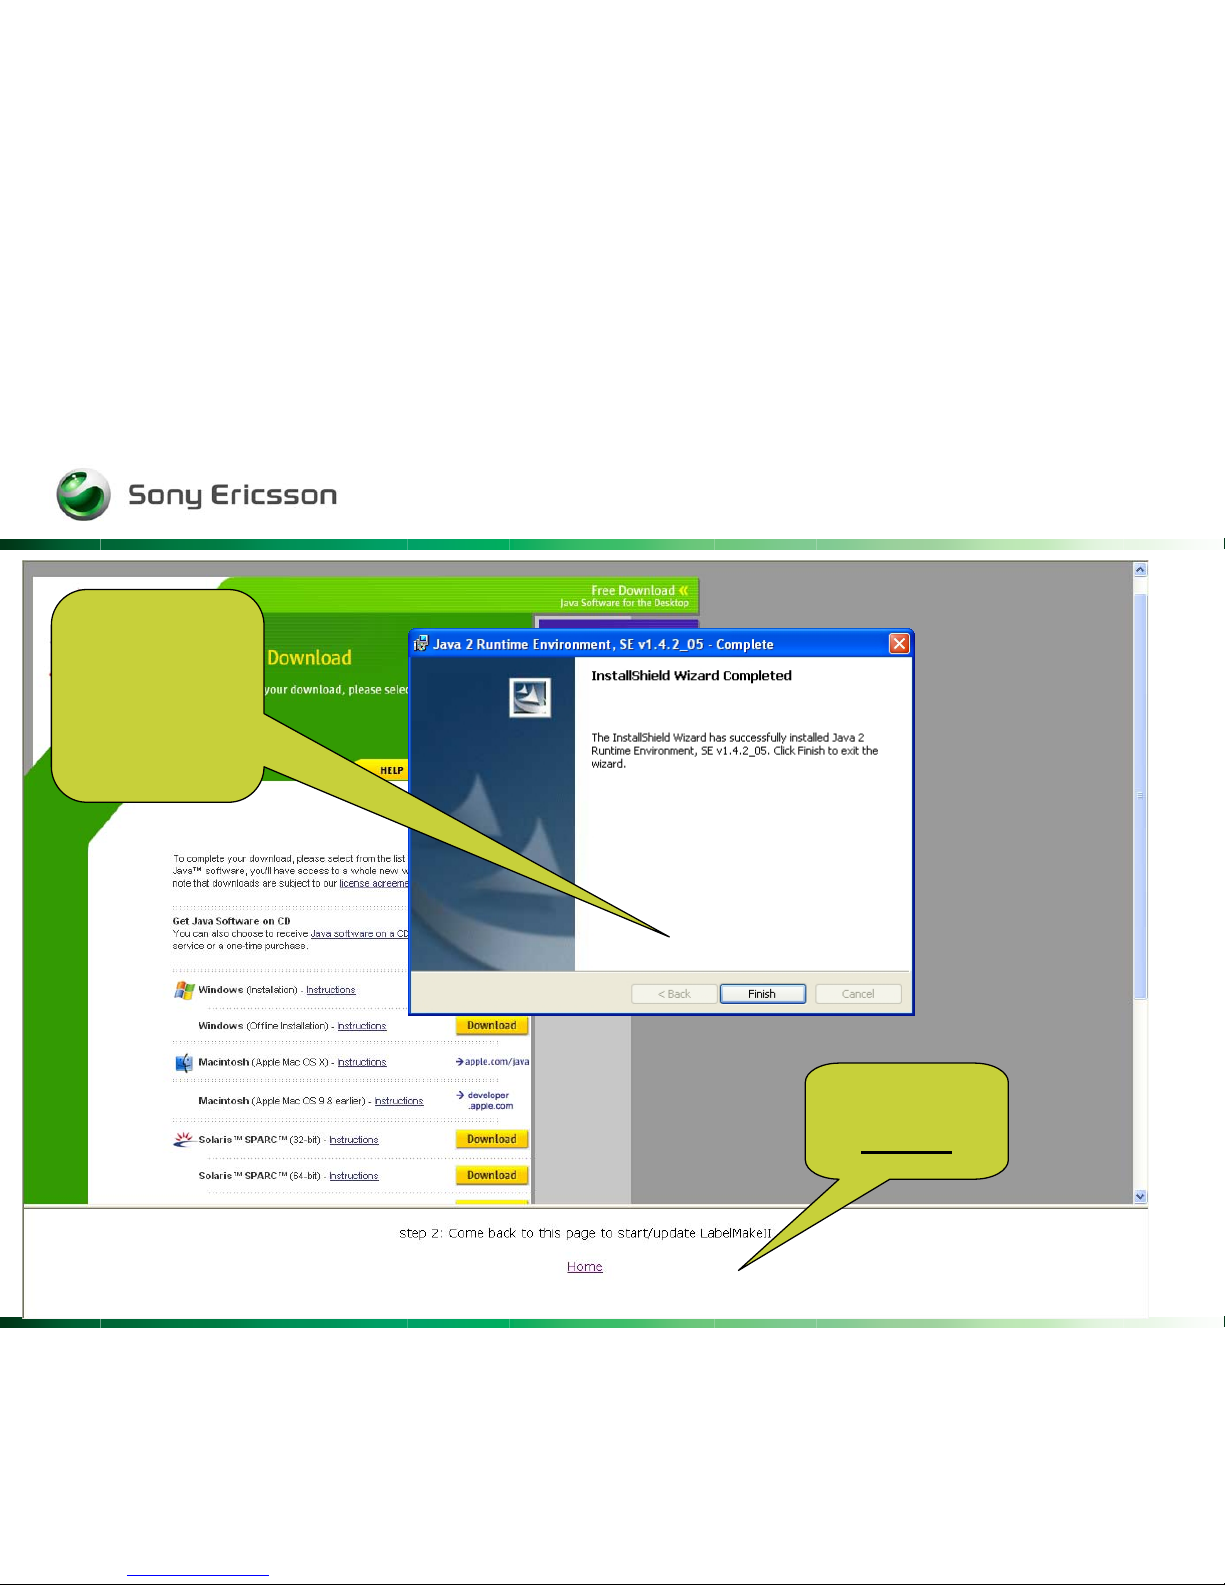
Click
Finish
To exit
the wizard.
Click
Home
Page 11
Company Internal
Rev 11
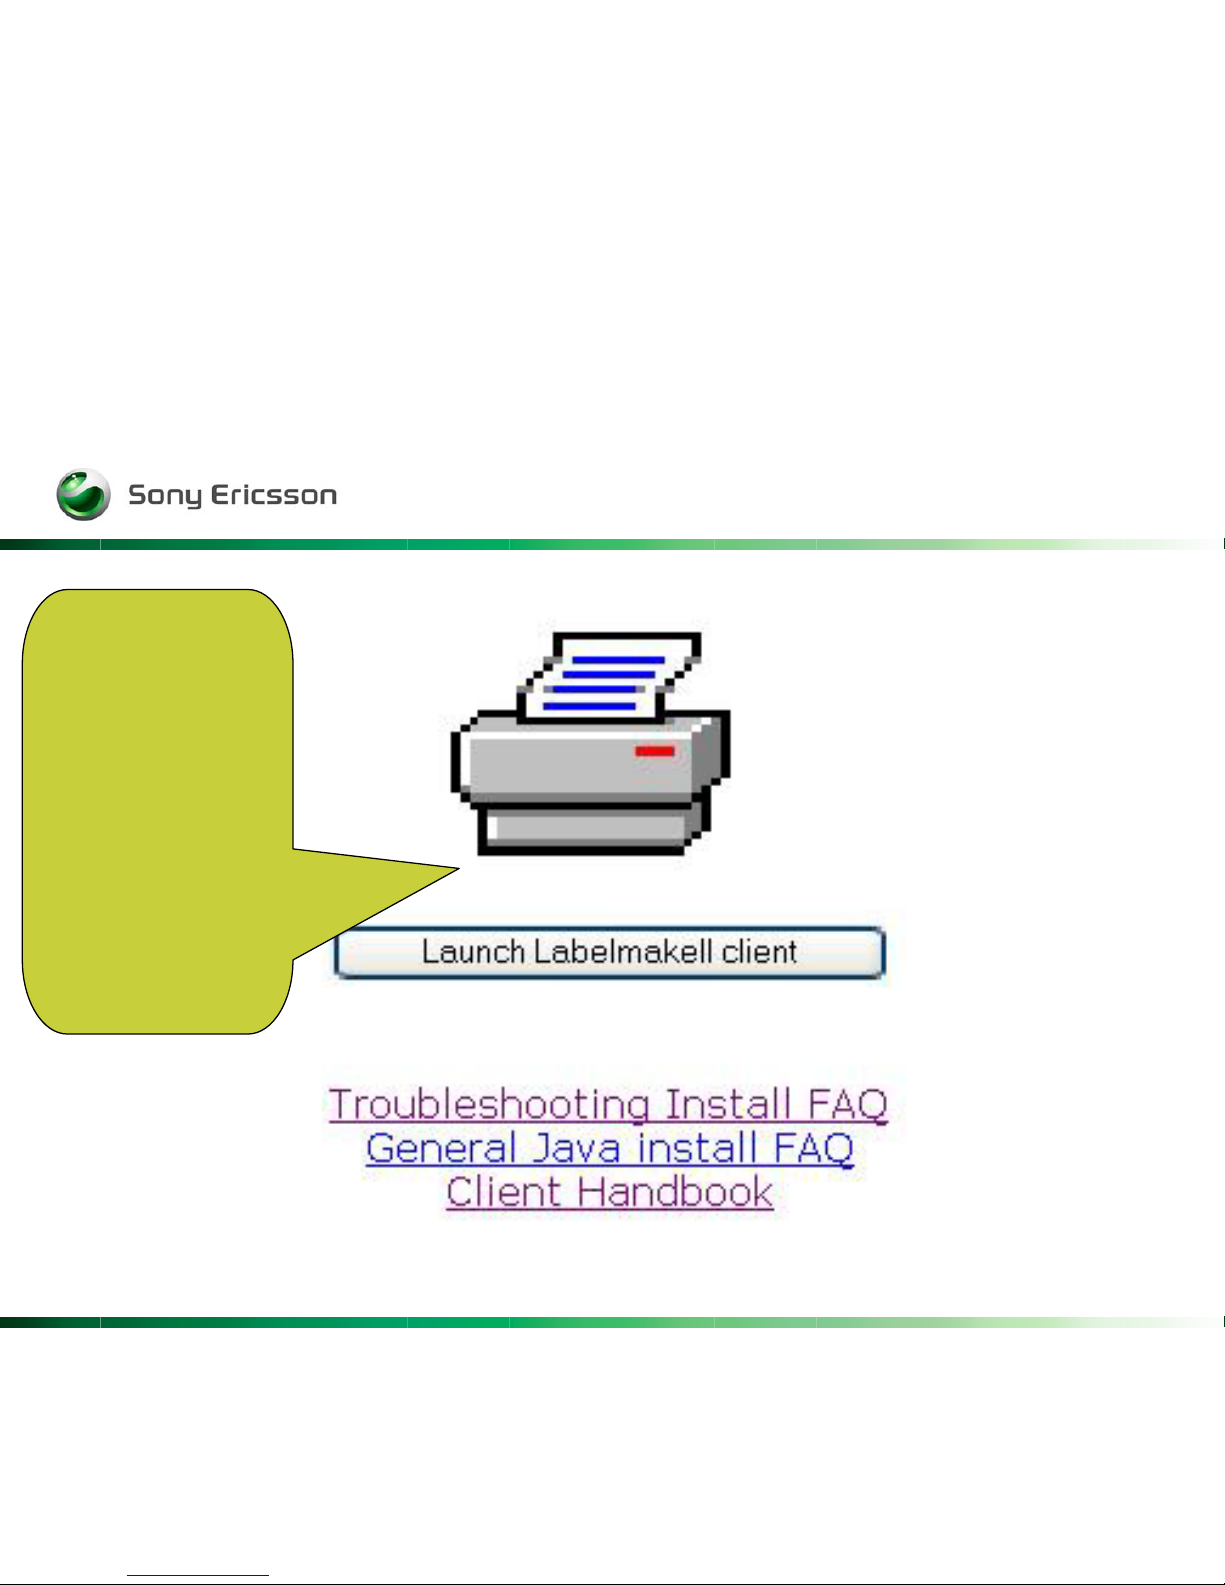
To start the
Labelmake II
Client
Click either
the button or
printer logo
Page 12

Company Internal
Rev 12
Click Start to continue.
Page 13

Company Internal
Rev 13
Page 14

Company Internal
Rev 14
This empty page is your first acquaintance with Label Make II
Now let see how to print a label……..
Page 15

Company Internal
Rev 15
One of the new thing with LM2 is that the search is done by the TACnr
the six first digits in IMEInr
ID:
Enter the first set of digits (TAC) from the IMEI number
shown on the product label. The TAC may contain six or
eight numbers. The TAC may be typed into the field or
entered by scanning the barcode.
Page 16

Company Internal
Rev 16
Use the dropdown menu to remove the 22S or S
prefix
And then set……..
Set this field
to prevent the extra
characters from entering
the "ID" field.
Some barcode scanners insert a "22S" or "S" in front
of the scanned number. With these characters in front of the
number, the search
function will not be able to find the correct label in the database.
Page 17

Company Internal
Rev 17
…the Number of characters in field.
Number of chars in field:
Selecting a number from this field determines how many
characters will be allowed in the "ID" field. If the TAC has six characters, then
select 6. If the TAC has eight characters, then select 8. Be careful. If 6 is
selected, but a TAC with eight characters is scanned, the last two characters will
not show in the "ID" field and the search function may not be able to find the label in the database.
You could of course type in the TACnr. Manually and
click on Search button
TACnr
Page 18

Company Internal
Rev 18
After the search you will find Available labels to choose from.
- Click on the one you need to print.
Offline or Online:
Select the "Offline" option to search the labels that have
already been downloaded. Be careful. Using the "Offline" option for long periods
of time may cause updated labels to be missed. Select the "Online" option to search
the latest labels in the database and have them downloaded. This option may take
longer if there are many different labels for a product model.
Page 19

Company Internal
Rev 19
Choose
your label,
and some
fields will
appear
Page 20

Company Internal
Rev 20
Label Fields: The label fields that appear for the selected label must all be populated with the correct information from
the product label. Position the curser over the field to see a help note appear on the screen. The help notes describe
the type of information that goes in the fields. Click on the button beside each field to reset the field, or click on the
"Reset all" button to reset all of the fields. The "Repair Week" field is automatically populated and cannot be edited.
Print on ... on comX: After entering data in all of the label fields, click this button to print the label. The "Alt + F1"
keyboard shortcut can be used instead of clicking this button.
Page 21

Company Internal
Rev 21
To correct the information in a separate field use the button
to the left of the field to erase the content.
Page 22

Company Internal
Rev 22
One very good feature when working with batches of the
same model is to use the checkbox, this will erase the content
In Serial and IMEI – field automatically after the label is printed.
Page 23

Company Internal
Rev 23
com1:
This field allows the
client to select the
appropriate com port to
which
the printer is connected.
Print settings:
Clicking this
button causes
the printer to
print a list of
its current
parameter
settings.
Print test label:
Clicking this button
causes the printer to
print a test label.
This is useful for
checking the printer
connection and setup. If
the test label
does not appear, then
check the label top
position, left position,
and darkness
settings.
Calibrate:
Clicking this button
causes the printer to
calibrate the length of
the label. It does not
calibrate the media
and ribbon sensors.
Reset:
Clicking this button
causes the printer to
power off and back on
again. This power cycle
resets any parameters
that have not been
permanently saved in
the printer menu.
Page 24

Company Internal
Rev 24
Use this dropdown menus to adjust the layout on the label.
When you have chosen a value in the menu, you have to
confirm it by tab the button right to the field.
….When do a test print, or go back to the first side “ Label Print”
and print a proper label.
Page 25

Company Internal
Rev 25
If you select “2”. Two
labels with the same
information will be
printed.
Use this when you
need an extra label
for the DPY/Z – box.
Page 26

Company Internal
Rev 26
Page 27

Company Internal
Rev 27
You could rename the print
buttons by using the Rename
buttons.
Page 28

Company Internal
Rev 28
And you could of
course set it to
default again by
using Reset buttons
Page 29

Company Internal
Rev 29
Summary of most important new features
- Product labels are downloaded online from a remote server database. This is
faster and easier than downloading ZIP files from CSPN, so updates are easier to
obtain.
- Downloaded labels are then cached on the local hard disk and ready to be printed.
- One computer can be used to access the database, and it can be a server for other
computers
-If LabelMake II is used in LAN server mode, files are cached to the directory specified in the LAN setup tab.
This may be a local directory or a network share.
-If LabelMake II is used in LAN client mode, labels are read from the directory
(i.e. the network share) specified in the LAN setup tab and are thus not stored on the local disk.
- The application automatically checks for new versions of the software when it is
launched from the LabelMake II website:
http://emma.extranet.sonyericsson.com/labelmake/
- Some printer parameters controlled through the printer menu can now be adjusted
from within the LabelMake II application.
- The application automatically installs printers when it is launched.
- Up to 4 printers can be attached to the COM ports.
- No longer have to load logos.
- The label printing screen only contains the fields a specific label requires.
Users no longer have to determine which fields to populate.
Page 30

Company Internal
Rev 30
Update of the software
The client checks automatically if new versions of the
LabelMake II software are available whenever you
Start Labelmake II online from this internet page:
http://emma.extranet.sonyericsson.com/labelmake/
Page 31

Company Internal
Rev 31
Hardware Requirements
• Sony Ericsson Service Card: the client requires smart card
and its drivers to be installed.
• Windows 2000, Windows XP, Windows 98, Windows NT
• Best configuration : 128 MB RAM minimum
Page 32

Company Internal
Rev 32
Troubleshooting
LabelMake II did not install:
- Is the correct Java version selected in the Java Web Start Application
Manager? In Windows, click "Start/Programs/Java Web Start/Java Web Start". In the
Application Manager, click "File/Preferences/Java". Make sure there is a check mark
in the "Enable" box for version 1.4.2_05, then click one time on this version and
click "OK". Close the Application Manager and try to launch LabelMake II again.
- Are the proxy settings correct?
In Windows, click "Start/Programs/Java Web Start/Java Web Start". In the
Application Manager, click "File/Preferences/General". There should be three proxy
options, "None", "Use Browser", and "Manual".
The "Use Browser" option is usually the best if the browser's settings are valid.
Contact the local System Administrator to determine the correct settings.
The "Manual" option may also be used by inserting the LabelMake II IP address,
193.180.14.126, into the "HTTP Proxy" field.
- Did the Java software download correctly?
Try downloading it again or use the "Offline" option.
- Is the correct hardware installed?
See the Hardware Requirements section above.
Page 33

Company Internal
Rev 33
Printers did not install:
- Were the printers powered on before launching the application?
The application installs printers at start up only if they are powered on. Power on
the printer and click the "Refresh printers" button on the "Label Print" screen.
- Is the HOST HANDSHAKE in the Zebra printer menu set to XON/XOFF?
LabelMake II may have problems finding a printer if the handshake is set to another
value.
- Does the computer have software that keeps the COM ports busy?
Some software applications like Bluetooth connection, photo acquire, and
synchronization may keep the ports busy. Close these applications and click the
"Refresh printers" button on the "Label Print" screen.
Also, check the COM port properties to make sure the ports are enabled.
On Windows 2000 and Windows XP, the COM port settings are located under
Settings/Control Panel/System/Hardware/Device Manager.
Page 34

Company Internal
Rev 34
EMMA II compatibility
EMMA II and LabelMake II is installed on the same PC, and
EMMA II is not working properly.
You may need to disable Sun Java from Internet Explorer.
- You do this in: Tools -> Internet options -> Advanced ->
Sun Java : disable this if it is enabled.
-See pictures……..
Page 35

Company Internal
Rev 35
 Loading...