

FM Cassette
Car Stereo
3-810-678-12 (3)
Operating Instructions
Mode d’emploi
Bedienungsanleitung
Istruzioni per l’uso
For installation and connections, see the supplied installation/connections
manual.
En ce qui concerne l’installation et les connexions, consulter le manuel
d’installation/connexions fourni.
Zur Installation und zum Anschluß siehe die mitgelieferte Installations-/
Anschlußanleitung.
Per l’installazione e i collegamenti, vedere il manuale di installazione/
collegamenti in dotazione.
EN
F
D
I
Actual total number
XR-3700RDS
1995 by Sony Corporation
Sony XR-3700RDS (E,F,G,I) 3-810-678-12 (3)

EN
Features
General
• Detachable-front panel enables you to take
the front panel away with you when you
leave your car (page 4).
• Caution alarm will be activated if you turn
off the ignition key without removing the
front panel from the unit.
• Built-in power amplifier (max. output:
20 W × 4 ch) enables you to enjoy a
4-speaker system.
• Digital 24-hour clock provided (page 5).
• Line outputs for connecting on optional
power amplifier.
Cassette player section
The auto-reverse function changes the tape
direction automatically.
Tuner section
• Up to 18 FM stations can be preset.
• BTM (Best Tuning Memory) function
automatically searches and stores the stations
with the strongest signals on the preset
number buttons in order of frequency
(page 7).
• Additional services are available, if FM RDS
stations can be received (page 8).
• Compatible with the RDS features such as
EON (Enhanced Other Networks), AF
(Alternative Frequency), TA (Traffic
Announcement) and CT (Clock Time)
function (page 8 ,9, 10 and 11).
Precautions
•If your car is parked in direct sunlight
resulting in a considerable rise in
temperature inside the car, allow the unit to
cool off before operating it.
•If no power is being supplied to the unit,
check the connections first. If everything is in
order, check the fuse.
•If no sound comes from the speakers of a
2-speaker system, set the fader control to the
center position.
•If your car is equipped with a power
antenna, note that it will be automatically
extended while the unit is operating.
If you have any questions or problems
concerning your unit that are not covered in
this manual, please consult your nearest Sony
dealer.
2
Actual total number Sony XR-3700RDS (E,F,G,I) 3-810-678-12 (3)
Notes on Cassettes
Table of Contents
Cassette care
•Do not touch the tape surface of a cassette, as
any dirt or dust will contaminate the heads.
•Keep cassettes away from equipment with
built-in magnets such as speakers and
amplifiers, as erasure or distortion of the
recorded tape could occur.
•Do not expose cassettes to direct sunlight,
extremely cold temperatures, or moisture.
•When the tape is played back for a long
period, the cassette shell may become warm
because of the built-in power amplifier. This
is not a sign of a malfunction.
Notes on Cassette Deck Tape Heads
•Long use of cassette tapes contaminates the
tape head causing poor sound quality or
complete sound dropout. Therefore, we
recommend cleaning the tape head once a
month or so with the separately available
Sony Cassette Cleaning Set. If the sound does
not improve after using a cleaning cassette,
please consult your nearest Sony dealer.
•In case of old or inferior cassette tapes, the
tape head gets contaminated much more
quickly. Depending on the tape, one or two
playbacks may cause poor sound.
Cassettes longer than 90 minutes
The use of cassettes longer than 90 minutes is
not recommended except for long continuous
play. The tapes used for these cassettes are
very thin and tend to be stretched easily.
Frequent playing and stopping of these tapes
may cause them to be pulled into the cassette
deck mechanism.
Resetting the unit ..................................................... 4
Detaching and Attaching the Front Panel ............ 4
Setting the Clock ...................................................... 5
Cassette Player Operation
Listening to Tape Playback .................................... 5
Ejecting the Cassette ................................................ 5
Fast-winding the Tape ............................................ 6
Radio Reception
Searching for Stations Automatically
— Automatic Tuning ......................................... 6
Tuning in by Adjusting the Frequency
— Manual Tuning ............................................... 6
Memorizing Stations Automatically
— BTM (Best Tuning Memory) Function ........ 7
Memorizing Only the Desired Stations ................ 7
Receiving the Memorized Stations ....................... 7
RDS Functions
Overview of the RDS Function .............................. 8
Displaying the Station Name ................................. 8
Re-tuning the Same Programme Automatically
— Alternative Frequencies (AF) ....................... 8
Listening to Traffic Announcements .................... 9
Presetting the RDS Stations with the AF
and TA Data ....................................................... 10
Locating a station by Programme Type ............. 10
Using RDS Data for Setting the Clock
Automatically .................................................... 11
EN
Other Functions
Adjusting the Sound Characteristics .................. 11
Enjoying Bass and Treble at Low Volume
— Loudness Function ....................................... 11
Muting the Beep Tone ........................................... 11
Maintenance ........................................................... 12
Dismounting the Unit ........................................... 12
Button Locations .................................................... 13
Specifications .......................................................... 14
Troubleshooting Guide ......................................... 15
Actual total number Sony XR-3700RDS (E,F,G,I) 3-810-678-12 (3)
3
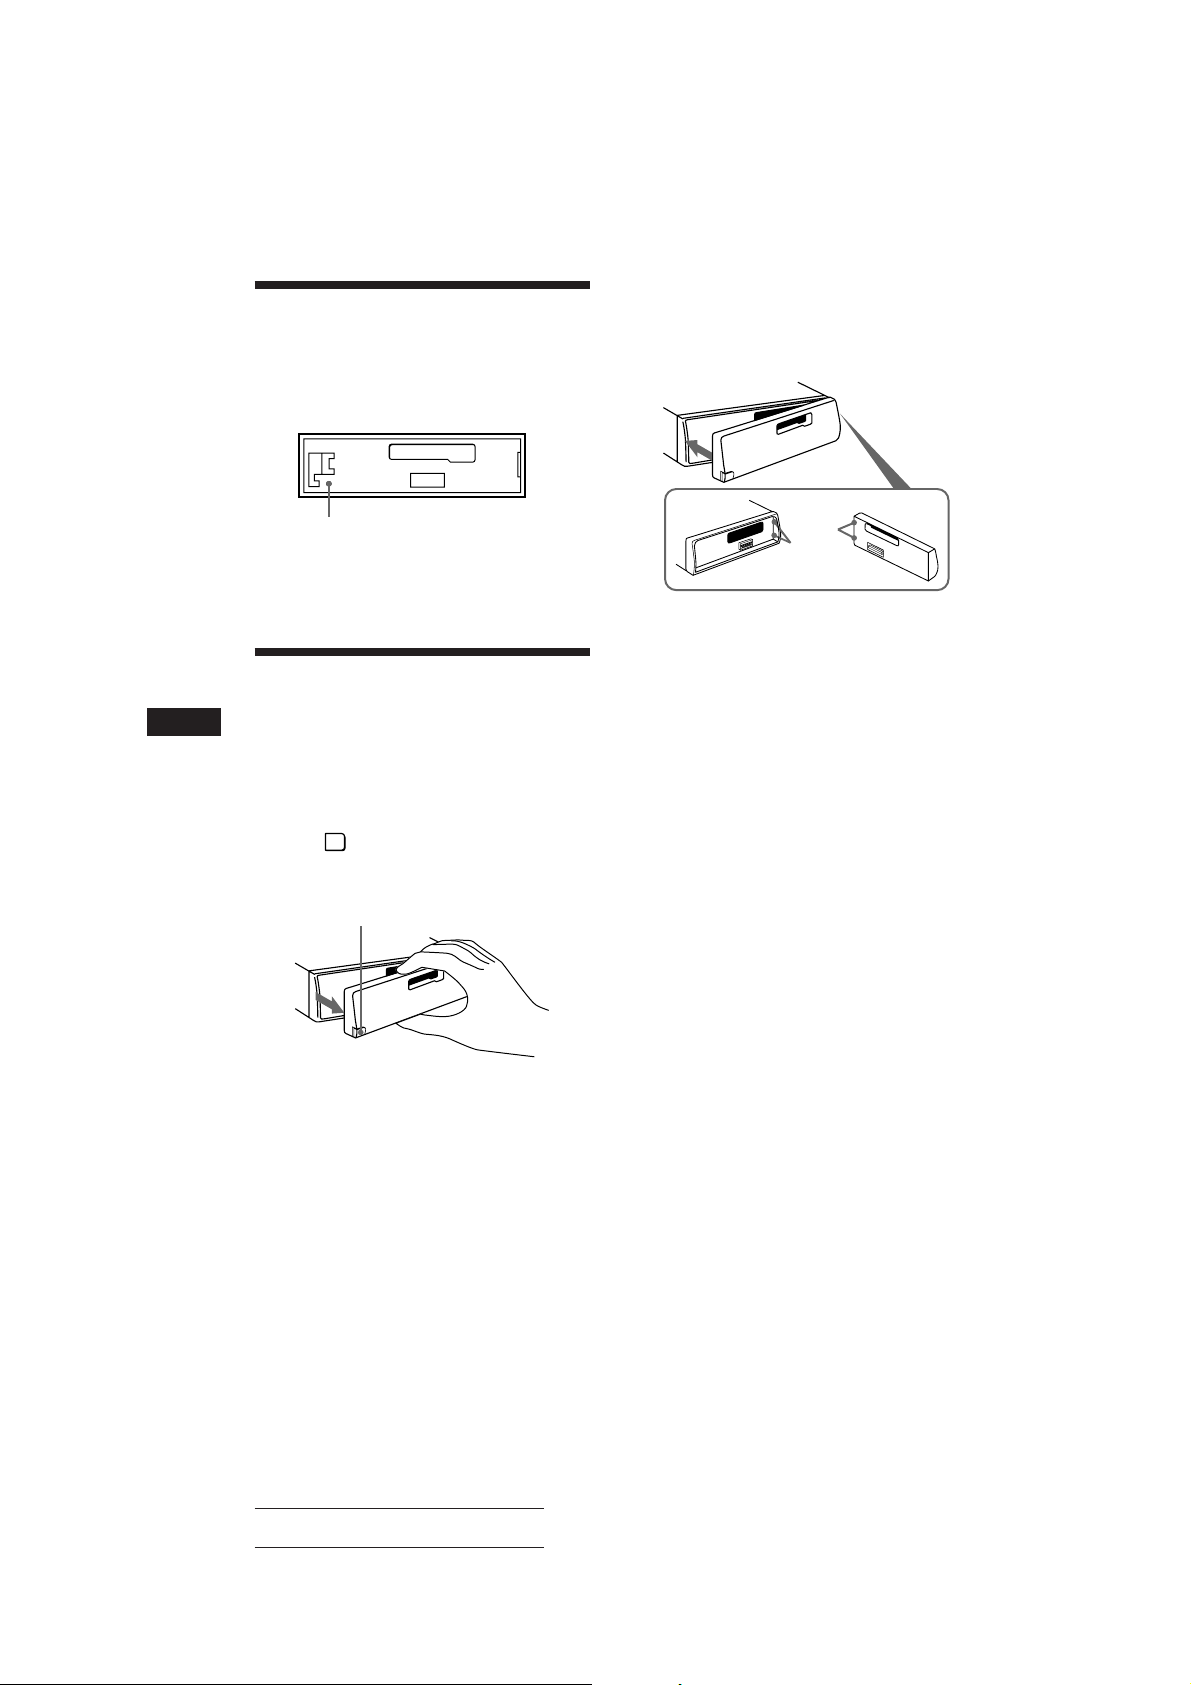
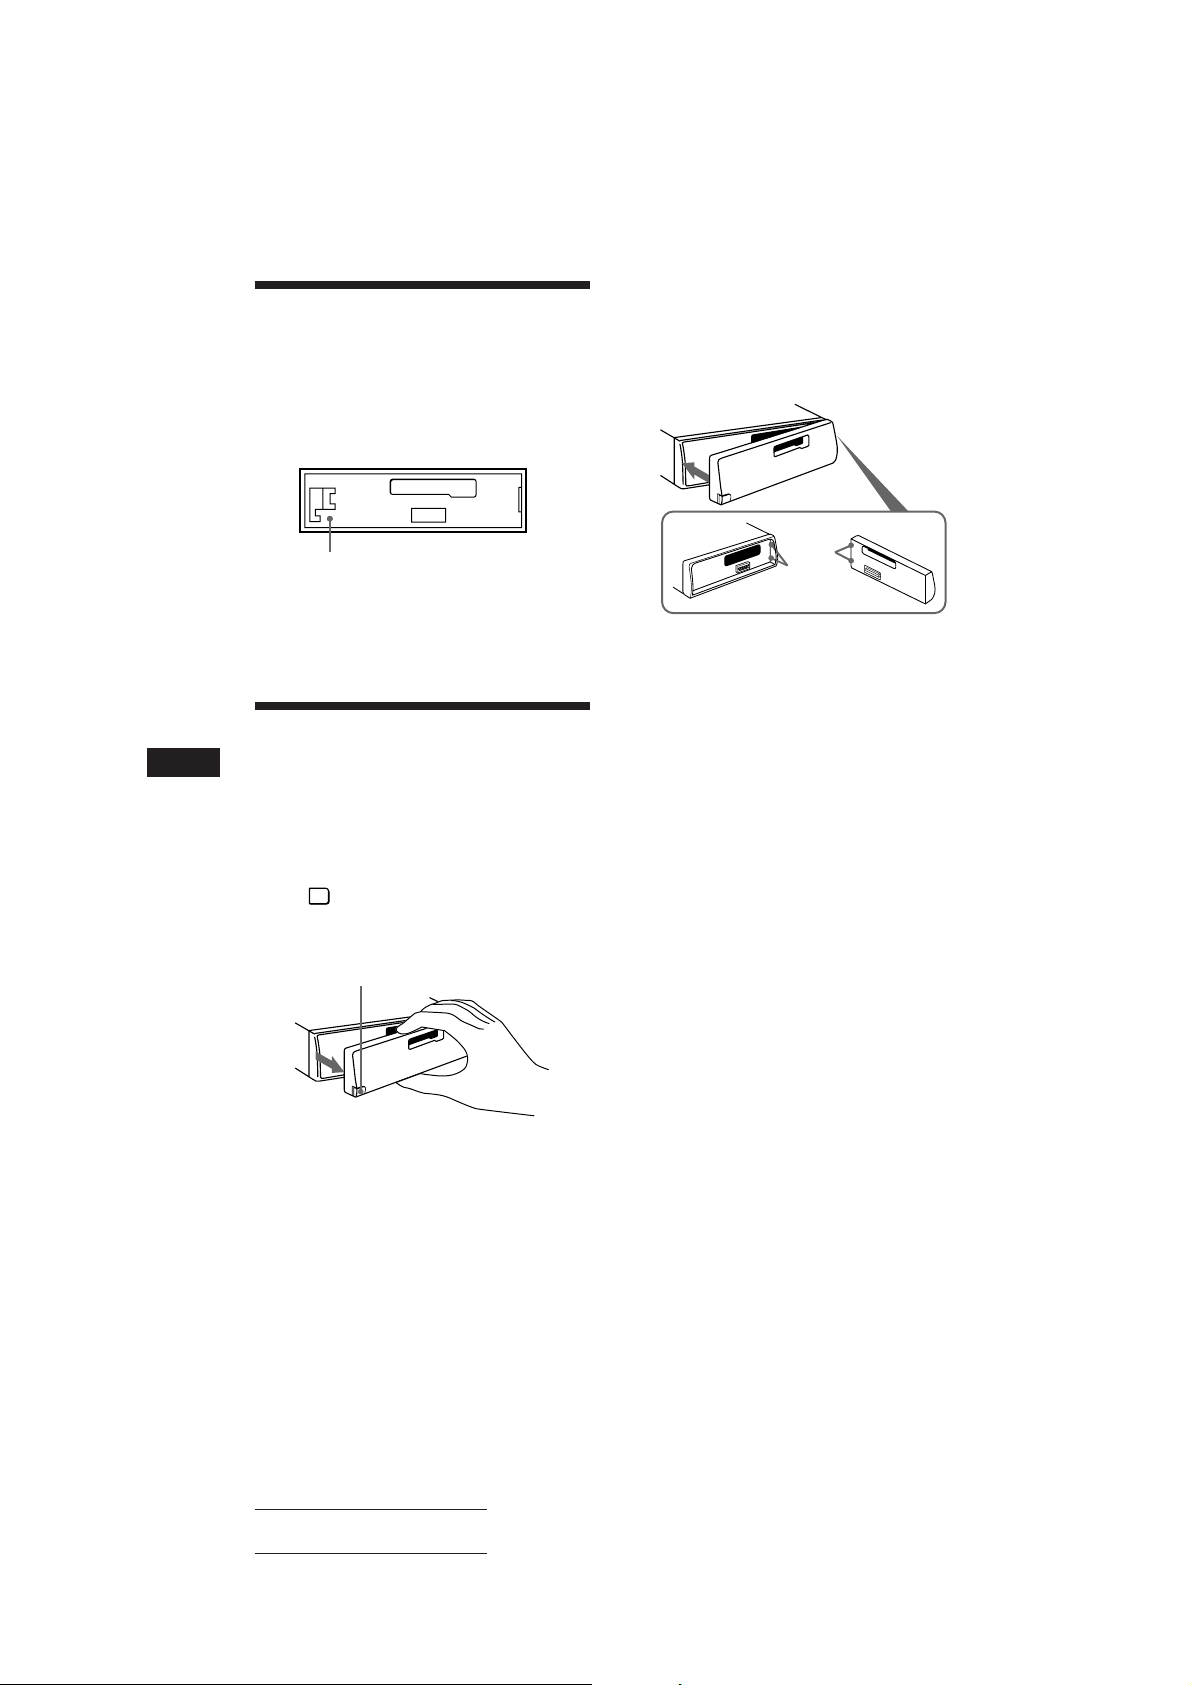
Resetting the unit
Before operating the unit for the first time or
after replacing the car battery, you must reset
the unit.
Press the reset button with a pointed object,
such as a ballpoint pen.
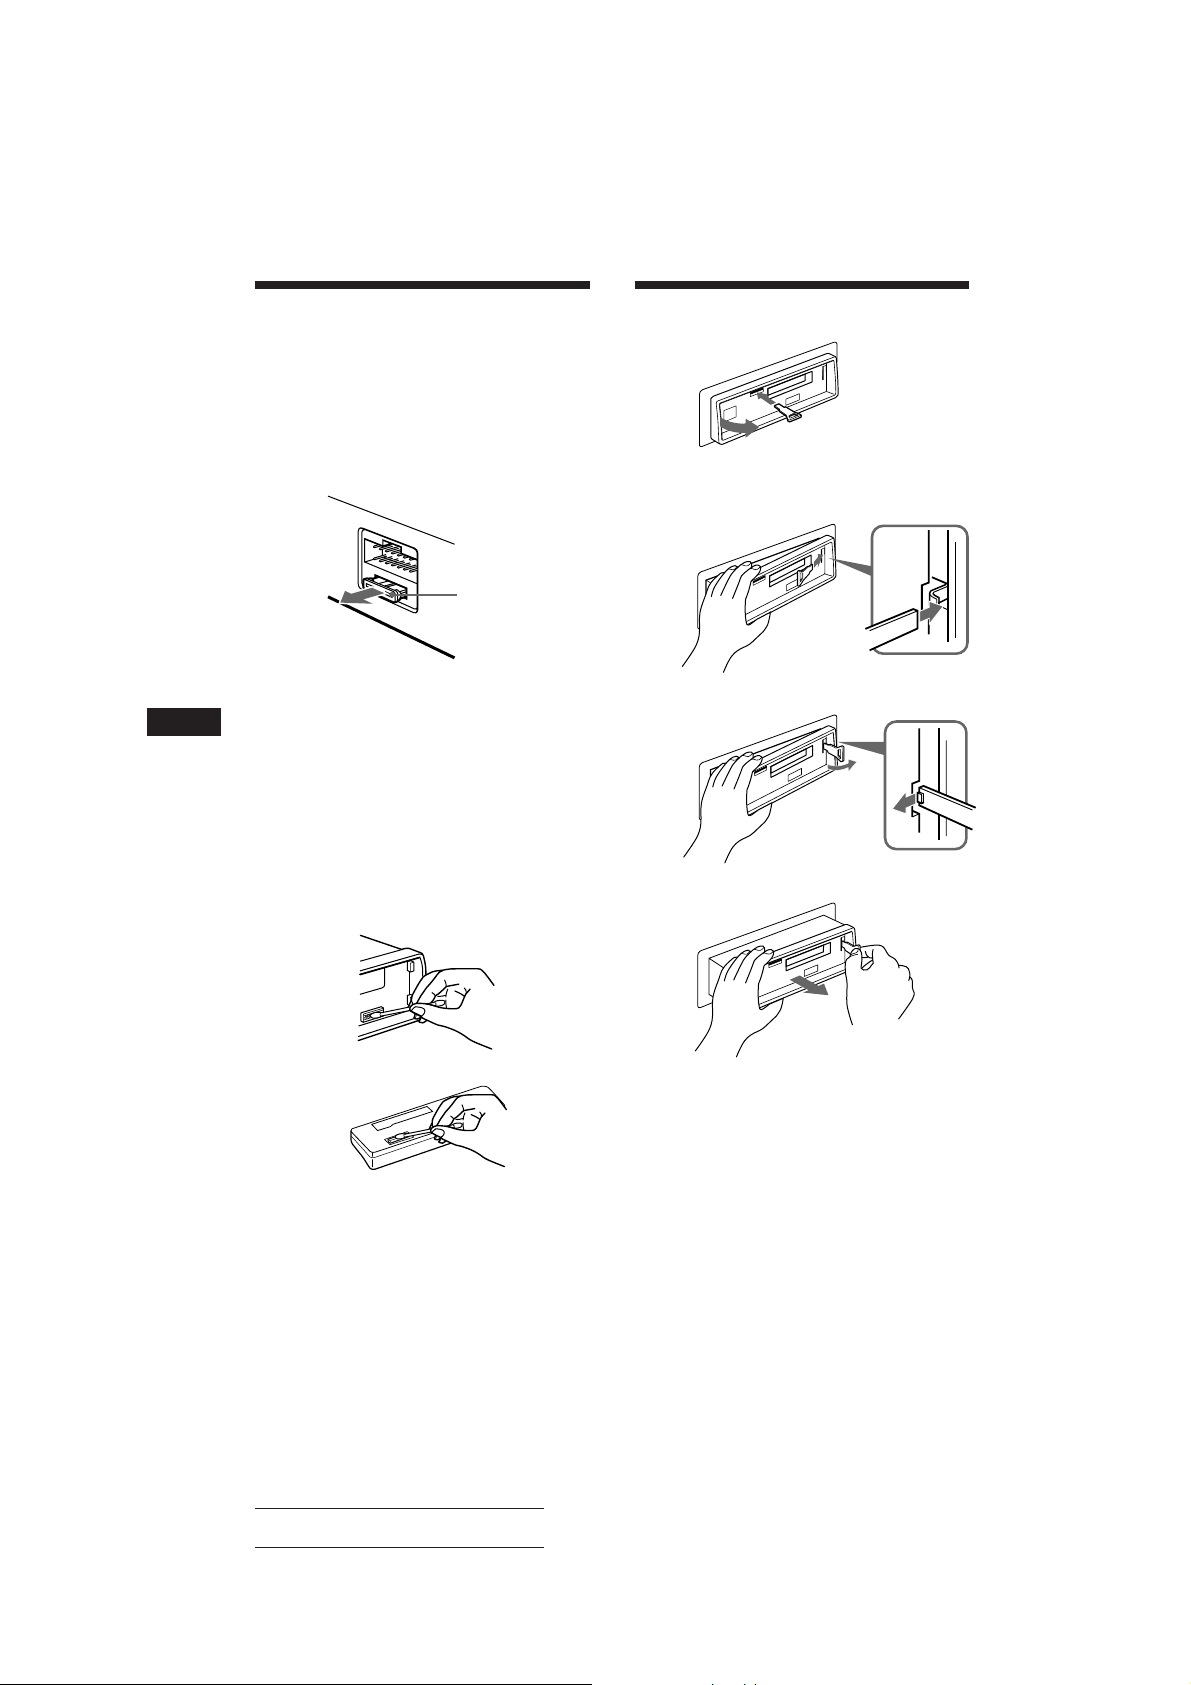
Attaching the Front Panel
Apply the right side of the front panel to the
unit by attaching part A of the front panel to
part B of the unit as illustrated, then swing
the left side into the unit until it clicks.
EN
Reset button
Note
Pressing the reset button will erase all the memory
functions except for the preset stations.
Detaching and Attaching
the Front Panel
The front panel of this unit can be detached in
order to prevent the unit from being stolen.
Detaching the Front Panel
Before detaching the front panel, be sure to
press the
RELEASE button to open up the front panel
and detach the panel by pulling it towards you
as illustrated.
Be sure not to drop the panel after detaching it
from the unit.
OFF
button first. Then press the
RELEASE button
A
B
Notes
• Make sure that the front panel is the right way up when
attaching it to the unit as it cannot be attached upside
down.
• Do not press the front panel hard against the unit when
attaching it to the unit. It can easily be attached by
pressing it lightly against the unit.
• When you carry the front panel with you, put it in the
supplied front panel case.
• Do not press hard or give excessive pressure to the
display windows of the front panel.
• Before removing the front panel, be sure to turn the
power off. However, if you press the RELEASE button to
detach the panel while the unit is still turned on, the
power will be automatically turned off in order to protect
the speakers from being damaged.
• Do not expose the front panel to direct sunlight, heat
sources such as hot air ducts or leave it in a humid place.
Never leave it on the dashboard etc. of a car parked in
direct sunlight where there may be a considerable rise in
temperature inside the car.
Caution alarm
If you turn the ignition key to the OFF position
without removing the front panel, the caution
alarm will be activated and a beep tone will be
heard for a few seconds (only when the
POWER SELECT switch is set to the A
position).
4
Actual total number Sony XR-3700RDS (E,F,G,I) 3-810-678-12 (3)
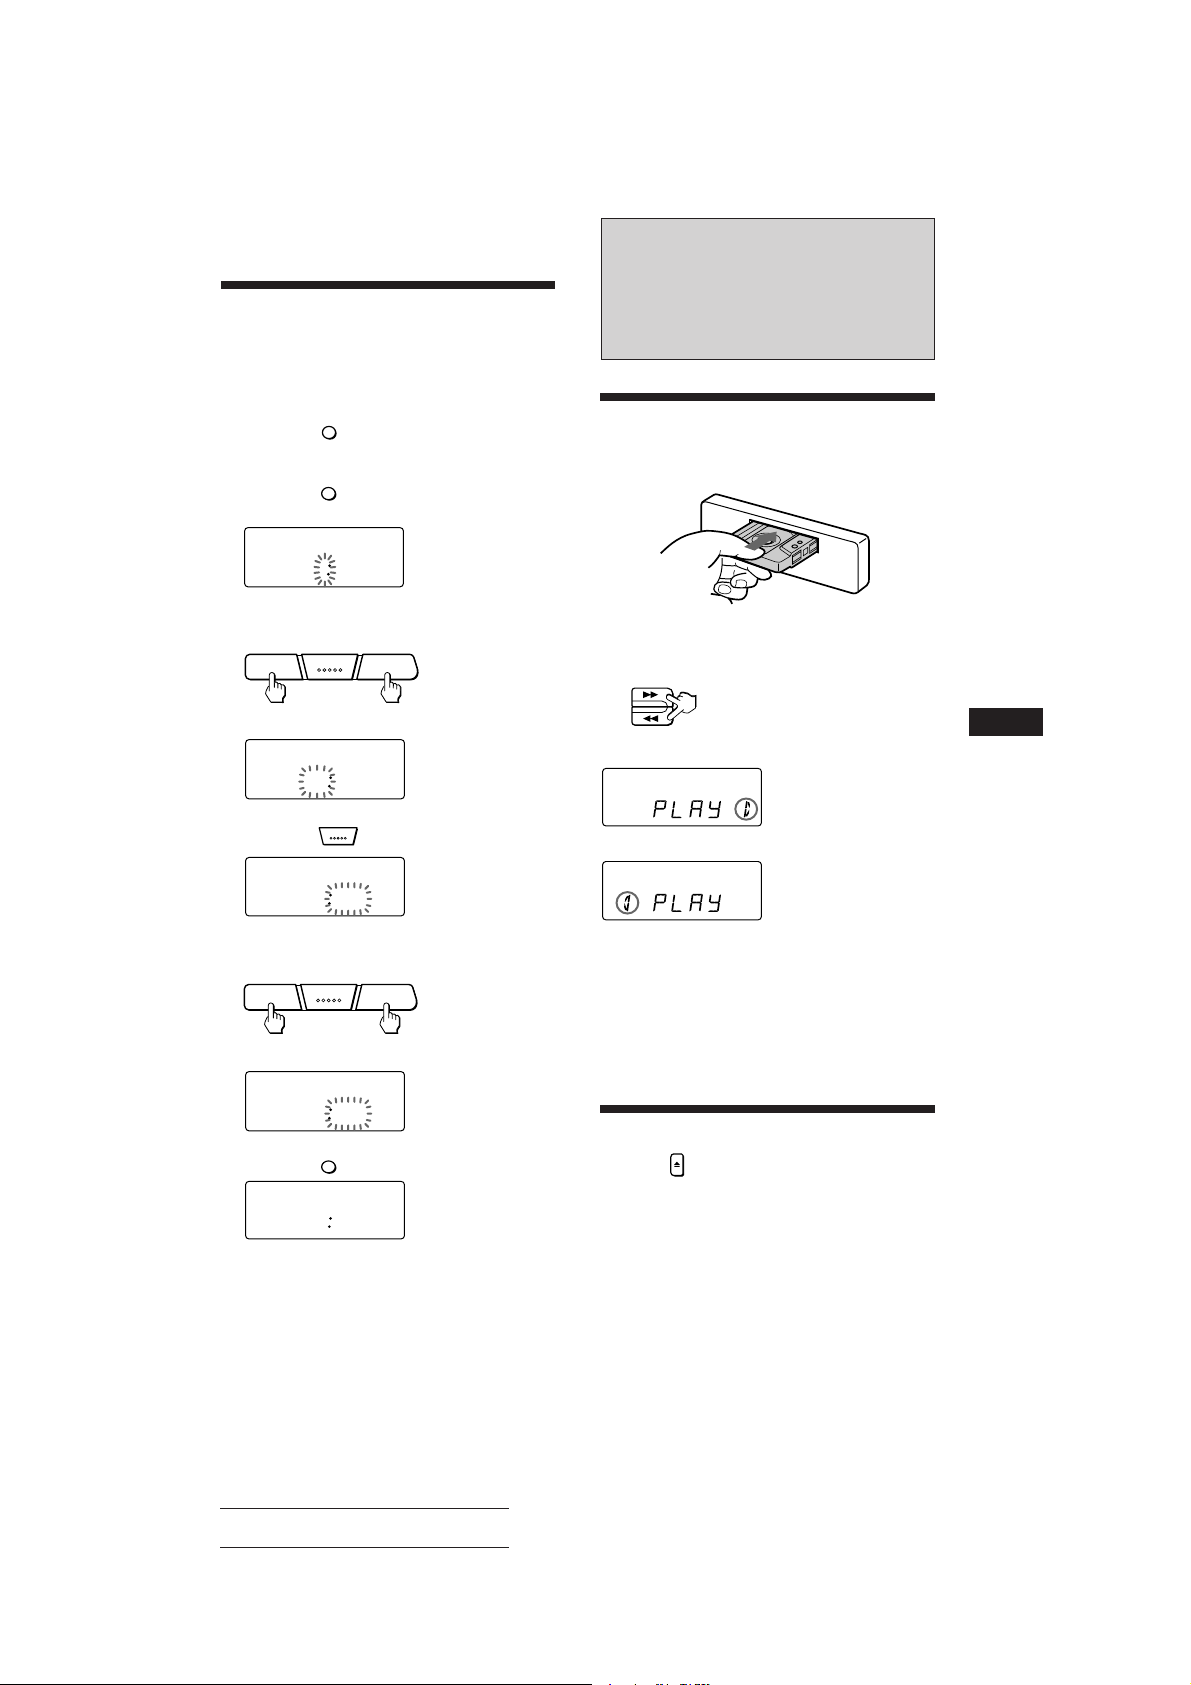
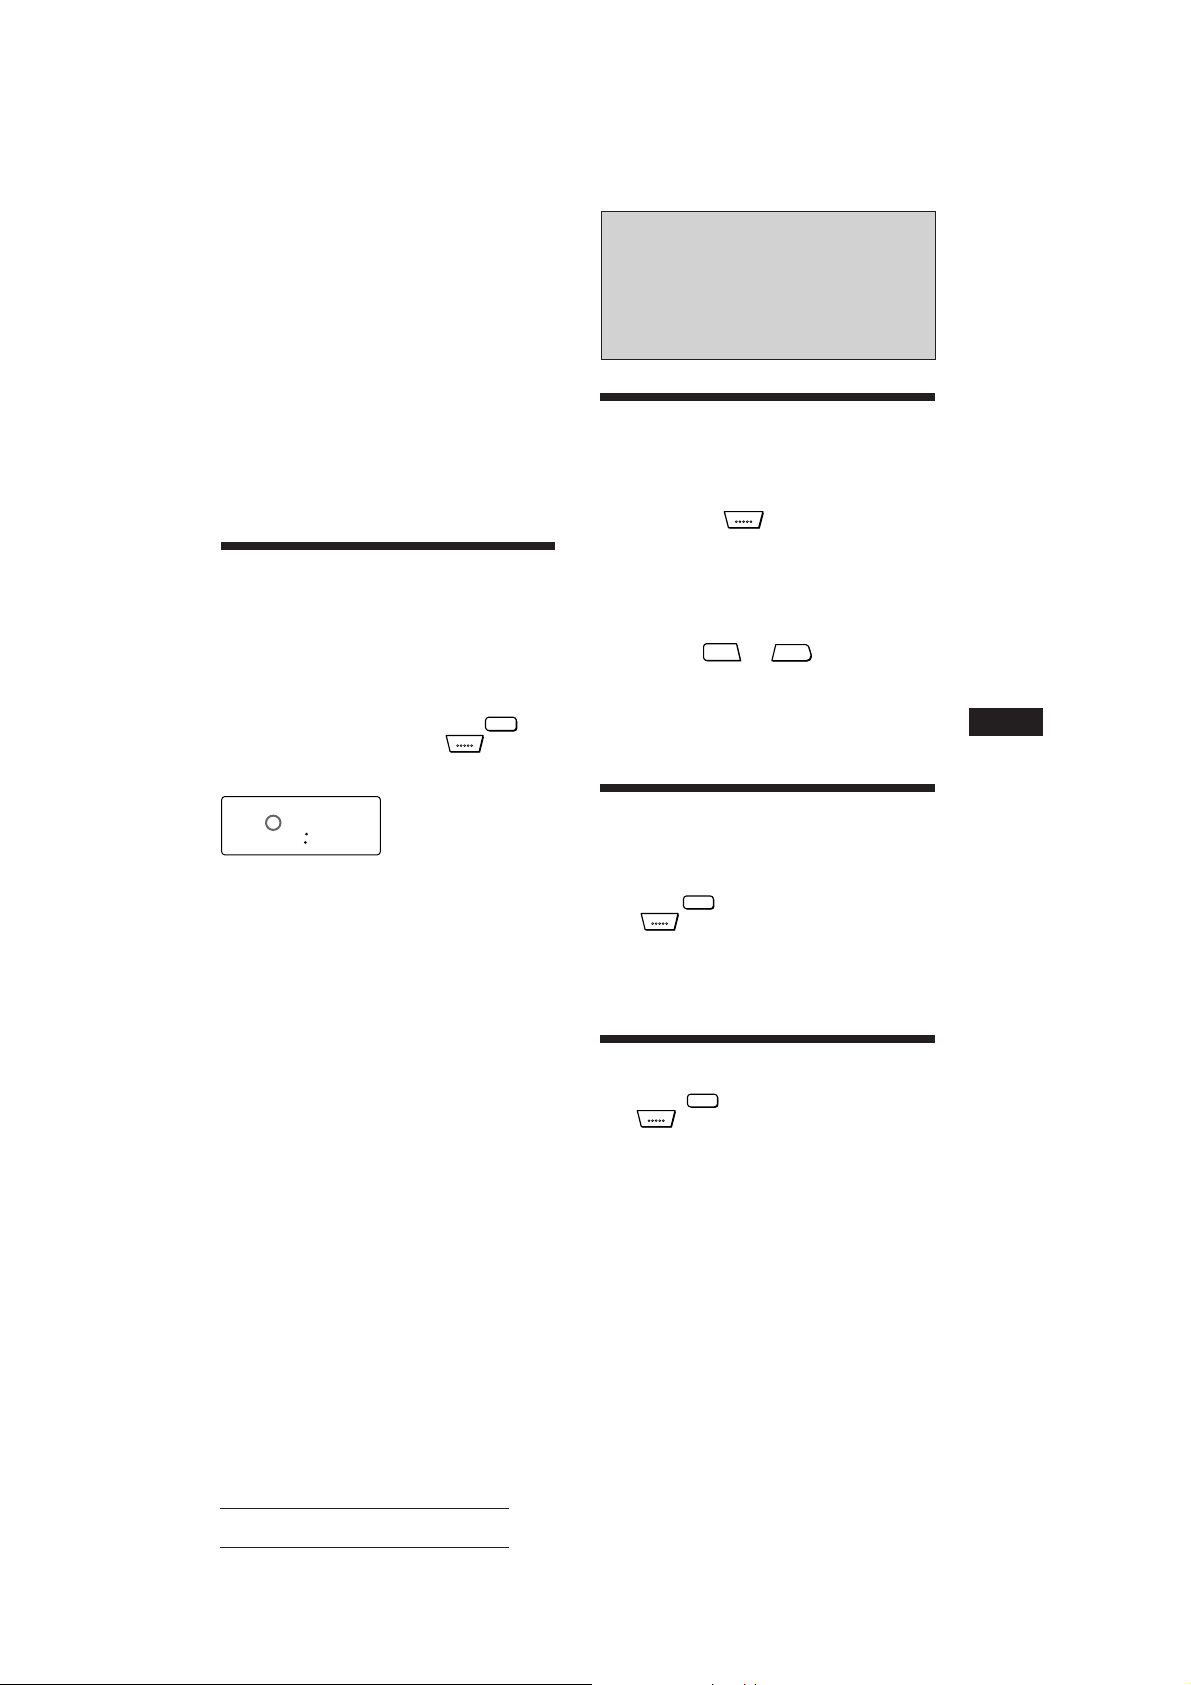
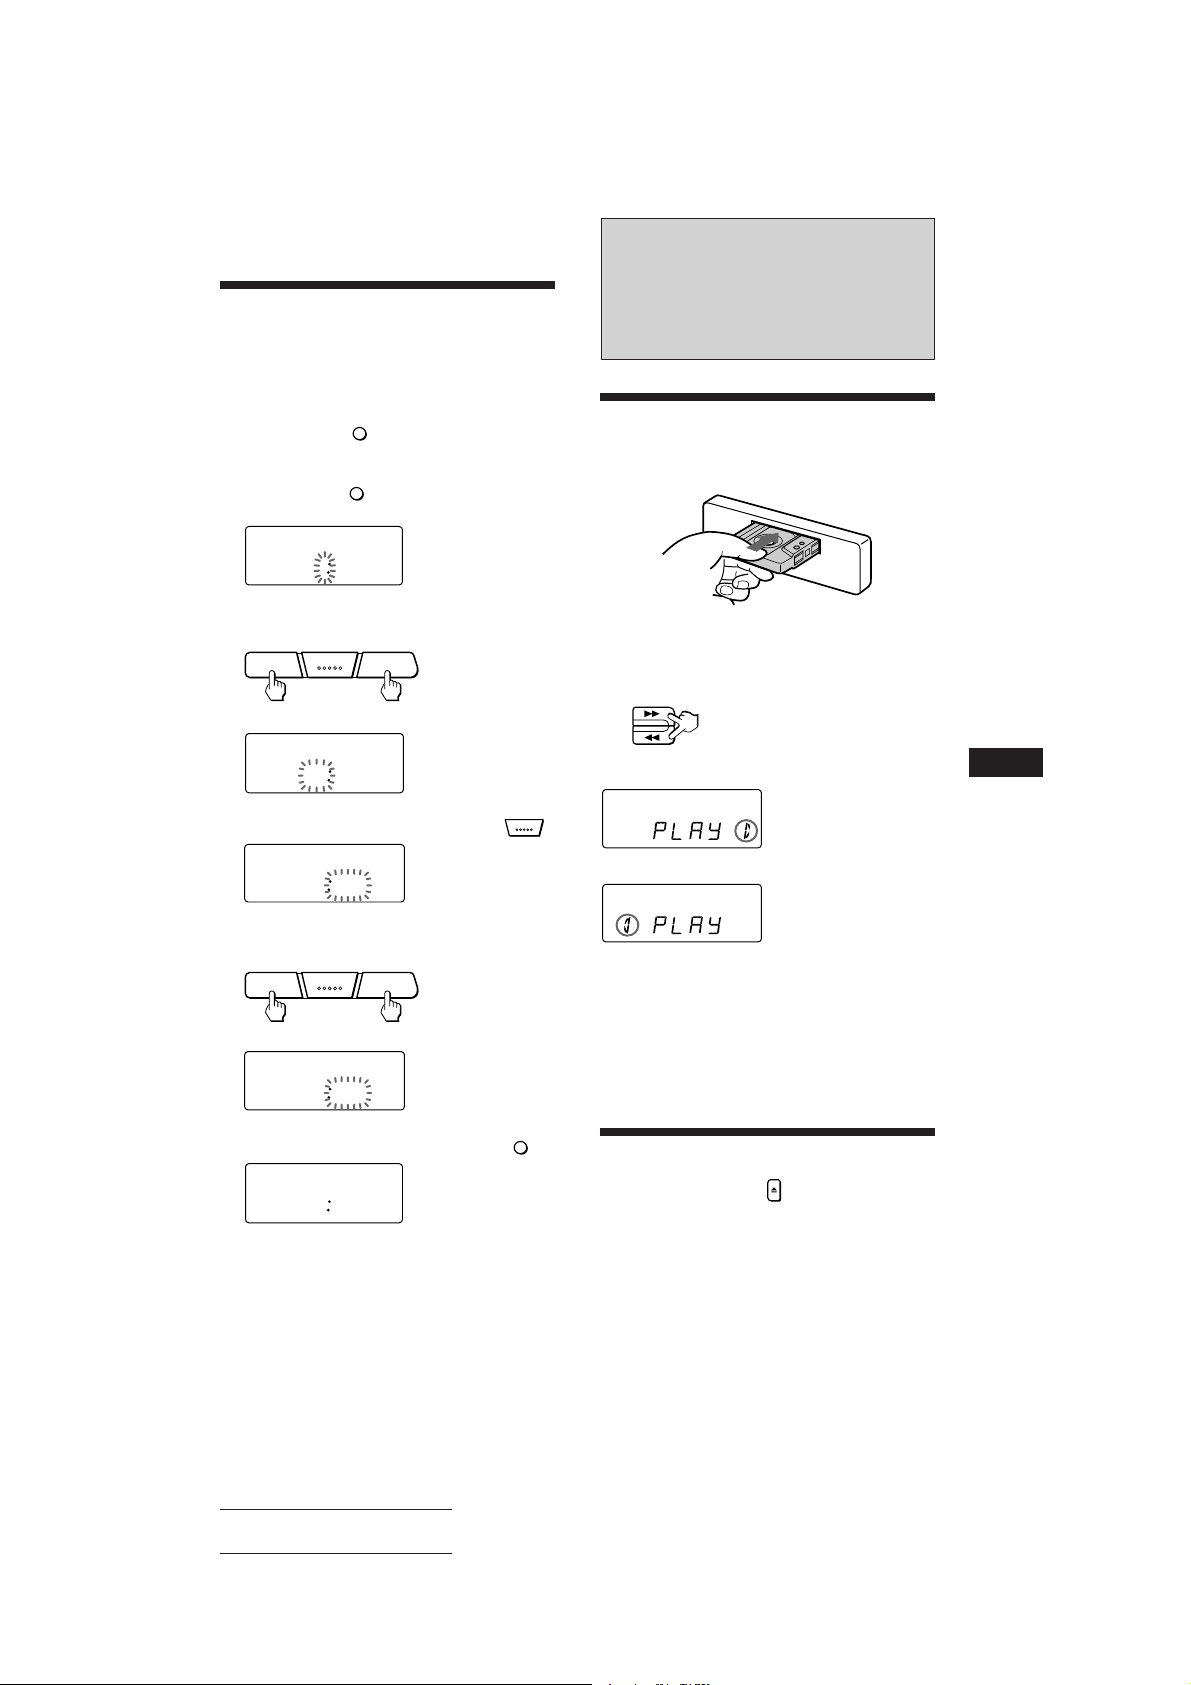
Setting the Clock
The clock has a 24-hour digital indication.
For example, setting it to 10:08
1 Display the time.
(Press the
operation.)
2 Press the
seconds.
100
The hour digit(s) blinks.
Set the hour digits.
DSPL
button during unit
DSPL
button for more than two
SEL
–+
Cassette Player
Operation
Listening to Tape Playback
After inserting the cassette, playback
will start automatically.
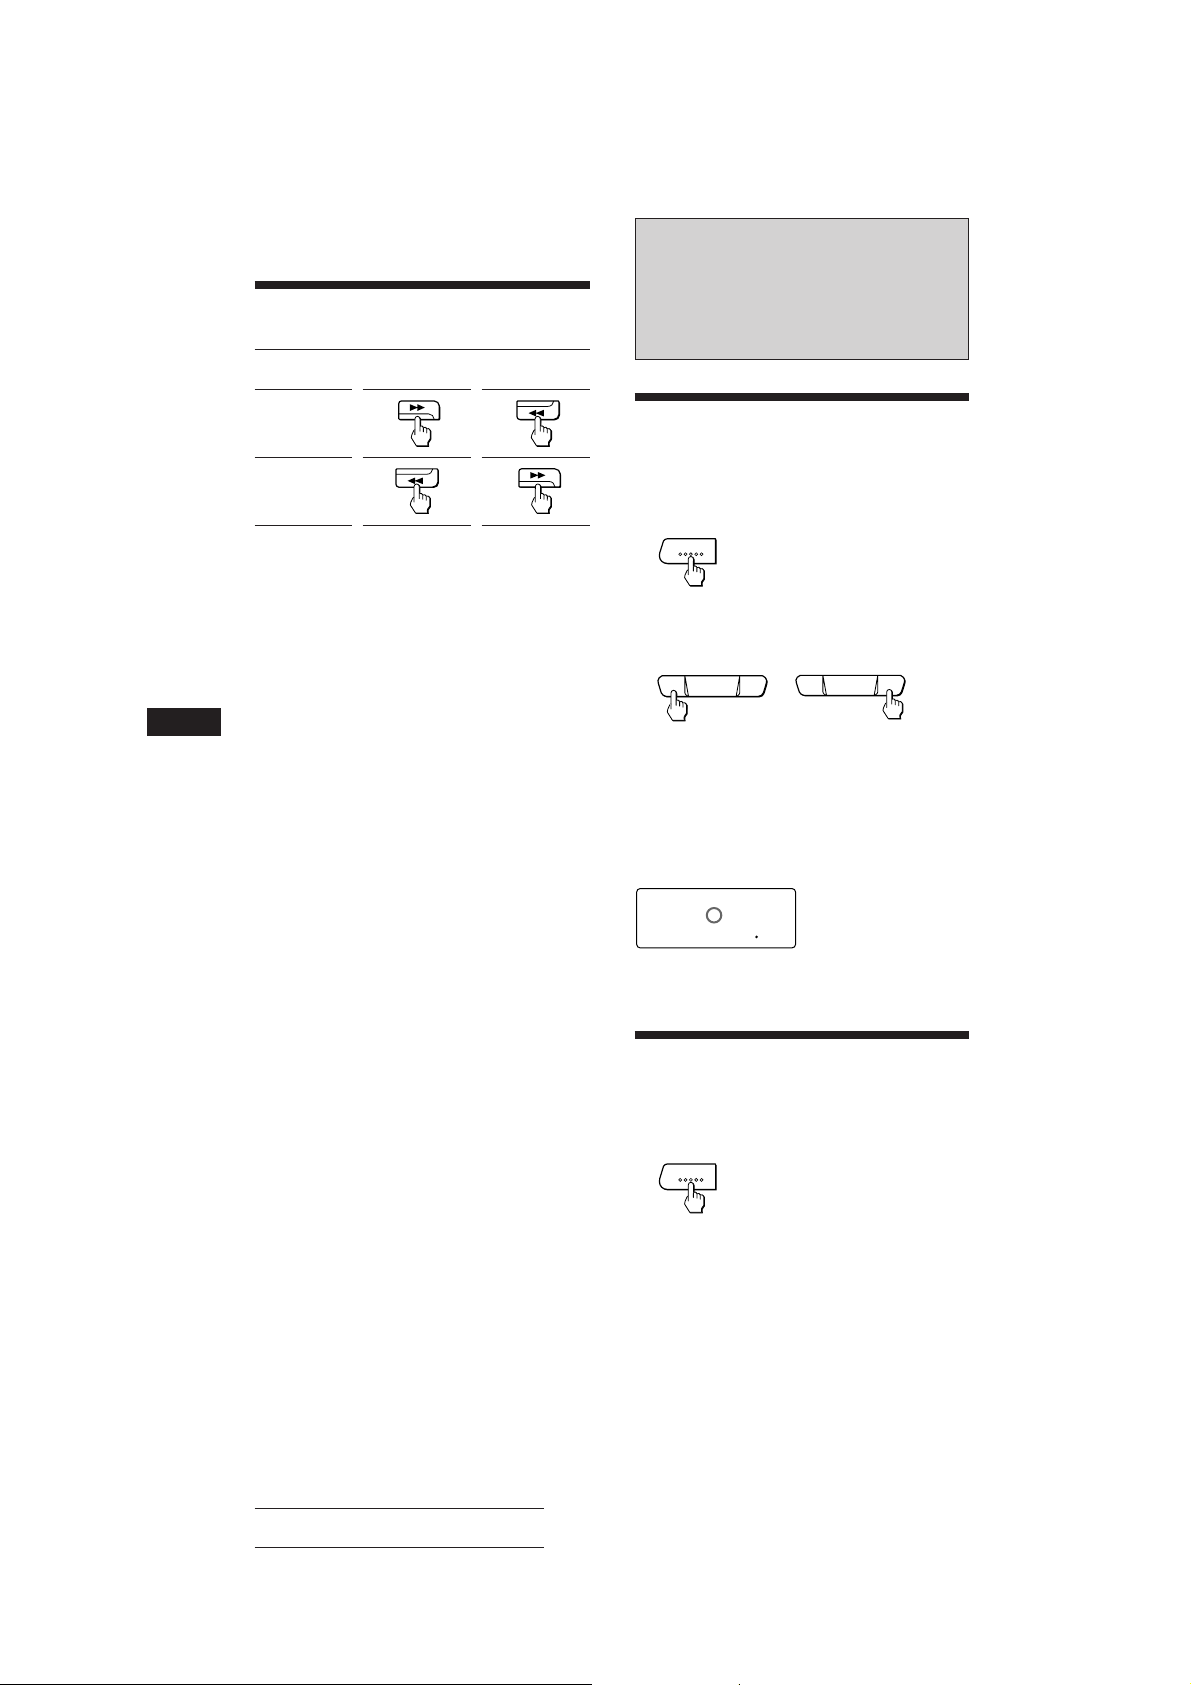
To change the tape direction,
press both the 0 and the ) buttons at the
same time.
(to go forward)(to go back)
1000
3 Press the
SEL
button momentarily.
1000
The minute digits blink.
Set the minute digits.
SEL
–+
(to go forward)(to go back)
1008
4 Press the
DSPL
button momentarily.
1008
The clock activates.
Note
If the POWER SELECT switch on the bottom of the unit is
set to the B position, the clock cannot be set unless the
power is turned on. Set the clock after you have turned on
the radio, or started cassette playback.
Indication of Tape Transport Direction
FWD
The side facing up is being played.
REV
The side facing down is being played.
Tape playback automatically changes
direction at the end of the tape.
Note
Before turning off the unit, eject the tape to avoid tape
damage.
Ejecting the Cassette
Press the button to stop playback and eject
the cassette.
EN
Cassette Player Operation
Actual total number Sony XR-3700RDS (E,F,G,I) 3-810-678-12 (3)
5
Fast-winding the Tape
FM
FM
Direction
indicator*
To advance To rewind
Radio Reception
EN
(
9
To resume playback, press the other fastwinding button partially until the locked
button is released.
* The 9 or ( indicator will flash while fast-winding the
tape.
Searching for Stations
Automatically
— Automatic Tuning
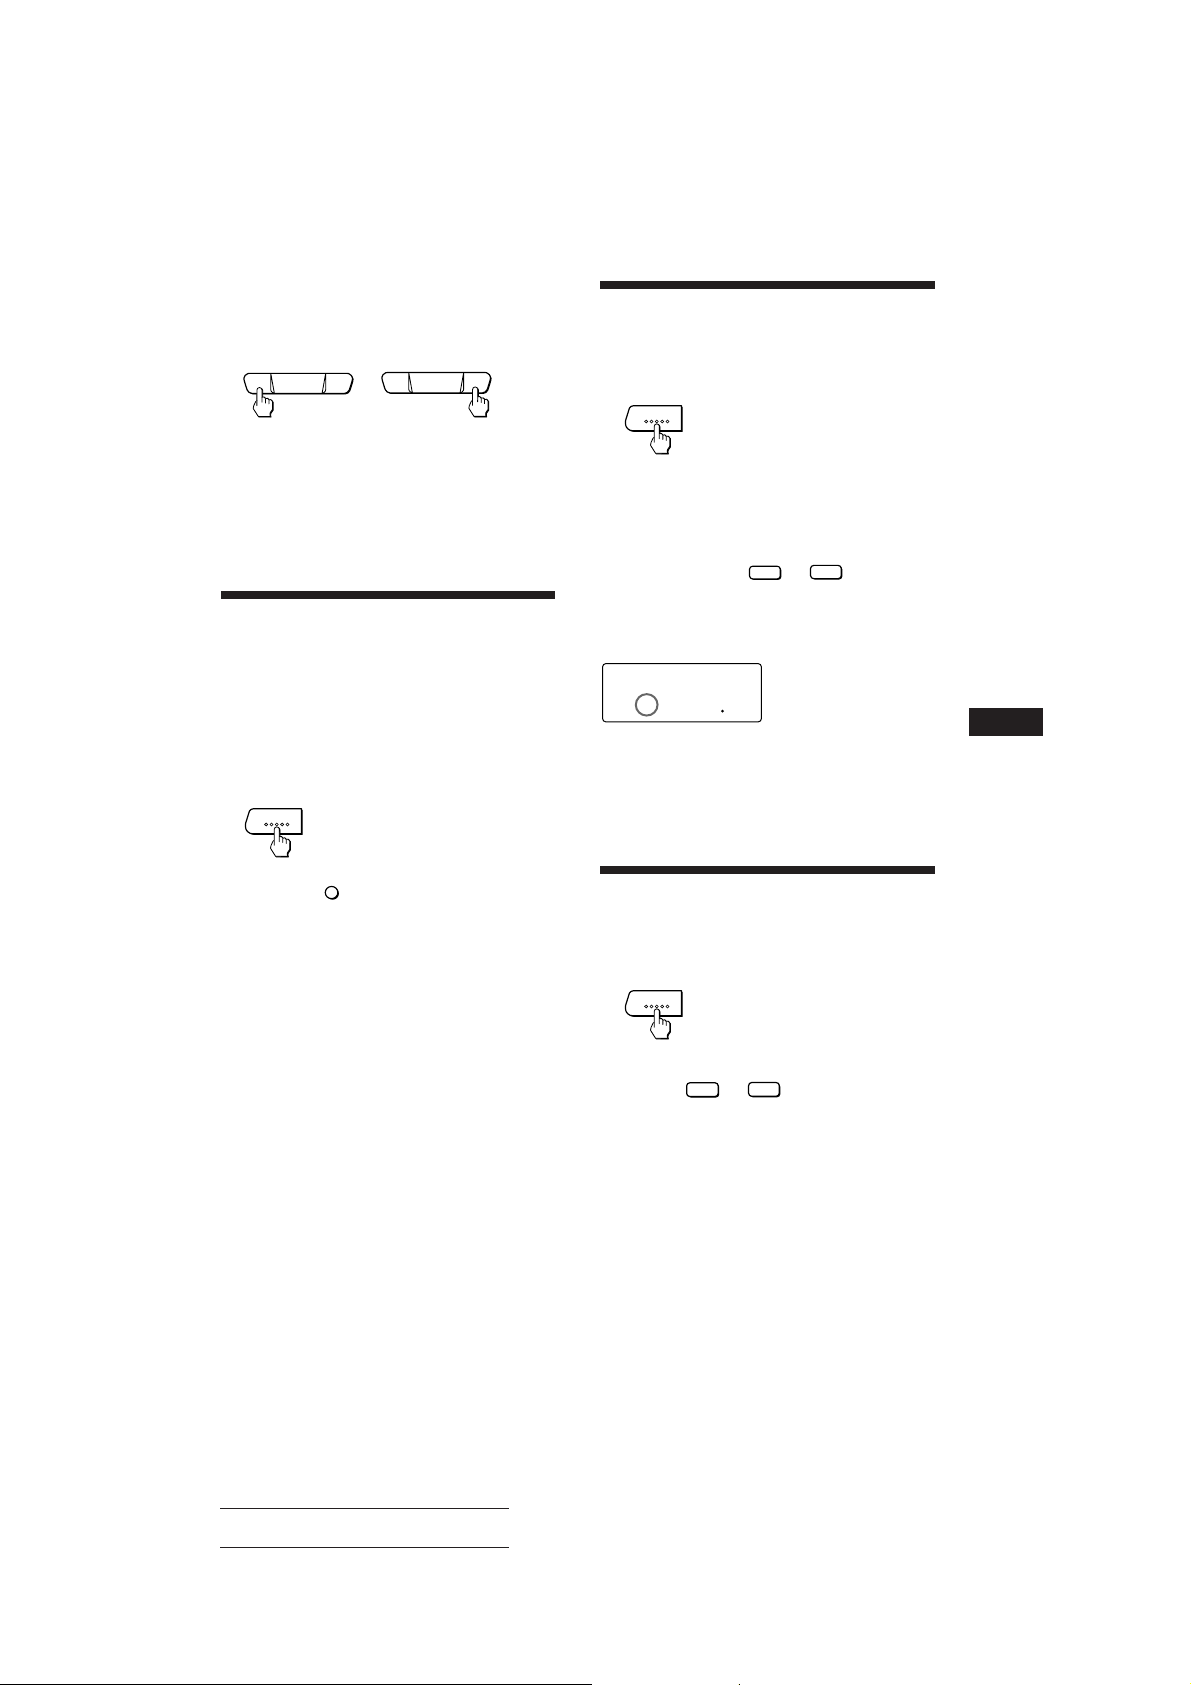
1 Select the desired band.
FM1 n FM2 n FM3 n FM1
2 Press either side of the SEEK/MANU
button momentarily to search for the
next station (automatic tuning).
SEEK/MANU
–+
For lower
frequencies
The scanning stops when a station is received.
Press either side of the button repeatedly until
the desired station is received.
When an FM stereo program with a sufficient
signal strength is tuned in,
ST
10430
the “ST” indication will appear.
SEEK/MANU
–+
For higher
frequencies
Tuning in by Adjusting the
Frequency
1 Select the desired band.
— Manual Tuning
FM1 n FM2n FM3 n FM1
6
Actual total number Sony XR-3700RDS (E,F,G,I) 3-810-678-12 (3)
2 Press and hold either side of the SEEK/
MANU button.
Release the button when the desired station
is received.
SEEK/MANU
–+
For lower
frequencies
PREVENT ACCIDENTS!
When tuning in during driving, use the
automatic tuning and the memory preset
tuning instead of the manual tuning.
SEEK/MANU
–+
For higher
frequencies
Memorizing Stations
Automatically
— BTM (Best Tuning Memory) Function
This function selects from the currently
received band the stations with the strongest
signals and memorizes them in order of their
frequency.
1 Select the desired band.
FM
FM1 n FM2n FM3 n FM1
Memorizing Only the
Desired Stations
1 Select the desired band.
FM
FM1 n FM2n FM3 n FM1
2 Tune in the station which you wish to
store on the preset number button.
3 Press and hold the desired preset
number button (1 to 6) for about
two seconds until you hear a beep tone.
The number of the pressed preset number
button appears in the display window.
FM1
1 10430
Up to 6 stations on each band (FM1, FM2 and FM3) can
be stored on the preset number buttons in the order of your
choice. Therefore, 18 stations can be memorized on FM.
If you try to store another station on the same preset
number button, the previously stored station will be
erased.
ST
EN
Cassette Player Operation/Radio Reception
2 Press the
seconds.
•When there is no preset number indicated
on the display window, stations will be
stored on all preset number buttons on the
currently selected band.
•When there is a preset number indicated on
the display window, the unit will store
stations on all preset number buttons from
the one currently displayed.
For example, when you select FM2 and preset
number 3 is displayed,
the operation will start from preset number 3 on FM2, and
will stop at preset number 6 on FM3.
PTY/BTM
button for more than two
Receiving the Memorized
Stations
1 Select the desired band.
FM
FM1 n FM2n FM3 n FM1
2 Press momentarily the preset number
button (1 to 6) on which the
desired station is stored.
Note
If you press the preset number button for more than two
seconds, the currently received station will be memorized.
To receive the previously memorized station, make sure
that the preset number button is pressed only momentarily.
7
Actual total number Sony XR-3700RDS (E,F,G,I) 3-810-678-12 (3)
EN
RDS Functions
Overview of the RDS
Function
Radio Data System (RDS) is a broadcasting
service that allows FM stations to send
additional digital information along with the
regular radio programme signal. Your car
stereo offers you a variety of services. Here
are just a few: Re-tuning the same programme
automatically, Listening to traffic
announcements and Locating a station by
programme type.
Notes
• Depending on the country or region, not all of the RDS
functions are available.
• RDS may not work properly if the signal strength is
weak or if the station you are tuned in is not
transmitting RDS data.
Re-tuning the Same
Programme Automatically
— Alternative Frequencies (AF)
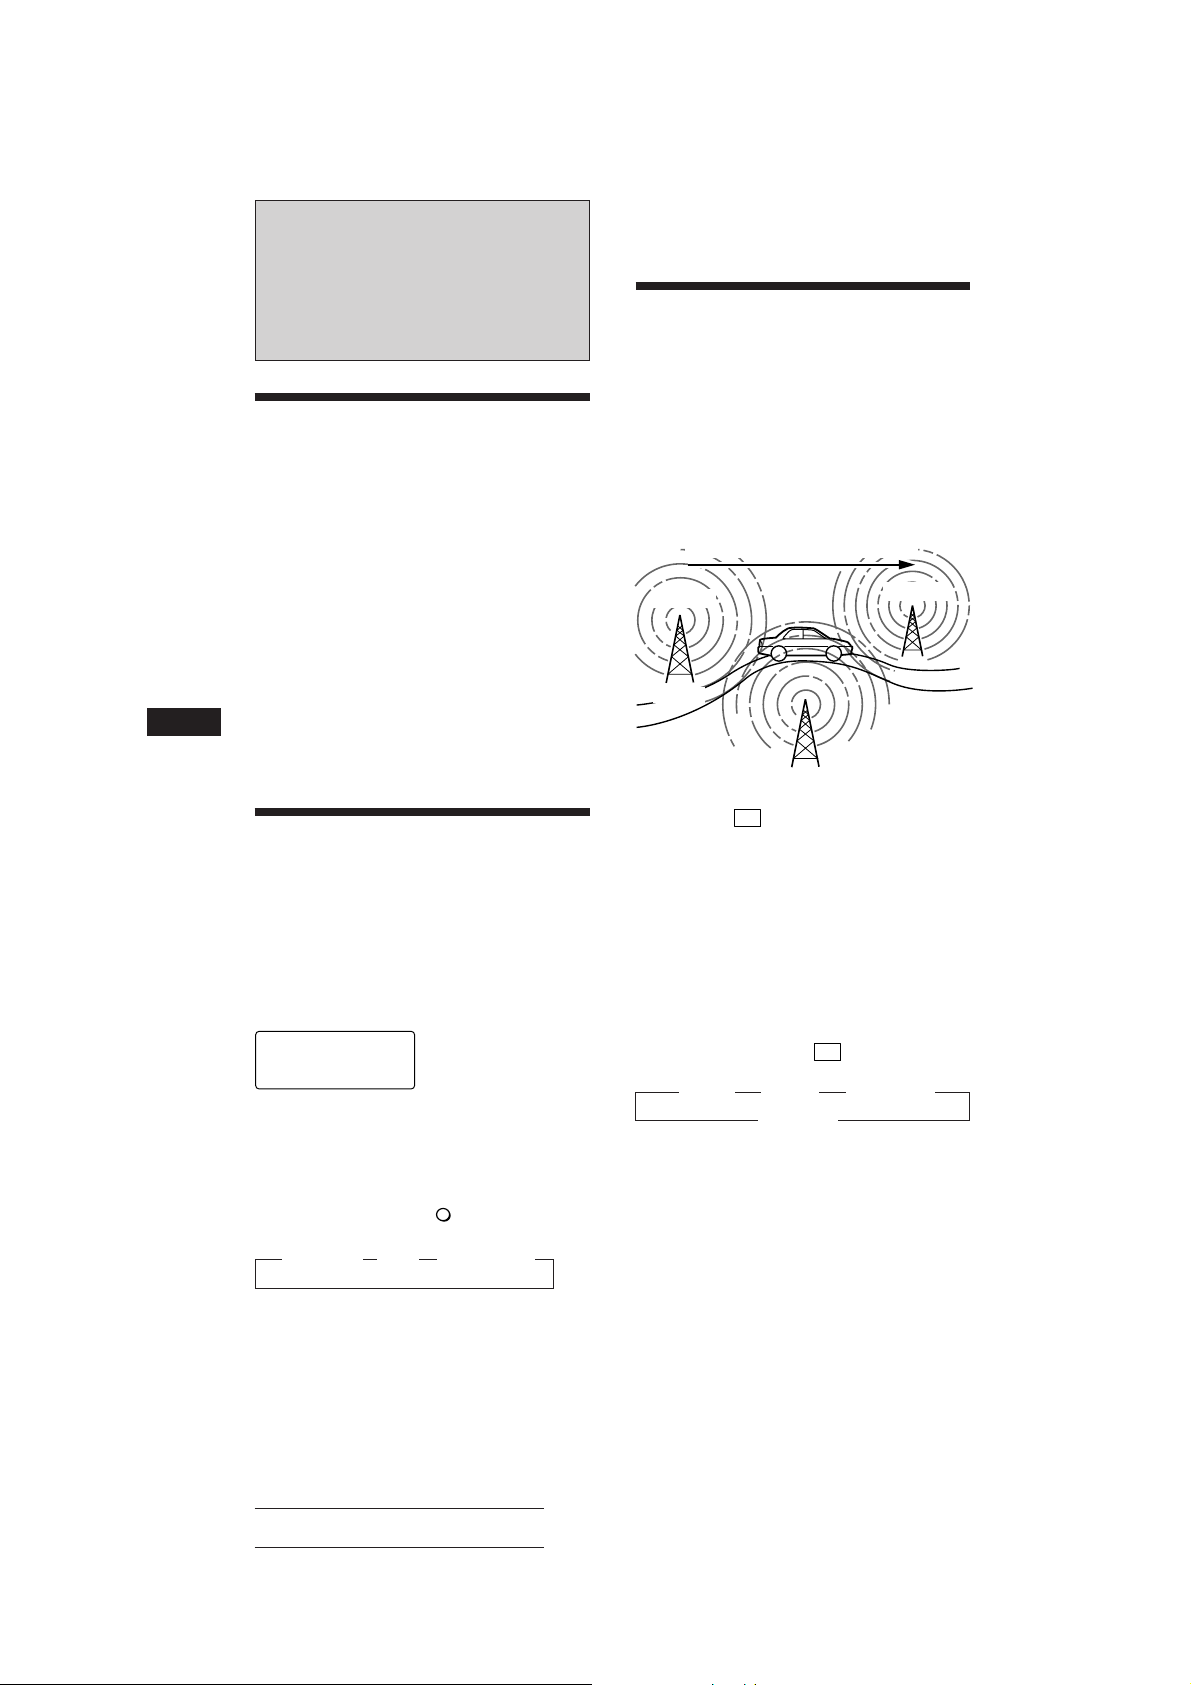
The Alternative Frequencies (AF) function
automatically selects and re-tunes the station
with the strongest signal in a network. By
using this function, you can continuously
listen to the same programme during a longdistance drive without having to re-tune the
station manually.
Frequencies change automatically.
98.5MHz
Station
102.5MHz
96.0MHz
Displaying the Station
Name
The name of the station currently received
lights up in the display.
Select an FM station.
When you tune in an FM station that transmits
RDS data, the station name lights up in the
display.
BBC1 FM
Note
The “*” indication means that an RDS station is being
received.
Changing the displayed items
Each time you press the
displayed items change as follows:
z Frequency z Time z StationName
Note
“NO Name” lights up if the station received does not
transmit RDS data.
DSPL
button, the
8
1 Select an FM station.
2 Press the
lights up in the display.
The unit starts searching for an alternative
station with a stronger signal in the same
network.
Note
When there is no alternative station in the area and you
don’t need to search for an alternative station, turn the AF
function off by pressing the AF/TA button until “AF/TA
OFF” lights up.
Changing the displayed items
Each time you press the
displayed items change as follows:
z AF ON z TA ON z AF/TA ON*
* Select this to turn on both AF and TA functions.
Notes
• “NO AF” and the station name flashes alternately, if the
unit cannot find an alternative station in the network.
• If the station service name starts flashing after you've
made the preset selection, it means that no alternative
frequency is available and the unit cannot receive the PI
(Programme Identification) data of the memorized
station. Press the SEEK/MANU button while the
station service name is flashing (for about eight seconds)
so the unit starts searching for a station with the same PI
data, but with another frequency (“PI SEEK” lights up
and no sound is heard). If the unit still cannot find an
alternative station, “NO PI” lights up and the unit goes
back to the original preset station.
AF/TA
button until “AF ON”
AF/TA
button, the
AF/TA OFF Z
Actual total number Sony XR-3700RDS (E,F,G,I) 3-810-678-12 (3)
Listening to a regional programme
The “REG ON” (regional on) function of this
unit lets you stay tuned to a regional
programme without being switched to another
regional station. (Note that you must turn the
AF function on.) The unit is factory preset to
“REG ON, ” but if you want to turn off the
function, do the following.
Press the
seconds until “REG OFF” lights up in the
display.
Note that selecting “REG OFF” might cause
the unit to switch to another regional station
within the same network.
Note
This function does not work in the United Kingdom and in
some other areas.
AF/TA
button for more than two
Local Link function (United
Kingdom only)
The Local Link function lets you select other
local stations in the area, even though they are
not stored in your presets.
1 Press a preset number button that has
stored a local station.
2 Within five seconds, press again the
preset number button of the local
station.
3 Repeat this procedure until the desired
local station is received.
Tip
When the traffic announcement starts while you are
listening to another programme source, the unit
automatically switches to the announcement and goes back
to the original source when the announcement is over.
Notes
• “NO TP” flashes for five seconds if the received station
doesn’t broadcast traffic announcements. Then, the unit
starts searching for a station that does broadcast traffic
announcements.
• When the “EON” indication appears with “TP” in the
display window, the current station makes use of
broadcast traffic announcements of other stations in the
same network.
To cancel the current traffic
announcement
Press the
To cancel all traffic announcements, turn off
the function by pressing the
“AF/TA OFF” lights up.
AF/TA
button momentarily.
AF/TA
button until
Presetting the volume of traffic
announcements
You can preset the volume level of the traffic
announcements beforehand so you wouldn't
miss the announcement. When a traffic
announcement starts, the volume will be
automatically adjusted to the preset level.
1 Select the desired volume level.
2 Press the
the
A beep sounds and the setting is stored.
SEL
3
button while pressing
button.
EN
RDS Functions
Receiving emergency
announcements
Listening to Traffic
Announcements
The Traffic Announcement (TA) and Traffic
Programme (TP) data let you automatically
tune in an FM station that is broadcasting
traffic announcements even though you are
listening to other sources.
Press the
TA ON” lights up in the display.
The unit starts searching for traffic information
stations. “TP” lights up in the display when
the unit finds a station broadcasting traffic
announcements.
When the traffic announcement starts, “TA”
flashes, then flashing stops when the traffic
announcement is over.
Actual total number Sony XR-3700RDS (E,F,G,I) 3-810-678-12 (3)
AF/TA
button until “TA ON” or “AF/
If an emergency announcement comes in while
you are listening to the radio, the programme
will be automatically switched to the
announcement. If you are listening to a source
other than the radio, the emergency
announcements will be heard if you set AF or
TA to on. The unit will then automatically
switch to these announcements no matter what
you are listening to at the time.
9
EN
Presetting the RDS
Stations with the AF and
TA Data
When you preset the RDS stations, the unit
stores each station’s data as well as its
frequency, so you don’t have to turn on the AF
or TA function every time you tune in the
preset station. You can select different setting
(AF, TA, or both) for individual preset station
or the same setting for all preset stations.
Presetting the same setting for all
preset stations
1 Select an FM band.
2 Press the
select either “AF ON, “ “TA ON,” or “AF/
TA ON” (for both AF and TA functions).
Note that selecting “AF/TA OFF” stores
not only RDS stations, but also non-RDS
FM stations.
3 Press the
Presetting different settings for
each preset station
AF/TA
button repeatedly and
PTY/BTM
button for two seconds.
1 Select an FM band and tune in the
desired station.
2 Press the
select either “AF ON, “ “TA ON,” or “AF/
TA ON” (for both AF and TA functions).
AF/TA
button repeatedly and
3 Press the desired preset number button
for two seconds until a beep sounds.
Repeat from step 1 for presetting other
stations.
Tip
If you want to change the preset AF and/or TA setting
after you tuned in the preset station, you can do so by
turning on/off the AF or TA function.
10
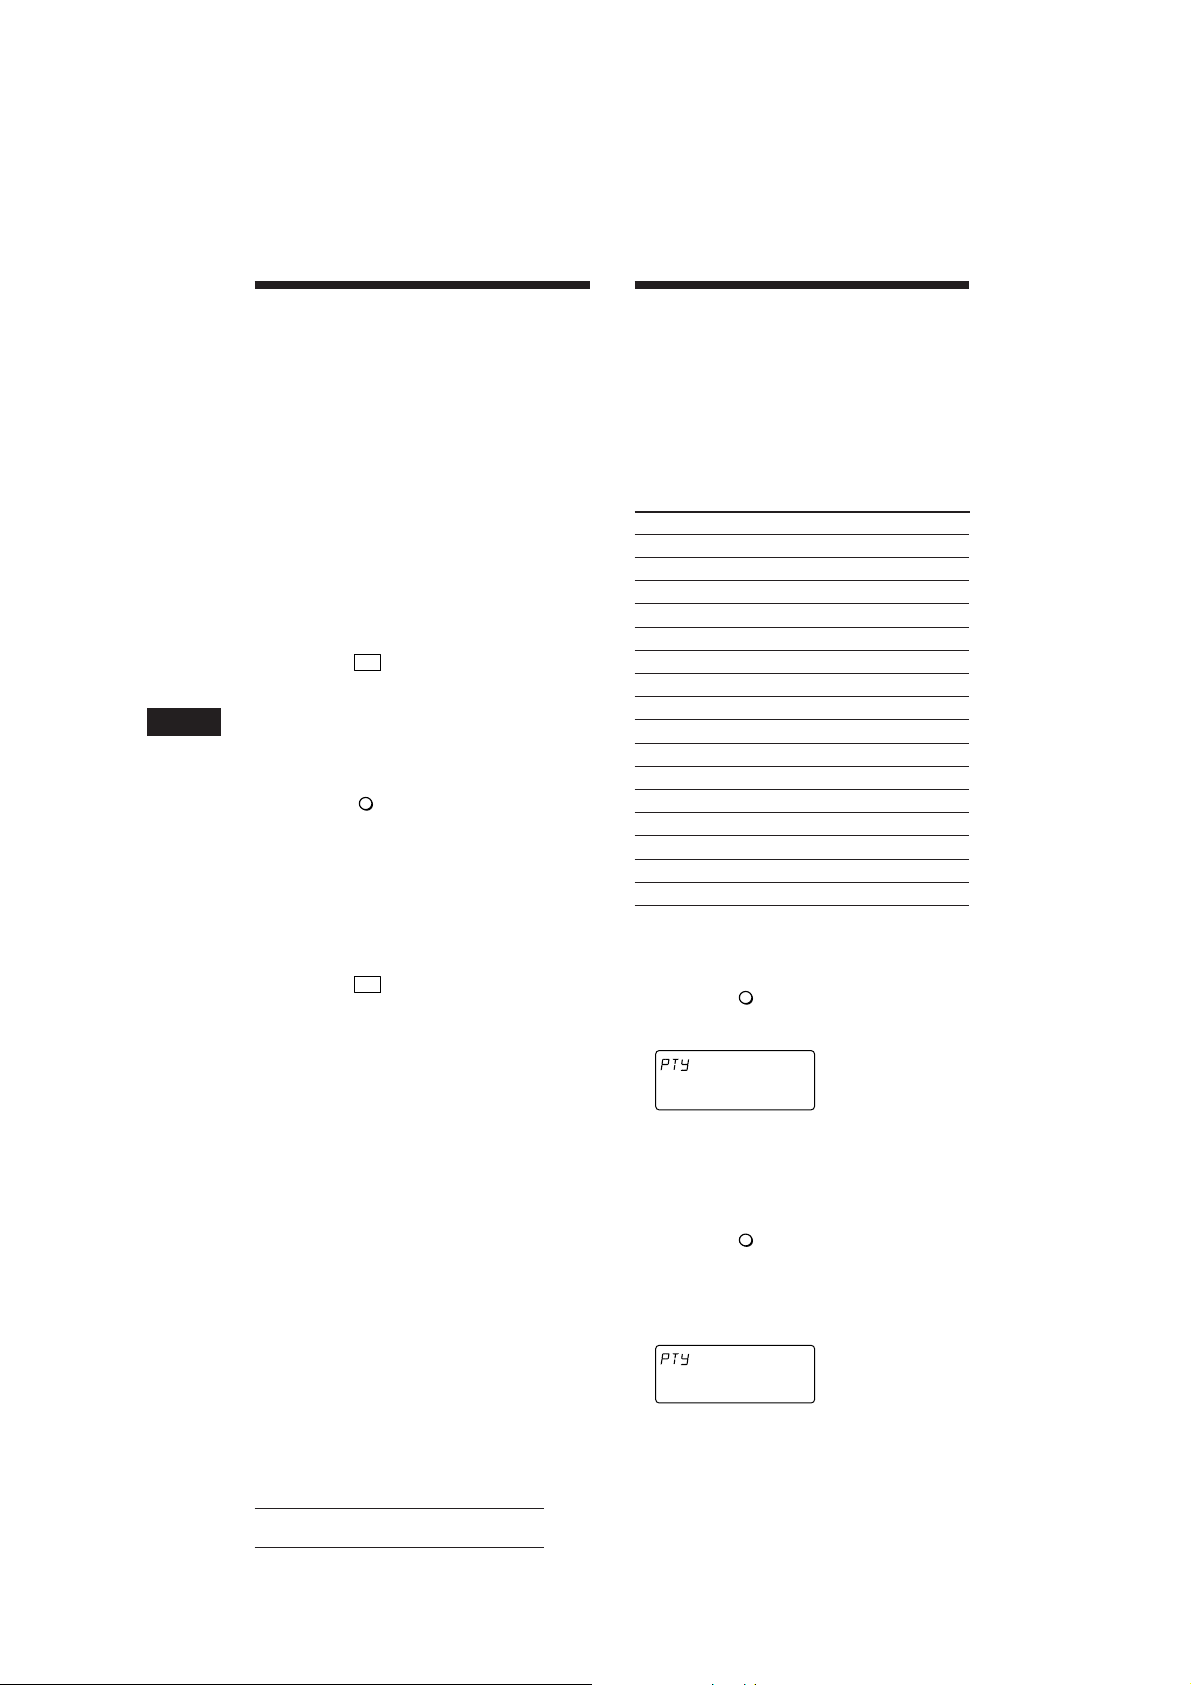
Locating a Station by
Programme Type
You can locate the station you want by
selecting one of the programme types shown
below.
Note
In the countries or regions where EON data is not
transmitted, you can use this function only for the stations
you have tuned in once.
Programme types
News
Current Affairs
Information
Sports
Education
Drama
Culture
Science
Varied
Popular Music
Rock Music
Middle of the Road Music
Light Classical
Classical
Other Music Type
Not specified
Note
You cannot use this function in some countries where no
PTY (Programme Type selection) data is available.
1 Press the
reception until “PTY” lights up in the
display.
PTY/BTM
button during FM
INFO
The current programme type name appears
if the station is transmitting the PTY data.
“- - - - -” appears if the received station is
not an RDS station or if the RDS data has
not been received.
2 Press the
the desired programme type appears.
The programme types appear in the order
as shown in the above table. Note that you
cannot select “NONE” (Not specified) for
searching.
PTY/BTM
button repeatedly until
SPORT
Display
NEWS
AFFAIRS
INFO
SPORT
EDUCATE
DRAMA
CULTURE
SCIENCE
VARIED
POP M
ROCK M
M.O.R. M
LIGHT M
CLASSICS
OTHER M
NONE
Actual total number Sony XR-3700RDS (E,F,G,I) 3-810-678-12 (3)
3 Press either side of the SEEK/MANU
button.
The unit starts searching for a station
broadcasting the selected programme type.
When the unit finds the programme, the
programme type appears again for five
seconds.
“NO” and the programme type appear
alternately for five seconds if the unit
cannot find the programme type and it
returns to the previous station.
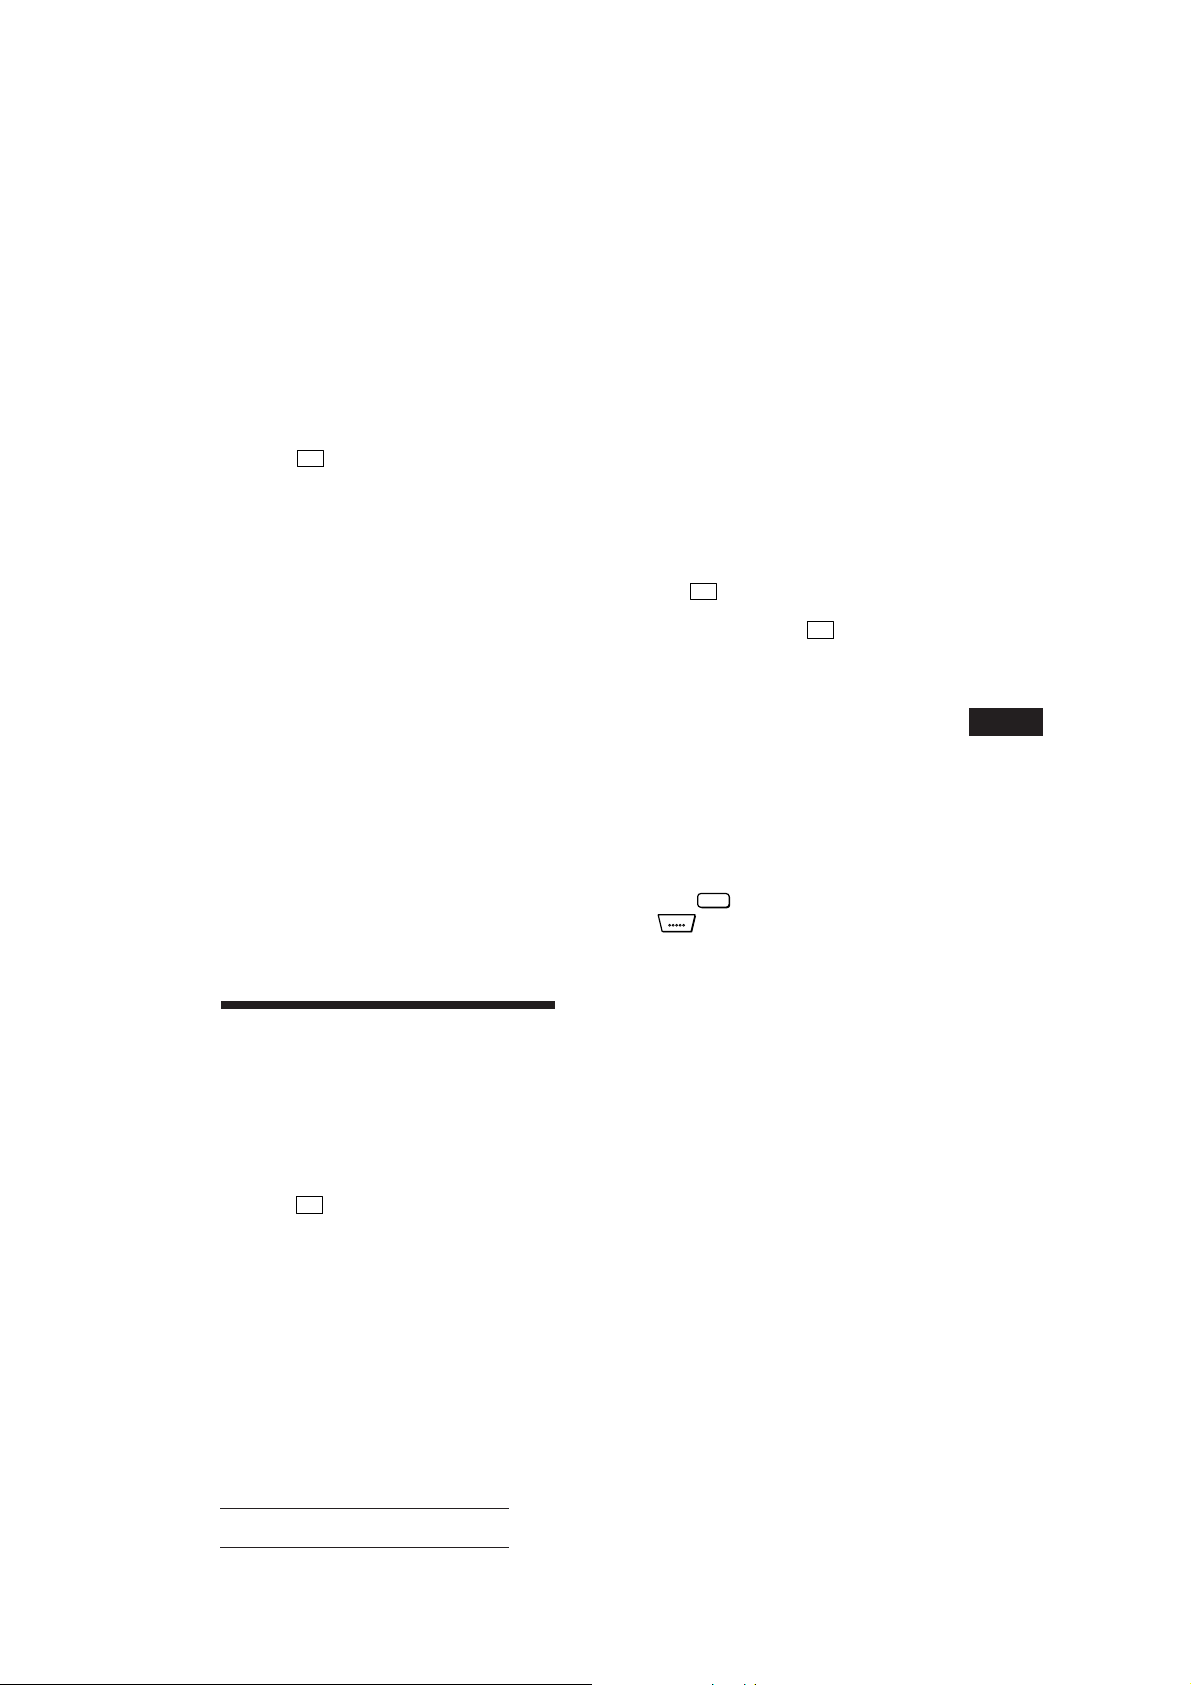
Using RDS Data for
Setting the Clock
Automatically
By receiving CT (Clock Time) data, the clock of
this unit can be set automatically.
During FM reception, press the
button while pressing the
n “CT” will be displayed, and the clock
will be set.
FM1
CT
100
To cancel the CT function, press these buttons
again.
Notes
• The CT function may not work even though an RDS
station is being received.
• The time set by the CT function may not be exact.
SEL
2
button.
Other Functions
Adjusting the Sound
Characteristics
1 Select the item you want to adjust by
pressing the
VOL (volume) n BAS (bass) n TRE
(treble) n BAL (balance) n FAD (fader)
nVOL (volume)
2 Adjust the selected item by pressing
either the
Adjust within three seconds after selecting.
(After three seconds the button will again
serve as volume control button.)
Enjoying Bass and Treble
at Low Volume
— Loudness Function
Press the
SEL
the
appear on the display.
Bass and treble will be boosted. To cancel,
press again.
SEL
button repeatedly.
–
4
button while pressing
button. n “LOUD” will
or
+
button.
EN
RDS Functions/Other Functions
Muting the Beep Tone
SEL
6
button while pressing
button.
Press the
the
To reactivate the beep tone, press these buttons
once more.
Actual total number Sony XR-3700RDS (E,F,G,I) 3-810-678-12 (3)
11
Maintenance
Dismounting the Unit
EN
Fuse Replacement
When replacing the fuse, be sure to use one
matching the amperage rating stated on the
fuse. If the fuse blows, check the power
connection and replace the fuse. If the fuse
blows again after replacement, there may be an
internal malfunction. In such a case , consult
your nearest Sony dealer.
Fuse (15 A)
Warning
Never use a fuse with an amperage rating
exceeding the one supplied with the unit as
this could damage the unit.
Cleaning the Connectors
The unit may not function properly if the
connectors between the unit and the front
panel are not clean. In order to prevent this,
open the front panel by pressing the RELEASE
button, then detach it and clean with a cotton
swab dipped in alcohol. Do not apply too
much force. Otherwise, the connector may get
damaged.
1
Release key (supplied)
2
3
4
Main unit
Back of the front panel
12
Actual total number Sony XR-3700RDS (E,F,G,I) 3-810-678-12 (3)
+
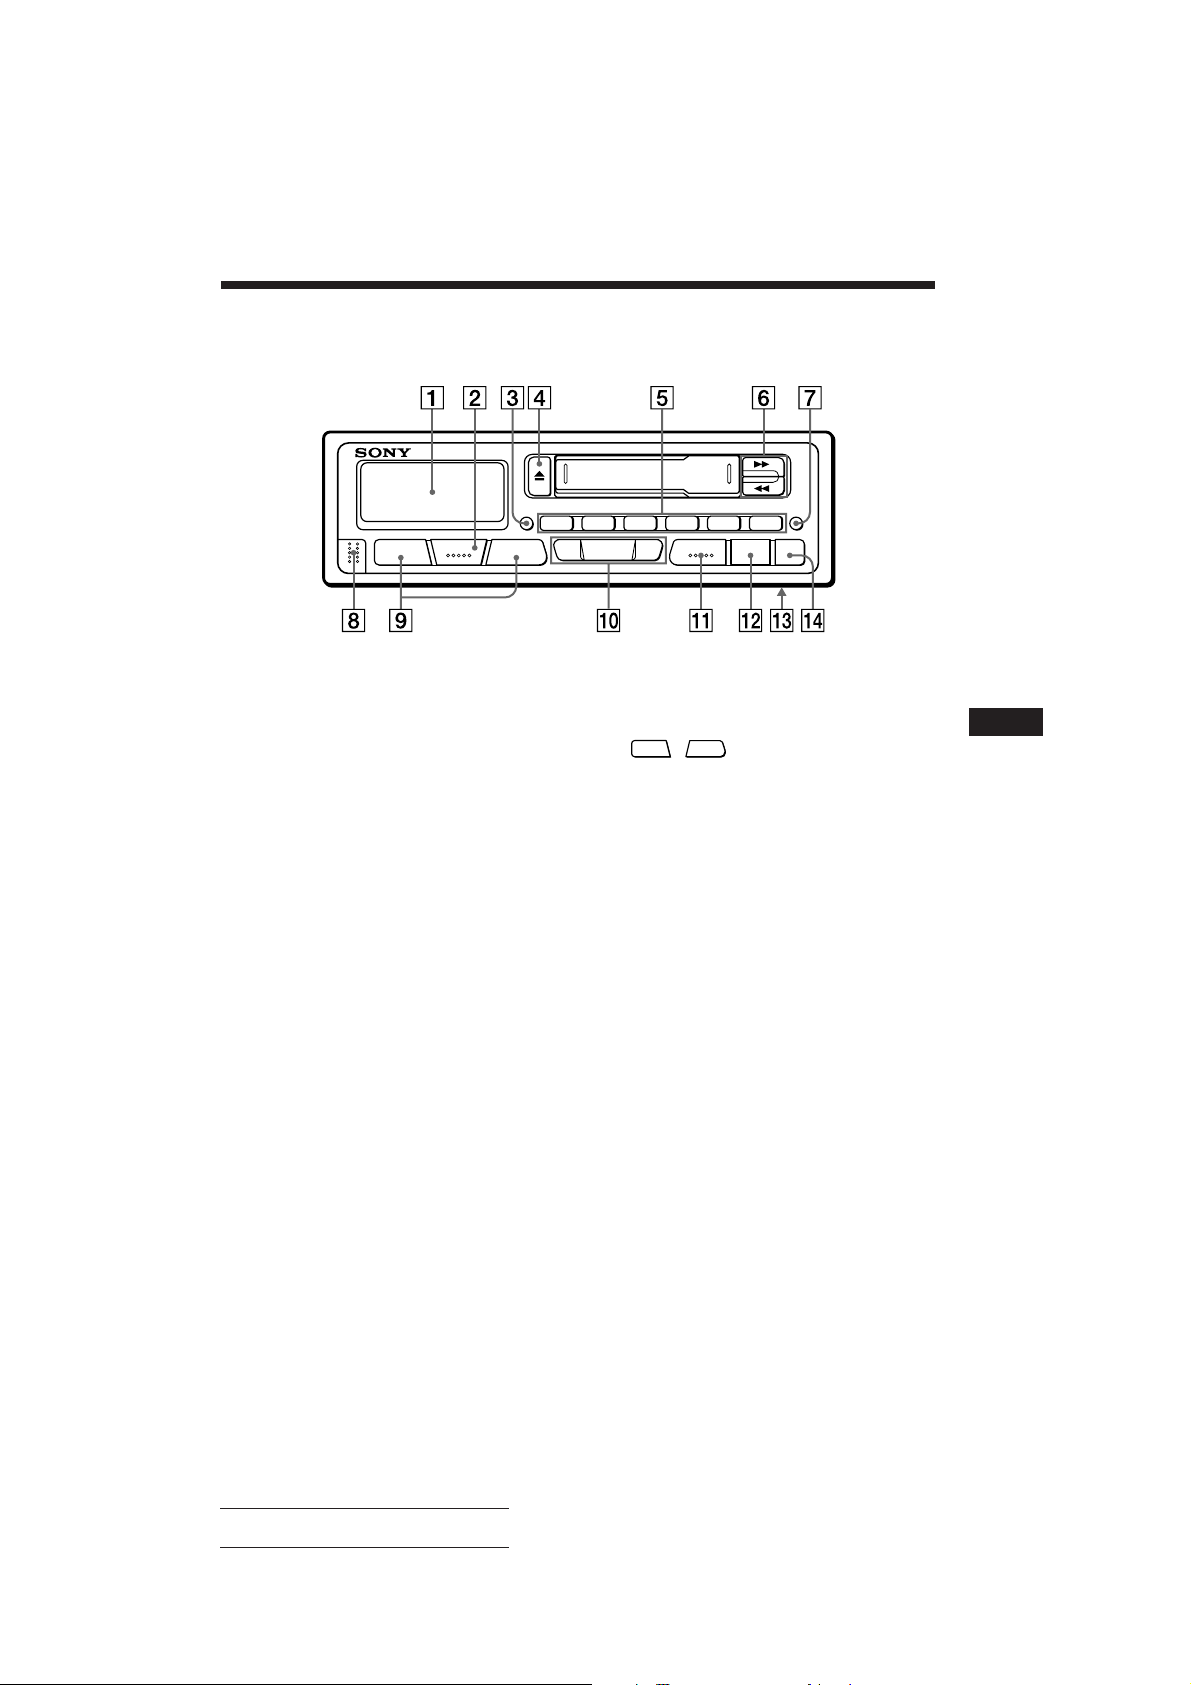
Button Locations
DSPL
RELEASE
SEL
–+
Refer to the pages in r for details.
1 Display window
2 SEL (control mode select) button 5!¡
3 DSPL (display mode change/time set)
button 58
4 6 (eject) button 5
5 Preset number buttons 7
6 0/) (fast winding)/DIR (tape
transport direction change) buttons
56
7 PTY/BTM (Programme type/Best Tuning
Memory Function) button 70
8 RELEASE (front panel release) button
4!™
215634
SEEK/MANU
–+
9
FM
–
PTY/BTM
AF/TA OFF
(volume/bass/treble/
balance/fader control) buttons 5!¡
0 SEEK/MANU button 67
!¡ FM (radio on • band select) button 67
!™ AF/TA (alternative frequency/traffic
announcement) button 89
!£ POWER SELECT switch (located on the
bottom of the unit)
See “POWER SELECT Switch” in the
installation/connections manual.
!¢ OFF button 4
EN
13
Actual total number Sony XR-3700RDS (E,F,G,I) 3-810-678-12 (3)

Specifications
EN
Cassette player section
Tape track 4-track 2-channel stereo
Wow and flutter 0.13 % (WRMS)
Frequency response 30 – 16,000 Hz
Signal-to- noise ratio 55 dB
Tuner section
FM
Tuning range 87.5 – 108.0 MHz
Antenna terminal External antenna connector
Intermediate frequency 10.7 MHz
Usable sensitivity 12 dBf
Selectivity 75 dB at 400 kHz
Signal-to-noise ratio 60 dB (stereo),
65 dB (mono)
Harmonic distortion at 1 kHz
0.6% (stereo),
0.4% (mono)
Separation 30 dB at 1 kHz
Frequency response 30 – 15,000 Hz
Capture ratio 4 dB
Power amplifier section
Outputs Speaker outputs
(sure seal connectors)
Speaker impedance 4 – 8 ohms
Maximum power output 20 W × 4 (at 4 ohms)
General
Outputs Rear line out (1)
Power amplifier control
lead
Tone controls Bass ±8 dB at 100 Hz
Treble ±8 dB at 10 kHz
Power requirements 12 V DC car battery
(negative ground)
Dimensions Approx. 186 × 57 × 170 mm
(w/h/d) not incl.
projecting parts and
controls
Mounting dimension Approx. 182 × 53 × 154 mm
(w/h/d) not incl.
projecting parts and
controls
Mass Approx. 1.3 kg
Supplied accessories Parts for installation and
connections (1 set)
Front panel case (1)
Design and specifications are subject to change without
notice.
14
Actual total number Sony XR-3700RDS (E,F,G,I) 3-810-678-12 (3)
Troubleshooting Guide
+
The following checklist will assist in the correction of most problems which you may encounter with
your unit.
Before going through the checklist below, refer to the connection and operating procedures.
General
Problem
No sound
Indications do not appear in the
display window.
Tape playback
Problem
Playback sound is distorted.
Cause/Solution
•Adjust the volume with the
•Set the fader control to the center position for 2-speaker
systems.
Remove the front panel and clean the connectors. See “Cleaning
the Connectors” of “Maintenance” for details.
Cause/Solution
Contamination of the tape head. n Clean the head.
button.
Radio reception
Problem
Preset tuning is not possible.
Automatic tuning is not possible.
The “ST” indication flashes.
RDS functions
Problem
A SEEK starts after a few
seconds of listening.
No traffic announcements
PTY displays “NONE”.
EN
Cause/Solution
•Memorize the correct frequency.
•The broadcast is too weak.
The broadcast is too weak. n Use the manual tuning.
Tune in precisely.
Cause/Solution
The station is non-TP or weaken signal. n Press the AF/TA
button to enter the “AF/TA OFF” mode.
•Activate “TA”.
•The station does not broadcast any traffic announcements
despite being TP. n Tune in another station.
The station does not specify the programme type.
15
Actual total number Sony XR-3700RDS (E,F,G,I) 3-810-678-12 (3)

Caractéristiques
Généralités
• Vous pouvez emporter la façade détachable
quand vous quittez votre véhicule (page 4).
• Un avertisseur retentit si vous tournez la clé
de contact sans avoir préalablement enlevé la
façade de l’appareil.
• L’amplificateur de haute puissance intégré
(sortie max. 4 ca × 20 W) permet d’utiliser
quatre haut-parleurs.
• Horloge numérique à cycle de 24 heures
(page 5).
• Les sorties de ligne permettent de raccorder
un amplificateur de puissance en option.
Lecteur de cassette
La fonction d’inversion automatique change
automatiquement le sens de défilement de la
bande magnétique.
Tuner section
• Il est possible de présélectionner jusqu’à 18
F
stations FM.
• Fonction BTM (Best Tuning Memory) qui
sert à sélectionner automatiquement les
stations les plus puissantes et à les
mémoriser sous les touches numériques de
présélection dans l’ordre des fréquences
(page 7).
• Services complémentaires disponibles si des
stations FM RDS sont captables (page 8).
• Compatible avec les fonctions RDS telles que
EON (Enhanced Other Networks), AF
(Alternative Frequency - changement de
fréquence), TA (Traffic Announcement radioguidage) et CT (Clock Time - horloge)
(page 8, 9, 10 et 11 ).
Précautions
• Si vous avez garé votre voiture en plein soleil
et que la température à l’intérieur a
considérablement augmenté, attendez que
l’appareil se refroidisse avant de vous en
servir.
• Si l’alimentation électrique n’arrive pas à
l’appareil, vérifiez d’abord les connexions. Si
elles sont correctes, vérifiez le fusible.
• Si aucun son ne sort des deux haut-parleurs,
réglez le fader (balance avant-arrière) sur la
position centrale.
• Si votre voiture est équipée d’une antenne
électrique, elle se déploie automatiquement
quand l’appareil est en service.
Pour toute question ou problème au sujet de
cet appareil, dont vous ne trouveriez pas
l’explication dans ce mode d’emploi, consultez
votre revendeur Sony.
2
Actual total number: Sony XR-3700RDS (E,F,G,I) 3-810-678-12 (3)
Remarques sur les
cassettes
Entretien des cassettes
• Ne touchez pas la face sensible de la bande;
toute salissure peut se déposer sur les têtes.
• Eloignez les cassettes enregistrées des
appareils contenant des aimants puissants
comme les haut-parleurs ou les
amplificateurs, car le son peut s’effacer
partiellement ou être déformé.
• N’exposez pas vos cassettes en plein soleil,
au froid intense ou à l’humidité.
• Le boîtier de la cassette peut chauffer un peu
si vous écoutez la cassette pendant
longtemps. Cette chaleur provient de
l’amplificateur de puissance de l’autoradio.
Ce n’est pas un signe de mauvais
fonctionnement.
Remarque sur les têtes de lecture
de la platine à cassette
• L’utilisation de cassettes entraîne à la longue
une contamination de la tête de lecture, ce
qui a pour effet une qualité sonore médiocre
ou même une perte de son. Nous vous
conseillons par conséquent de nettoyer la tête
de lecture environ une fois par mois au
moyen du set de cassette de nettoyage Sony.
Si la qualité sonore ne s’est pas améliorée
après avoir utilisé la cassette de nettoyage,
consultez votre revendeur Sony.
• Les cassettes usagées ou de qualité médiocre
contaminent beaucoup plus rapidement la
tête de lecture. Suivant le type de la cassette,
la qualité sonore peut s’avérer médiocre
après une ou deux lectures.
Remarque sur les cassettes de plus
de 90 minutes
L’utilisation de cassettes de plus de 90 minutes
n’est pas recommandée sauf pour une lecture
prolongée et ininterrompue. La bande de ces
cassettes est extrêmement fine et a tendance à
se détendre. Elle s’emmêle facilement dans le
mécanisme de la platine en cas de lectures et
arrêts fréquents.
Table des matières
Réinitialisation de l’appareil .................................. 4
Retrait et pose de la façade ..................................... 4
Réglage de l’horloge ................................................ 5
Fonctionnement du lecteur de
cassette
Ecoute d’une cassette .............................................. 5
Ejection de la cassette .............................................. 5
Bobinage rapide de la bande .................................. 6
Réception radio
Recherche automatique des stations
— Accord automatique ...................................... 6
Accord par réglage de la fréquence
— Accord manuel ............................................... 6
Mémorisation automatique des stations
— Fonction BTM (Best Tuning Memory,
Mémorisation du meilleur accord) .............. 7
Mémorisation de stations particulières ................ 7
Réception des stations mémorisées ...................... 7
Fonctions RDS
Aperçu de la fonction RDS ..................................... 8
Affichage du nom de la station ............................. 8
Resyntonisation automatique de la même
émission
— Fréquences alternatives (AF) ........................ 8
Ecoute des messages de radioguidage ................. 9
Présélection des stations RDS avec les données AF
et TA .................................................................... 10
Localisation d’une station en fonction du type
d’émission .......................................................... 10
Utilisation des données RDS pour régler
automatiquement l’horloge de l’appareil ...... 11
Autres fonctions
Réglage du son ....................................................... 12
Pour obtenir un son équilibré même à faible
niveau
— Correction physiologique ........................... 12
Coupure des bips sonores .................................... 12
F
Entretien .................................................................. 12
Retrait de l’autoradio ............................................ 13
Nomenclature des touches ................................... 14
Spécifications .......................................................... 15
Guide de dépannage ............................................. 16
Actual total number: Sony XR-3700RDS (E,F,G,I) 3-810-678-12 (3)
3
Réinitialisation de
l’appareil
Avant la première mise en service de l’appareil
ou après avoir remplacé la batterie de la
voiture, vous devez réinitialiser l’appareil.
Appuyez sur la touche de réinitialisation à
l’aide d’un objet pointu comme un stylo à bille.
Pose de la façade
Appliquez la partie droite de la façade sur
l’appareil et fixez la partie A de la façade sur
la partie B de l’appareil, comme indiqué sur
l’illustration, puis poussez de manière à
l’enclencher.
Touche de réinitialisation
Remarque
En appuyant sur la touche de réinitialisation, vous effacez
tous les programmes mémorisés sauf les stations
préréglées.
Retrait et pose de la
F
façade
Vous pouvez détacher la façade afin d’éviter
que l’appareil ne soit volé.
Retrait de la façade
Avant de détacher la façade, appuyez sur la
OFF
touche
RELEASE pour ouvrir la façade. Enlevez-la en
la tirant vers vous, comme indiqué sur
l’illustration.
. Appuyez ensuite sur la touche
Touche RELEASE
A
B
Remarques
• Vérifiez que la façade est dans le bon sens avant de la
fixer, car elle ne peut pas être fixée dans l’autre sens.
• Ne forcez pas pour fixer la façade sur l’appareil.Une
légère pression est suffisante.
• Rangez la façade dans son étui pour la transporter.
• N’appuyez pas avec force sur l’afficheur de la façade.
• Mettez l’appareil hors tension avant de retirer la façade.
Cependant, si vous appuyez sur la touche RELEASE
quand l’appareil est sous tension, il se met
automatiquement hors tension pour protéger les hautparleurs.
• Ne laissez pas la façade en plein soleil, près de sources de
chaleur comme des conduits d’air chaud ou dans un
endroit humide. Ne la laissez jamais sur le tableau de
bord, etc. d’une voiture garée en plein soleil, car la
température risque d’augmenter considérablement.
Avertisseur
Si vous mettez la clé de contact du véhicule sur
la position OFF (arrêt) sans enlever la façade,
l’avertisseur se déclenche et émet un bip
pendant quelques secondes. (Uniquement si
l’interrupteur POWER SELECT est commuté
sur A.)
Veillez à ne pas laisser tomber la façade quand
vous la détachez de l’appareil.
4
Actual total number: Sony XR-3700RDS (E,F,G,I) 3-810-678-12 (3)
Réglage de l’horloge
L’horloge numérique fonctionne sur 24 heures
Par exemple, réglez l’heure sur 10:08.
1 Affichez l’heure
(Appuyez sur
est allumé)
2 Appuyez sur
secondes.
100
Les chiffres des heures clignotent.
DSPL
pendant que l’appareil
DSPL
pendant plus de deux
Fonctionnement du
lecteur de cassette
Ecoute d’une cassette
Introduisez une cassette, la lecture
commence automatiquement.
Réglez l’heure
SEL
–+
(pour reculer) (pour avancer)
1000
3 Appuyez brièvement sur la touche
SEL
1000
Les chiffres des minutes clignotent.
Réglez les minutes
SEL
–+
(pour avancer)(pour reculer)
1008
4 Appuyez brièvement sur la touche
DSPL
.
1008
L’horloge fonctionne.
Remarque
Quand l’interrupteur POWER SELECT sous l’appareil est
réglé sur la position B, vous ne pouvez pas régler l’horloge
si l’appareil est éteint. Allumez la radio ou démarrez la
lecture d’une cassette avant de régler l’horloge.
Pour changer le sens de défilement de
la bande,
appuyez simultanément sur les touches 0 et
).
Indication du sens de défilement de la bande
FWD
.
La face supérieure de la cassette est reproduite.
REV
La face inférieure de la cassette est reproduite.
Le sens de lecture change automatiquement
lorsque la cassette arrive en fin de bande.
Remarque
Avant de mettre l’appareil hors tension, retirez la cassette
pour éviter d’en endommager la bande magnétique.
Ejection de la cassette
Appuyez sur la touche pour arrêter la
lecture et éjecter la cassette.
F
Fonctionnement du lecteur de cassette
Actual total number: Sony XR-3700RDS (E,F,G,I) 3-810-678-12 (3)
5
 Loading...